How to Set Up SEO Title and Description for Filtered URLs
Discover how to set the SEO title and description for filtered URLs right in the JetSmartFilters plugin settings on your WordPress website.
Before you start, check the tutorial requirements:
- Elementor (Free version), Block editor (Gutenberg), or Bricks
- JetSmartFilters plugin installed and activated
Set SEO Title and Description
Head to the WordPress Dashboard > Smart Filters > Settings and open the SEO Rules Settings tab.
Ensure that the Use SEO & Sitemap Rules toggle is activated.
Next, ensure that the Page URL (here, “filters-page”) is completed.
Then, select the Provider. In this case, it is set to “JetEngine” as we will work with the JetEngine’s Listing Grid.
For the Query ID, set the one that connects your filters and provider if such a connection exists. If not, leave it empty.
Next, we will add an SEO Title. To do this, we click on the “Dynamic Tags” button next to the SEO Title field.
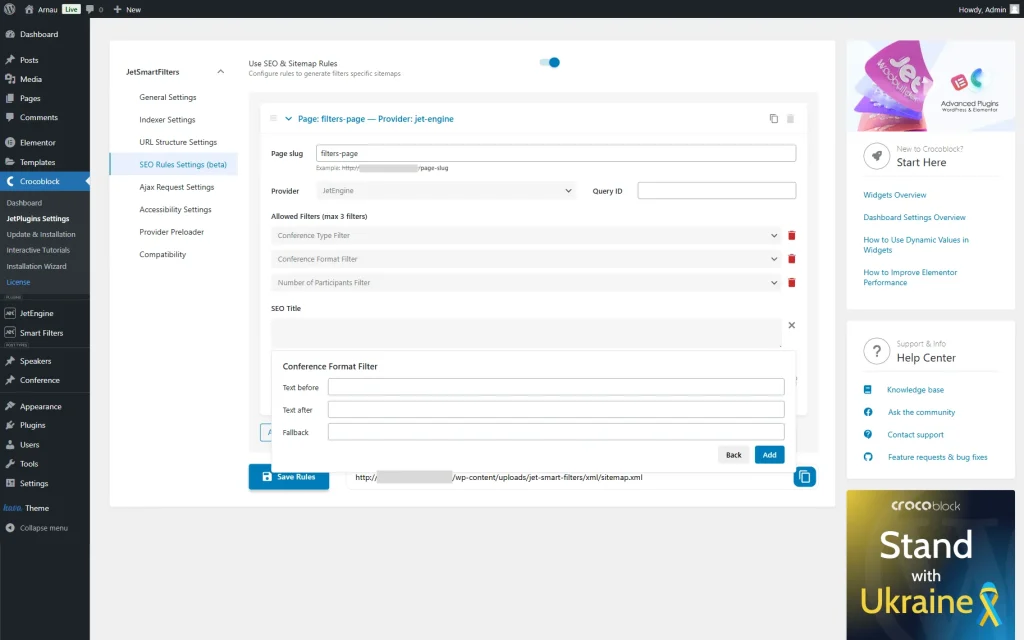
Here, we pick the “Conference Format Filter” option and click it.
Right away, the additional settings are opened. As this filter is the “Radio” one, the settings contain three fields: Text before, Text after, and Fallback. Here, you can enter the texts that will be displayed correspondingly before and after the filtered value and a fallback — text that will be displayed if there are no values picked in the filter.
Now, we will leave the fields empty and press the “Add” button.
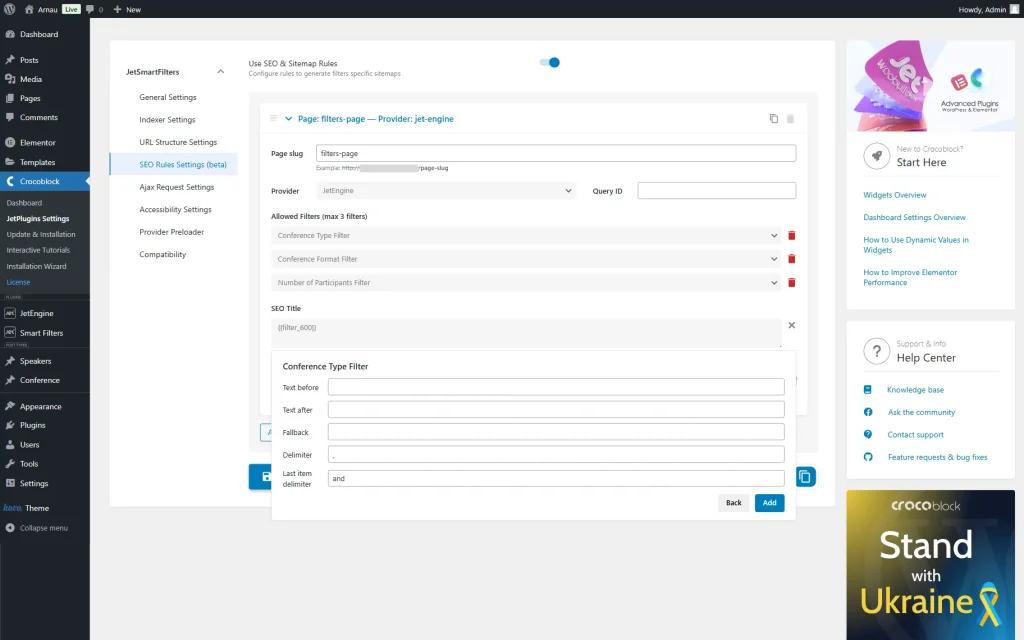
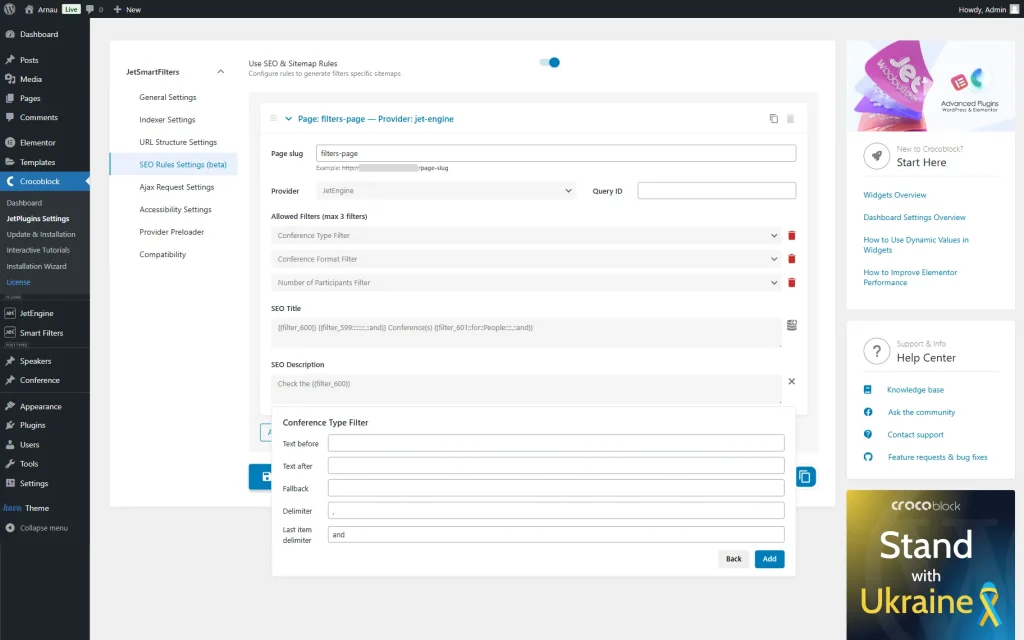
We click the “Dynamic Tags” button again, this time selecting the “Conference Type Filter” option from the list.
As this filter is one of the “Checkboxes list” filter types, it includes the following fields: Text before, Text after, Fallback, Delimiter, and Last item delimiter.
This time we complete the Delimiter field with the “,” value and the Last item delimiter with the “and” value. The Delimiter will separate values if two or more values are selected, and the Last item delimiter will be shown correspondingly before the last item.
Then, press the “Add” button.
After that, we add the “Conference(s) for” text to the SEO Title field and click the “Dynamic Tags” button once again.
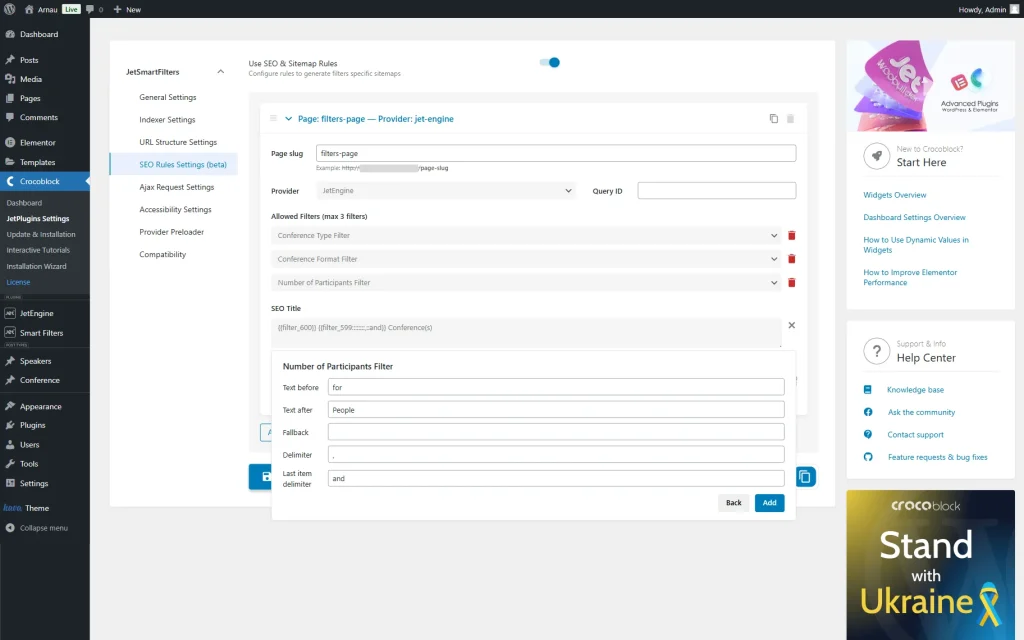
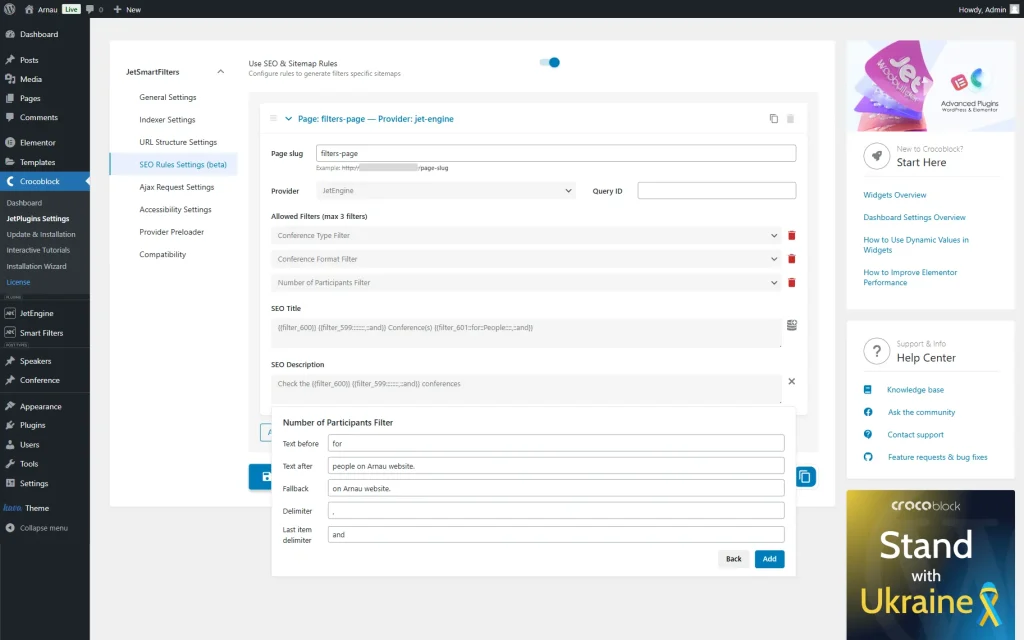
This time, we pick the “Number of Participants Filter” option and click it to open its settings.)
Here, we observe the same four fields as before — Text before, Text after, Fallback, Delimiter, and Last item delimiter.
We complete the Text before with the “for” value, the Text after with the “People” value, leave the Fallback empty (so there will be nothing displayed if no items are selected,) Delimiter field with the “,” value and the Last item delimiter with the “and” value.
To save the changes, we push the “Add” button.
Next, we move to the SEO Description field and start it with the “Check the” text.
We also press the “Dynamic Tags” button and find the “Conference Format Filter” option in the list, click it to select, and press the “Add” button without making any changes.
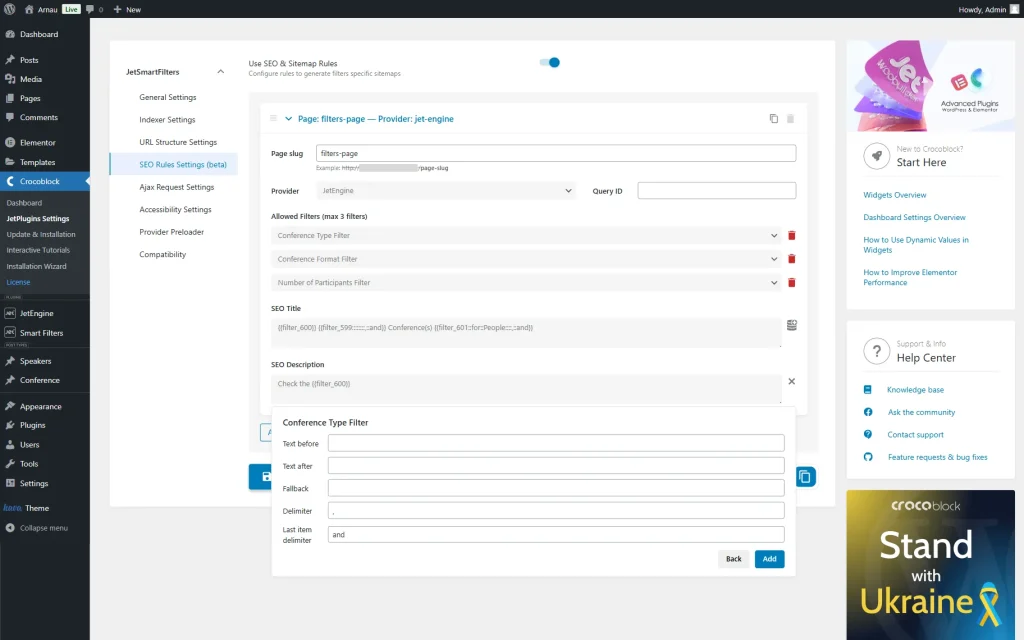
After that, we press the “Dynamic Tags” button and pick the “Conference Type Filter” option from the list.
Then, add the “,” Delimiter and “and” Last Delimiter, and click the “Add” button.
After that, we add the “conferences” text to the SEO Description field and hit the “Dynamic Tags” button once again.
In the list, pick the “Number of Participants Filter” option and press it. In our case, the Text before field is completed with the “for” value, the Text after with the “people on Arnau website.” value, and the Fallback with the “on Arnau website” value. Then, add the “,” Delimiter and “and” Last Delimiter.
Finally, press the “Save Rules” button to finish the setup.
Display SEO Title and SEO Description
You can display the SEO title and description using the following page builders: Elementor, Block Editor (Gutenberg), or Bricks.
Also, we recommend checking our video tutorial about Adding SEO Titles and Descriptions to the Front-End.
Elementor display
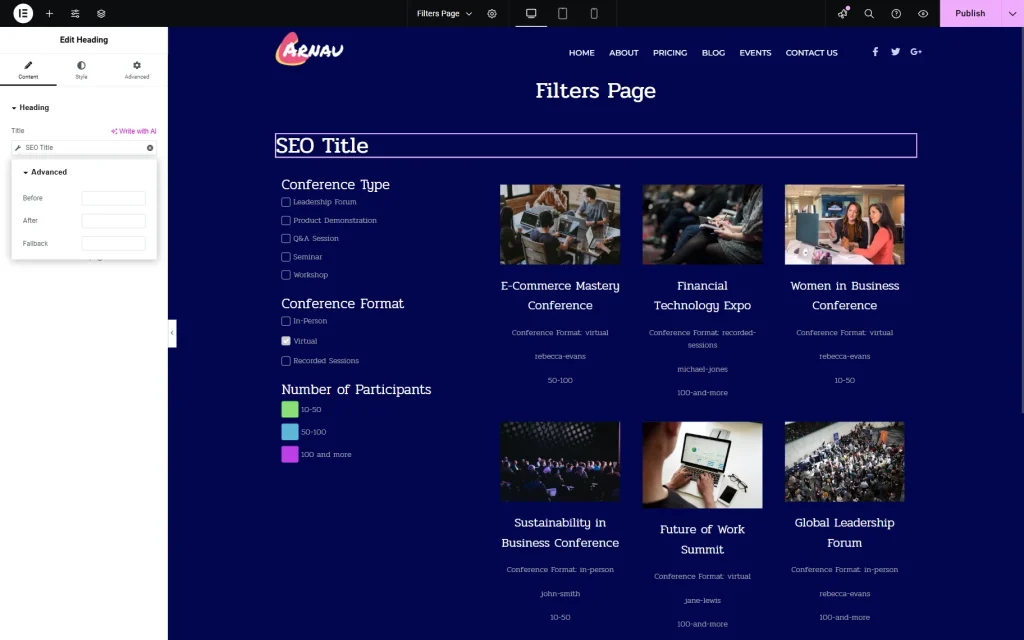
Proceed to the page where the filters are located. Add any widget that supports the Dynamic Tags feature, such as the Heading widget.
Push the “Dynamic Tags” button next to the main source field, in this case, Title.
In the JetSmartFilters section, pick the “SEO Title” option.
In the Advanced settings, you can adjust the Before, After, and Fallback texts if needed. However, we leave these fields empty for now.
Adjust the other settings if needed.
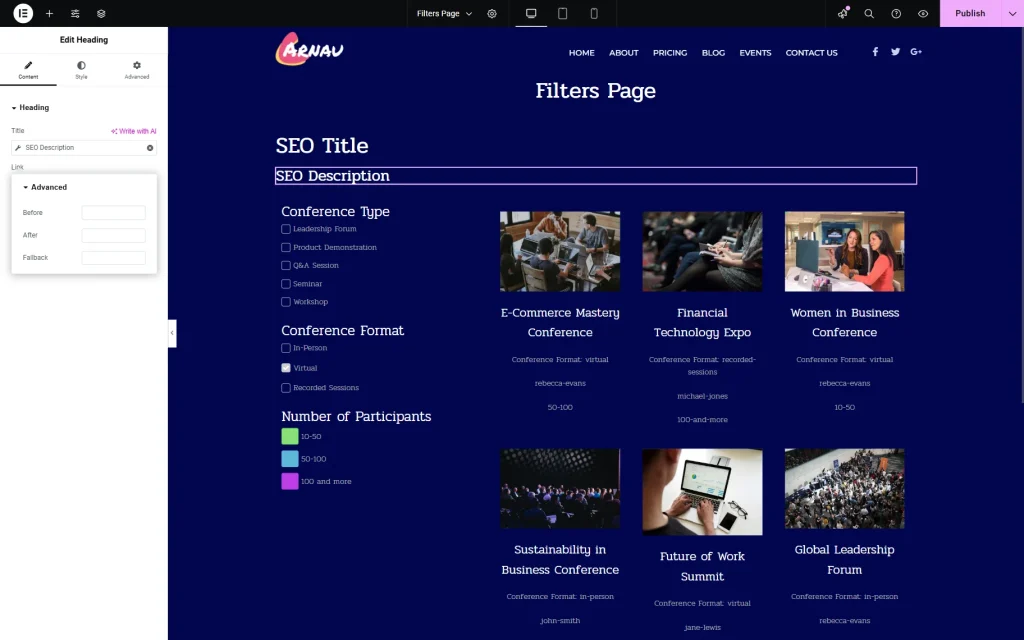
Now, we add one more Heading and press the “Dynamic Tags” button next to the Title field.
Select the “SEO Description” option in the JetSmartFilters section and adjust its settings if needed.
Press the “Publish” button whenever ready to save the page.
Block Editor (Gutenberg) display
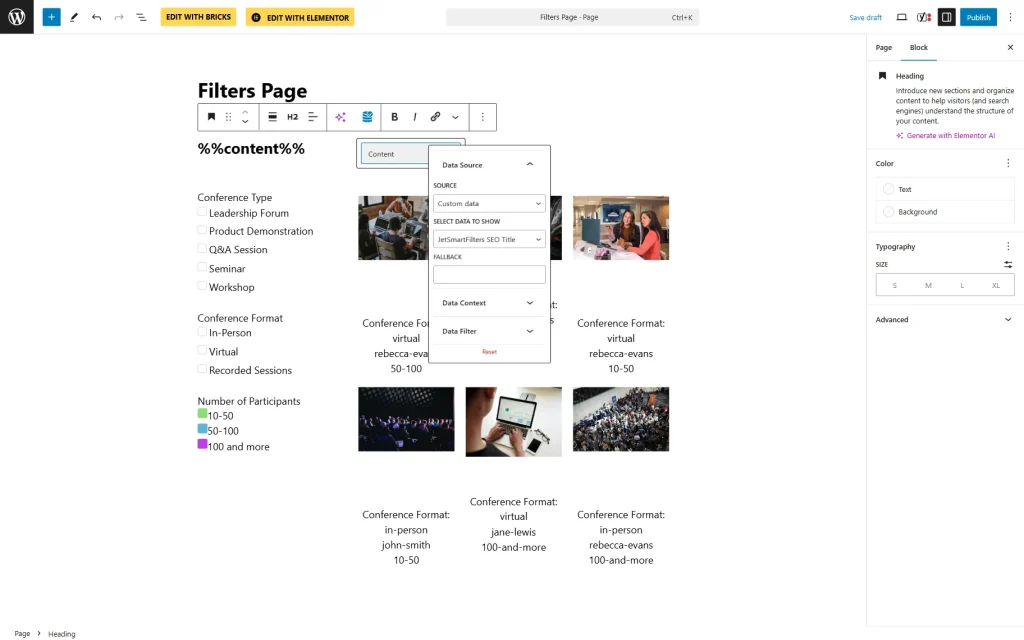
If you work with the Block Editor (Gutenberg), add a block that supports JetEngine’s macros (for instance, Heading) and press the “Dynamic Tags” button above the block.
Select the “Custom data” option in the SOURCE dropdown and the “JetSmartFilters SEO Title” option in the SELECT DATA TO SHOW dropdown.
This way, you can also add an SEO description. Just pick the “JetSmartFilters SEO Description” option in the SELECT DATA TO SHOW dropdown.
Once ready, hit the “Publish/Save” button to save the page.
Bricks display
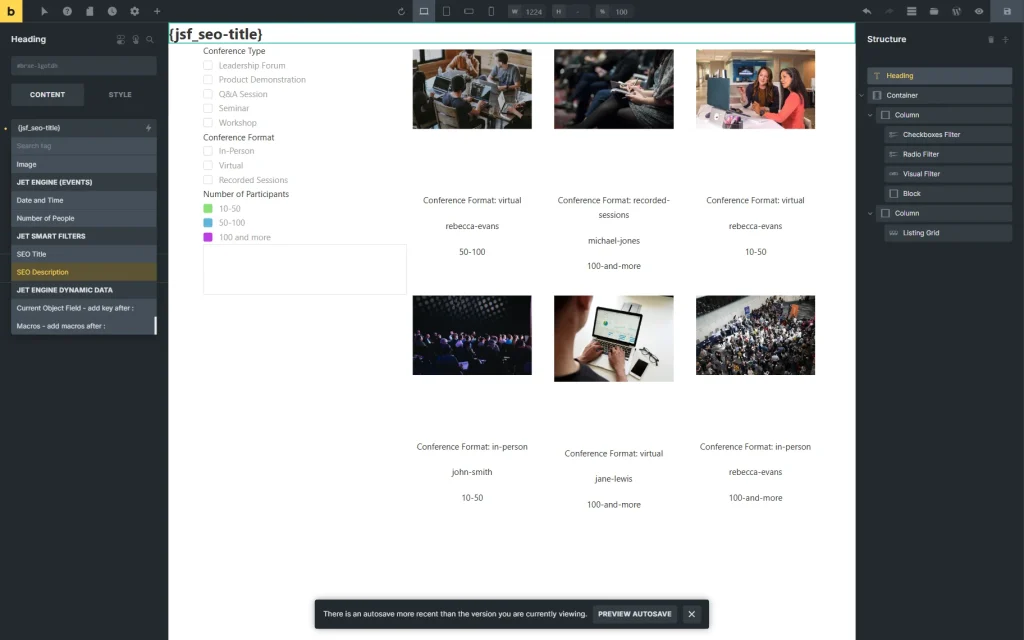
If you work in the Bricks editor, add the element that supports the “Dynamic Token” functionality (for instance, Heading) and press the corresponding button next to the main customization field. In the case of the Heading element, it’s the first field with the “I am a heading” text.
Here, find the JET SMART FILTERS section and select the needed options: “SEO Title” and “SEO Description.”
When ready, you can save the page.
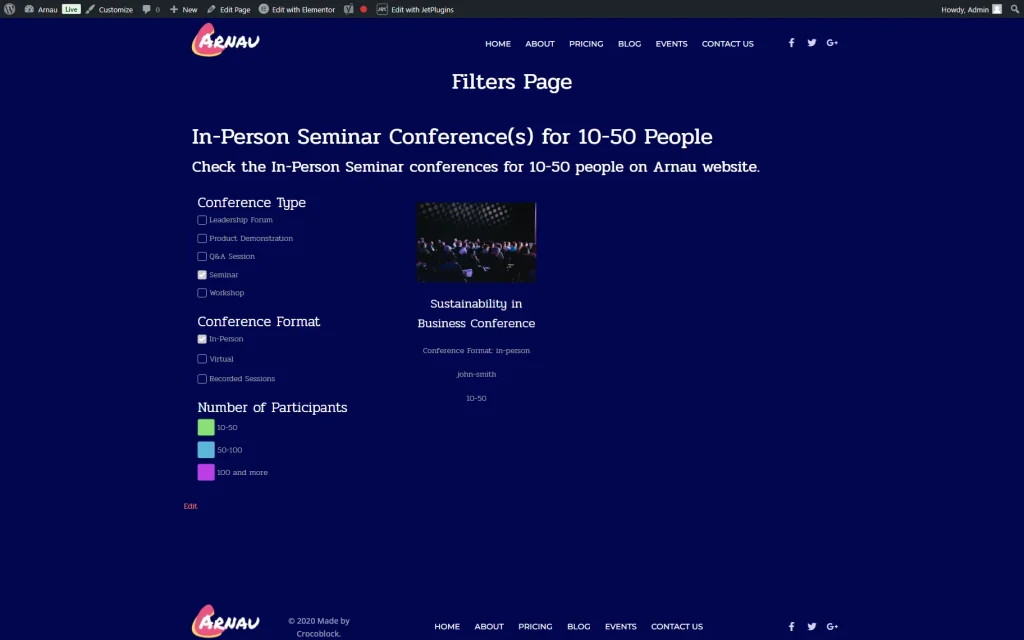
Check the Result
That’s all; now you know how to set up an SEO title and SEO description for the filtered URLs on your WordPress website with the help of the JetSmartFilters plugin.
