Creating an Alphabet Filter for the Users Listing Grid
This tutorial explains how to create an alphabet filter for the Users Listing Grid using JetSmartFilters and JetEngine plugins on WordPress websites.
Before you start, check the tutorial requirements:
- Elementor (Free version), Block editor (Gutenberg), or Bricks
- JetSmartFilters plugin installed and activated
- JetEngine plugin installed and activated
In this guide, you will find out how to build an alphabet filter specifically for the Listing Grid displaying users. The solution is suitable for cases when the users’ list needs to be filtered alphabetically.
You might notice that the Alphabet Filter from JetSmartFilters only works with posts and products, and there is no native way to apply it to the users’ Listing Grid at this time. However, we can replicate the needed behavior by using a Radio Filter combined with a custom SQL query.
So, let’s go through the workaround step by step.
Build a Filter for the Listing Grid
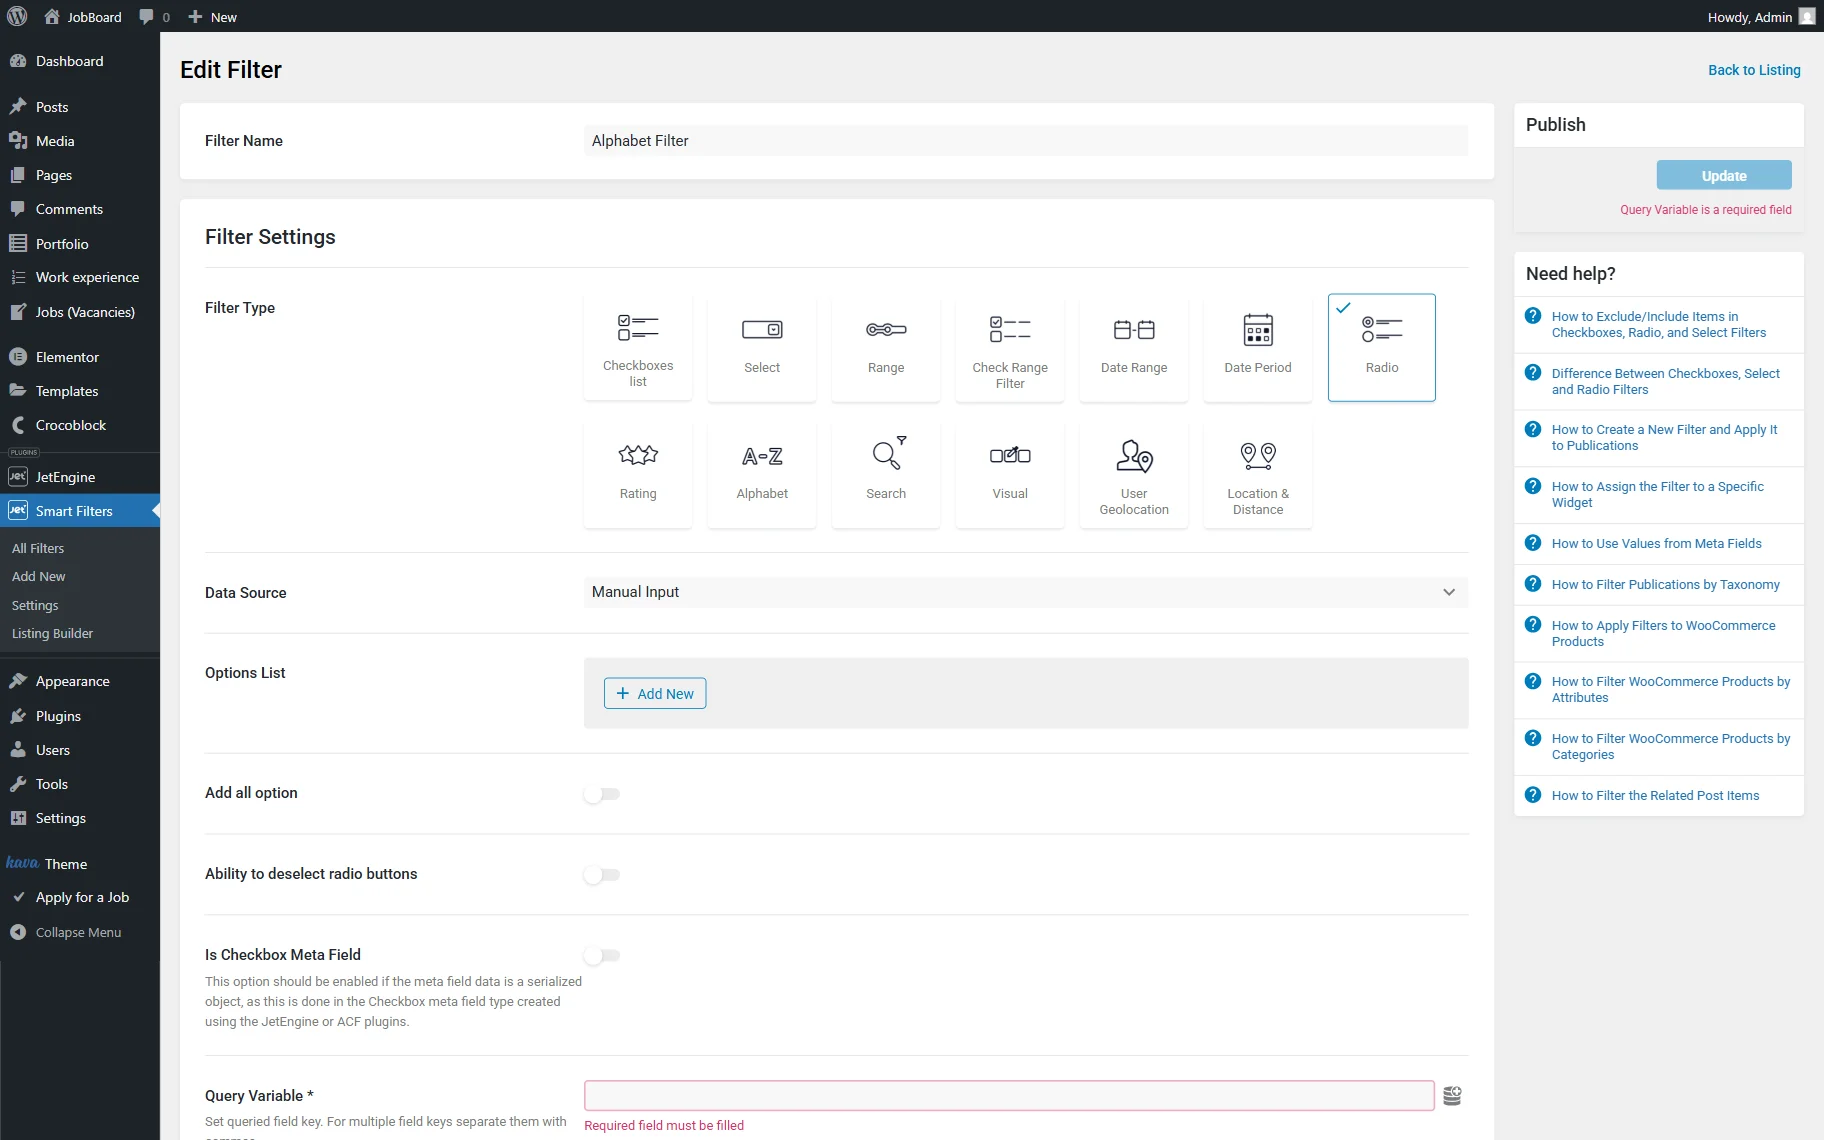
Start by navigating to WordPress Dashboard > Smart Filters > Add New.
Name a filter (here, “Alphabet Filter”) and select the “Radio” Filter Type.
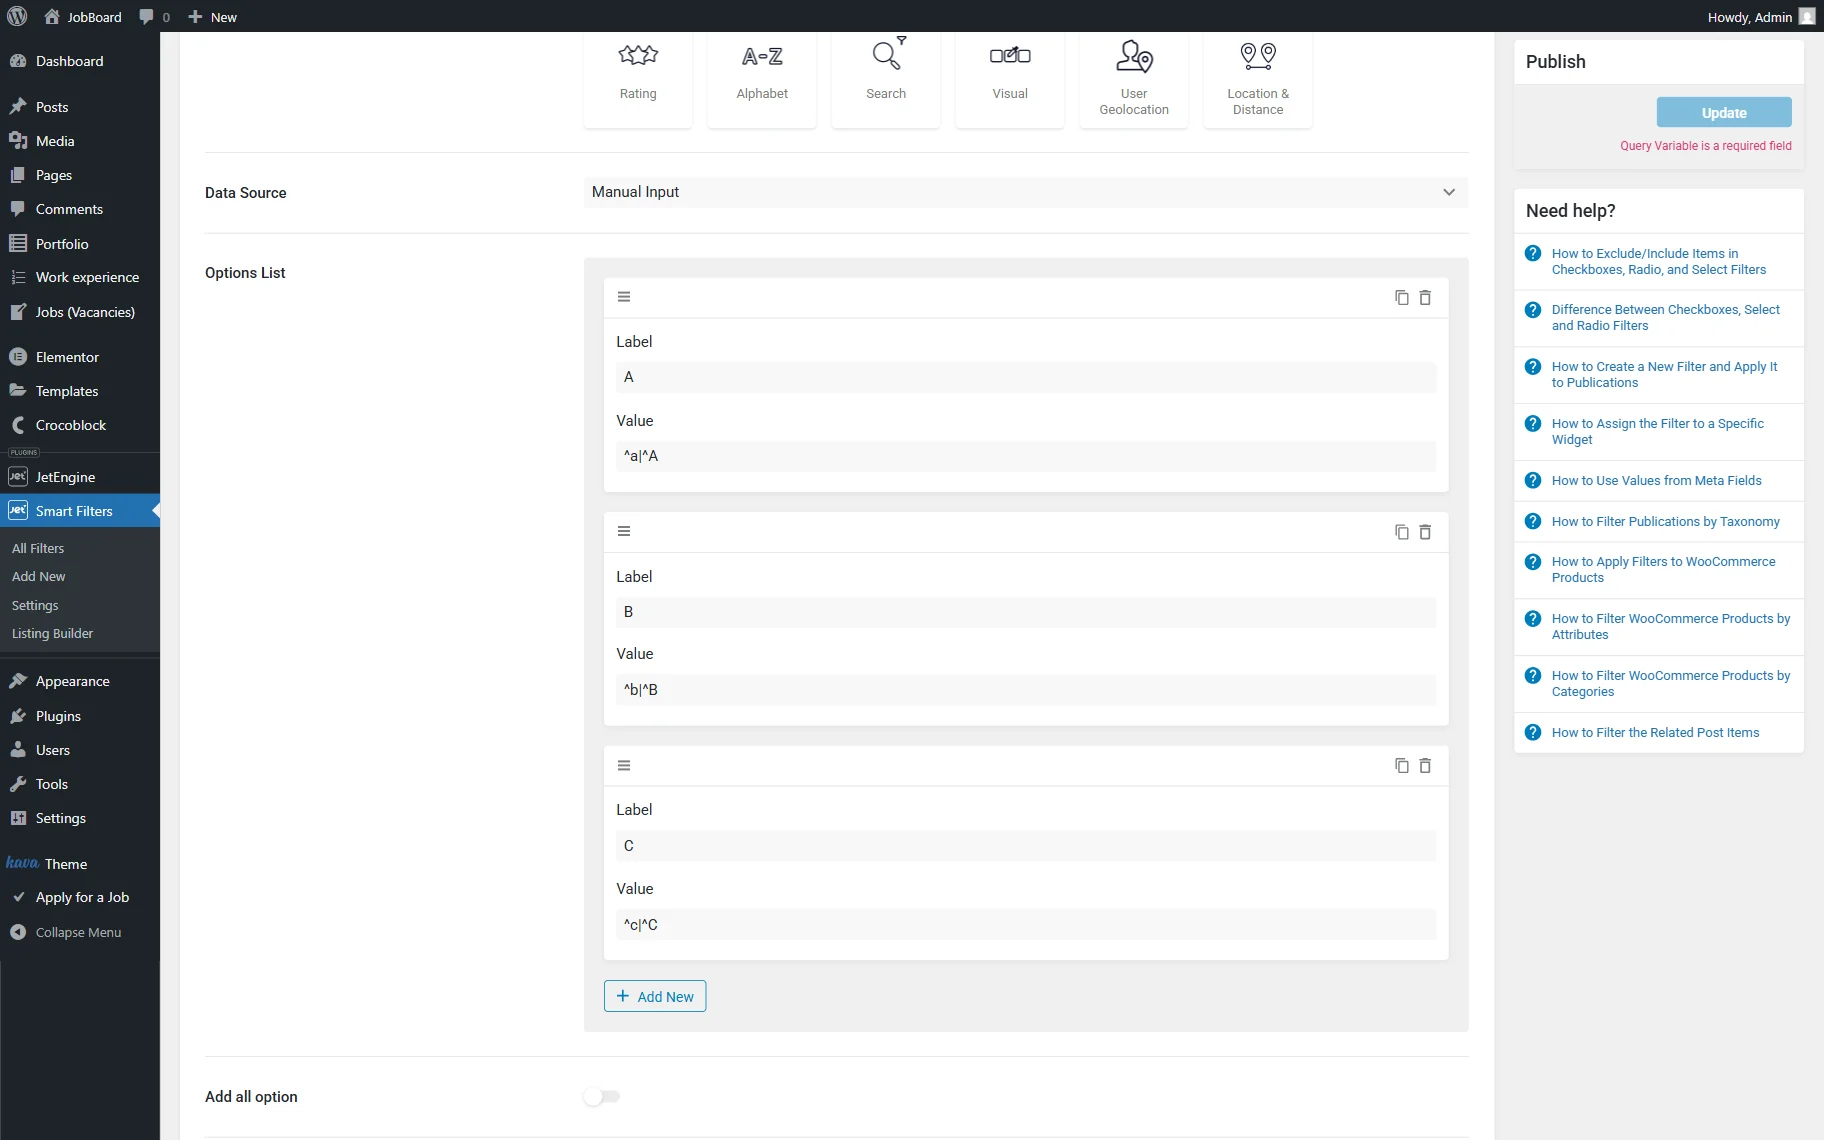
Set the Data Source to “Manual Input” and click “Add New” in the Options List area.
Add options, with each representing a letter of the alphabet. Values should be presented like this:
- ^a|^A
- ^b|^B
- ^c|^C
This approach ensures that both uppercase and lowercase values are matched, making the filter case-insensitive.
Repeat for all the remaining letters.
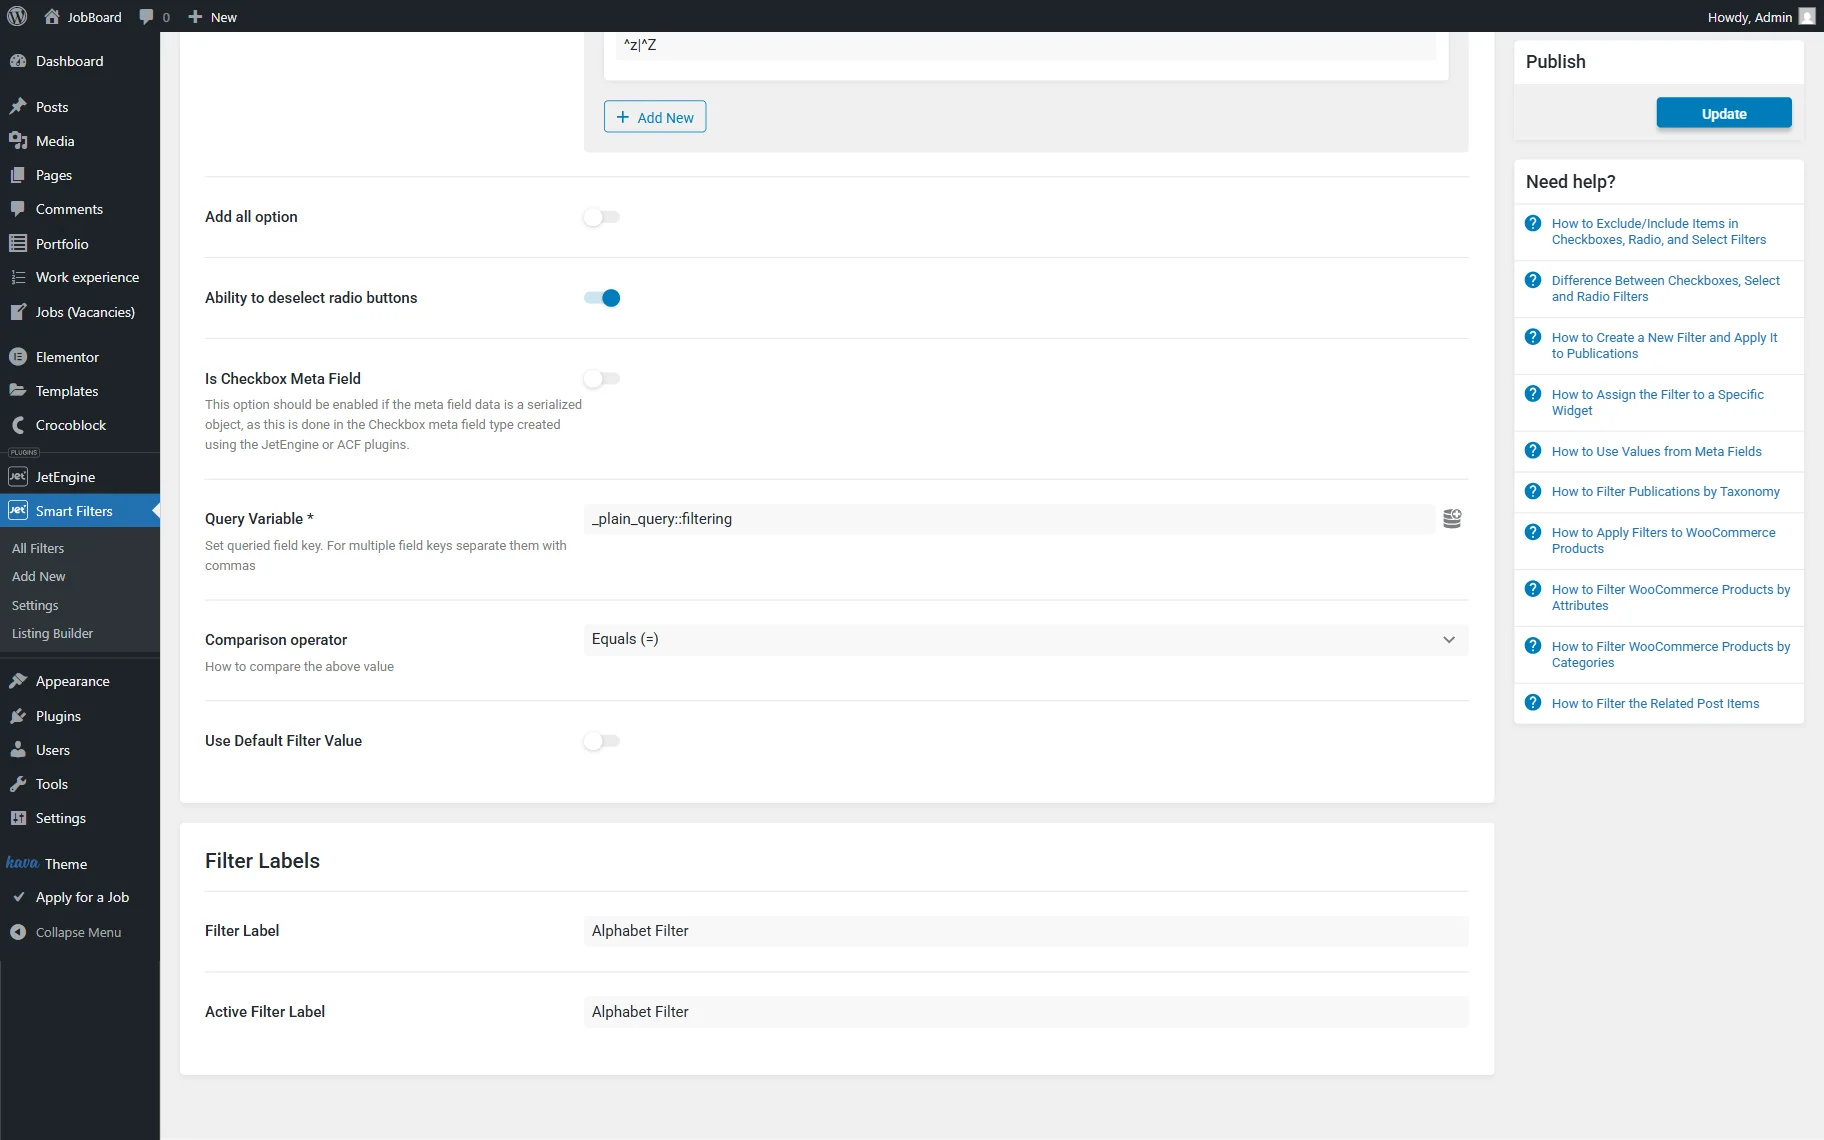
Optionally, you can activate the Ability to deselect radio buttons toggle.
In the Query Variable field, paste the following value:
_plain_query::filteringWhere the “_plain_query::” part indicates that the filter value should be passed to the query as a plain SQL value, and the “filtering” part is a custom query variable name. It is used to connect the filter with the SQL query and must match the Variable Name specified later in the Query Builder.
Ultimately, complete the Filter Labels section with your preferred labels, then press the “Update” button to save the filter.
Create an SQL Query
Go to WordPress Dashboard > JetEngine > Query Builder and hit the “Add New” button to build a new query.
Complete the query’s Name (in our case, “Users Alphabet Filter Query”) and set the Query Type to “SQL/AI Query.”
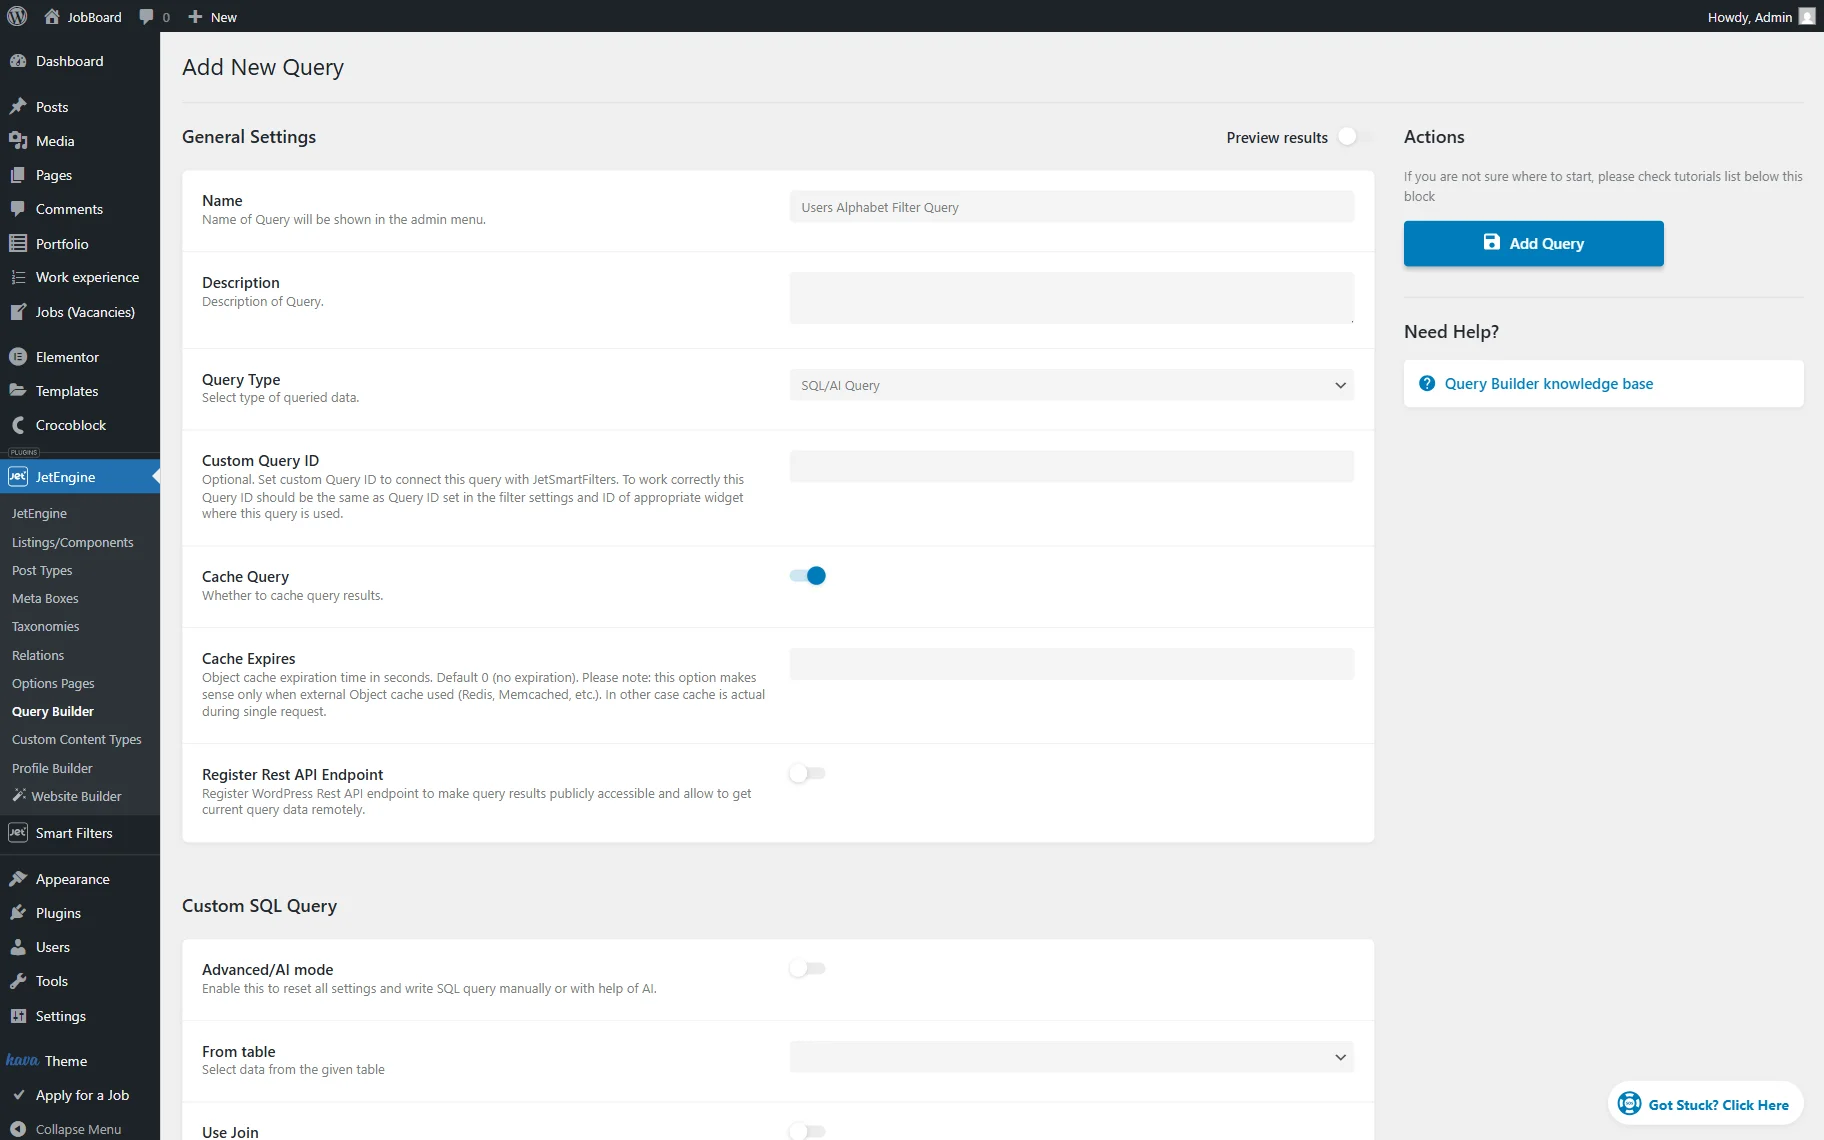
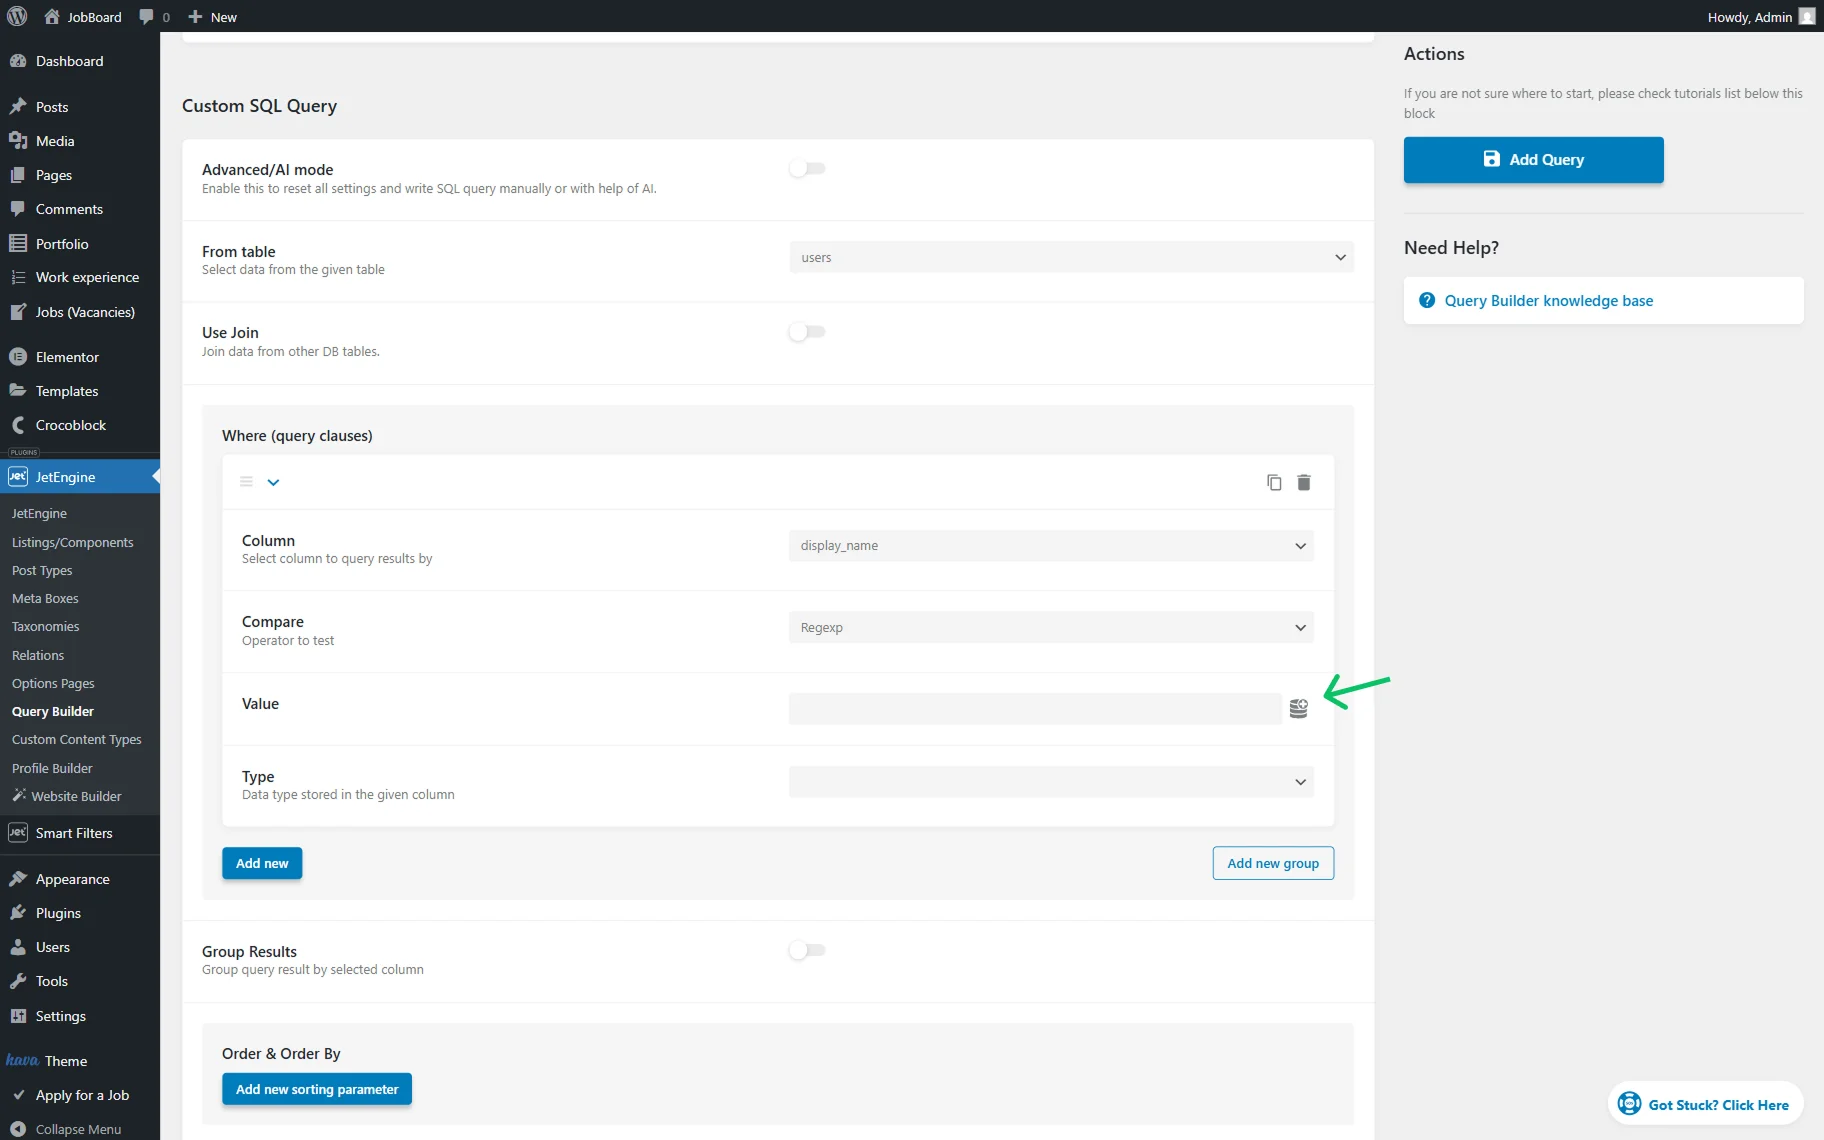
Scroll down to the Custom SQL Query section and pick the “users” option in the From table dropdown menu.
Then, press the “Add new” button in the Where (query clauses) section.

Pick the “display_name” option in the Column dropdown menu.
Next, select the “Regexp” Operator. The “Regexp” operator is used to match values by a regular expression. In this case, it allows filtering users whose names start with a specific letter.
Each filter option contains a regular expression (for example, “^a|^A”), which matches values that begin with the selected letter, regardless of letter case.
Click the “dynamic tags” button next to the Value field.
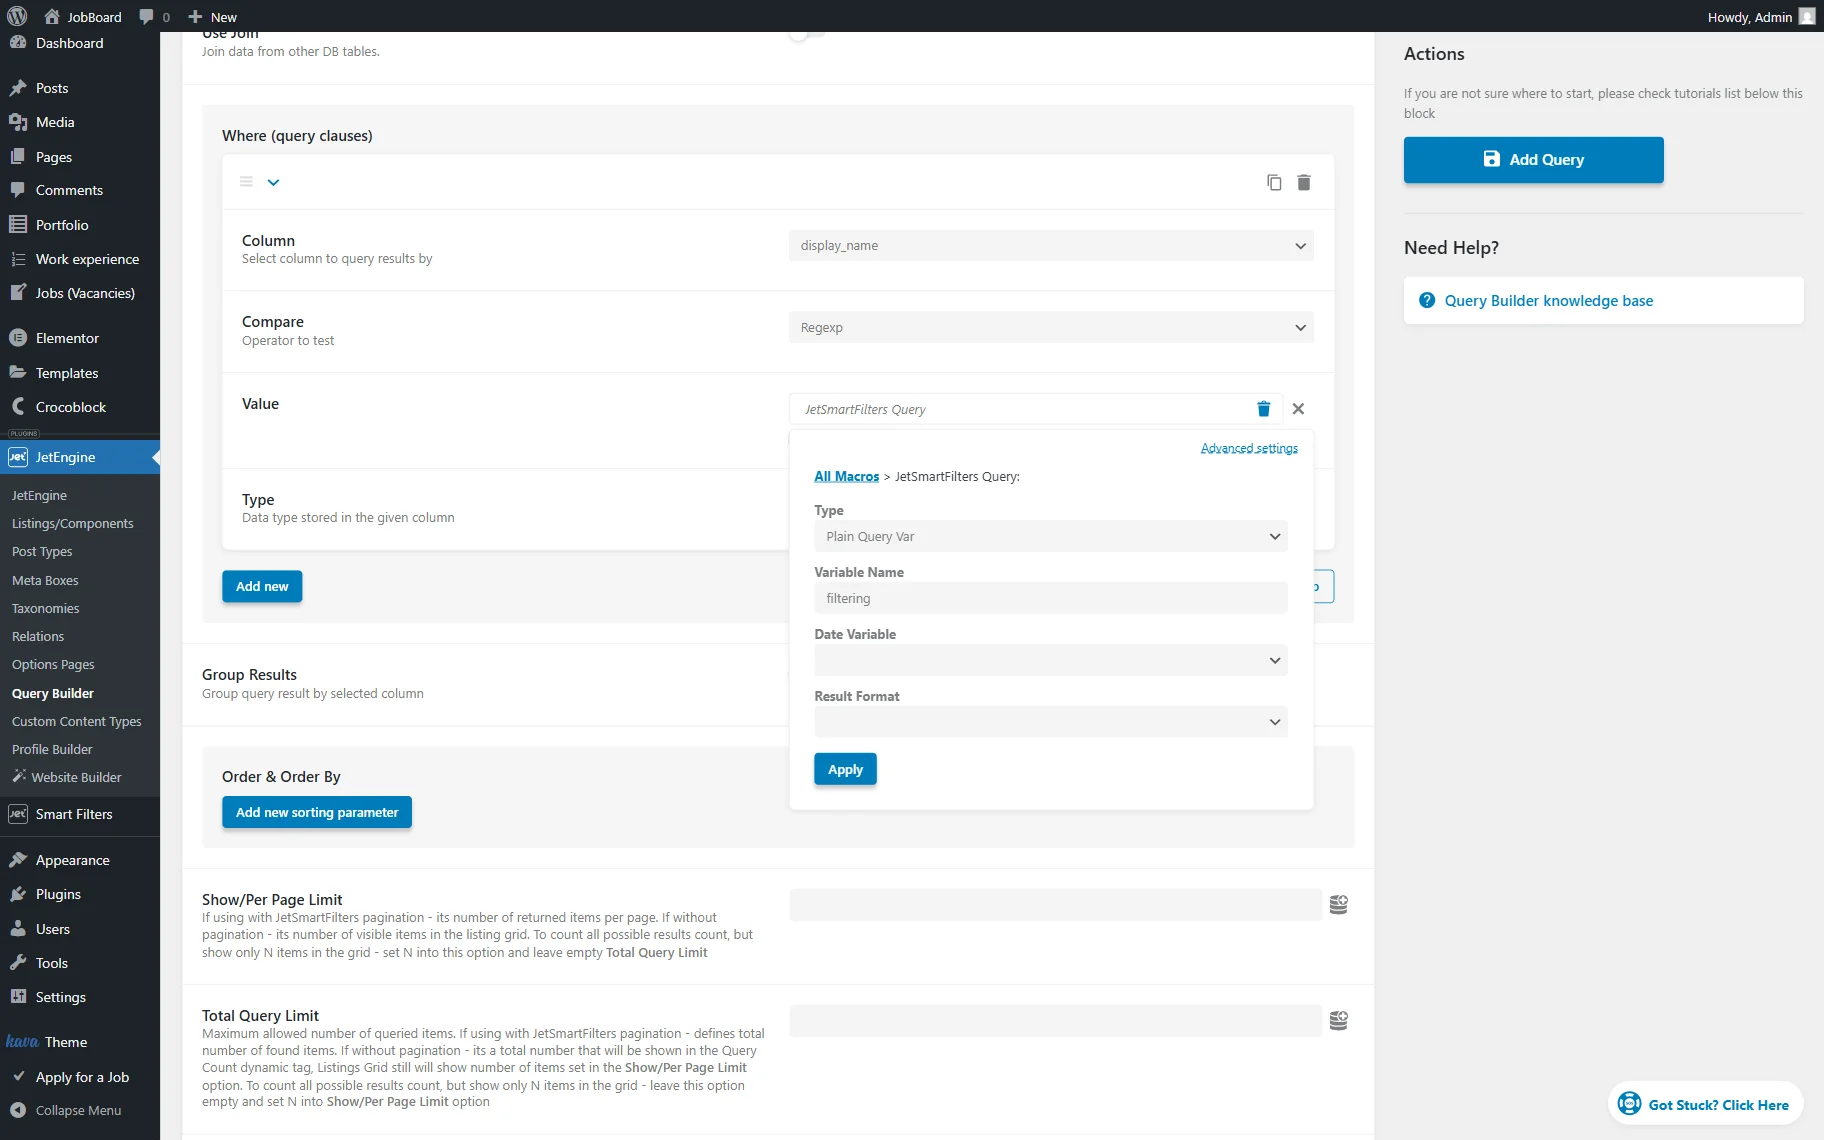
In the list, find and click the “JetSmartFilters Query” option to open its settings.
Set the Type to “Plain Query Var” and complete the Variable Name with the value that was a part of the Query Variable set in the created Radio Filter. In the described case, the “filtering” value.
Press the “Apply” button to save the settings.
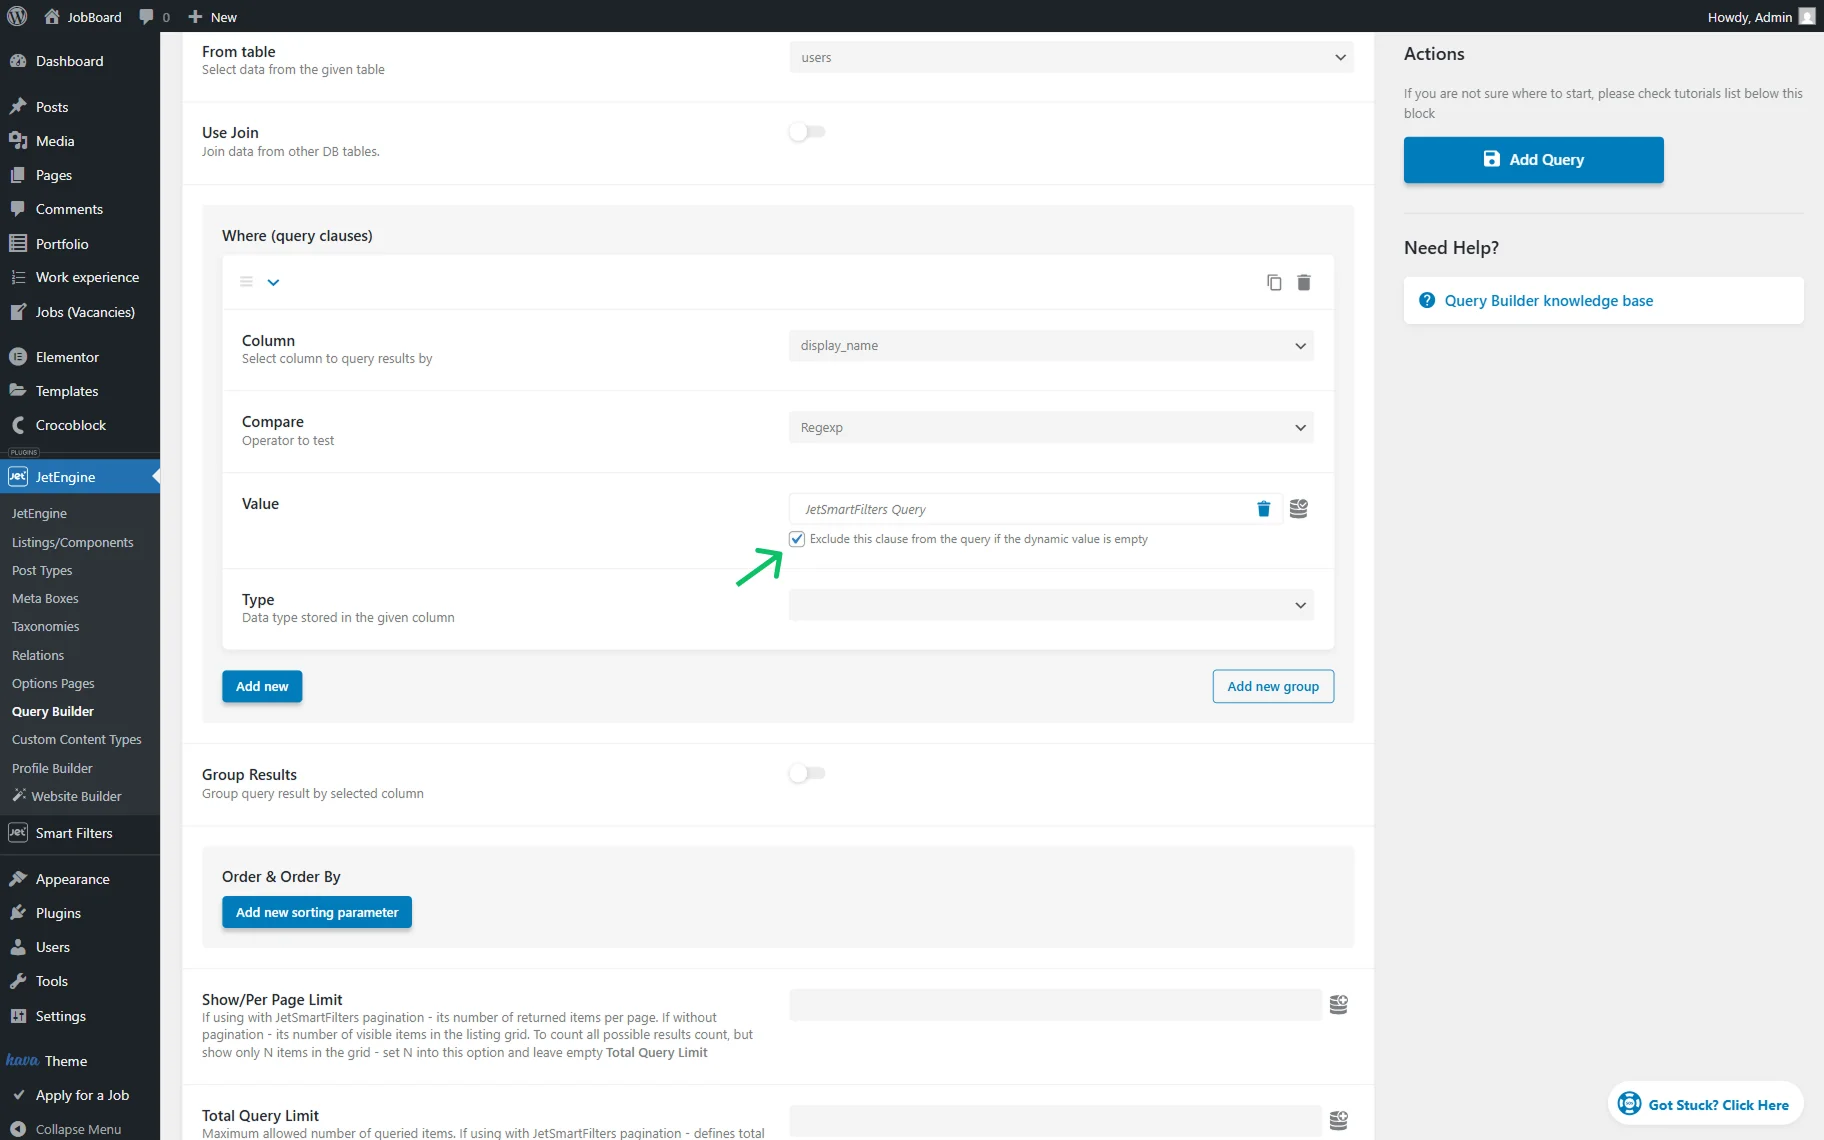
Make sure to tick the “Exclude this clause from the query if the dynamic value is empty” checkbox under the “JetSmartFilters Query” Value so that the Listing Grid will not be empty if the filter value is not selected.
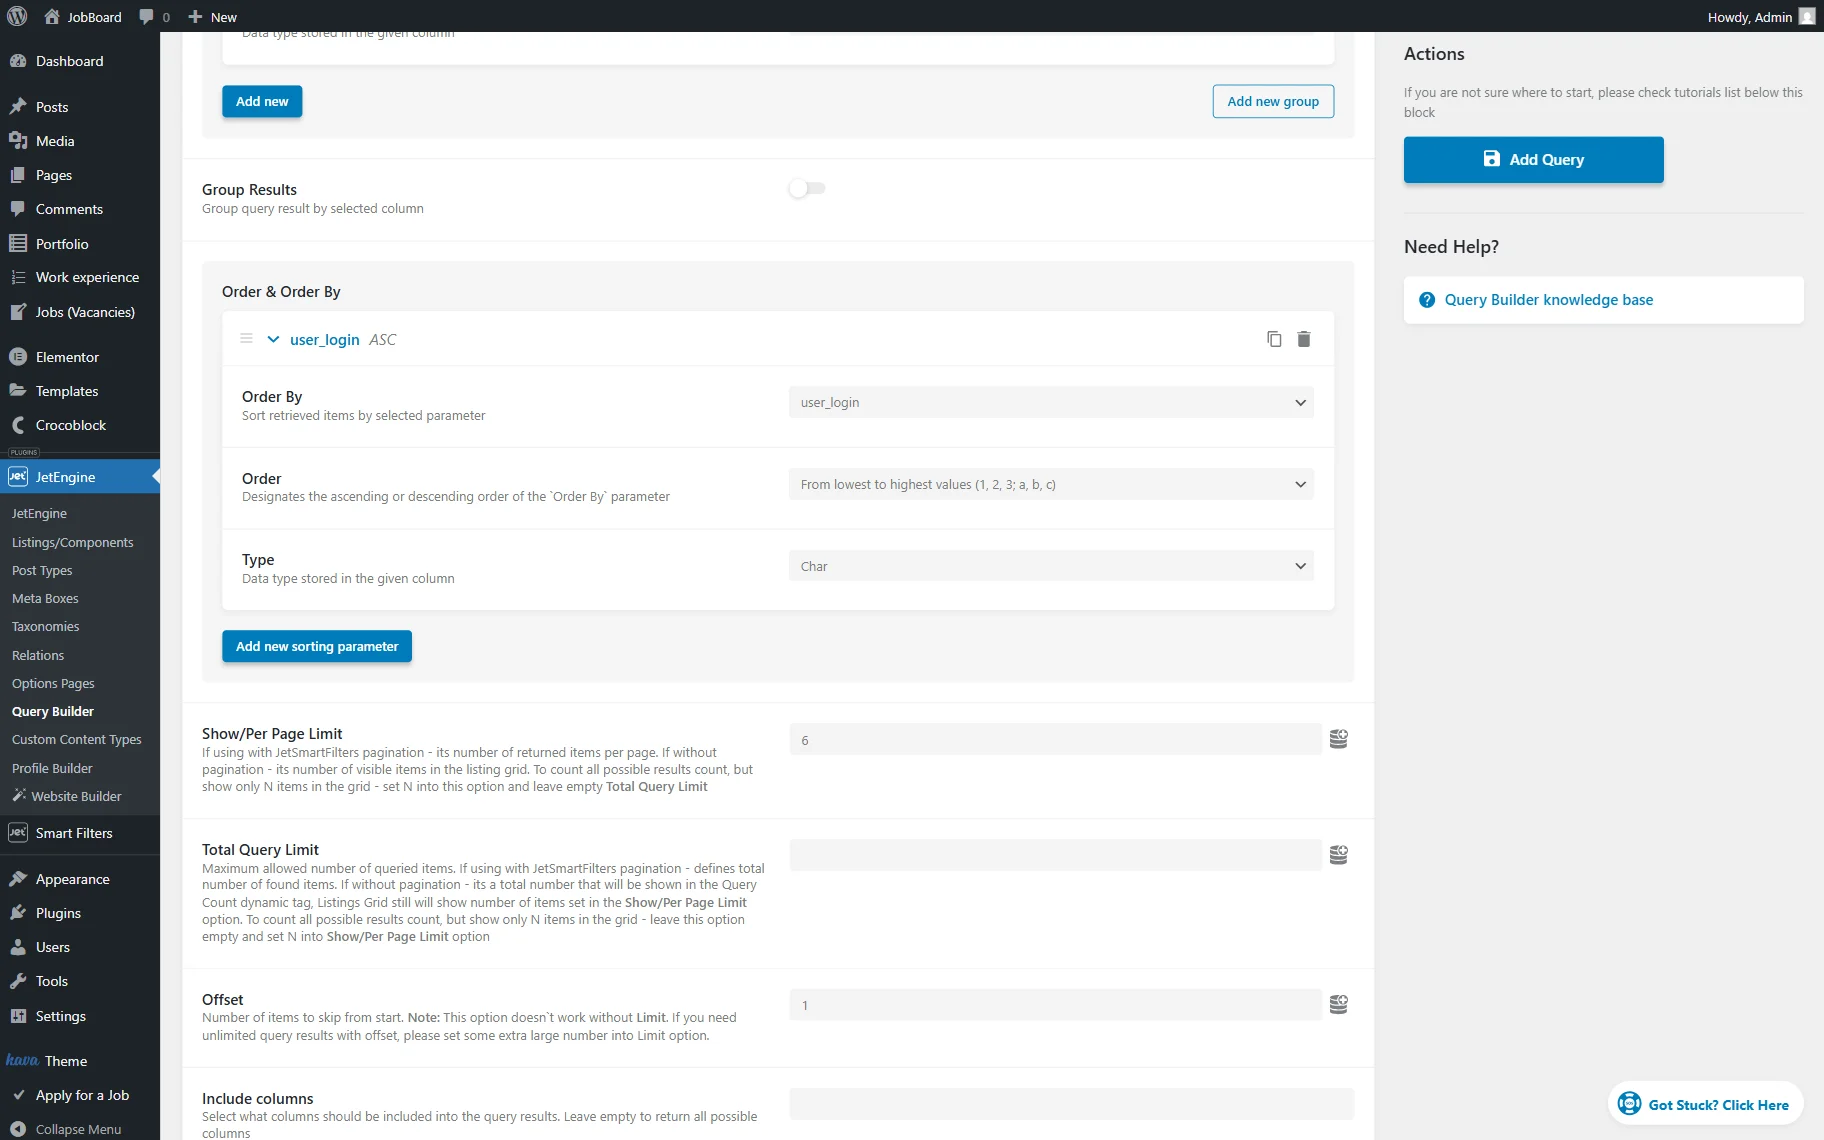
We also click the “Add new sorting parameter” button in the Order & Order By section.
In the Order By field, we select the “user_login” option, set Order to “From lowest to highest values”, and select the “Char” Type. This way, our listing will be ordered by the user logins.
Next, we set the Show/Per Page Limit value to “6” in order to display only six items in the Listing Grid. Also, we set the Offset field to “1”; this will skip the first user in the Listing Grid (the website administrator in our case).
Finally, scroll down to the Cast result to instance of object field and select the “User” option there. This feature defines how JetEngine will interpret the query results.
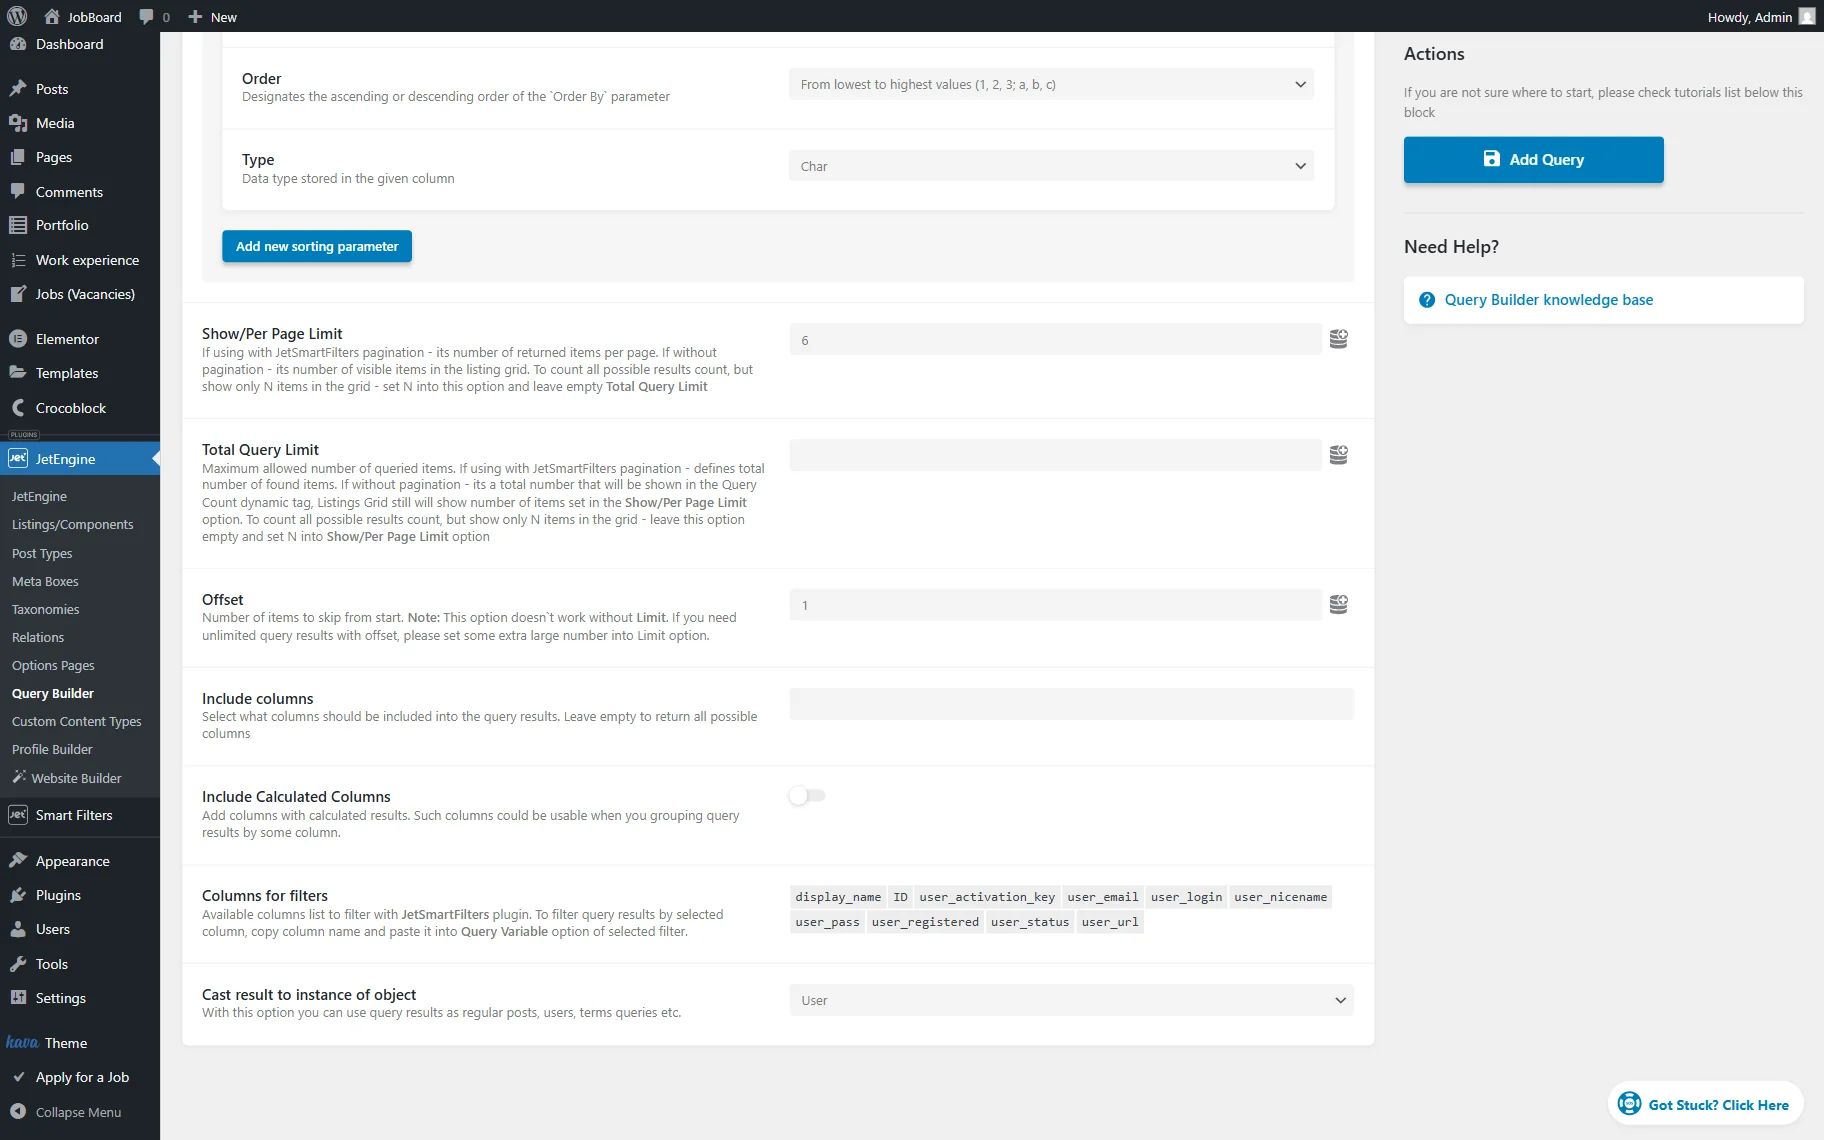
Press the “Add Query” button to publish the built query.
Apply the Query to the Listing Grid
Head to the page where the Listing Grid is located. You can build a new one if you haven’t done so already.
We build a new page in the WordPress Dashboard > Pages directory. Work with the preferred page builder: Block Editor (Gutenberg), Elementor, or Bricks. In our case, it’s Elementor.
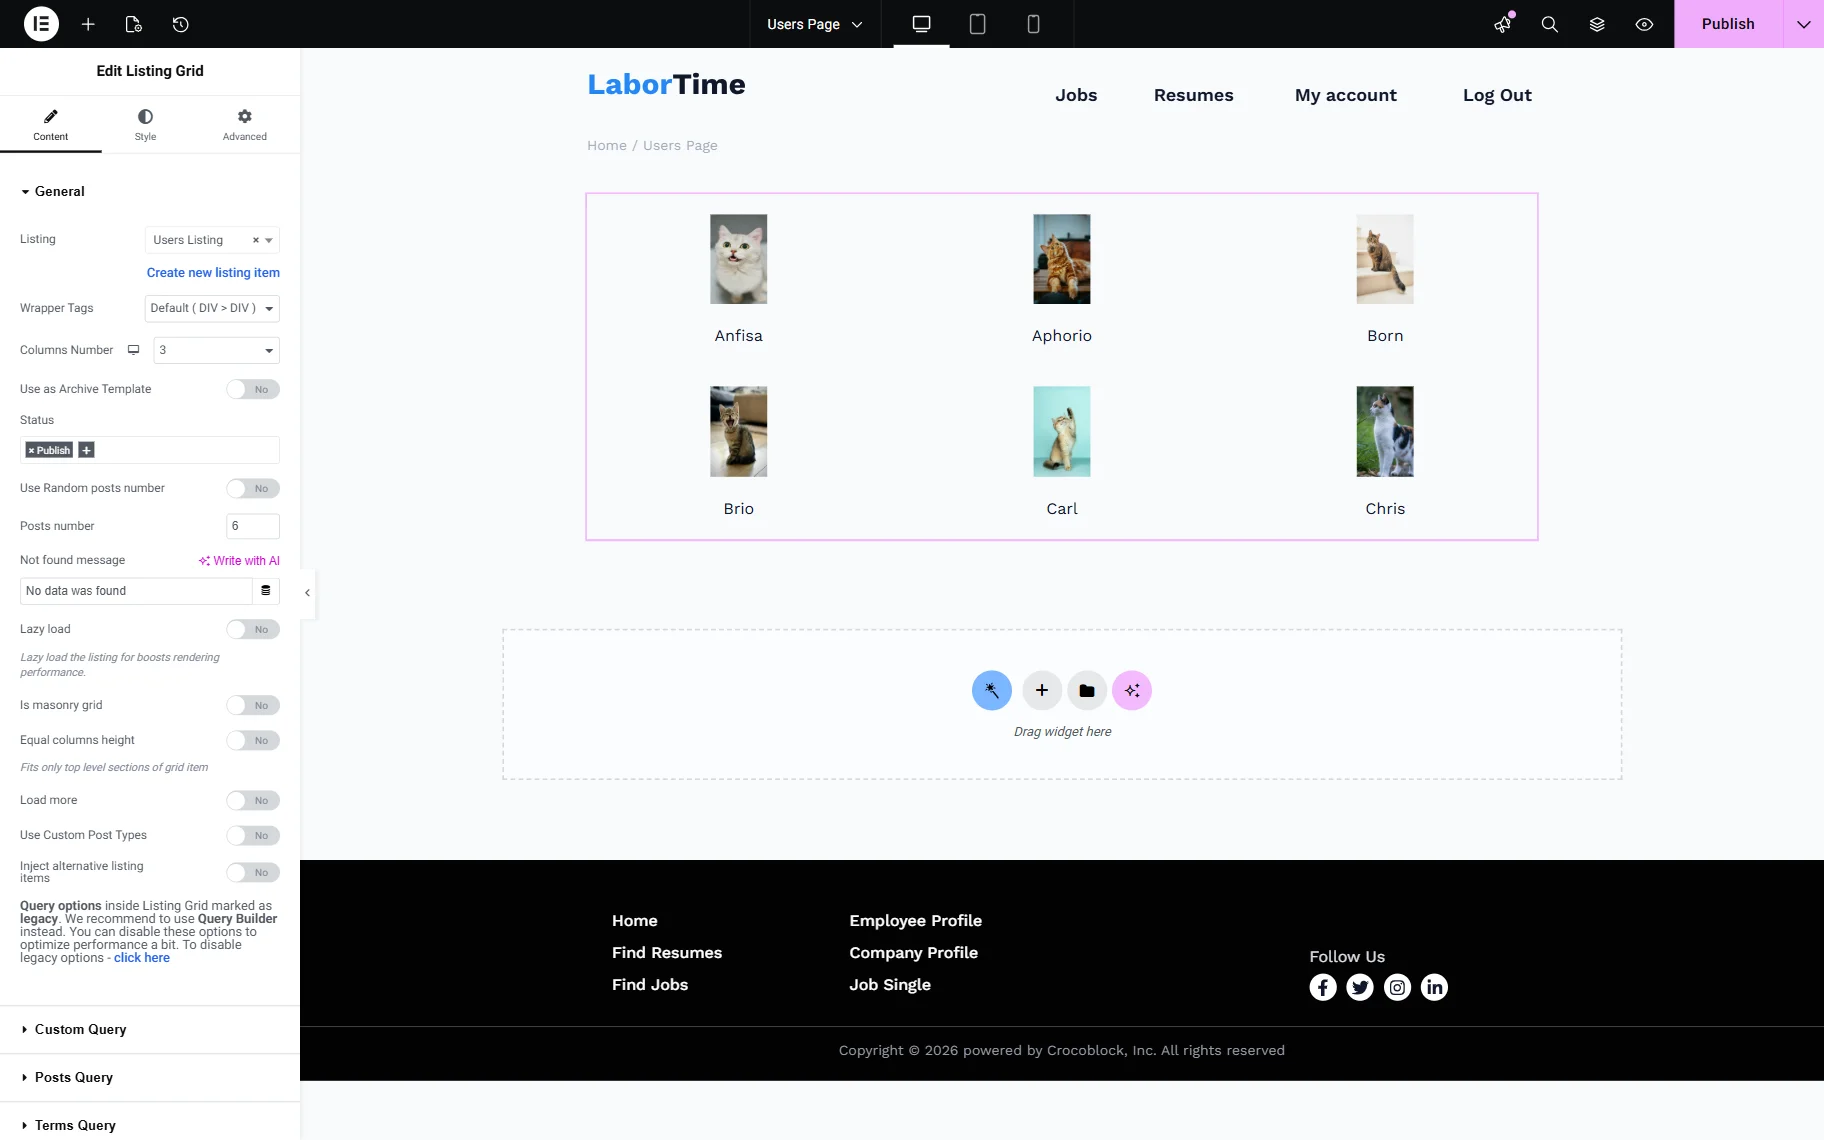
Add the Listing Grid to the page and select the built Listing.
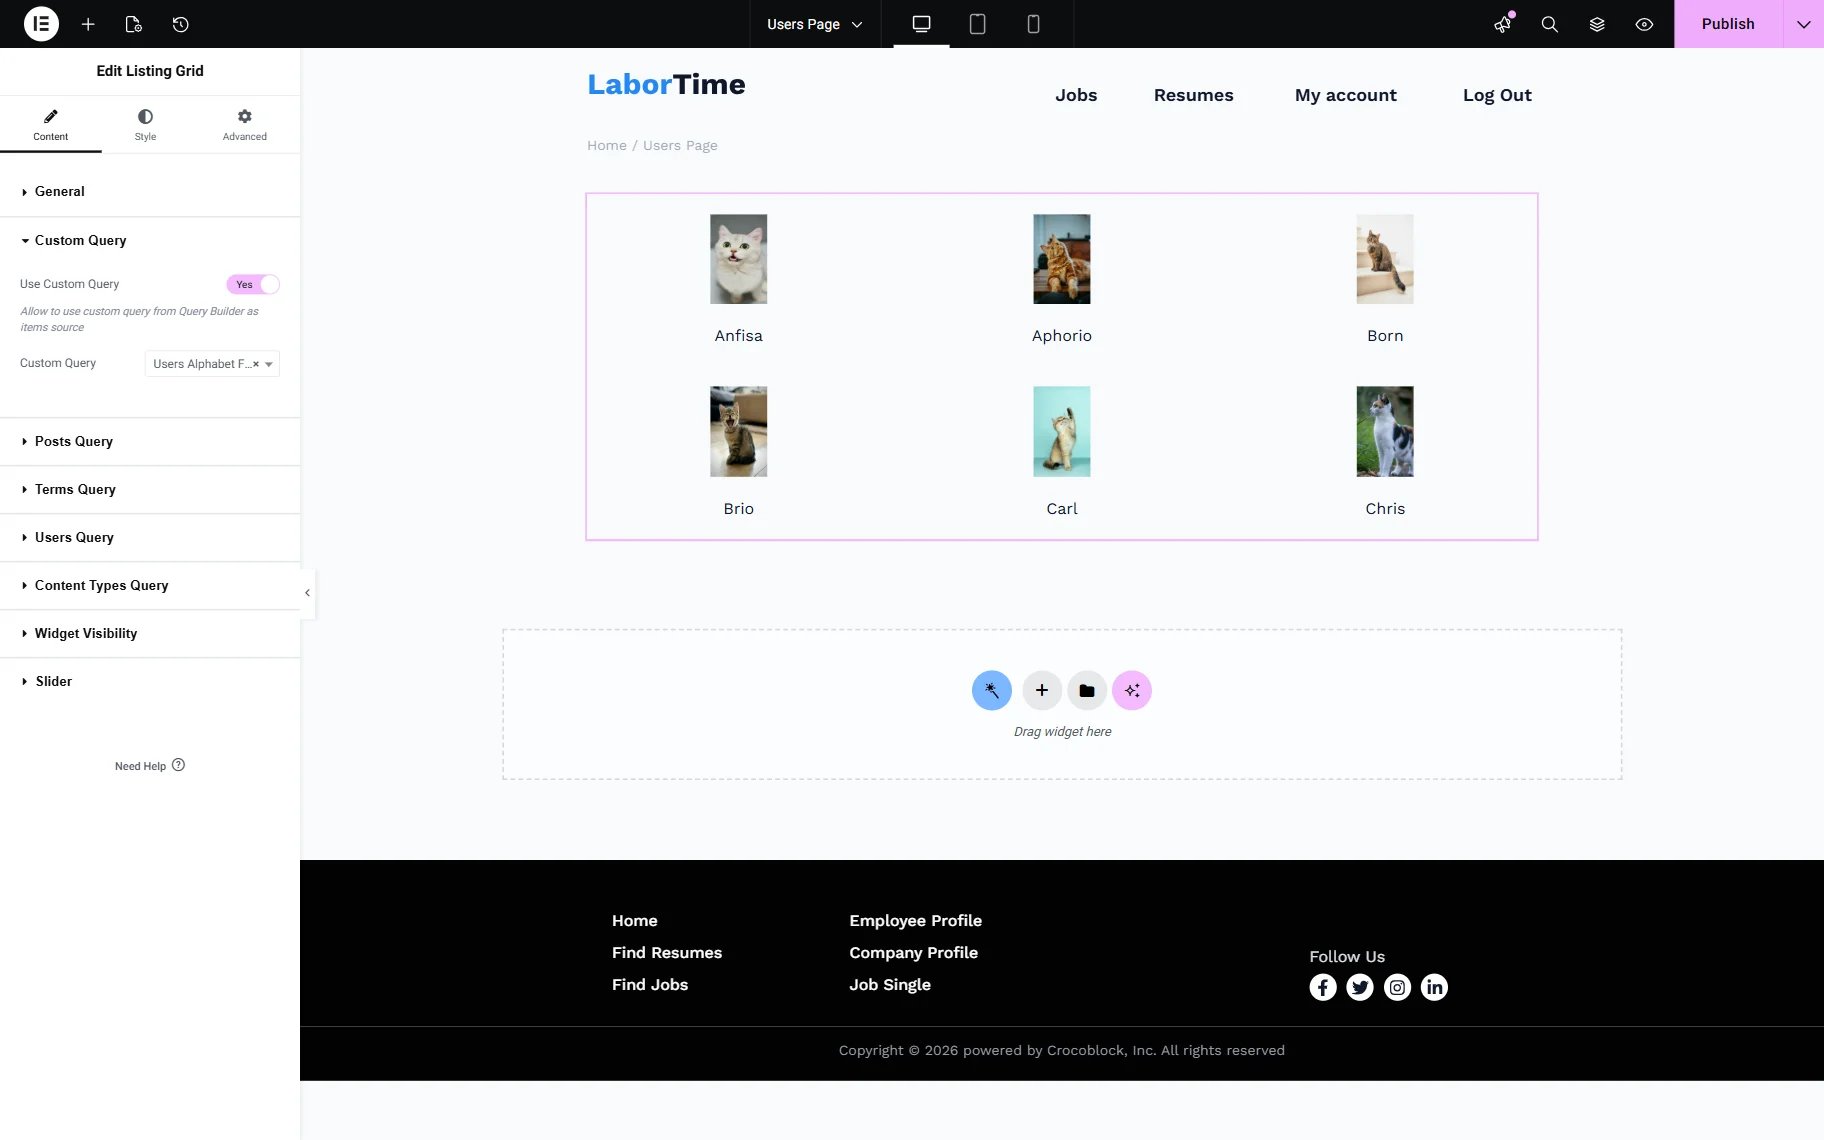
Open the Custom Query tab and activate the Use Custom Query toggle.
Pick an SQL query you have just created in the Custom Query field.
Work on other settings if needed and style the widget.
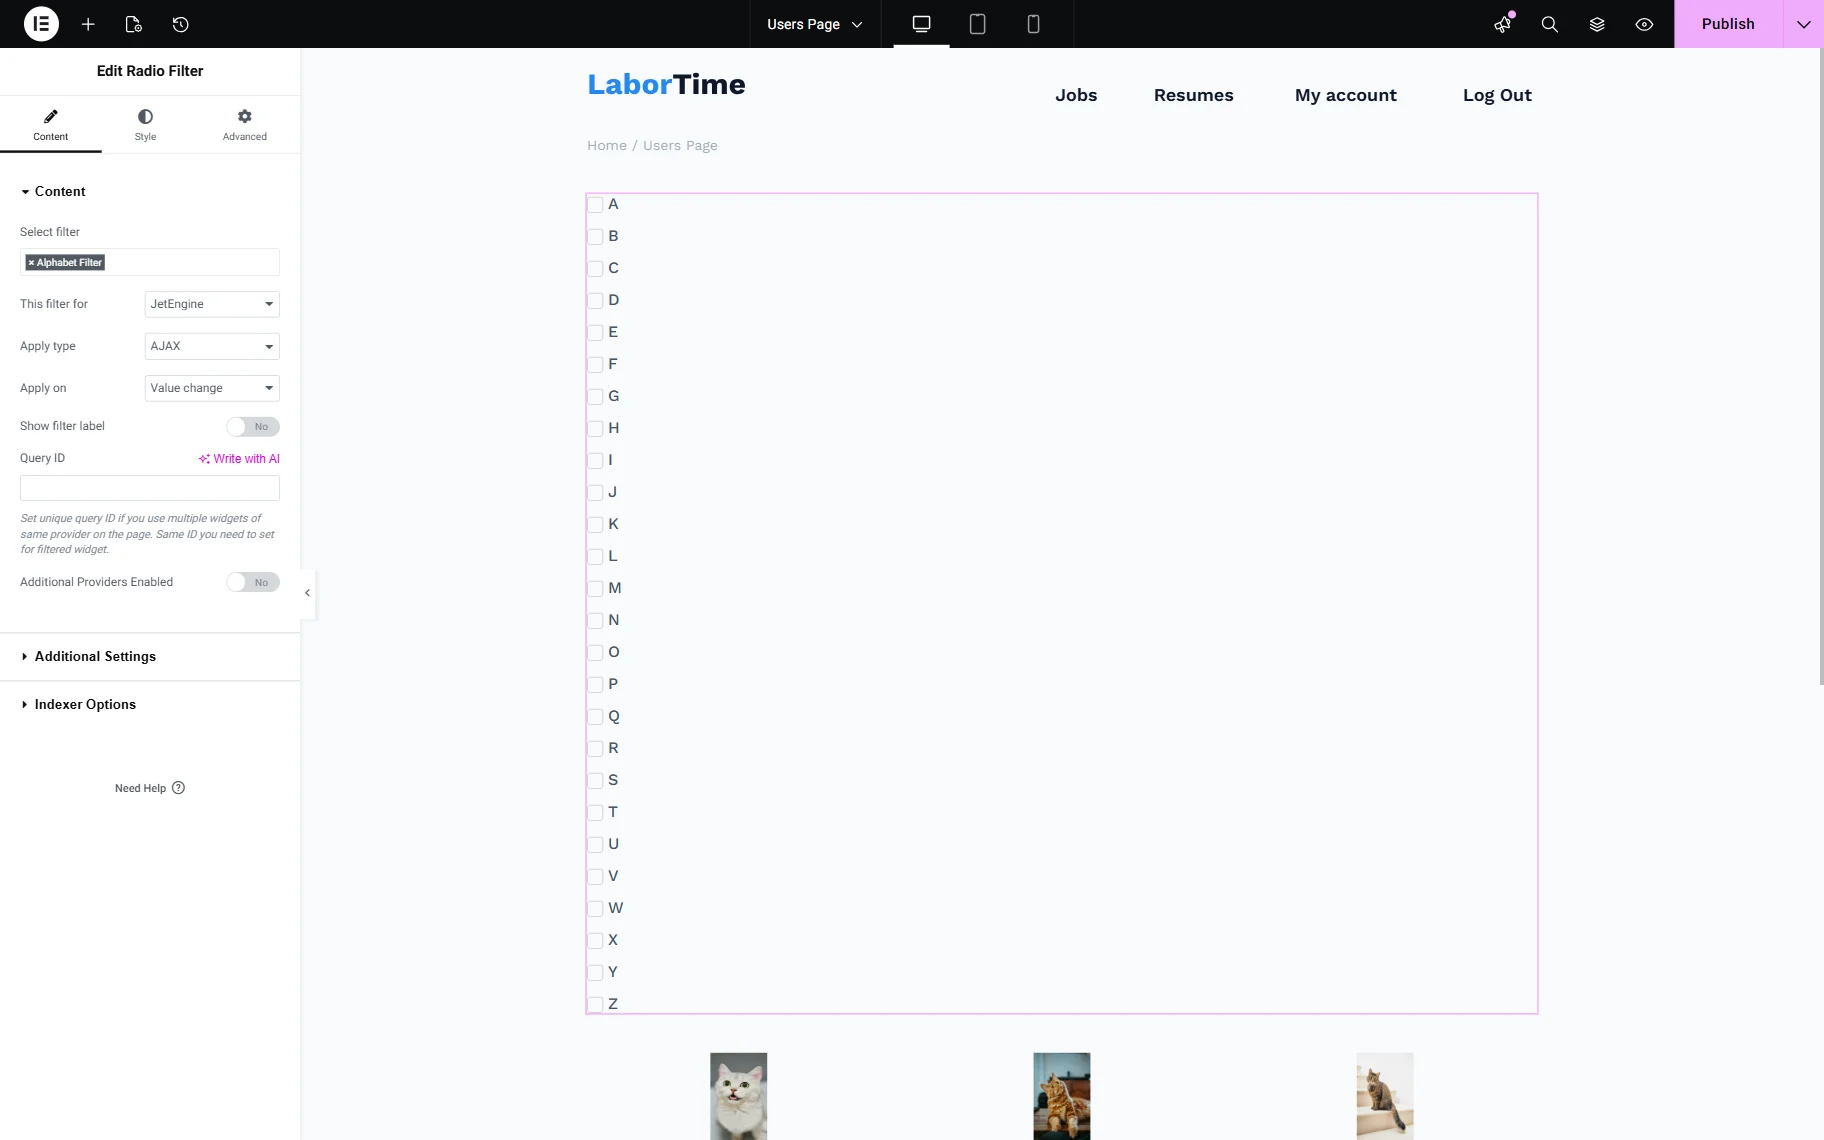
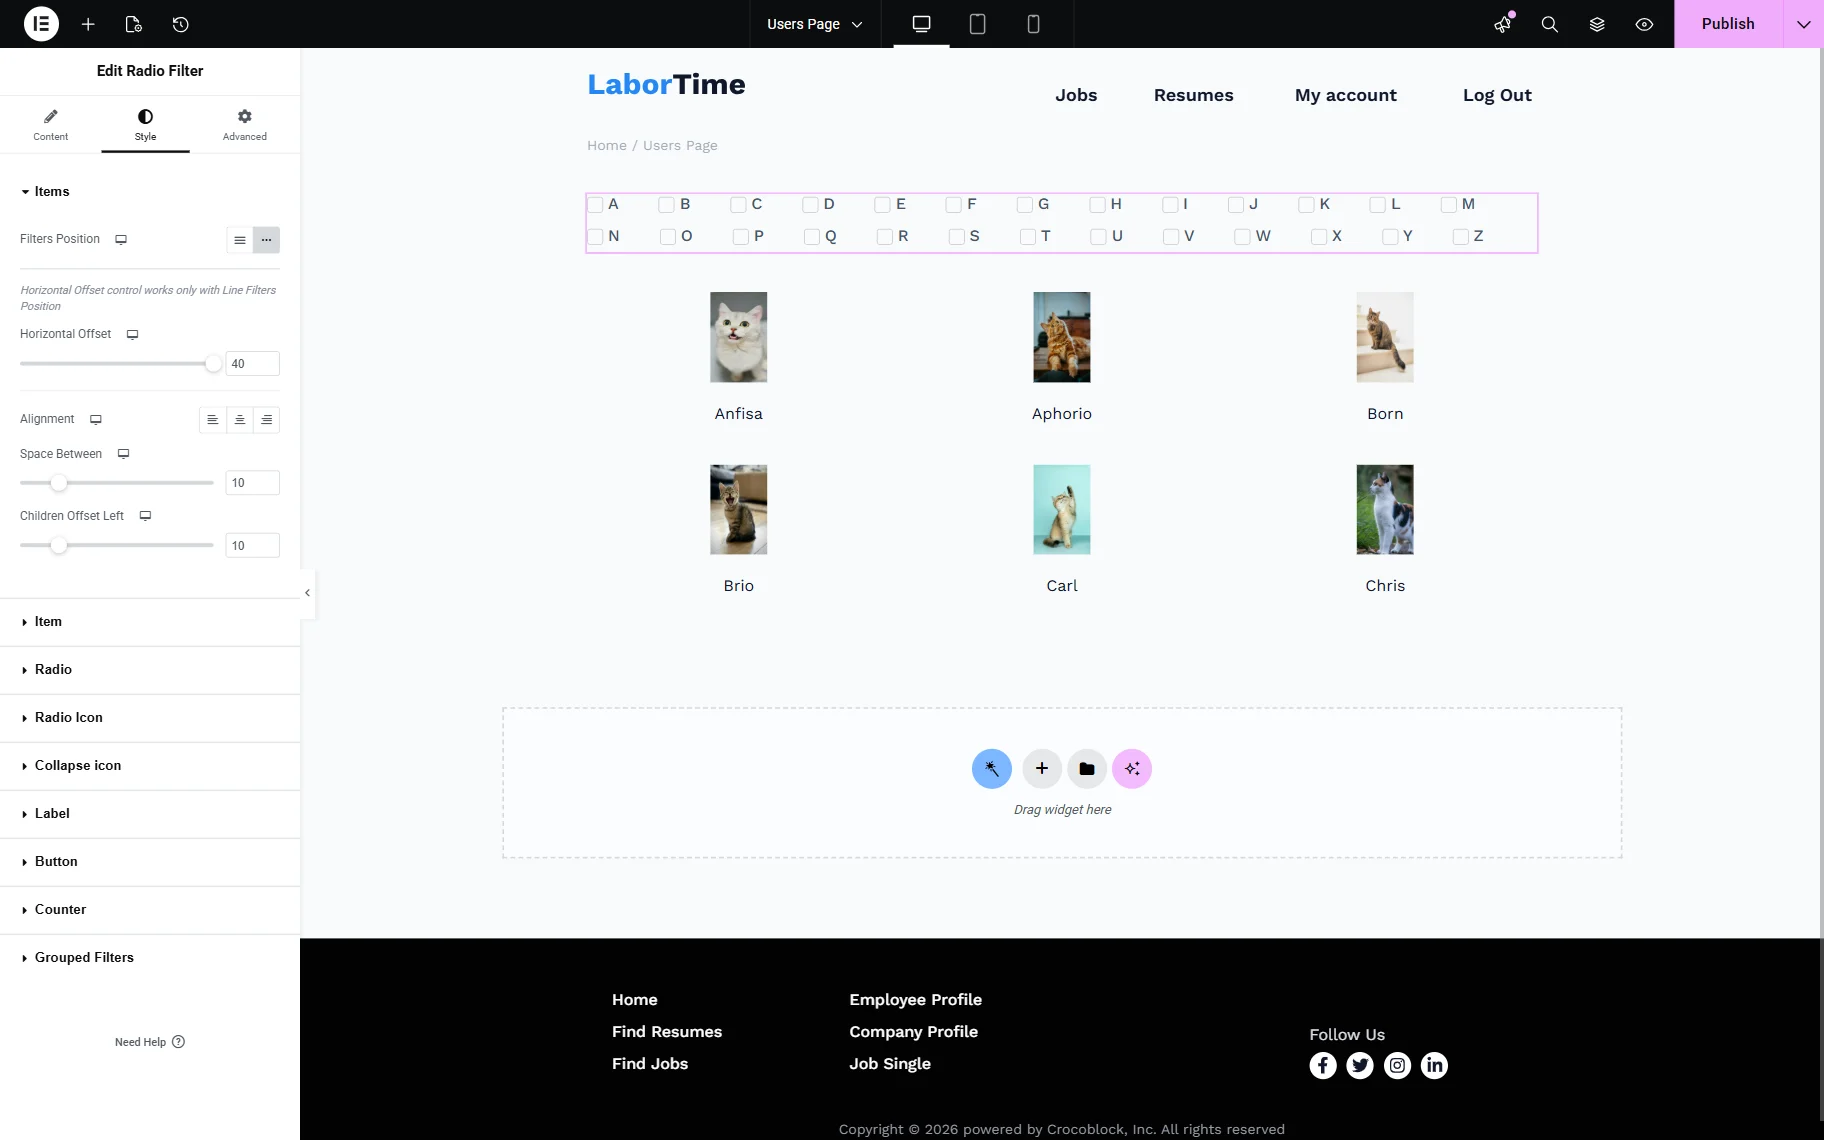
Above the Listing Grid, we place the Radio Filter widget and pick the built filter in the Select filter dropdown menu.
Select the “JetEngine” provider in the This filter for selector.
Work on other Radio Filter settings; check more about them in our Radio Filter Overview.
For instance, we make some changes in the Style tab.
When the page is ready, press the “Publish” button to save the page.
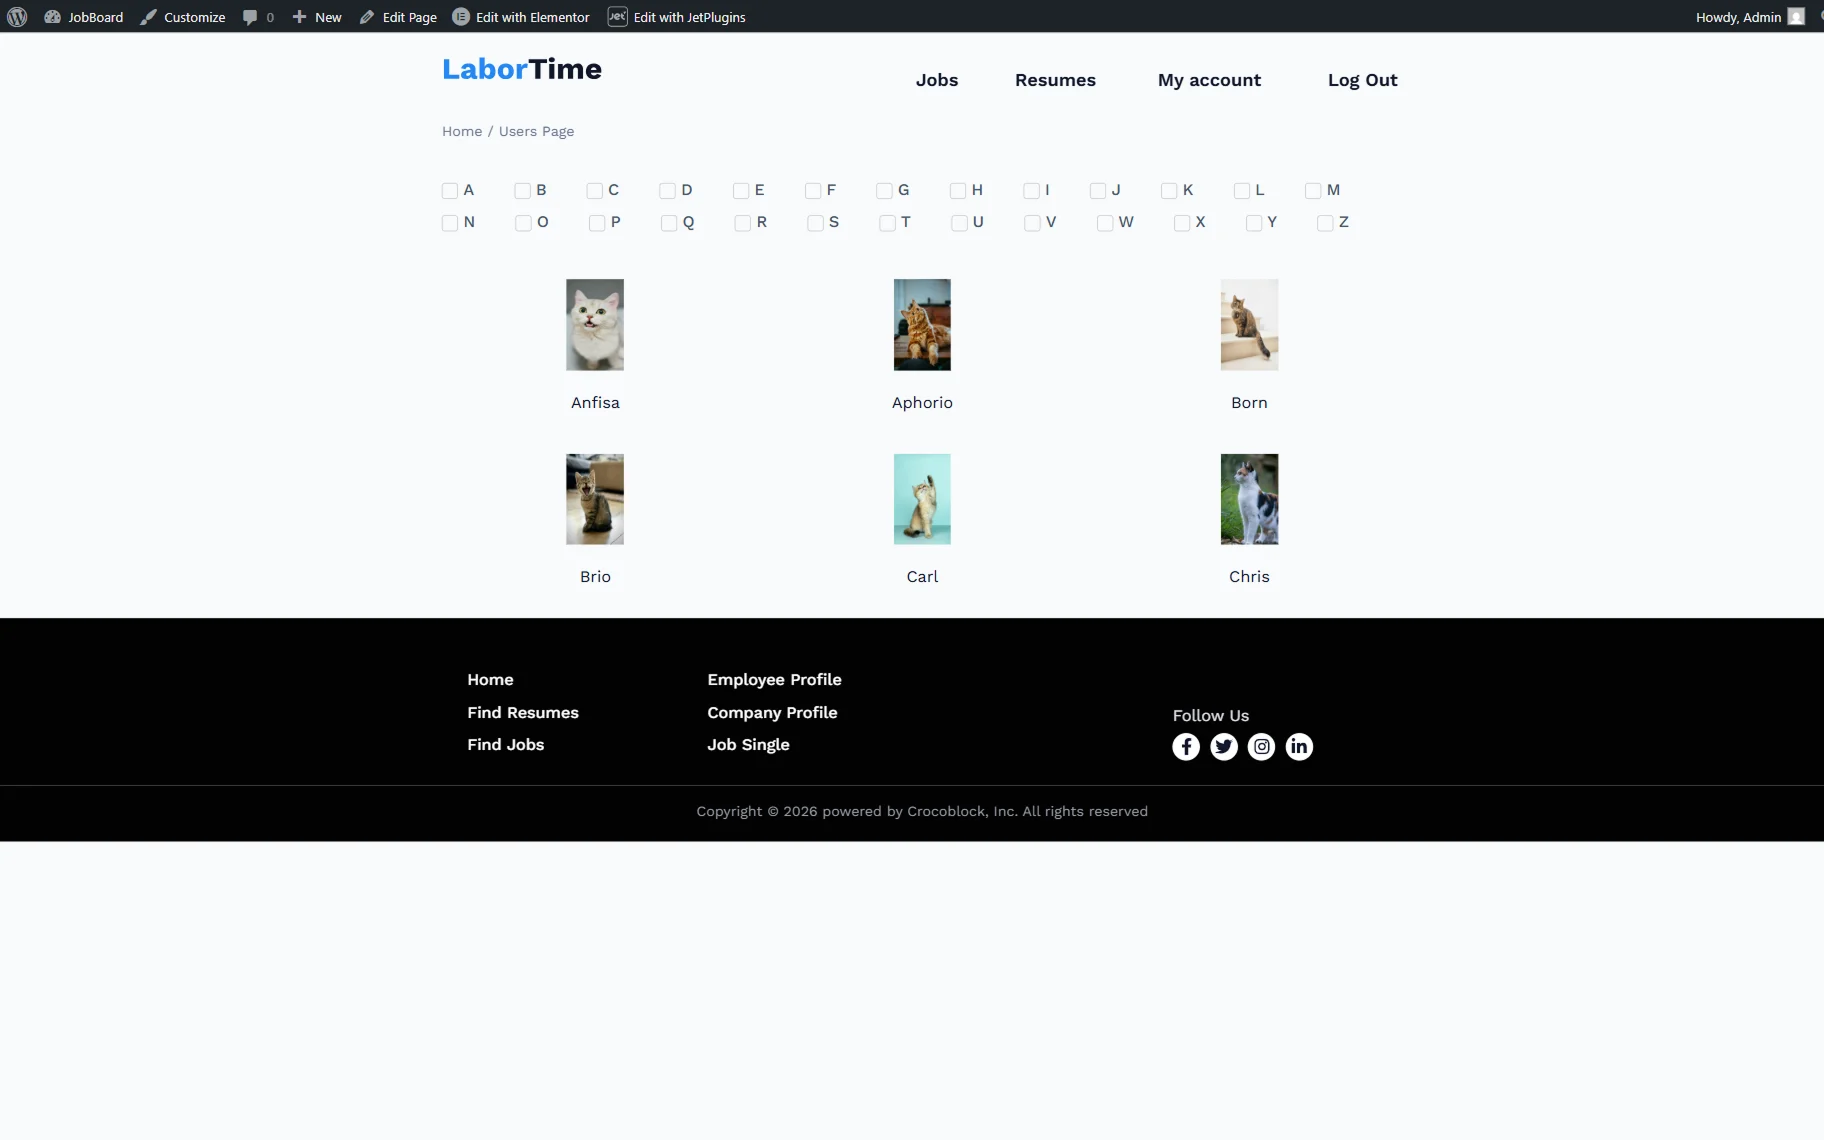
Check the Result
It’s time to check the result. Open the just-edited page on the front end. You will see the Radio Filter with the alphabet letters set as options and a Listing Grid displaying users.
After you select an option, you will see the users whose names start with the selected letter.
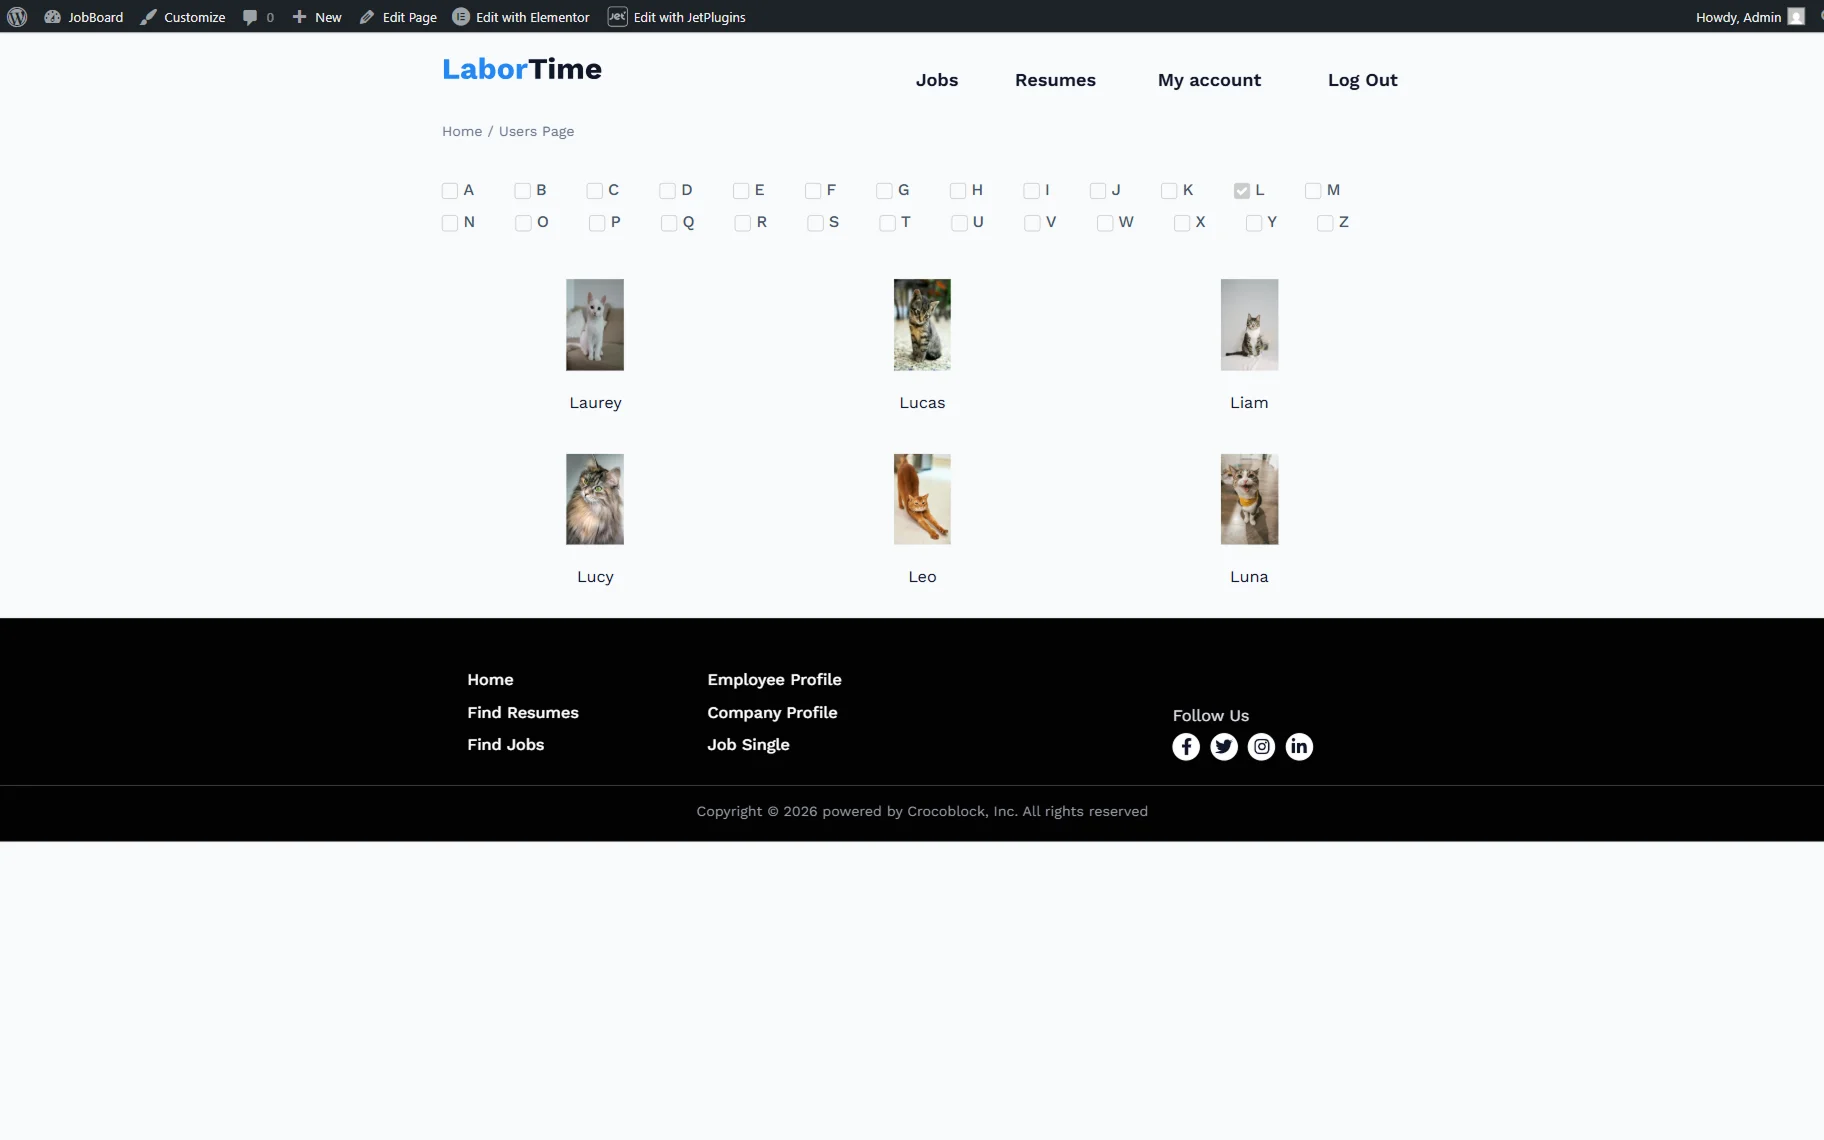
That’s all; now you know how to build an alphabet filter for the JetEngine’s Listing Grid, displaying users with the help of the JetSmartFilters plugin for WordPress websites.