How to Use Messenger Across Posts and Product Contexts
Learn how to build a WordPress contextual messaging system and individual product page chat or post chat in WordPress using the JetMessenger widgets and configure the messenger settings.
Before you start, check the tutorial requirements:
- Elementor (Free version), Block editor (Gutenberg), or Bricks
- WooCommerce plugin installed and activated
- JetWooBuilder plugin installed and activated with the with a Single Product Page Template created
- JetMessenger plugin installed and activated
Configure the JetMessenger Settings
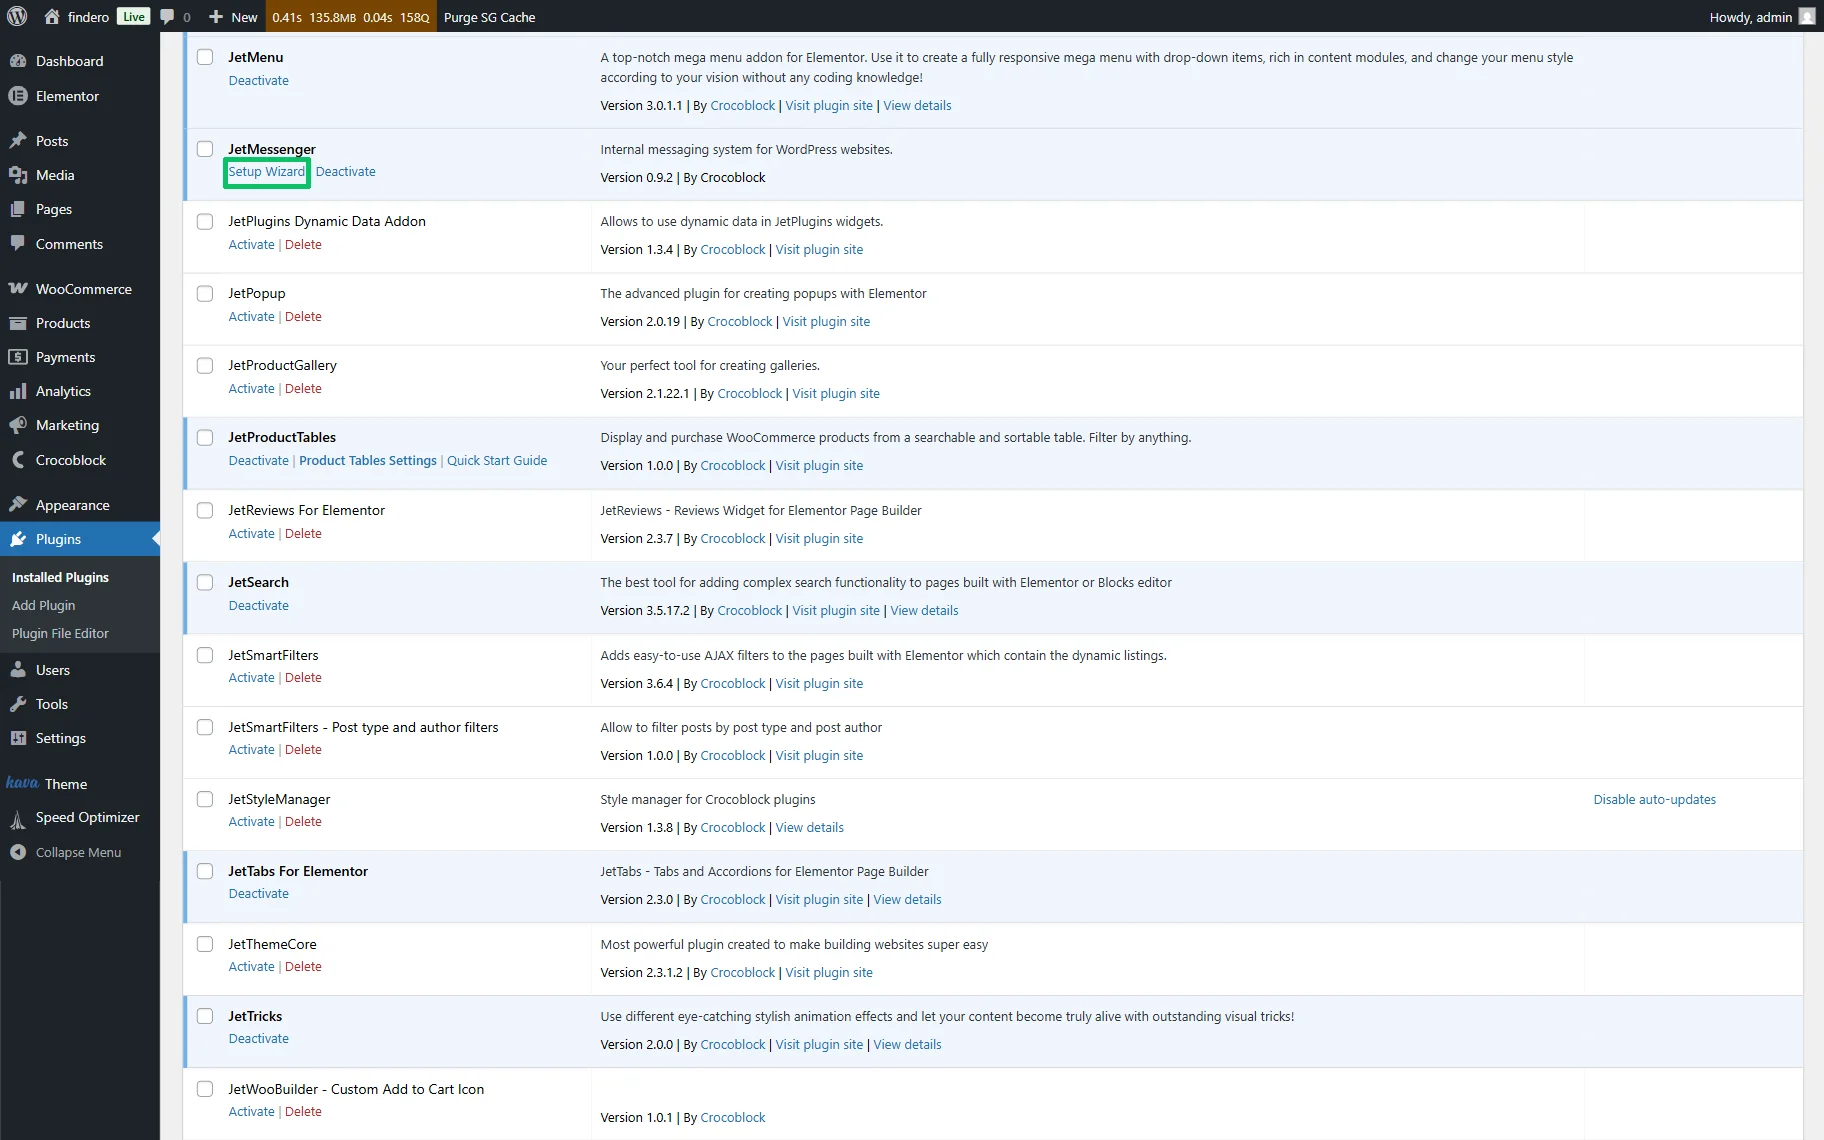
After activation of the JetMessenger plugin, configure the needed settings using the wizard or by pressing the “Setup Wizard” link below the plugin’s name in the WordPress Dashboard > Plugins > Installed Plugins tab.
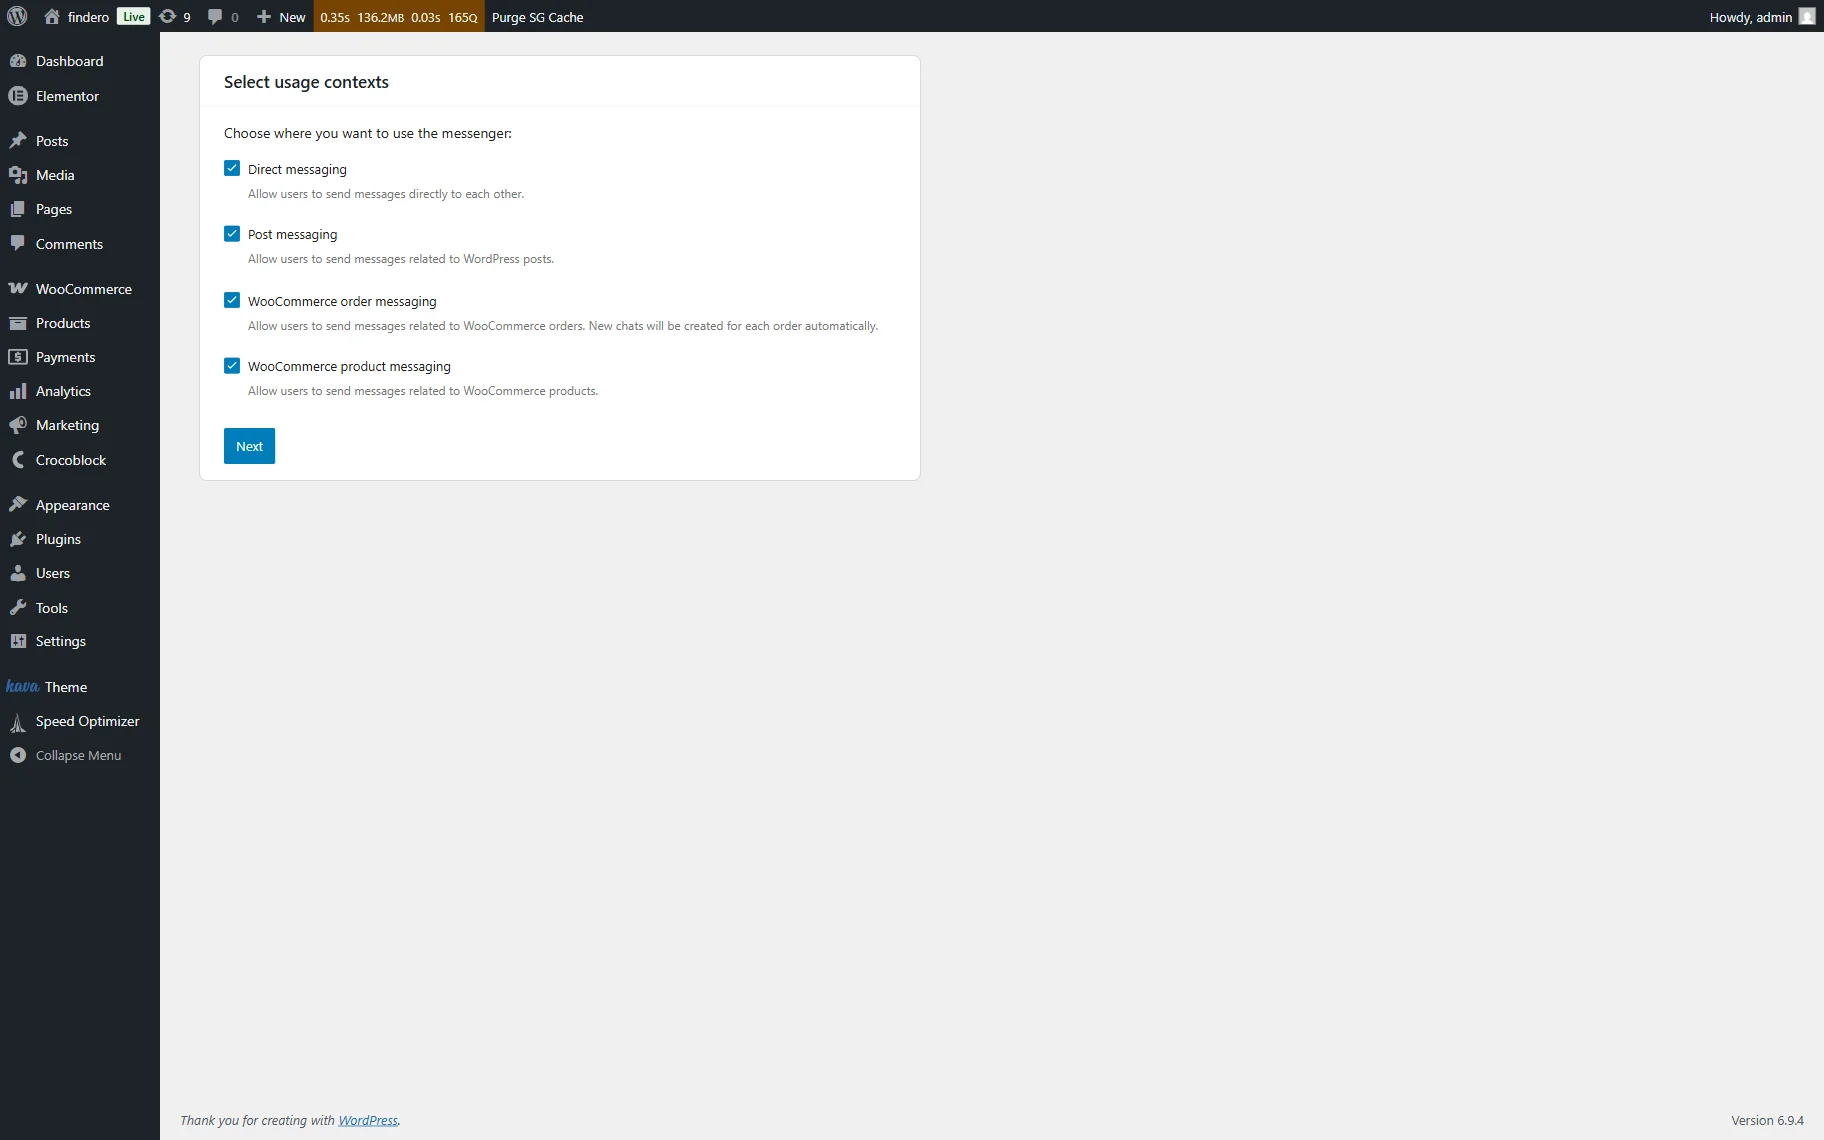
First, on the Select usage contexts page, we tick all available options to allow “Direct messaging,” “Post messaging,” “WooCommerce order messaging,” and “WooCommerce product messaging” to allow placement of charts on the corresponding pages and direct messaging.
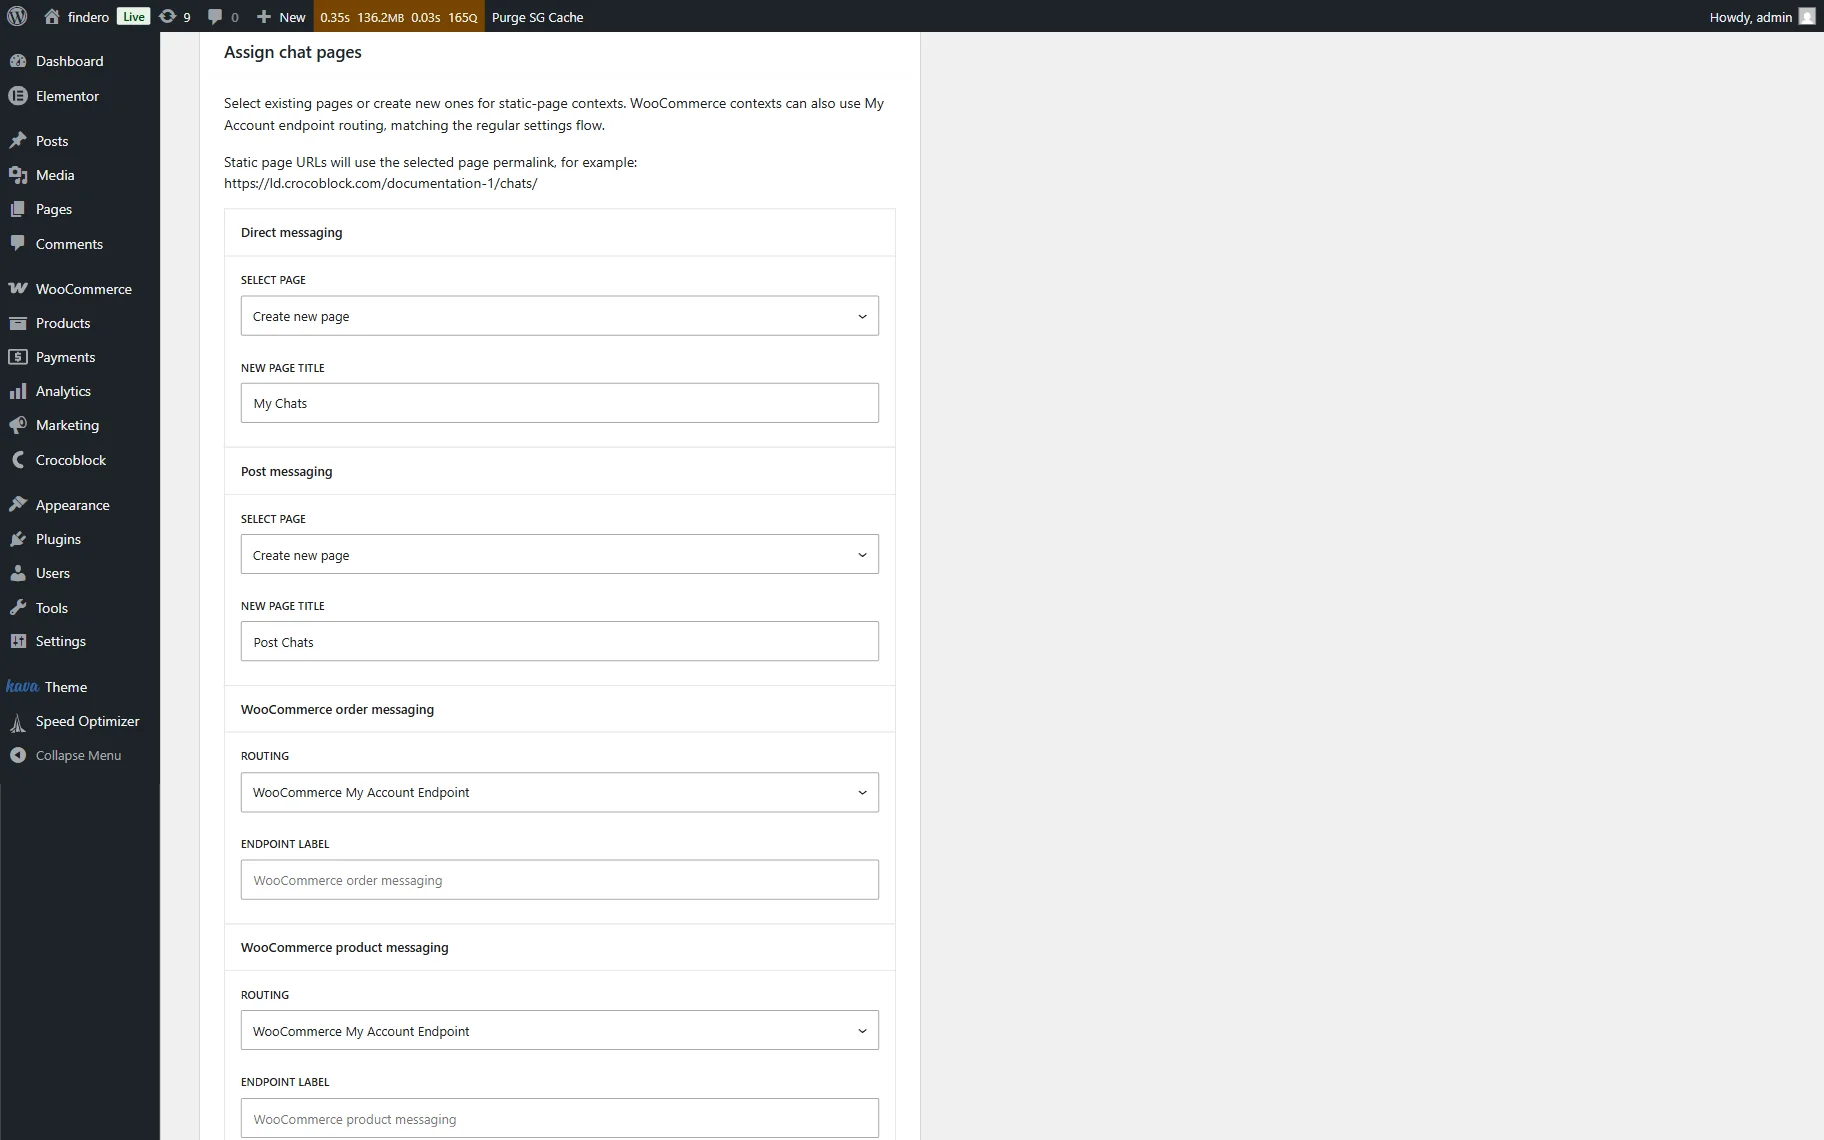
Next, on the Assign chat pages page, select existing pages or create new ones for messaging.
Here, we create new pages and insert their names in the corresponding fields.
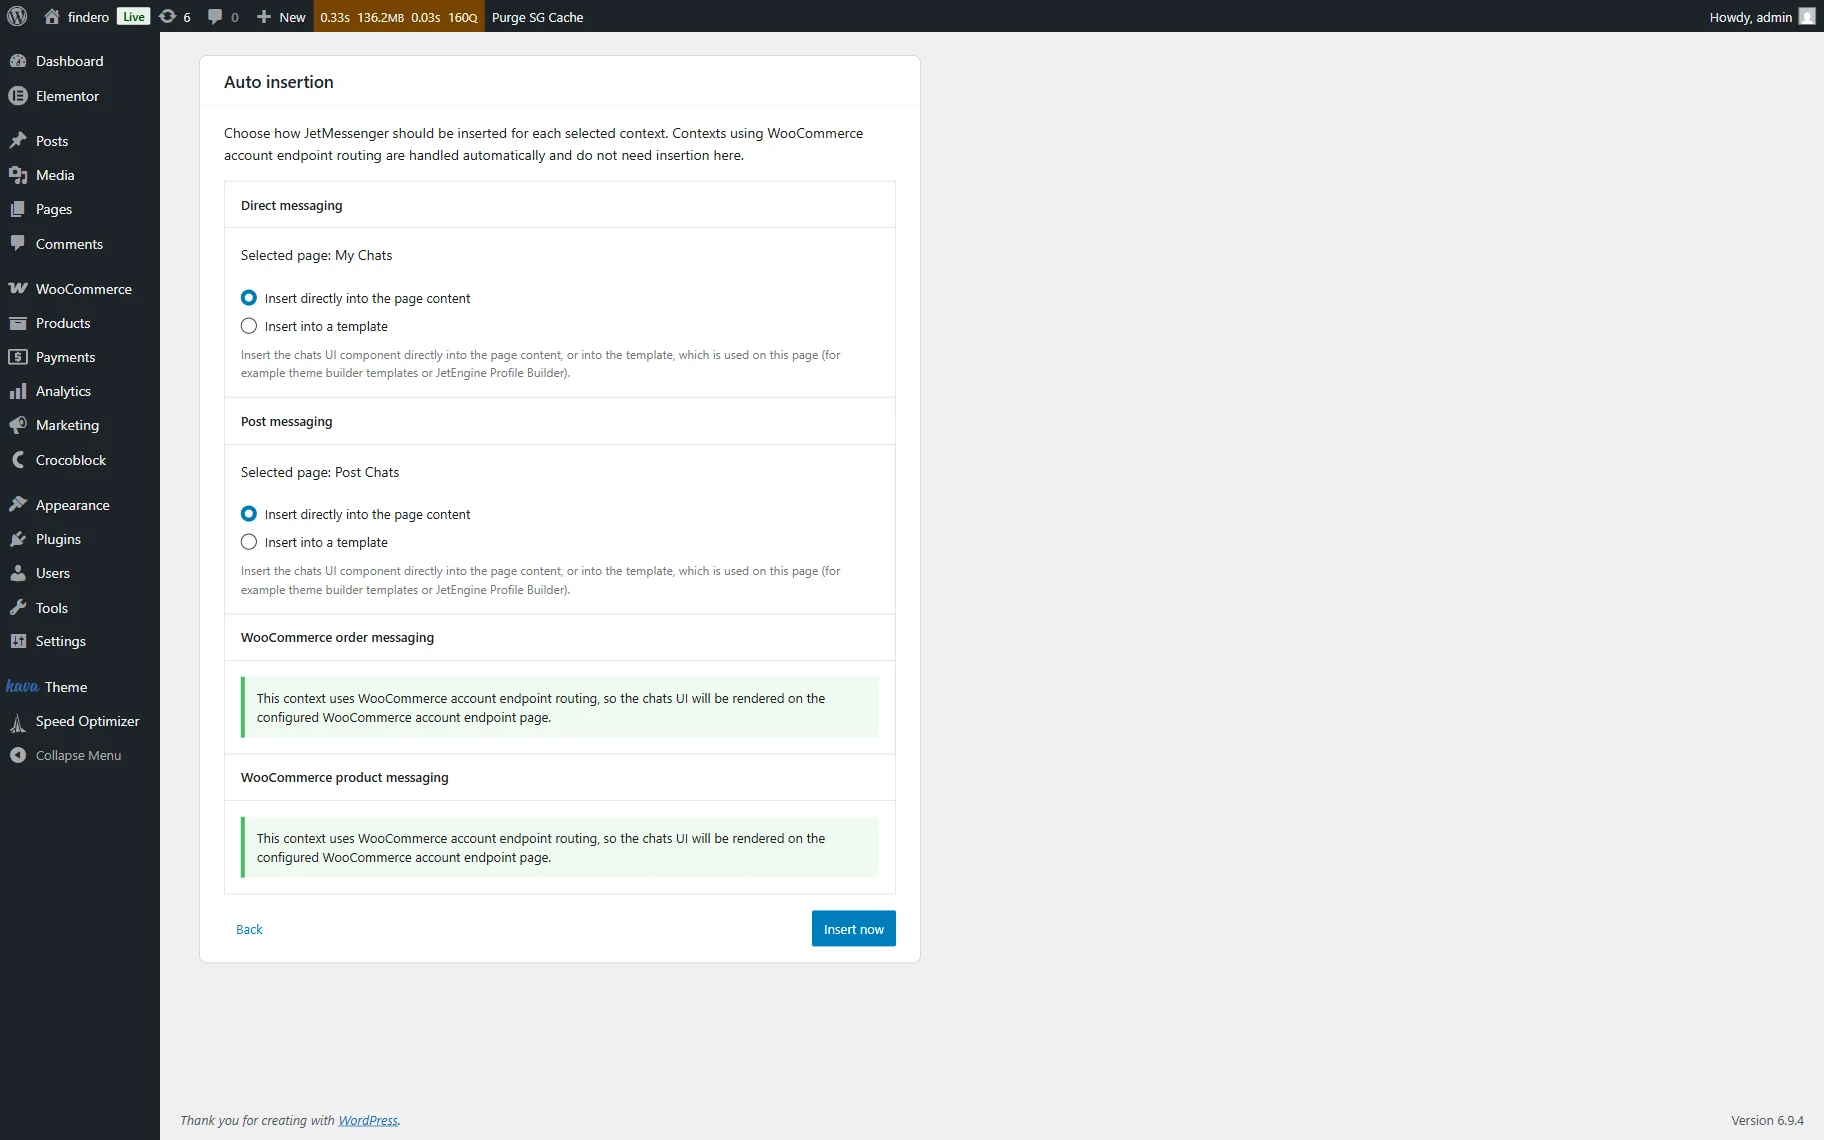
In the next step, select the page builder and choose how you want to add chat-related components to the page: here, we set “Elementor” and press the “Add components for me” button. Then, on the Auto insertion page, we tick the “Insert directly option into the page content” option for the Direct messaging and Post messaging fields.
Finally, press the “Insert now” button, and after redirection to the last wizard page, complete the configuration settings.
More details on configuring the plugin’s settings can be found in the How to Set Up JetMessenger After Activation tutorial.
Then, move to the WordPress Dashboard > Crocoblock > Messenger tab, scroll down the JetMessenger Settings page, and select the “WooCommerce My Account Endpoint” ROUTING in the Woo Orders section.

More details about configuring the JetMessenger settings can be found in the JetMessenger Dashboard Overview.
After that, scroll the page down and set the “woocommerce order details after order table” BUTTON POSITION in the Woo Orders section.
Finally, press the “Save changes” button at the end of the page.
Create a Chat by Product Context
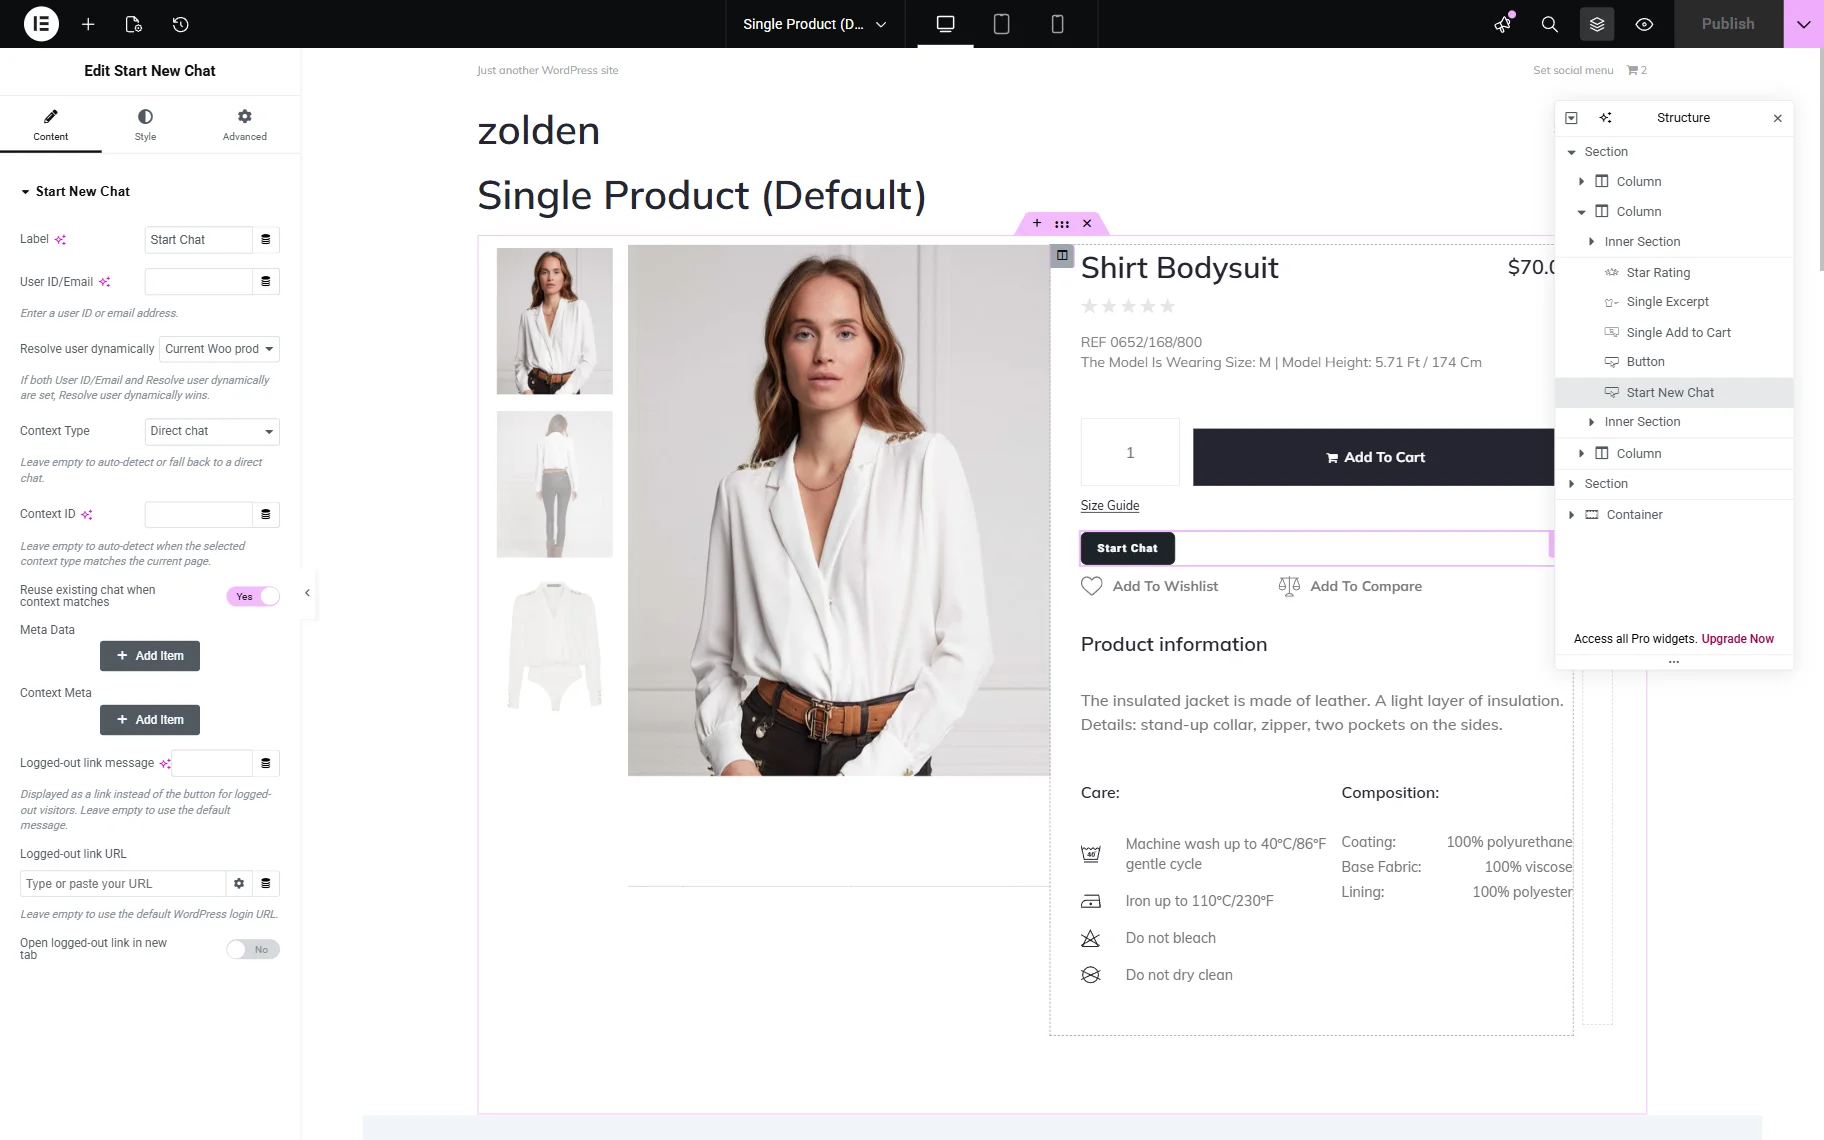
First, open a single-page template of the product. Then, find the Start New Chat widget and add it where needed.
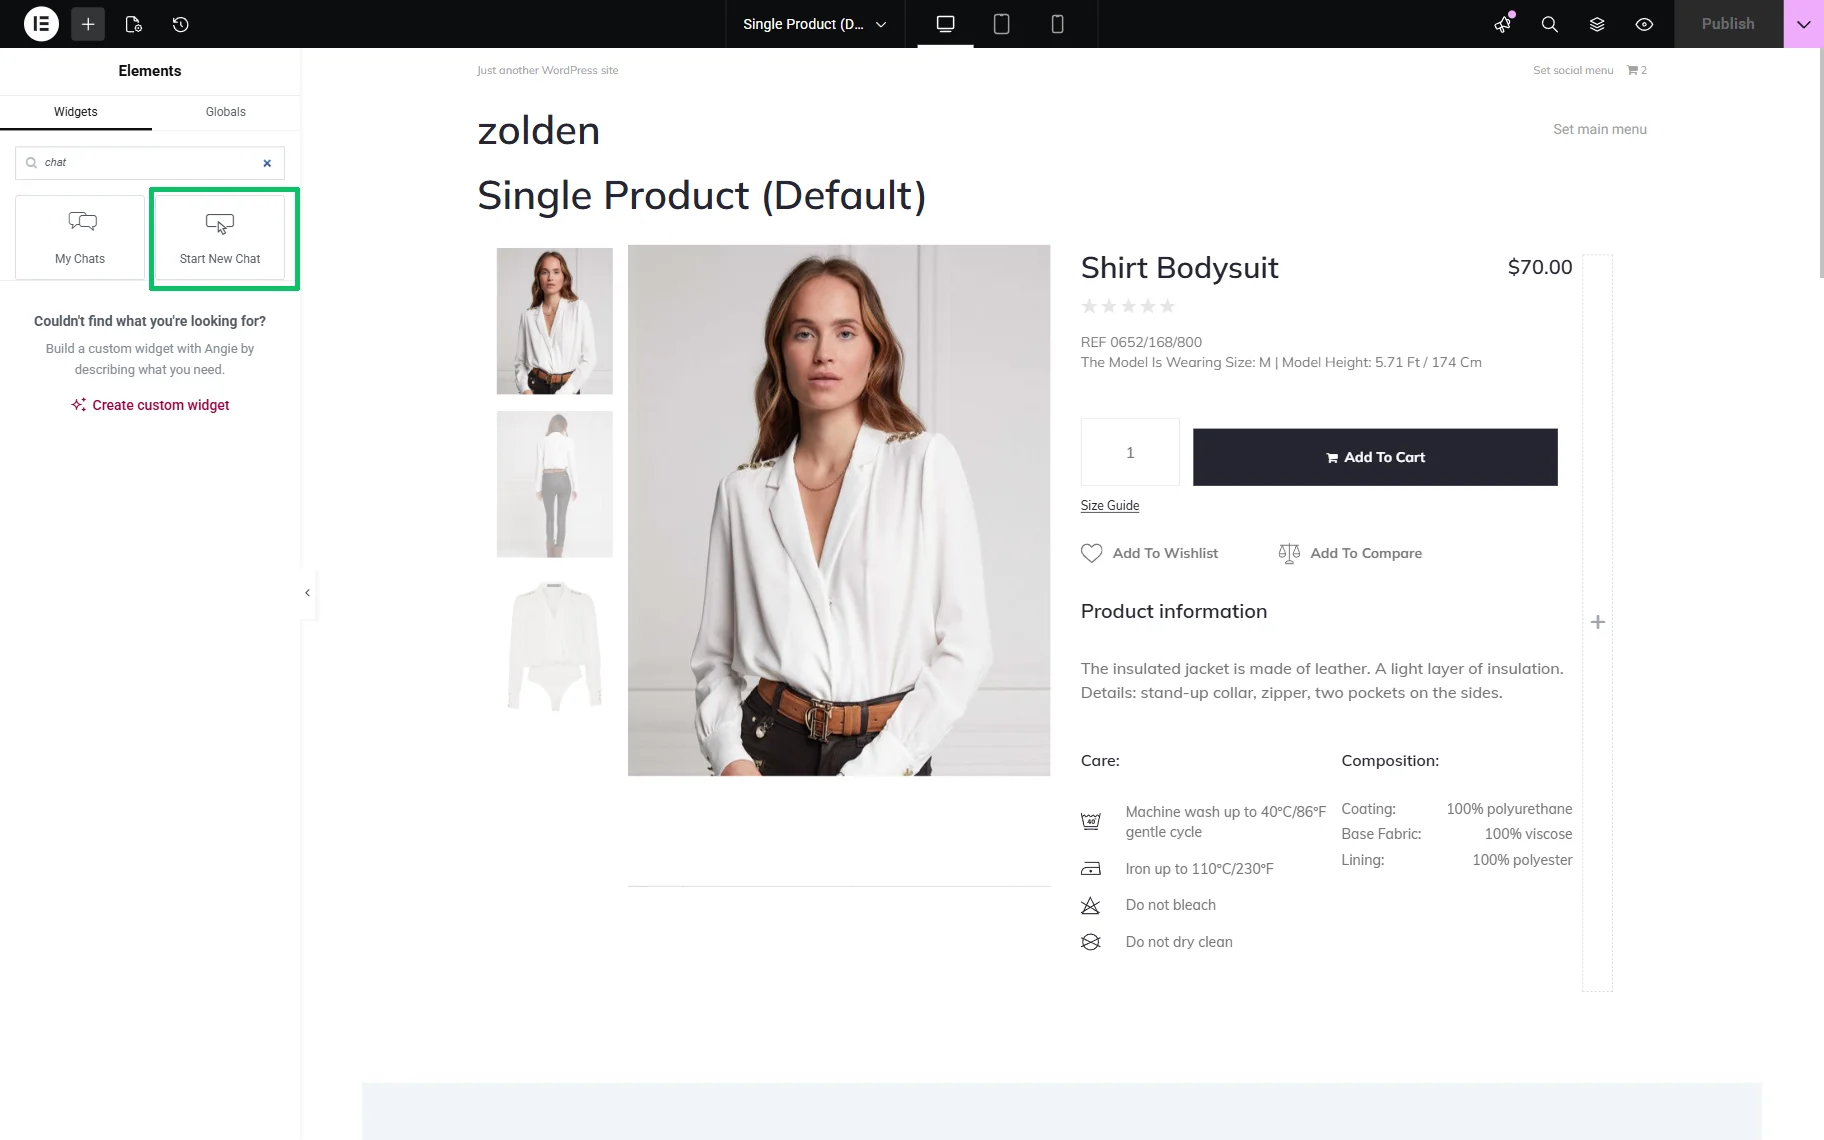
Once added, configure the following settings. First, insert the text into the Label field or keep the default “Start Chat” one. Next, we set the “Current Woo product” Resolve user dynamically and “Direct chat” Content Type options.
Thus, the corresponding button will be added to the template.
Finally, publish the template.
Create a Post Chat
First, open a post. Then, find the Start New Chat widget and add it where needed.
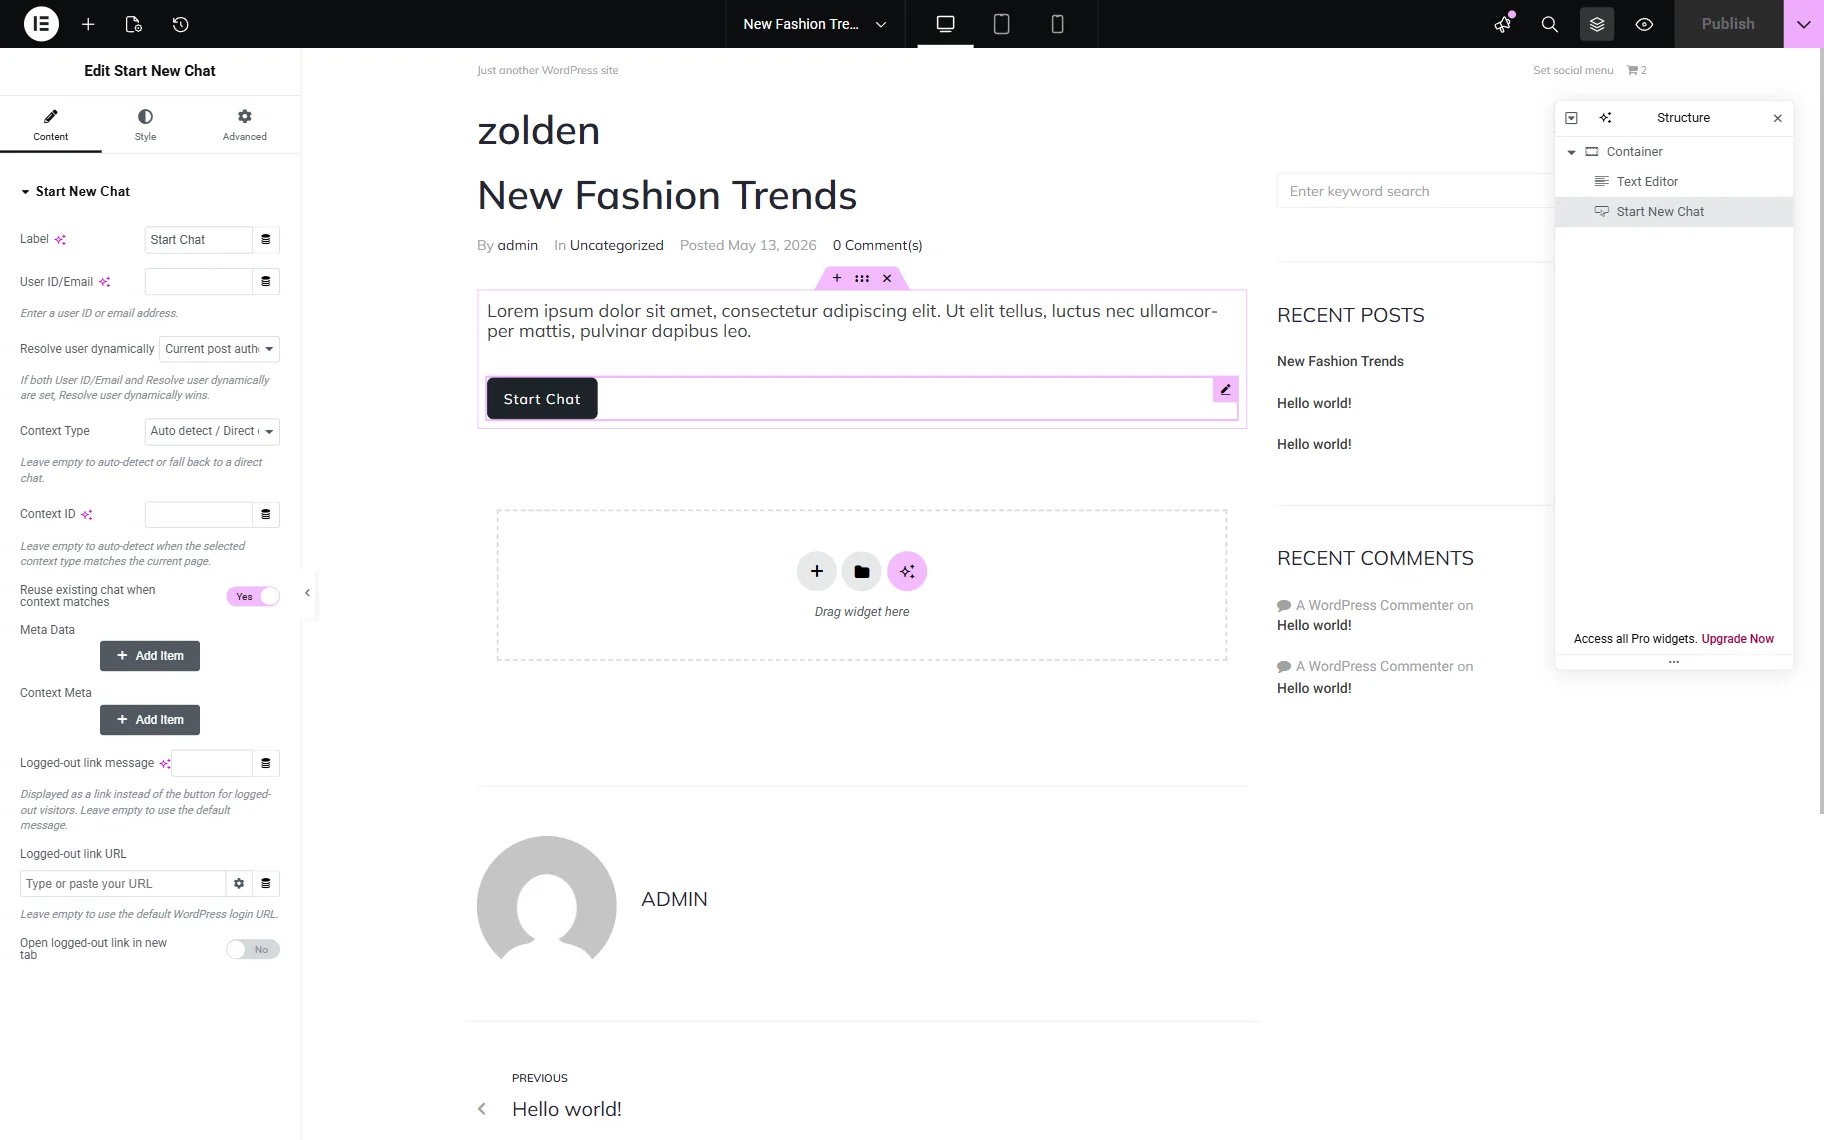
Configure the settings: set the “Post chats” Content Type and “Current post author” Resolve user dynamically options. Then, save the post.
Build a Listing Page Chat
This page is designed to collect and manage all messages received from the context-based chats.
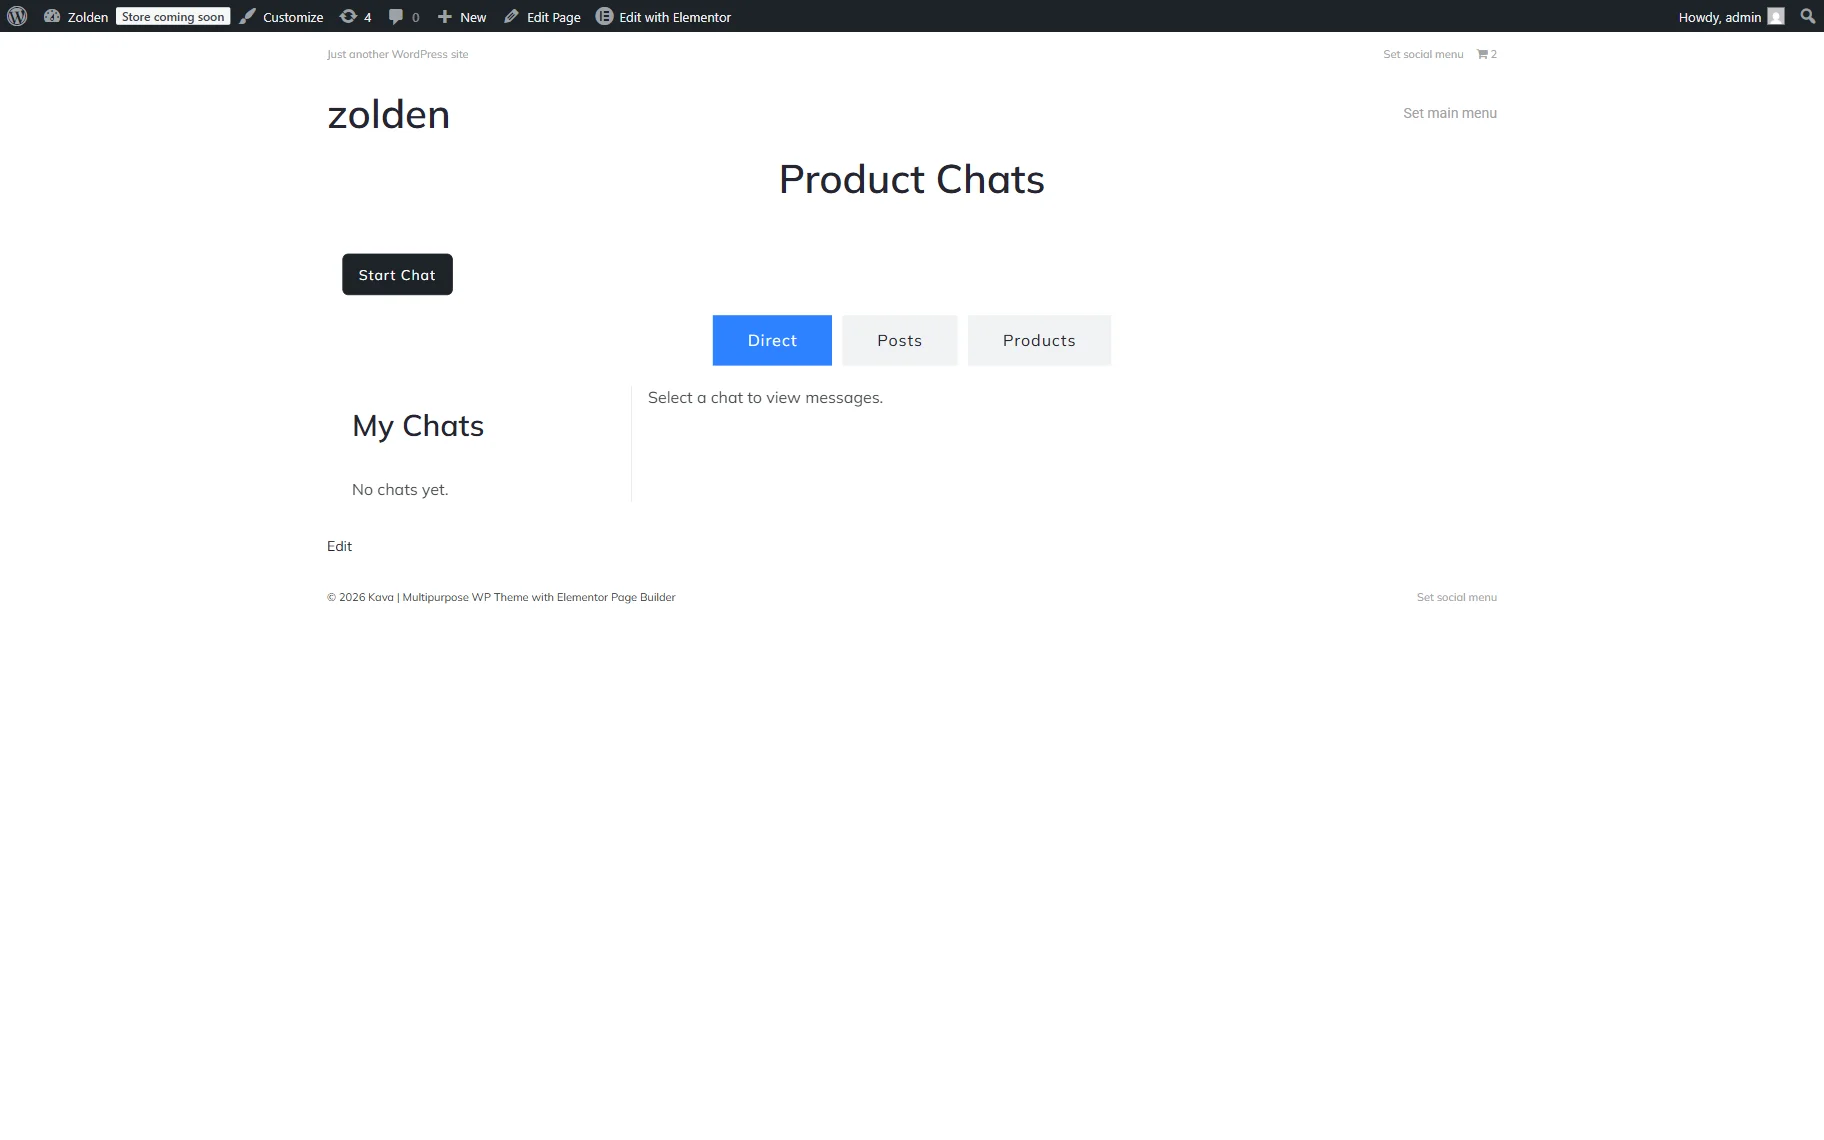
Open the static page intended to collect the chat data. In this case, it is the page specified while configuring the JetMessenger settings on the Auto insertion page (the “My chats” page, in this tutorial). Here, the My Chats widget is added by default.

Since this widget is intended to show messages associated with only one type of content, we use the Tabs widget to arrange the messages and collect them via one dashboard. Here, we add this widget, insert the Titles of the tabs (the “Direct,” “Posts,” and “Products” texts, in this case).
After that, drag-n-drop the My Chats widget into the tabs fields.
Once the widget is added, set the corresponding Content type for each tab, e.g, the “Direct” option for the tab entitled “Direct”, etc.
In addition, to allow chatting, we add the Start New Chat widget and set the “Direct chat” Context Type and “Current Woo product” Resolve user dynamically options.
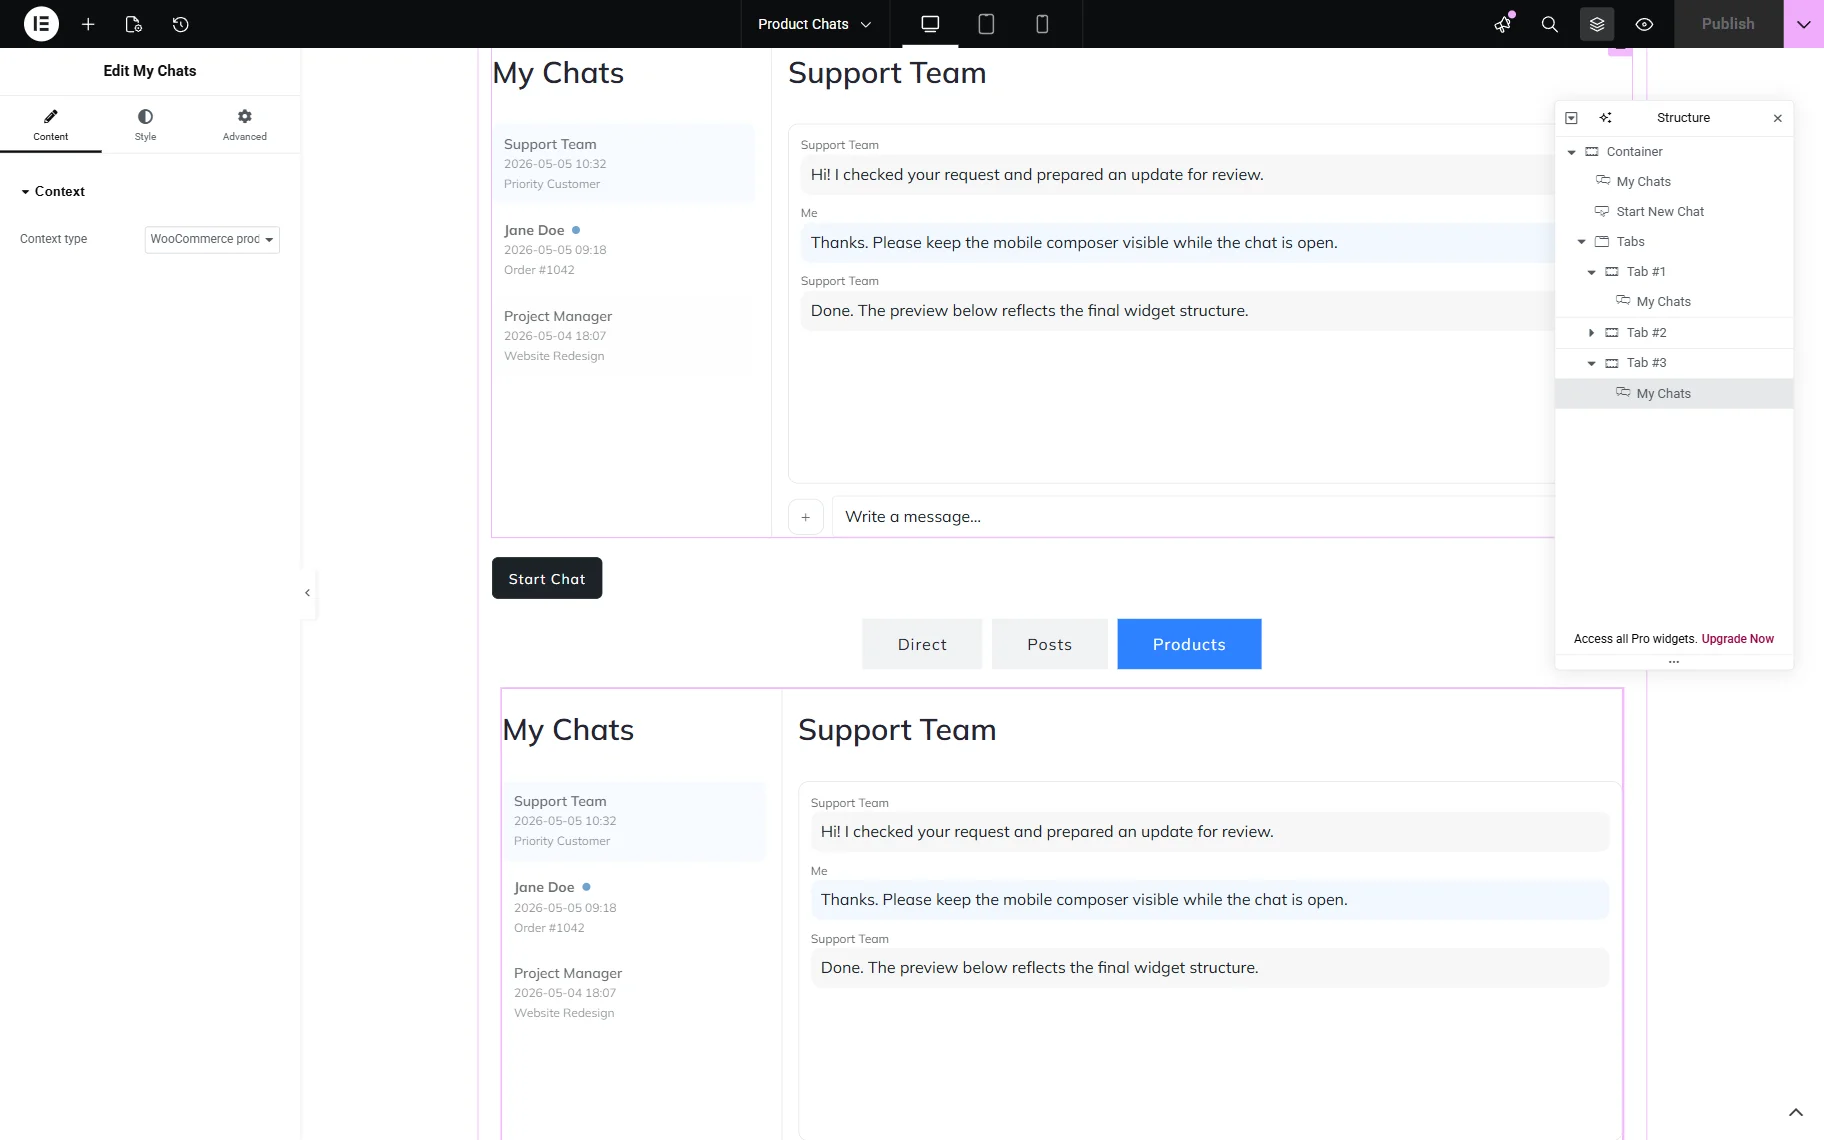
Finally, save the page.
Test the Flow
Messaging is not available while you build the corresponding pages and/or templates, but only logged-in users can start chatting. If a user is not logged in, the “Please log in to start a chat” text will be displayed.
Therefore, we log out as the site’s administrator and log in as another user.
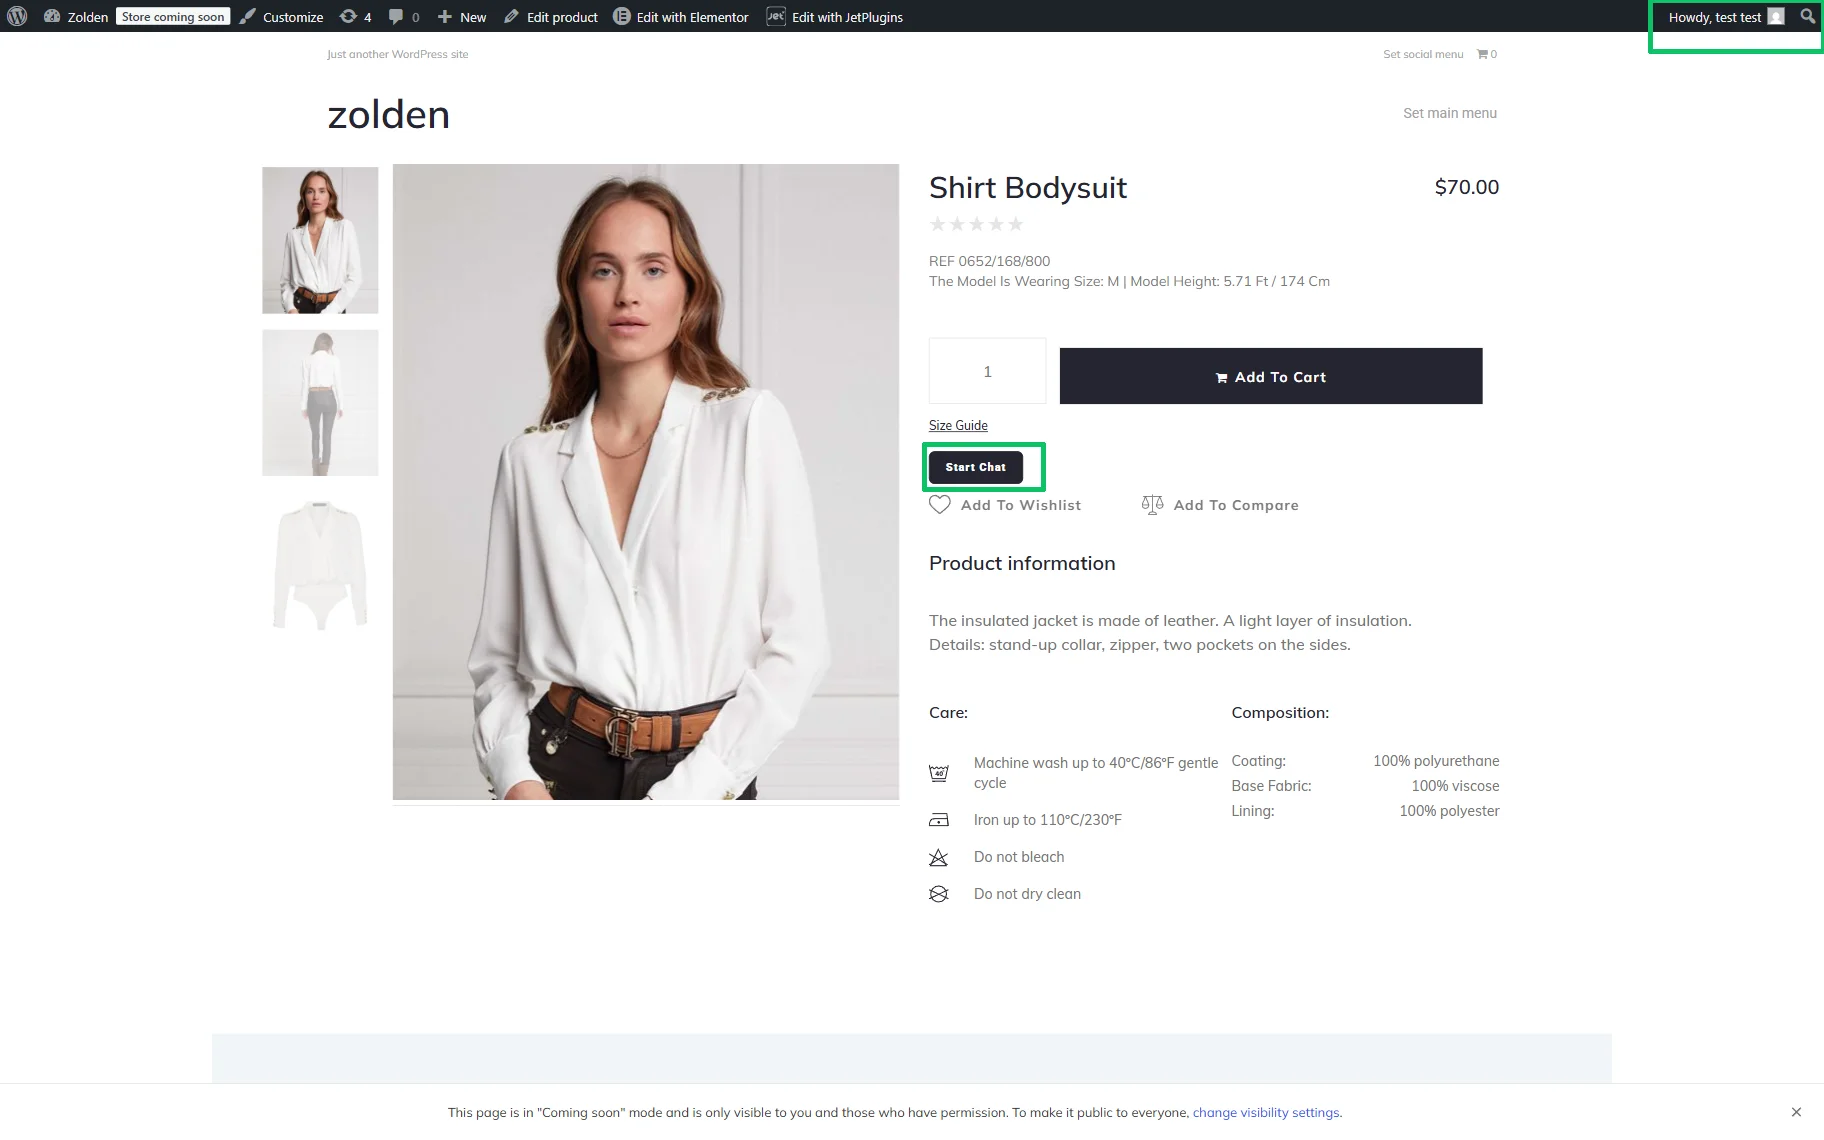
Messaging on product pages
When users open the product page on the front end, they should press the “Start Chat” button to start the messaging.
After that, they will be redirected to their accounts. Here, they can insert the needed text or press the “plus” icon to upload a needed file.
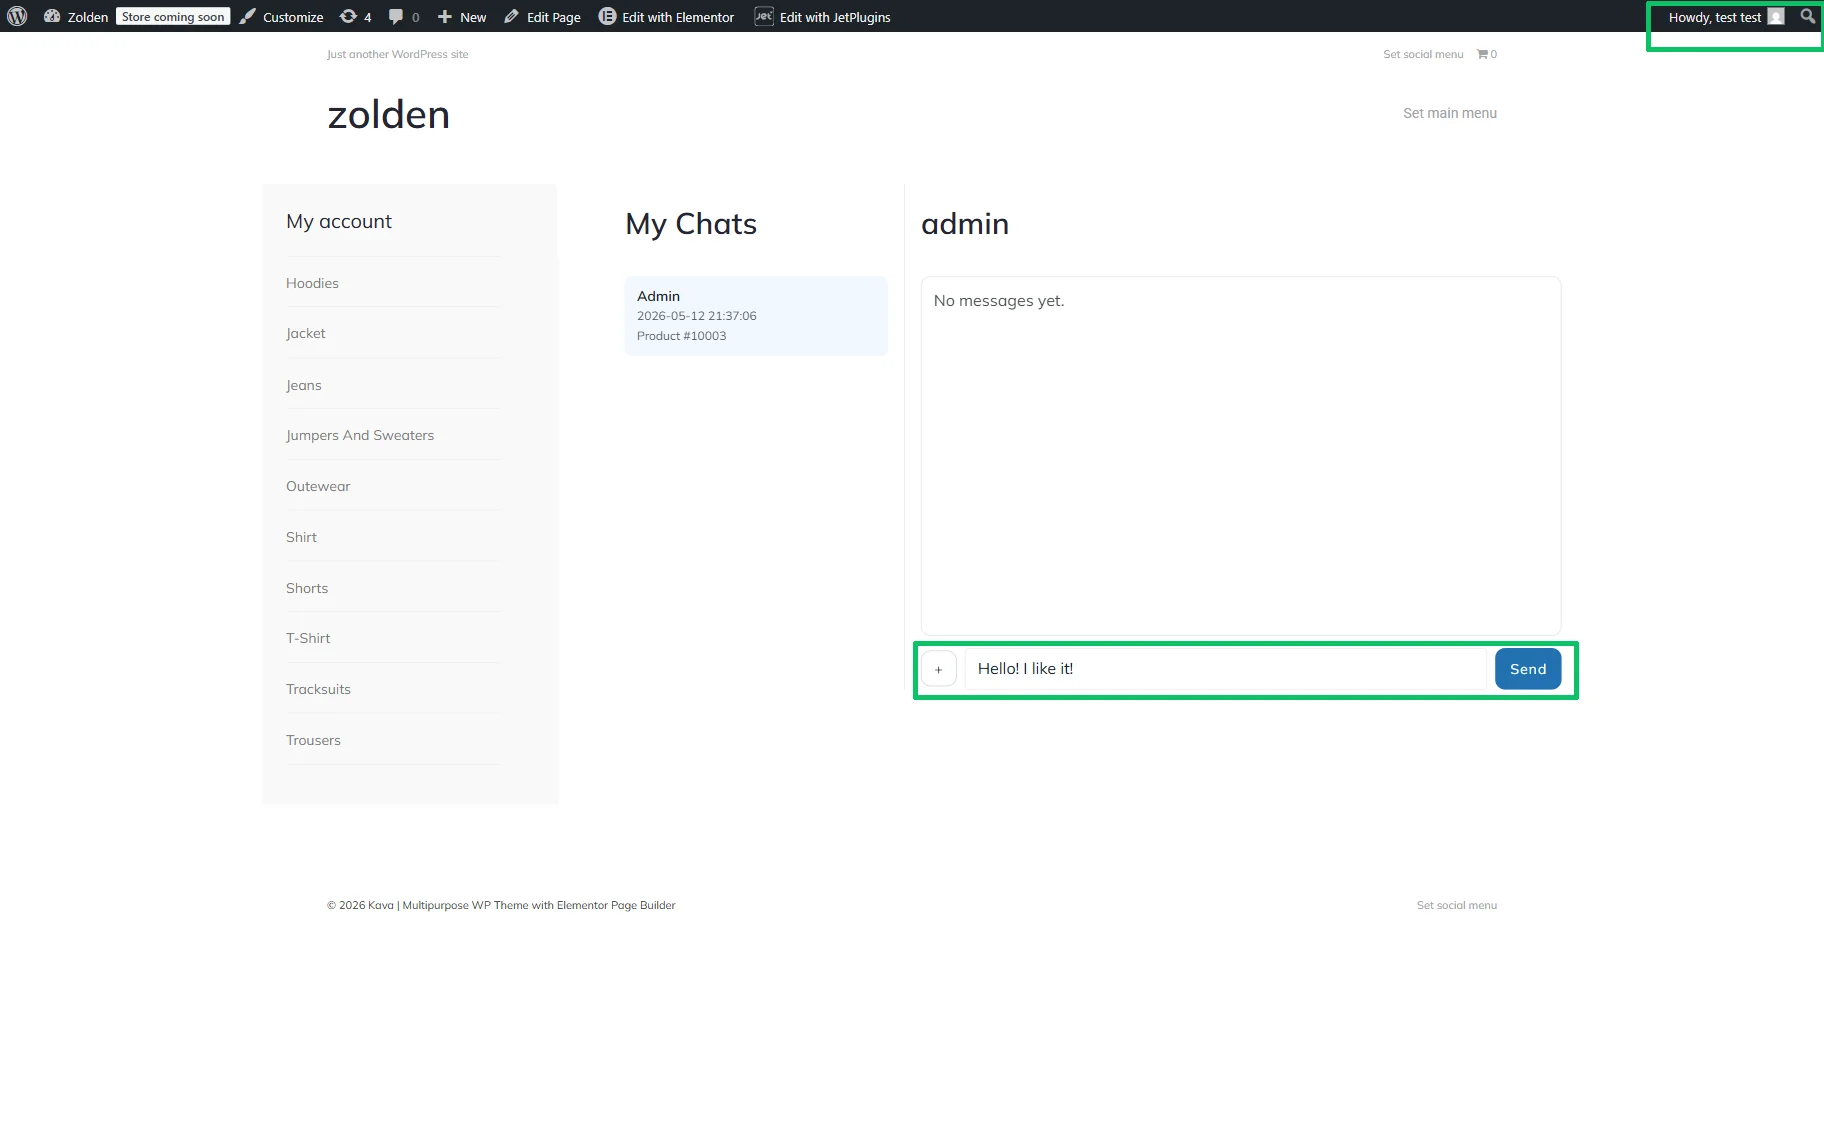
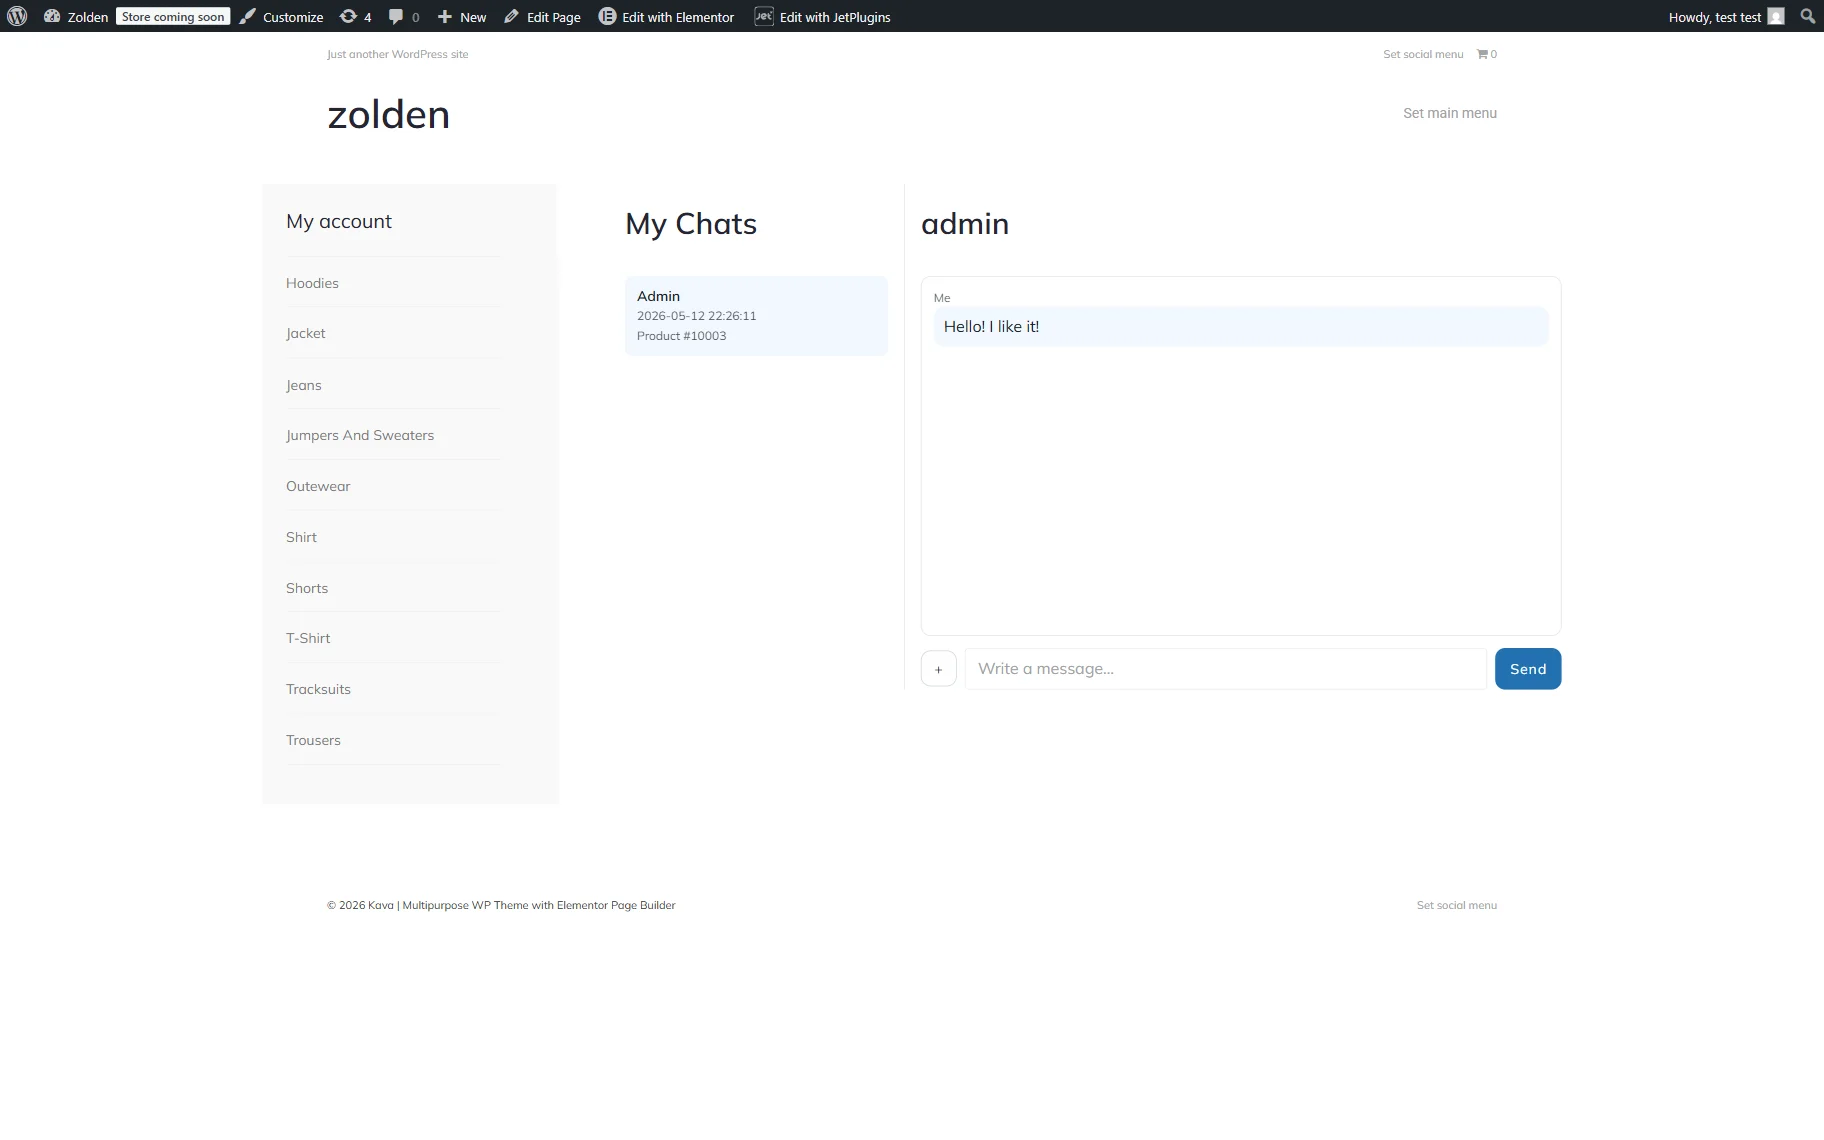
After pressing the “Send” button, the message will be displayed in the chat field.
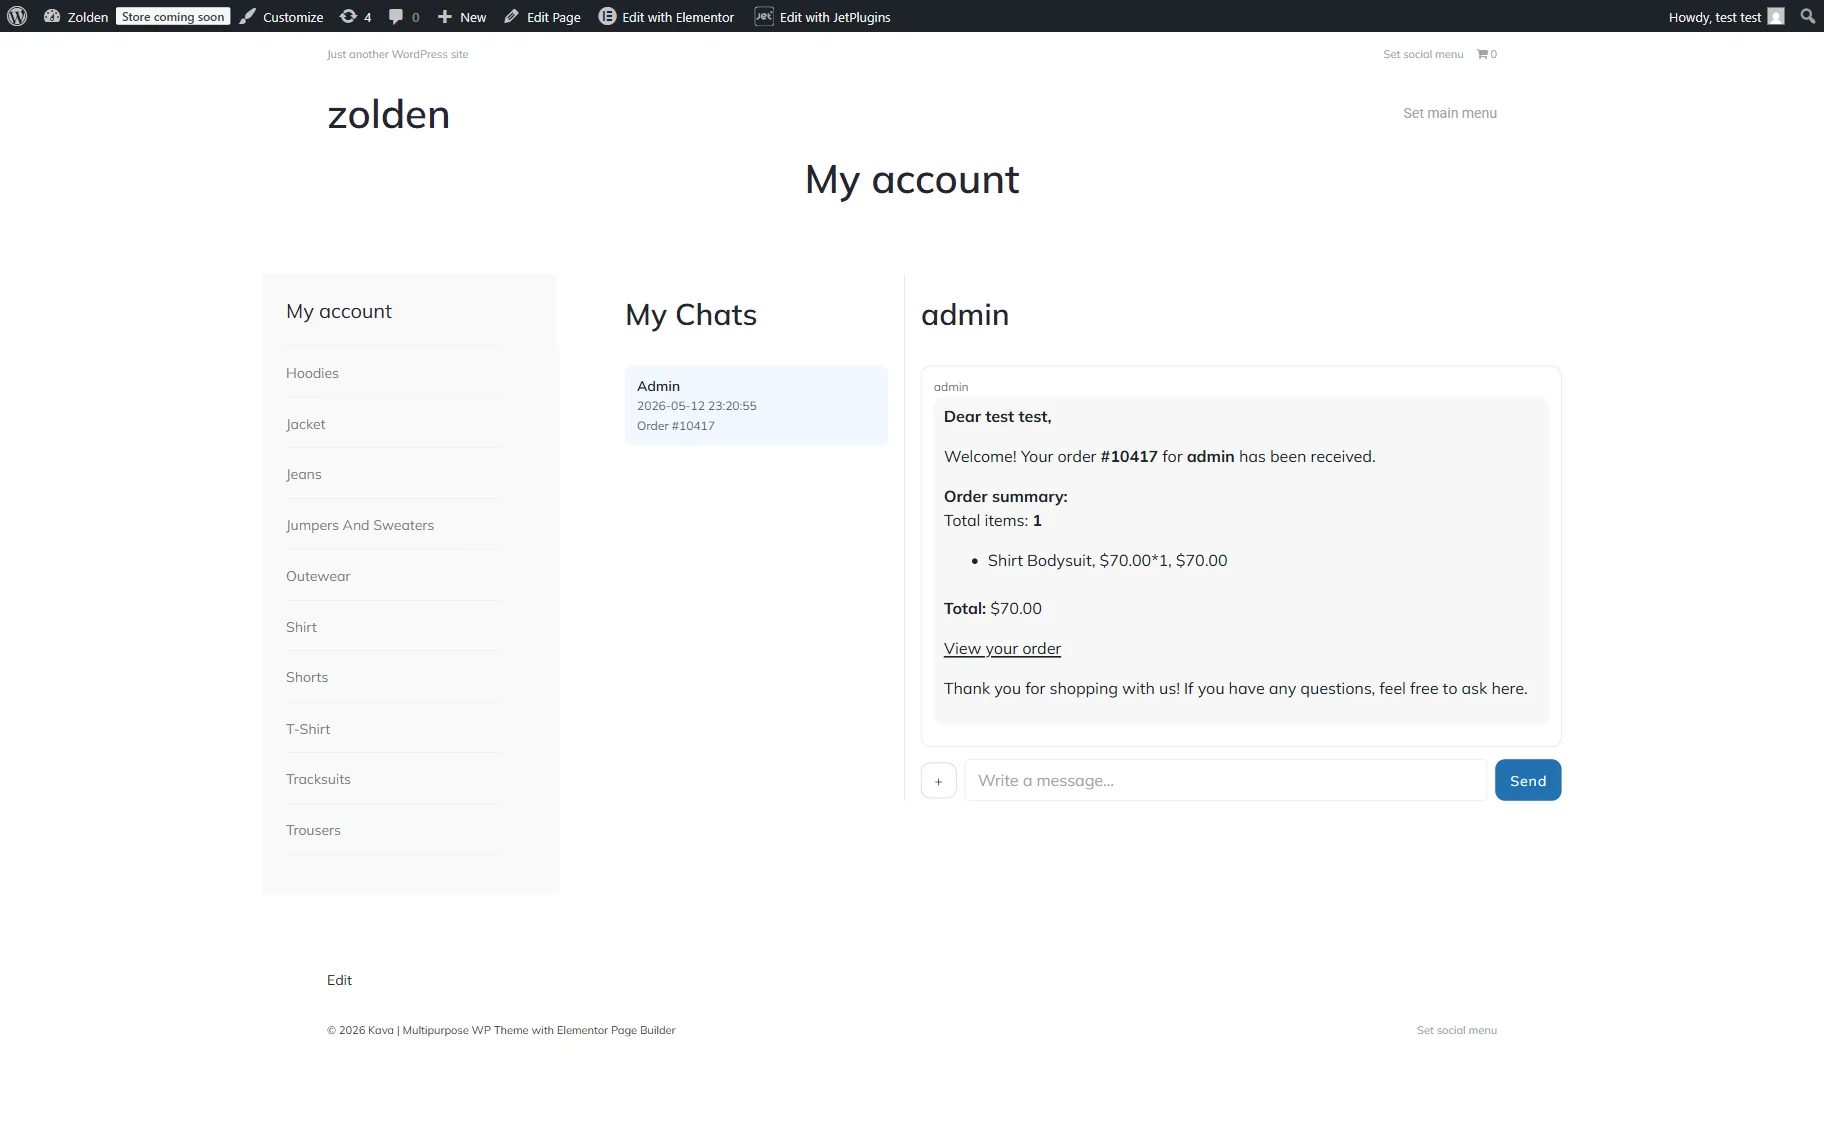
Also, if users place their order, the “CHAT ABOUT THIS ORDER” button will appear on the thank you page.
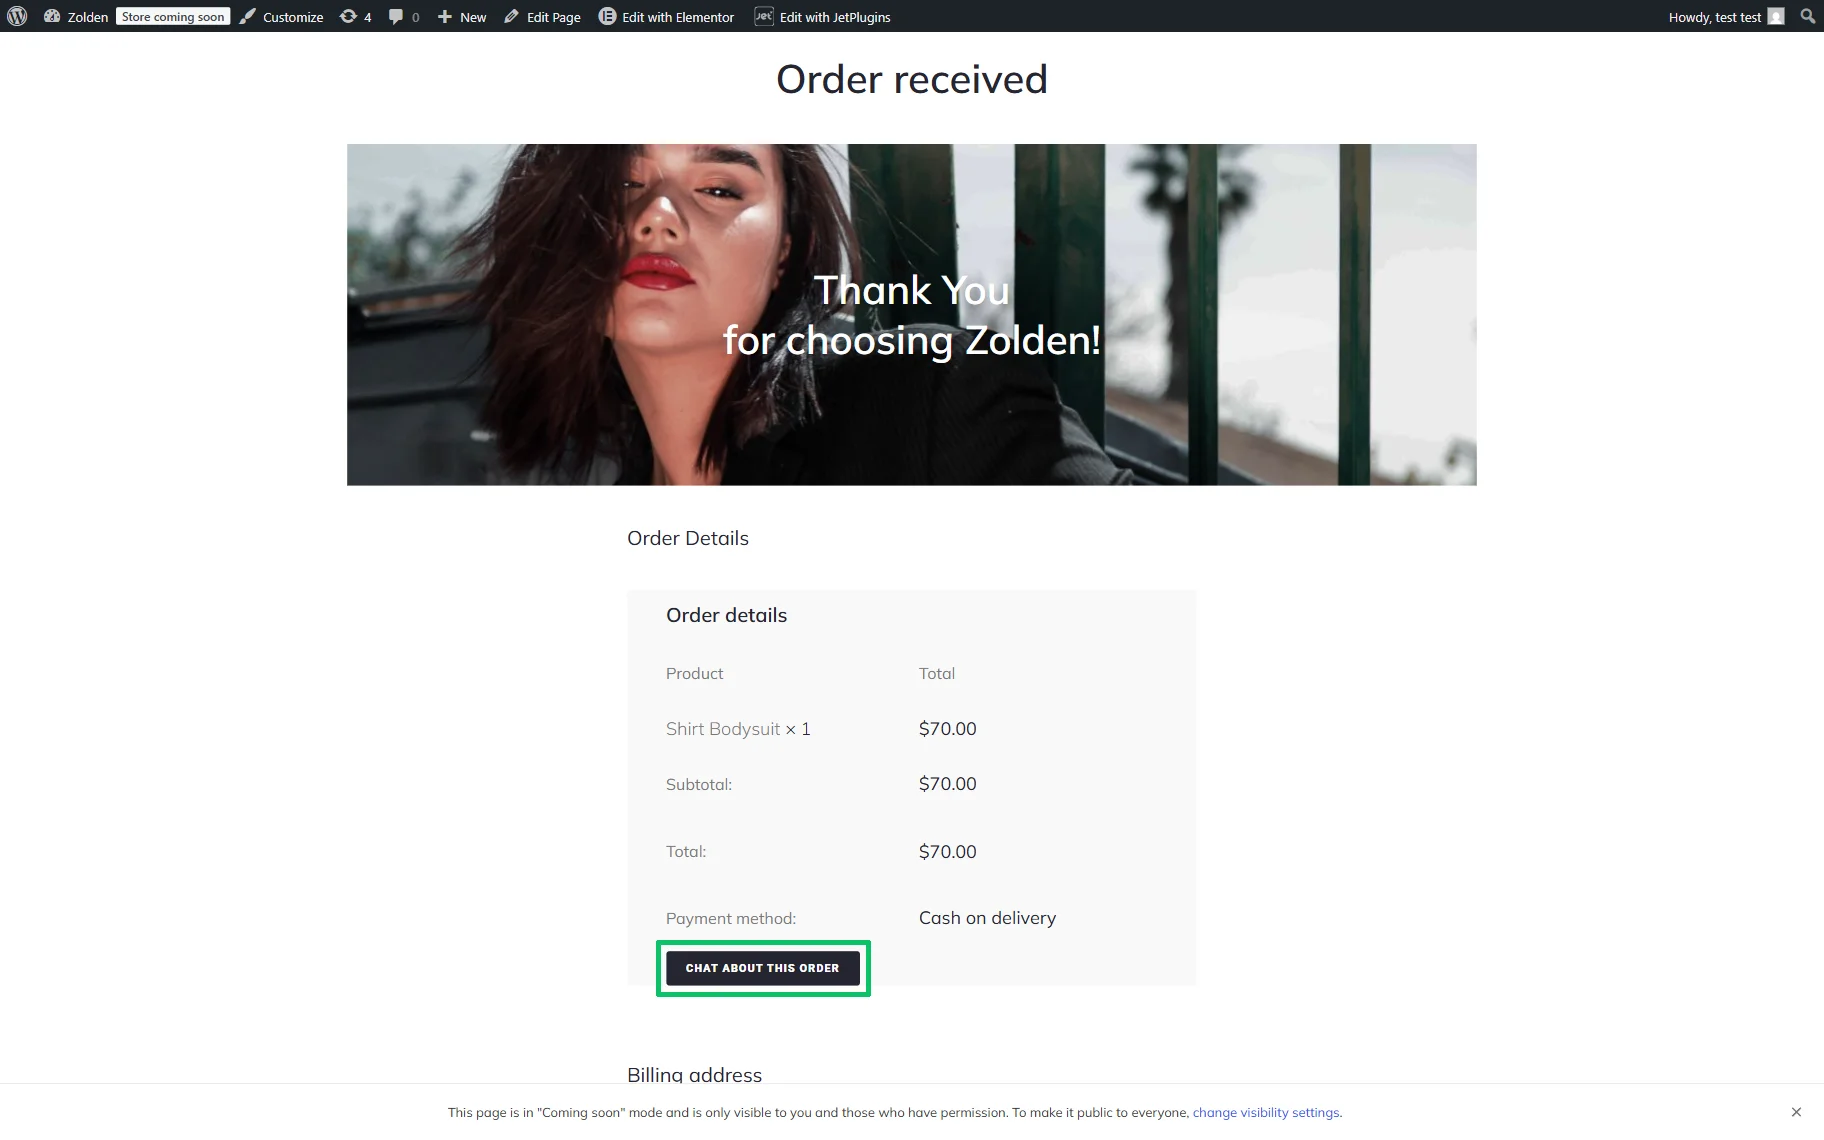
After pressing this button, users will be redirected to their accounts.
Here, they can continue messaging.
Read the My Account Widgets Overview to learn how to use shortcodes and different widgets to develop the account page. In addition, read the How to Create My Account Page With Endpoint Templates to learn how to design custom templates for various WooCommerce pages.
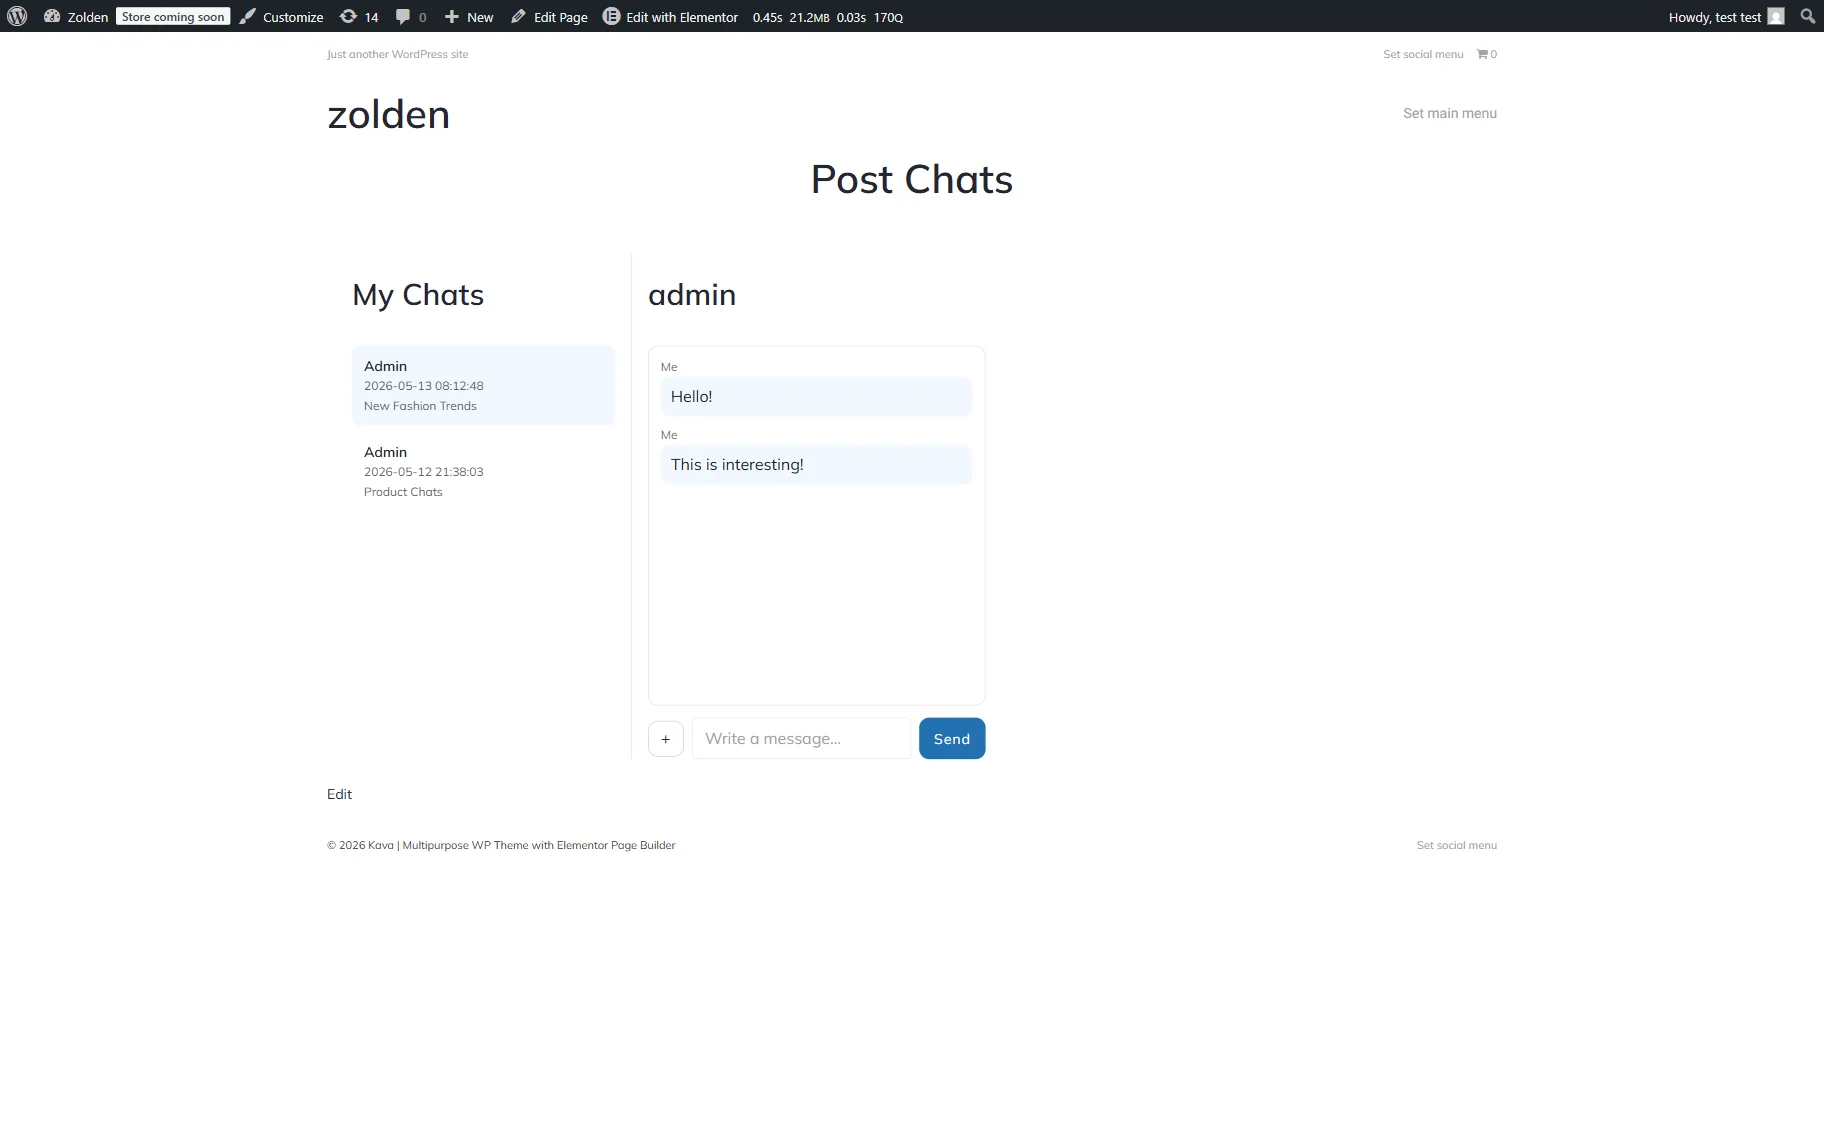
Messaging on the WordPress posts
When logged-in users open the posts on the front end, they should press the “Start Chat” button to start the messaging.

After that, users will be redirected to the Post Chats page where they can write their messages.
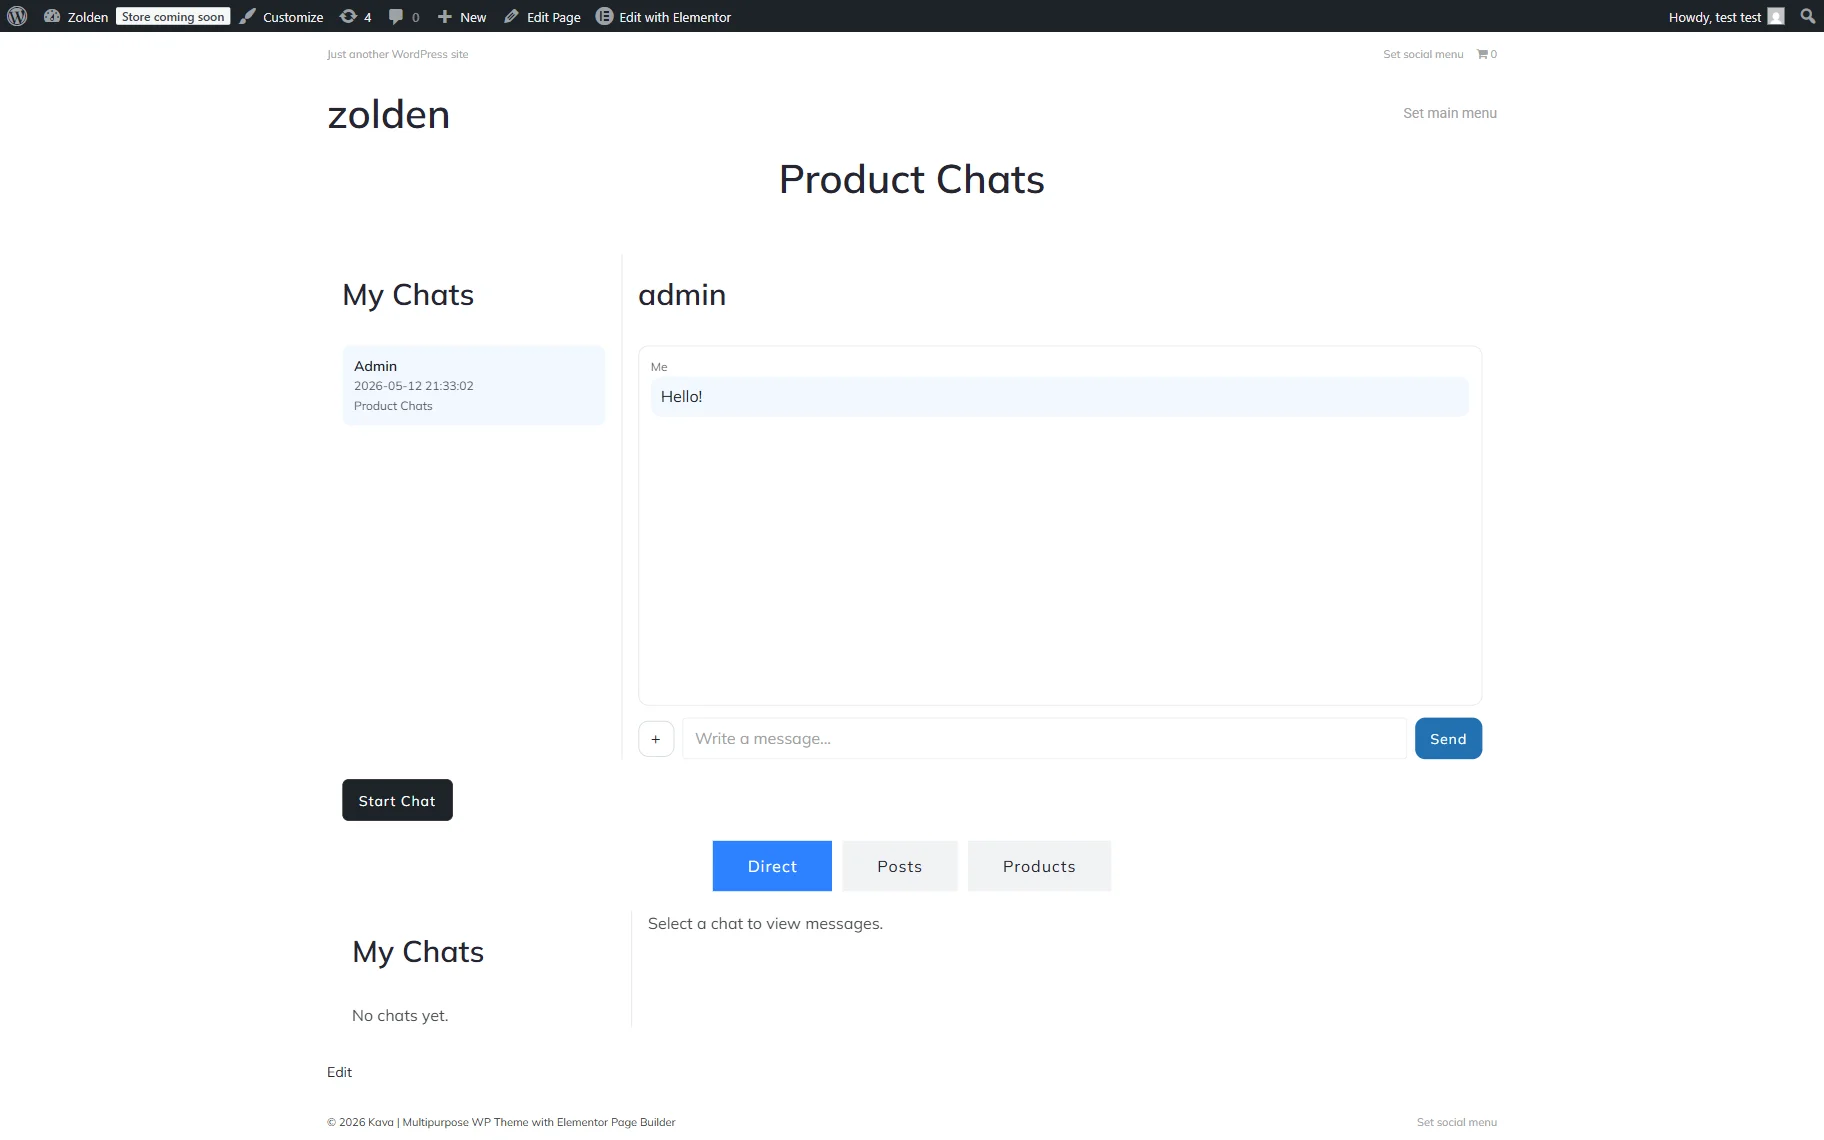
Messaging in the context-based chats
To start messaging on posts, products, or write direct messages, logged-in users should navigate to the static page with the added Tabs and My Chats widgets.
Here, they should press the “Start Chat” button and insert the needed text in the message field or press the “plus” icon to upload a file. After clicking the “Send” button, the message will be displayed in the chat field.
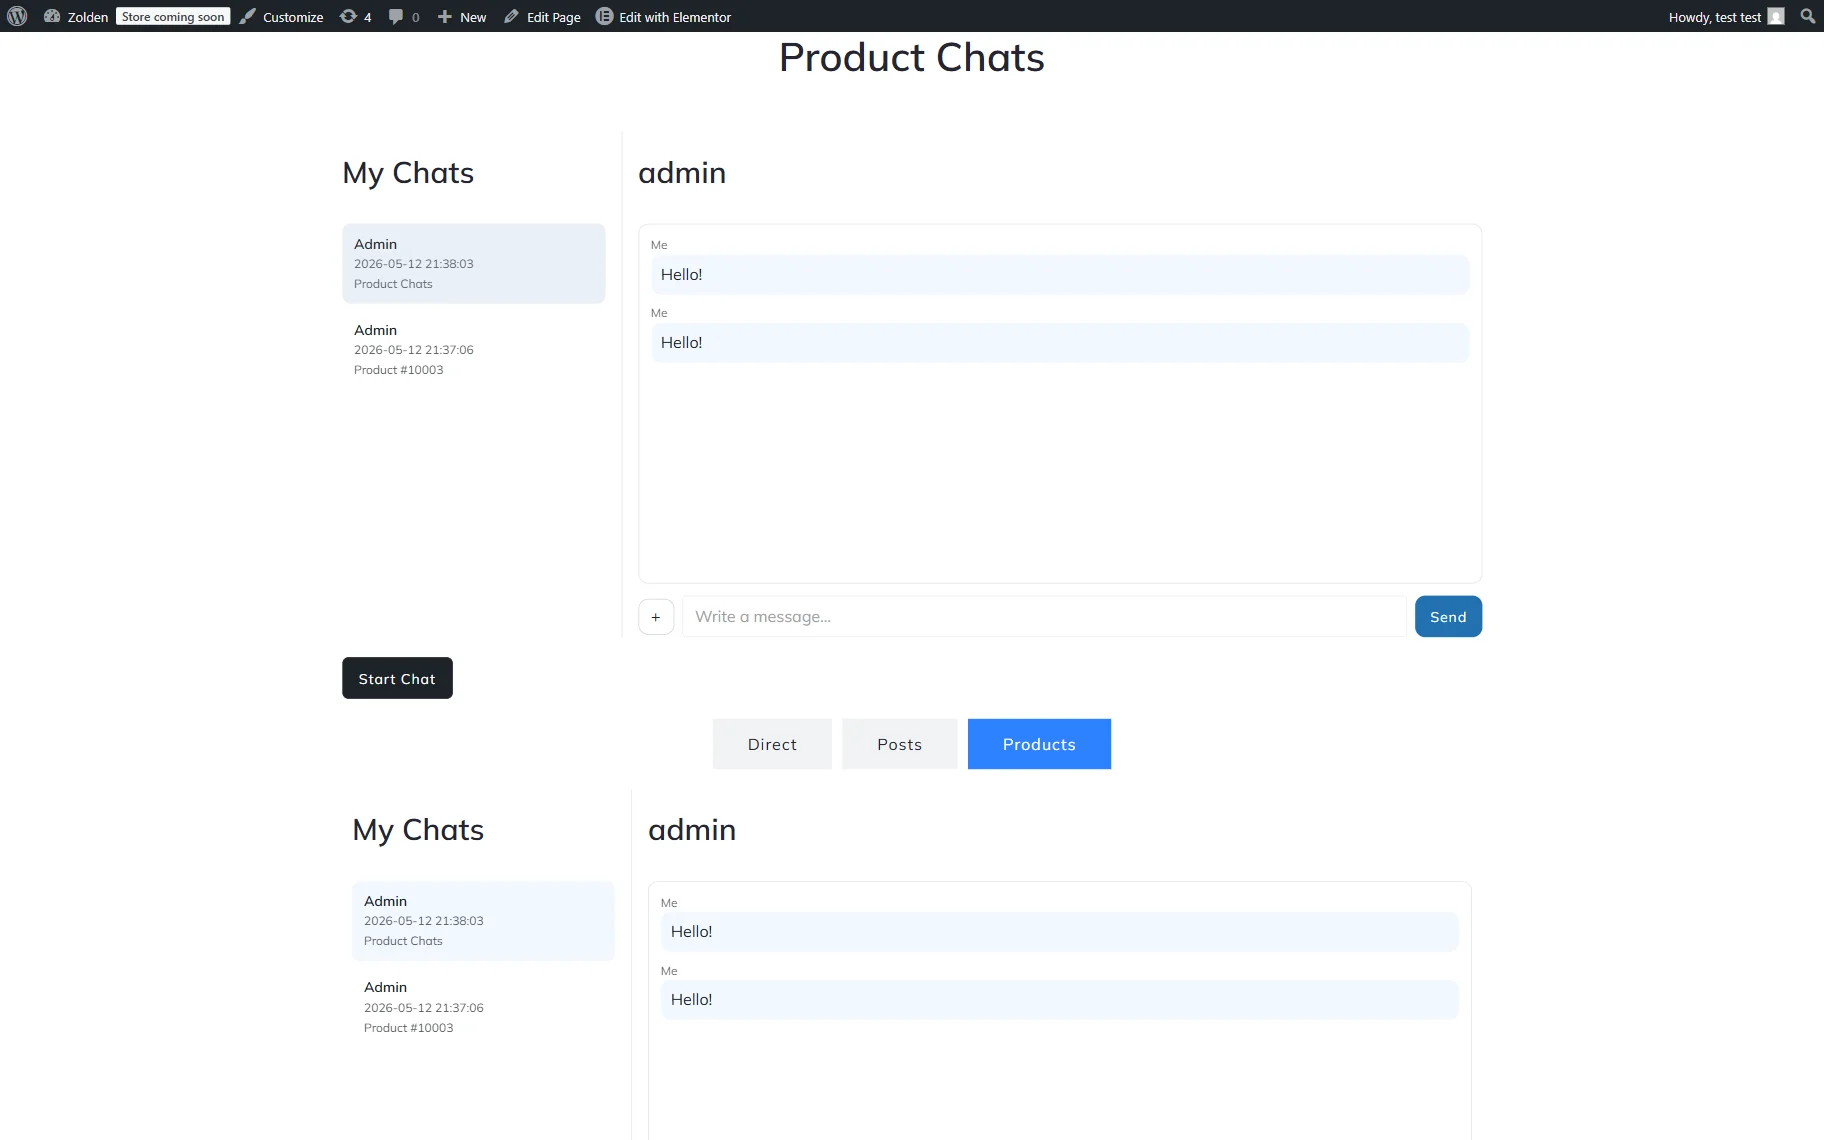
In addition, the message text will be shown after unrolling the Product tab.
FAQ
No, only logged-in users can send messages.
Yes, read how to do it in the How to Build Direct Messaging Between Users tutorial.
Yes, it is possible, you can set up only the needed options while configuring the JetMessenger settings.
No, this button is placed by default on the WooCommerce Order Details page only.
That’s it. Now you know how to build a WordPress contextual messaging system and individual product page chat or post chat in WordPress using the JetMessenger widgets and configure the messenger settings.