How to Set Up JetMessenger After Activation
This tutorial explains how to set up JetMessenger after activation. Learn how to set up direct, post, WooCommerce order, and product chat systems automatically.
Before you start, check the tutorial requirements:
- JetMessenger plugin installed and activated
- WooCommerce plugin installed and activated (optional)
What is JetMessenger?
JetMessenger is a WordPress private messaging plugin that helps teams and creators manage communication directly on their site. It uses contextual threads and an integrated inbox to streamline coordination and reduce missed leads.
It’s well-suited for:
- Marketplaces — handle pre-purchase questions between buyers and sellers;
- Directories — enable conversations directly from listings and pages;
- Booking platforms — answer inquiries without relying on email;
- LMS and membership sites — support secure WordPress user messaging between students, members, instructors, and administrators;
- Client portals — build a centralized WordPress portal messaging experience.
In this tutorial, we describe how to set JetMessenger settings after activation via the setup wizard or manually from the plugin dashboard. With the default settings, you can configure chats between users and chats linked to WordPress posts (e.g., booking properties).
Also, the JetMessenger plugin can be integrated with WooCommerce to create chats related to orders and products.
JetMessenger Setup Wizard
After the JetMessenger plugin installation and activation, the wizard setup will be opened immediately.
If you want to delay the JetMessenger setup, you can reach it later in the WordPress Dashboard > Plugins tab by pressing the “Setup Wizard” link under the plugin.
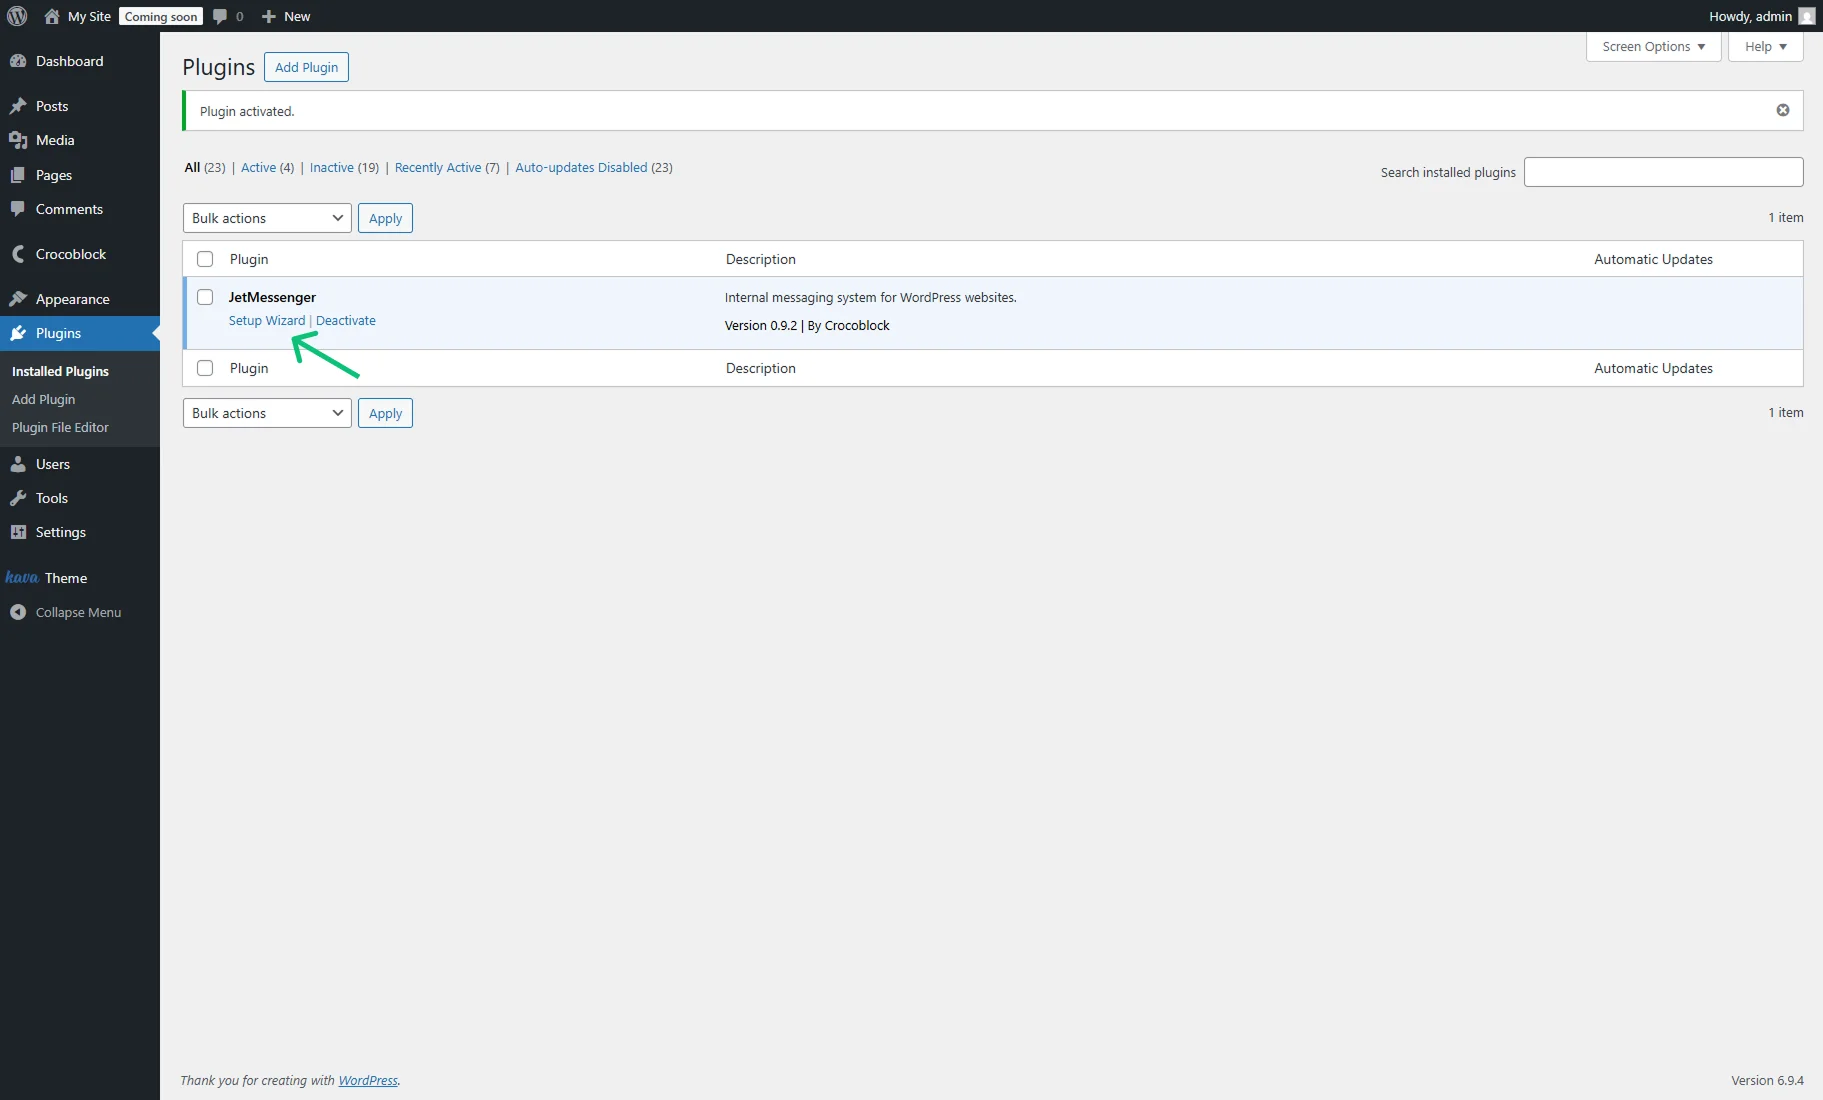
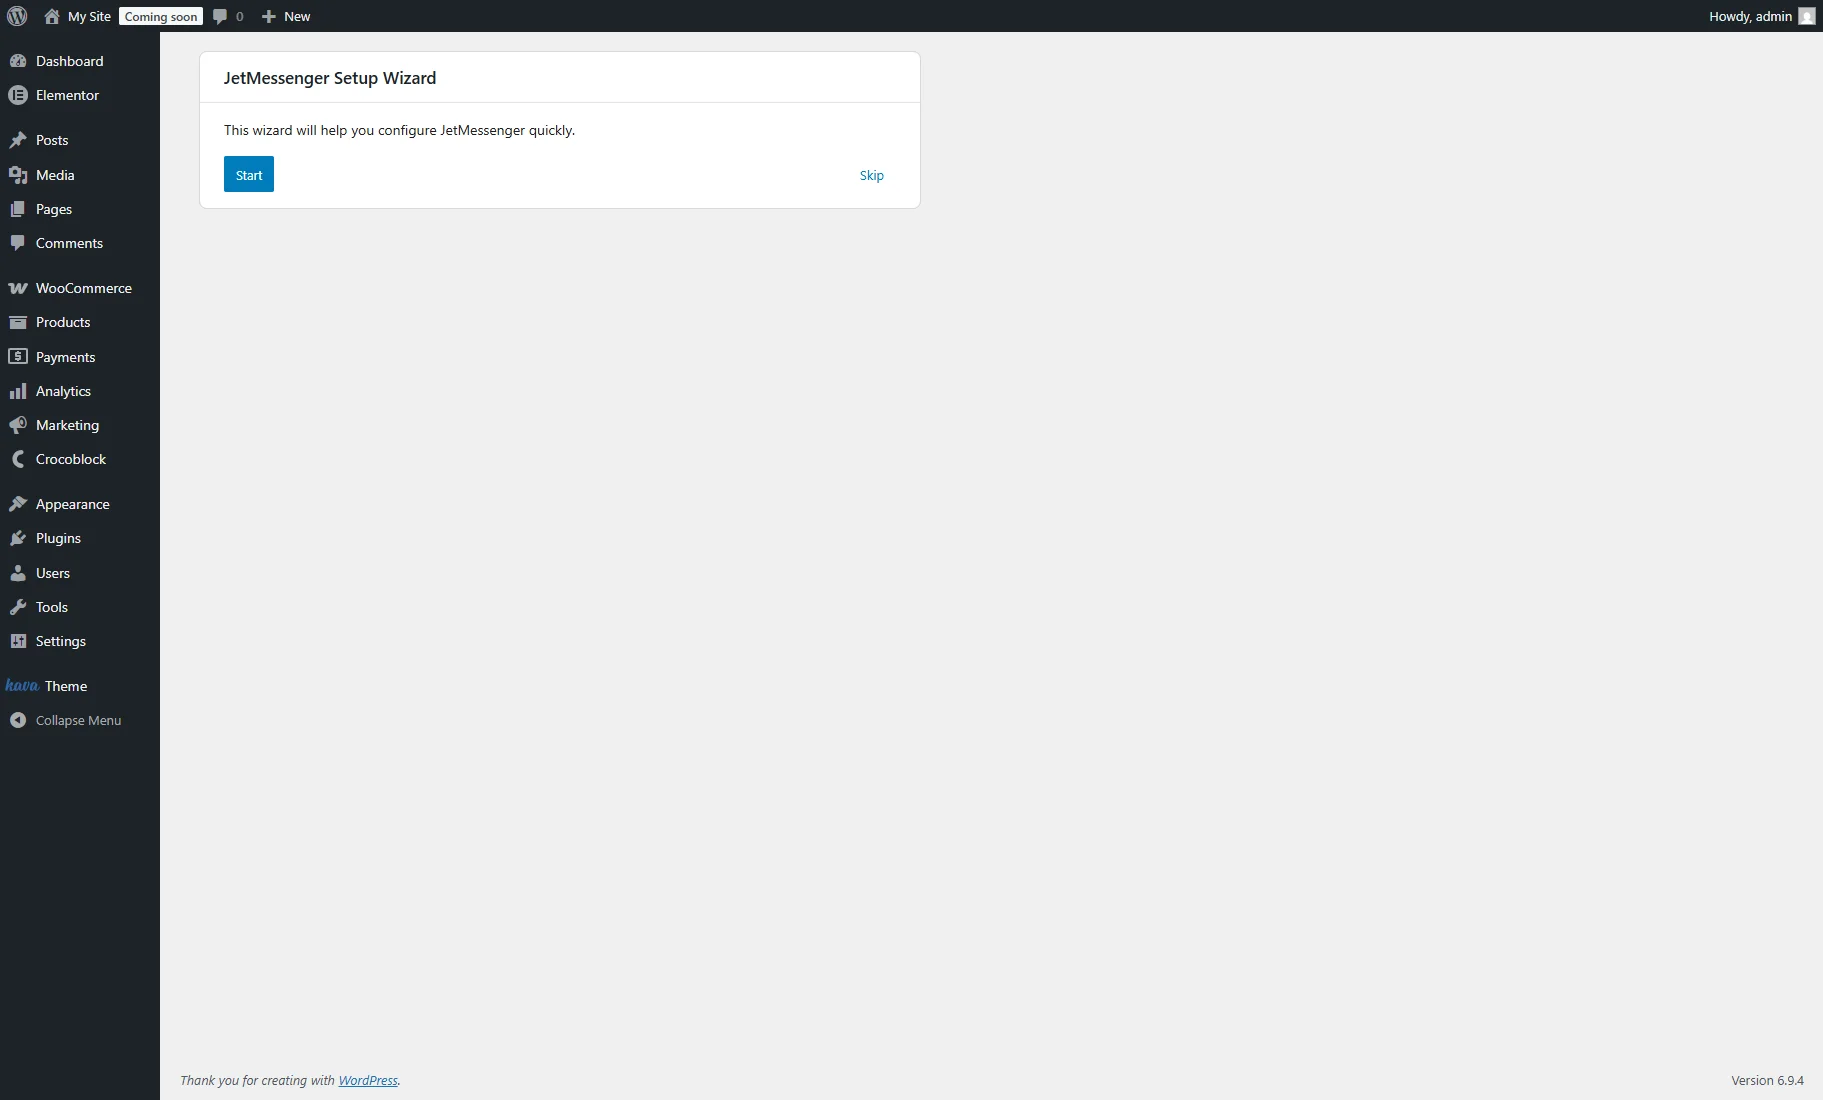
To begin the JetMessenger Setup Wizard process, press the “Start” button.
If you click the “Skip” button, you’ll proceed to the JetMessender Settings page. To learn more, proceed to the JetMessenger Overview.
The Select usage contexts window contains four checkboxes:
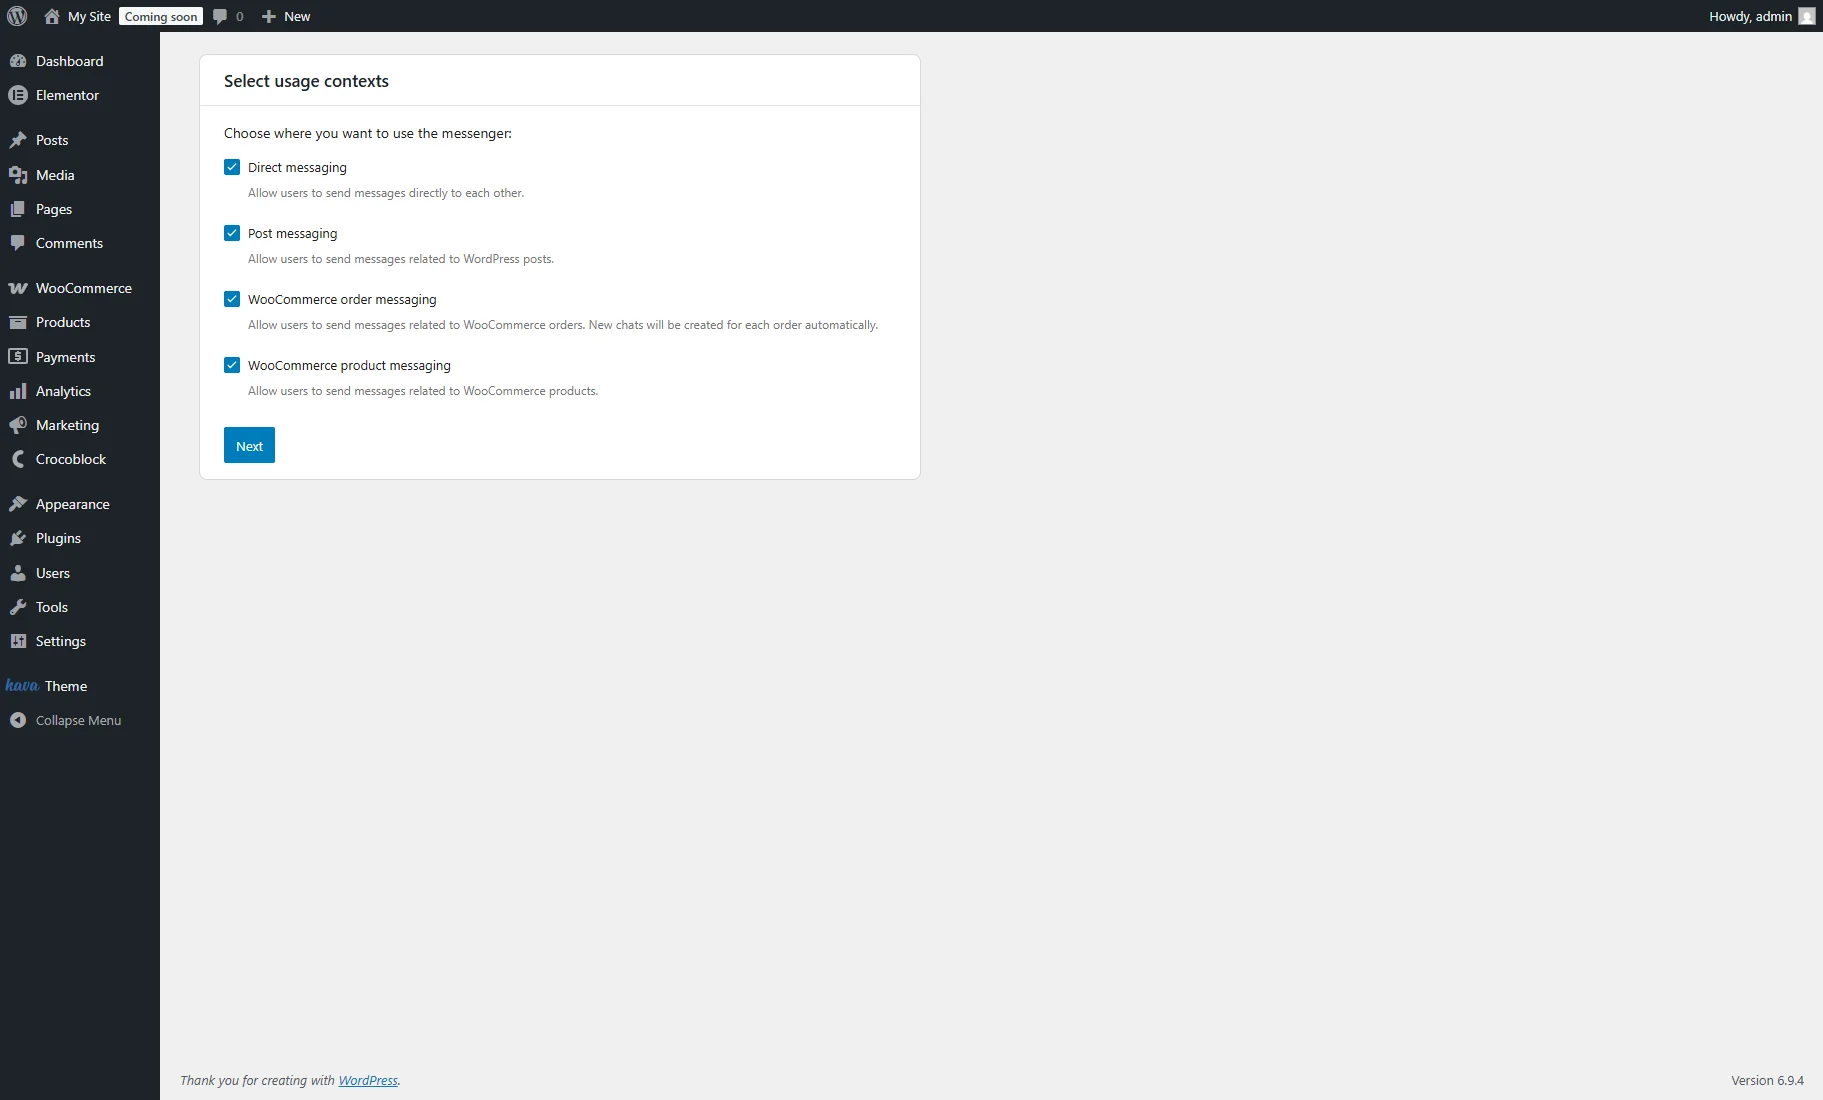
- Direct messaging — allows users to send messages directly to one another;
- Post messaging — allows users to send messages related to WordPress posts, e.g., asking about a property before booking;
- WooCommerce order messaging — allow users to send messages related to WooCommerce orders. After the order is created, users can clarify details in the chat, e.g., why the shipping is delayed. New chats will be created for each order automatically;
- WooCommerce product messaging — allows users to send messages related to WooCommerce products. Every product will contain the “Chat” button, by clicking on which users can ask questions to the buyer about this product, e.g., what size or color is available.
You can tick from one to four options and press the “Next” button.
In the Assign chat pages window, you can select routes where the messages will be stored.
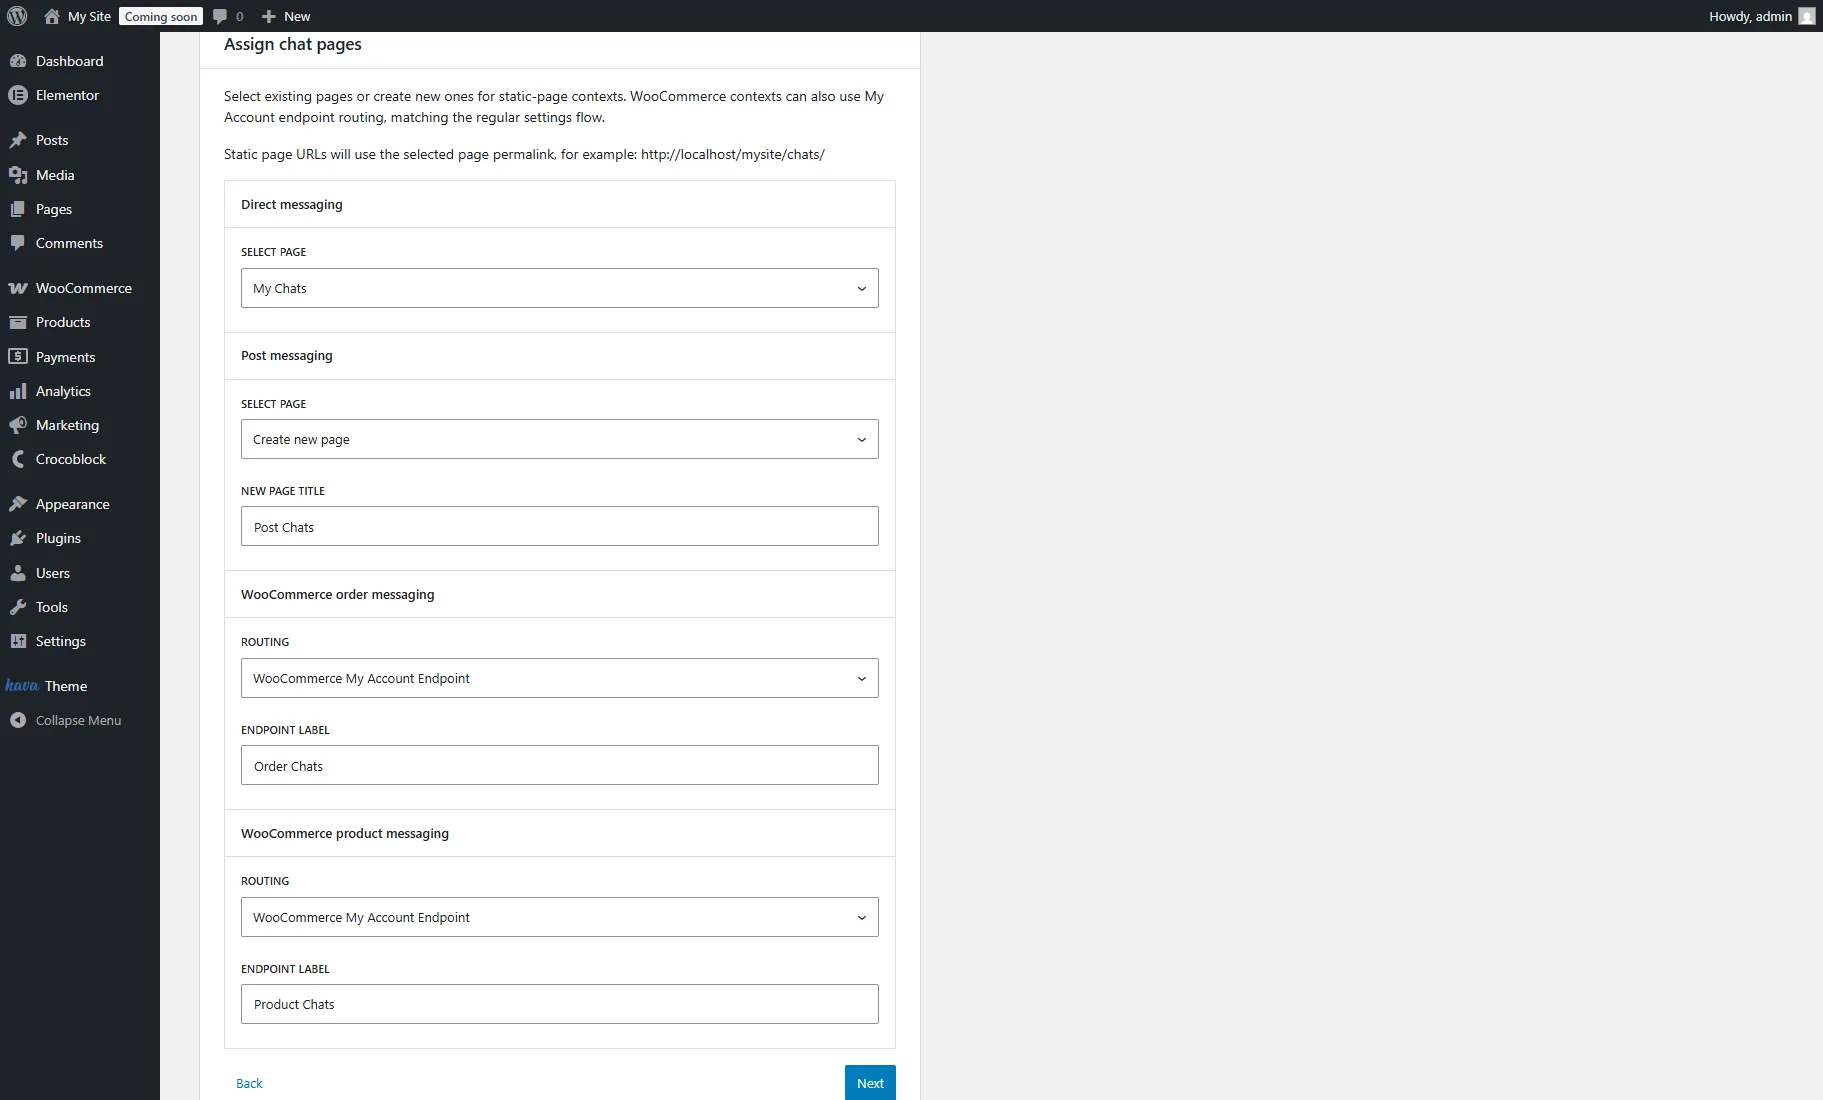
For static contexts like Direct or Post messaging, you can select an existing WordPress page or generate a new one automatically.
For the WooCommerce contexts (order and product messaging), you can additionally select the “WooCommerce My Account Endpoint” ROUTING to create a dedicated tab within the My Account area.
For more details about the WooCommerce endpoints, refer to the How to Create My Account Page With Endpoint Templates tutorial.
After making all customizations, click “Next”.
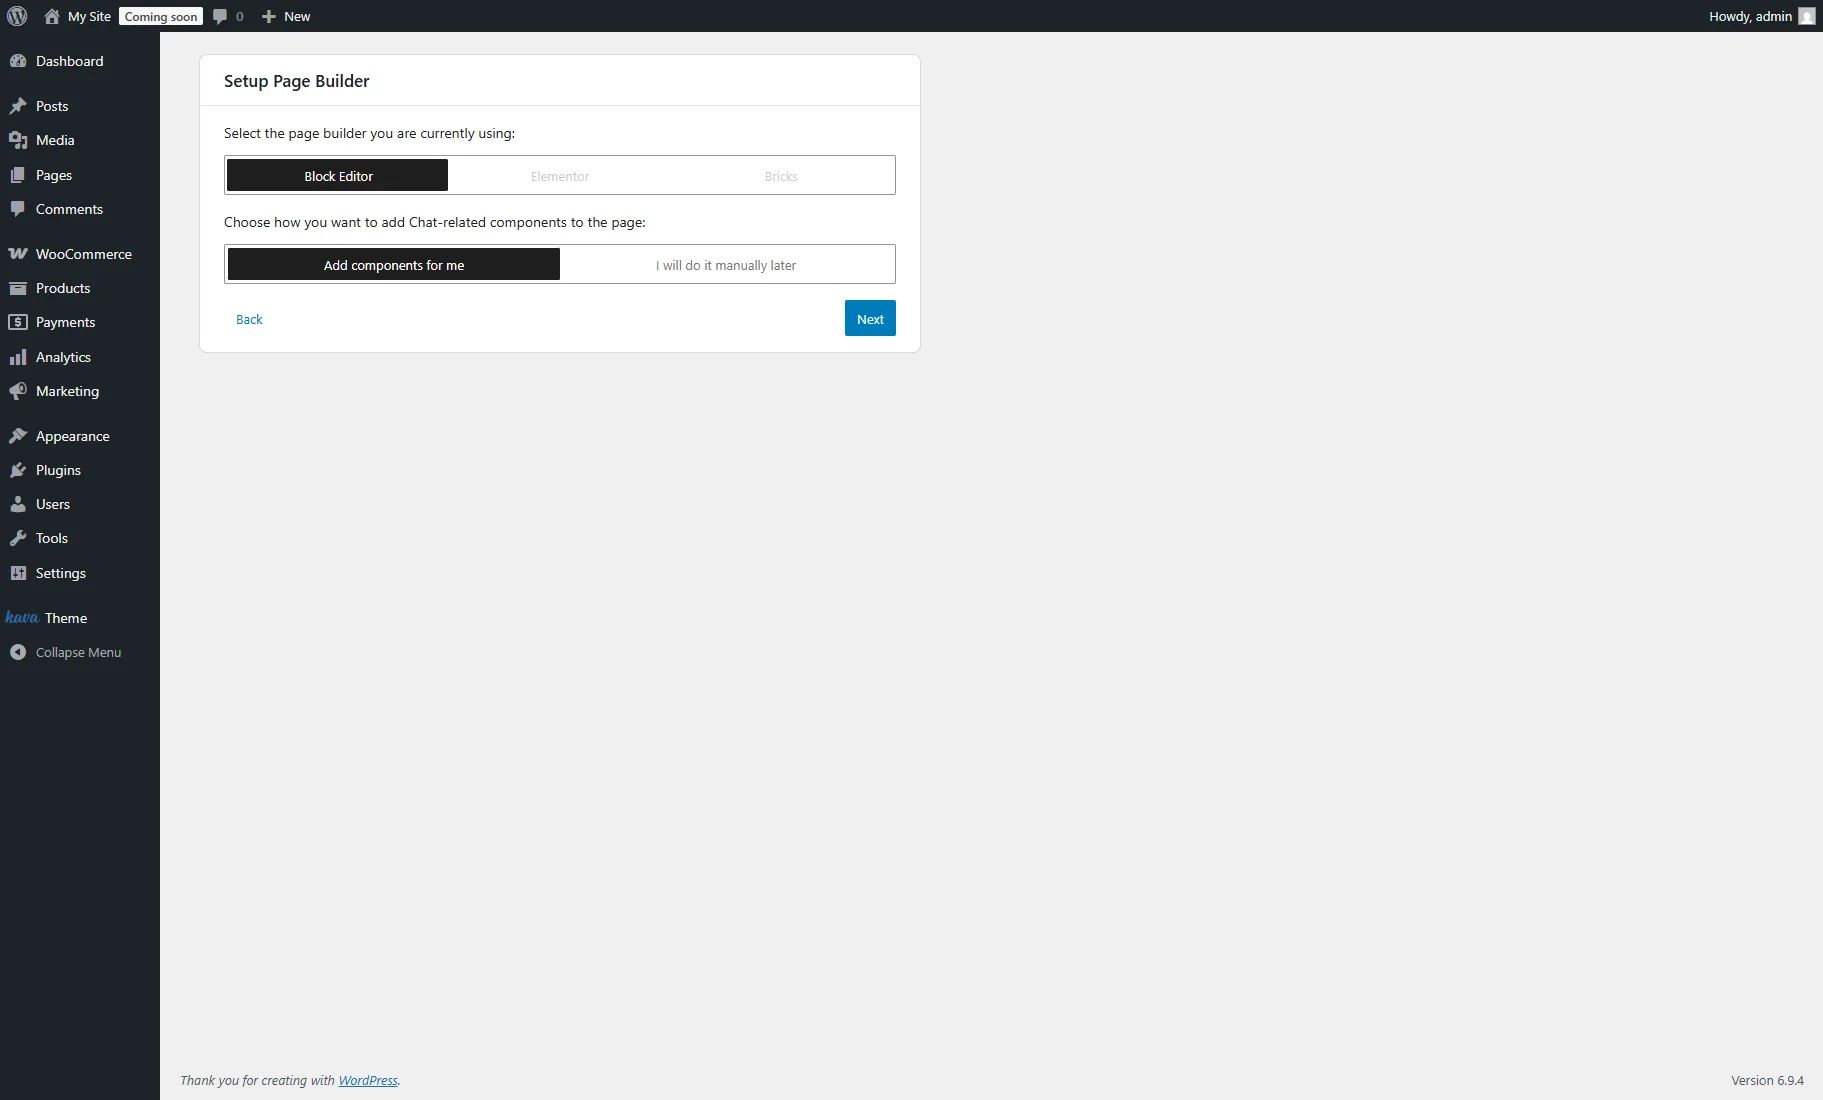
In the Setup Page Builder window, you can select the page builder for the chat pages (“Block Editor,” “Elementor,” or “Bricks”).
Choose also if you want to place the chat-related components automatically (My Chats and Start New Chat blocks/widgets/elements) or add them manually later.
If you selected the “Add components for me” in the previous step, the Auto insertion window will appear.
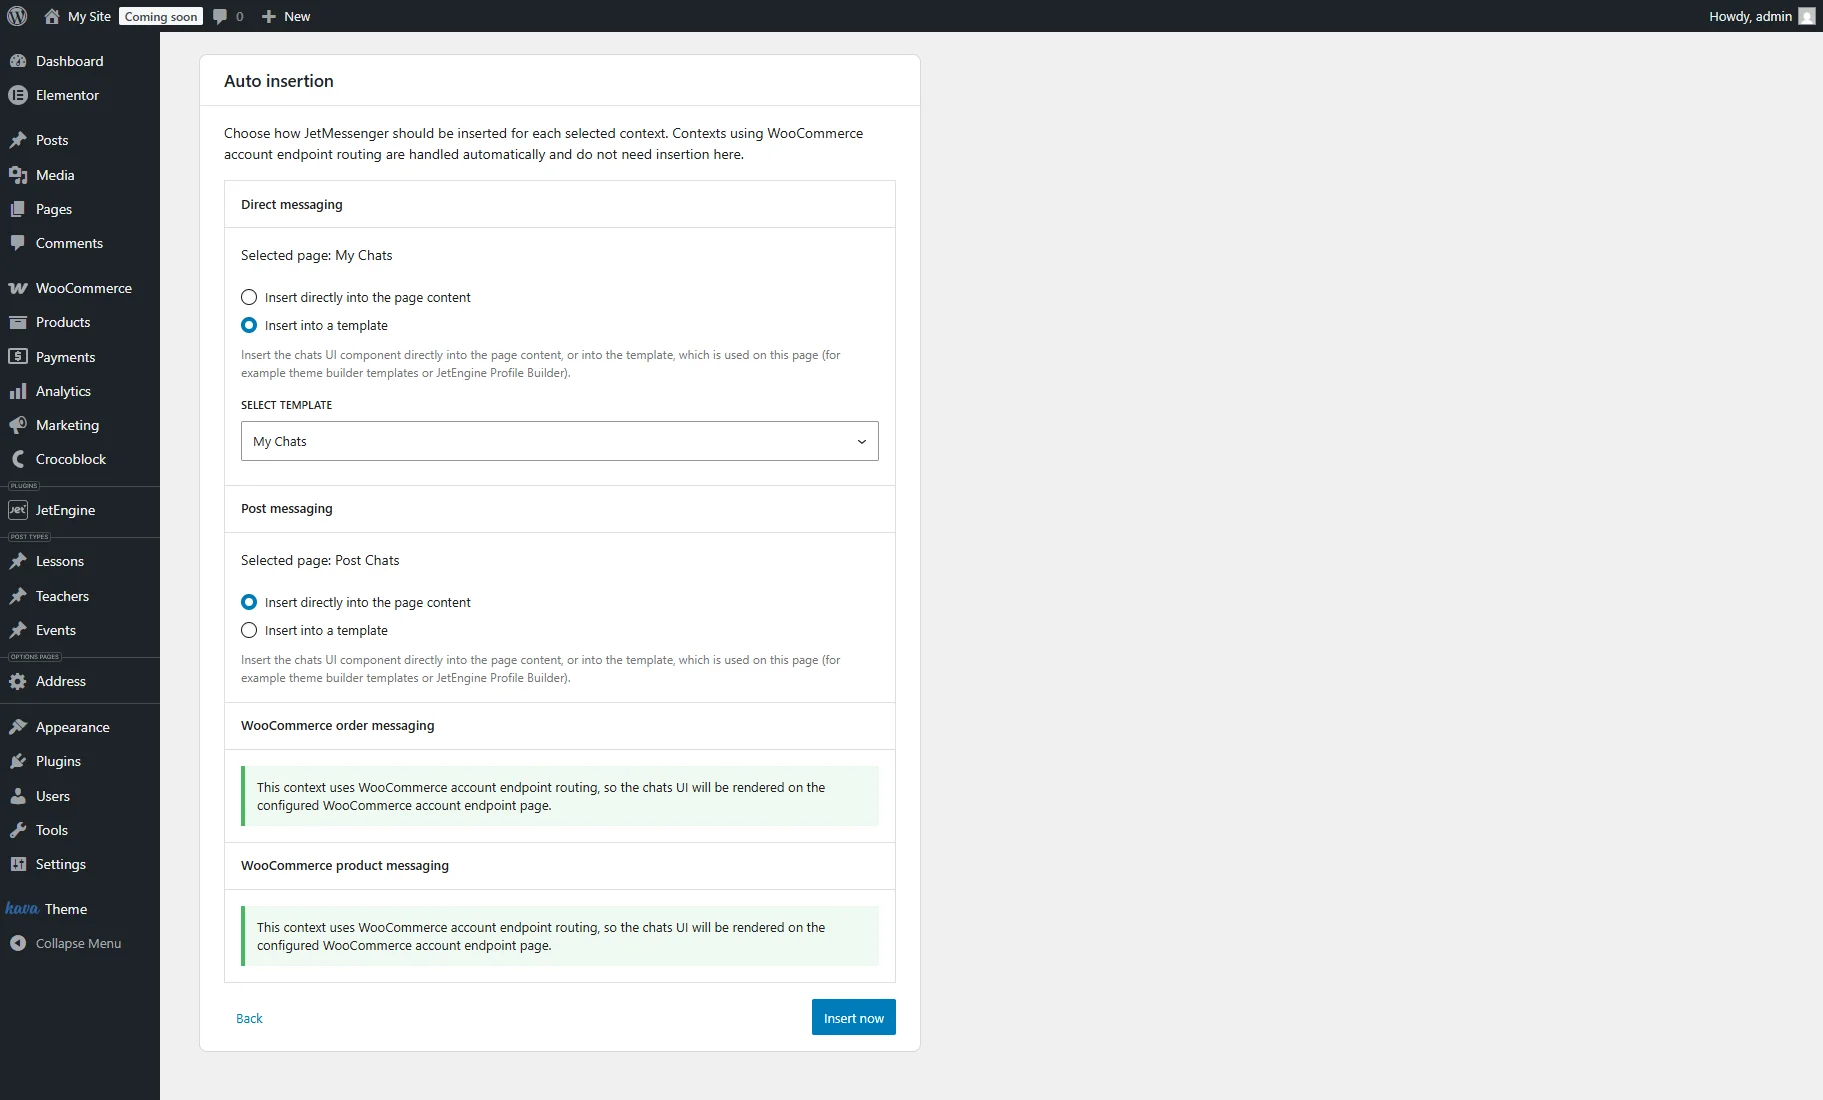
There are two options for the Static Page context:
- Insert directly into the page content — inserts the My Chats and Start New Chat components into the static page;
- Insert into a template — inserts them into the template related to the page, which can be chosen in the SELECT TEMPLATE dropdown (for example, theme builder templates or JetEngine Profile Builder templates).
For the WooCommerce context, if the endpoint route is selected, the chat UI will be automatically rendered on the configured WooCommerce account endpoint page.
After the configuration, the “Insert now” button can be clicked.
The Setup complete window provides a configuration summary and a post-setup checklist to ensure your chat system is fully functional.
Additionally, it contains the list of selected contexts with links.
If you select templates in the previous step, there will be a reminder to add the My Chats and Start New Chat components manually for the corresponding items.
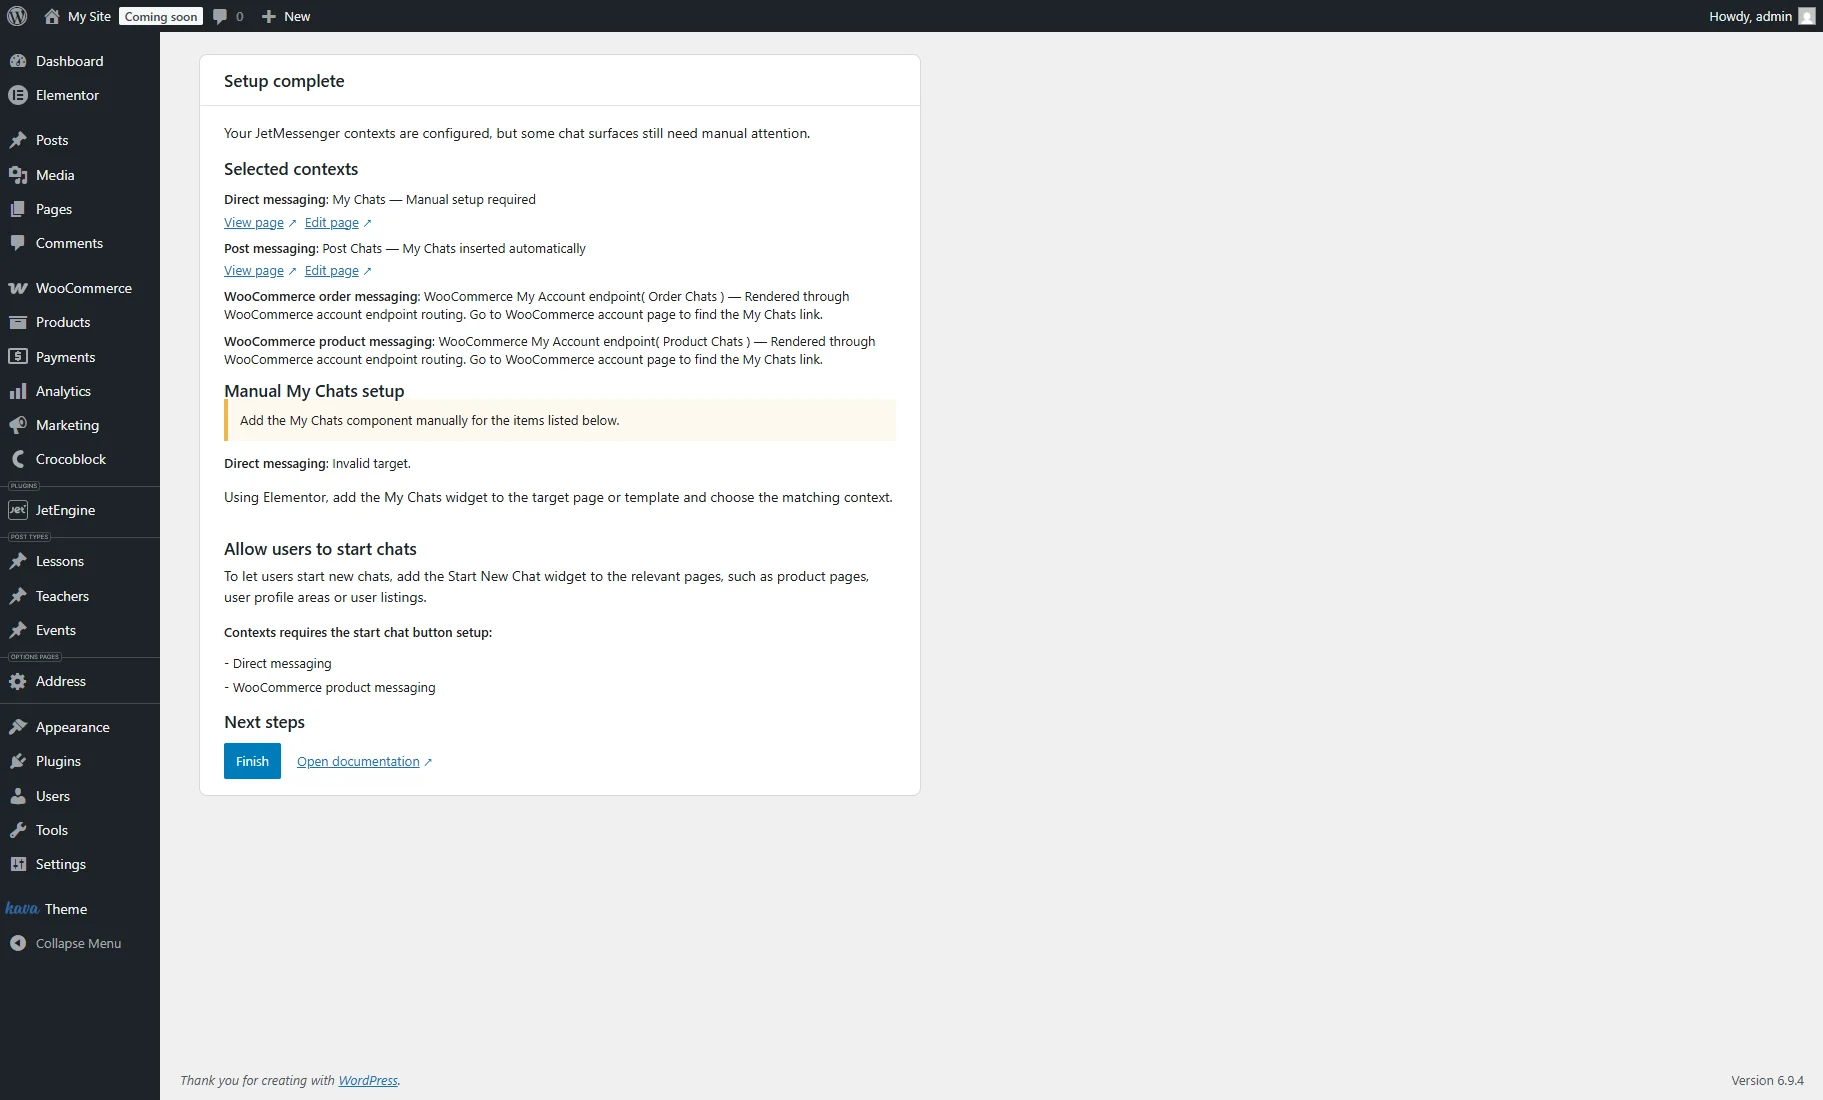
Finally, you can press the “Finish” button.
Once the messaging plugin wizard is completed, your WordPress messaging system is ready to use.
JetMessenger Settings
After completing the JetMessenger Setup Wizard, you’ll proceed to the JetMessenger Settings.
To learn more, refer to the JetMessenger Dashboard Overview.
Additional Documentation
The JetMessenger use cases are described in such tutorials:
- How to Build Direct Messaging Between Users
- How to Use Messenger Across Posts and Product Contexts
- How to Set Up WooCommerce Order Messaging System
These documents describe how to set up direct, post, WooCommerce order, and product chat systems.
FAQ
The setup wizard lets you configure direct messaging, post-related chats, WooCommerce order messaging, and WooCommerce product messaging automatically after plugin activation.
Yes, you can reconfigure chat pages and messaging settings later from the JetMessenger Settings in the WordPress dashboard.
Yes, during the setup process, you can choose whether to insert the My Chats and Start New Chat components automatically or place them manually later.
Yes, direct messaging, post messaging, order messaging, and product messaging can work separately, so you can enable only the communication flows your website needs.
That’s all. Now you know how to configure JetMessenger setup after activation and adjust a flexible WordPress messaging system for users, posts, WooCommerce orders, and products with a WordPress chat plugin.