How to Create My Account Page With Endpoint Templates
Learn how to use My Account Page widgets and build the My Account page with endpoint templates with the help of the JetWooBuilder and JetThemeCore plugins.
Before you start, check the tutorial requirements:
- Elementor (Free version)
- WooCommerce plugin (Free version) installed and activated
- JetWooBuilder plugin installed and activated
Using the JetWooBuilder plugin, you can design custom templates for various WooCommerce pages, including the My Account page. The My Account page serves as a central dashboard where customers can view their orders, manage addresses, and update account details.
Additionally, it is advisable to create individual templates for each My Account endpoint and display them on the page using a menu, as this can improve WordPress website performance. Before delving into this process, let’s discuss what an endpoint entails.

What Is a My Account Page Endpoint?
Simply put, the WooCommerce endpoint is an additional part of the content shown after certain conditions are met. That part of the content changes the page’s URL. On the My Account page, tabs such as Edit, Orders, and Downloads serve as endpoints. When the user opens them, an additional part will be appended to the page URL. For example, it can look like this: “your_website/my_account/downloads.”
Endpoint functionality allows your website to display diverse content that users need without creating extra pages, thereby preserving page load speed.
When you start using the WooCommerce plugin, these endpoints are created automatically, but you’re not obligated to stick with the default design. The JetWooBuilder plugin empowers you to build your pages and style them according to your preferences.
How to Create My Account Page Endpoint Templates
Enable the My Account widgets
Navigate to the WordPress Dashboard > Crocoblock > JetPlugins Settings > JetWooBuilder > Widgets tab.
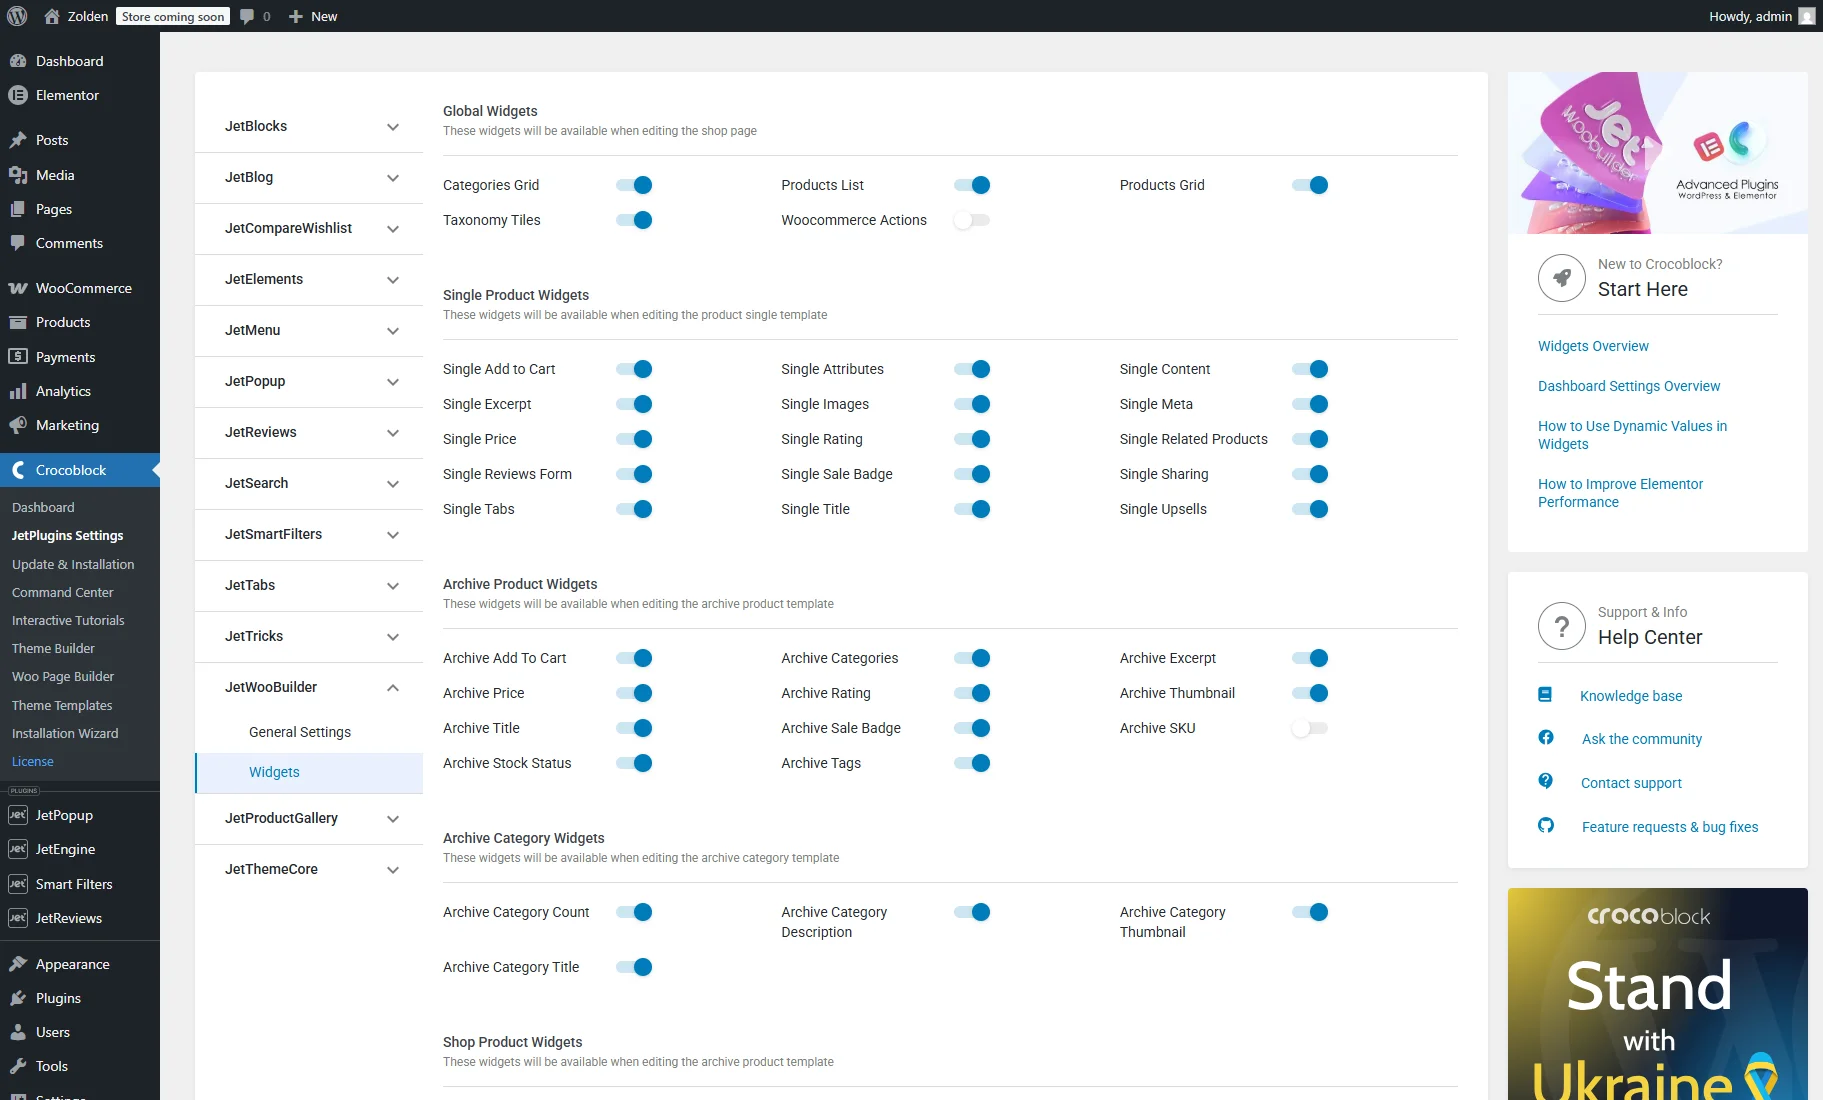
For this tutorial, we ensured that all widget toggles are enabled in the My Account Page Widgets section.

Create templates
You can create such templates:
- My Account Dashboard Template with the Account Dashboard widget;
- My Account Orders Endpoint Template with the Account Orders widget;
- My Account Downloads Endpoint Template with the Account Downloads widget;
- My Account Address Endpoint Template with the Account Addresses widget;
- My Account Edit Account Endpoint Template with the Account Details widget;
- My Account Payment Methods Endpoint Template with the Account Payment Methods widget.
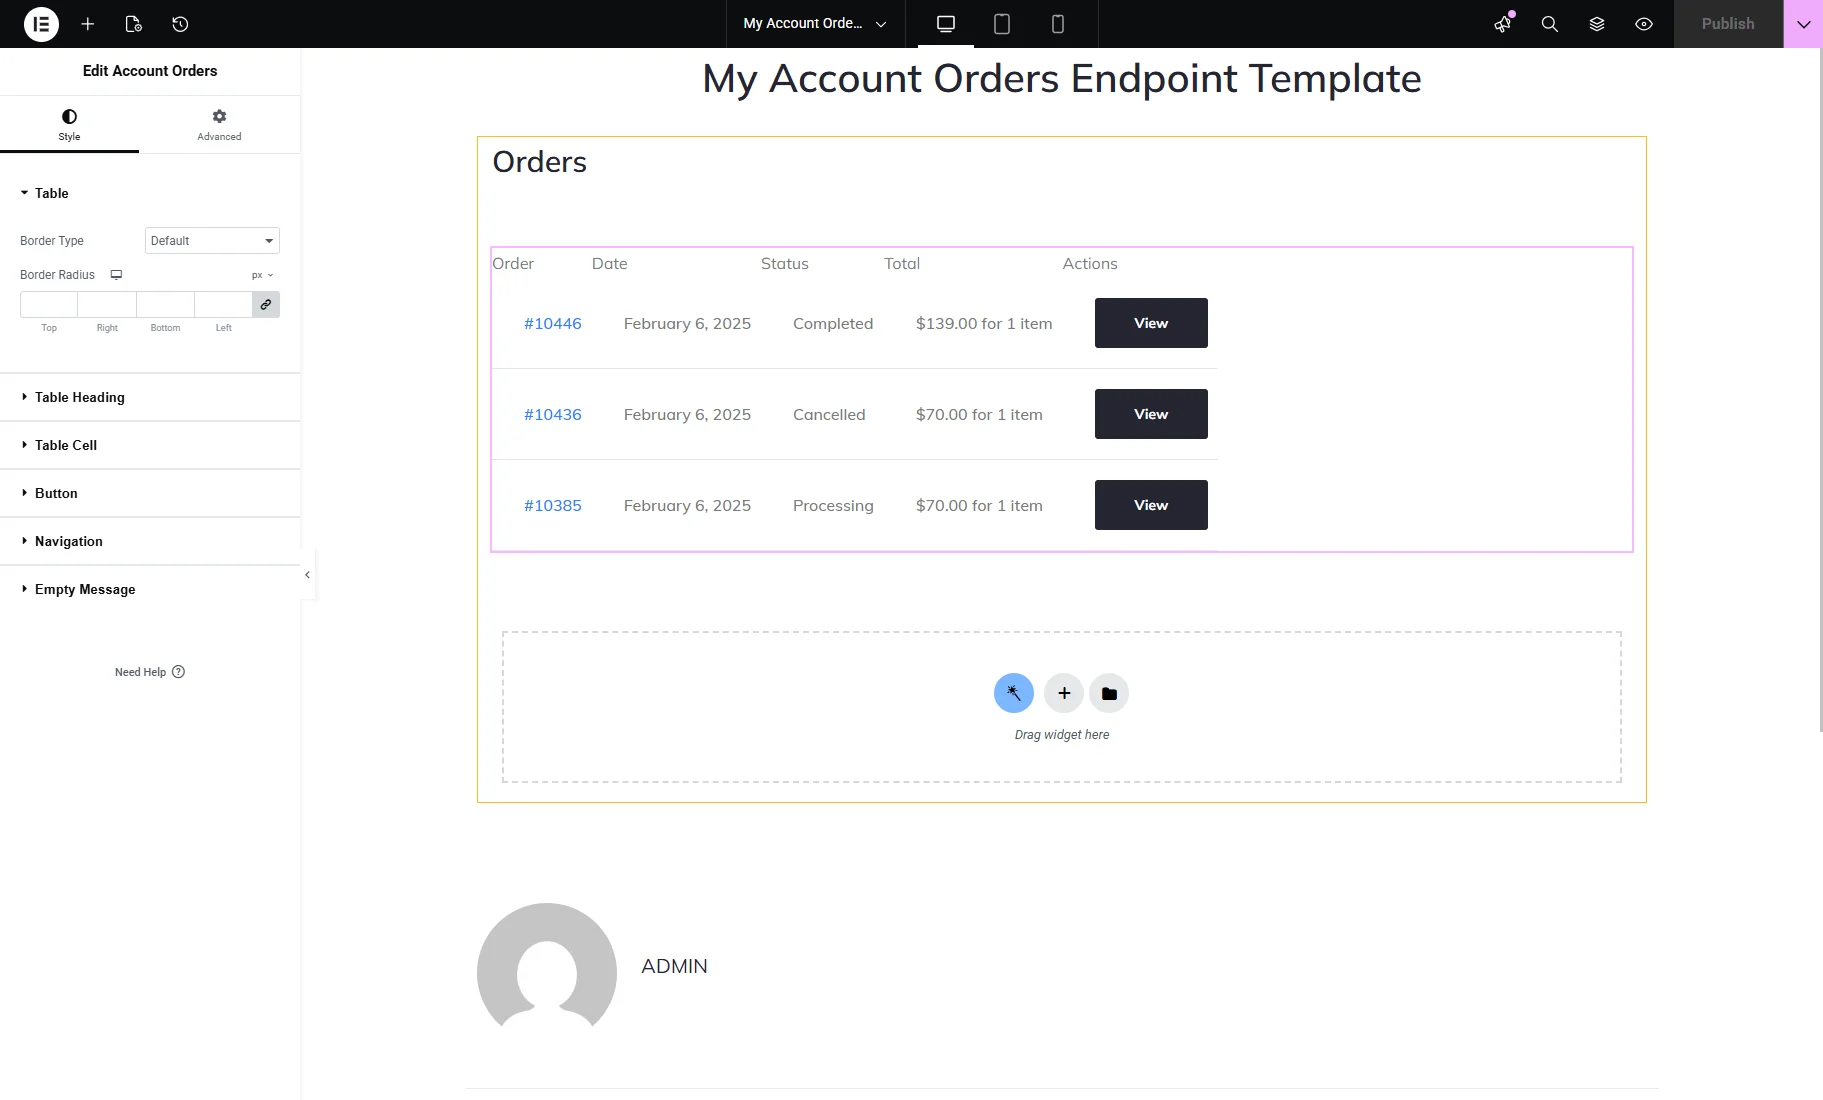
Go to the WordPress Dashboard > Crocoblock > Woo Page Builder menu tab, and hit the “Create New Template” button. In the This Template For drop-down menu, choose the “My Account” option and name the template. For example, it could be a template for the “Orders” endpoint. Click the “Create Template” button.

You will be redirected to the Elementor page builder. Find the Account Orders widget and drop it to the page. Customize its style according to your needs. You can also enhance the page by adding other useful widgets, such as image or product sliders, recently viewed items, or text blocks. When you are done, press the “Publish” button.
Then, create the other needed templates mentioned at the beginning of this step.
Apply the endpoint templates to the website
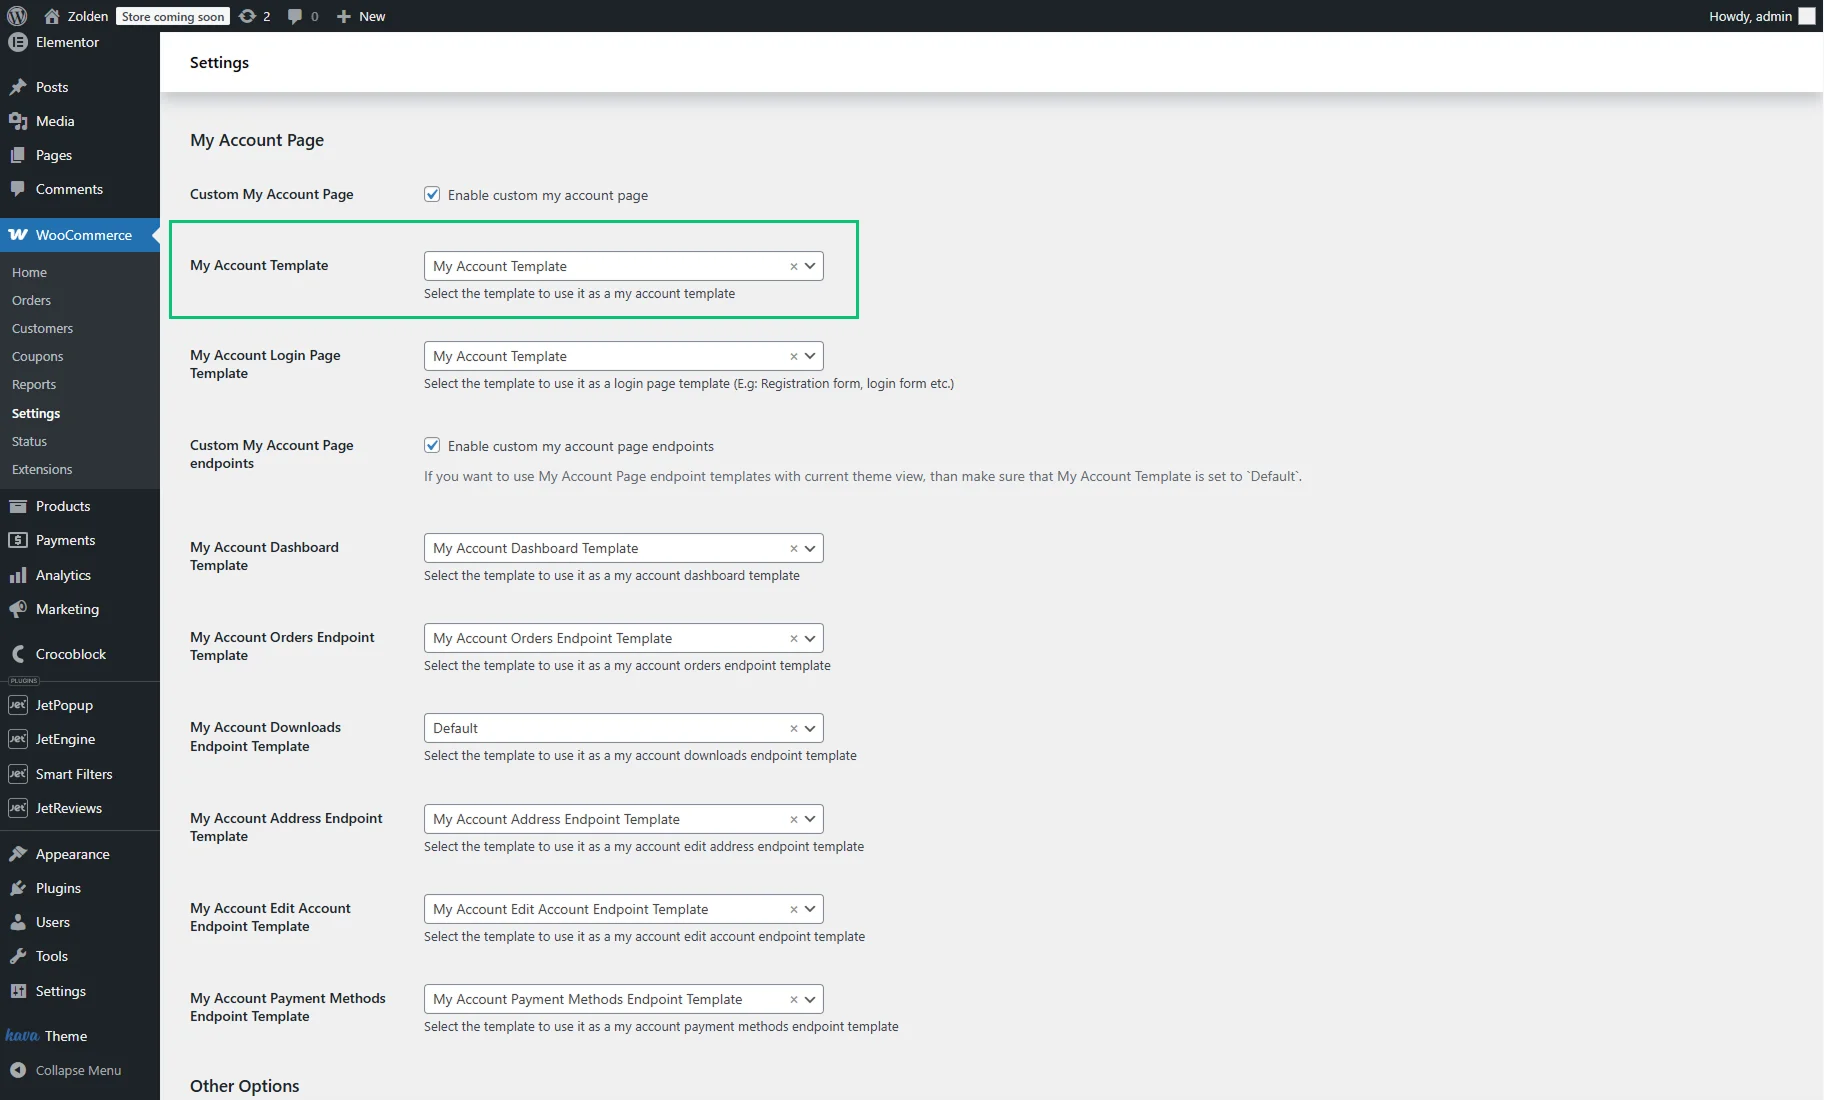
Return to the dashboard and go to theWordPress Dashboard > WooCommerce > Settings > JetWooBuilder tab. Scroll the window down and find the My Account Page section. Tick the Custom My Account Page and Custom My Account Page endpoints checkboxes.
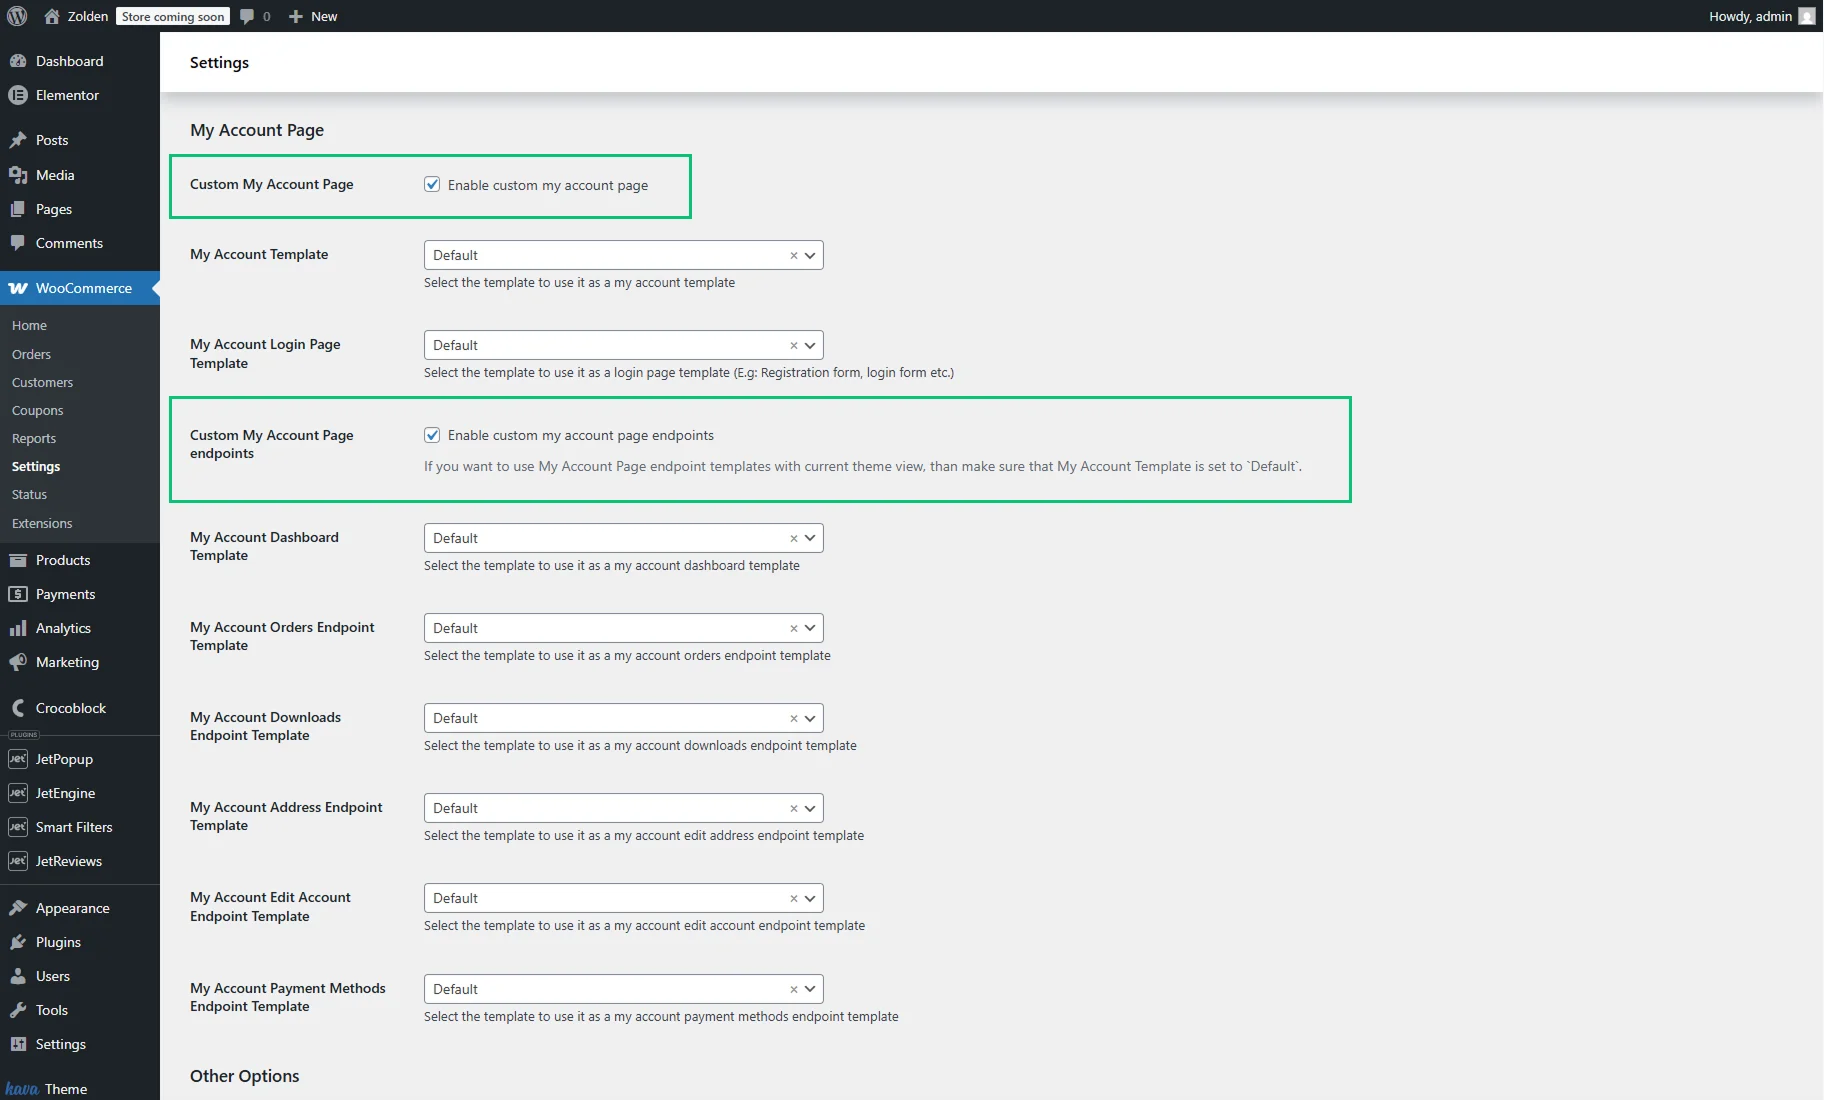
Choose the templates you’ve just created from the corresponding drop-down menus. For example, we pick “My Account Orders Endpoint Template” for the My Account Orders Endpoint Template option.
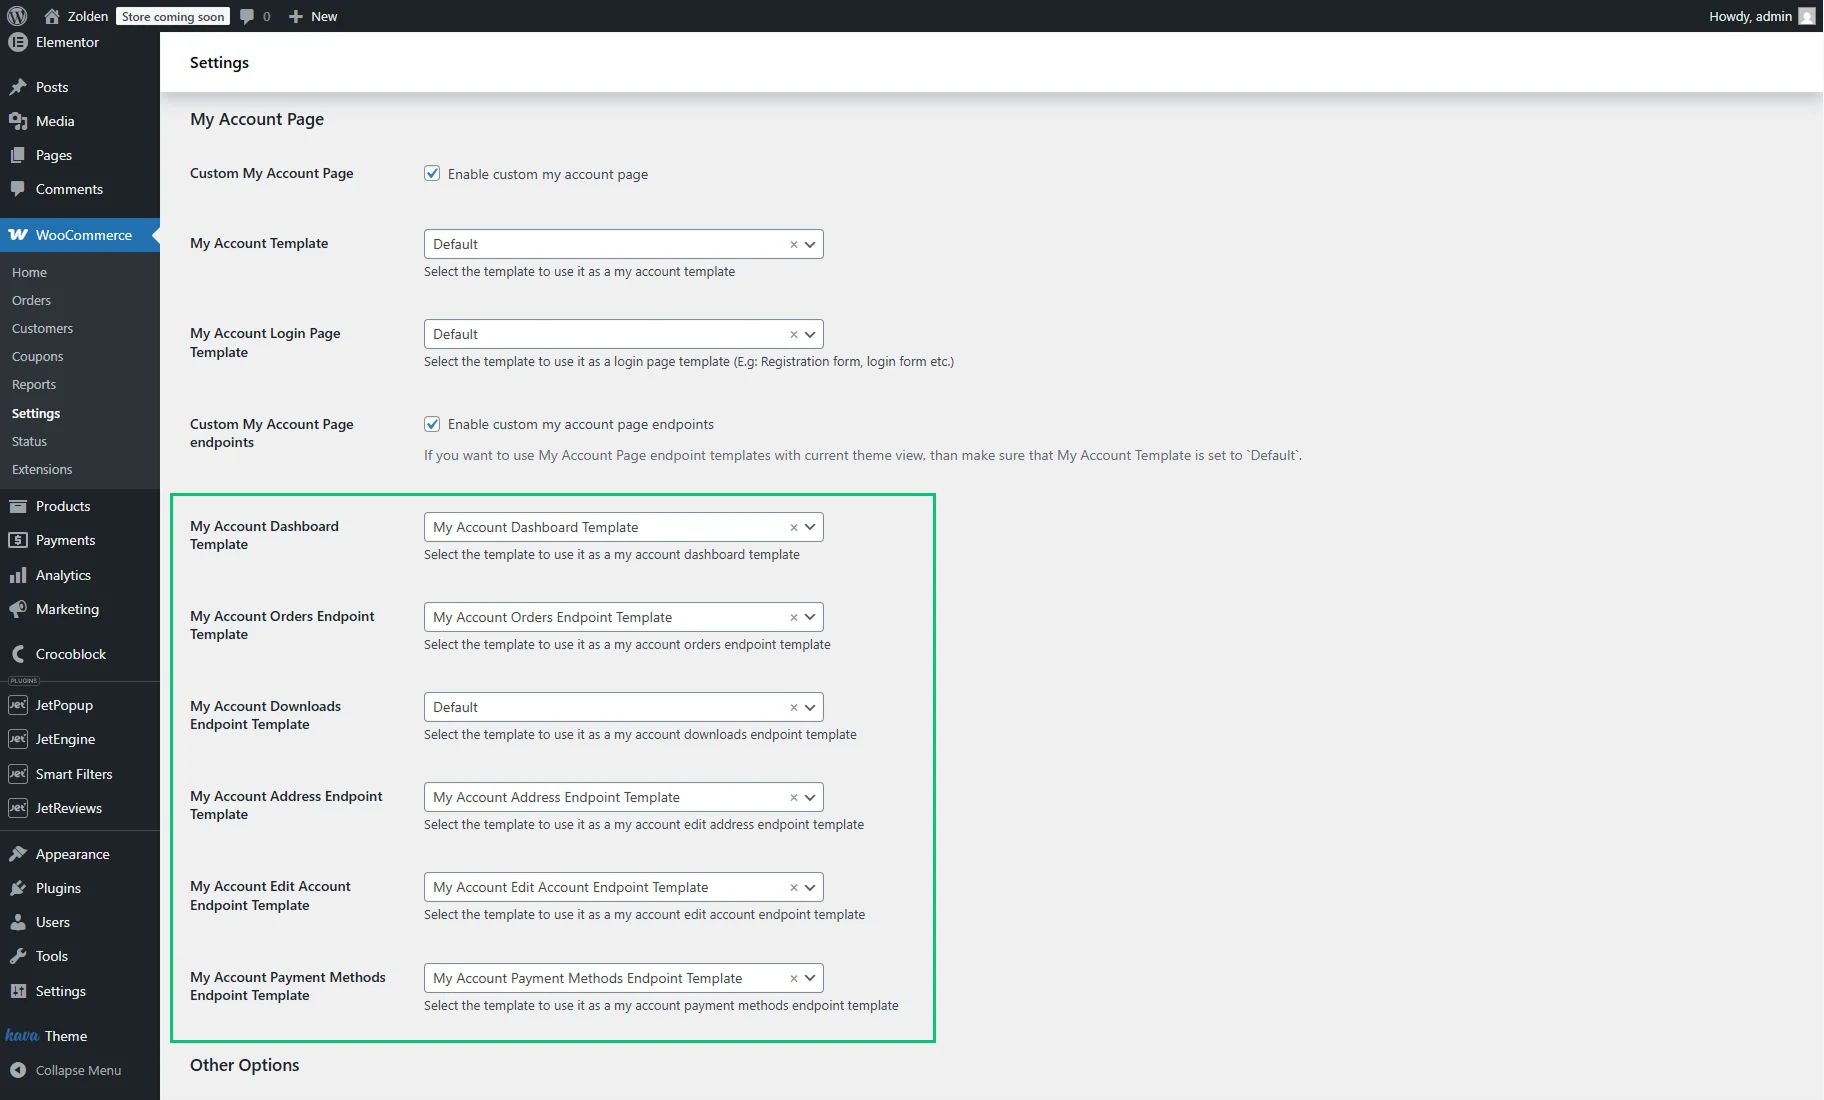
The templates are created and applied to the endpoint. When you open the My Account page, the templates you created will be applied to the appropriate endpoints.
How to Create a Custom My Account Template with Custom Endpoints
The endpoint custom templates can be used with the default My Account page template. This means the navigation will adopt the design defined by your website’s theme and the endpoints you chose to create custom templates for. To create a fully customized page with the same design for every part of it, you will have to build it from scratch.
Create a menu with the endpoint URLs
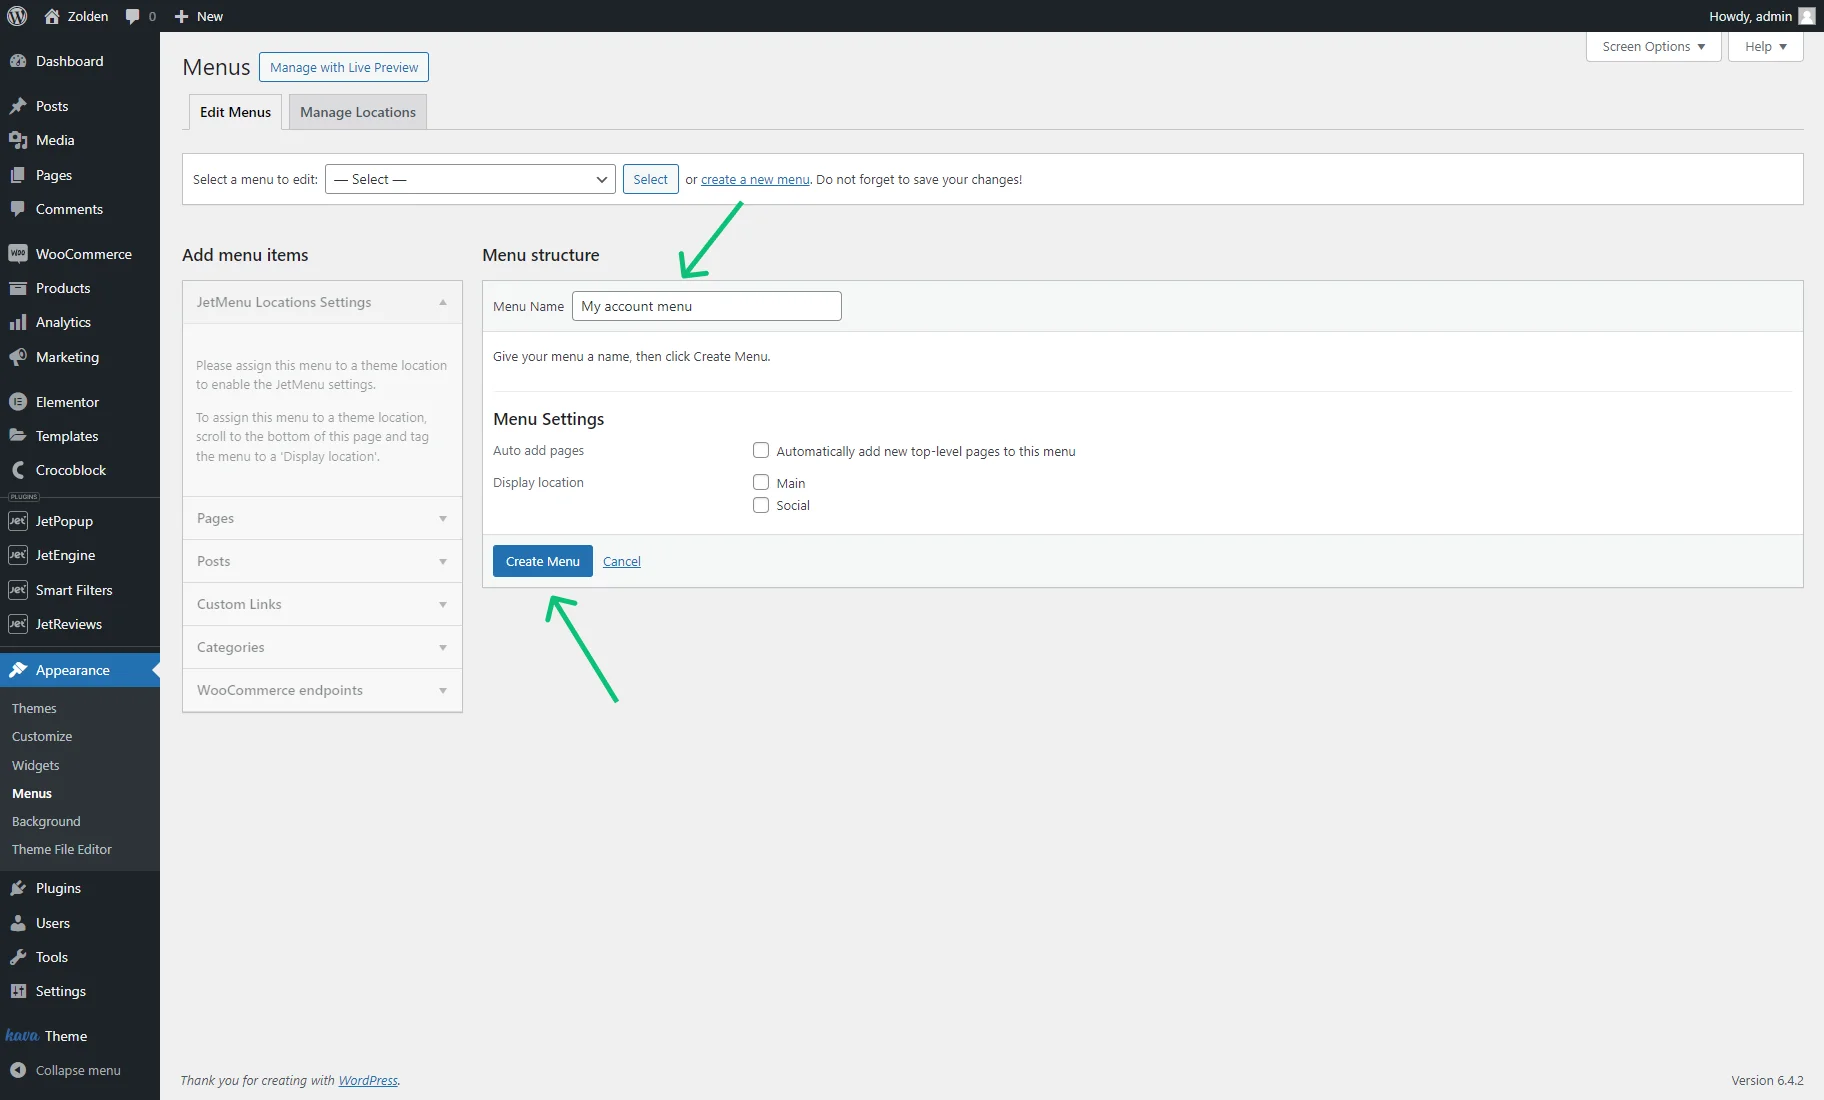
Go to the WordPress Dashboard > Appearance > Menus tab. If you have created any menus here, click the “Create a new menu” link.
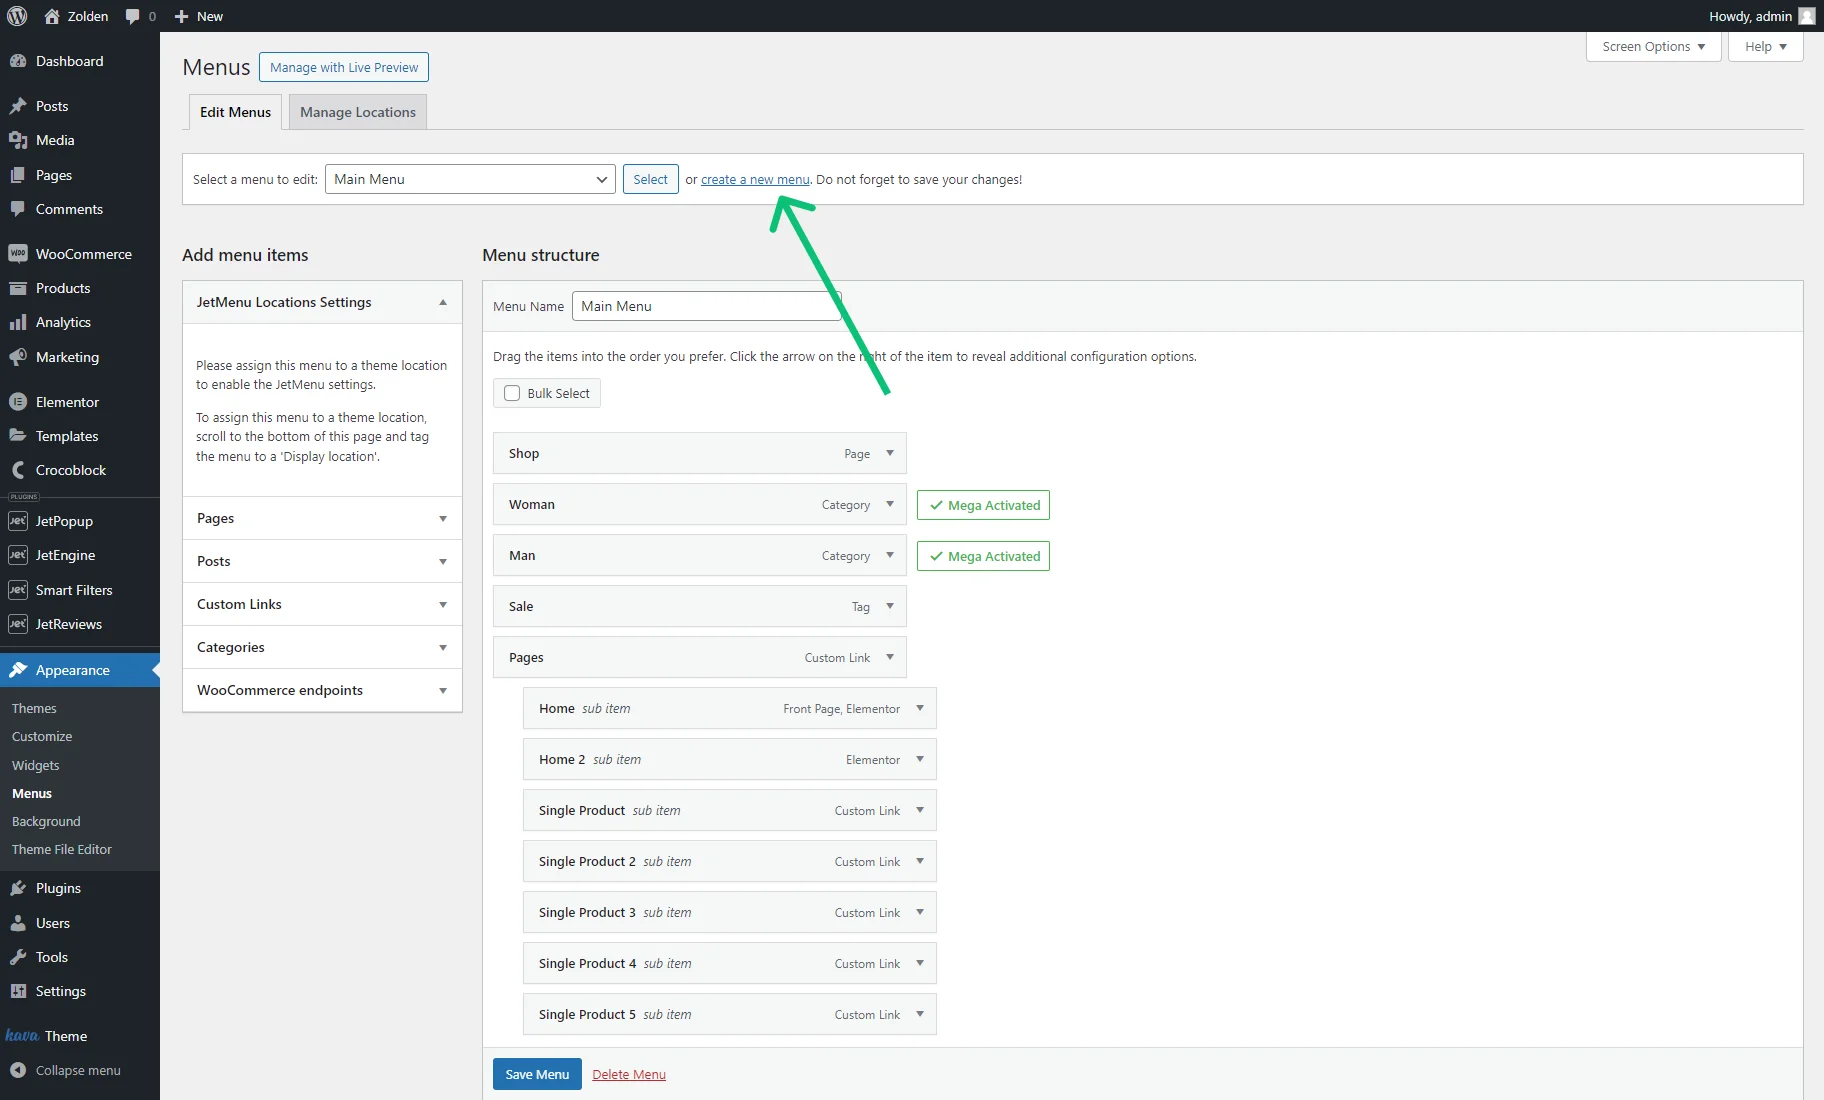
Enter the Menu Name (e.g., “My account menu”) and hit the “Create Menu” button.
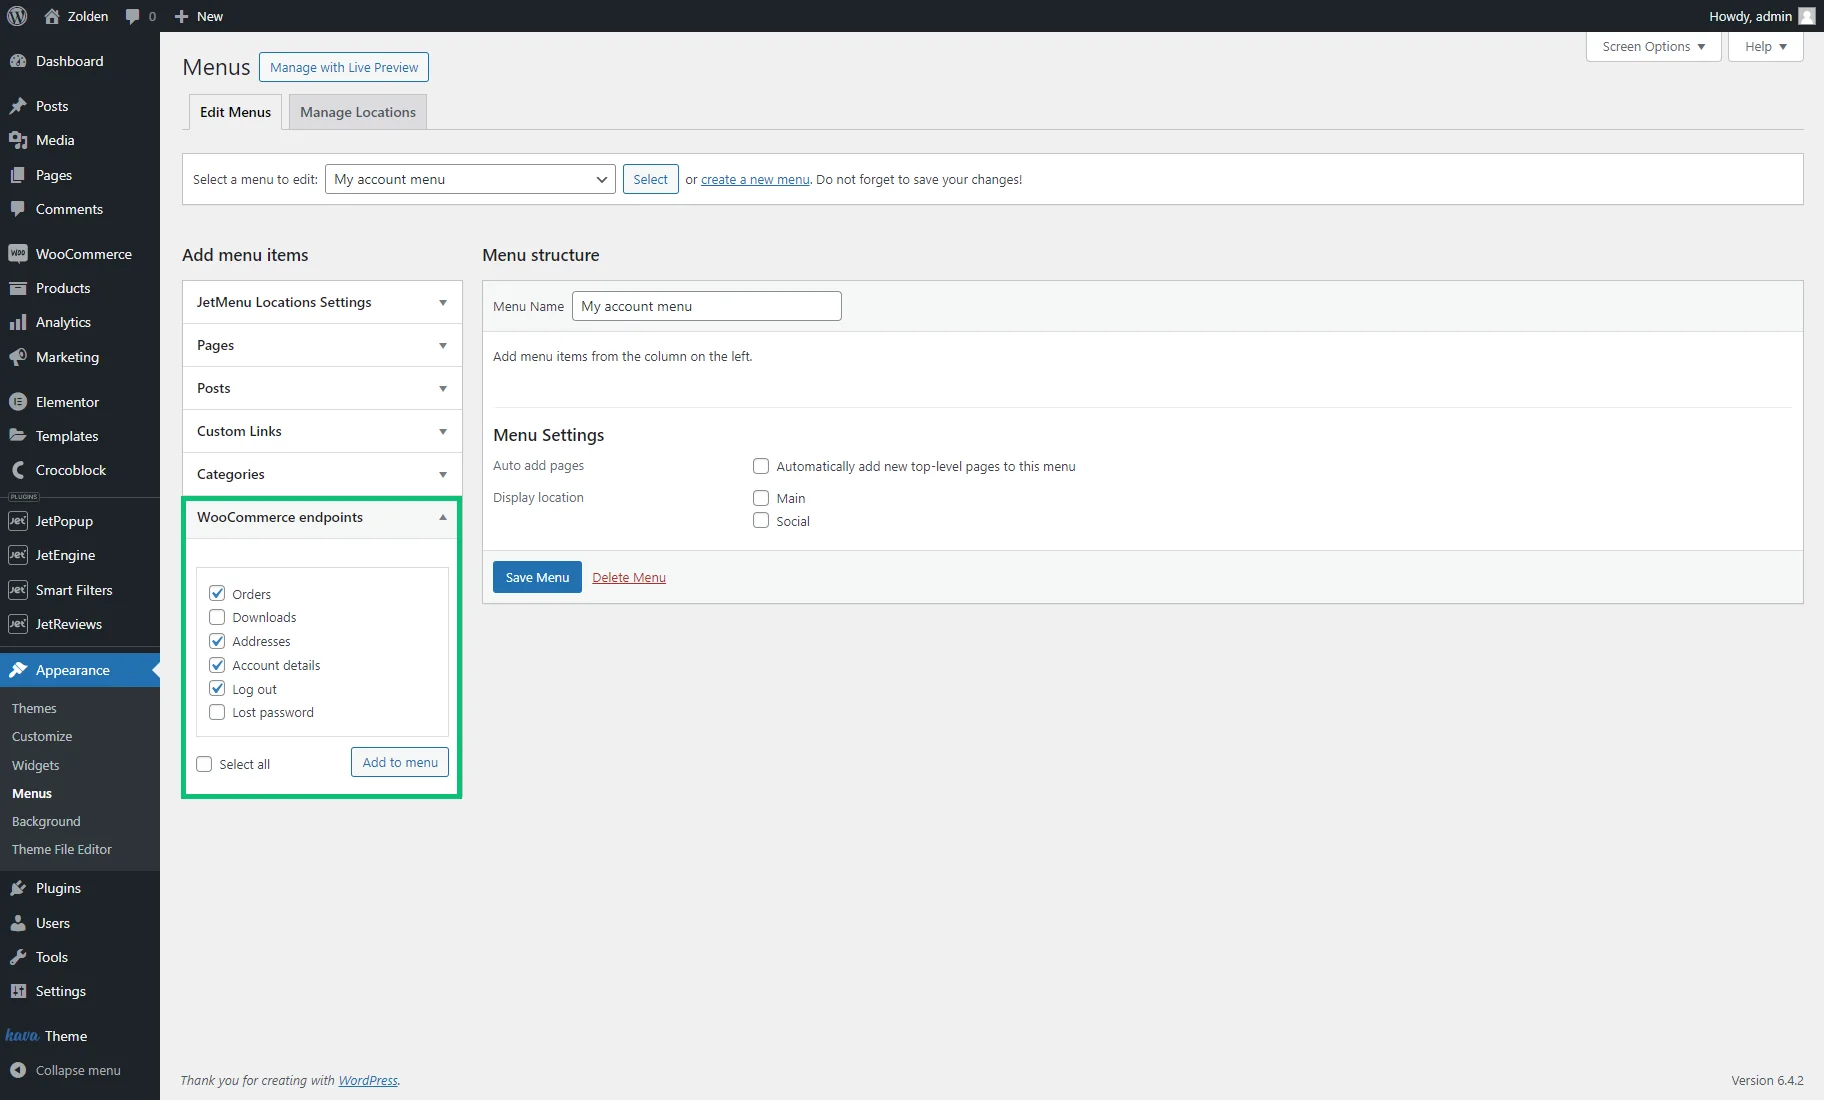
Unfold the WooCommerce endpoints tab in the Add menu items section. Tick the checkboxes of the endpoints you want to add to the My Account page menu and hit the “Add to menu” button.
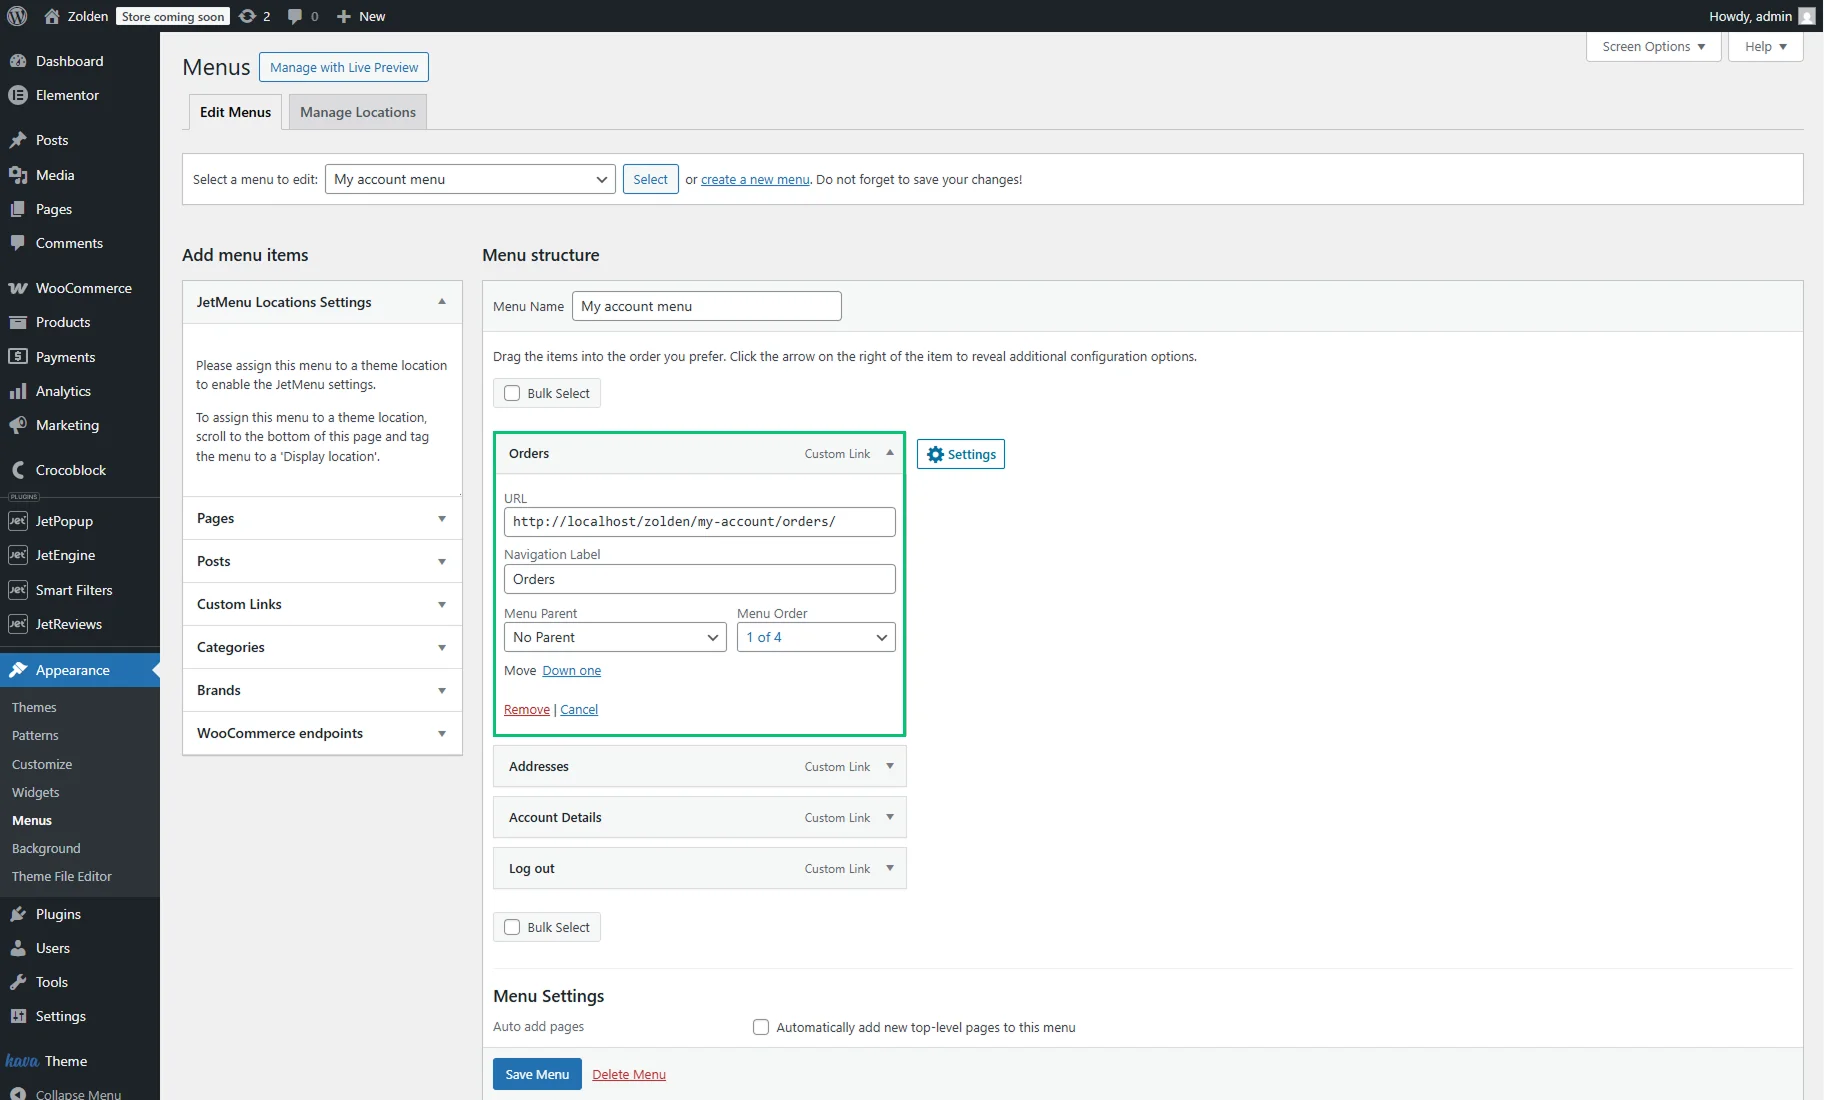
By unfolding the menu item tabs, you can change the menu item labels in the Navigation Label bar.
Besides the labels, the tabs contain the URLs, which include the My Account page URL and endpoint. For instance, the “Orders” menu item URL is: “your_website/my_account/orders.”
You can also change the menu item order by dragging the menu tabs.
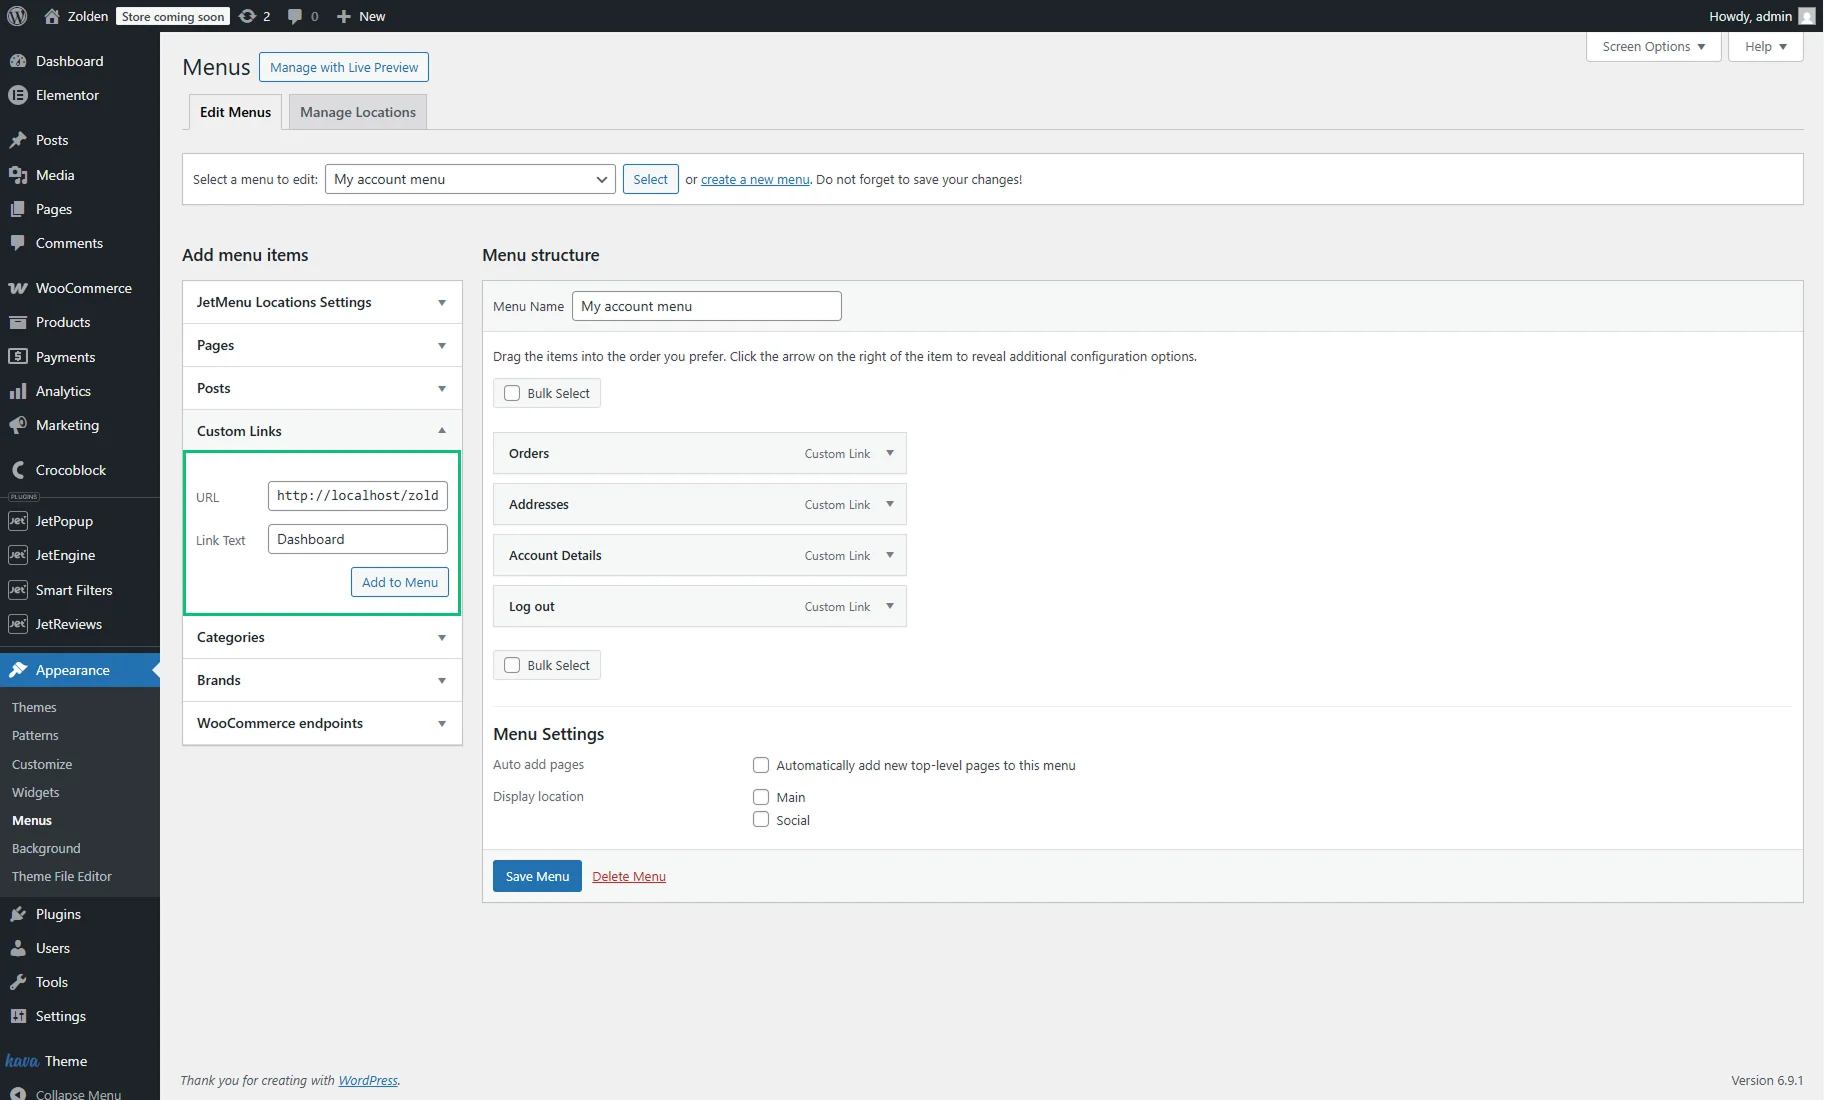
To add the “Dashboard” menu item, unfold the Custom Links tab in the Add menu items section. Here, add the My Account page URL (e.g., your_website/my-account/) into the URL field. Also, insert the Link Text (e.g., “Dashboard”) and push the “Add to Menu” button.
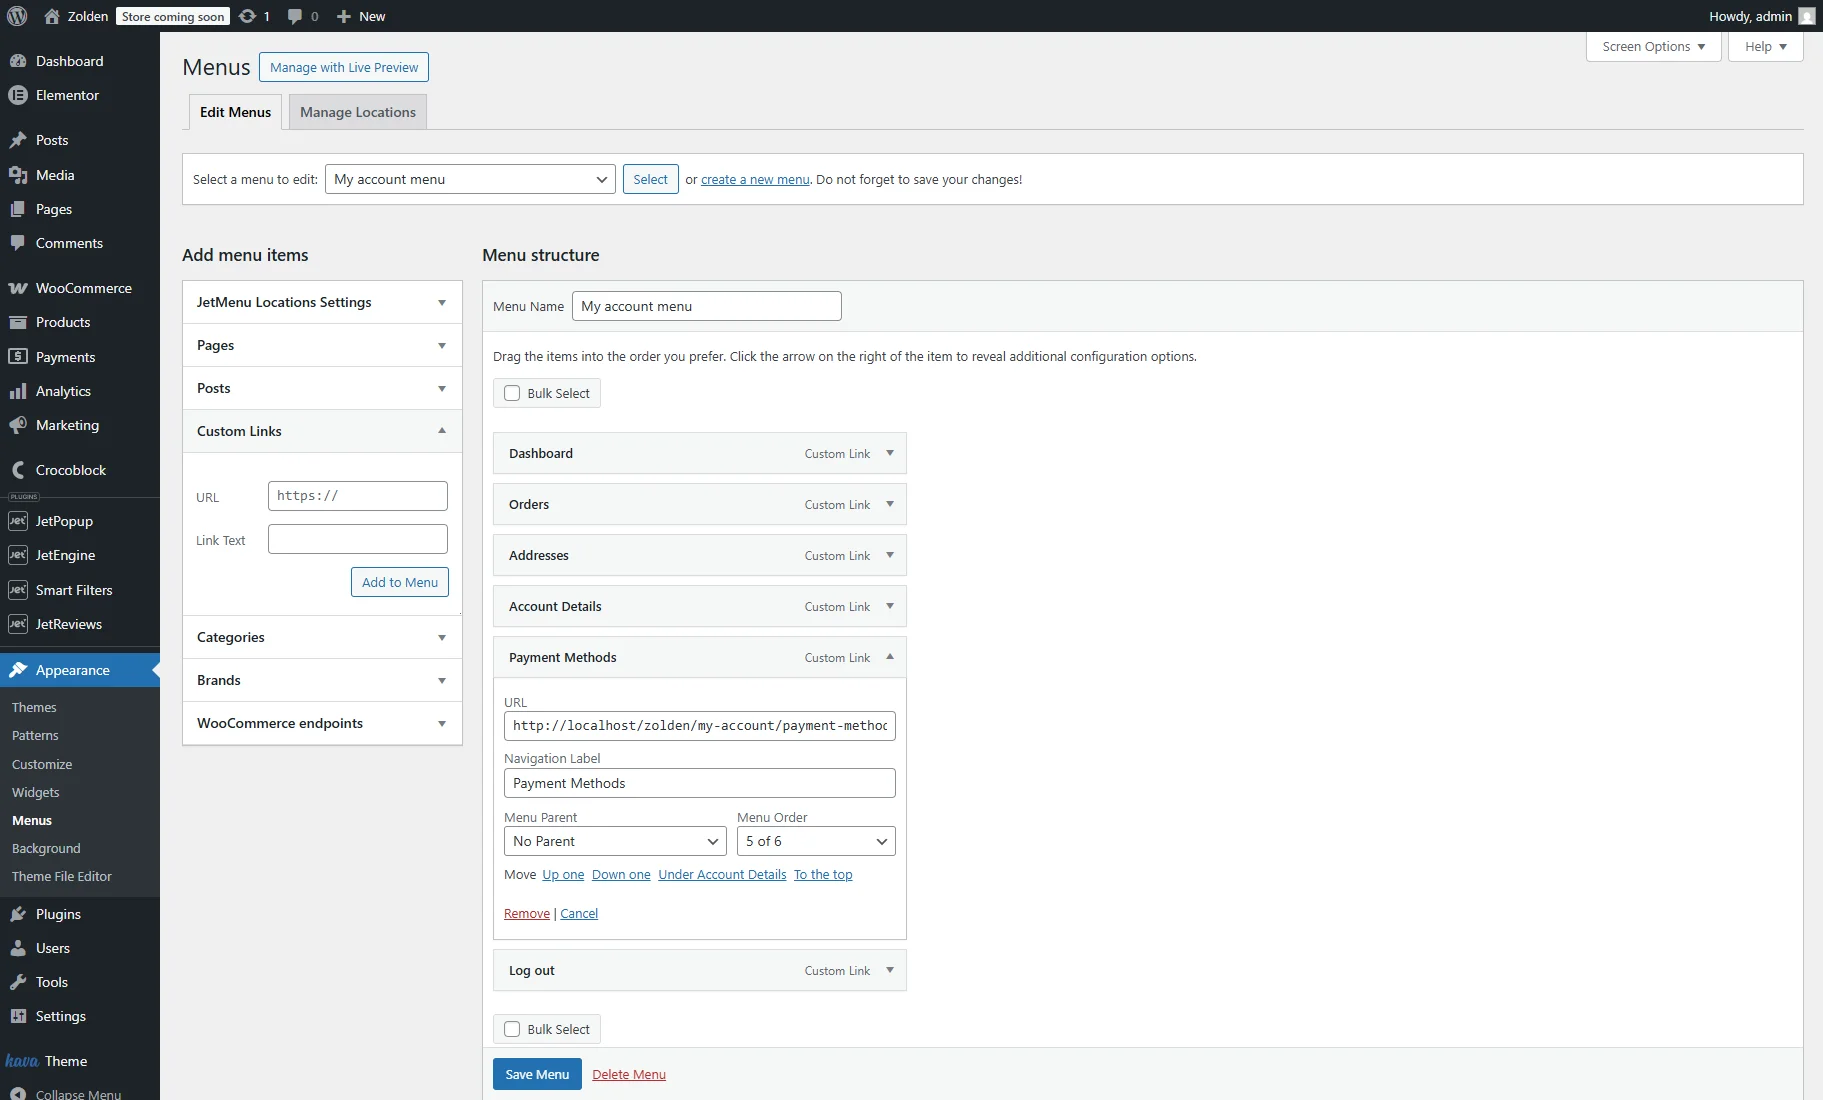
To add the “Payment Methods” menu item, unfold the Custom Links tab in the Add menu items section one more time. Here, add the URL with ‘/payment-methods/’ endpoint (e.g., your_website/my-account/payment-methods/). Also, insert the Link Text (e.g., “Payment Methods”) and push the “Add to Menu” button.
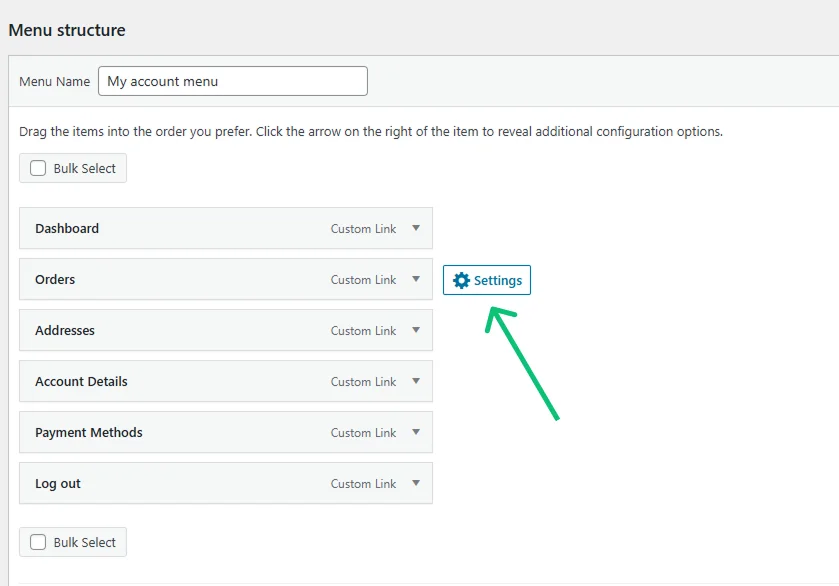
To add an icon to the menu item, move the cursor to the place to the right of a menu tab and hit the “Settings” button that appears.
In the menu settings pop-up, proceed to the Item Icon tab to set the SVG icon. Adjust other settings as desired and press the “Save” button.
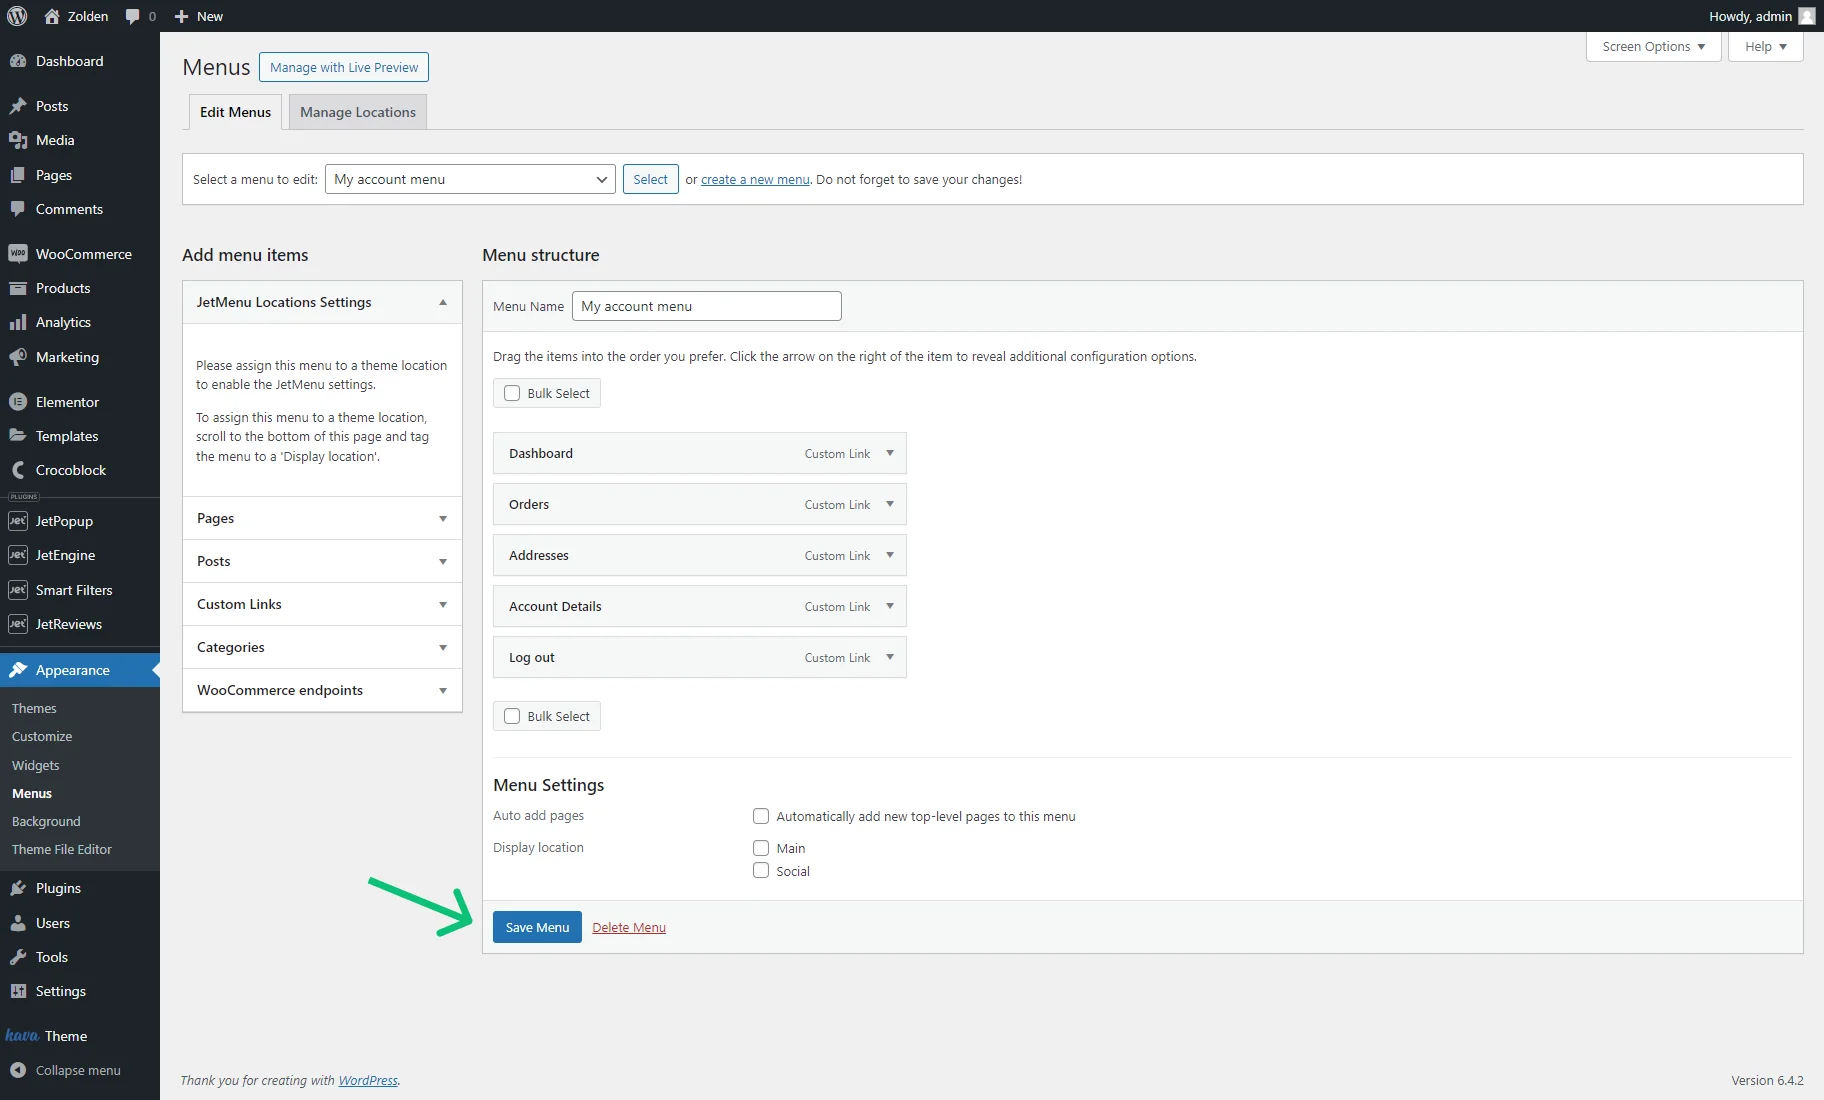
You can add icons to other menu items if required. When you are done customizing the My Account page menu, hit the “Save Menu” button.
Create a custom My Account Page template
Go to the WordPress Dashboard > Crocoblock > Woo Page Builder tab and hit the “Create New Template” button. In the This Template For drop-down menu, choose the “My Account” option and type in the Template Name. Afterward, click the “Create Template” button.

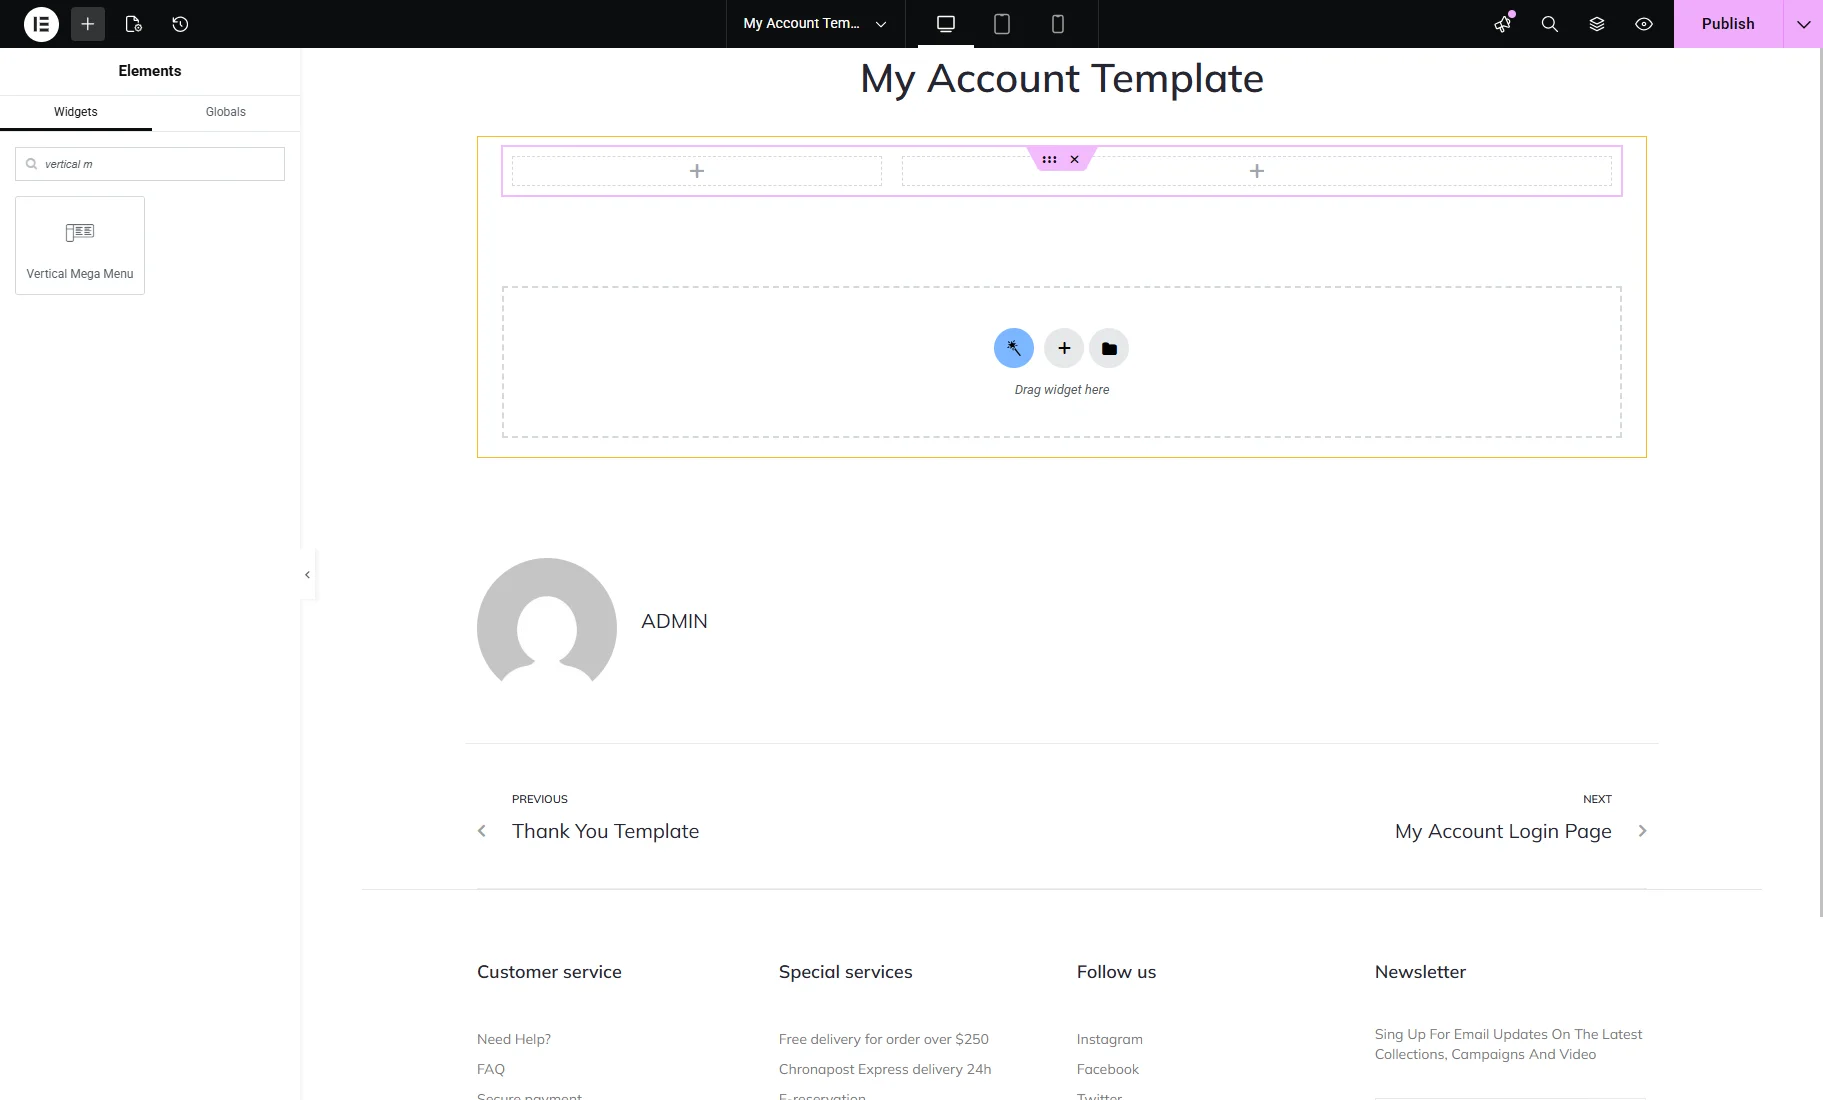
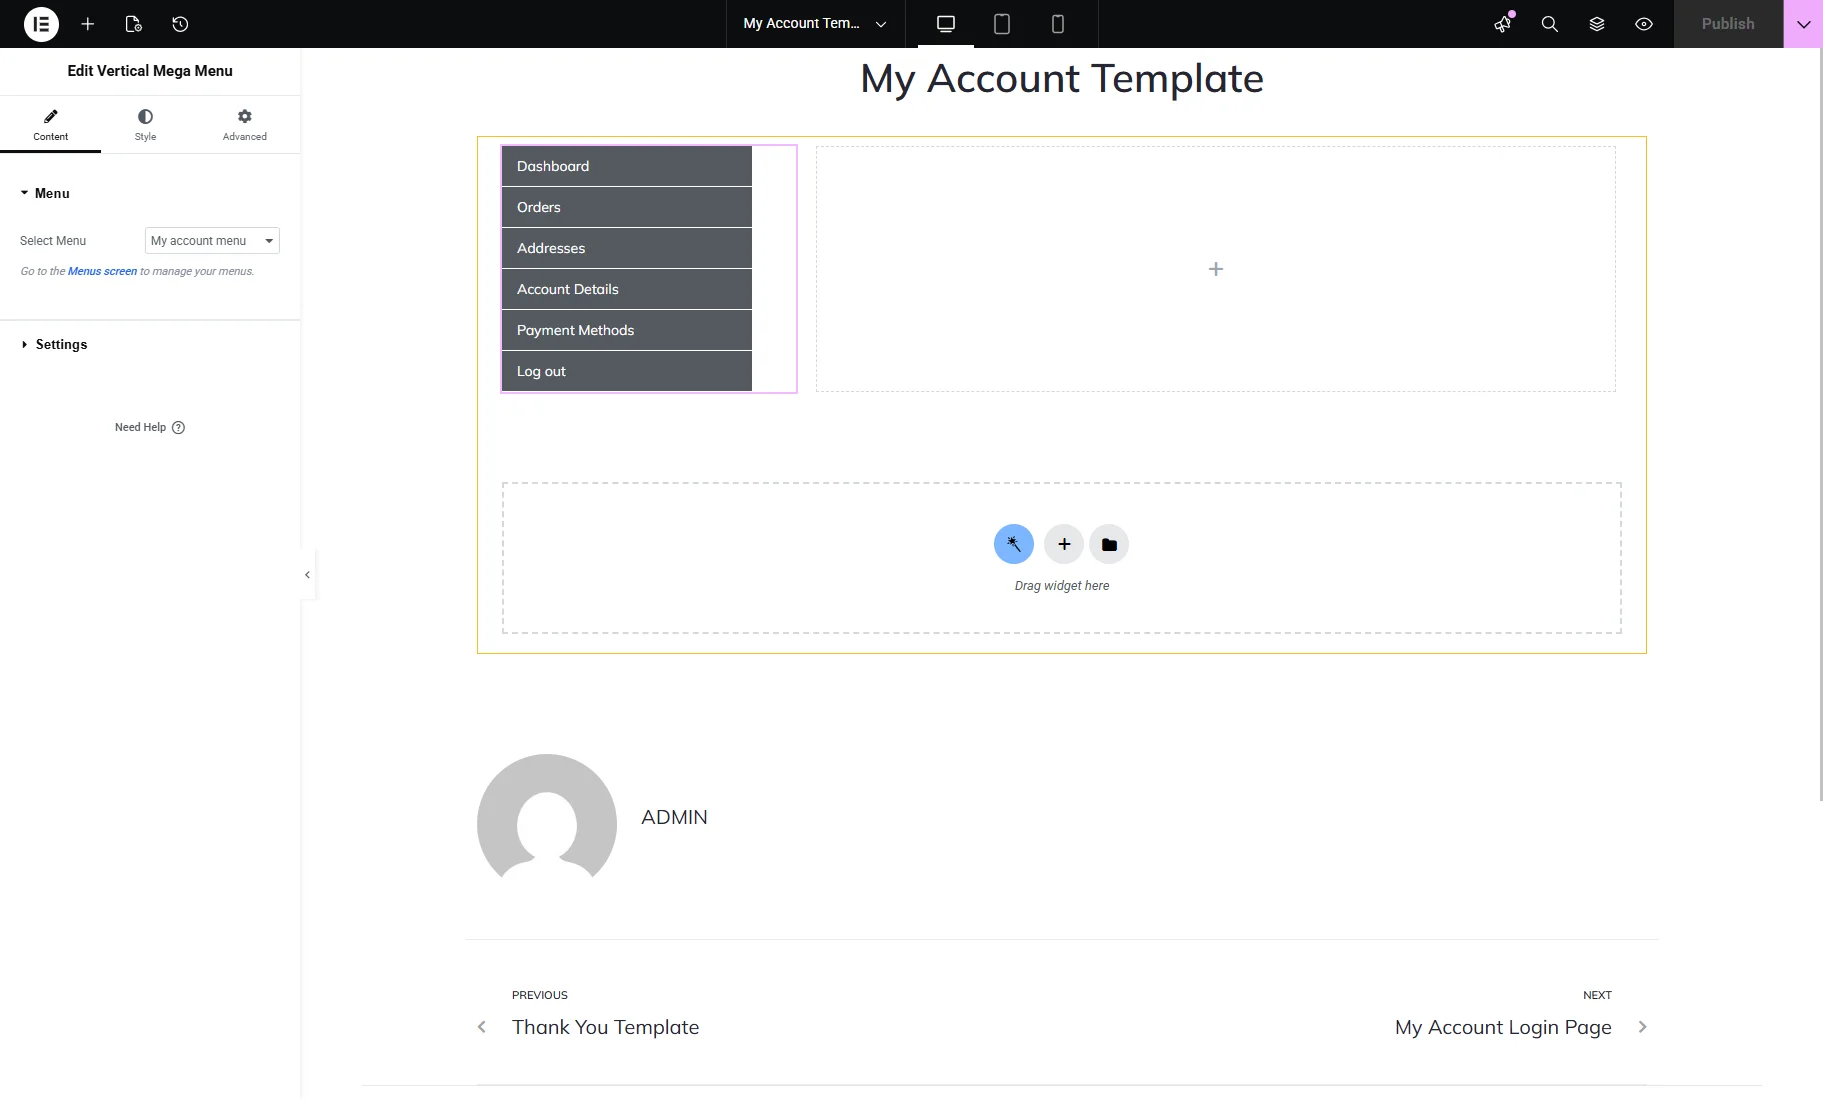
The layout of the page is completely up to you. For example, we added a Section with two Columns to the Elementor editor. A navigation widget can be placed in the first column, such as the Vertical Mega Menu widget of the JetMenu plugin.
The menu previously created for the My Account template can be chosen in the Select Menu drop-down list.
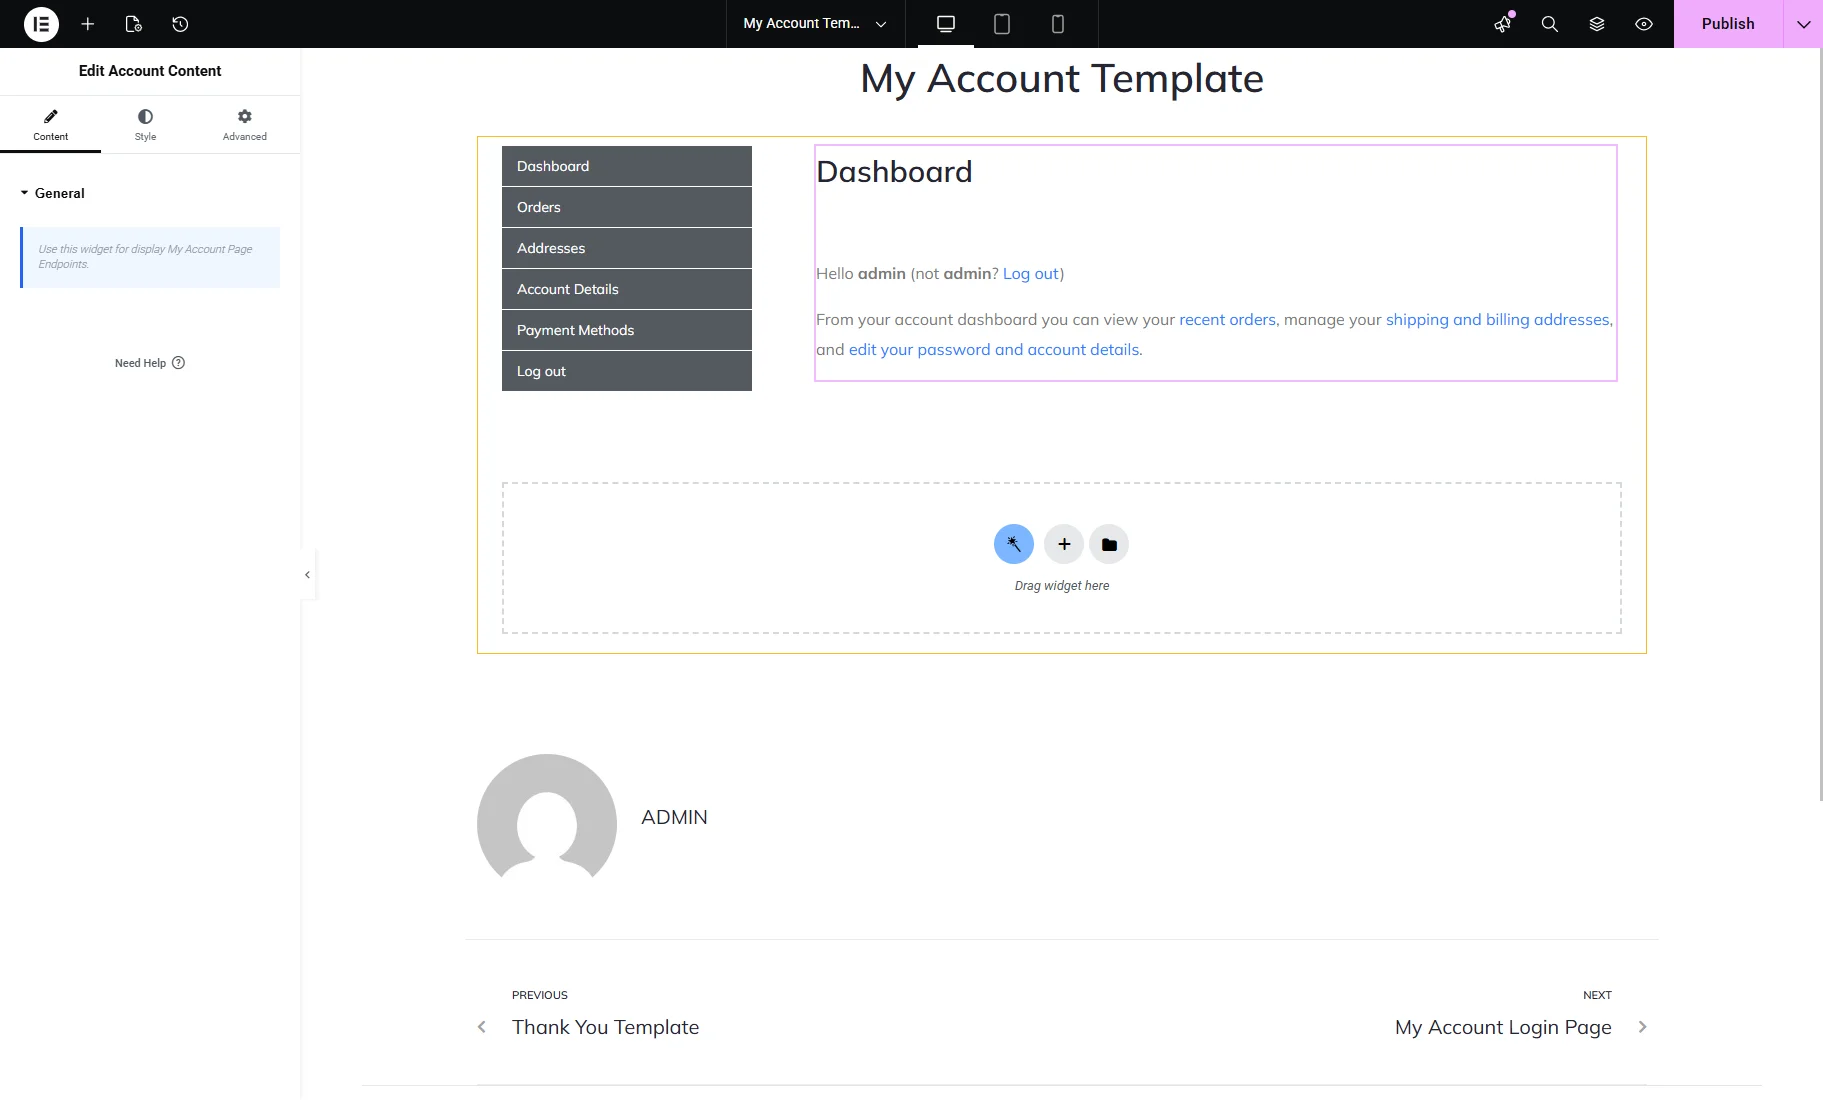
In the second Column, we drag-n-dropped the Account Content widget.
This widget shows the corresponding endpoints when you click on the menu item.
Arrange the style settings and add extra widgets if you fancy, such as the Heading widget above the Vertical Mega Menu widget with the “My account” Title.
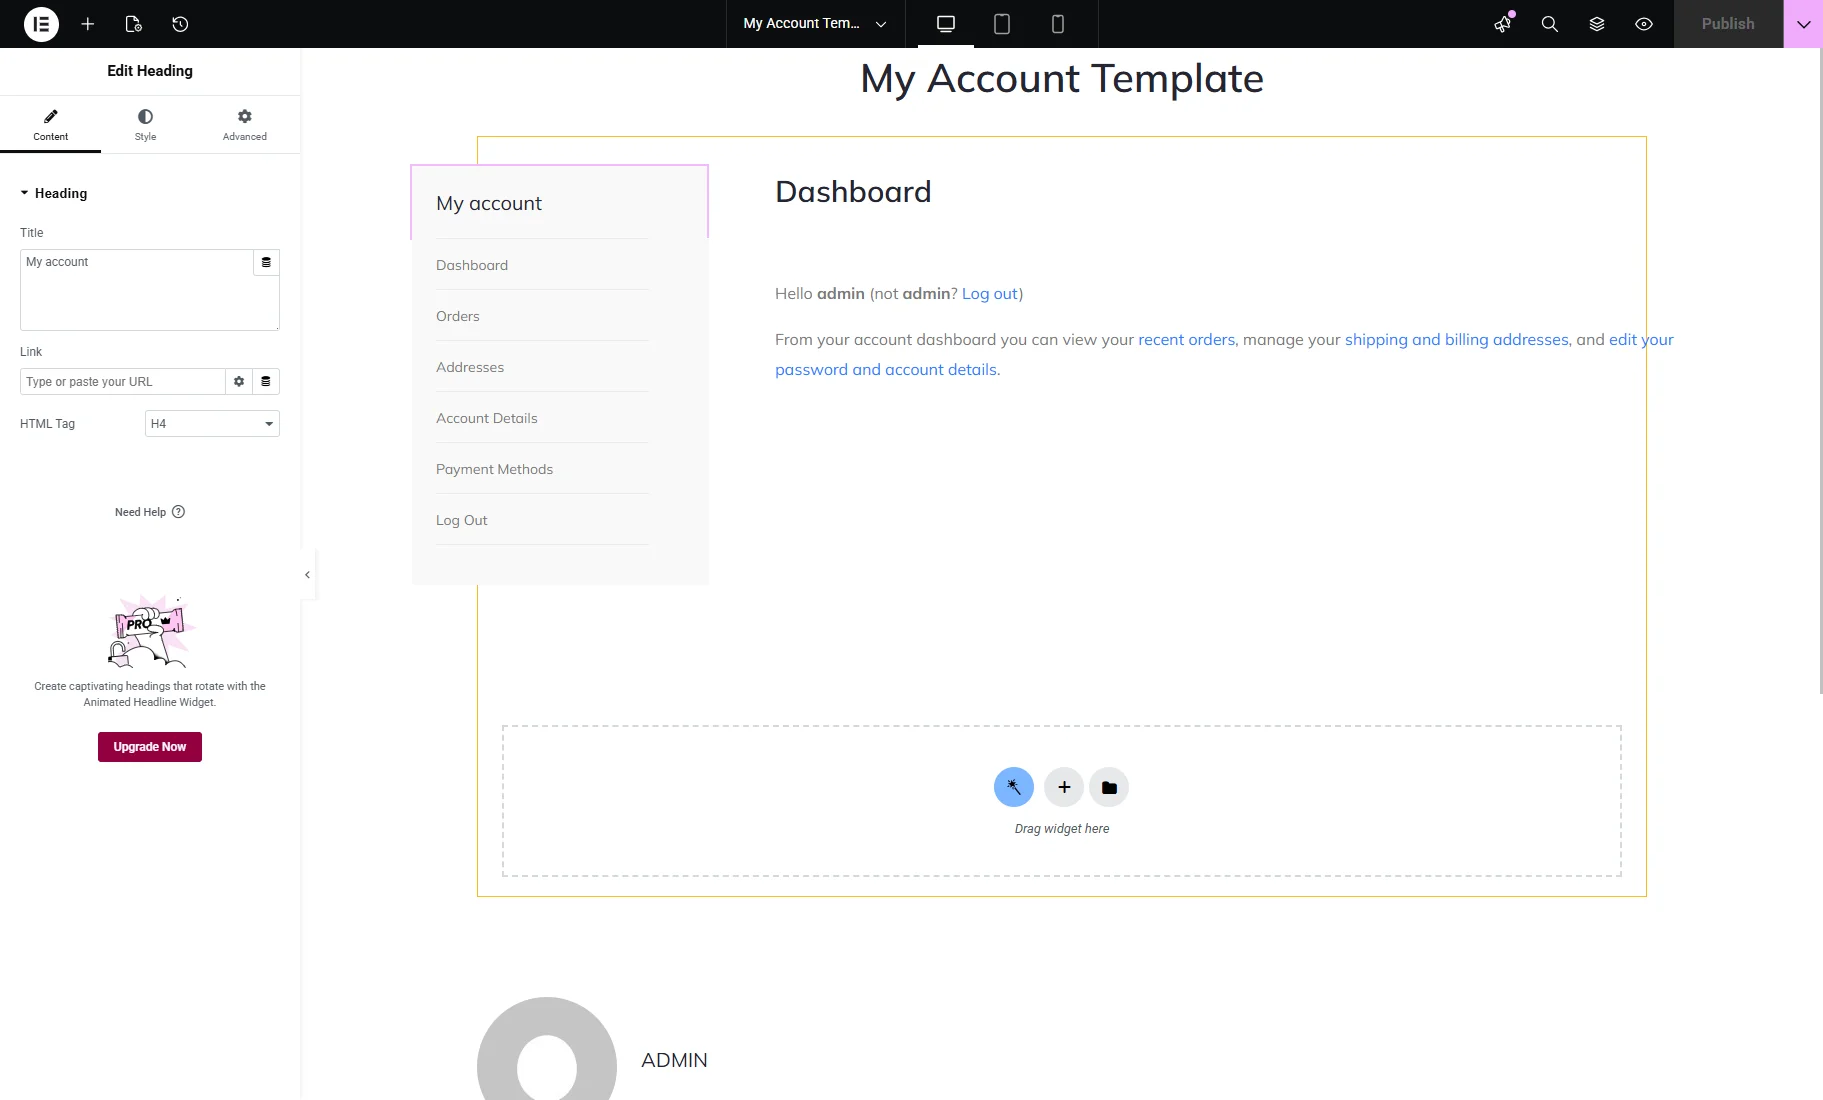
When you are done, click the “Publish” button.
Apply the template to the page
Go to the WordPress Dashboard > WooCommerce > Settings > JetWooBuilder tab and scroll down the page to the My Account Page section. Choose the template you created in the My Account Template drop-down menu here.
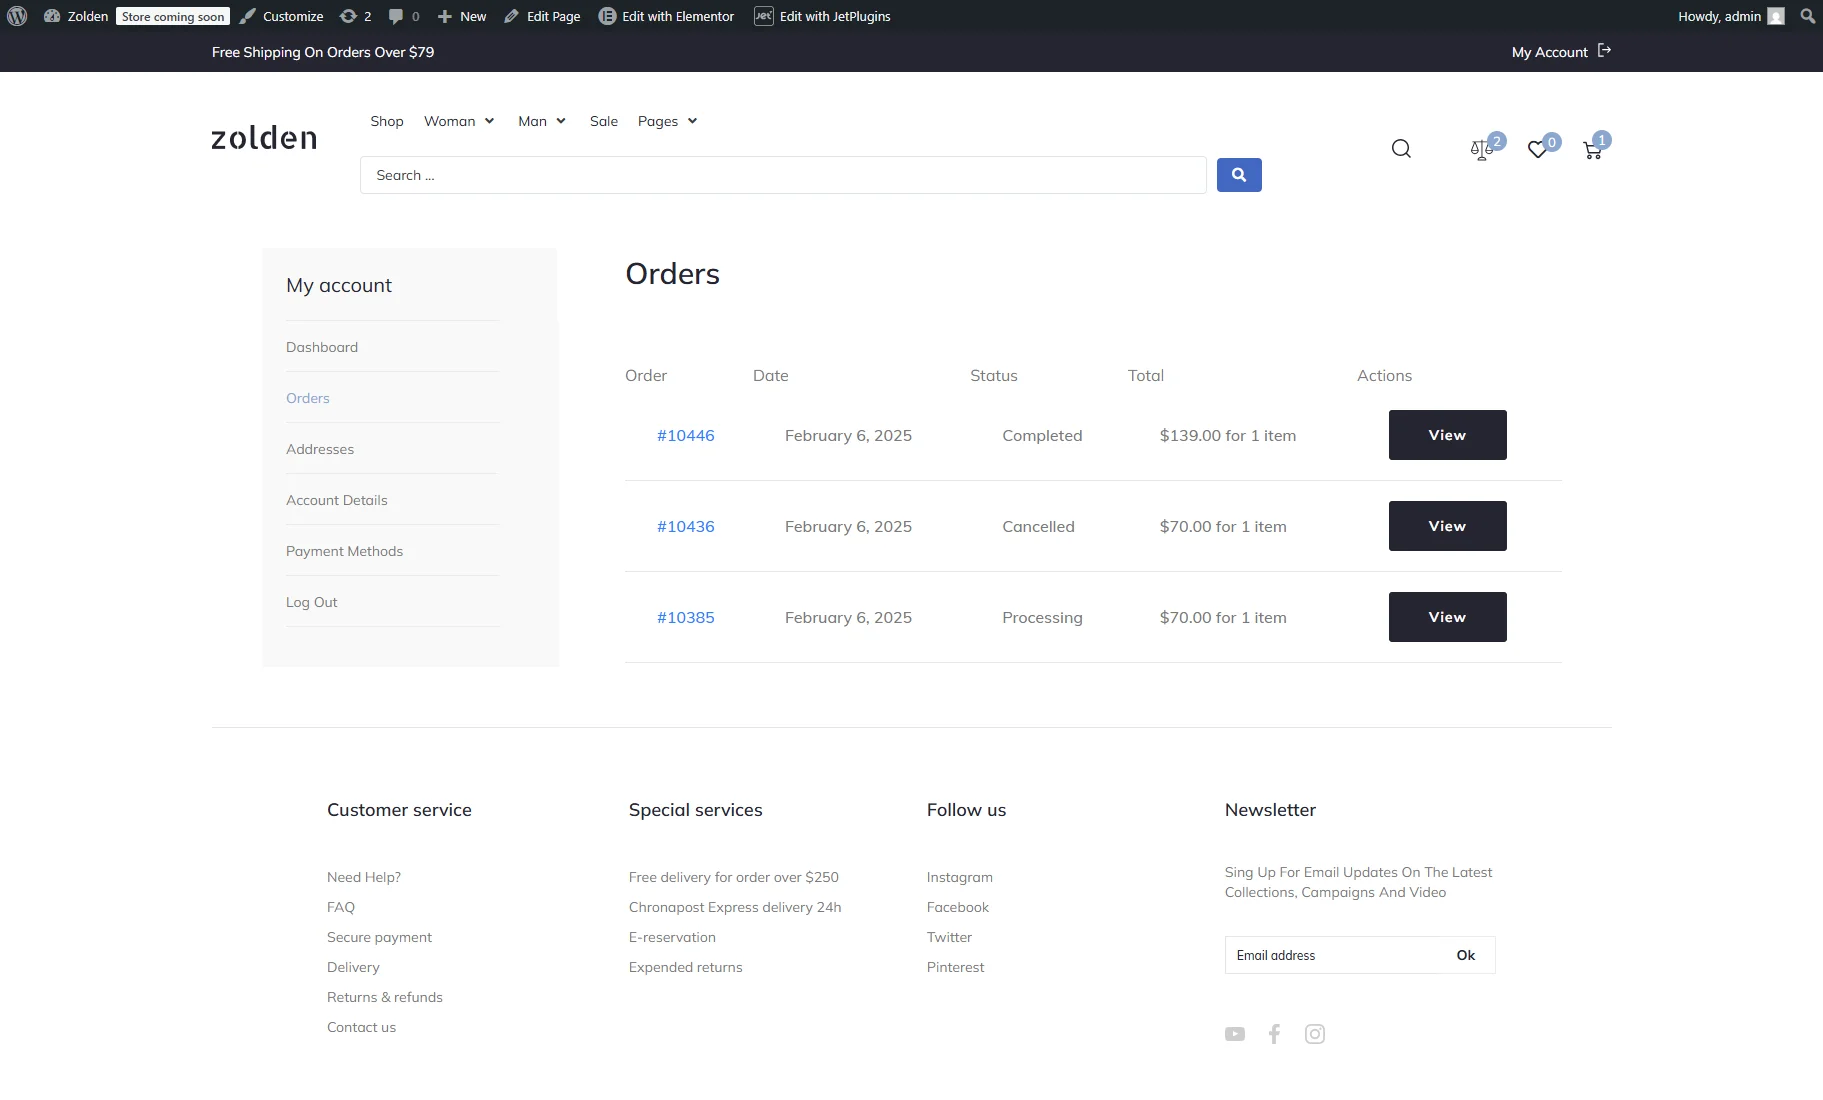
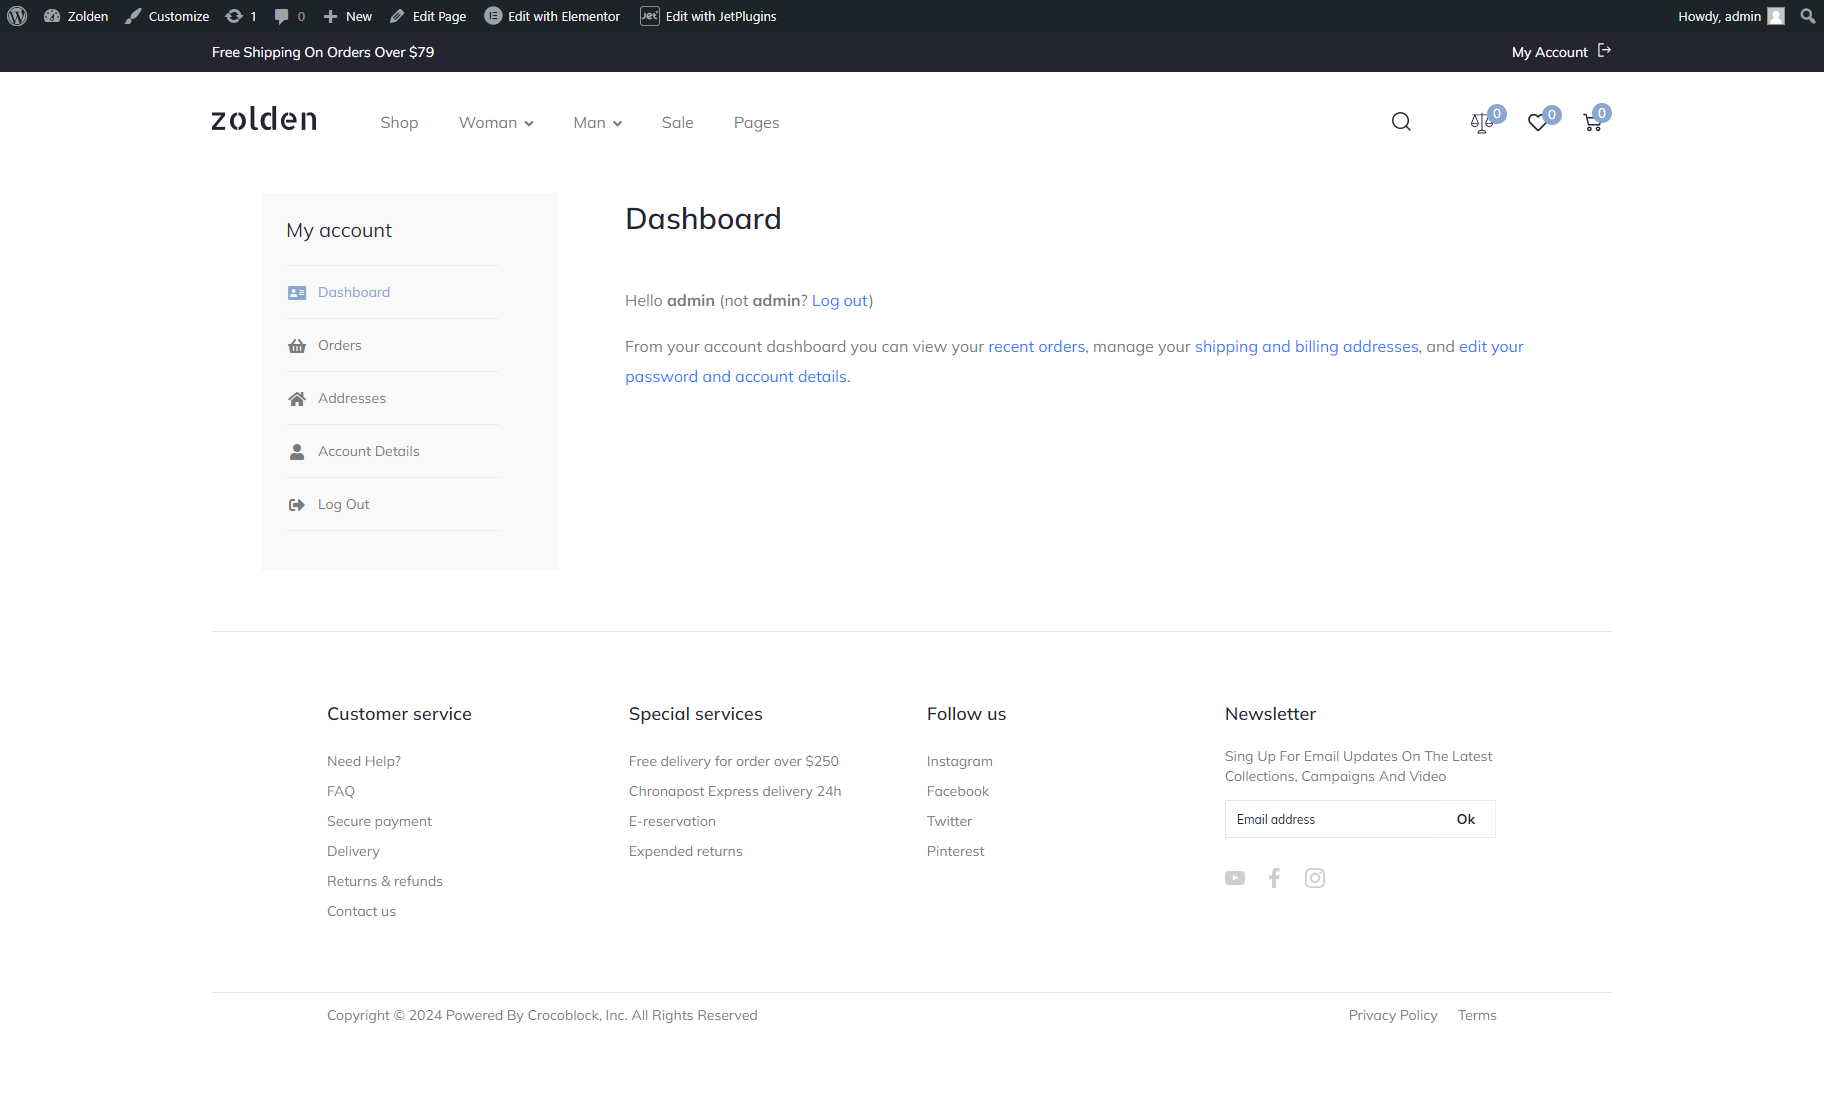
Now, you can open the My Account page on the front end and check the result.
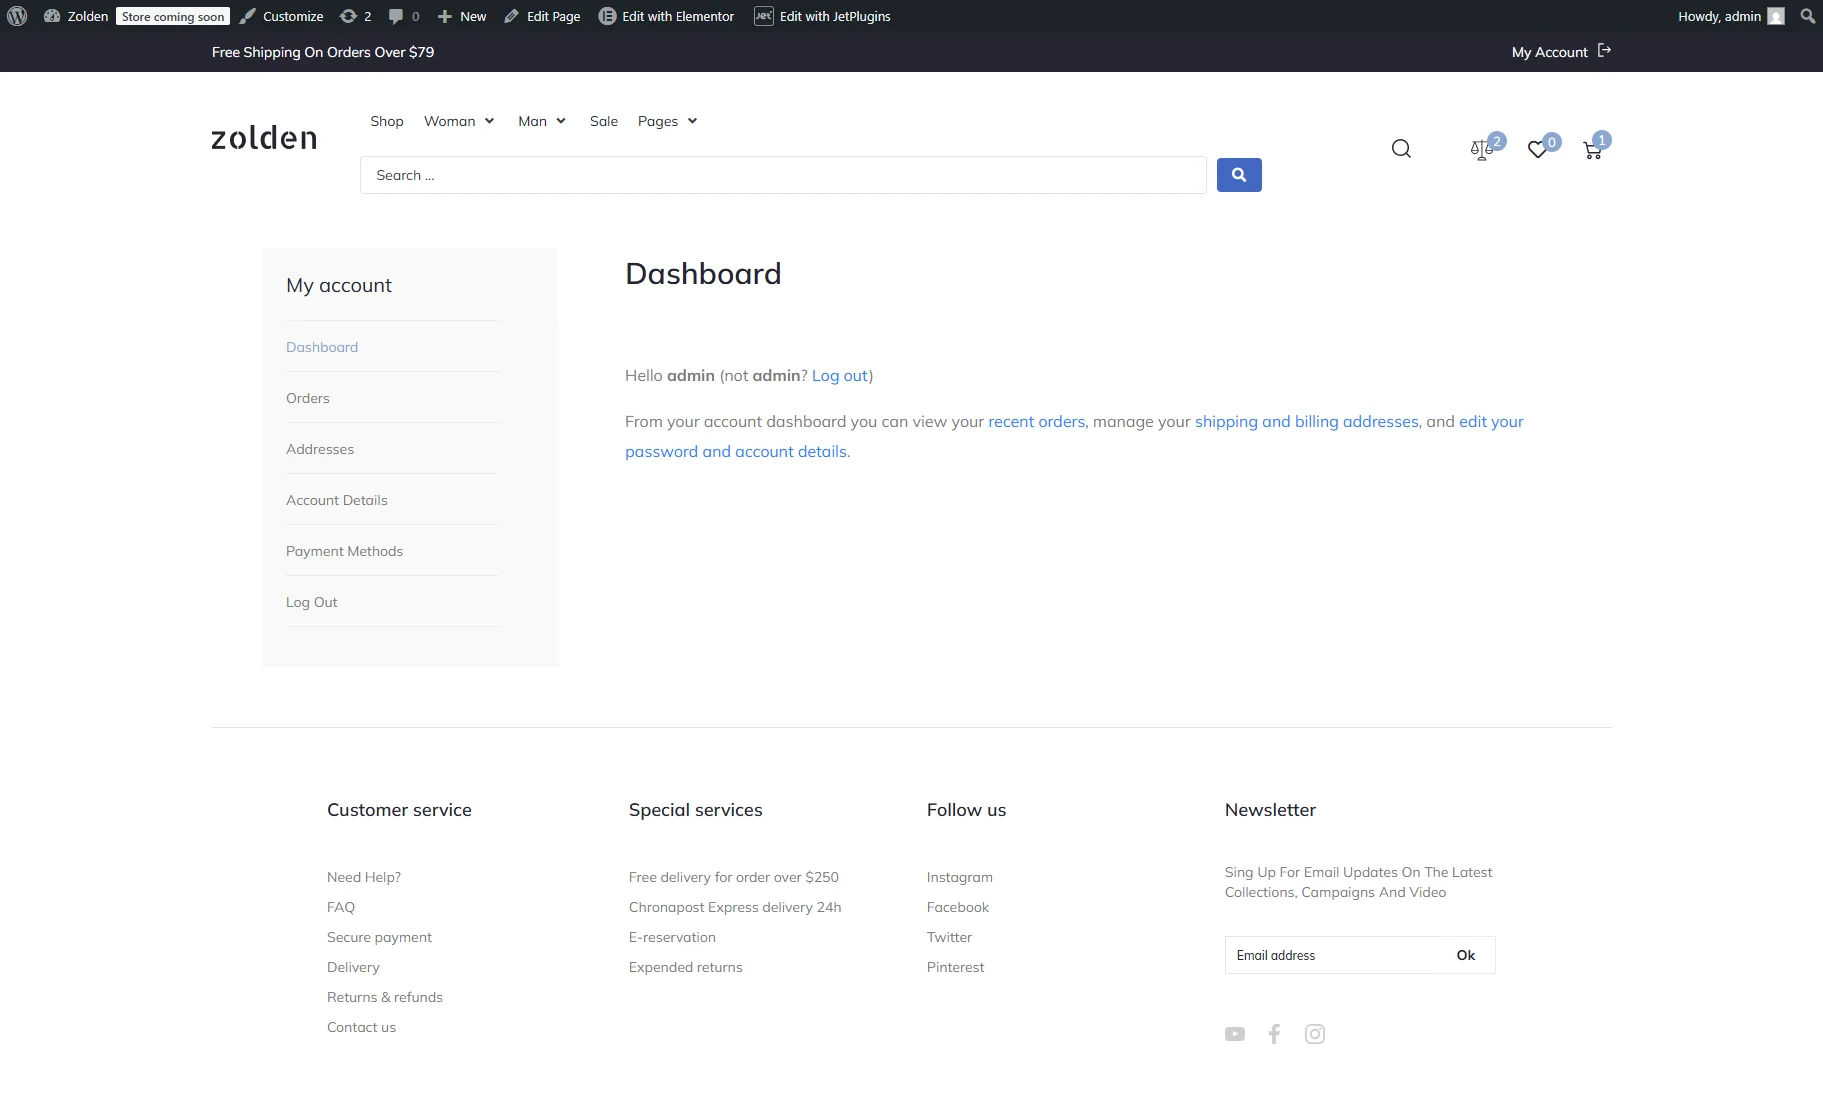
Click different menu items to see endpoints. For example, the order endpoint is displayed with the Account Orders widget.
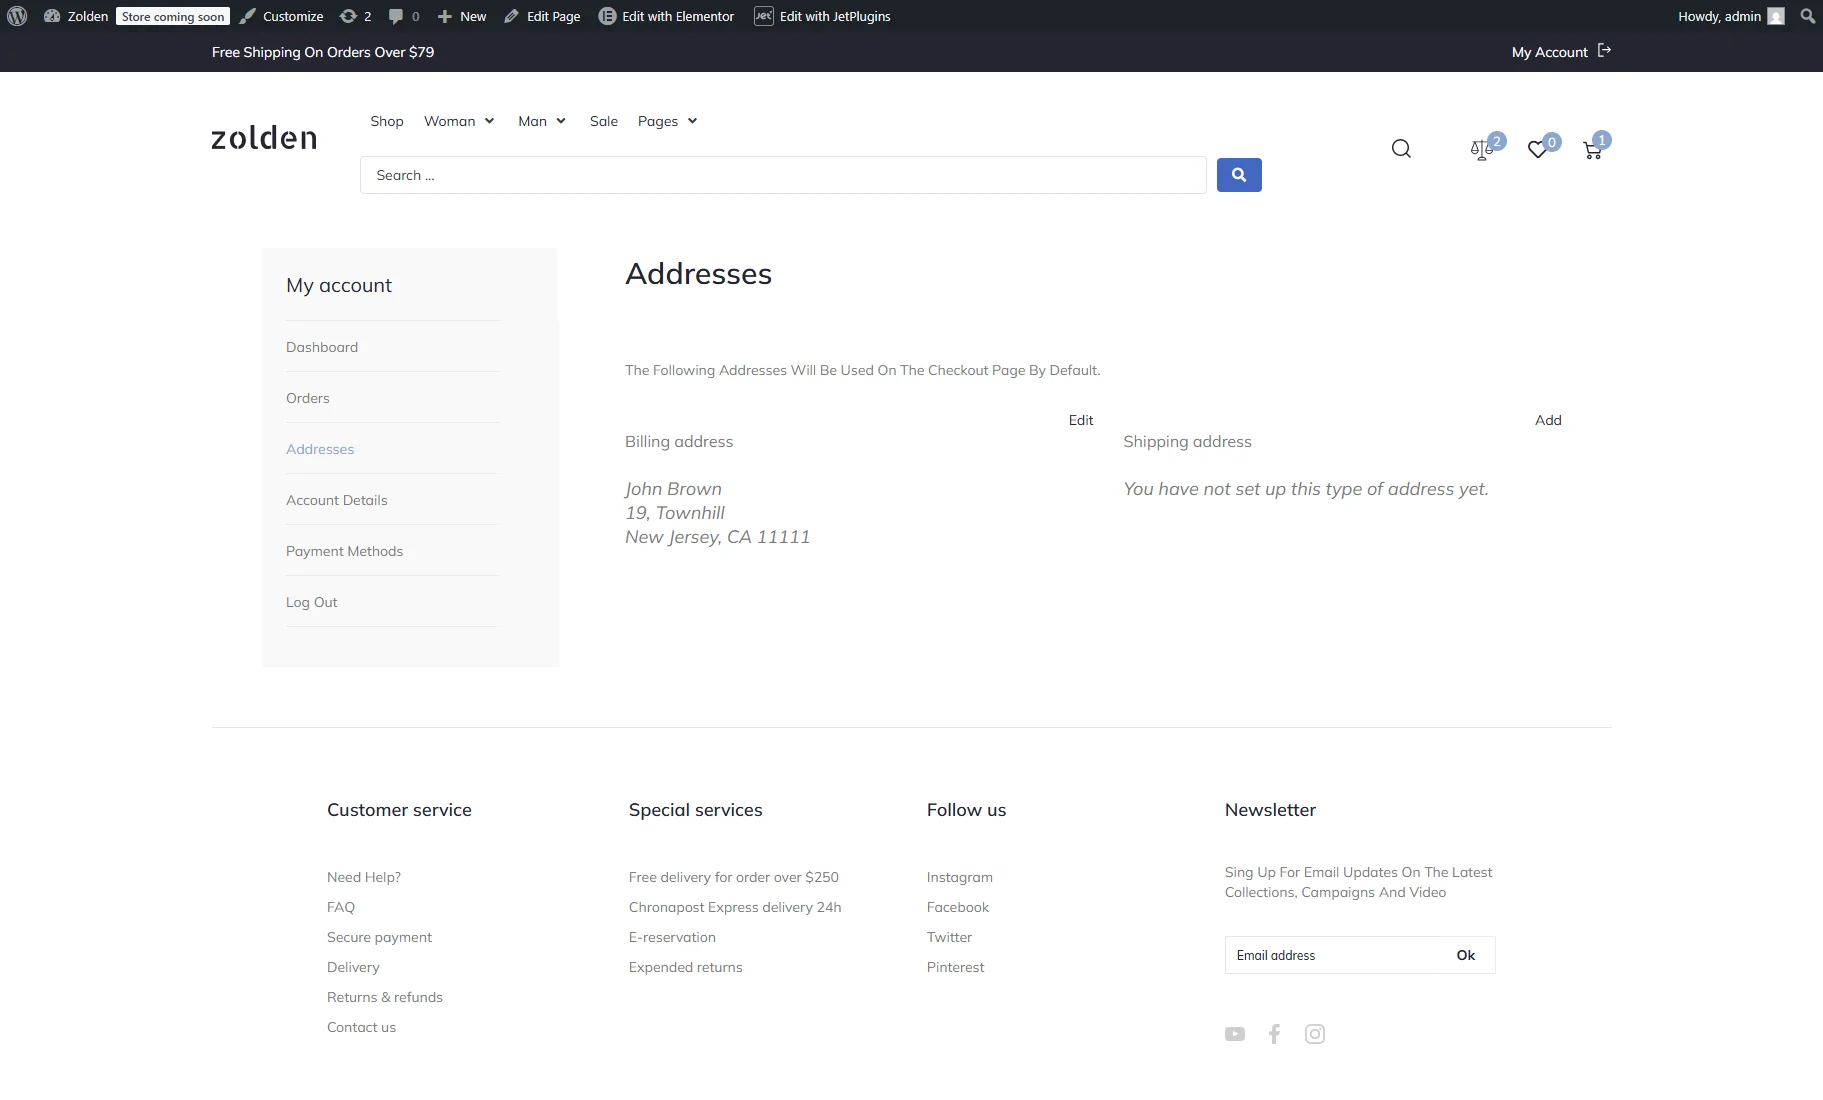
Or the edit addresses endpoint is shown with the Account Addresses widget.
How to Build the My Account Page Template with the JetThemeCore Plugin
Create the My Account template
With the JetThemeCore plugin, you can construct page templates with diverse elements like body, header, and footer.
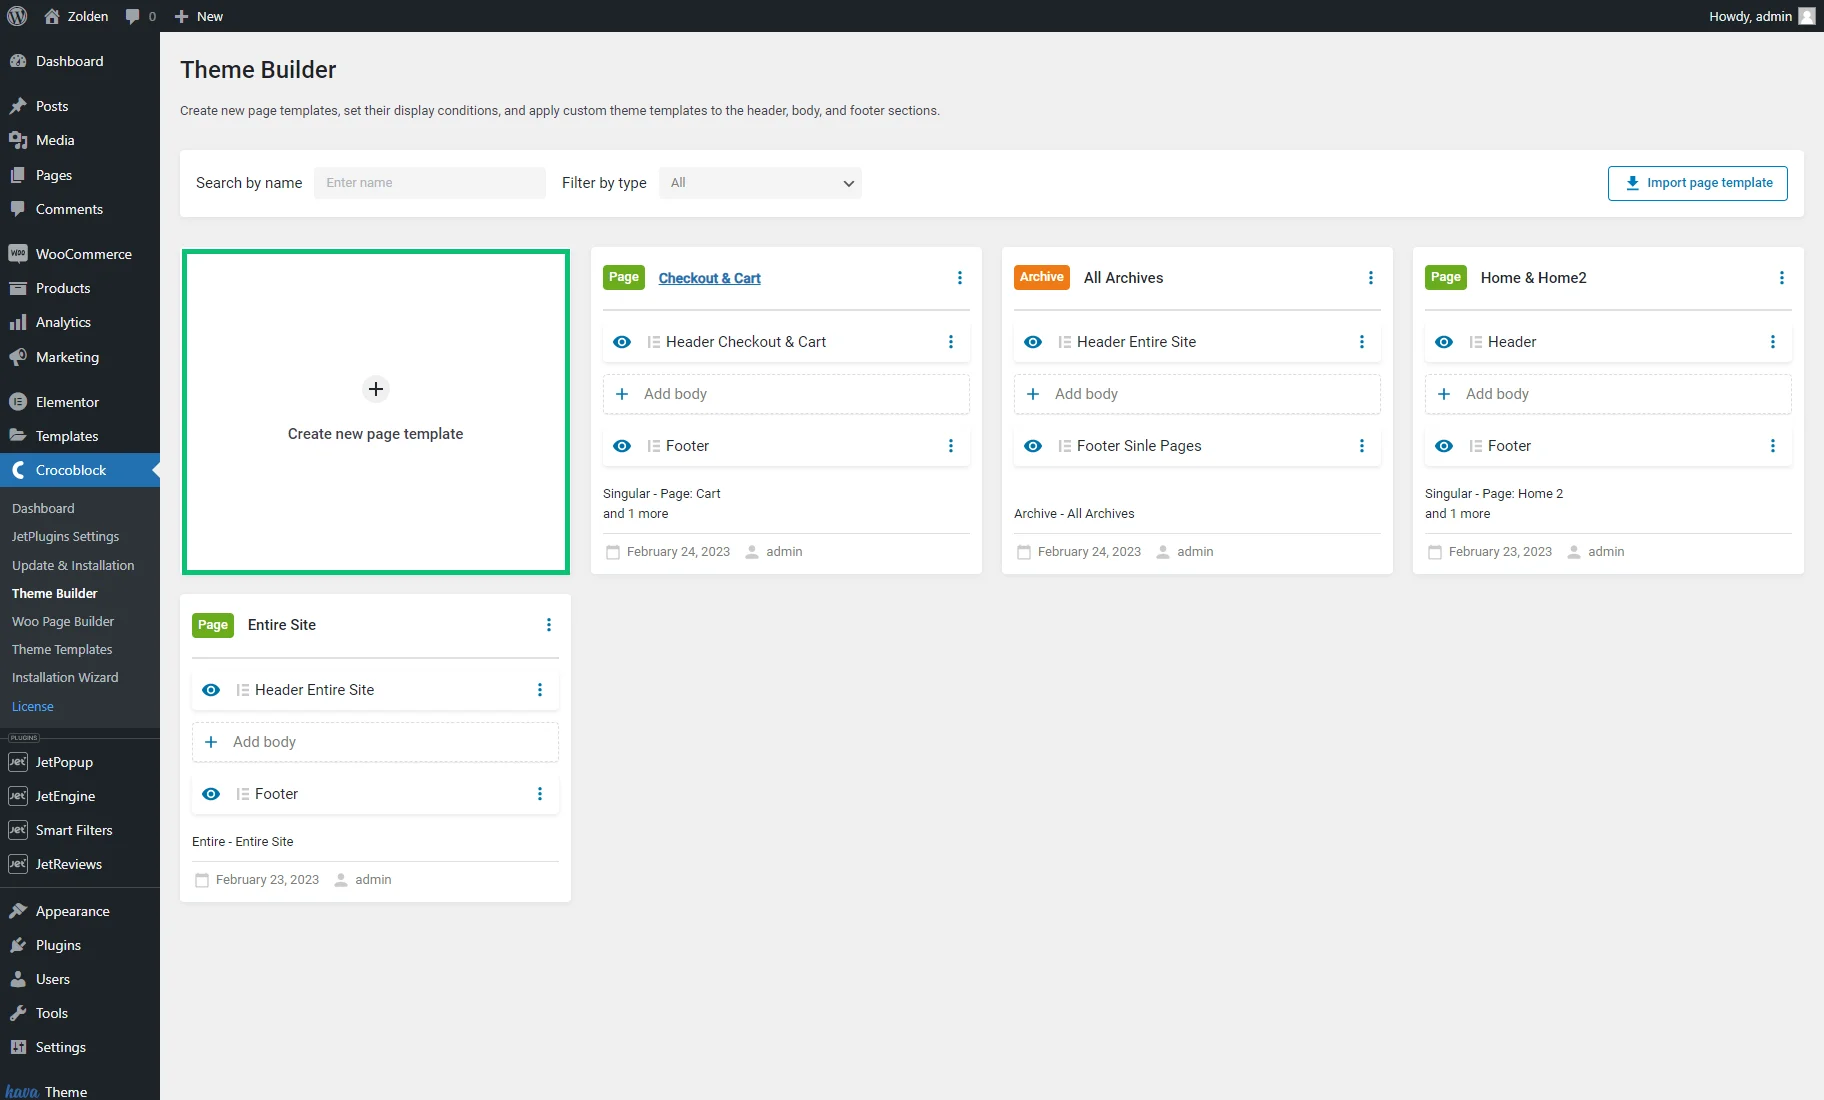
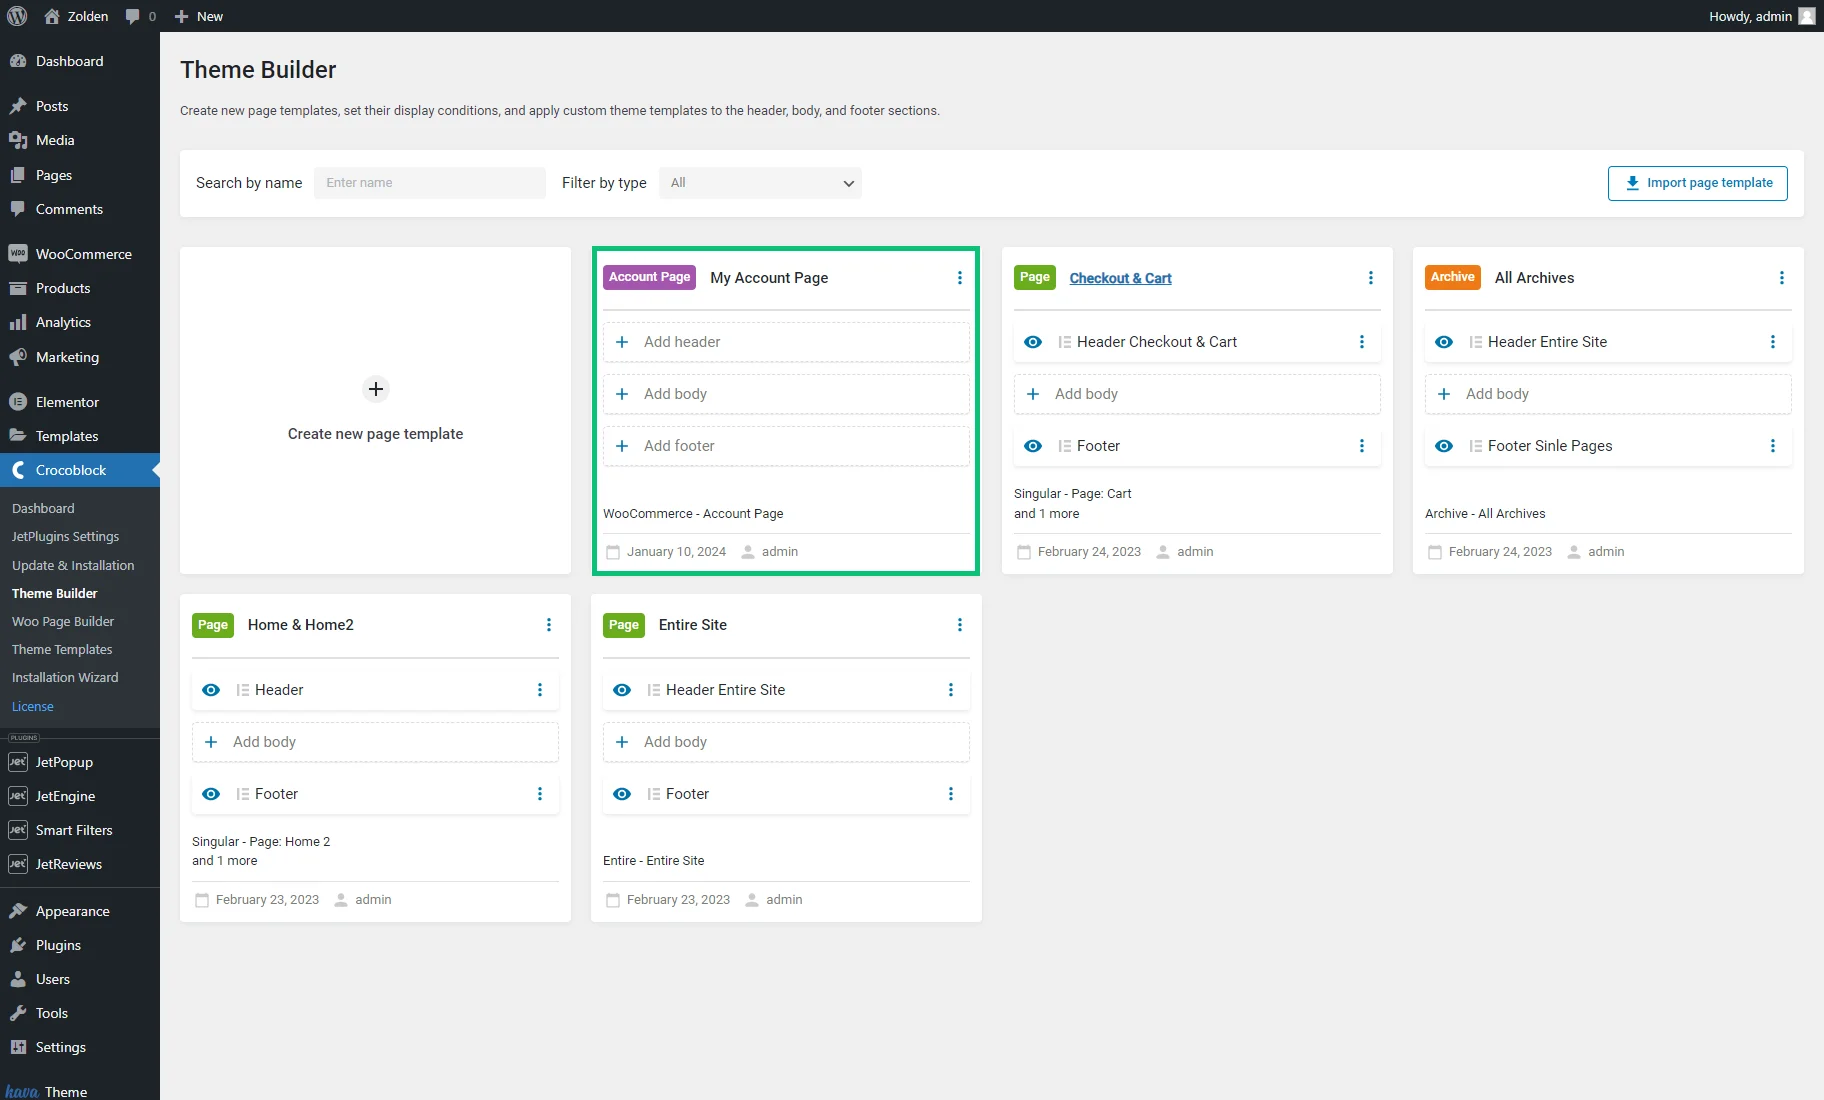
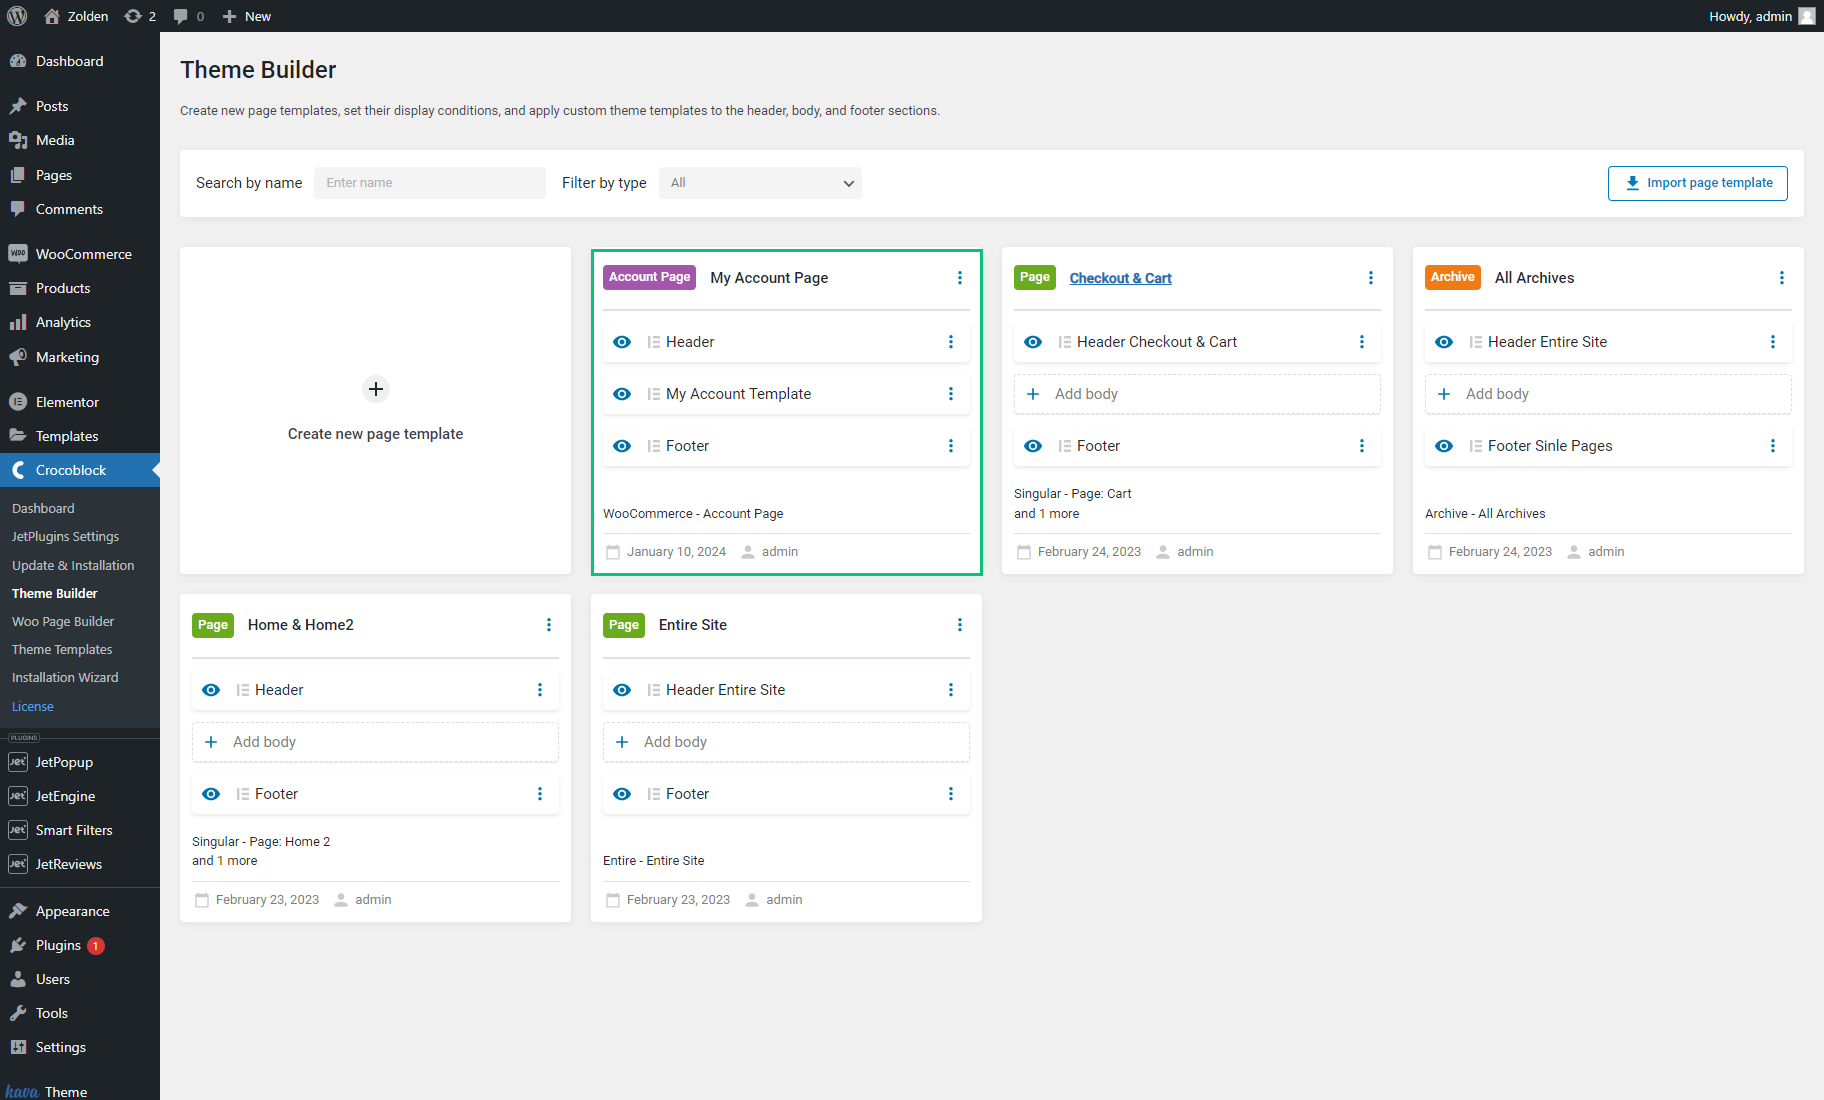
Proceed to WordPress Dashboard > Crocoblock > Theme Builder and click the “Create new page template” button.
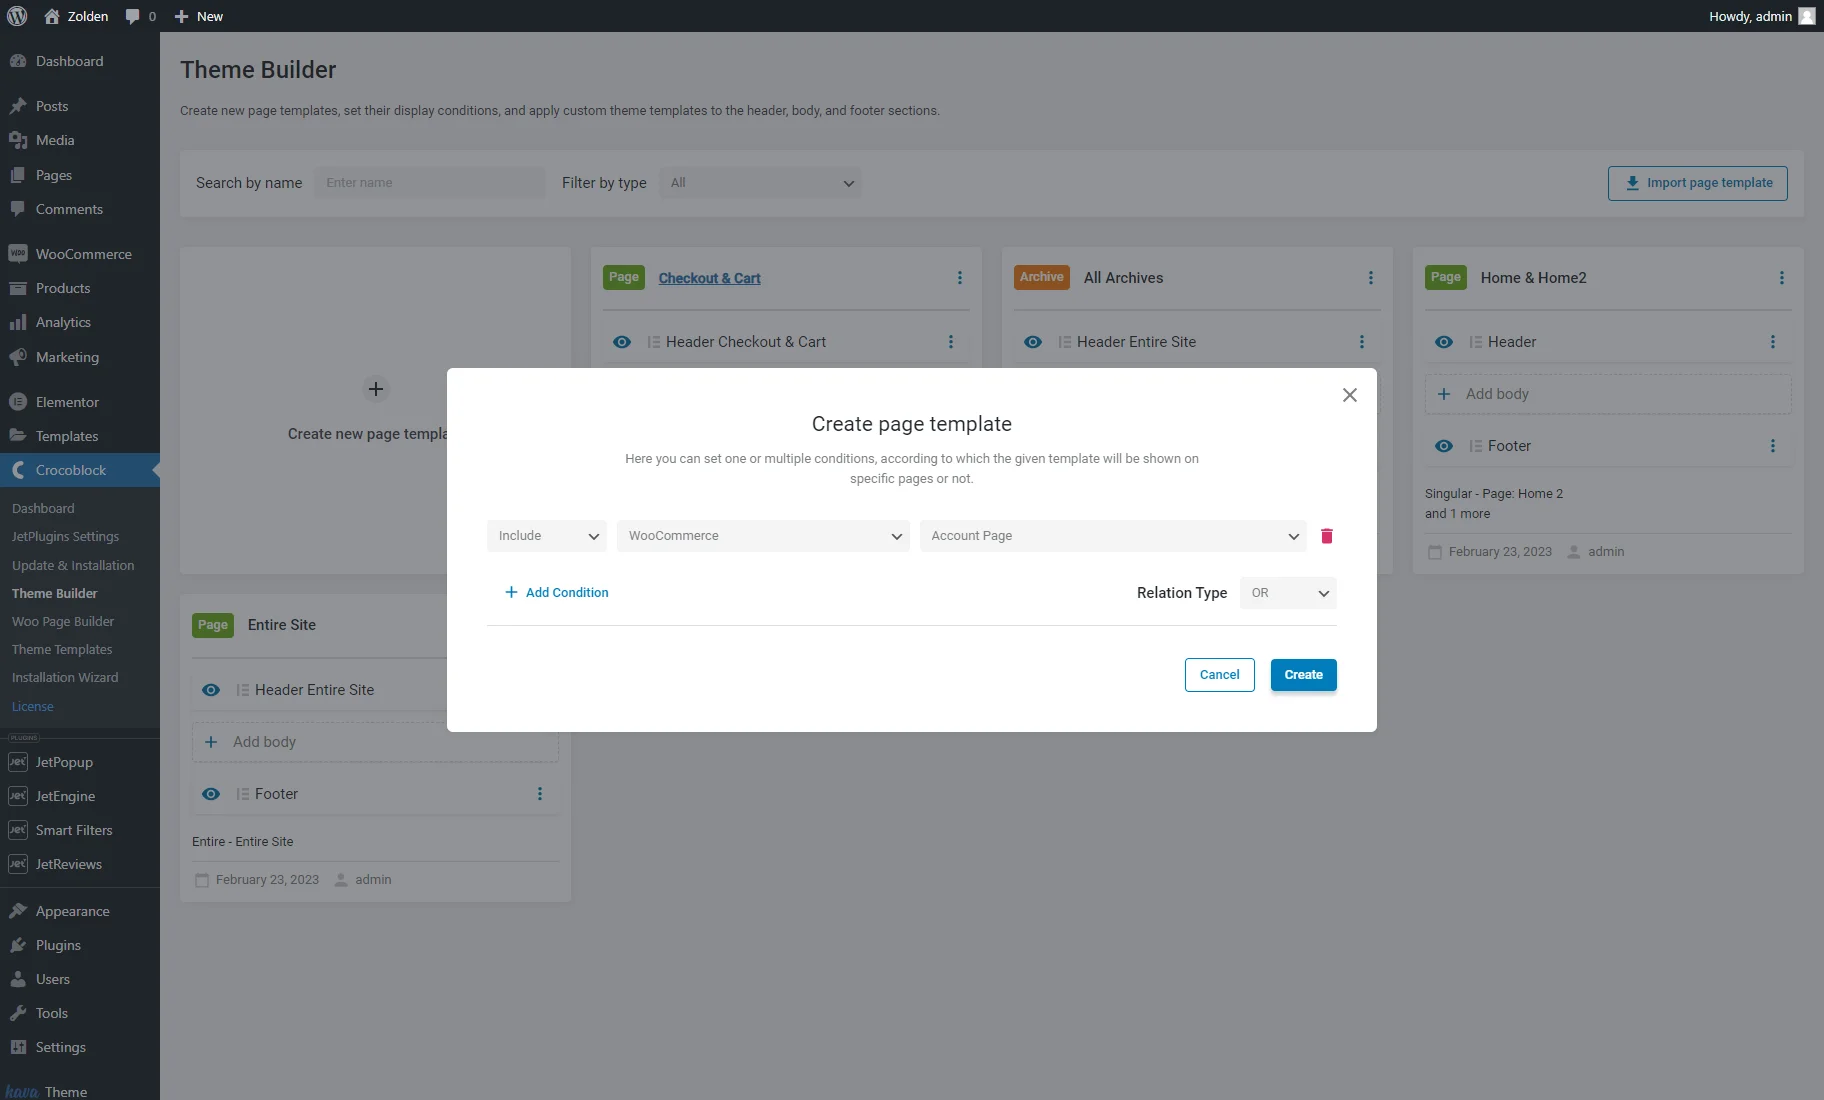
A new pop-up window will allow you to set one or multiple conditions, according to which the given template will be displayed on specific pages or not.
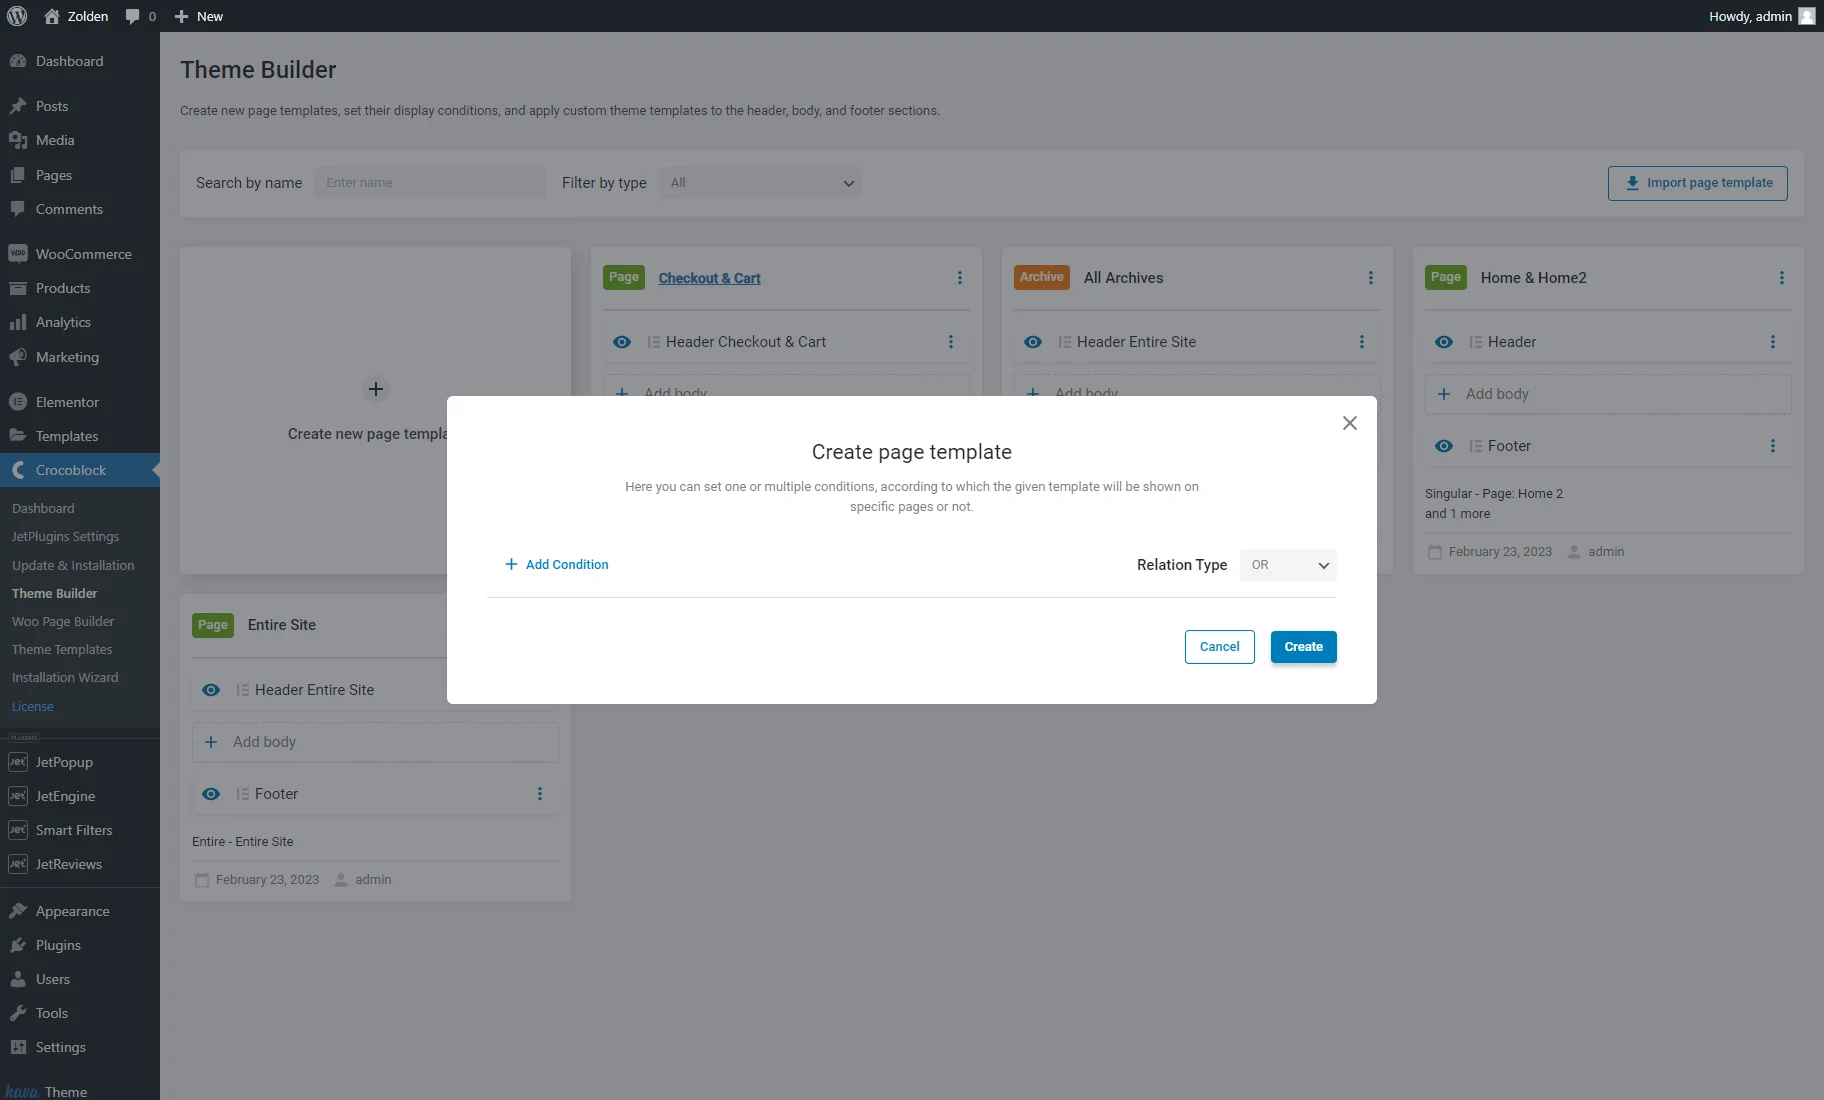
Hit the “+ Add Condition” button and select the “Include,” “WooCommerce,” and “Account Page” options from the drop-down menus.
Once you hit the “Create” button, you will see a new template in the JetThemeCore dashboard. Give it a name.
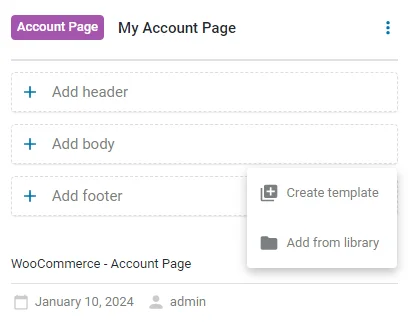
Firstly, click the “+ Add body” button to trigger the “Create template” and “Add from library” options.
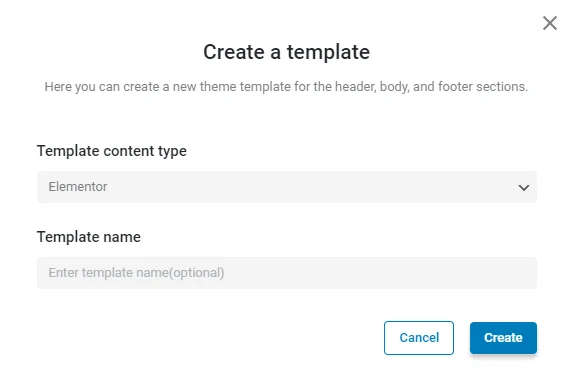
Hit the “Create template” button to open a new pop-up if you want to create the My Account page from scratch. Pick the “Elementor” Template content type, enter the Template name if needed, and push the “Create” button.
In the Template created pop-up, you can hit the “Edit later” button to close the pop-up and stay in the Theme Builder tab or the “Go to editor” button to proceed to the Elementor builder.
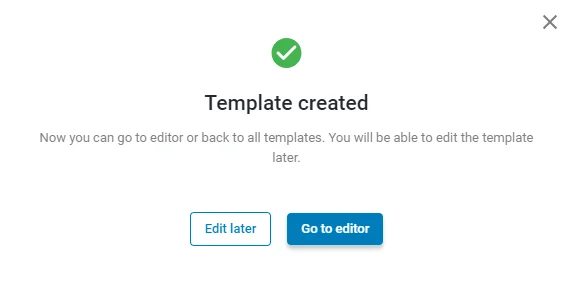
If you hit the “Go to editor” button, you can customize the My Account body template as described in the Create a Custom My Account Page template chapter of this tutorial.
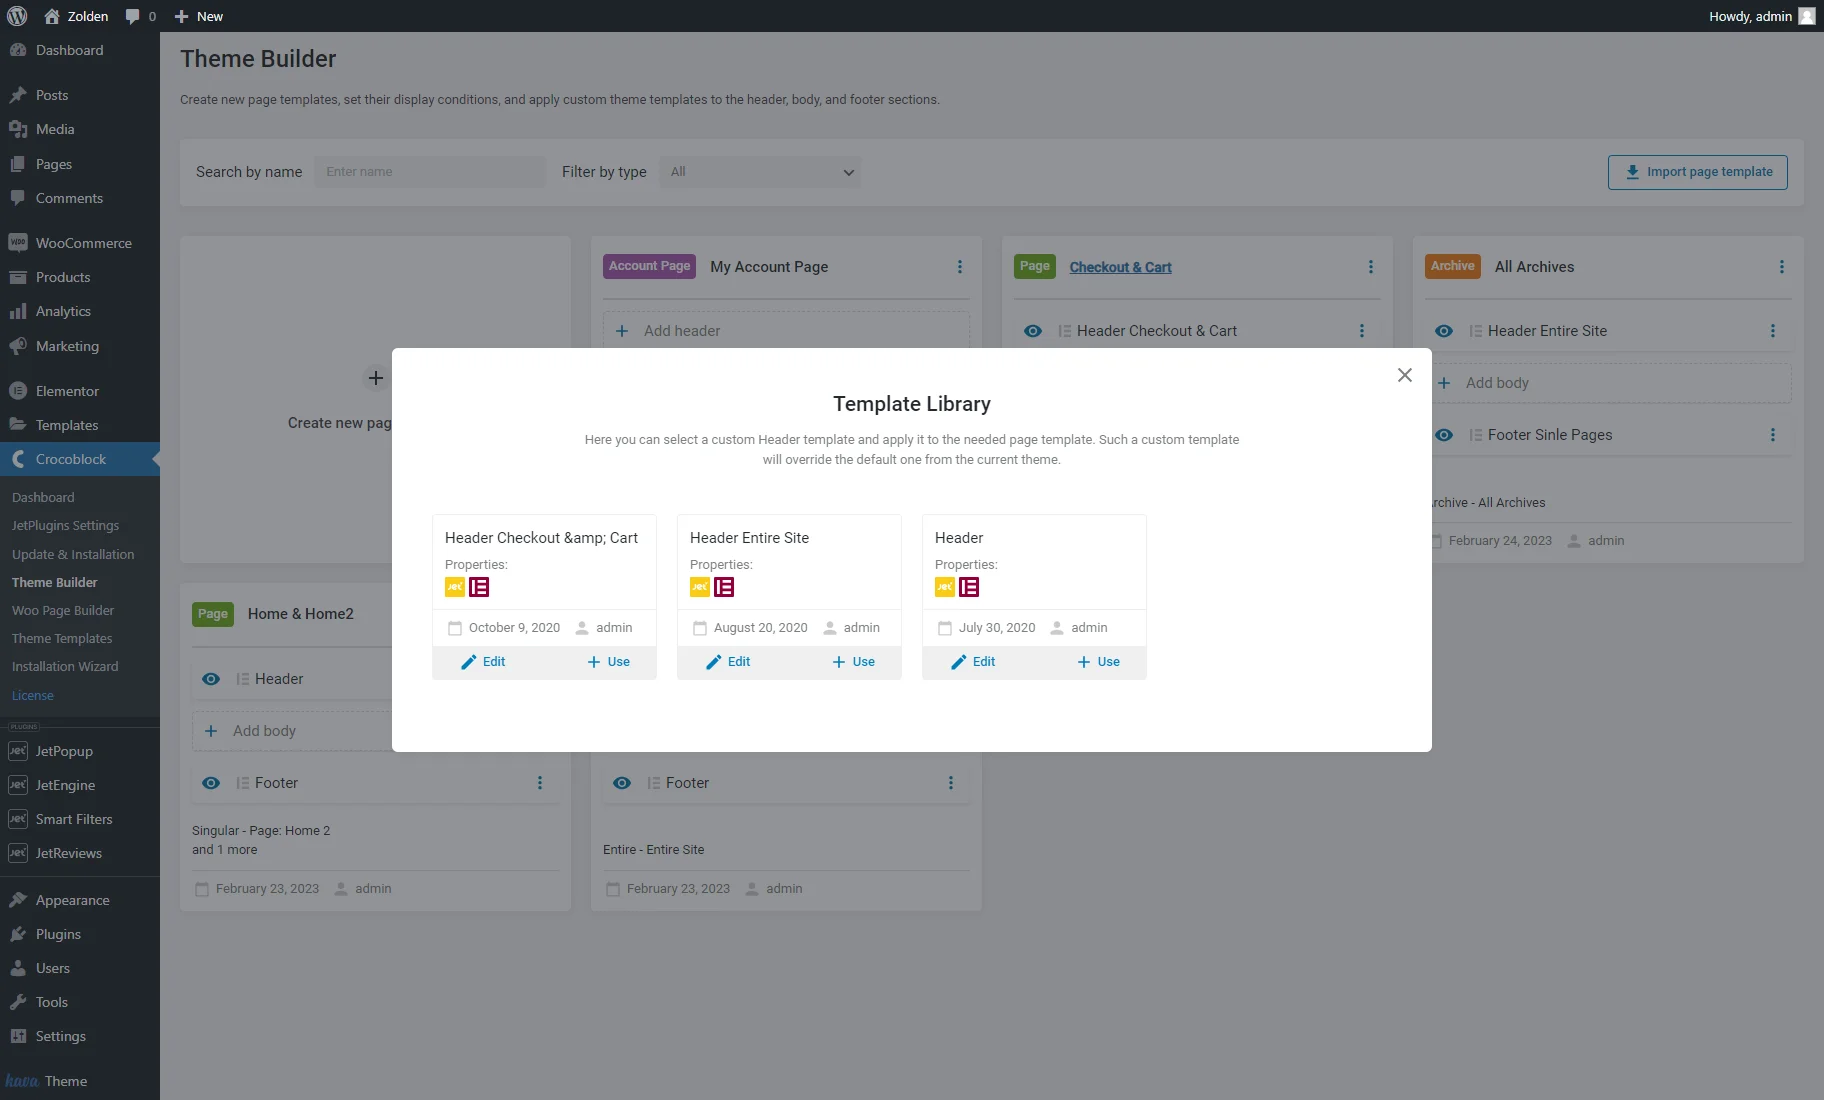
If you want to add an already created My Account page template, hit the “Add from library” button and the “+ Use” button under the desired template.

Add a custom header and footer to the My Account page
The JetThemeCore plugin allows adding custom headers and footers to the pages right from the dashboard.
Click the “Add header” button and create a new header, or choose one from the library.
Repeat the same steps and add a custom footer if needed. As a result, you’ll get the My Account page template with header, body, and footer templates.
Check the JetWooBuilder settings
Now, when you are done with the page template design, it is time to check the JetWooBuilder settings.
Go to WordPress Dashboard > WooCommerce > Settings > JetWooBuilder tab. Scroll down to the My Account Page section and ensure that the Custom My Account Page checkbox is disabled.
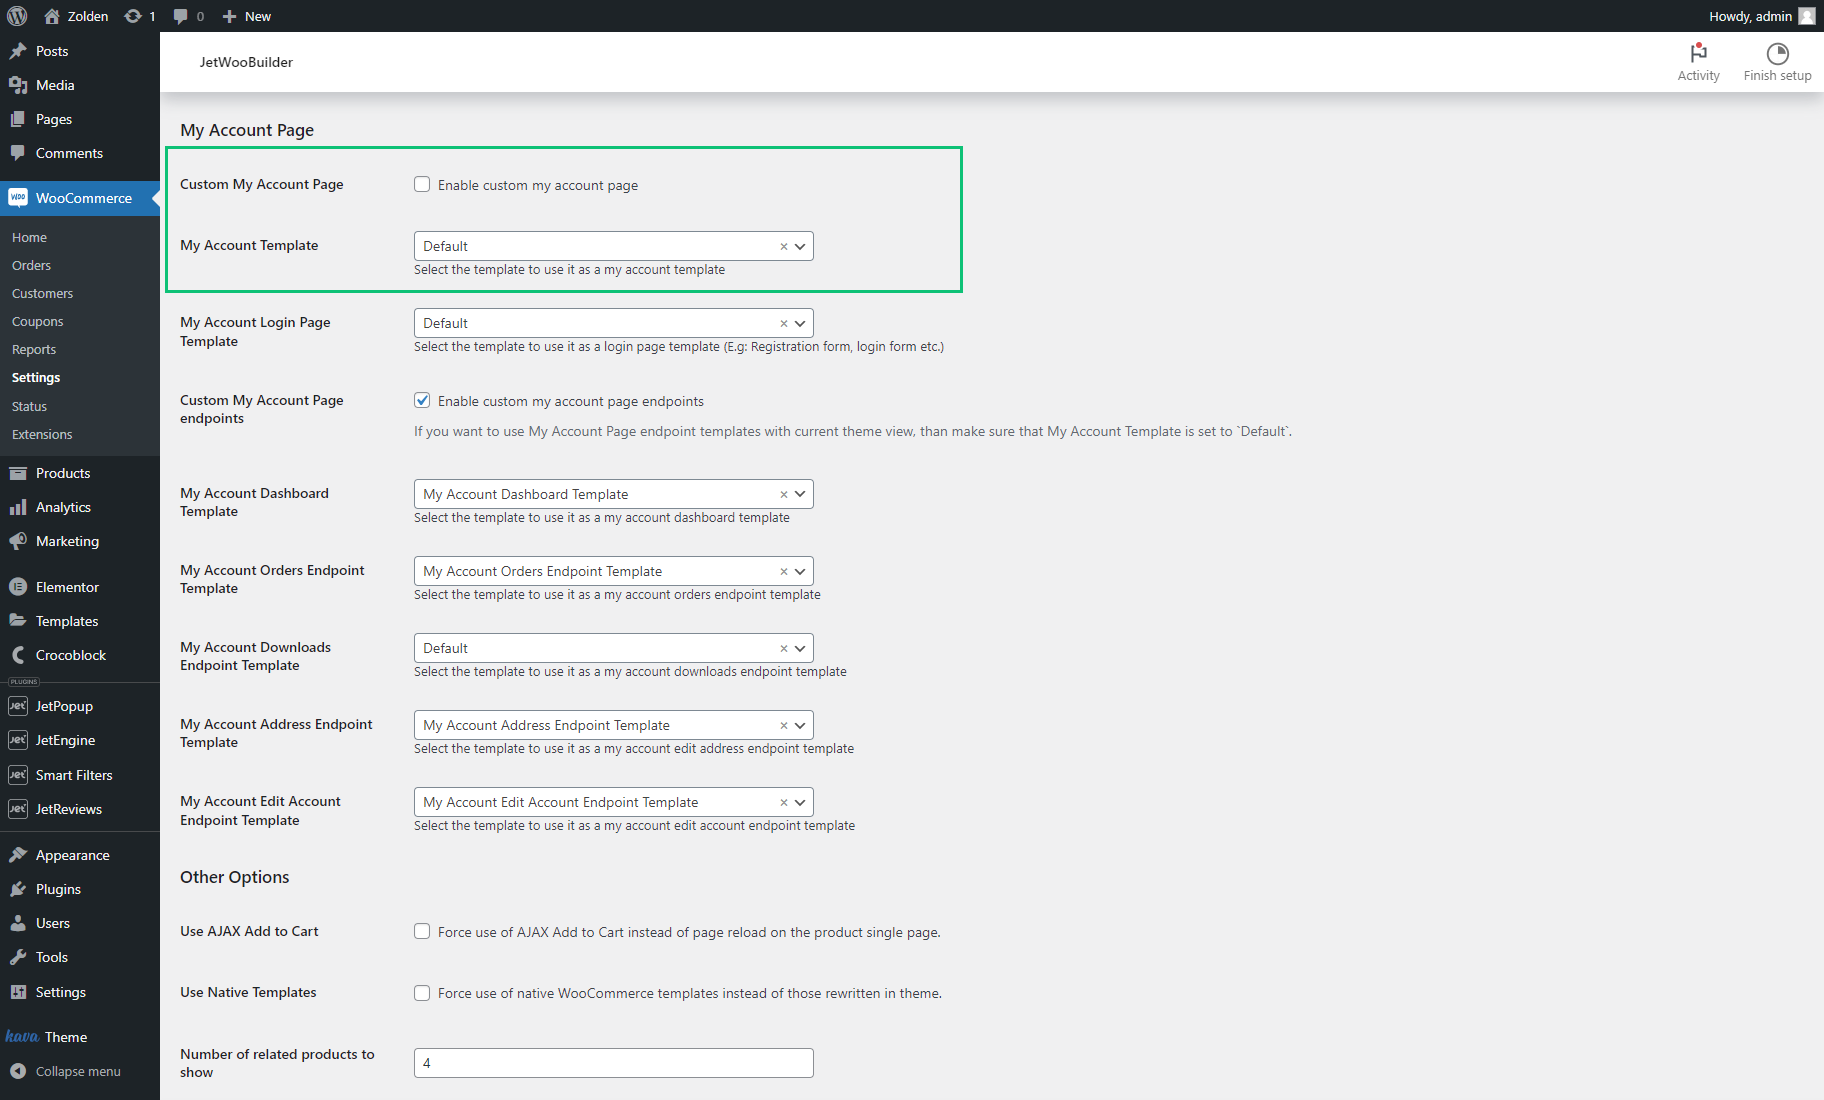
There is no need to choose the template in the My Account Template drop-down menu as we have already assigned the template to the My Account page in the Theme Builder dashboard.
Scroll the page down and click the “Save Changes” button.
Finally, check the result on the My Account page on the front end.
That’s all. Now you know how to use My Account Page widgets and build the My Account page with endpoint templates with the help of the JetWooBuilder and JetThemeCore plugins.