Adding Sites to the Subscription
Specify sites you want to work with the Crocoblock plugins.
Following this tutorial, one can specify sites to work with the Crocoblock plugins after downloading, installing, and activating any purchased plugins for one or several sites, depending on the license. But first, these sites should be added to the list of managed sites.
Please note that one should list sites so they can work with the Crocoblock plugins via a personal Crocoblock account. Thus, proceed to the Crocoblock account.
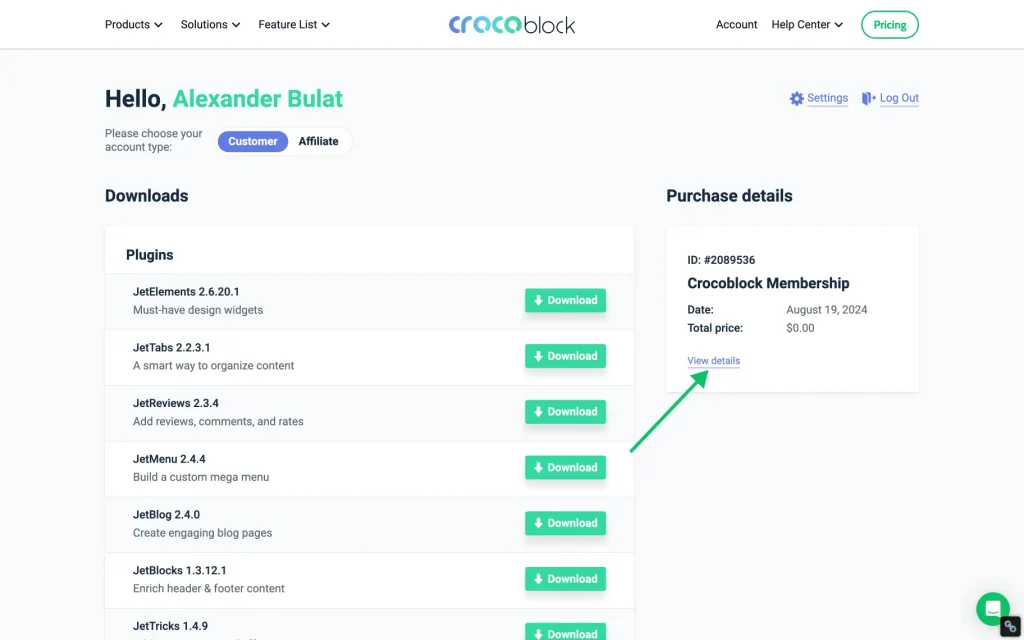
Navigate to the section with the plugin or subscription details on the right side. Click the “View details” link in the Purchase details block for the plugin that needs to be applied to your site(s).
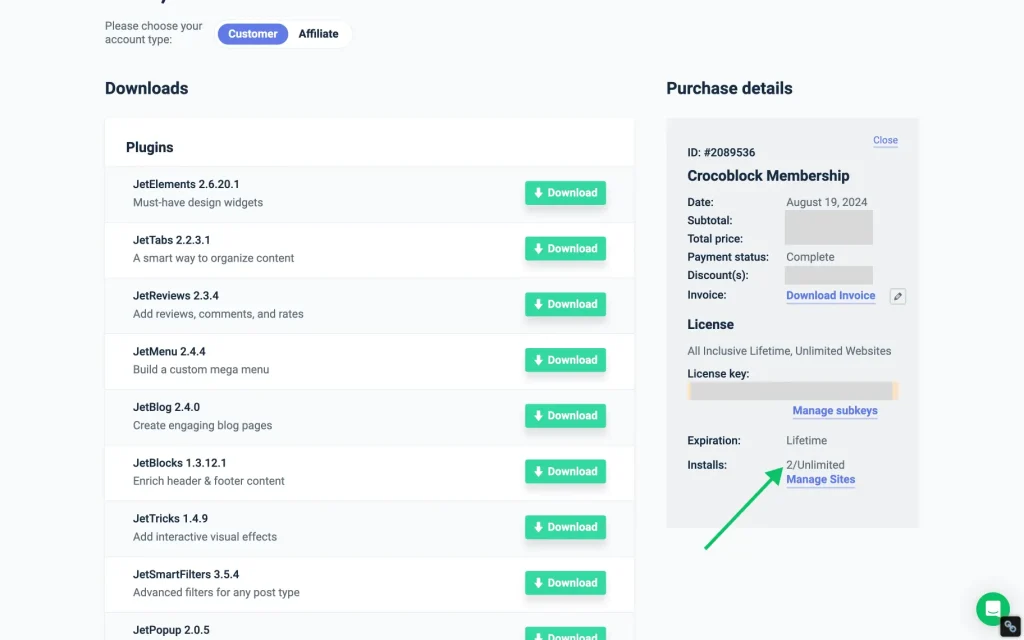
Then, scroll down the Purchase Details block to navigate to the Installs. This field shows the number of active sites from the possible sites according to your license.
For example, the “2/Unlimited” text means two active sites from the number of possible.
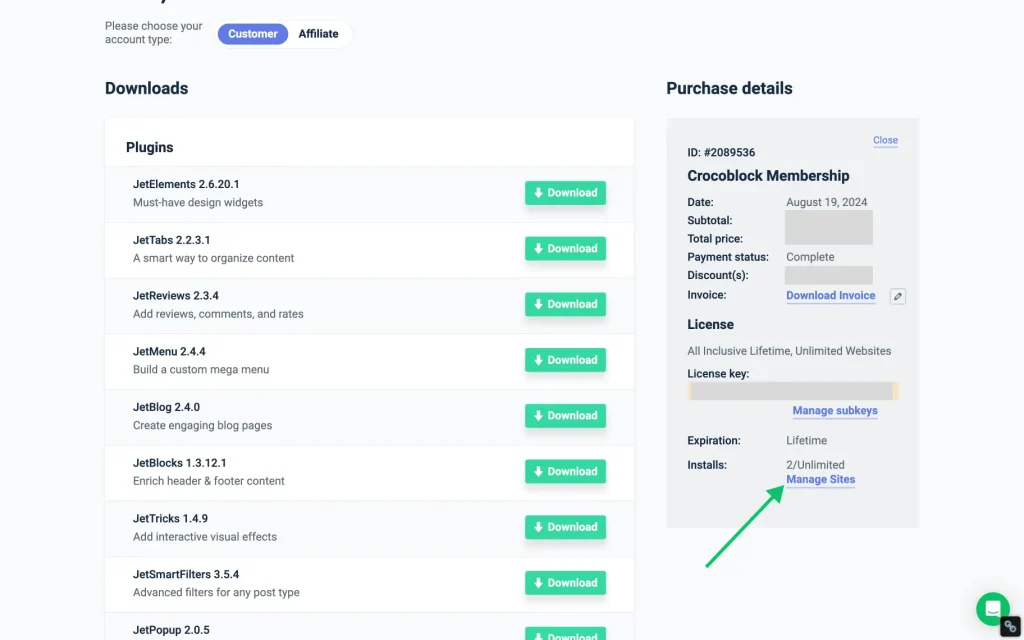
Click the “Manage Sites” link to add more sites to your license or deactivate them.
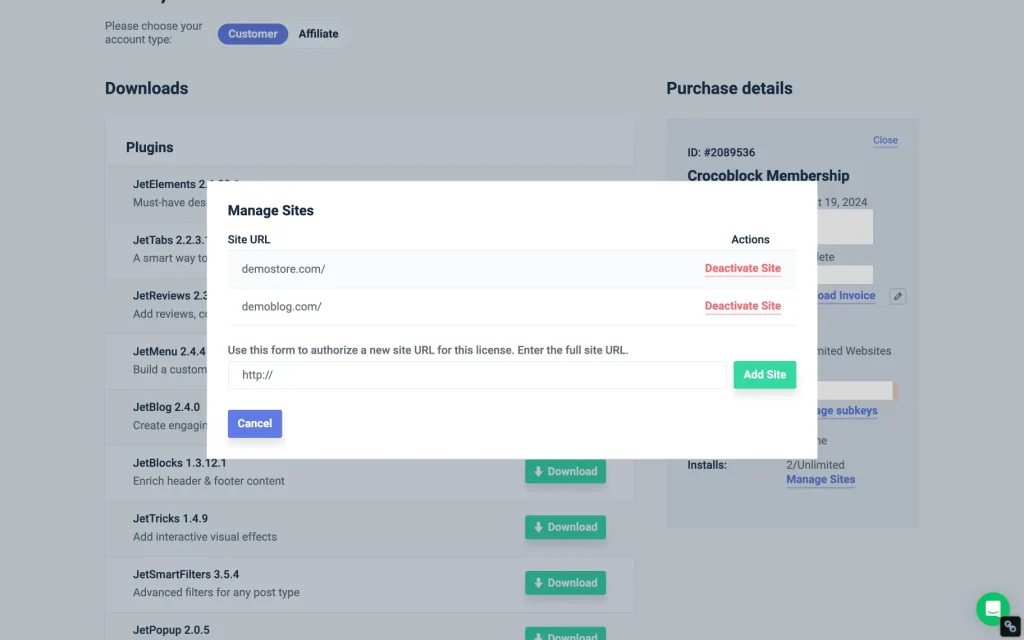
In the pop-up window, add the URL of a website where the license will be activated. Here, one can also deactivate the license from any website where it is installed.
If a new site needs to be authorized, enter the full site URL in the free form field under the Use this form to authorize a new site URL for this license. Enter the full site URL text.
If the license needs to be deactivated on the website, one needs to press the “Deactivate Site” link, and the site will be removed from this list. Thus, the license on the deleted site will not work further (no upcoming product updates will be available, but everything created on the website will be saved).
To roll the entire block up, click on the “Close” button (at the top of the Purchase Details block).
That’s all about adding sites to the subscription. By following this guide, one can activate the Crocoblock plugin license on newly created or established WordPress sites.


