How to Create a Listing Template for Custom Taxonomy in Elementor
From this tutorial, you will learn how to create a listing template for the terms from custom taxonomy with the JetEngine plugin.
Before you start, check the tutorial requirements:
- Elementor (Free version)
Add Meta Fields to Taxonomy
Dynamic Field widget can display the taxonomy’s name, description, and post count. However, if you want to add any other additional data, like a single picture or image gallery, you will need to add corresponding meta fields.
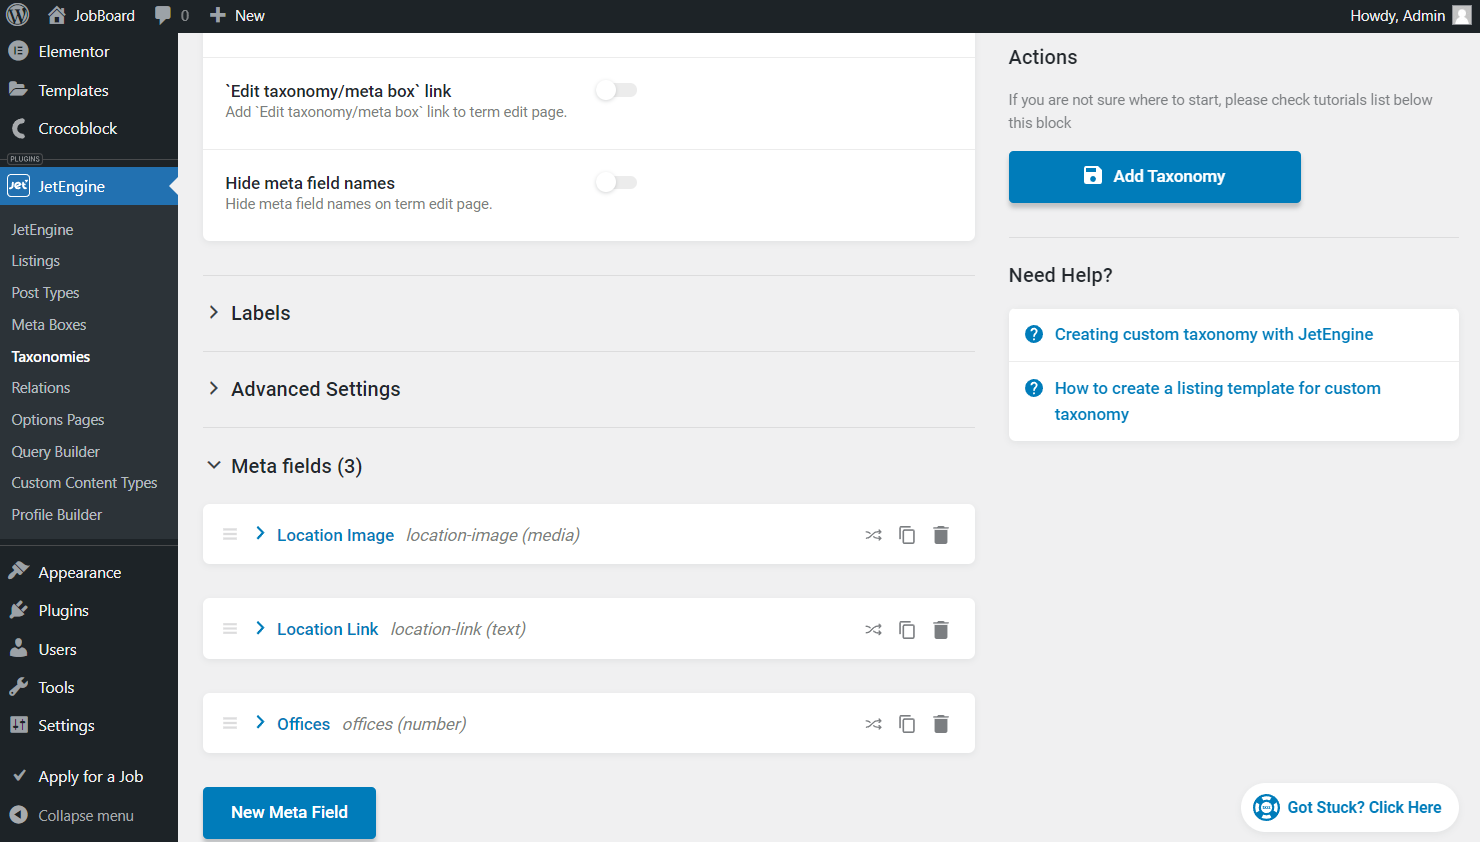
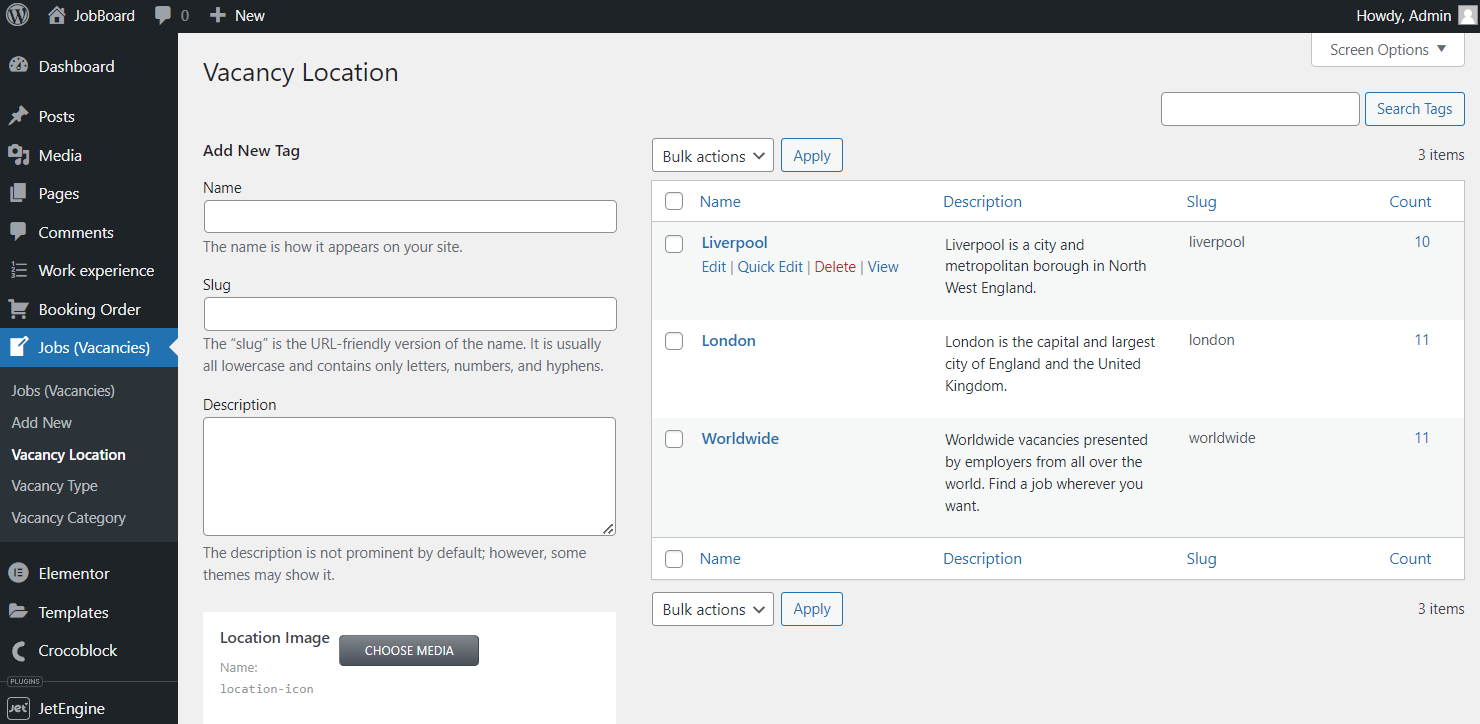
Custom taxonomy
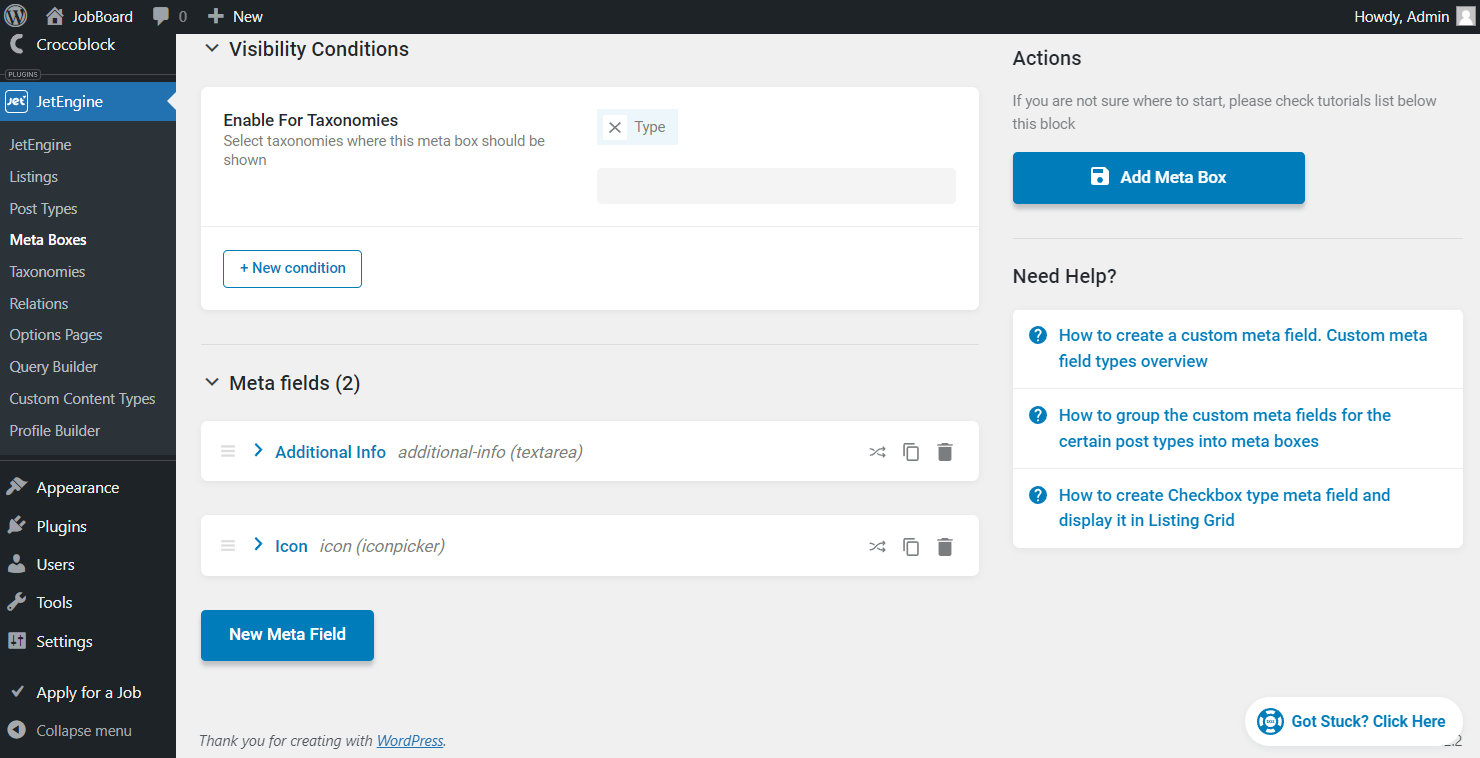
If you are creating a custom taxonomy, you can add meta fields right in the taxonomy editing window. Go to WordPress Dashboard > JetEngine > Taxonomies and either click the “Add New” button or choose to edit the existing taxonomy.
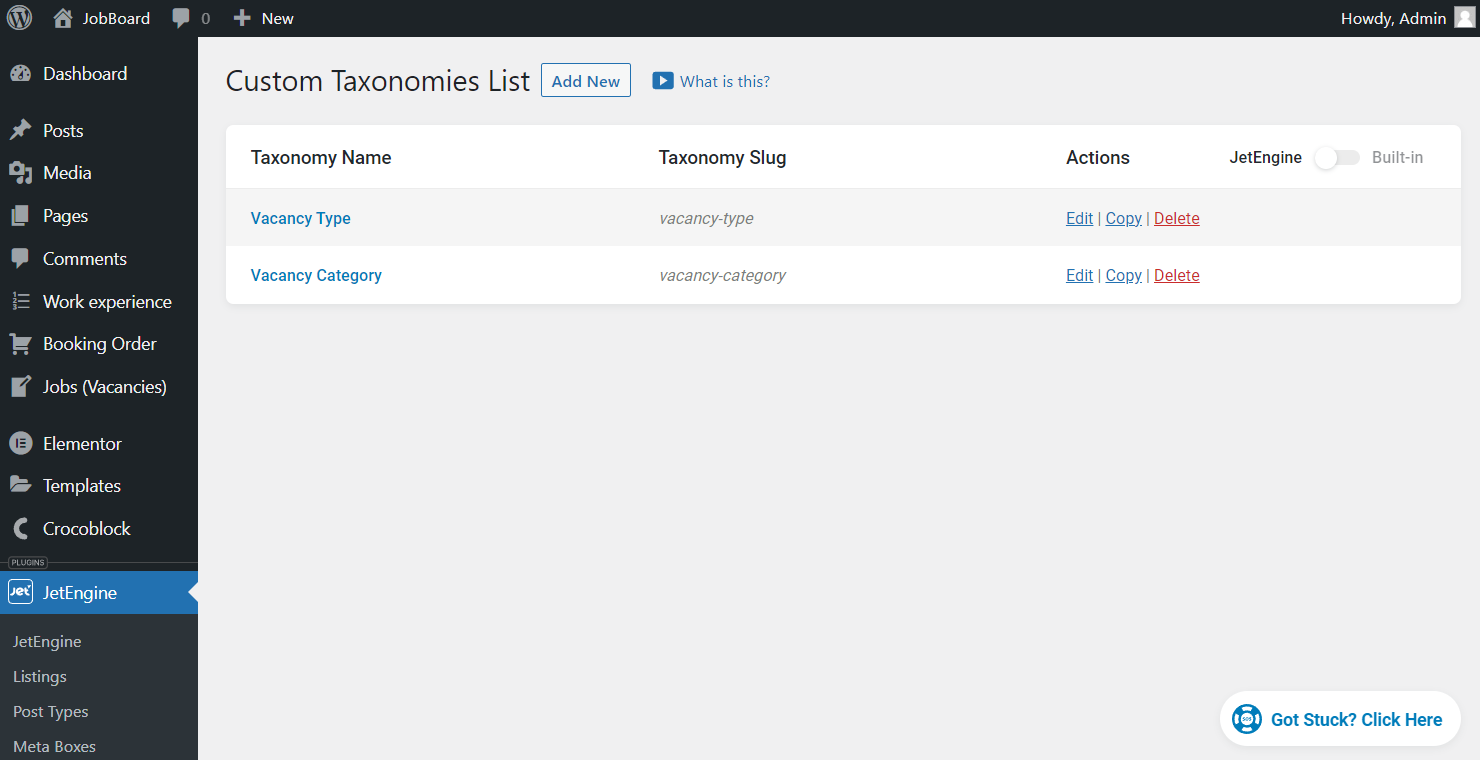
The meta fields can be added in the Meta Fields section by hitting the “New Meta Field” button.
Don’t forget to click the “Add/Update Taxonomy” button.
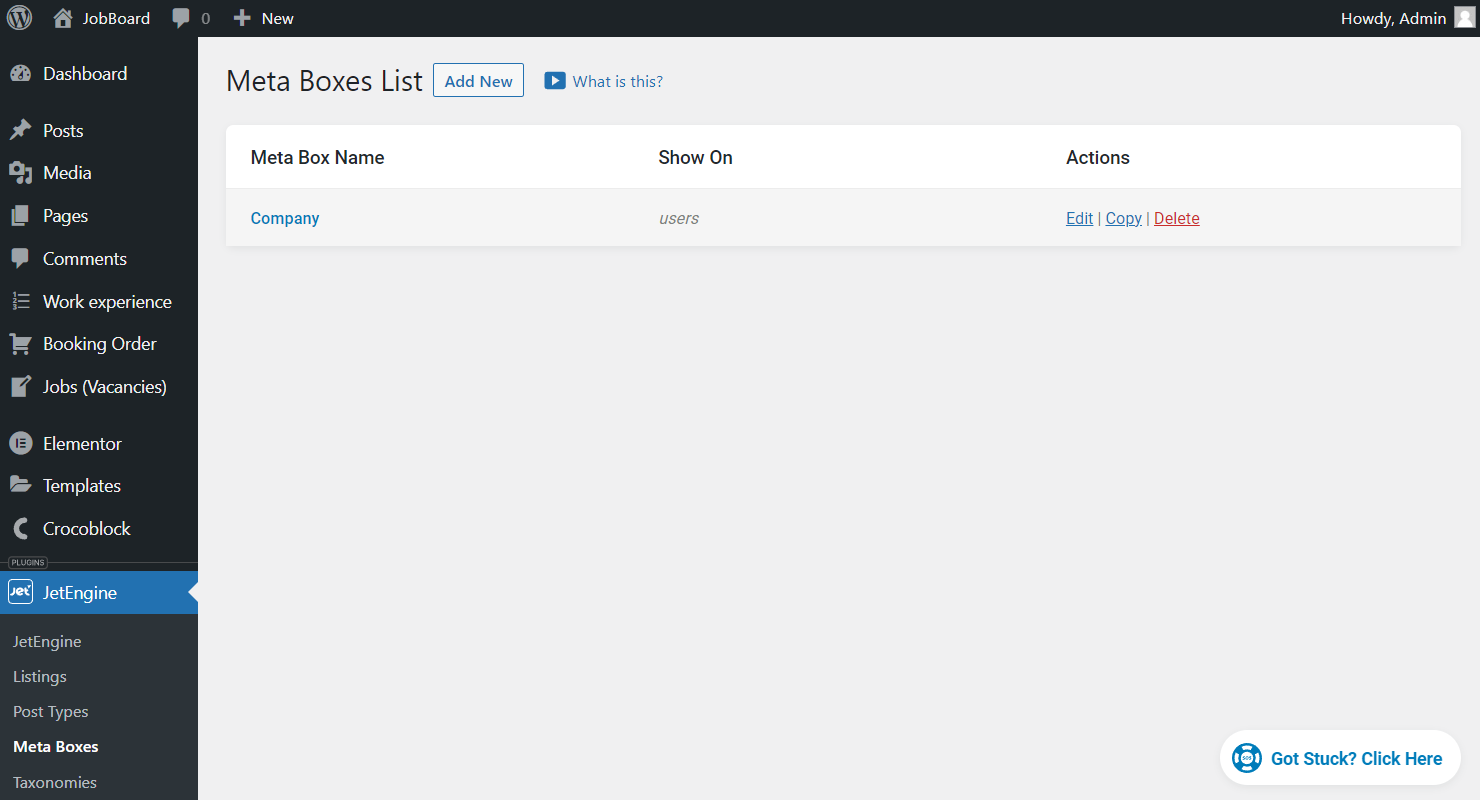
Default taxonomy
If you are going to create a Listing for the default term, you can add it to a meta box.
Go to the WordPress Dashboard > JetEngine > Meta Boxes and press the “Add New” button.
Open the General Settings block. In the Meta Box for drop-down menu, choose the “Taxonomy” option, and in the Enable for Taxonomies field, pick the needed default WordPress term.
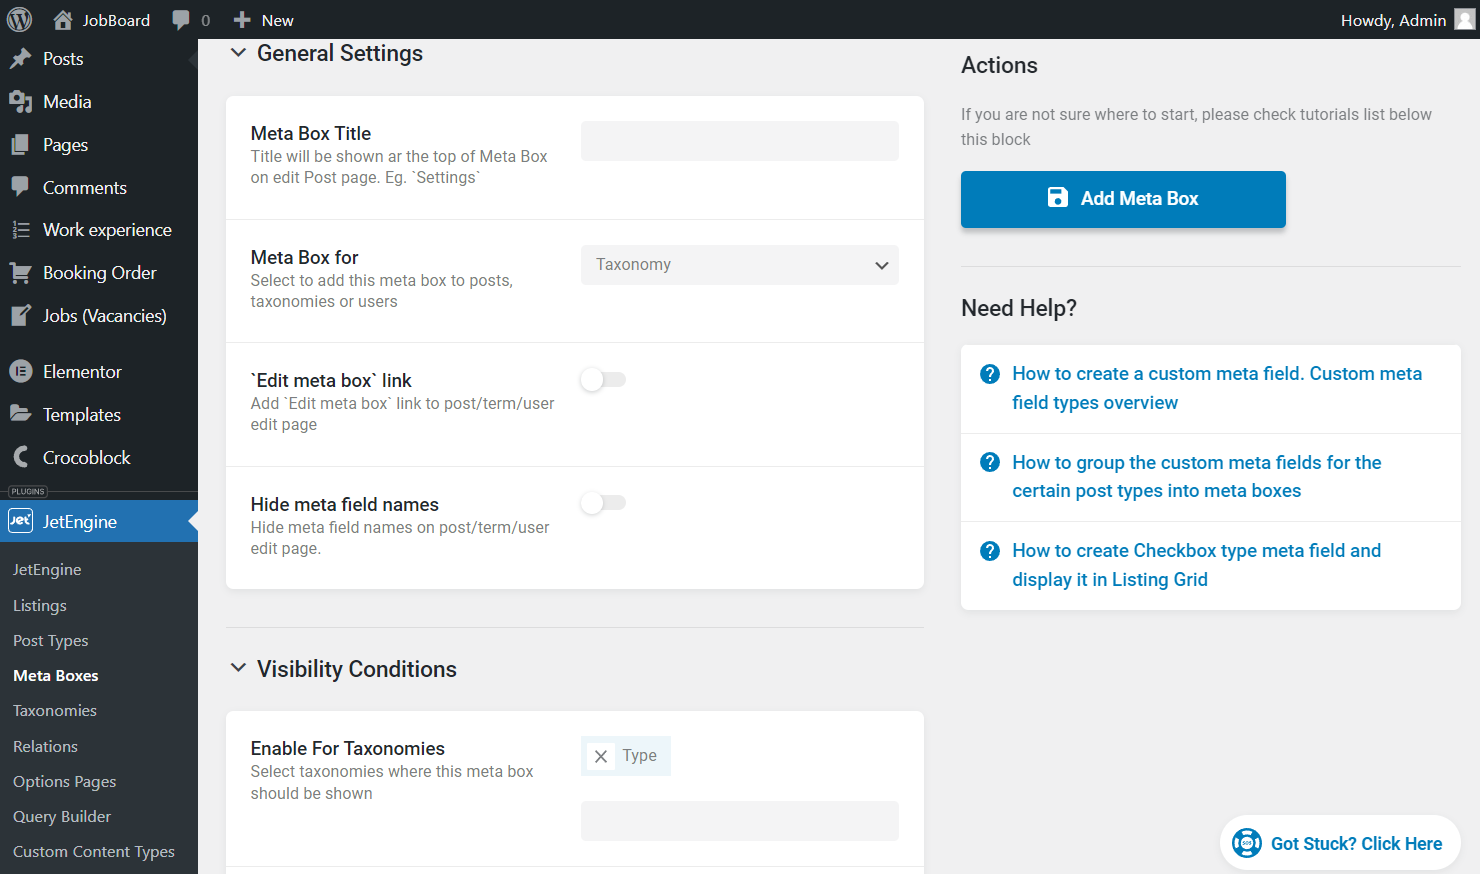
Here, the Meta Fields section is also present. All the needed fields can be added by pressing the “New Meta Field” button.
After completing data about meta fields, press the “Add/Update Meta Box” button.
Create Listing Template
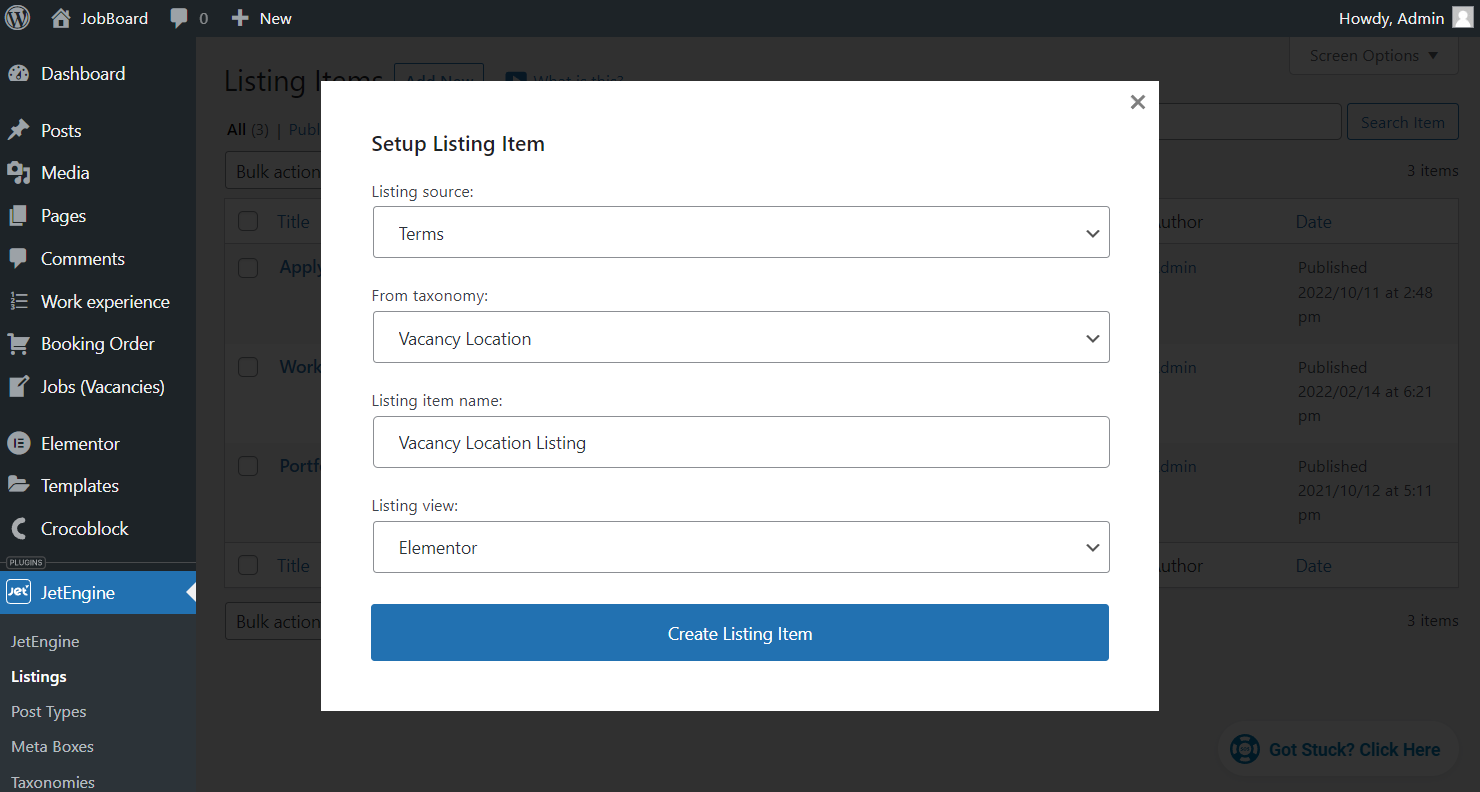
To start, go to the WordPress Dashboard > JetEngine > Listings to see the Listing Items page.
The next step is to click the “Add New” button at the top of the page. Then a pop-up will appear.

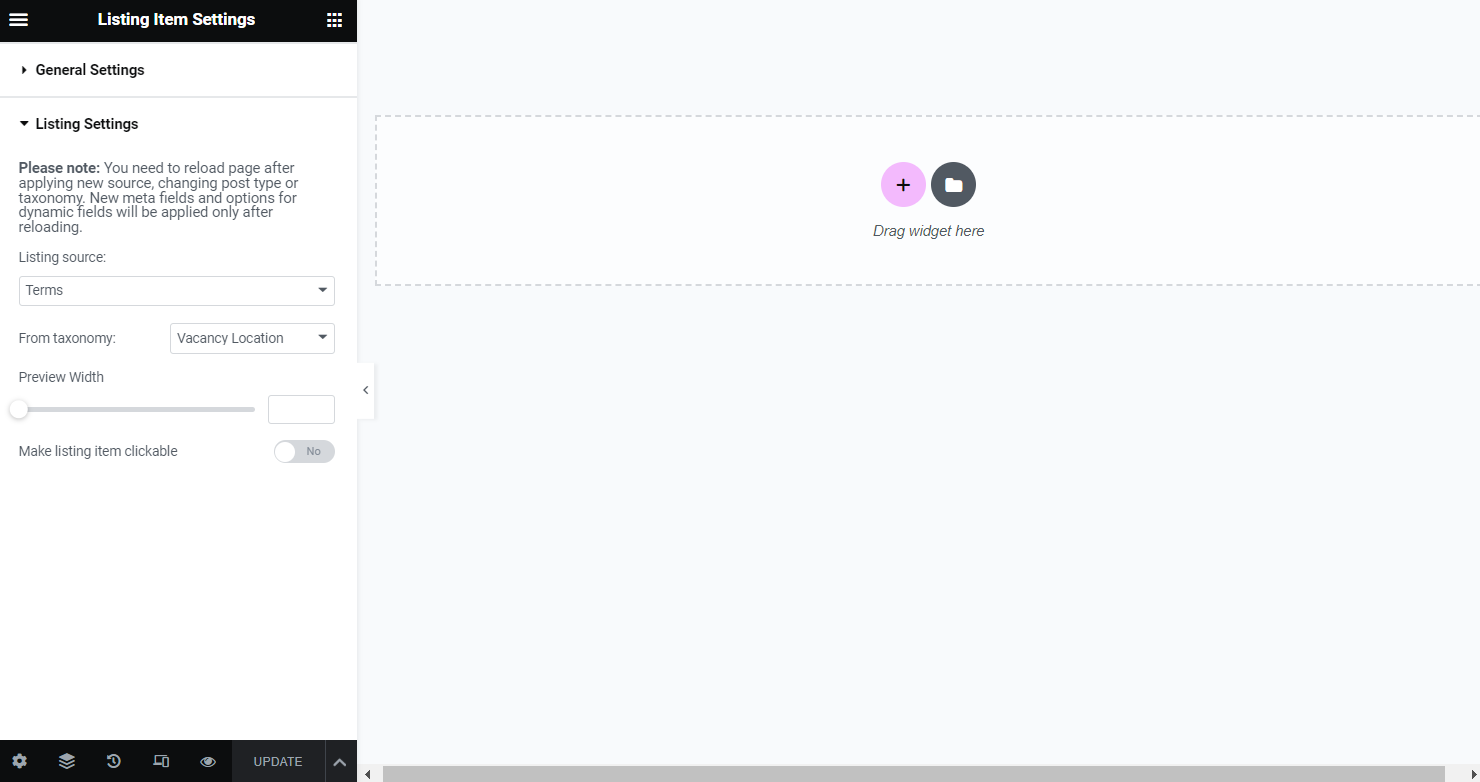
Choose the “Terms” option in the Listing source field and choose the needed taxonomy in the From taxonomy drop-down list. Then set the Listing item name and select the “Elementor” editor as Listing view.
Afterward, press “Create Listing Item.”
Adjust listing item settings
If needed, the general settings of the listing can be altered.
In the lower-left corner of the screen, find the settings icon and click on it.
In the General Settings section, you can change the Title and Status of the listing item.
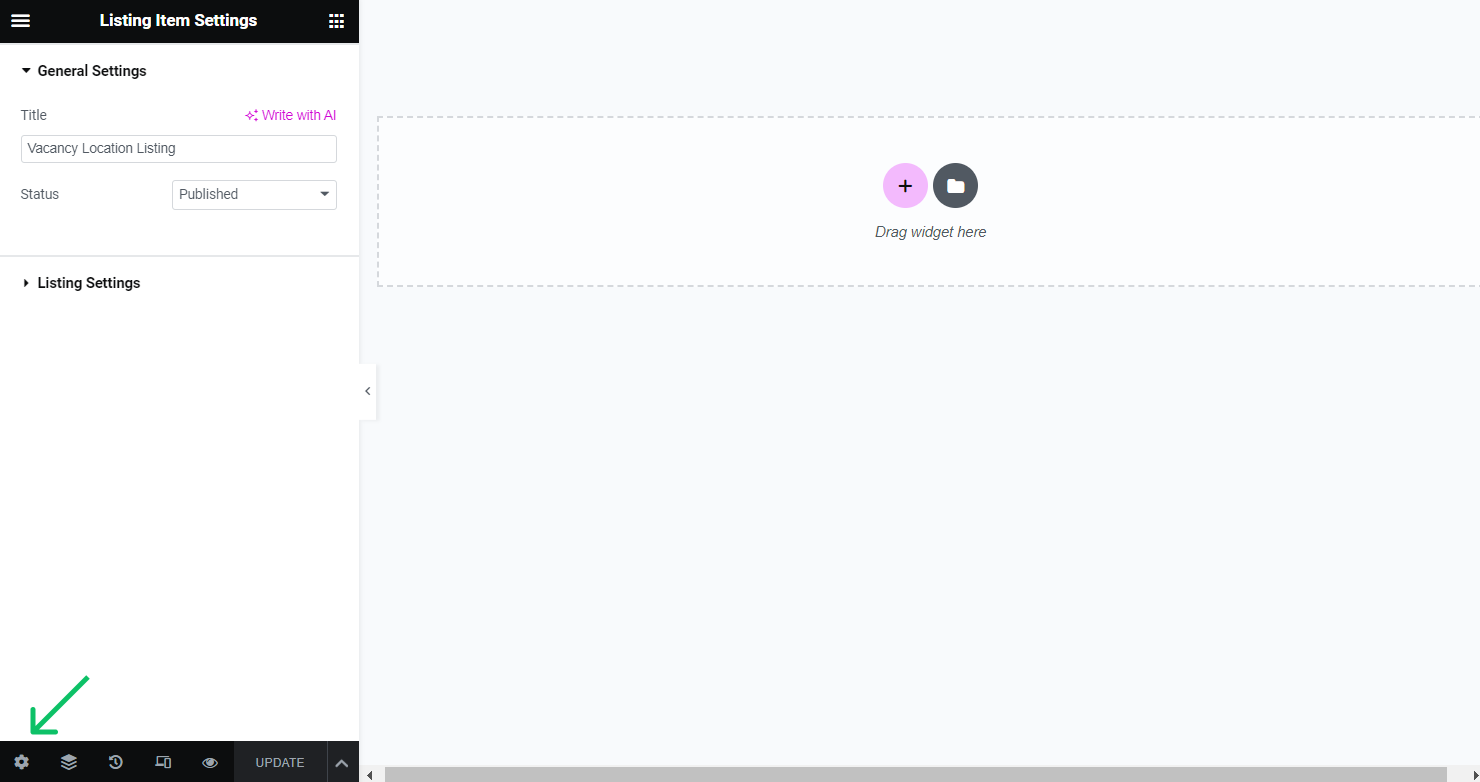
In the Listing Settings section, you can change the Listing source, select another taxonomy in the From taxonomy field, change the Preview Width, and activate the Make listing item clickable switcher, which means adding a permalink to it.
Add dynamic widgets
Now, you can add content to the listing. To pull the dynamic data, use dynamic widgets accessible with JetEngine: Dynamic Field, Dynamic Image, or Dynamic Link.
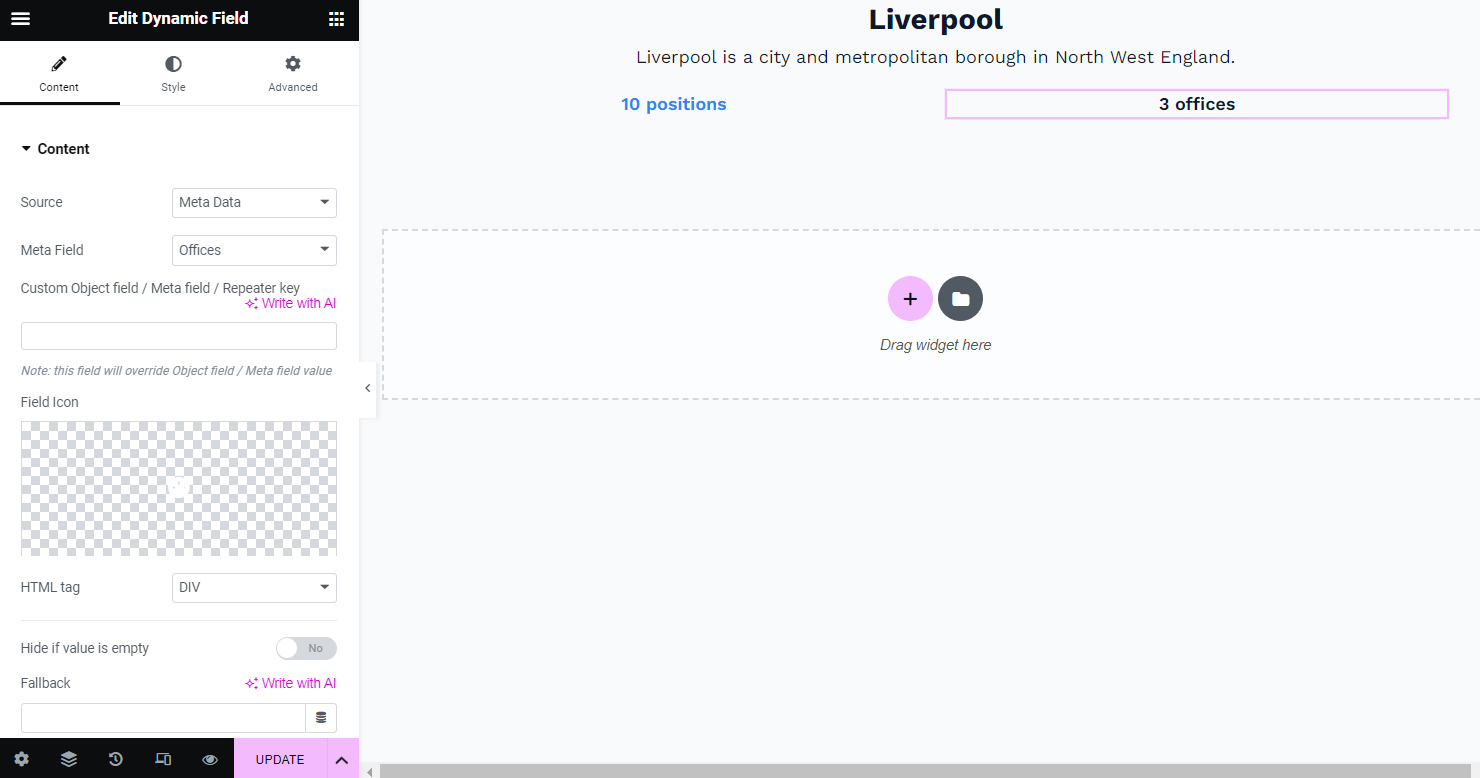
For instance, the Dynamic Field widget can help you add any type of text information to the Listing.
First of all, if you choose the “Post/Term/User/Object Data” option in the Source drop-down list, you will be able to add the “Term name,” “Term description,” and “Posts count.”

With the “Meta Data” Source, you will be able to display the meta fields you have added to the taxonomy earlier. Then you can choose the field you created as the Meta Field.
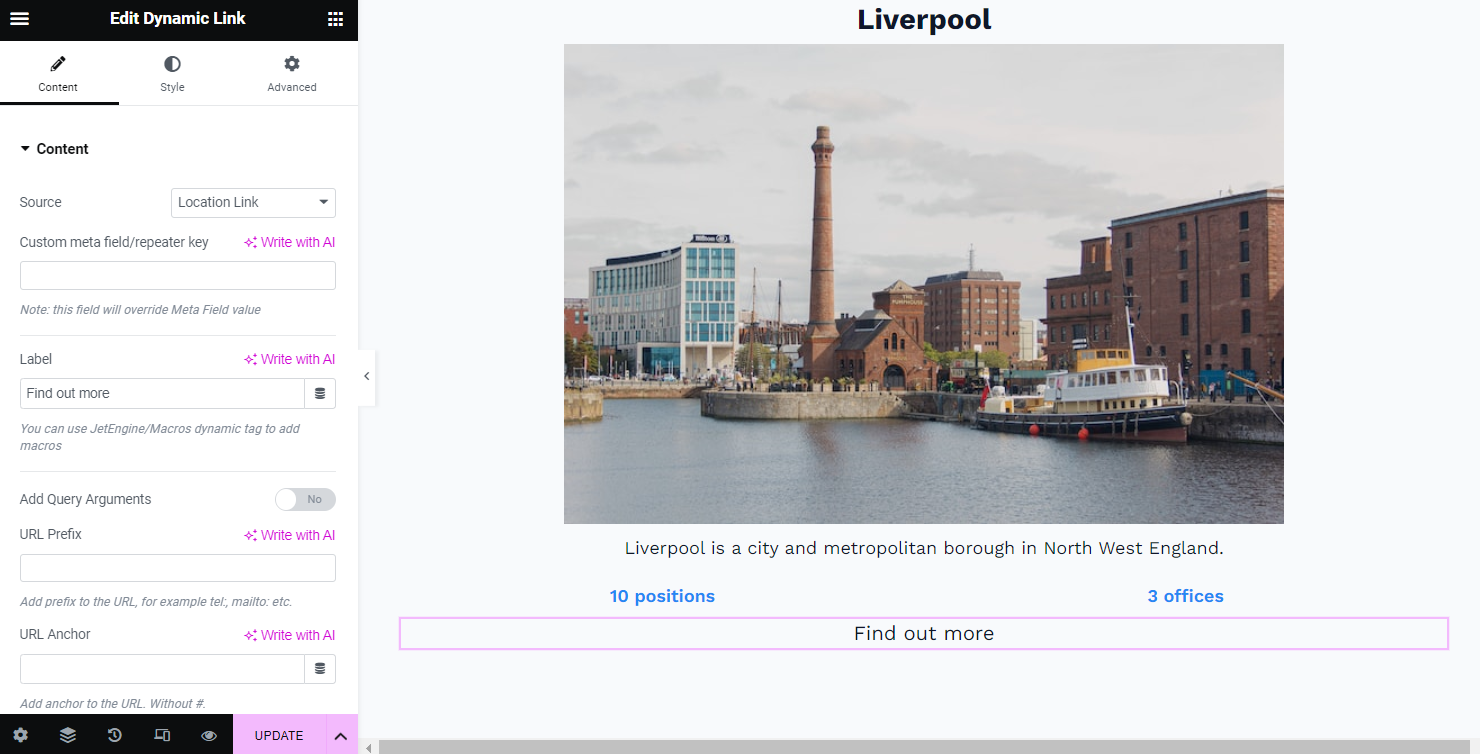
You can also add images and links to the listing with the help of Dynamic Image and Dynamic Link widgets.
When you are done creating a Listing, hit the “Publish” button.
Display Listing
When all is set and saved, you need to display the listing via the Listing Grid.
Find the page where you need a taxonomy grid and click on the “Edit with Elementor” button.

Drag and drop the Listing Grid widget to the page. In the Listing drop-down menu, choose the previously created one.
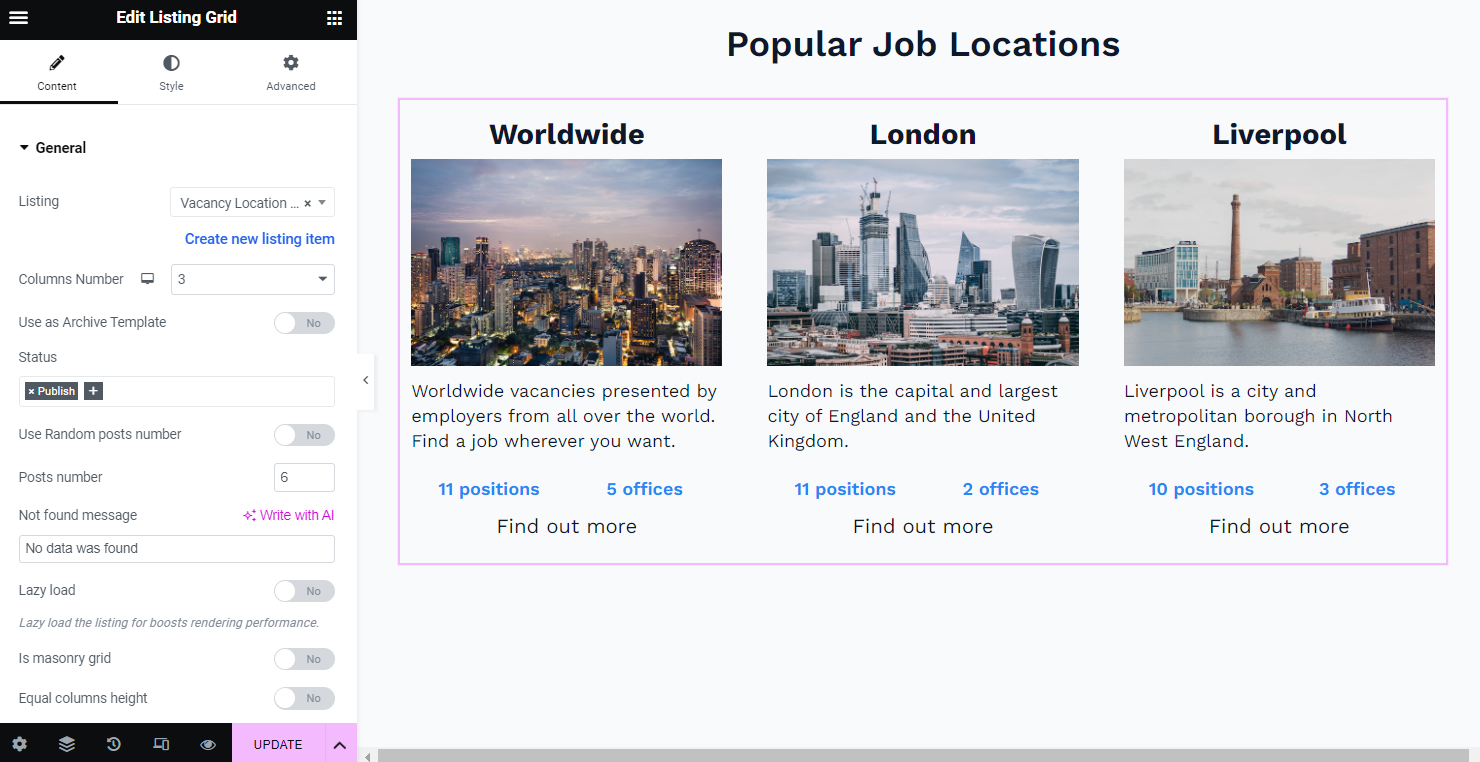
Now you can use the listing template in order to showcase the terms (either the default ones or the custom ones you’ve created) with the Listing Grid widget from the JetEngine plugin.