How to Install Crocoblock Skins Without the Kava Theme
If you want to use professionally designed Crockoblock skins with any theme you like - this tutorial can come in handy. Find out how to install Crocoblock skins without installing the Kava theme.
The users who purchase the All-Inclusive subscription plan get access to the Extras section, which is full of high-quality websites and popup templates. Do you know you can use Crocoblock skins with any WordPress theme of your choice as long as it supports Elementor?
This tutorial provides detailed information about the way to install Crocoblock skins to any WordPress theme using Crocoblock Wizard.
Upload and activate the Crocoblock Wizard plugin
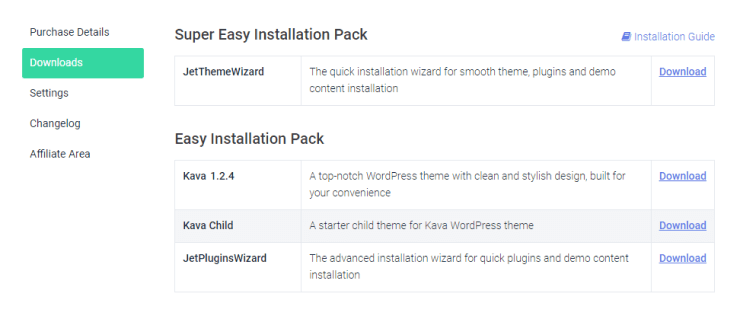
First of all, you need to download the Crocoblock Wizard plugin, which allows installing plugins and demo content quickly and smoothly. You will find the plugin in the Extras > Installation section of your Crocoblock account. If you need more details – check out the Wizard installation tutorial.
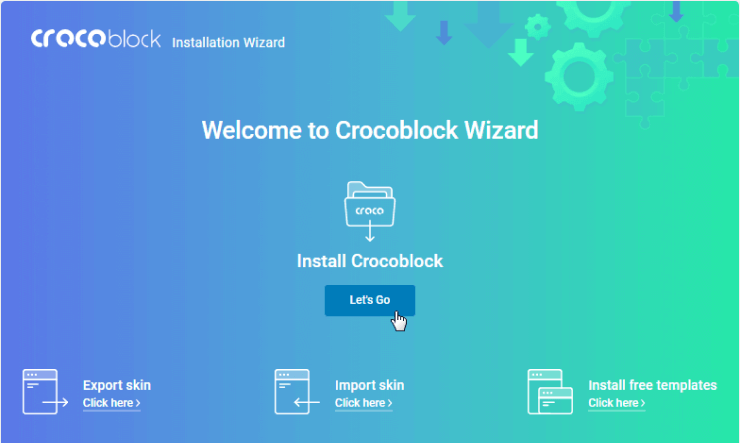
Start the Wizard
After you install the Crocoblock Wizard plugin go to JetPlugins > Installation Wizard. Among the various options on the welcome window, you can need to click the “Let’s Go” button.
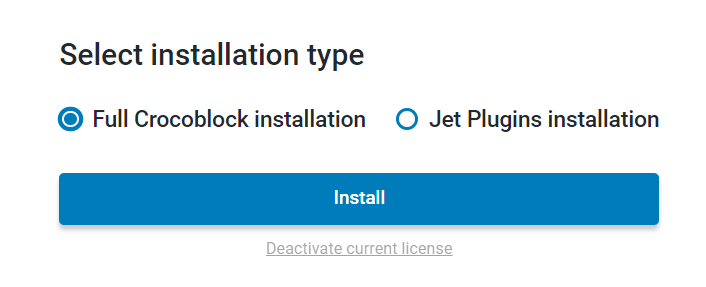
Select the Full Crocoblock installation type.
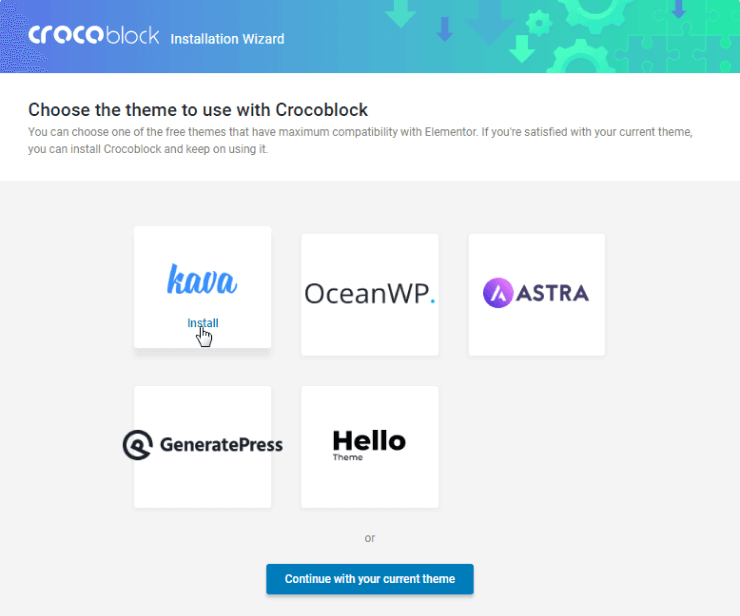
Skip the Theme installation
In the Chose the theme to use with Crocoblock window just hit the “Continue with your current theme” button.
Choose the Skin and Continue the Installation
In the Select the template and start installation window, you can choose any skin you like, either Dynamic or Design one, and install it to your current template. If you want to check what it will look like first, hit the “View Demo” button. When you make up your mind, just click the “Start Installation” button.

You will be taken to the Configure plugins screen, where you can view the list of the Required plugins and Extra plugins.
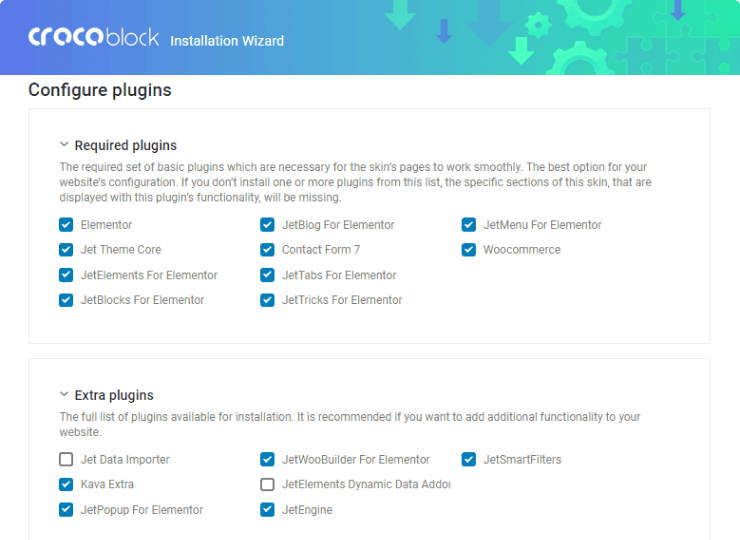
- Required Plugins – here you can find the minimum set of service plugins for this skin set by default.
- Extra Plugins – here you can view the full list of plugins available for a template installation. They add extra functionality to the skin but are not required.
Tick the plugins, which you want to install on your site, and click the “Continue” button to finally run the installation.
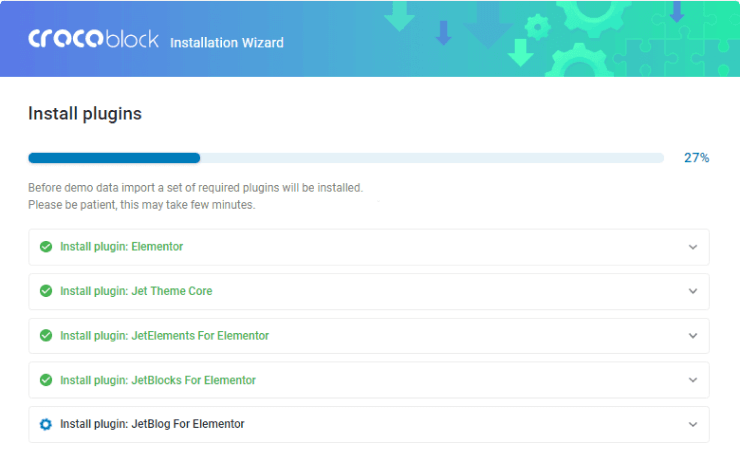
Now you can see the installation process at work.
The Demo Content Import page allows selecting whether you want to append the demo content or replace the existing content on the site.
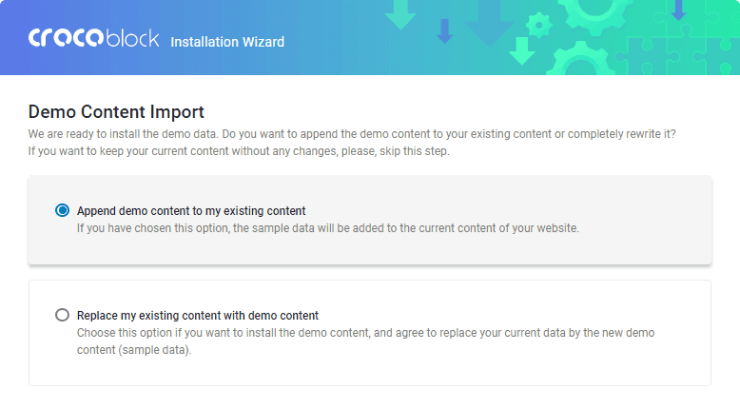
If you don’t have any content on your site, and it’s a clean installation, you can select the Replace my existing content with demo content option.
In all the other cases, if you don’t want your existing content to be ruined, select the Append demo content to my existing content option.
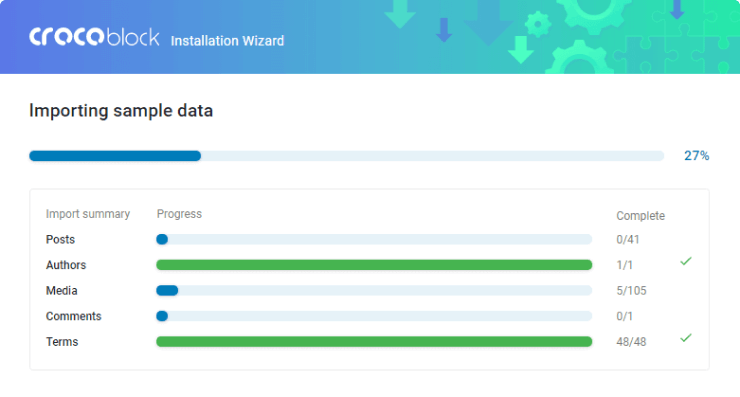
After adjusting all the settings, click the “Continue” button. The demo content will be automatically installed on your site. The blue progress bars will indicate the percent of demo content which are already imported.
Now you can choose where you’d like to start. Click the “Take a look at your website” button to check how your site looks now.

Great! The process is complete and your website’s appearance has been changed in a matter of several minutes!