Form Notifications Settings Overview (Legacy)
This tutorial overviews in detail the variety of notification settings within the Form created with the help of the JetEngine plugin.
While creating a form, one of the inevitable steps is to create an email that will be sent immediately after the user submits a form. This email notifies the user that his form has been accepted successfully. Here you can also set the automatic email which will be sent to you as soon as a new user submits a form.
However, sending an email to the user is not the only available option available in the Post-submit Actions / Notifications Settings block. Let’s take a look at all the possibilities it reveals.
After you have created an actual form with all the necessary fields, proceed to the Post-submit Actions / Notifications Settings accordion block. Click the “Add Notification” button. The first feature you see is the Type drop-down menu, where you can specify the type of notification.
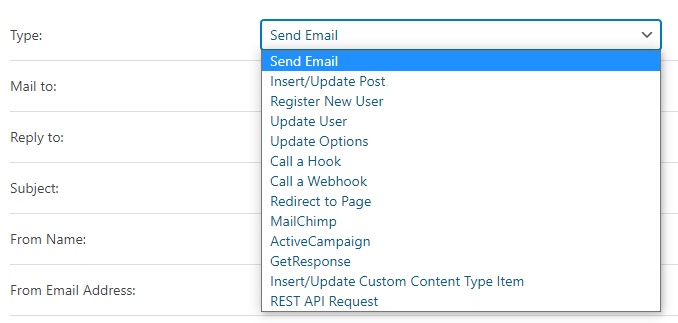
- Send Email – this type of notification allows you to notify a user via email;
- Insert/Update Post – by choosing this type of notification the user gets posts data and can update the info in the post;
- Register New User – after selecting this option, you can register new users;
- Update User – this type allows you to edit user data by changing it in the form. After the user submits the form the data of the user will be overwritten with the data from the form fields;
- Update Options – just as you can edit the data of the user, you can also edit the meta fields of the Options Page using this post-submit action;
- Call a Hook – this type allows creating a custom hook and attaching a PHP function in order for this popup function to be called in a certain moment. Pay attention that this option is only for advanced users aka developers;
- Call a Webhook – with the help of this option you are able to set automated tasks from 3rd party services like Zapier or Make to a server. If you would like to know more about it – get through our 3rd party services integration guide;
- Redirect to Page – using this type you can redirect the users either to a certain static page on your website or another web page;
- MailChimp – this notification type adds compatibility with the MailChimp service;
- ActiveCampaign – this type is responsible for synchronization with the ActiveCampaign marketing tool. You can find more details about this type in our ActiveCampaign notification type usage tutorial;
- GetResponse – with this type, you can connect your Form with the GetResponse marketing software;
- Insert/Update Custom Content Type Item – besides adding a custom post, you can also add a CCT item using this post-submit action;
- REST API Request – this type of action allows you to perform the REST API requests via custom Endpoints. You can find more details about this option in our REST API usage tutorial.
And now, let’s through the options settings that are not described in the separate tutorials.
Send Email
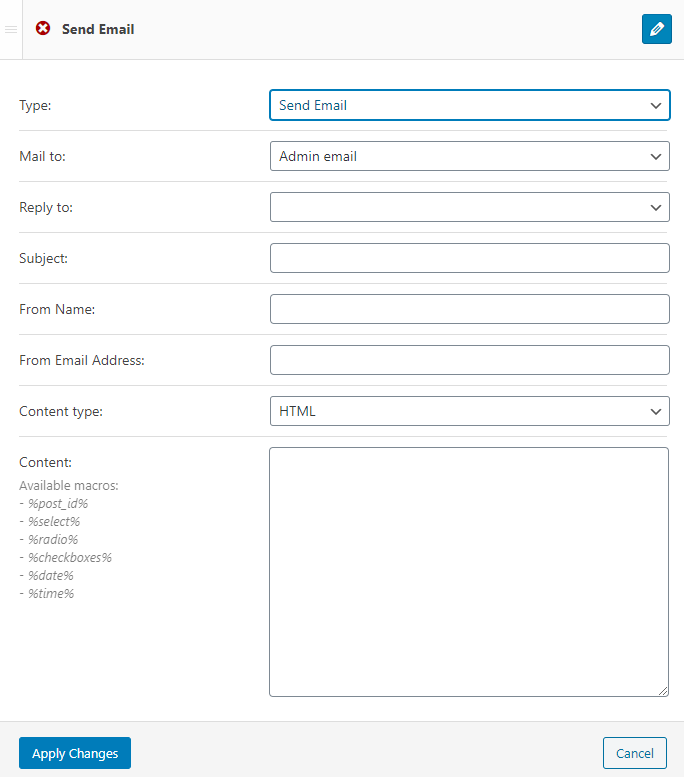
- Mail to. In this drop-down, you have to define the email address to where the notifications will be sent. The message can be sent either to the Admin email or to the Email Pulled out From the Submitted Form Field. Also, you can choose the Custom Email option, which means you can enter any email address you need;
- Reply to. Here you can select the address where the user’s reply will be sent to. It can be sent either to the Email From Submitted Form Field – the one which was mentioned in the form or to the Custom Email in case you work as an intermediary agent. If you choose the Email From Submitted Form Field option, you have one more dropdown appearing below – Reply To Email From Field, where you have to specify the form field, where the email will be chosen from;
- Subject. Type in the subject of the email into this field;
- From Name. Here you have to specify the name in which the email will be sent;
- From Email Address. This field has to be filled with the address which appears in the address field of the email;
- Content type. It can be either the HTML code or Plain text;
- Content. Type in the text of the email which will be sent to the user into this text area. You can use the macro codes here. Macros automatically pull the information from the respective fields of the form. You can see the clues on the left to decide which macros you should use in your case.
Insert/Update Post

If you choose the Insert/Update Post option in the Type dropdown, it means that the information contained in the form will be included in the custom post type which you choose further down below.
- Post Type. Here you have to specify the type of post you would like to add or edit;
- Post Status. Specify the status of the post in this drop-down list;
- Fields Map. All the fields added to the form are listed here. You have to set a connection between those form fields and meta fields of the selected Custom Post Type. Just choose the necessary meta fields from the drop-down menus next to the form field names.
Learn more about this option here.
Register New User
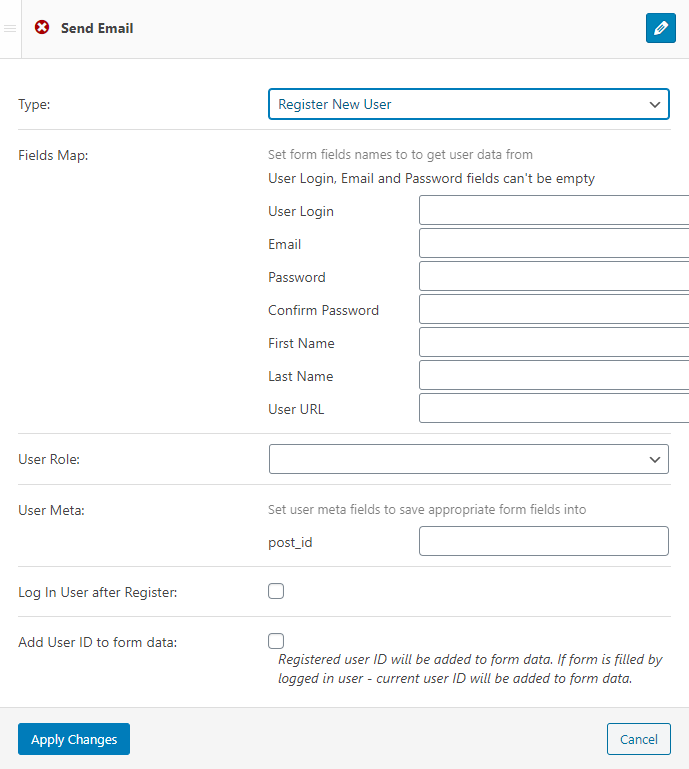
- Fields Map. Every user account has to be filled with certain information and all the necessary data pieces are listed in this feature. Choose the form fields with the corresponding data in the drop-down located in every row;
- User Role. Here you can choose what will be the role of the user you can create via this form;
- User Meta. If the user account has meta fields you added, here you can link the form fields with the meta fields;
- Tick the Log In User after Register option if you want that user to be logged in after registration;
- Tick the Add User ID to form data option if you want the registered user’s ID to be able to form data.
Update User
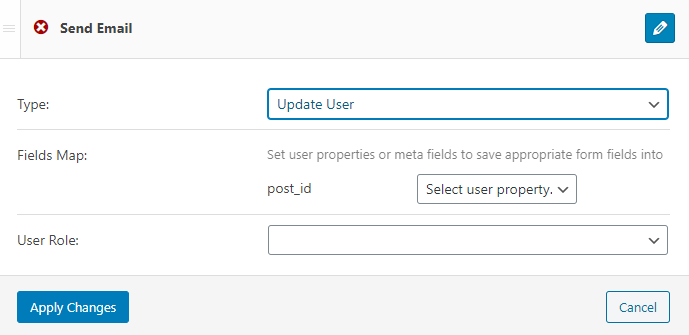
If the user account already exists you can give the visitor an opportunity to edit his account with the help of this post-submit action. there is a list of form fields in the Fields Map feature. In the drop-down menus placed next to them choose the corresponding account meta fields. Also, in the User Role select, you can define the users of what role can be edited this way.
Update Options
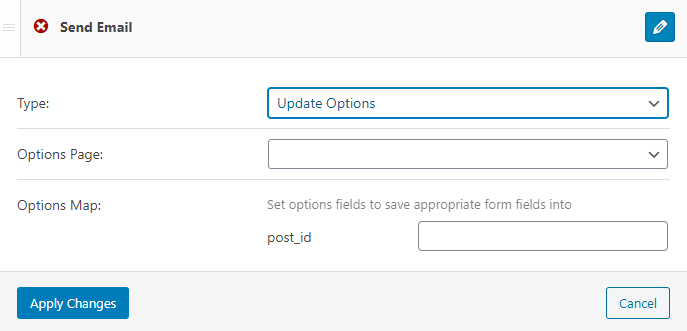
You can give the user an opportunity to edit some of the Options. Choose the necessary one in the Options Page drop-down, and afterward, set the connections between the form fields and option’s meta fields in the Options Map section.
Call a Hook
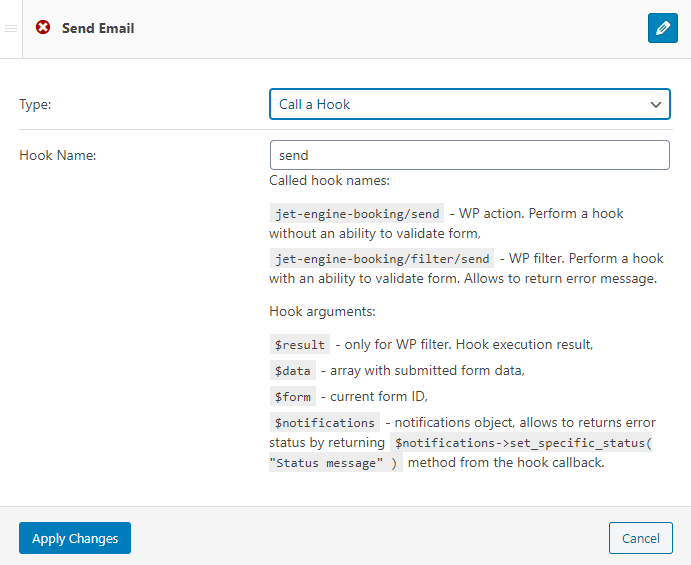
If you choose the Call a Hook notification type, you have to create your own hook (a piece of code that gives a command to perform a specific action). Insert your hook into the functions.php file that can be found on your PC (wordpress > htdocs > wp-content > themes > your-theme). Type in the Hook Name into the field to define which one to use after the form is submitted.
Redirect to Page
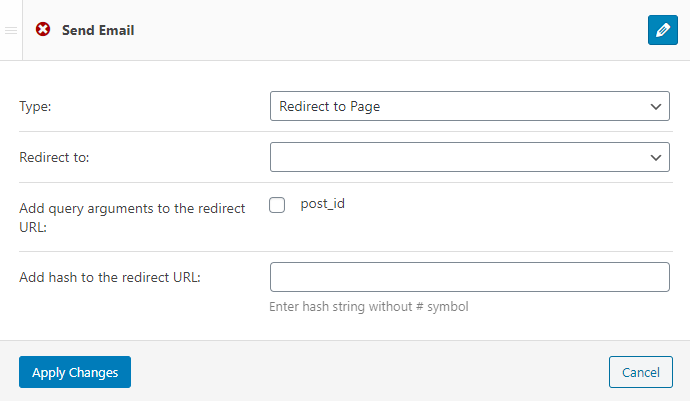
- Redirect to. This drop-down menu allows you to choose a type of page that the user will be redirected to after submitting the form. It could be either a static page, a custom URL, or the current page. the static and custom page you can define in the bar that will appear below;
- Add query arguments to the redirect URL. Tick the checkboxes to add an argument from the form field to the redirect URL;
- Add hash to the redirect URL. Here you can enter the hash strings you would like to add to the URL.
MailChimp

To create a connection between the form and your MailChimp account you just need to paste the API Key to the bar. The process of obtaining the MailChimp API key is described in this tutorial.
Insert/Update Custom Content Type Item
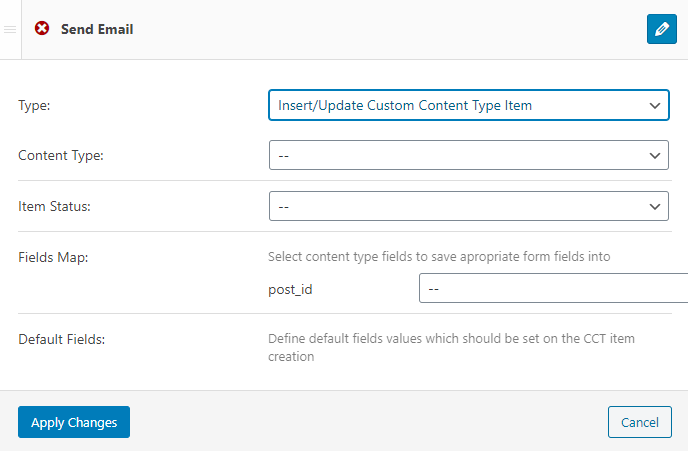
This type of post-submit action is similar to the Insert/Update Post.
- Content Type. Choose the previously created Content Type from the drop-down list;
- Item Status. Select the status of the Content Type item;
- Fields Map. Here you define the connection between the form fields and item’s meta fields;
- Default Fields. This section allows you to define the default values of the CCT item.
You have mastered the Post-submit Actions / Notifications Settings. Good luck creating super-useful forms for your website.