How to Show Content Only on Particular Days
This tutorial teaches you how to make widgets, columns, and sections visible/invisible only on particular days with the JetEngine Dynamic Visibility module and the Elementor Pro plugin.
Before you start, check the tutorial requirements:
- Elementor (Free version) or WordPress Block editor (Gutenberg)
- JetEngine plugin installed and activated
with the Dynamic Visibility module activated
Showing the Content on Particular Days Using Elementor Pro
JetEngine is a WordPress plugin that provides the user with all the needed tools for displaying dynamic content in Elementor and Gutenberg. Using the JetEngine plugin, you can create a membership site with a whole set of features. The Dynamic Visibility module is one of them, and it allows you to define parameters of visibility for every element on the page.
With the Dynamic Visibility module and Elementor Pro plugin, you can show or hide elements on the front end on particular days. For example, it can be an advertisement or announcement like the picture below. Let’s set it up in a way that it will be shown only on Mondays.

Proceed to any post or page and click “Edit with Elementor.” Select any of the elements on the page and go to Advanced > Dynamic Visibility. Enable the toggle.
Select the needed Visibility condition type to show or hide the element. Then click on the Condition drop-down and choose the “Equal” option. Hit the “Dynamic Tags” button in the Field and select the “Current Date Time.” Be aware that this dynamic tag is available only with the Elementor Pro plugin.

Click on the chosen dynamic tag in the Field, and you will see the window with settings. Select the “Custom” option in the Date Format field and enter “l” (lowercase L) in the Custom Format field; it’s the format character for a day of the week. If you need more information about customizing the time and date format, you can read it here.
Except for the days of weeks, you can enter:
- F = month, enter the full name of the month in the Value field;
- j = day, enter the number in the Value field;
- Y = the year in 4 digits (lowercase y gives the year’s last two digits).

Lastly, enter the name of the day of the week in the Value field. Be aware that it should start with a capital letter and be in the language set on your website. You can enter several names as values separating them with commas.

Don’t forget to push the “Update” button after ending the work.
Let’s try all format characters for days. We have entered “l, F j, Y” in the Custom Format field.

And we have entered today’s date (Monday, November 15, 2021) in the Value field.

As we can see, Dynamic Visibility shows the advertisement on the front end. If we change the date in the Value field or visit the page tomorrow, this element will be hidden.

Making the Content Visible in Elementor
The JetEngine plugin is fully compatible with the free version of Elementor.
The process of using Dynamic Visibility is almost the same. By the way, you can set visibility conditions to the widget or even the whole section.
Select the element you want to set conditions for and proceed to the Advanced tab. Unfold the Dynamic Visibility section and enable it.
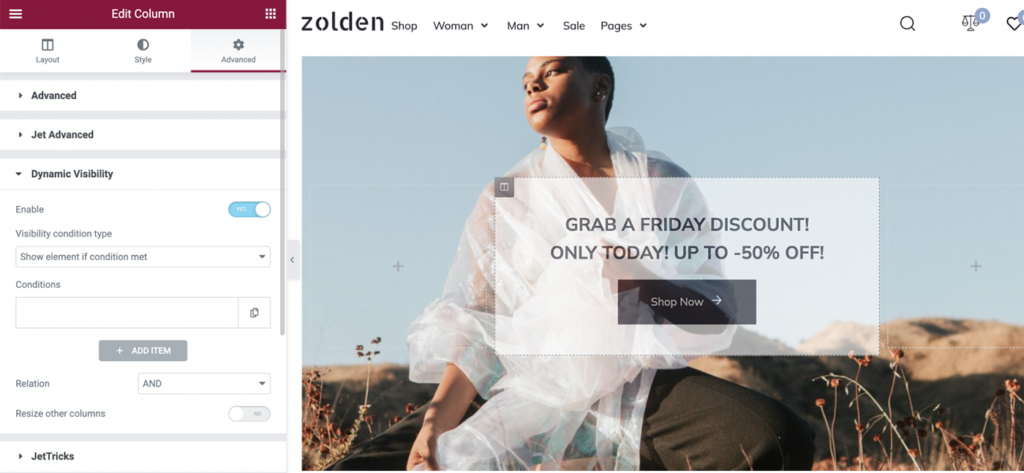
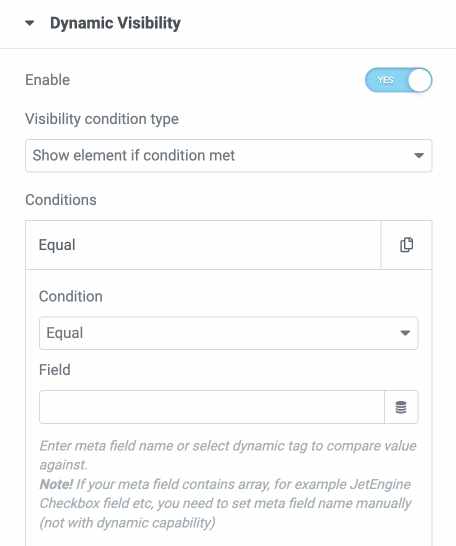
Set the Visibility condition type to “Show element if condition met.” Below unfold Conditions and choose “Equal” from the drop-down list.
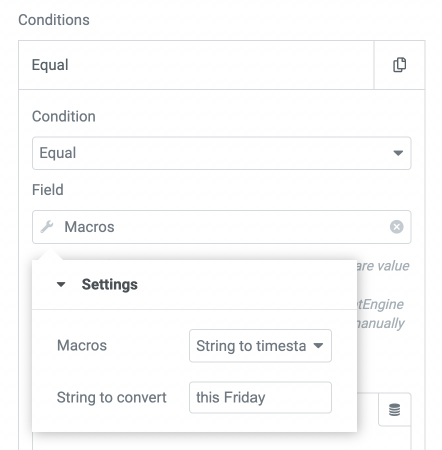
In the Field, click on the Dynamic Tags button. Select Macros and choose “String to timestamp” macros in the pop-up window.
Enter “this Friday” to the String to convert field bar.
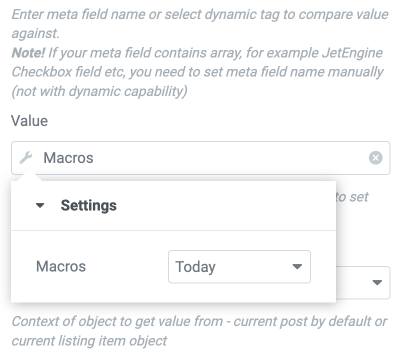
Proceed to the Value. Again hit the Dynamic Tags button and select Macros.
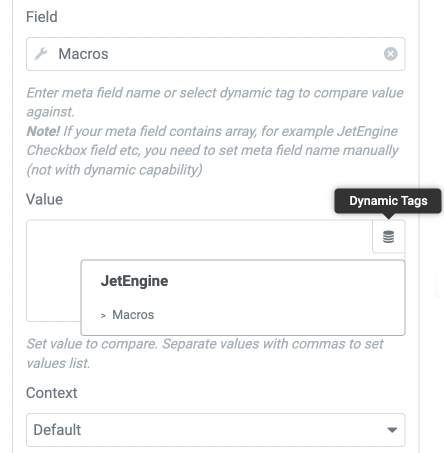
In the Settings pop-up window, choose the “Today” macros from the list. Update the page.
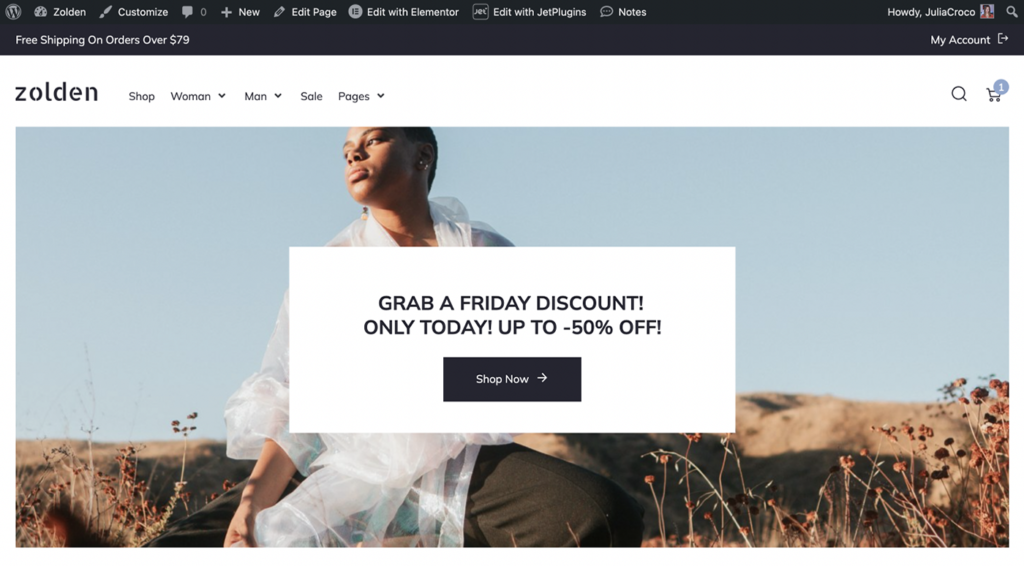
The element is visible on the front end because today is Friday. On the next day, the message about the discount will be hidden.
Displaying the Content on Particular Days in Gutenberg
The JetEngine plugin got updated, and now it allows applying Dynamic Visibility to the blocks of the WordPress default editor.
Select a block in Gutenberg. There will be an eye-shaped icon on the toolbar on top of the block.
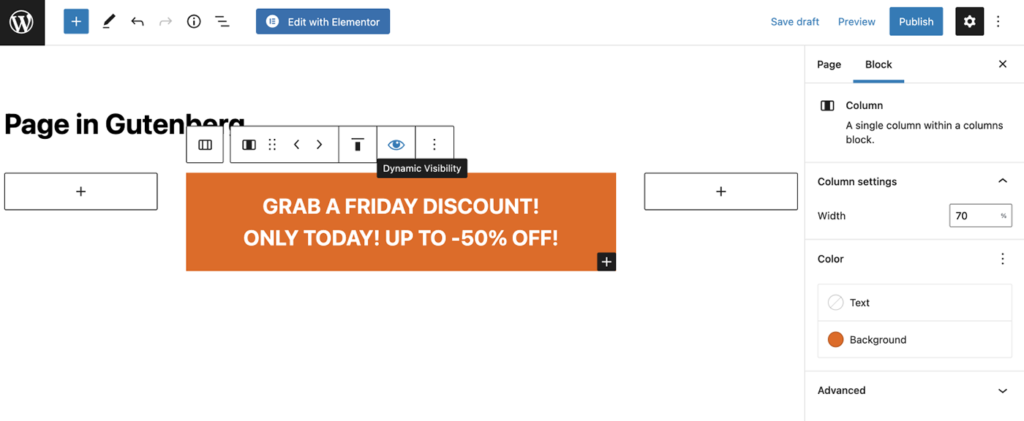
Once you click on it, you will see a pop-up window with the Enable toggle.
Turn it on, but first, make sure that the Visibility condition type is set to “Show element if condition met.”
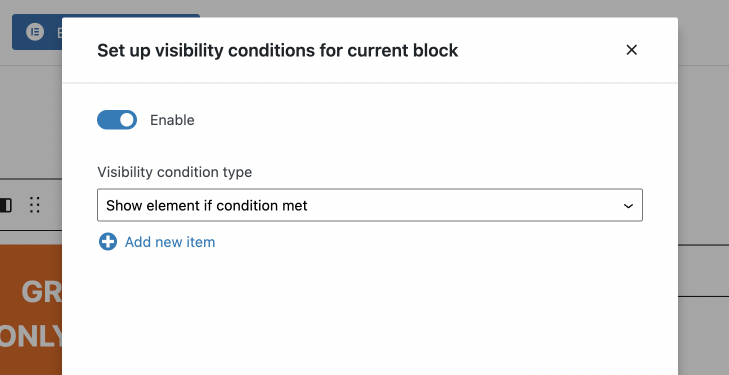
Then hit the “Add new item” button and choose “Equal” in the Condition drop-down list.
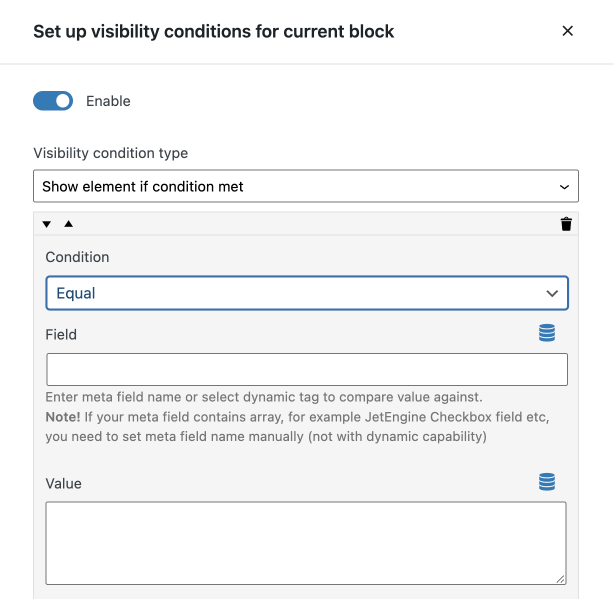
Proceed to the Field and hit the Dynamic Tags button. Choose “Custom data” as a Source.
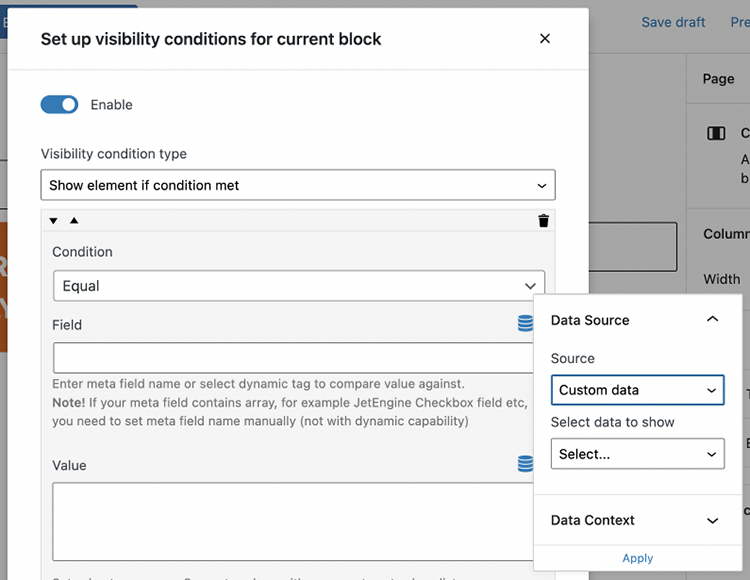
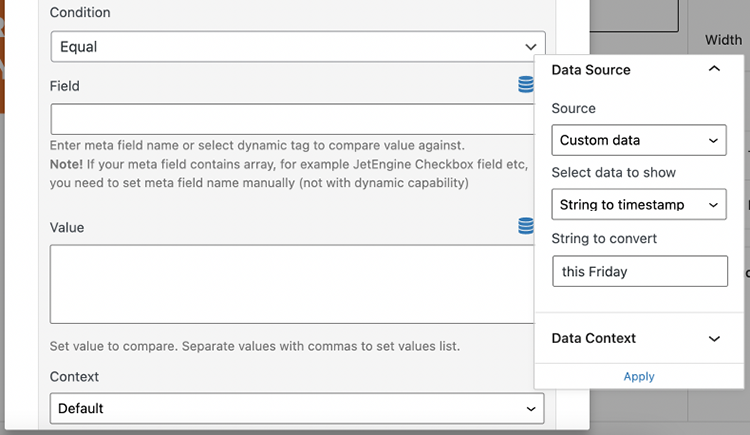
In the Select data to show dropdown, choose the “String to timestamp” option, and type “this Friday” in the String to convert field bar.
Don’t forget to apply the settings.
Proceed to the Value field. Click the Dynamic Tags button. Then select “Custom data” as a Source and choose the “Today” macros from the list below.
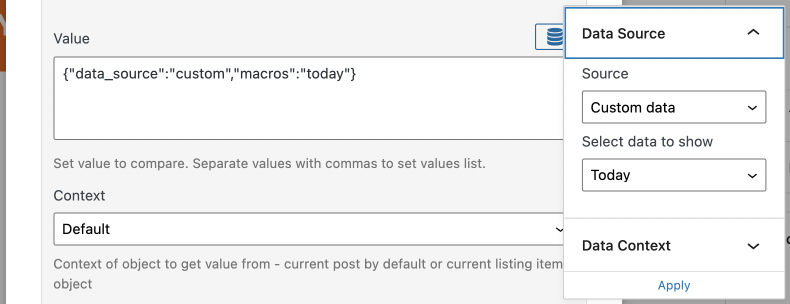
Make sure you apply the settings and update the page once you’re done.
That’s it. You now know how to apply Dynamic Visibility and show the content only on a particular date.