How to Create an Automatic Notification System with JetBooking
This tutorial explains how to set the automatic email notifications with the JetBooking Workflows feature for WordPress. Send emails to users after the booking creation or after the booking status changes.
Before you start, check the tutorial requirements:
- JetBooking plugin installed and activated with Wizard setup.
If you haven't done it yet, proceed to this tutorial.
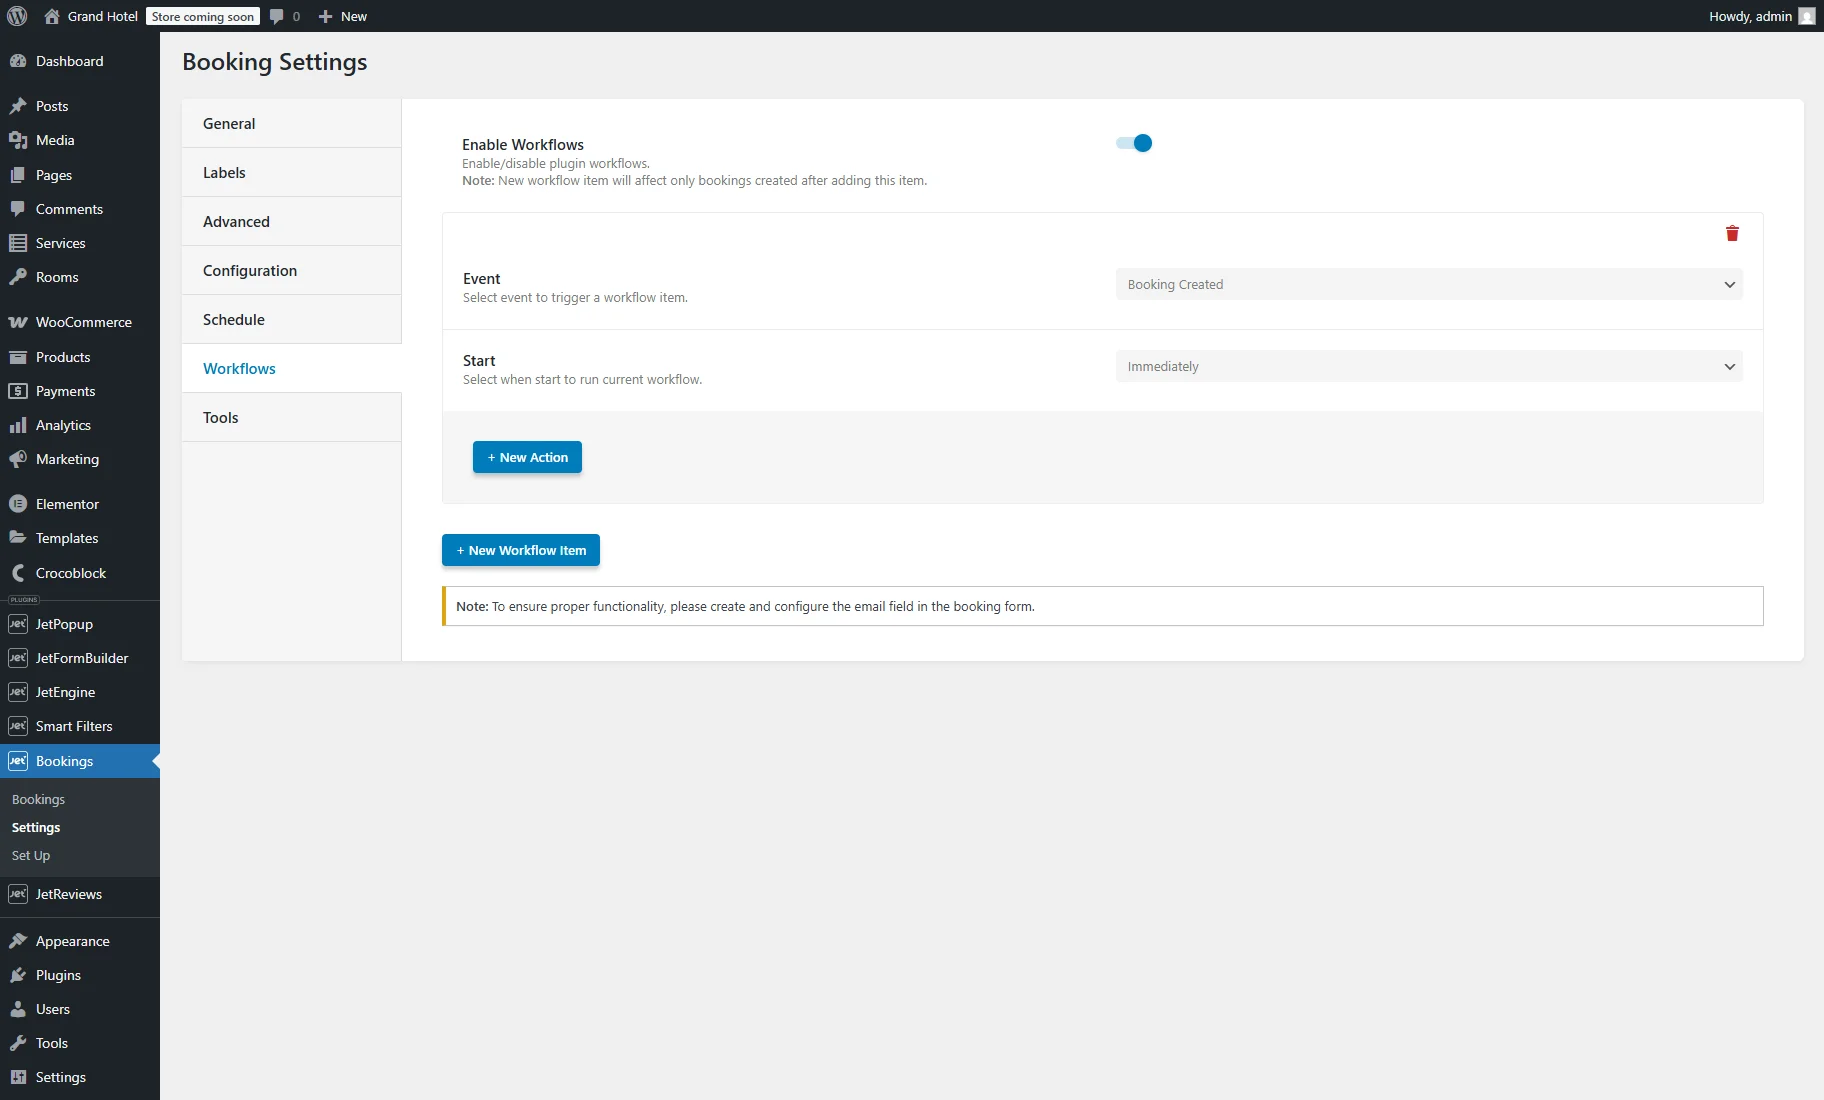
Head to the WordPress Dashboard > Bookings > Settings > Workflows tab and activate the Enable Workflows toggle.
Then, press the “+ New Workflow Item” button and adjust its settings described in the Workflows chapter of the JetBooking Dashboard Overview.
Sending a Confirmation Email
In this chapter, we’ll explain how to send a confirmation email to the customer once a new booking is successfully created. The email will include essential booking details, such as check-in and check-out dates, booking ID, and customer name.
For the workflow item, set the “Booking Created” option in the Event dropdown menu and “Immediately” in the Start dropdown. In this way, the email will be sent immediately to the client after the booking creation.
Afterward, press the “+ New Action” button.
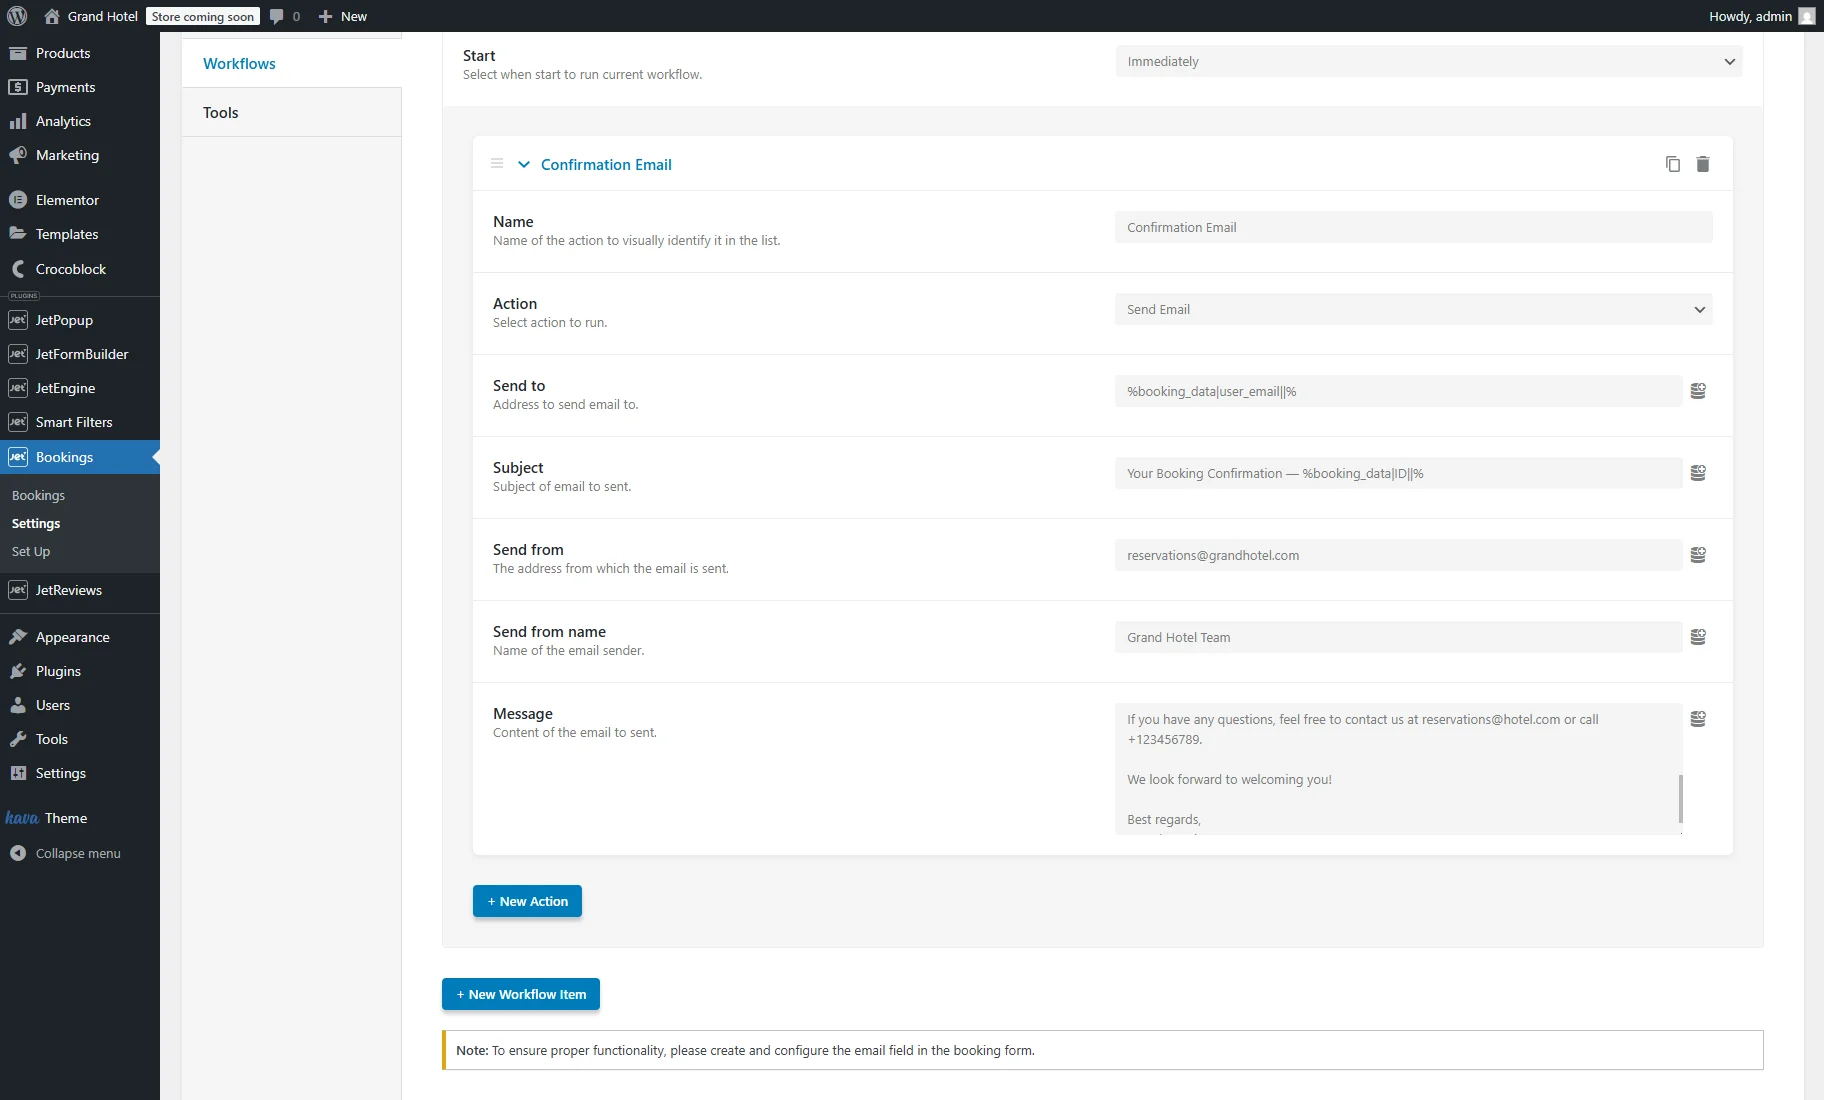
Enter the Name (e.g., “Confirmation Email”) and keep the “Send Email” Action.
In the next fields, you can enter static text or use dynamic JetBooking macros to personalize it.
In the Send to field, enter the recipient’s email address. To set this dynamically, click the “database” button, select the “Booking Data” macro, and choose “User E-mail” as the Data Type. After that, the “%booking_data|user_email||%” macro will be inserted into the field. This ensures the email is automatically sent to the customer who made the booking.
In the email’s Subject, you can include details such as booking ID, customer name, check-in date, or other relevant information. For example, we press the “database” button, select the “Booking Data” macro, and choose “ID” as the Data Type. Before the macro, we enter the static text: “Your Booking Confirmation — ” followed by %booking_data|ID||%.
In the Send from field, enter the address from which the email is sent. It can be the hotel’s official email address (e.g., [email protected]).
In the Send from name field, type the name of the email sender (e.g., “Grand Hotel Team”).
In the Message textarea, customize the email body using static text and macros. Here, we use such macros:
- “Booking Data” — in the same way as previously described, we add “%booking_data|ID||%”, “%booking_data|check_in_date|readable|F j, Y%”, and “%booking_data|check_out_date|readable|F j, Y%” to display the booking ID, check-in and check-out dates in the “Readable” Data Format;
- “Booking Additional Column” — a macro that inserts the information from the columns added in the Tools tab of the Bookings dashboard. We add “%booking_column|user_name%” to fetch the user name and “%booking_column|total%” to fetch the total price;
- “Booking Unit Title” — returns the unit name. To learn more, proceed to the How to Manage Units tutorial. If not set, you can use the “Booking Instance Title” macro instead.
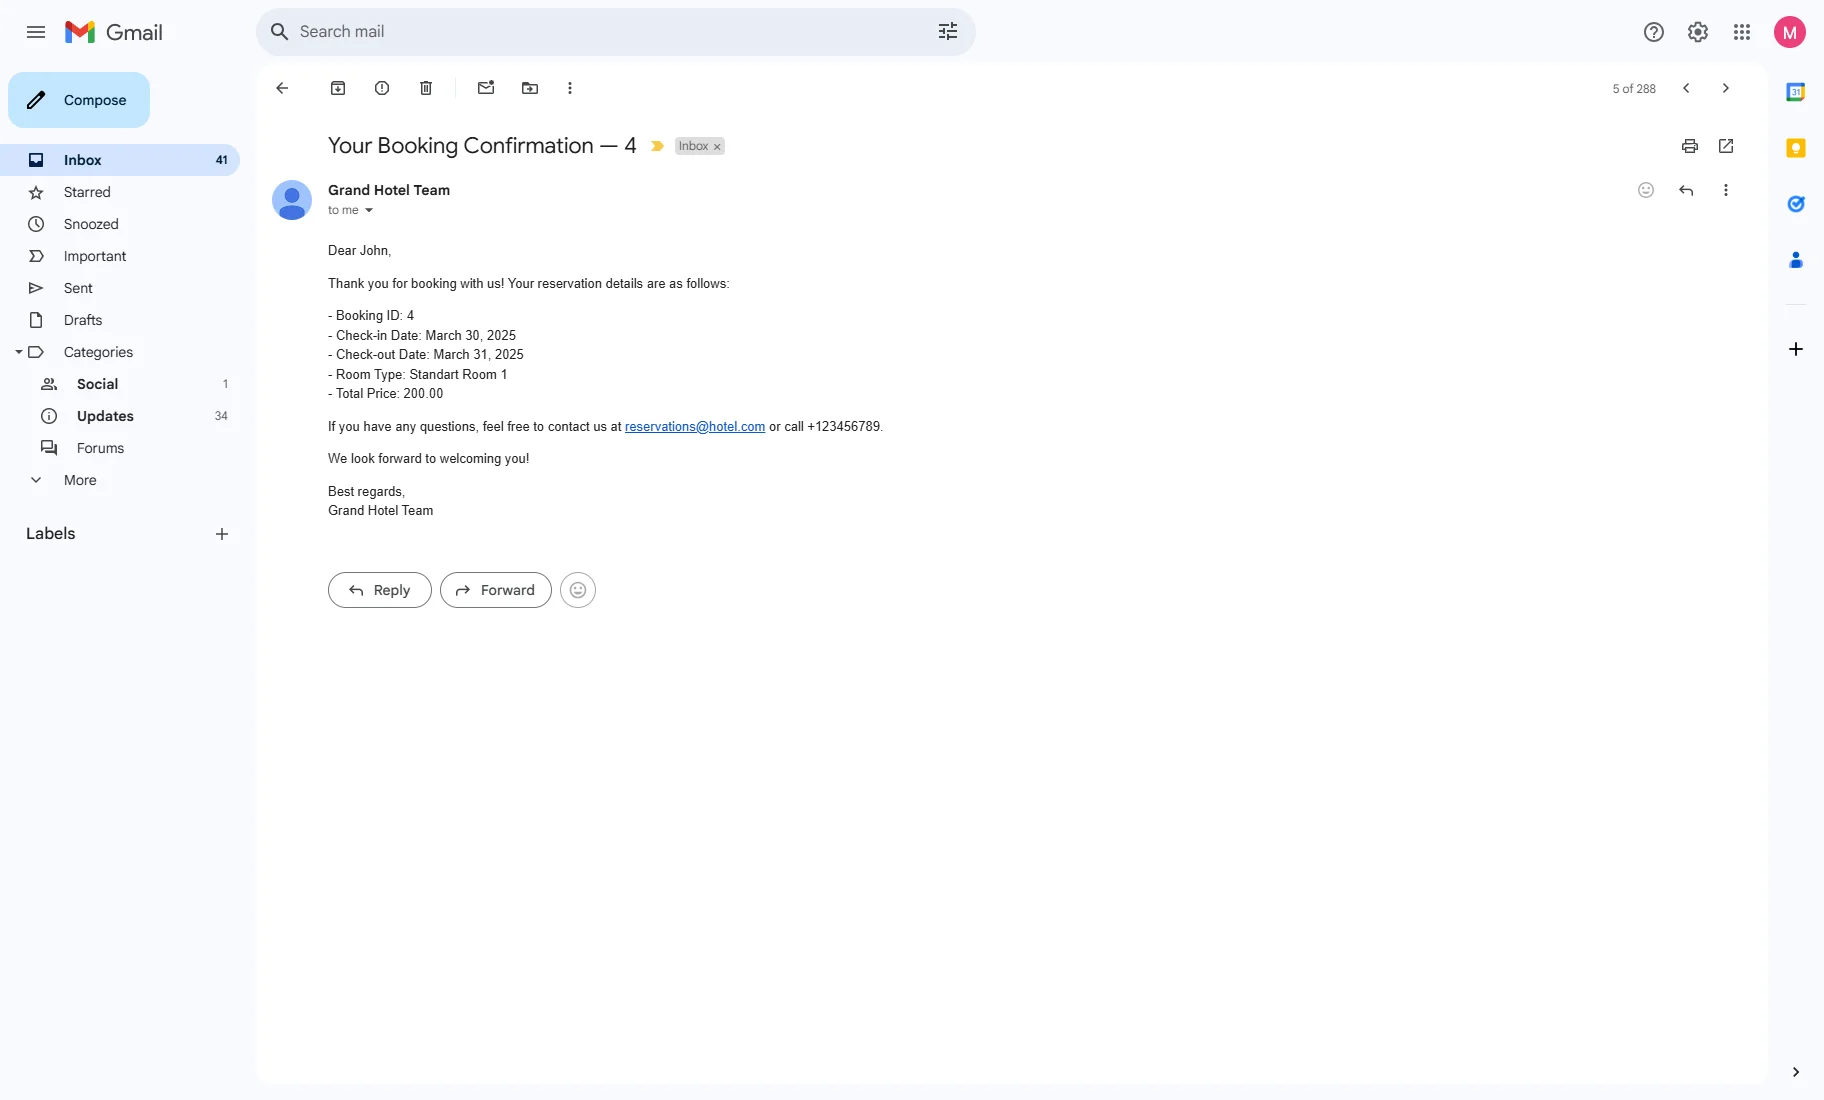
In our example, the message body looks like this:
Dear %booking_column|user_name%,

Thank you for booking with us! Your reservation details are as follows:

- Booking ID: %booking_data|ID||%
- Check-in Date: %booking_data|check_in_date|readable|%
- Check-out Date: %booking_data|check_out_date|readable|%
- Room Type: %booking_unit_title%
- Total Price: %booking_column|total%

If you have any questions, feel free to contact us at [email protected] or call +123456789.

We look forward to welcoming you!

Best regards,
Grand Hotel Team
Sending a Reminder Before Check-in
Now, we’ll describe how to configure a reminder email to the customer one day before their check-in date.
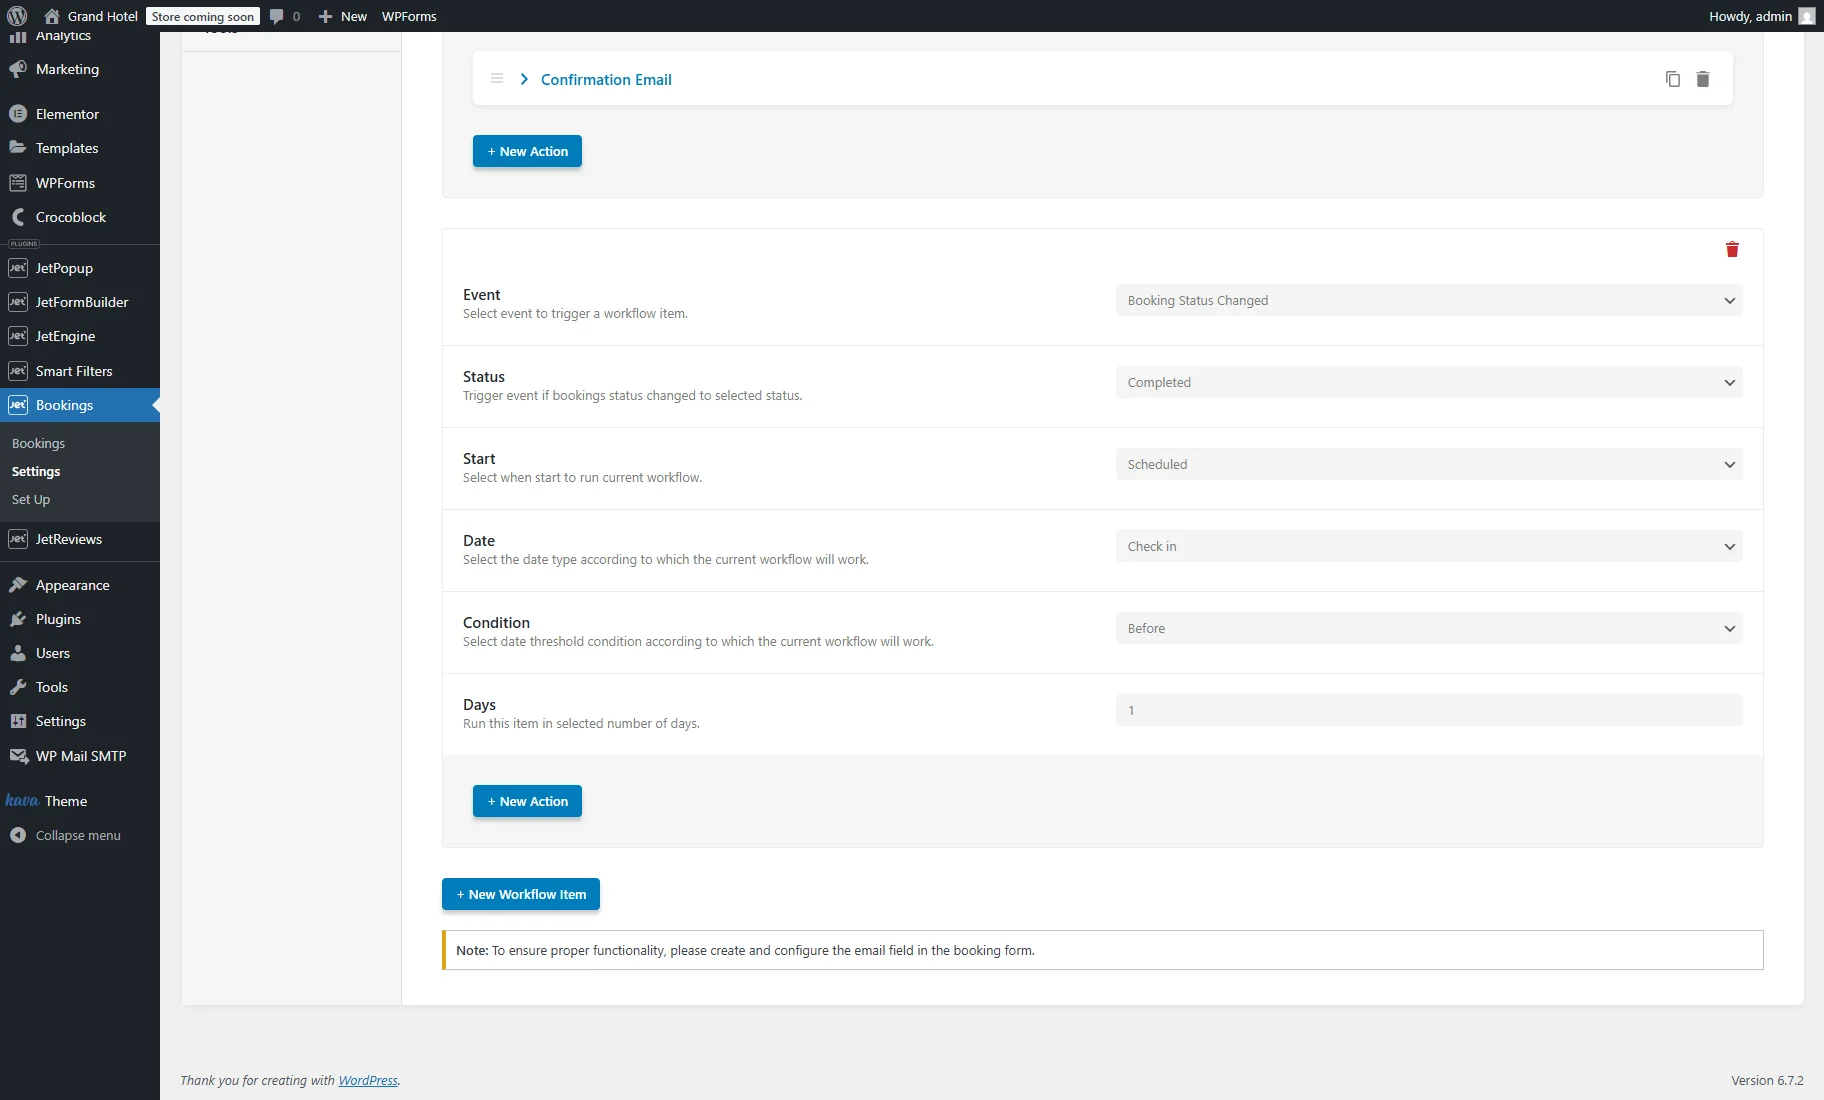
Press the “+ New Workflow Item” button once again, set the “Booking Status Changed” Event and “Completed” Status.
In the Start field, select “Scheduled”, then set Date to “Check in”, Condition to “Before”, and enter “1” in the Days field.
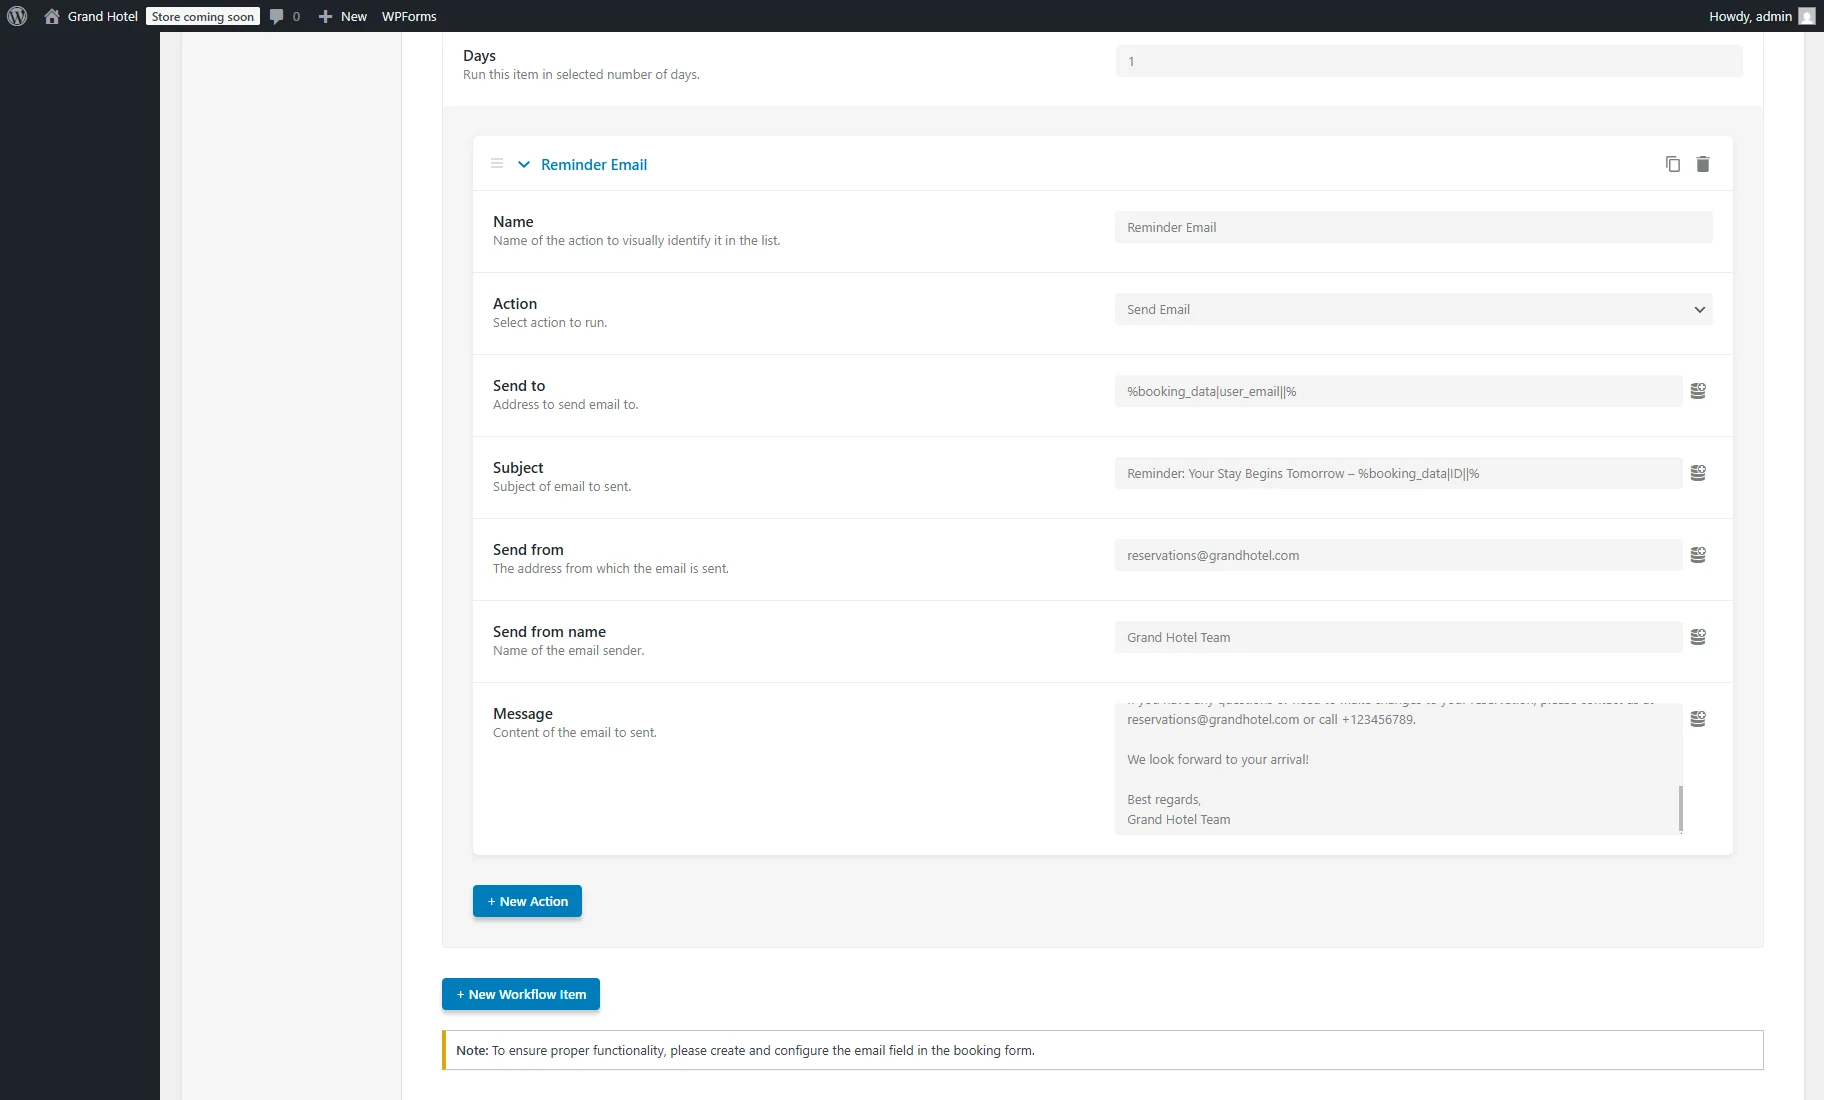
Then, press the “+ New Action” button.
For the action, the settings are similar to those used for the confirmation email. You can customize them as needed to fit your requirements.
Testing the Flow
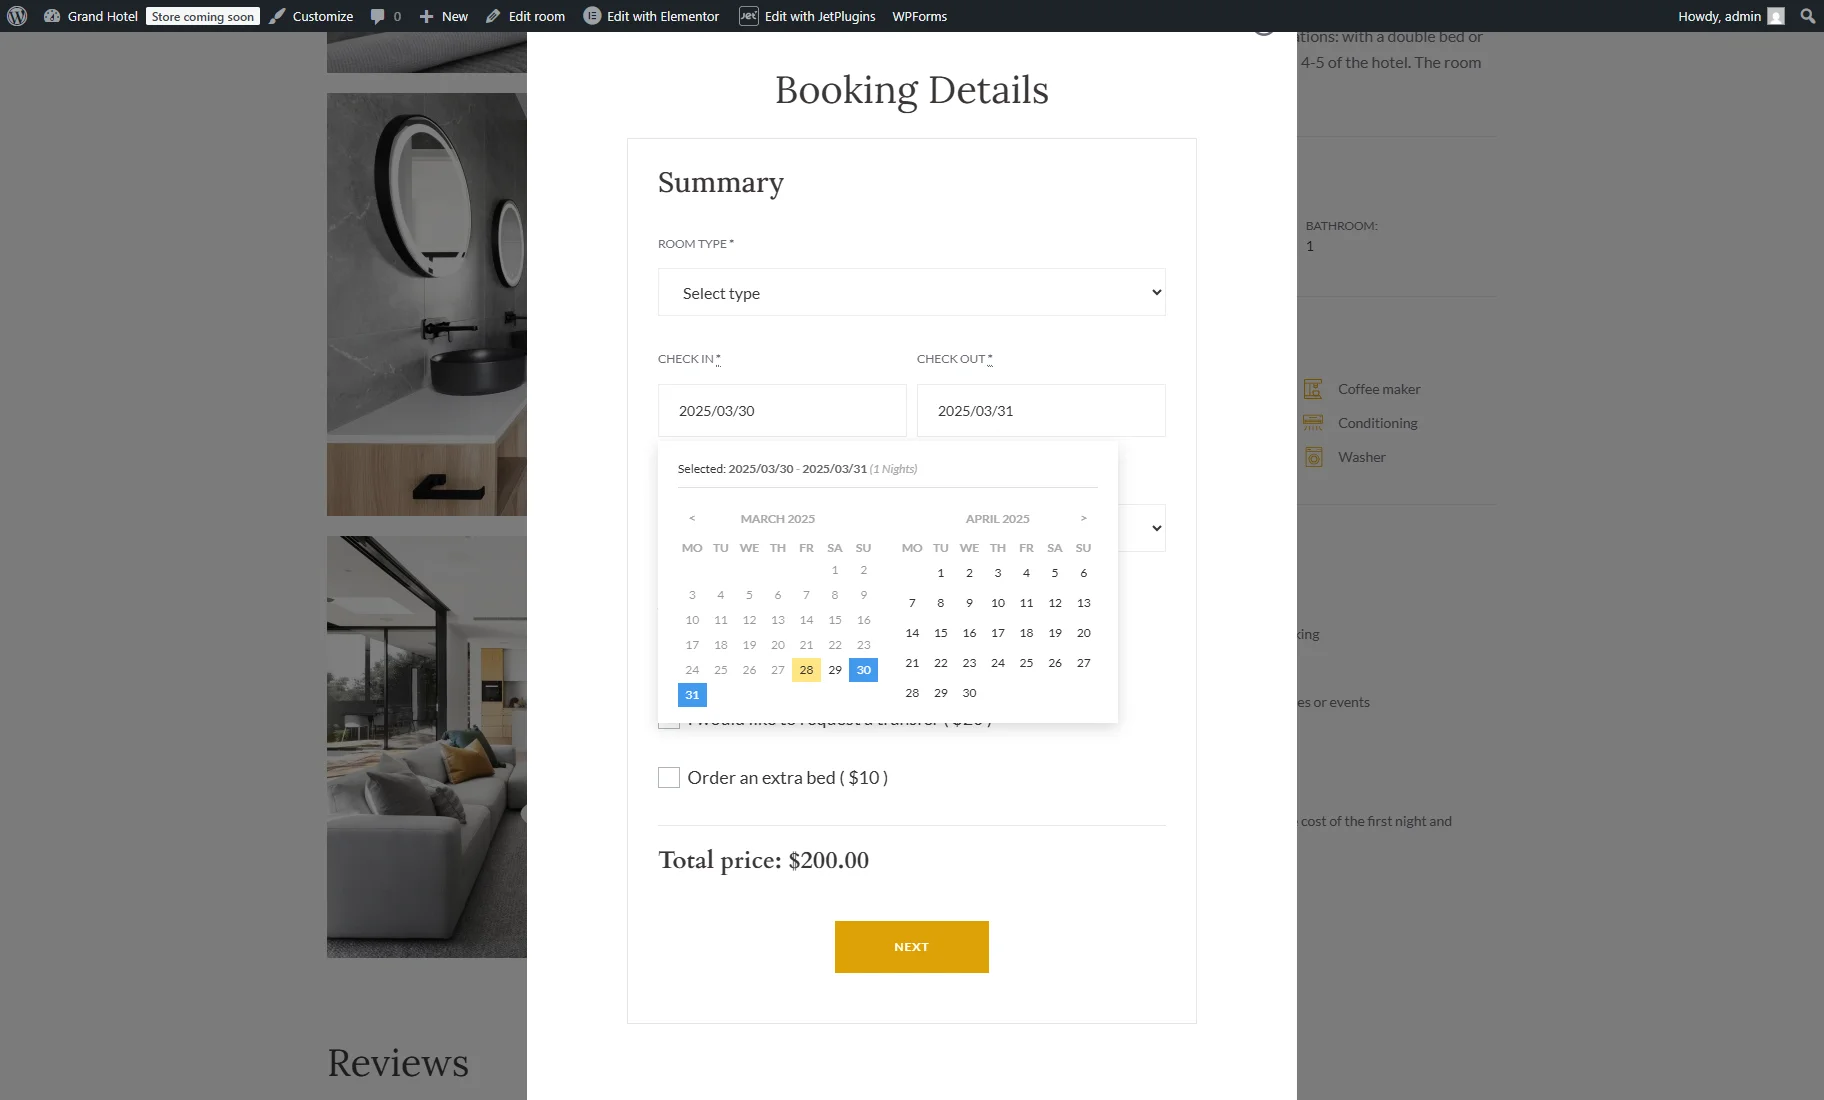
Proceed to the front end and create a booking.
After that, we immediately get the email.
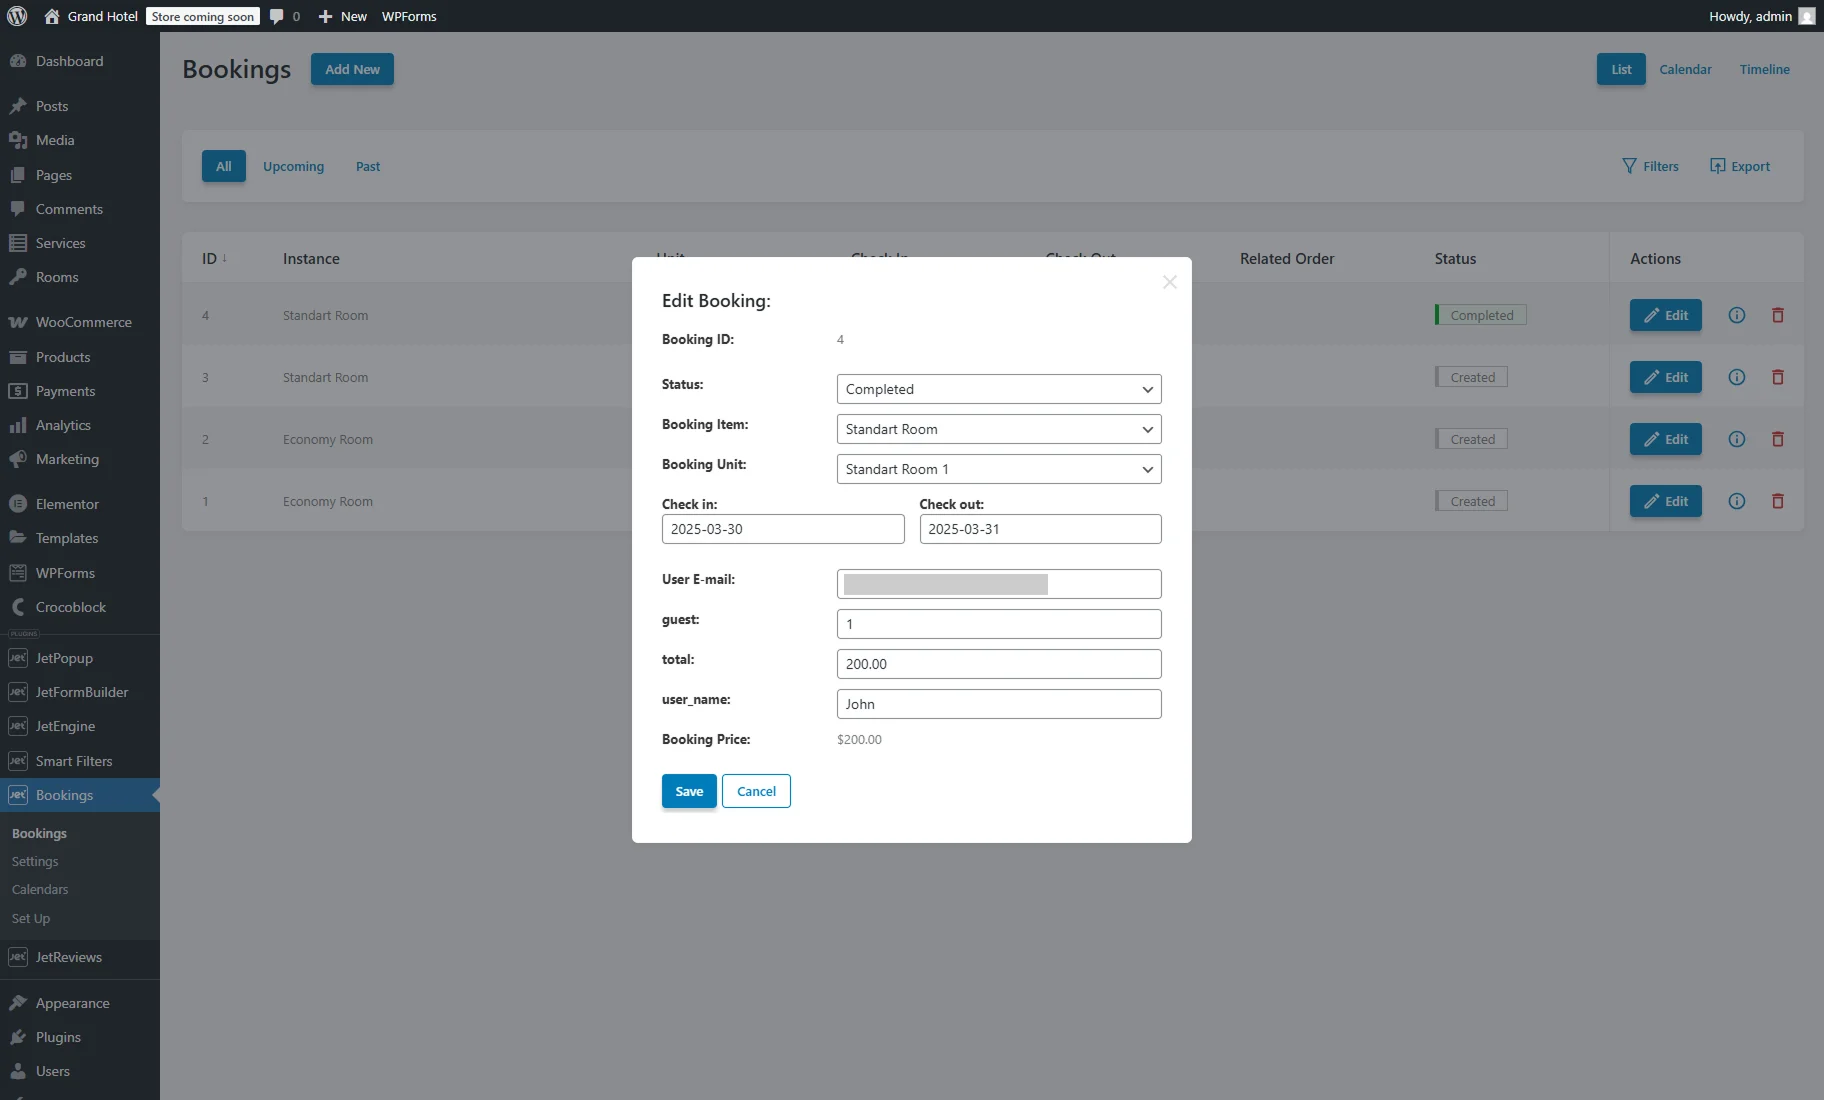
Afterward, we proceed to the WordPress Dashboard > Bookings > Bookings tab, click the “Edit” button for the freshly created booking, and change its Status to “Completed”.
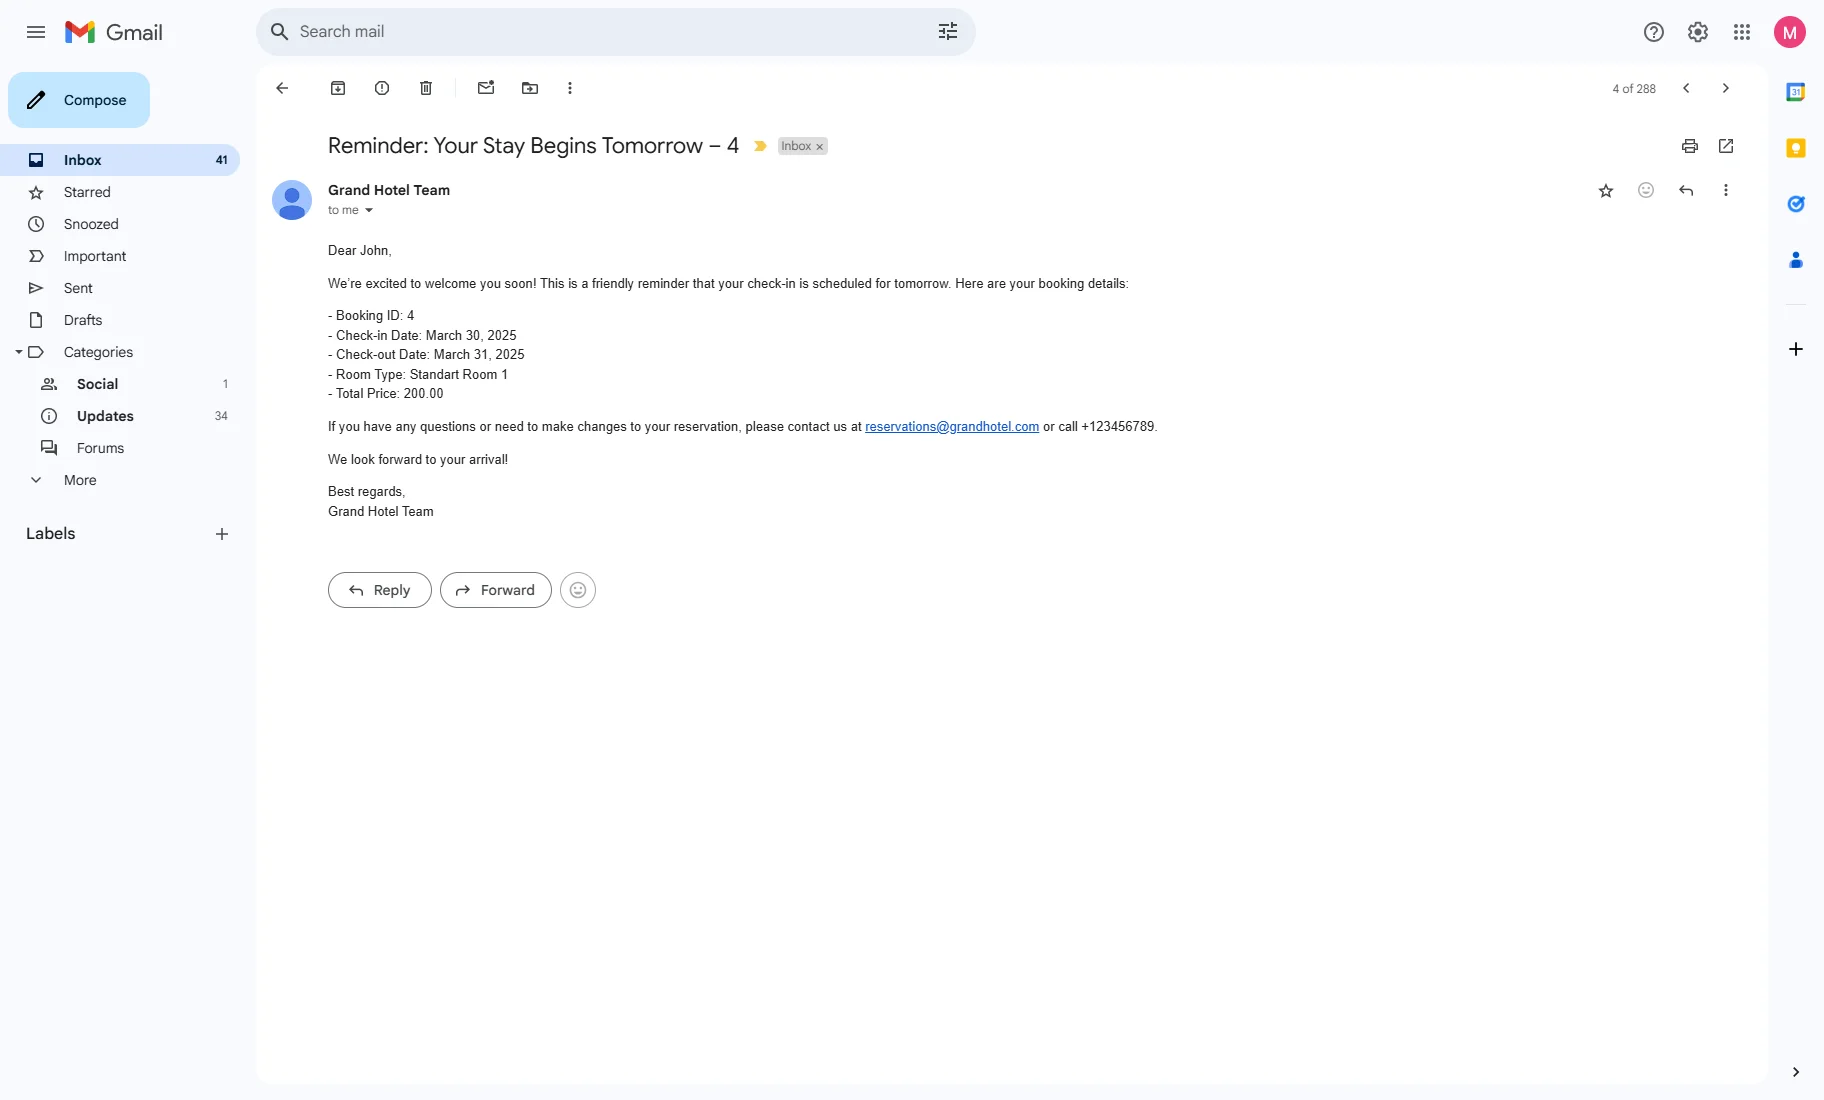
One day before the check-in, we get a reminder email with the booking details.
That’s all. Now you know how to set the automatic email notifications with the JetBooking Workflows feature for WordPress.
