How to Display Bookings in a Dynamic Calendar
Learn how to dynamically display the booking data obtained by JetFormBuilder forms via the Dynamic Calendar widget of the JetEngine plugin.
Before you start, check the tutorial requirements:
- Elementor (Free version) and Block Editor (Gutenberg)
- JetBooking plugin installed and activated
- JetThemeCore plugin installed and activated
- JetFormBuilder plugin installed and activated with a booking form created
Configure the JetBooking Plugin Settings
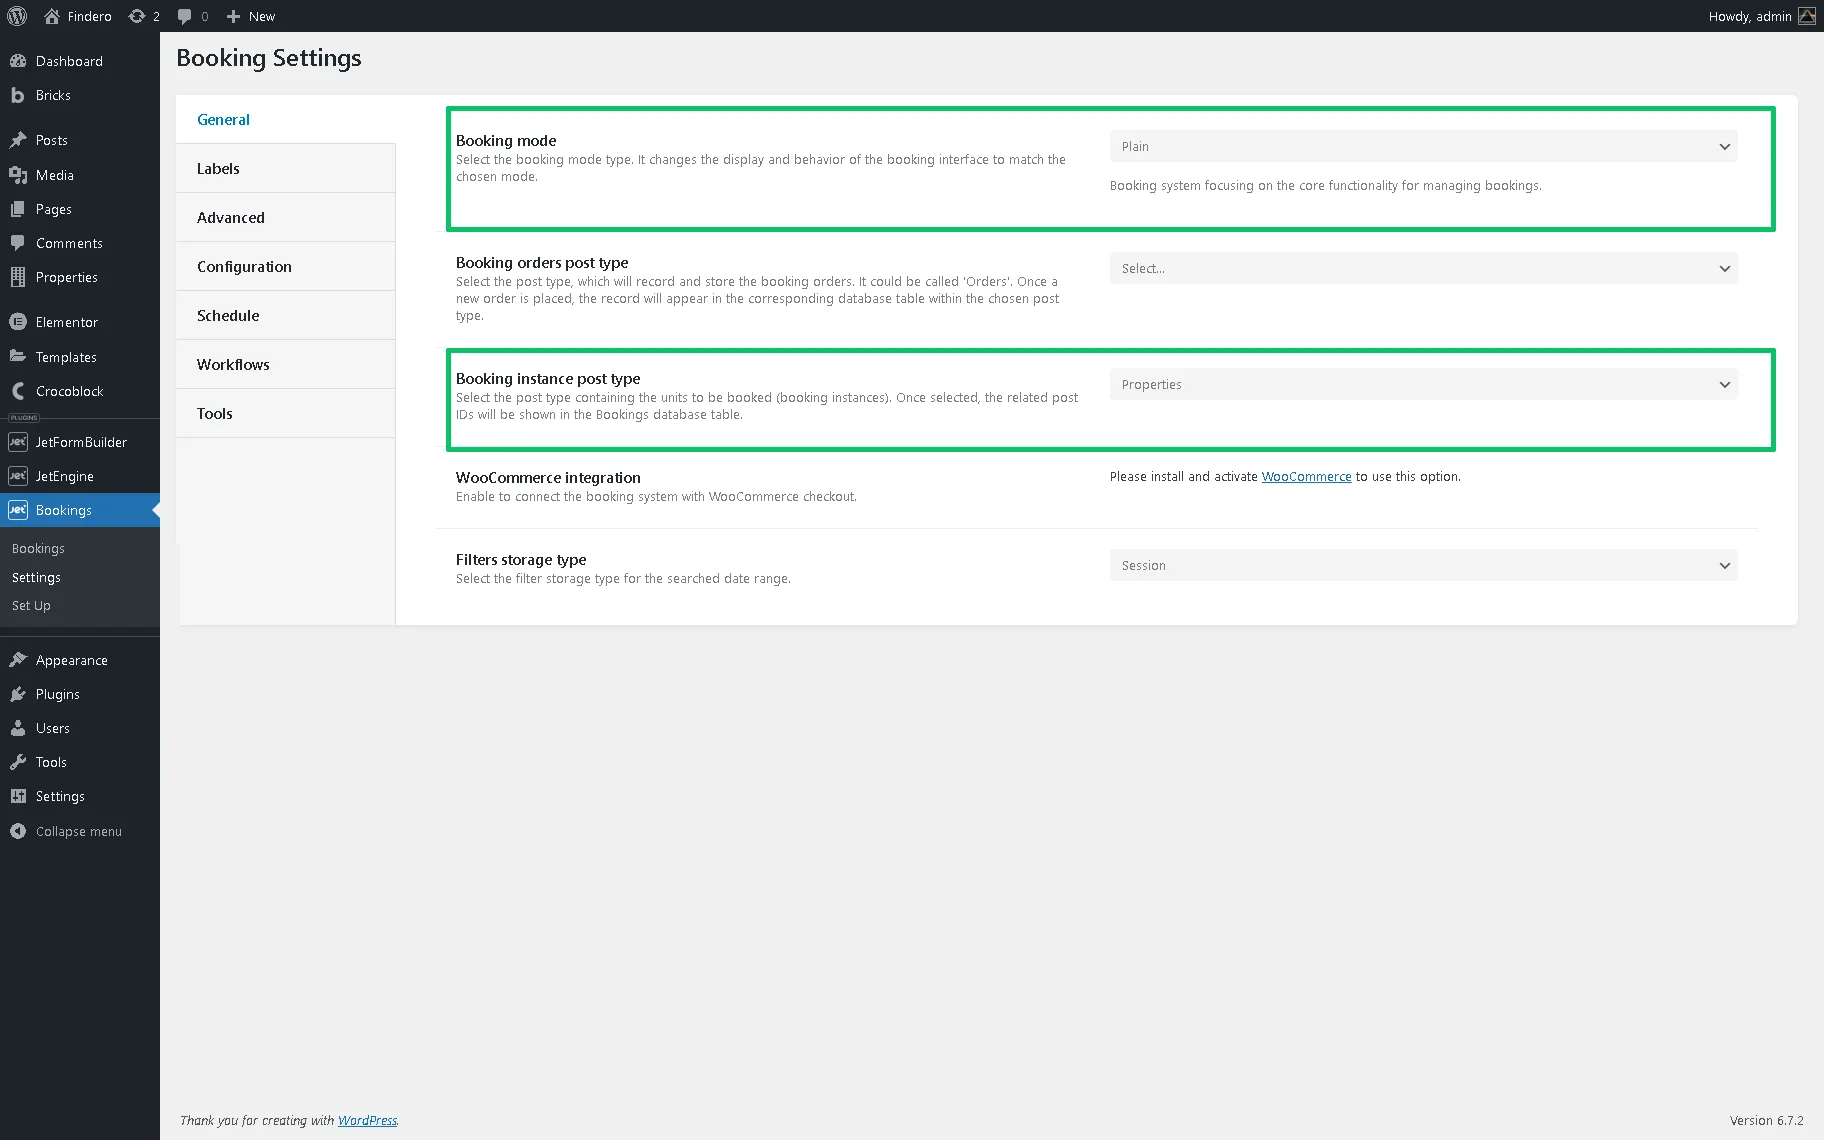
Initially, navigate to WordPress > Bookings > Settings. In the General tab, select the “Plain” option in the Booking mode drop-down menu. After that, unroll the Booking instance post type drop-down menu and choose the CPT for which the set booking data will be displayed (“Properties” in this tutorial).
Then, move to the Schedule tab and set the weekday and time booking rules using the corresponding fields and toggles.
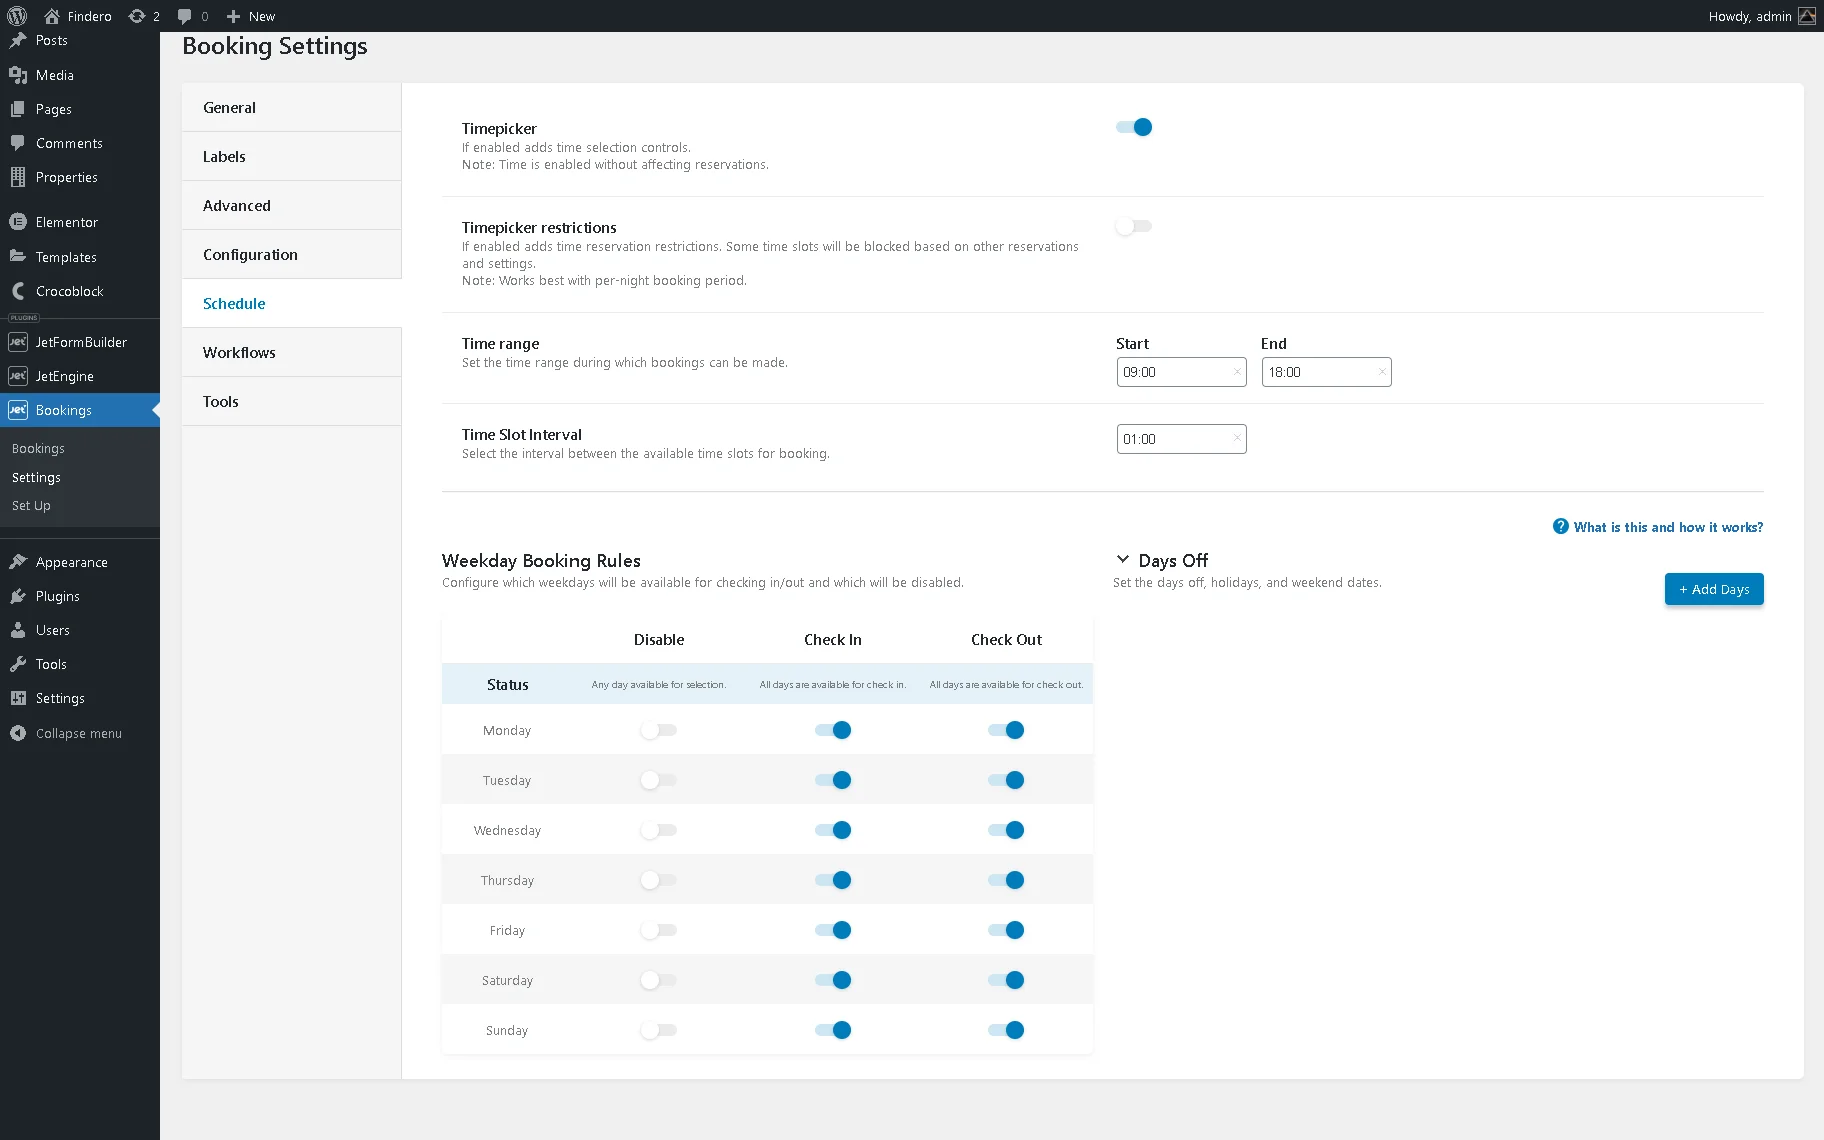
More details about configuring the timepicker settings can be found in the How to Manage Timepicker for Check-In/Check-Out tutorial.
Build a JetEngine Query
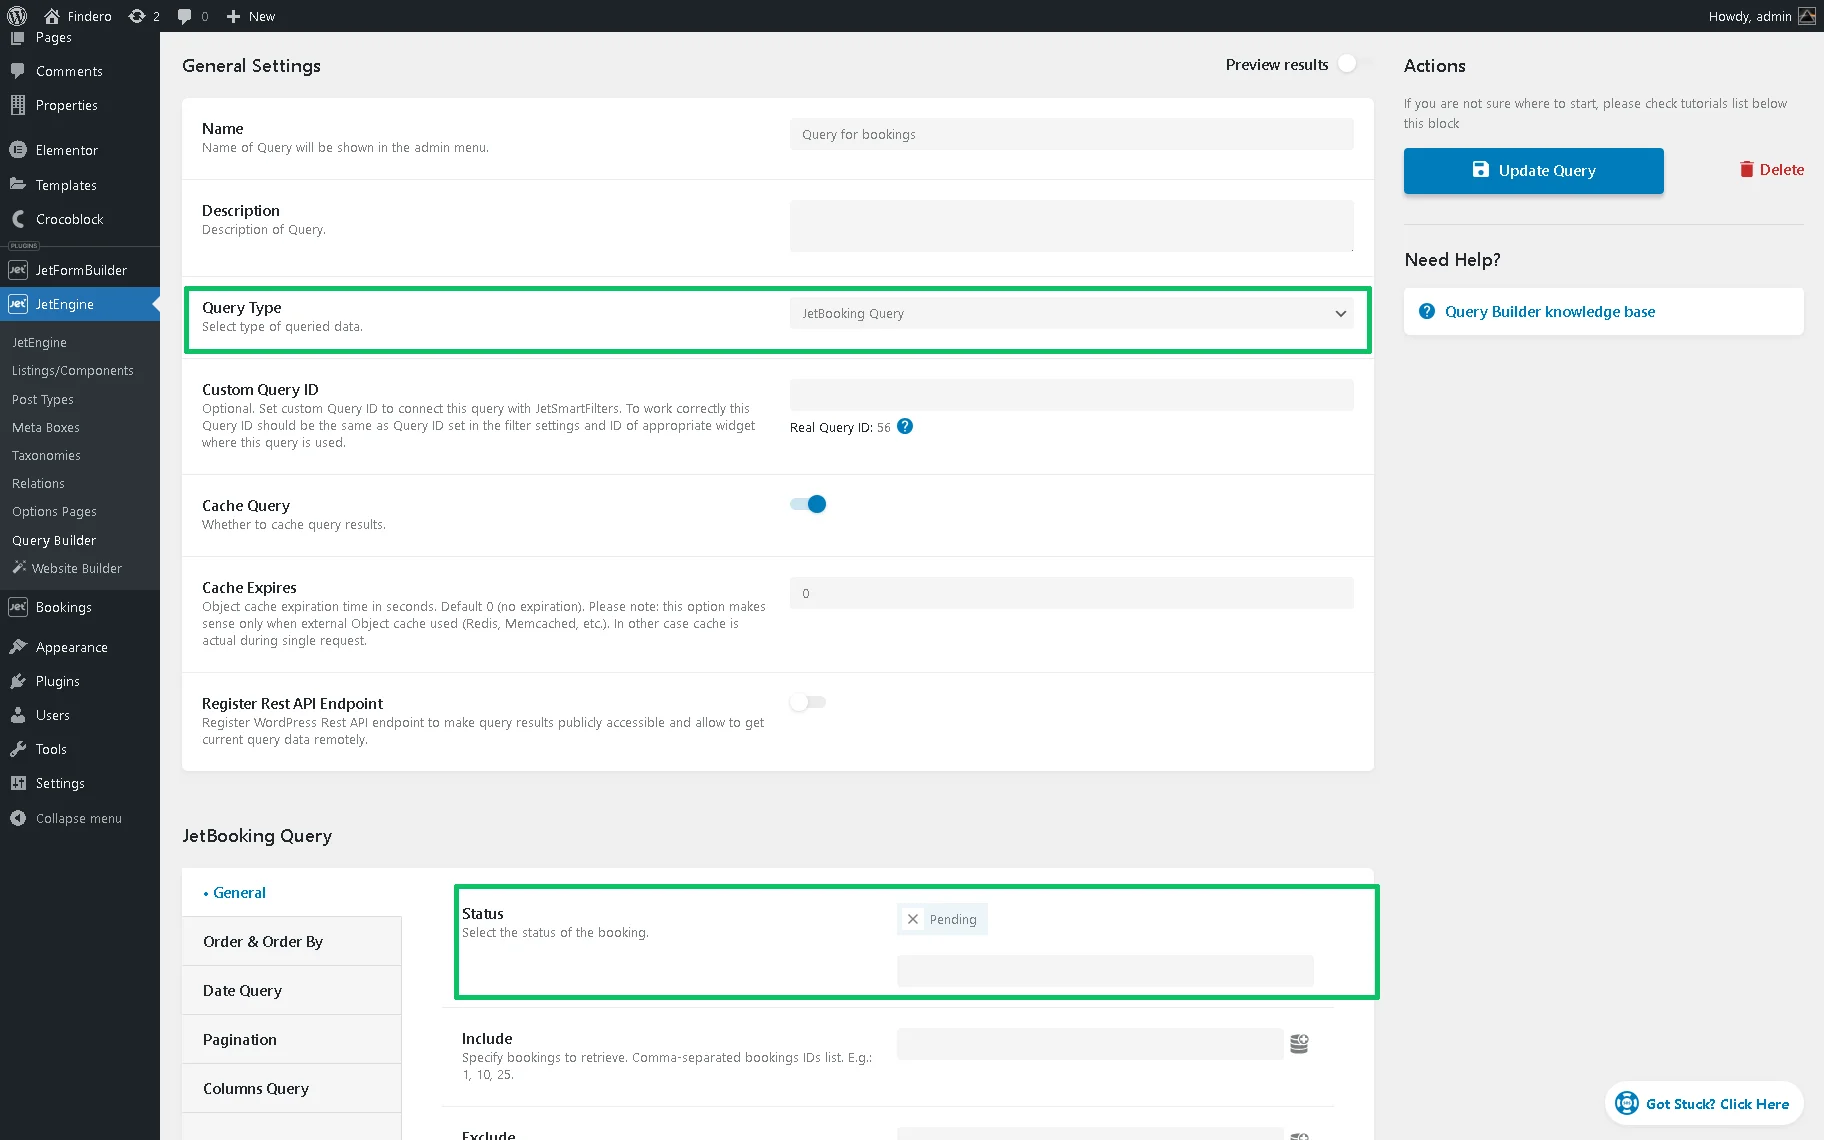
Unroll the WordPress Dashboard > JetEngine > Query Builder tab and press the “Add New” button to build a new query. Type the query’s name (here, “Query for bookings”) into the Name field and select the “JetBooking Query” option from the Query Type drop-down menu.
Navigate to the General tab and select the desired booking status to display (e.g., “On hold”, “Pending”, etc.) from the Status drop-down menu.
In the next step, move to the User ID drop-down menu, press the “Dynamic Tag” icon, and select the “Current user ID” macro.
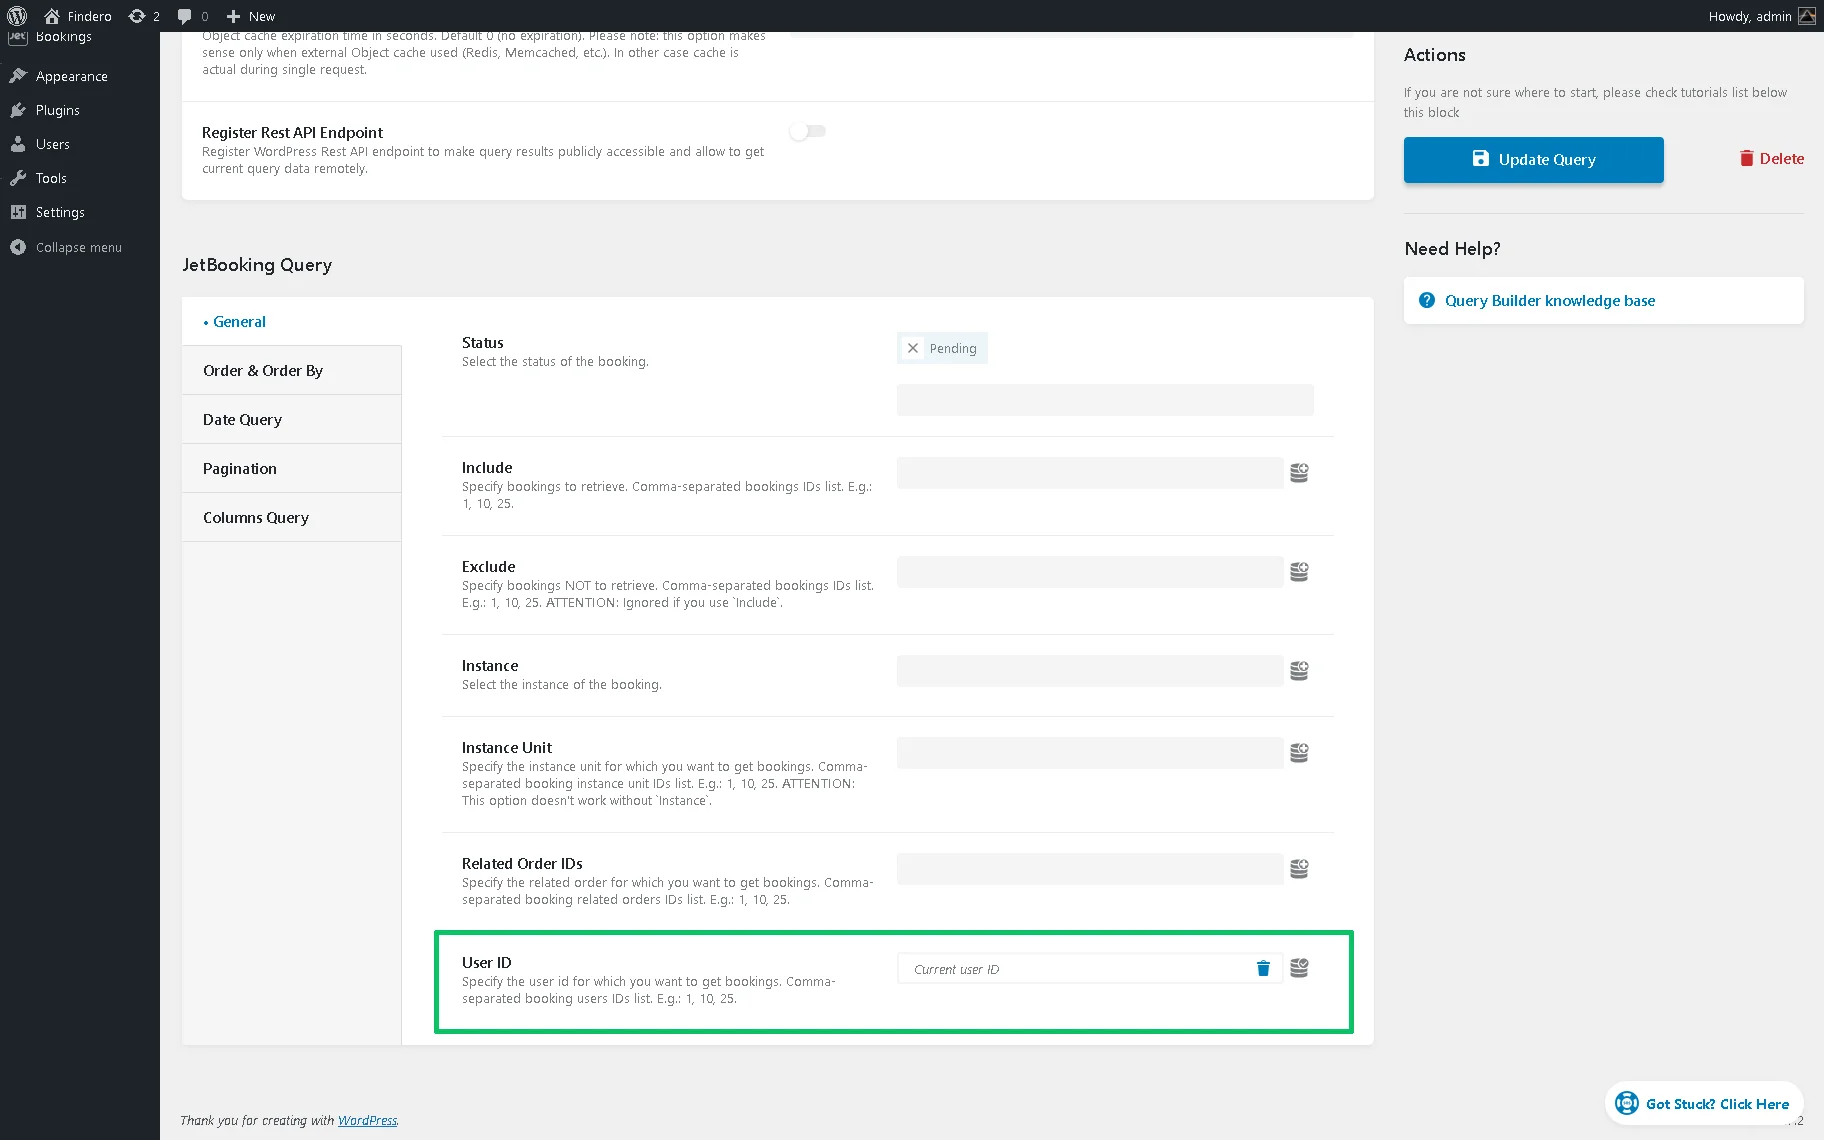
Press the “Add Query / Update Query” button to save it.
Get Booking Data
Create a form or open a previously built one. Read the Creating a Form tutorial to learn more about the form-building process.
Insert the needed form fields. The How to Create a Booking Form tutorial explains the main features of booking forms.
Add the form fields to collect users’ data, such as “First Name,” “Last Name,” and “Email.”
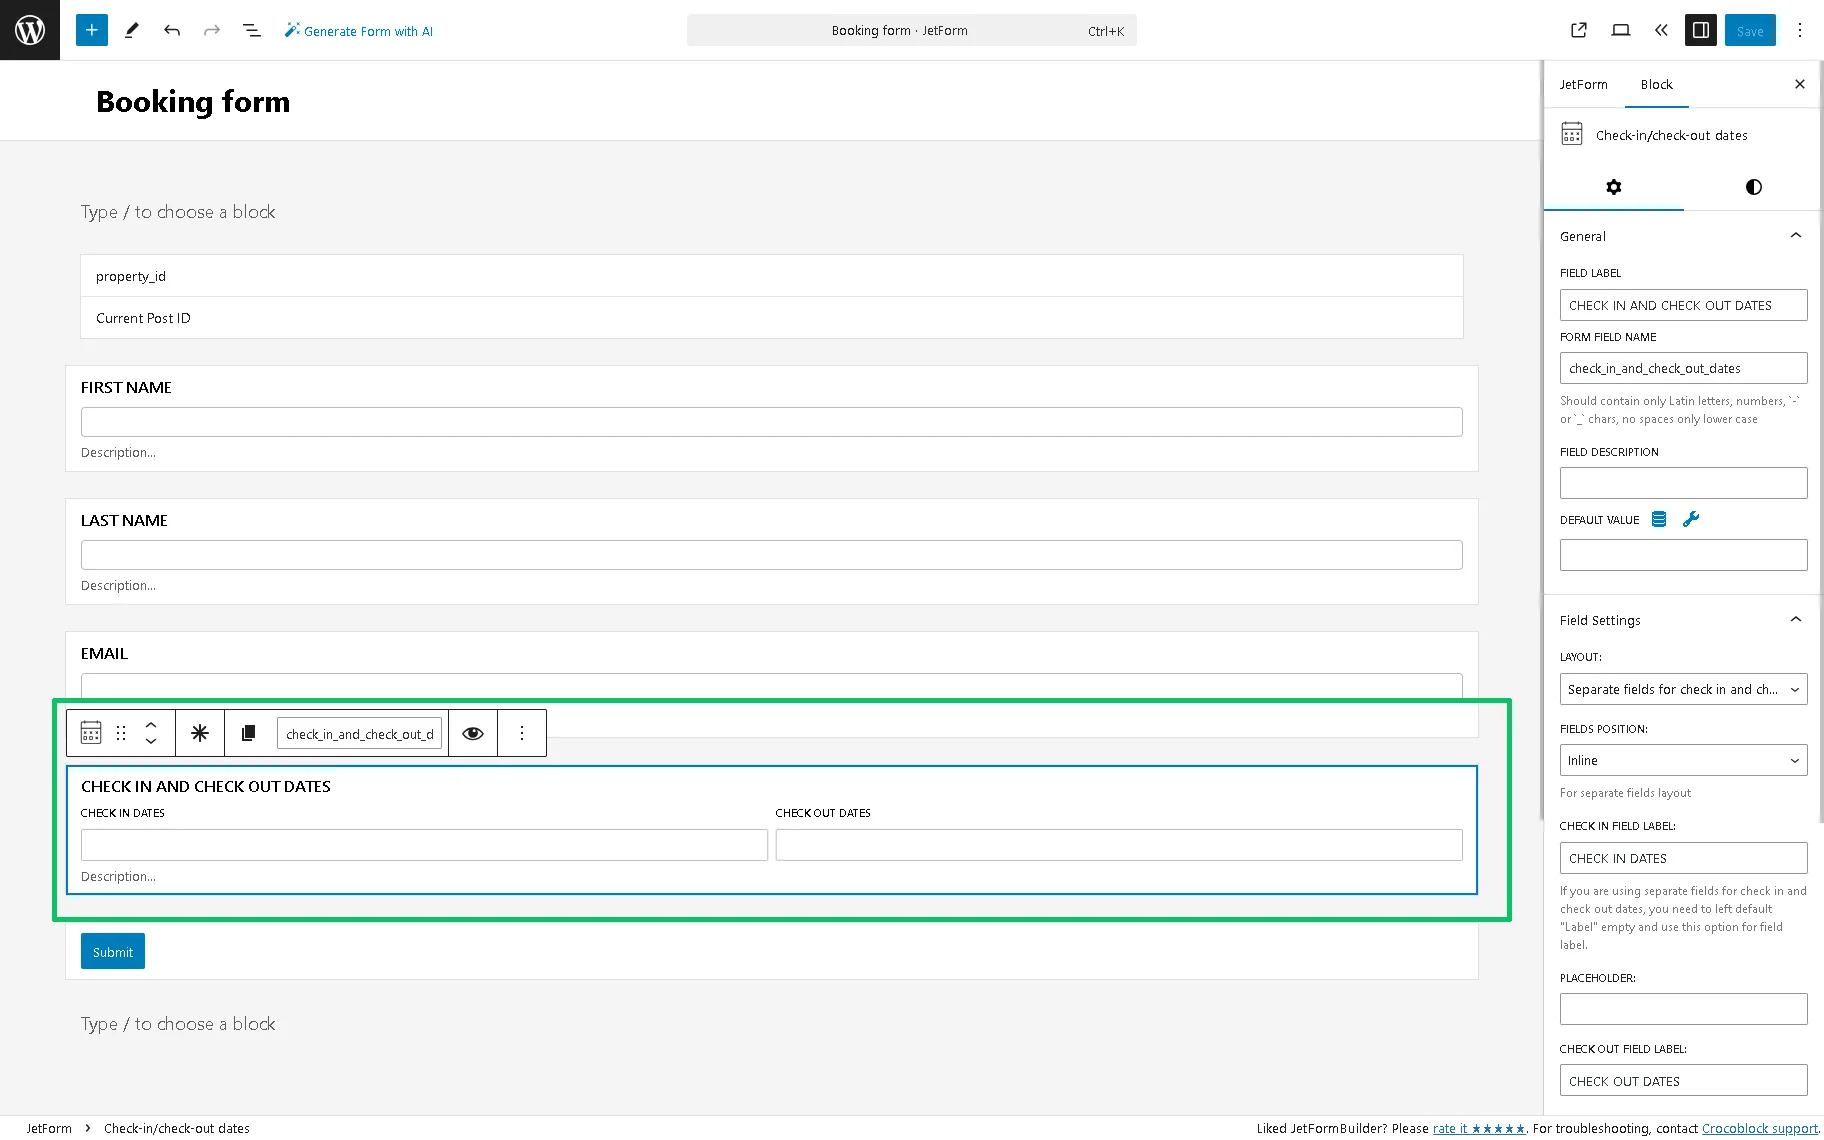
Also, we insert the Check-in/check-out dates block and set its settings. First, we type the field’s label in the General > FIELD LABEL field; after that, we pick the “Inline” FIELDS POSITION and select the “Separate fields for check in and check out dates layouts” option in the Field Settings > LAYOUT drop-down list. Next, set the date format, date separator, and the first day of the week in the Field Settings > DATE FORMAT, Field Settings > DATE FIELD SEPARATOR, and Field Settings > FIRST DAY OF THE WEEK drop-down lists.
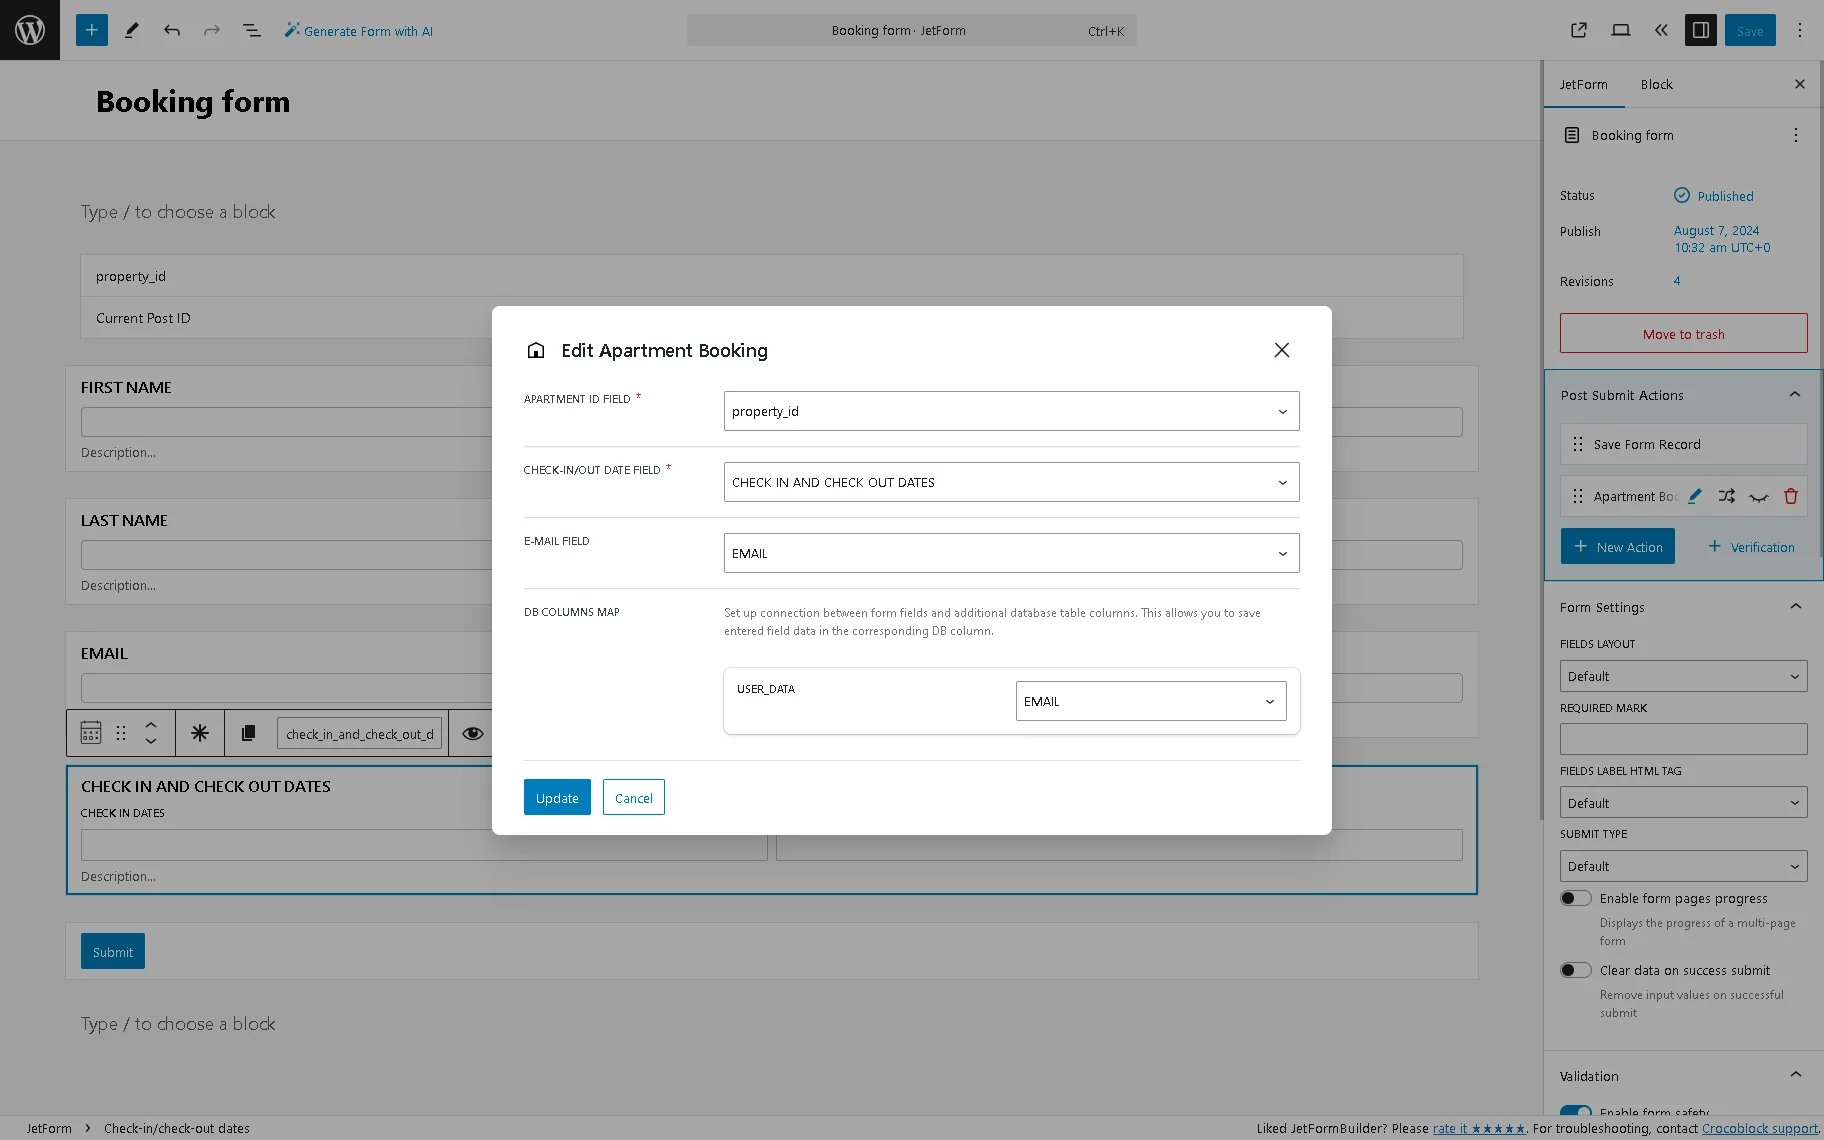
Then, move to the JetForm settings and add the “Apartment Booking” Post Submit Action. Here, we fill out the pop-up’s fields: choose the name of the Hidden Field (in this case, the “property_id”) in the APARTMENT ID FIELD; the corresponding fields in CHECK IN/OUT DATA FIELD and EMAIL FIELD. Finally, we move to the DB columns map block and match the form’s field data to the corresponding database column (in this tutorial, we picked the EMAIL form’s field in the USER_DATA drop-down menu).
In the last step, press the “Update” button and save the form.
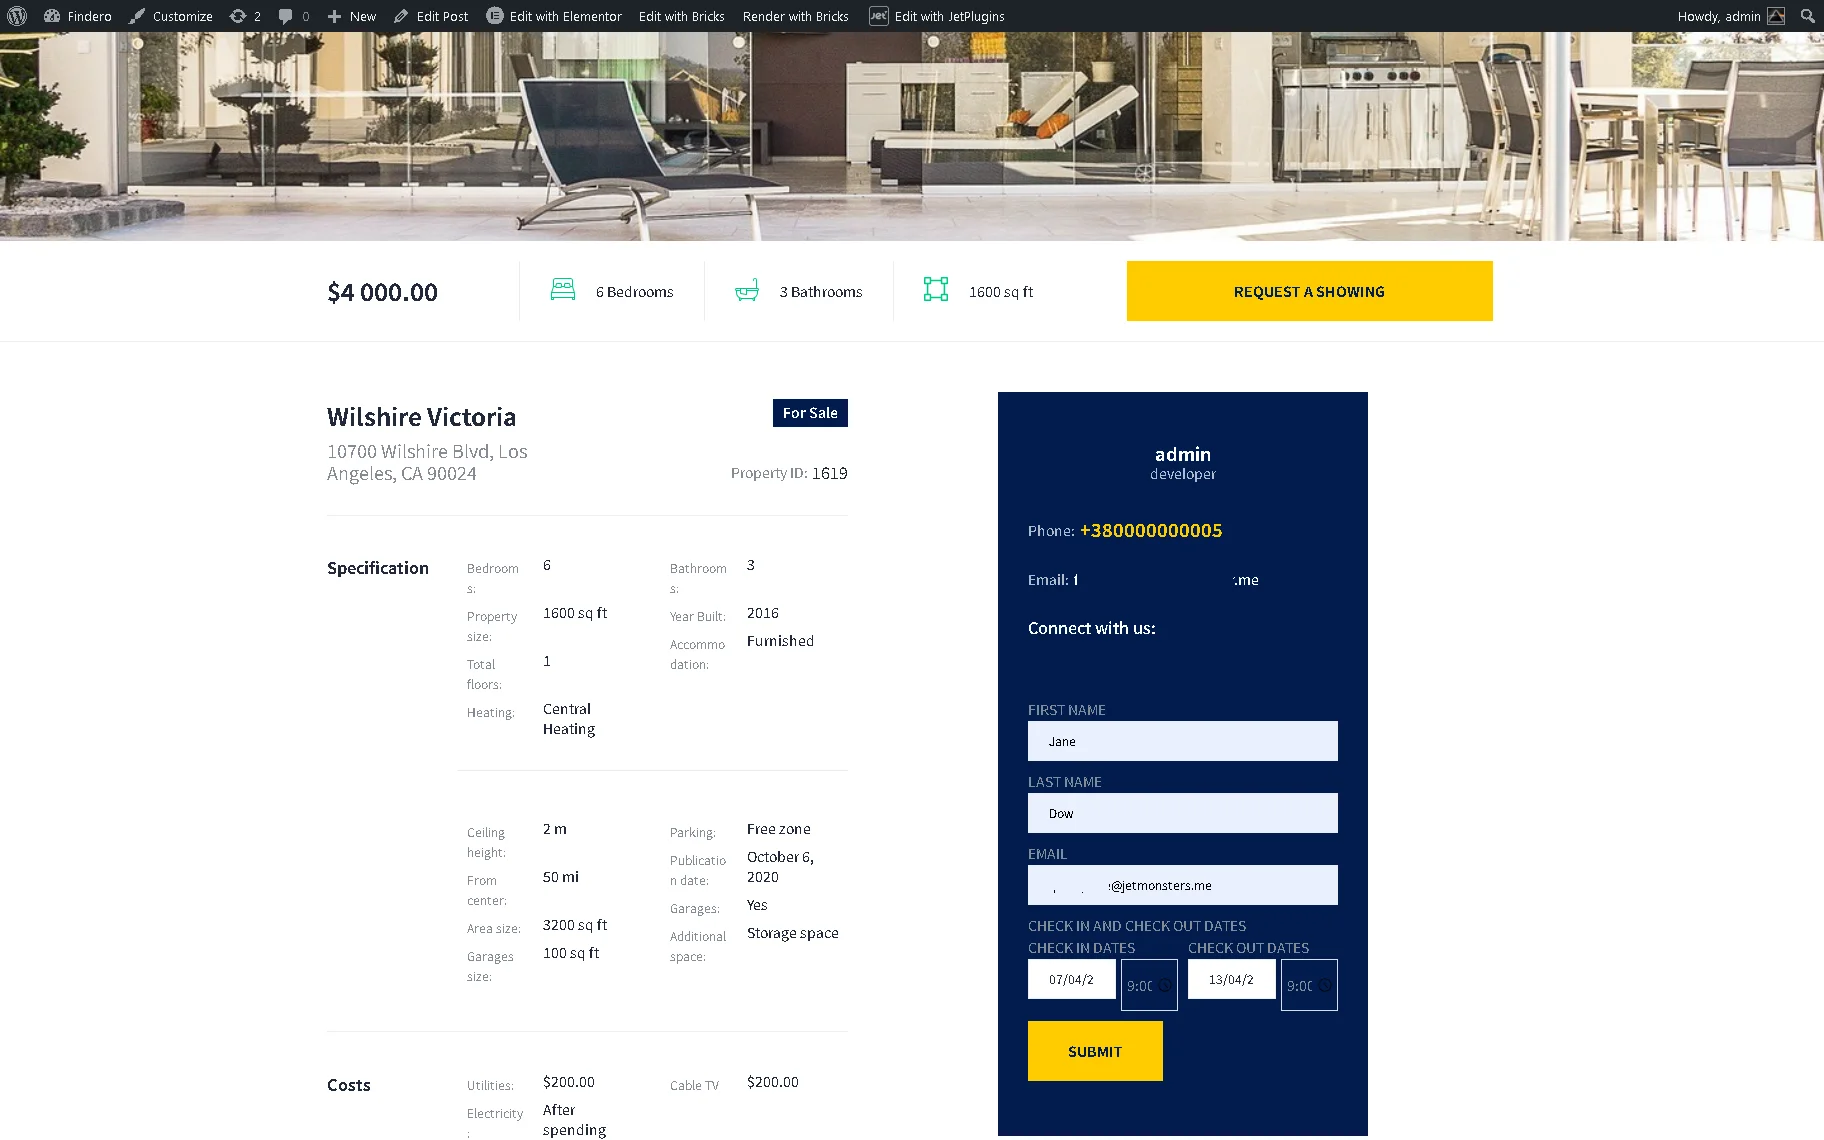
Finally, add the form to a Single Post Page Template of the CPT post. In this case, we use Elementor to insert the form via the JetForm widget. Read the How to Display the Booking Form on the Single Post Page tutorial for more details. Then, navigate to the front end and submit the form.
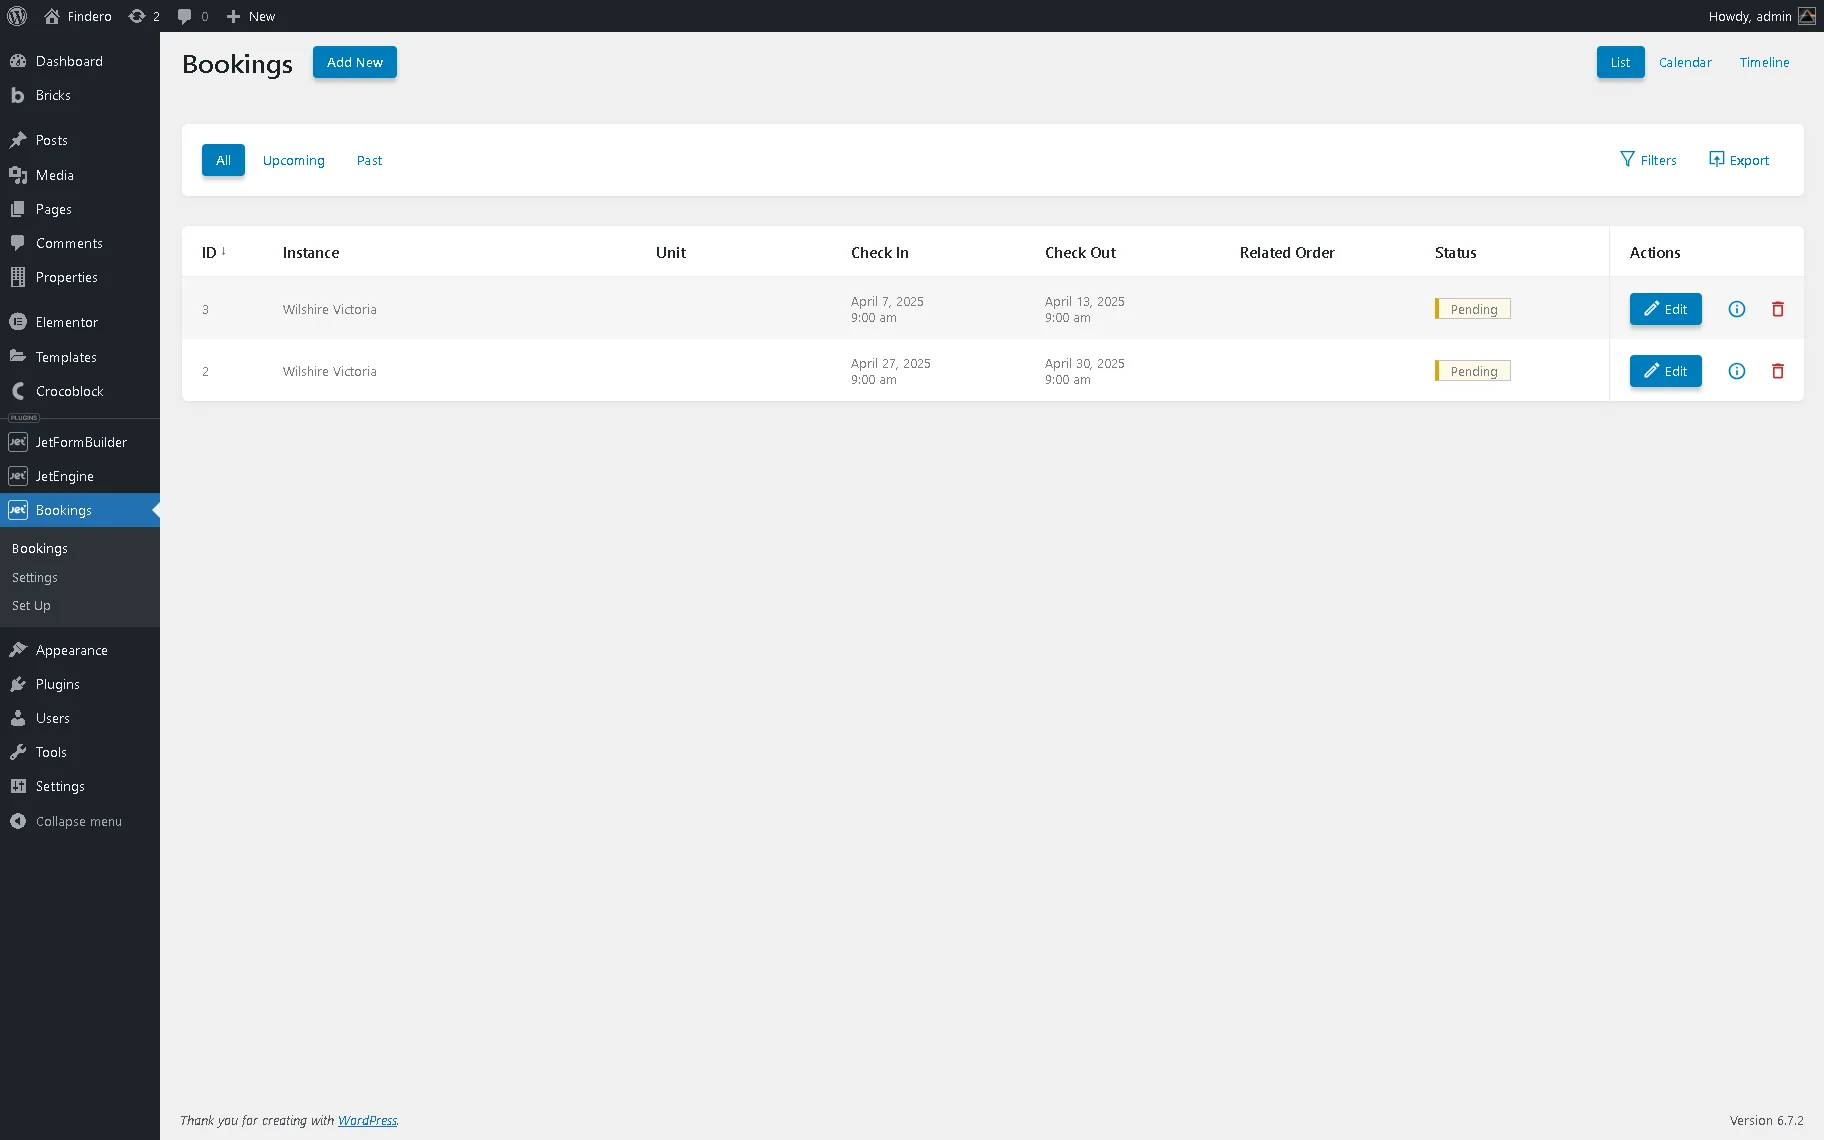
After submitting the form, all booking data will be collected by the JetBooking plugin in the WordPress Dashboard > Bookings > Bookings tab.
Create a Listing Item
The next step is creating a Listing item to display the entered booking data.
First, navigate to the WordPress Dashboard > JetEngine > Listings/Components tab and press the “Add New Item” button. Now, select the “Query Builder” option from the Listing source drop-down menu and choose the necessary query from the Query drop-down menu (here, we pick the “Query for bookings” query); next, set the Listing item name field, and select the editor from the Listing view drop-down menu.

Press the “Create Listing Item” button.
Add the necessary fields to the listing item. For this tutorial, we find and drag-and-drop the Dynamic Field widget.
First, we select the “Post/Term/User/Object Data” option from the Source drop-down menu and set the “Booking ID” option from the JetBooking section in the Object Field drop-down menu.
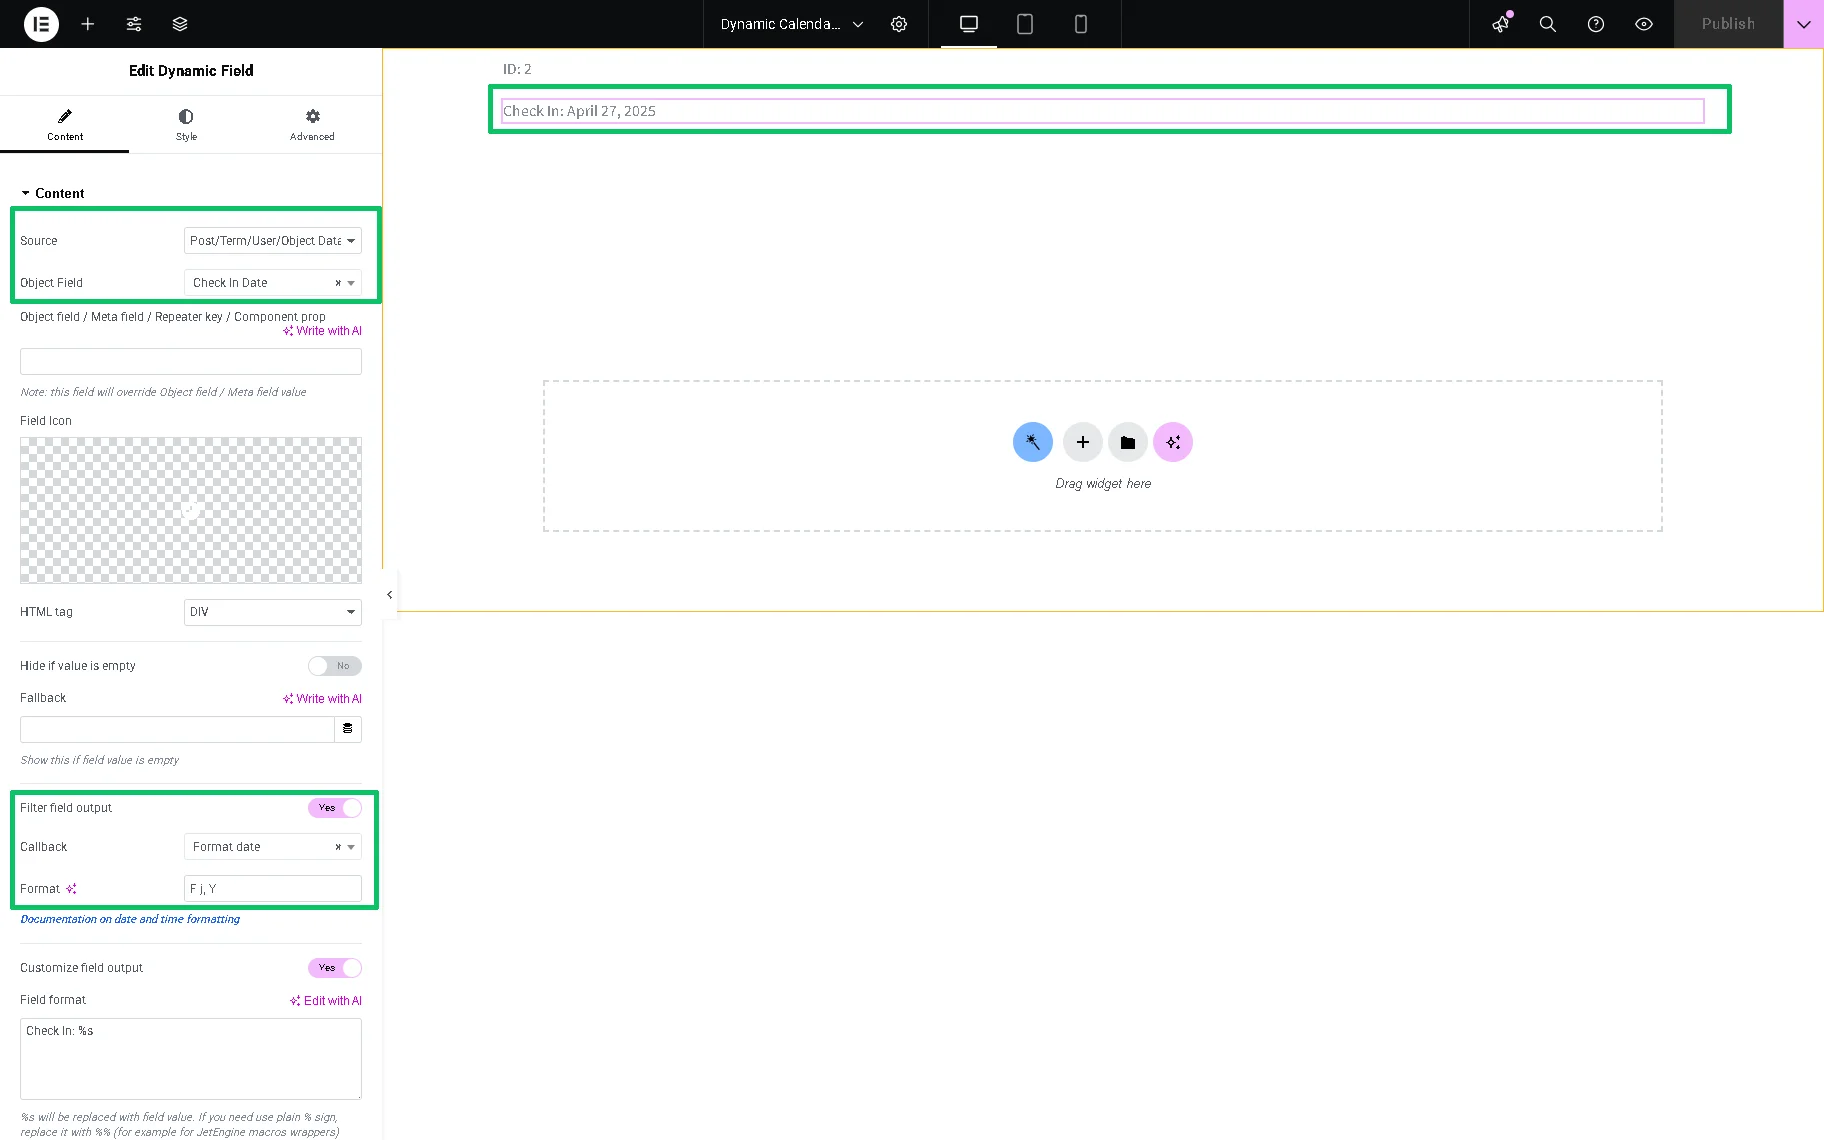
After that, we duplicate the Dynamic Field widget and select the “Check In Date” option that can be found in the JetBooking section in the Object Field drop-down menu. To display the data in the necessary format, activate the Filter field output toggle and select the format option from the Callback drop-down menu. In this case, we choose the “Format date” Callback and set the “F j, Y” Format to display the date in the “Month, day, year” view.
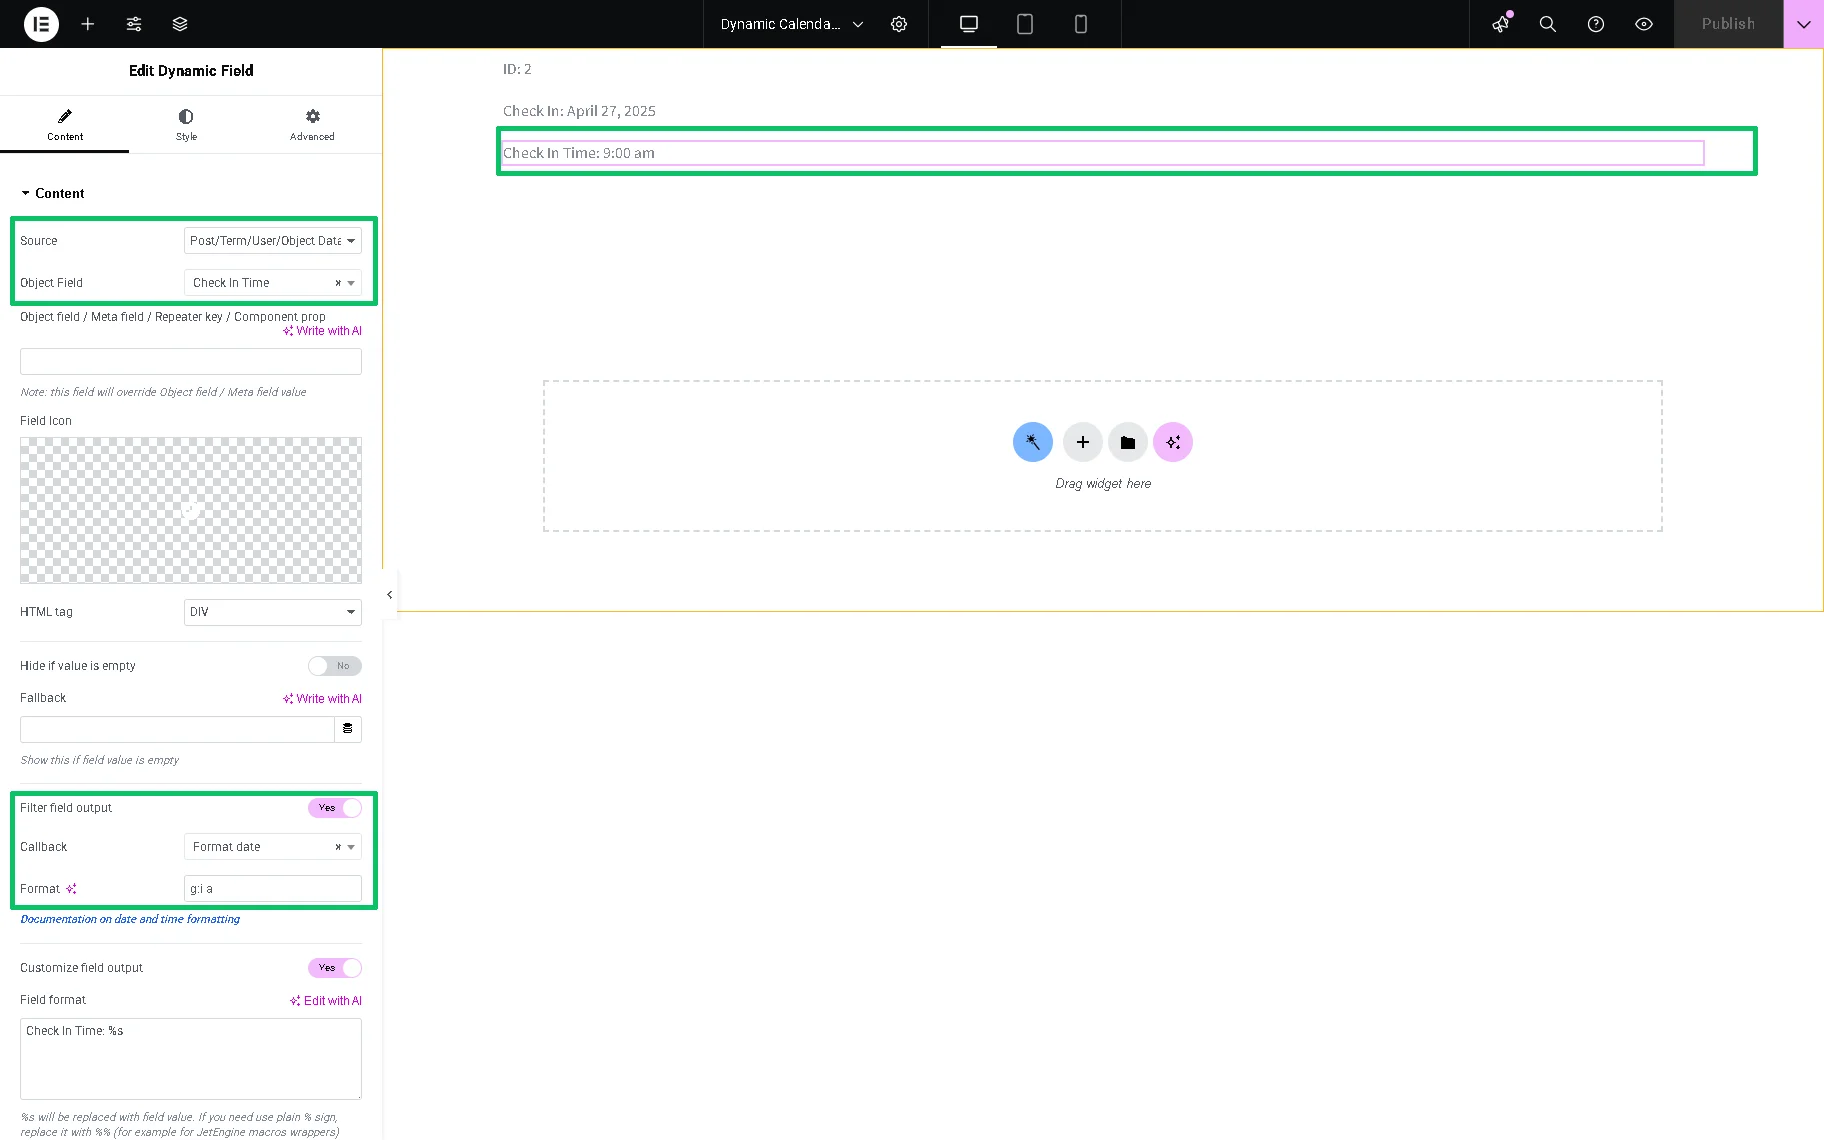
We duplicate the Dynamic Field widget again and select the “Check In Time” option, which can be found under the JetBooking section in the Object Field drop-down menu. Also, we activate the Filter field output toggle, set the “Format date” Callback, and type the “g:i,a” text in the Format field.
In the same way, we add the Dynamic Field widget and display the “Check Out Date” and “Check Out Time” options.
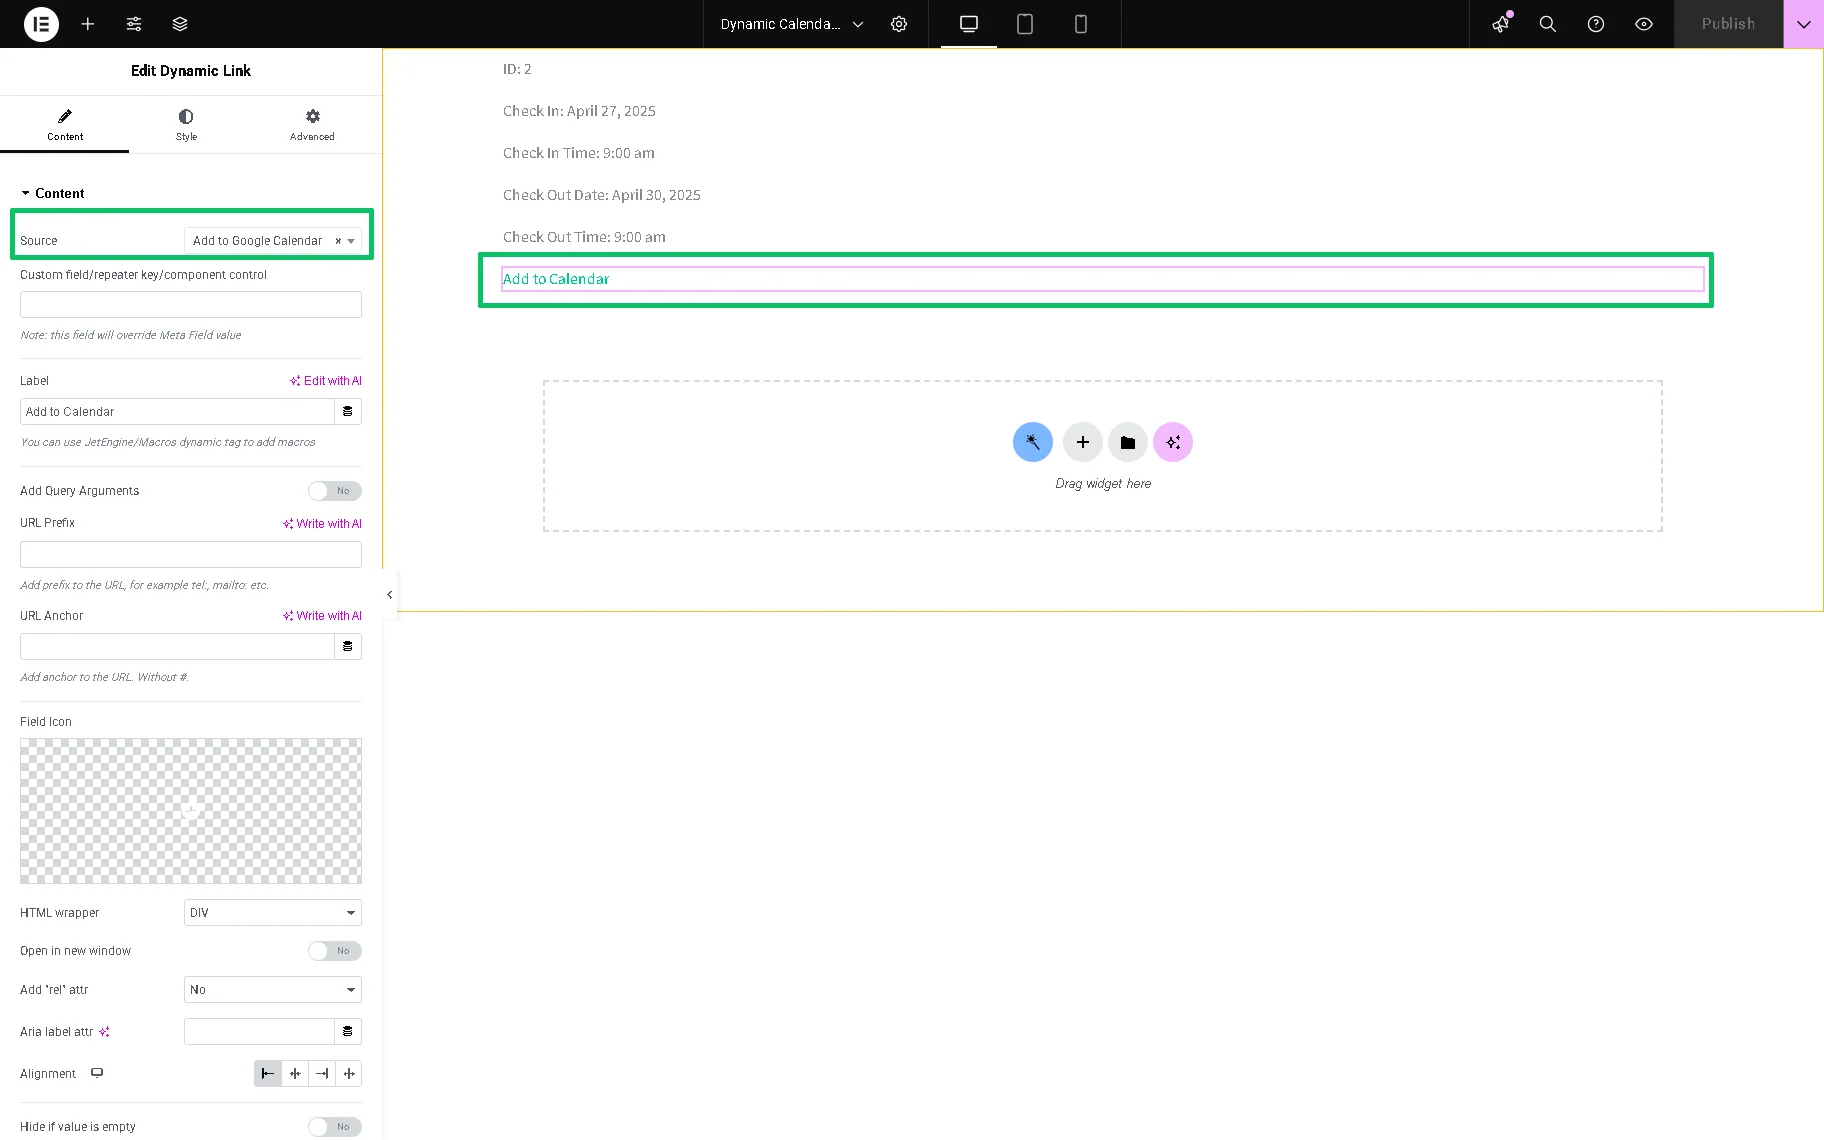
Finally, to add the booking to the Google Calendar, we add the Dynamic Link widget and select the “JetBooking: Add booking to Google Calendar” option from the Source drop-down menu.
Press the “Publish” button to save the page.
Display Bookings in the Dynamic Calendar Widget
Create a new Single page or open the one you created for the CPT post you used to build a query and display booking data.
Find the Dynamic Calendar widget and drag and drop it to the single page. Select the built listing item from the Listing drop-down menu and the “Booking date” option from the Group posts by field.
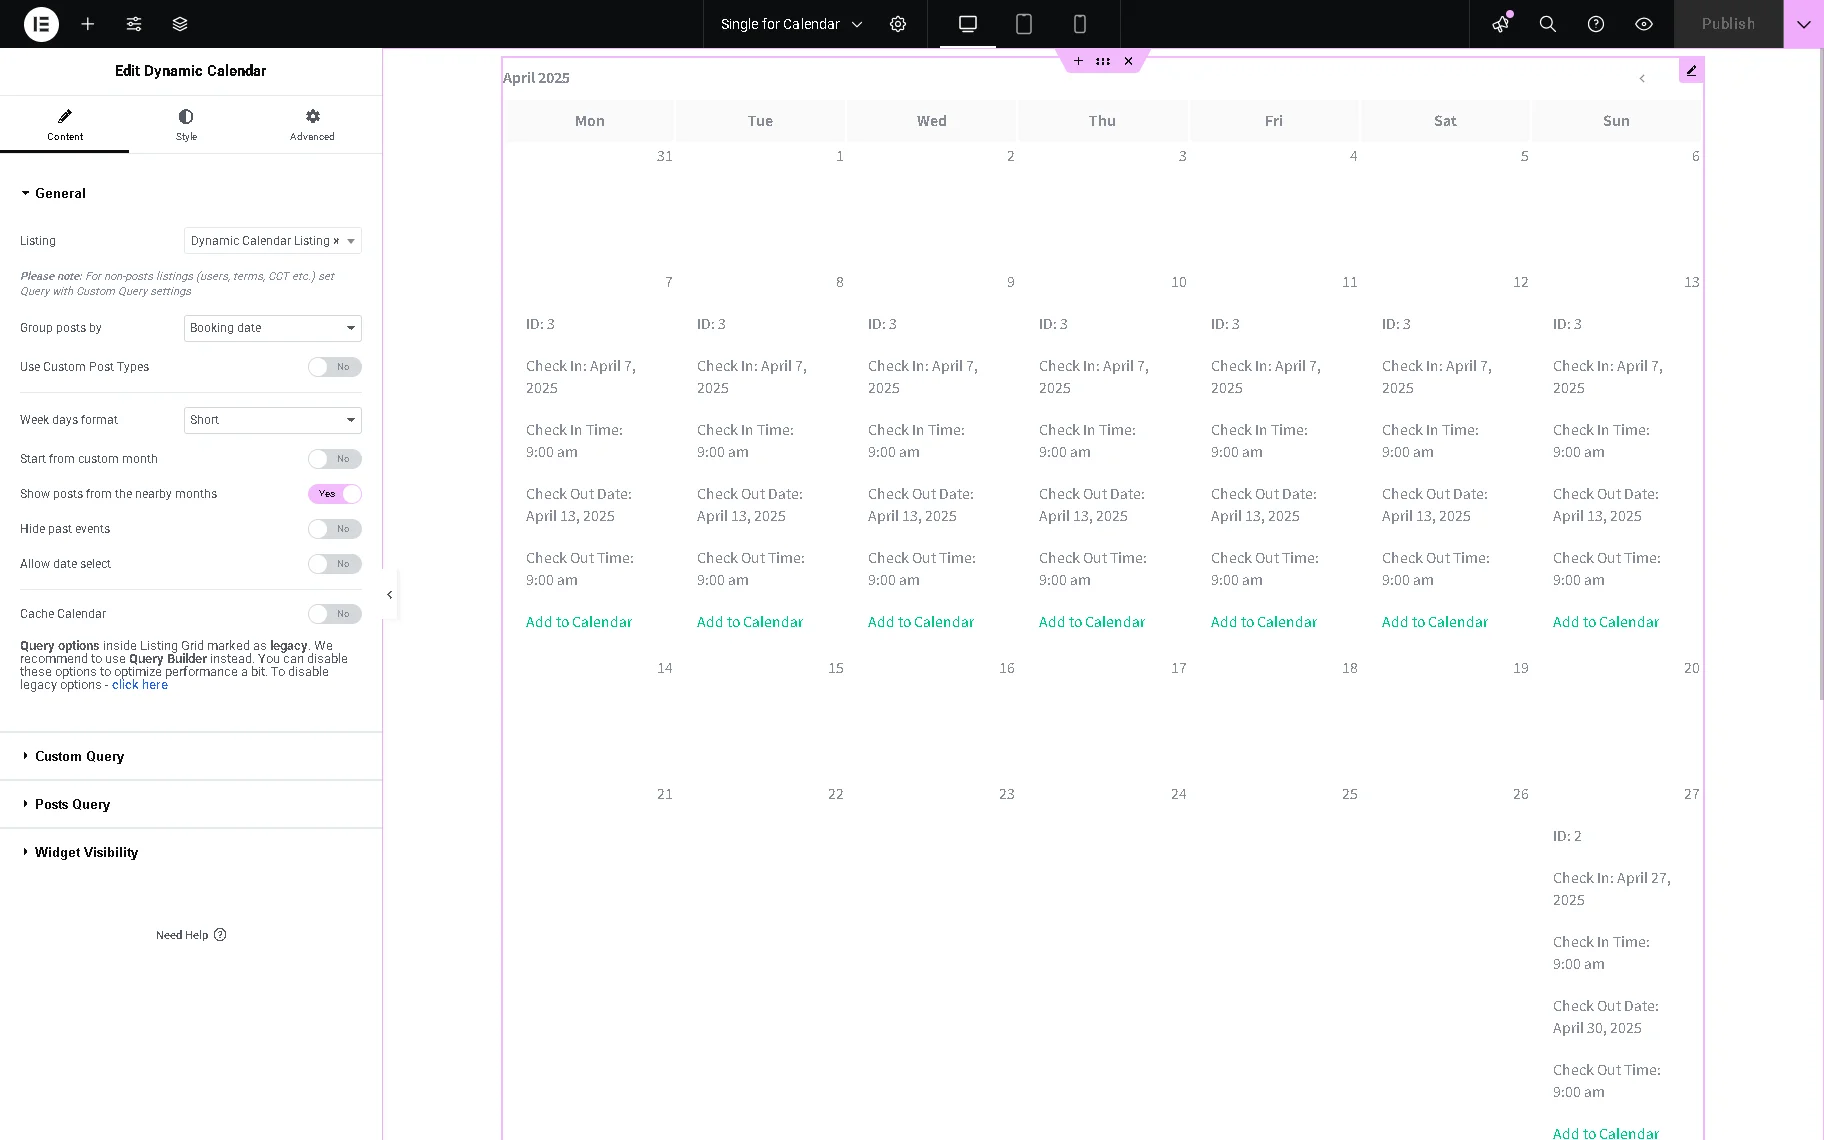
Update the single page and check the Dynamic Calendar on the front end.
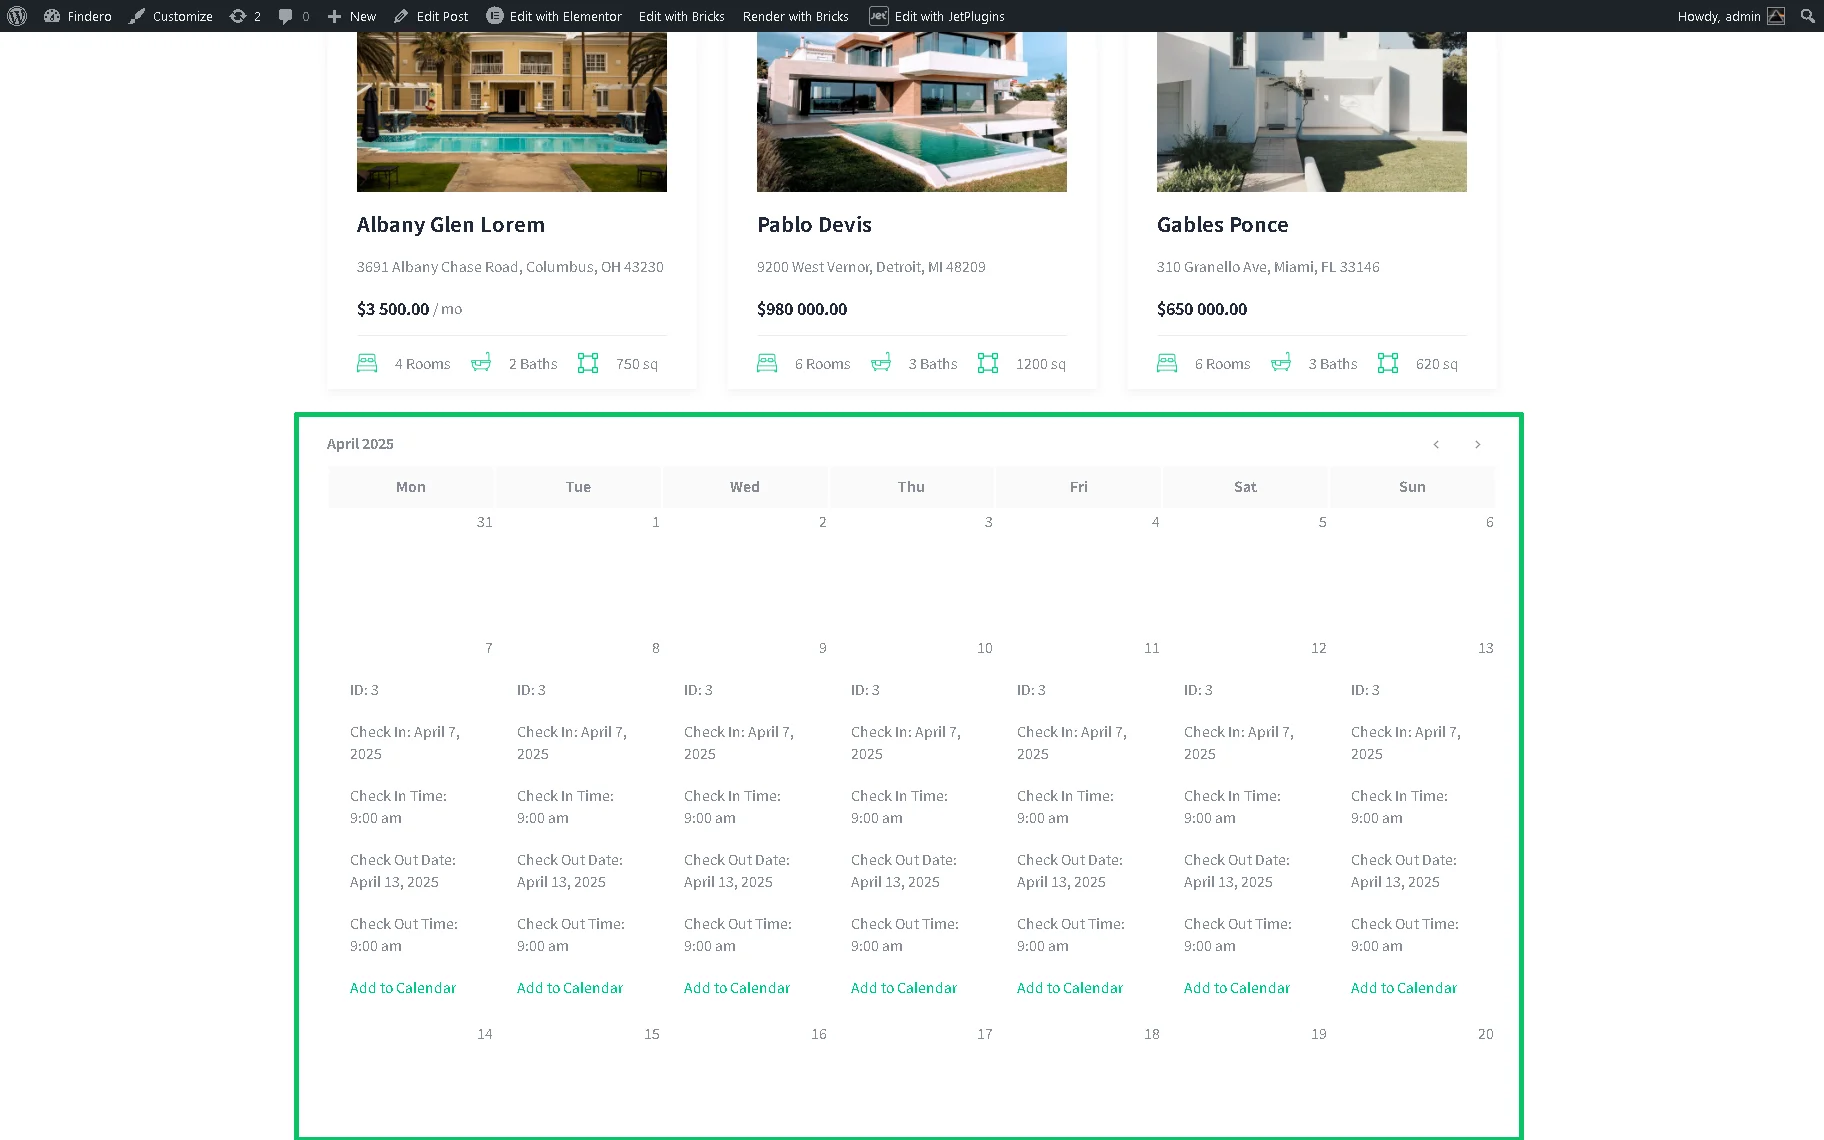
Pressing the “Add to Google Calendar” link adds the booking to the Google Calendar.
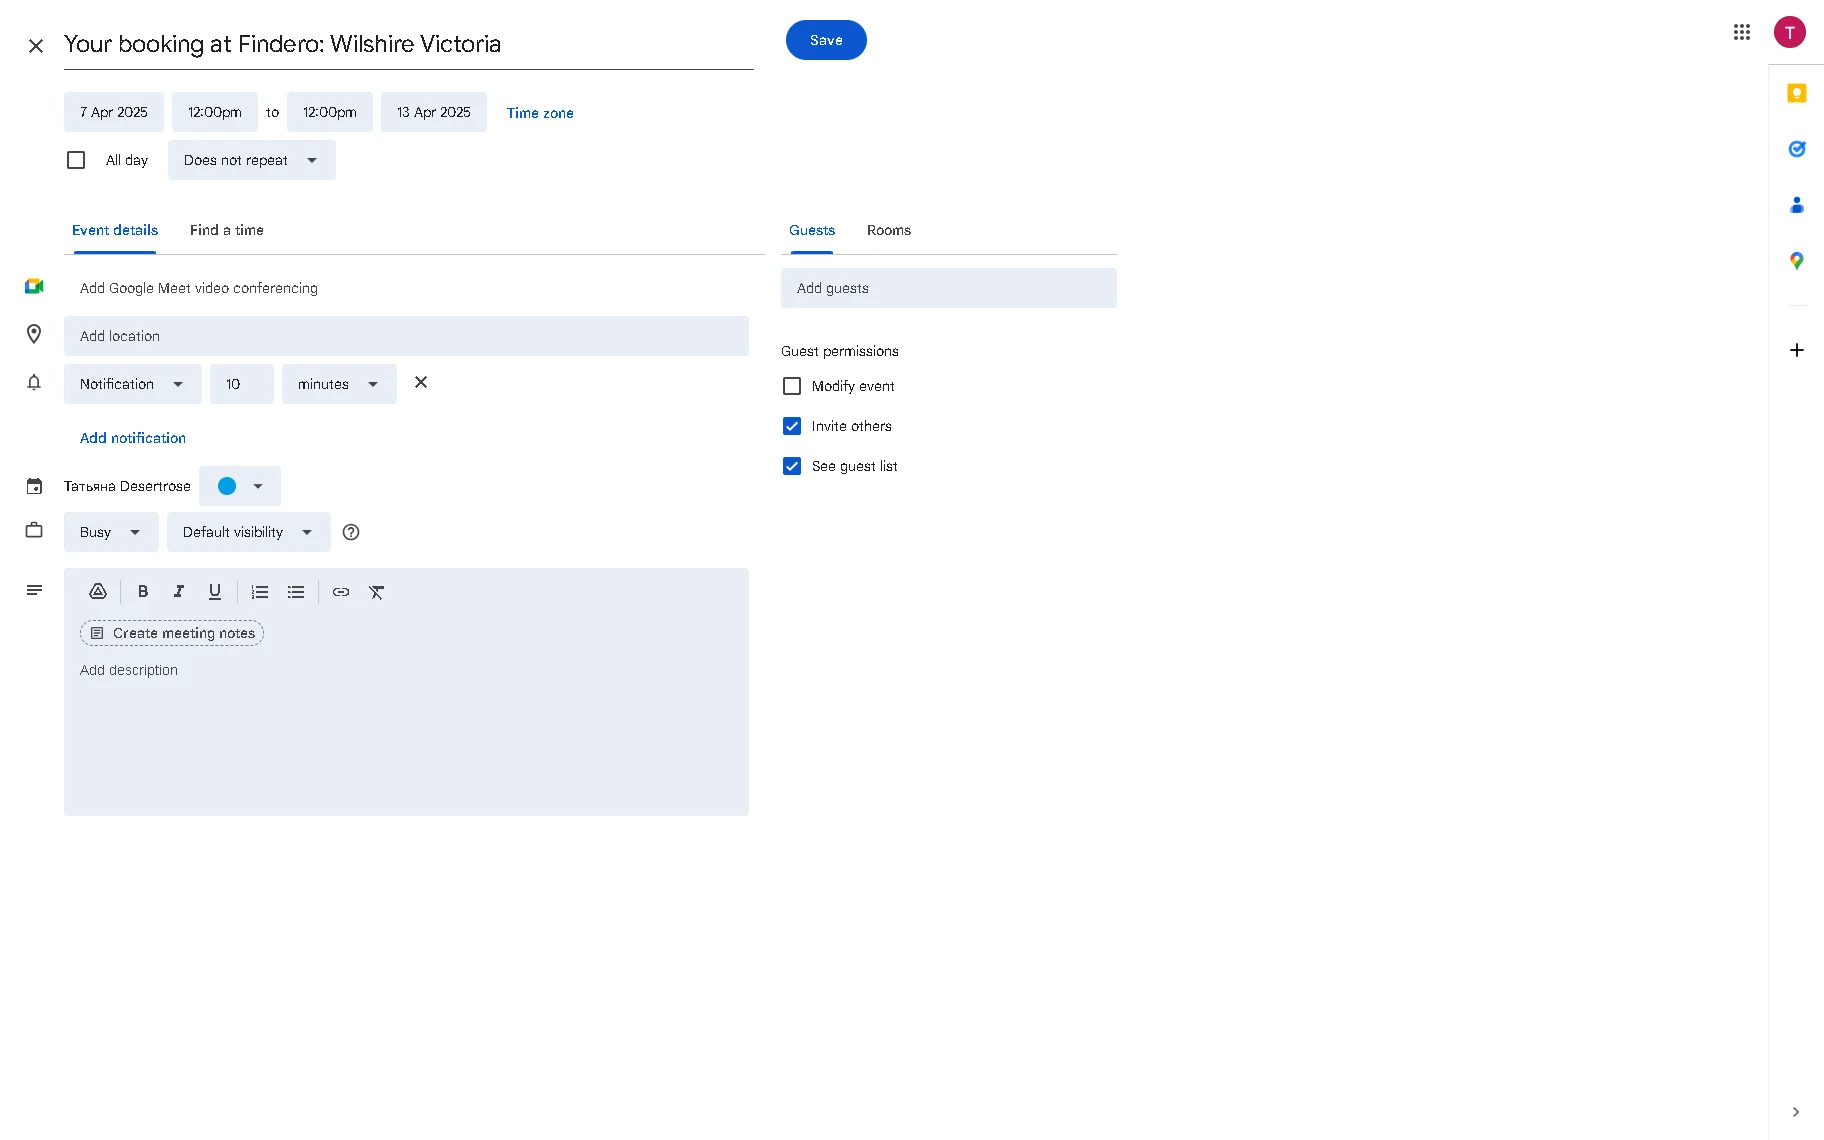
That’s all about displaying booking data via the JetEngineDynamic Calendar widget.