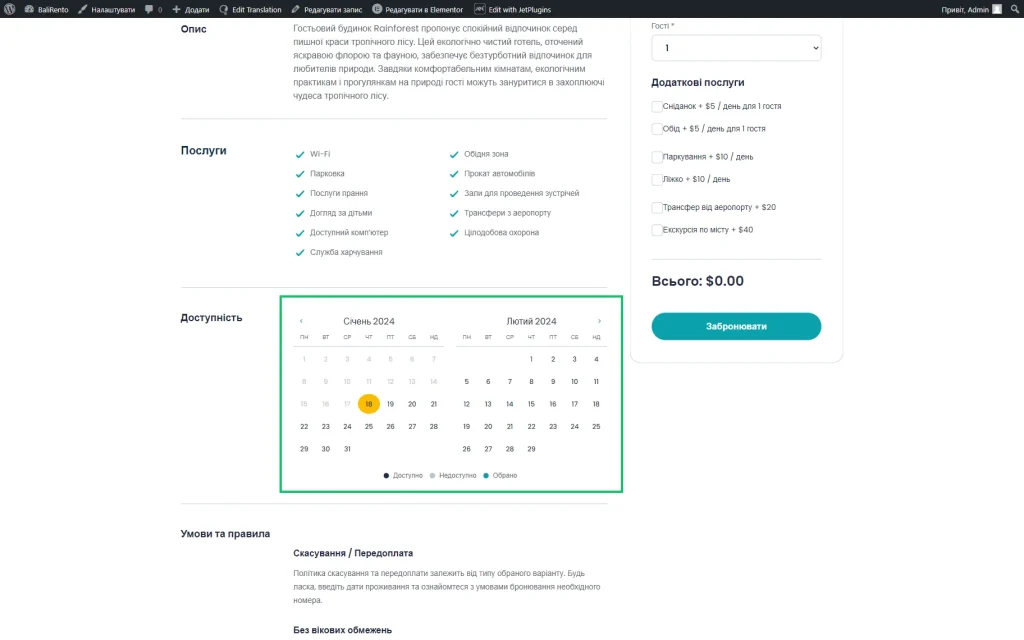
How to Translate Booking Availability Calendar Labels with WPML
From this tutorial, you will find out how to translate the Booking Availability Calendar from the JetBooking WordPress plugin with WPML.
Before you start, check the tutorial requirements:
- WPML installed and activated
- JetBooking plugin installed and activated with booking set up
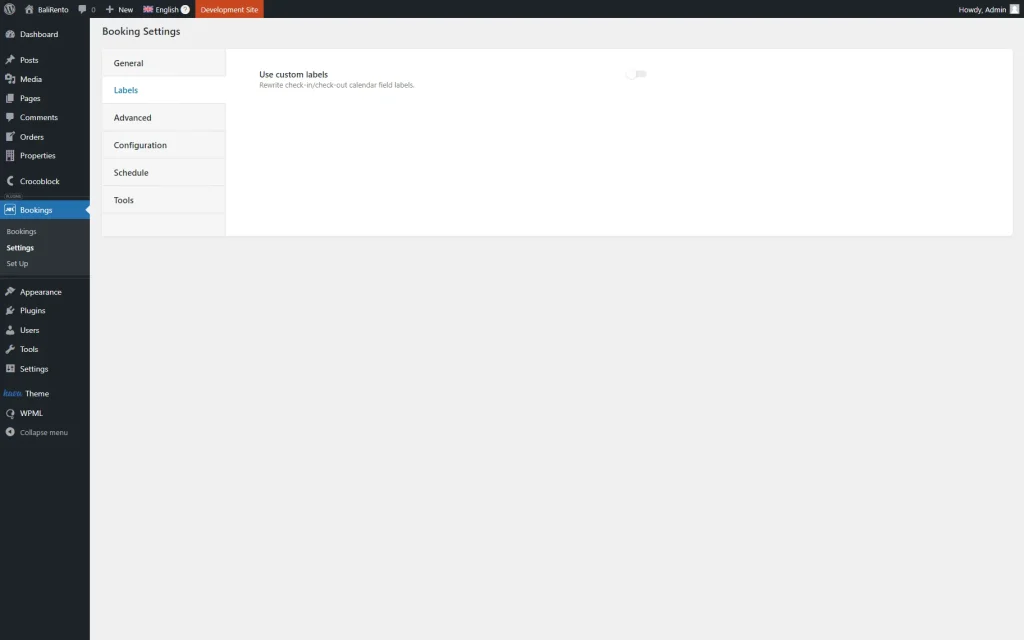
Head to WordPress Dashboard > Bookings > Settings and open the Labels tab.
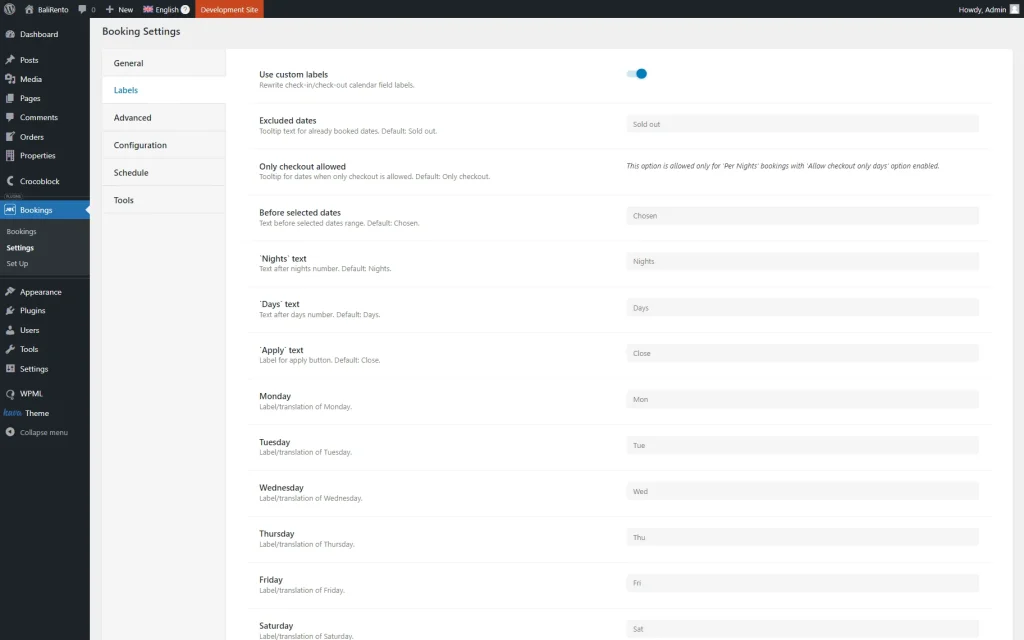
Activate the Use custom labels toggle if you haven’t activated it yet.
Complete the fields to change the labels if needed. They will be saved automatically.
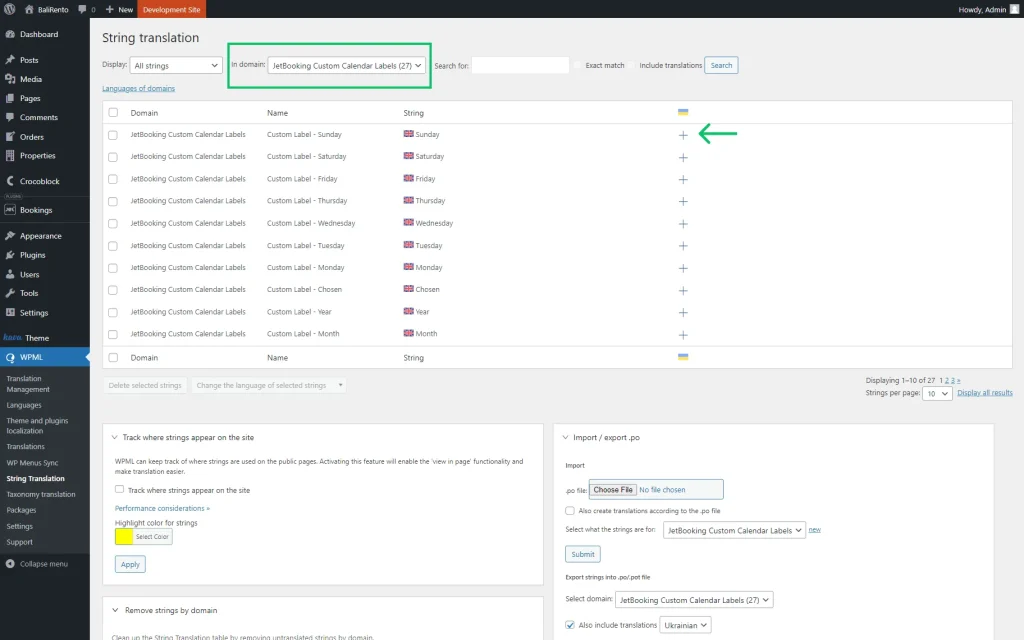
Navigate to WordPress Dashboard > WPML > String Translation.
Pick the “JetBooking Custom Calendar Labels” option in the In domain filter. The page will reload itself, and you will see a list of the needed items.
Here, pay attention to the Name column where all the labels are displayed.
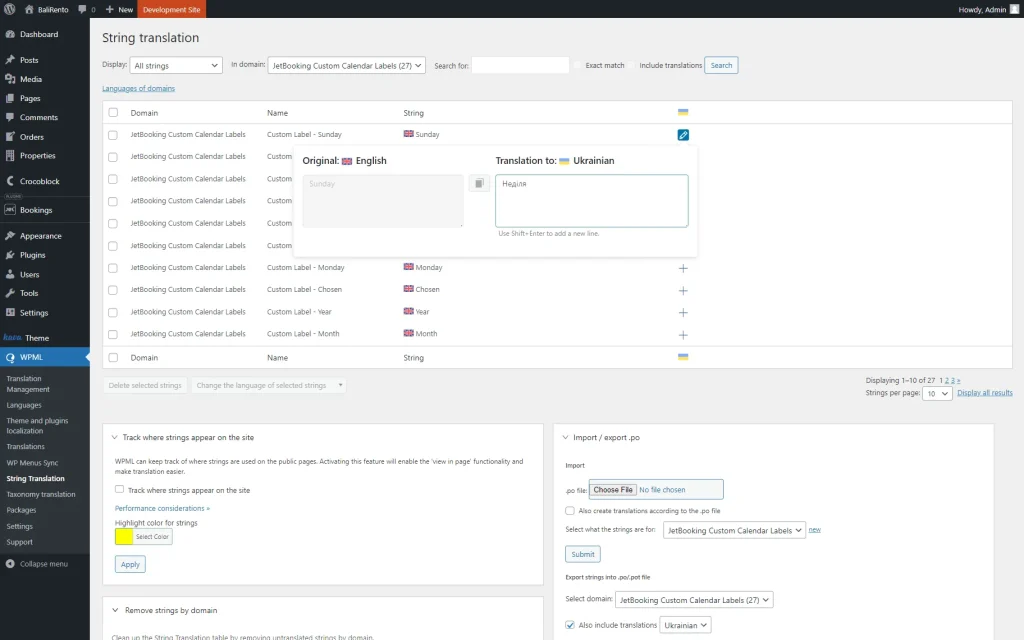
To translate the needed label, press the “plus” button in the column with the flag icon.
Once the pop-up opens, complete the Translation to field.
Mind translating all the labels of the “JetBooking Custom Calendar Labels” Domain.
You can now head to the translated page version to check the result.
That’s all; now you know how to translate the Booking Availability Calendar from the JetBooking plugin with WPML on your WordPress website.
