Displaying Badges on a User Profile Depending on Liked Posts Number
Learn how to display badges on the WordPress User Profile page with the help of JetEngine and Public Users Meta Stores add-on.
Before you start, check the tutorial requirements:
- Elementor (Free version)
- JetEngine plugin installed and activated with Profile Builder module enabled and User Profile page built
Let’s assume the situation that you want to encourage users to like more and more posts on your website. To do so, you want to show the badges depending on the number of liked posts.
Once the user adds ten posts to their favorites, they get the “Interactive Member” badge, and after they like more than 15 posts, the badge changes into the “Engaged Member” one.
Continue reading to find out how to adjust this feature with the help of the JetEngine plugin and the Public User Meta Stores add-on.
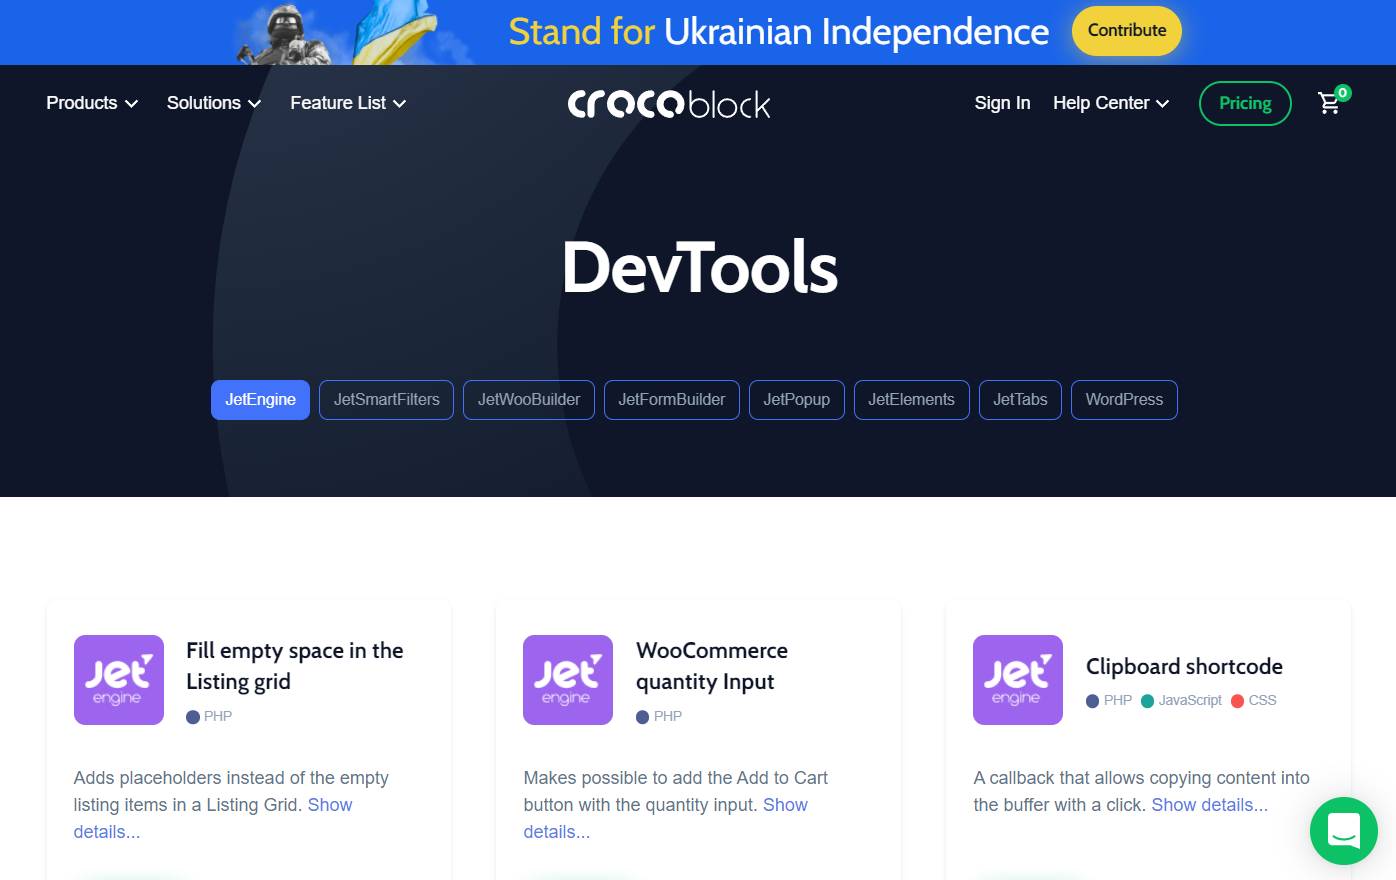
Begin by opening the Crocoblock DevTools page. Press the “JetEngine” button under the page title to make the search more specific.
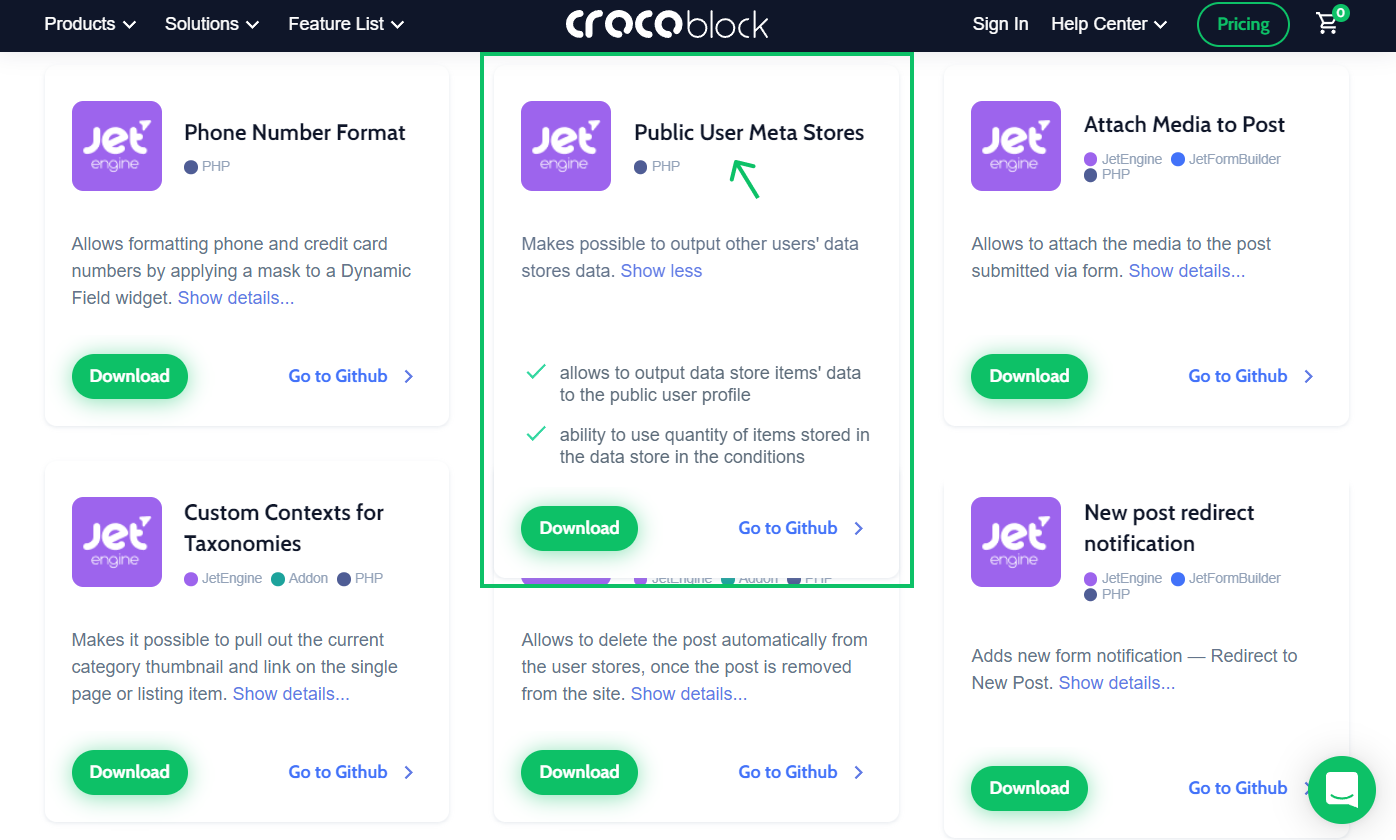
Find the Public User Meta Stores add-on and hit the “Download” button. Now the file is saved on your computer.
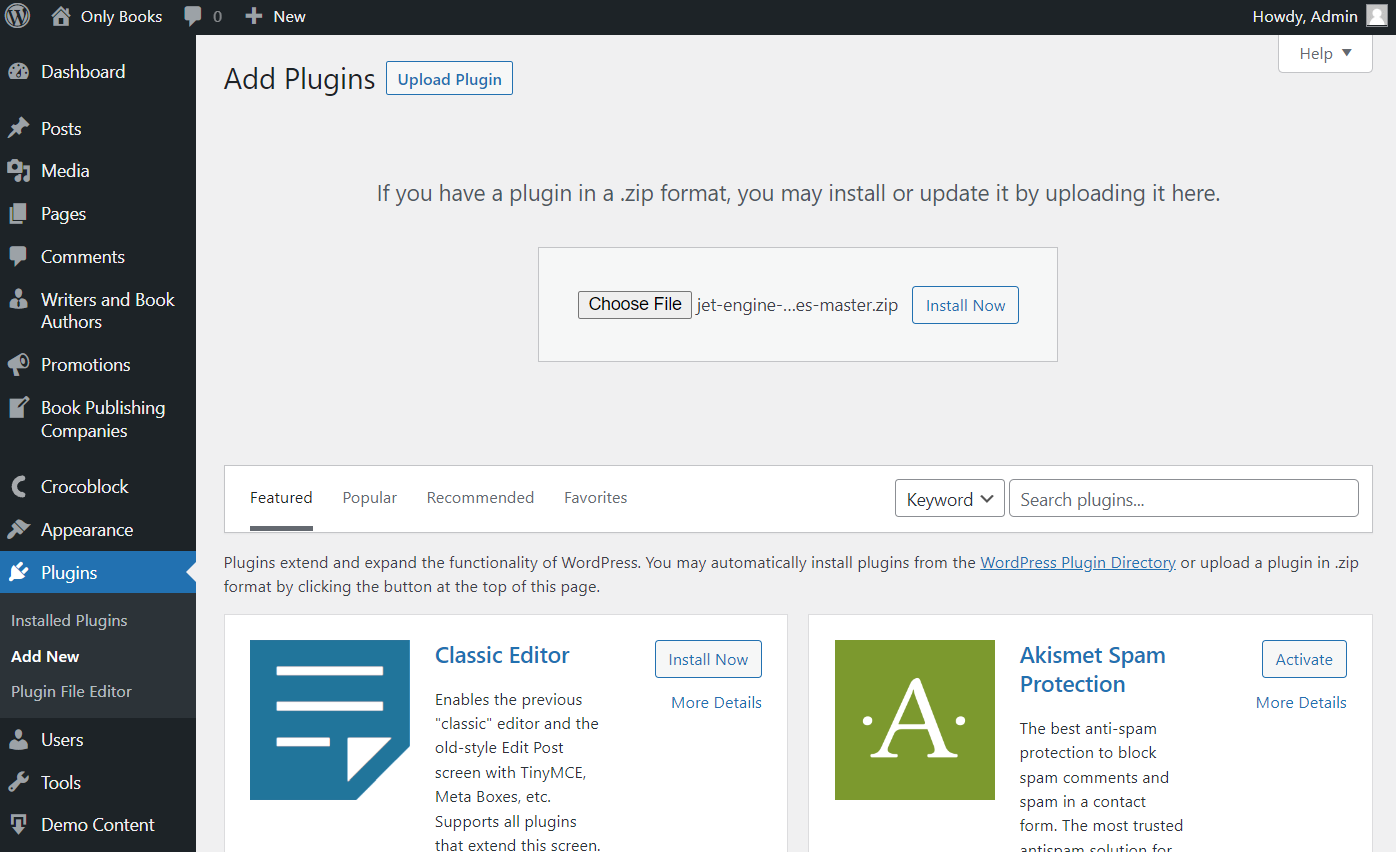
Open the WordPress website admin dashboard. Here, navigate to Plugins > Add New.
Click on the “Upload Plugin” button, then “Choose File” to find the needed add-on file on the computer, and finally, “Install Now.”
Don’t forget to activate the add-on after its installation.
Create a Data Store
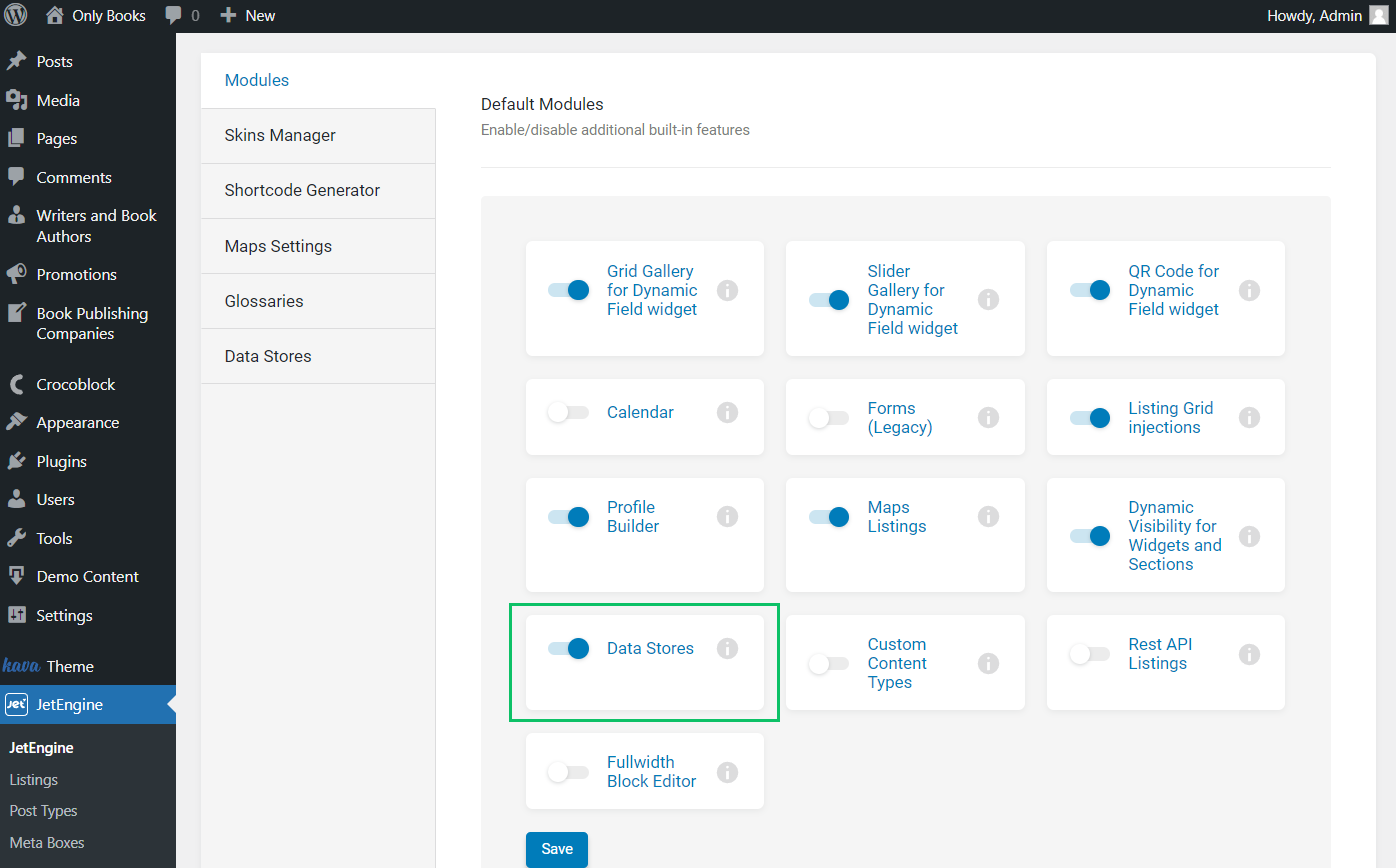
If you haven’t done so before, enable the Data Stores module in the WordPress Dashboard > JetEngine Modules tab.
Switch on the Data Stores feature and press the “Save” button.
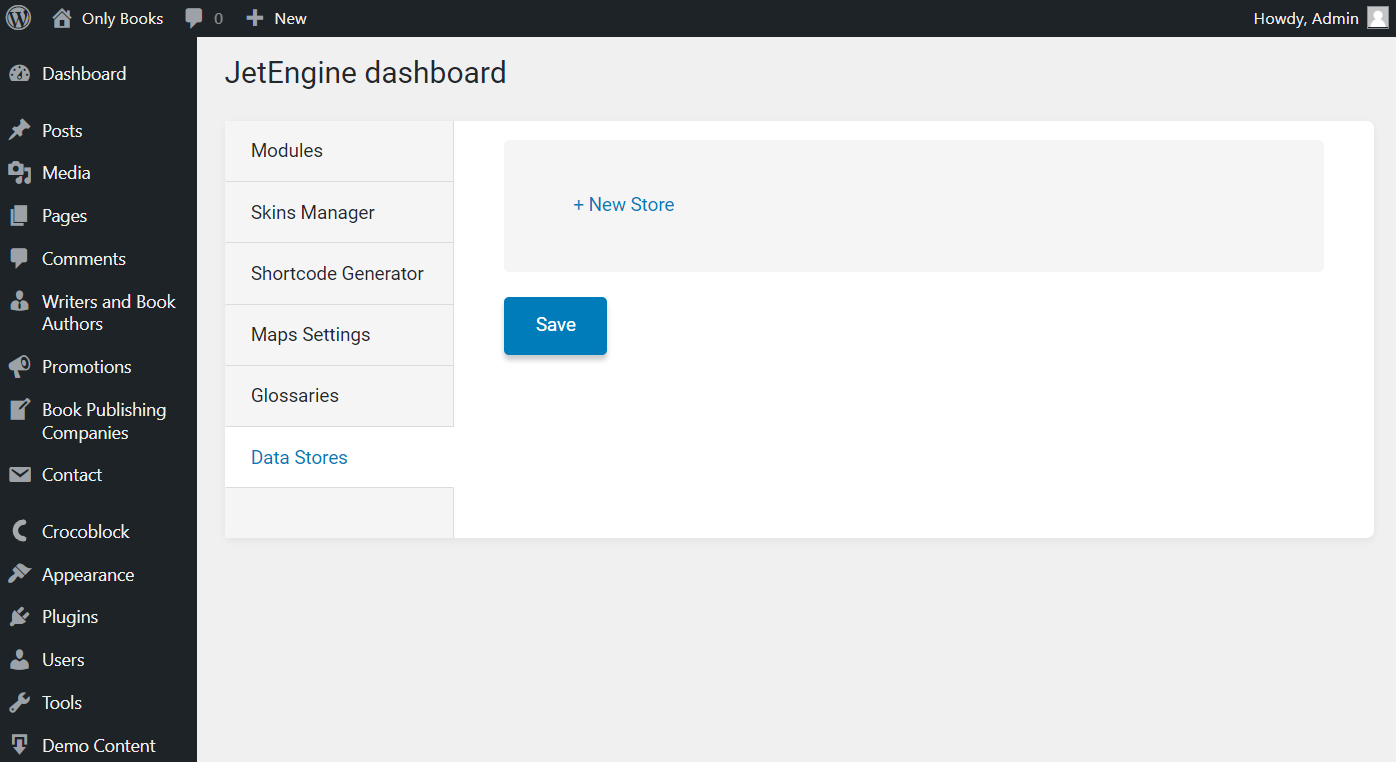
Navigate to the Data Stores tab to create a new data store. Hit the “New Store” button.
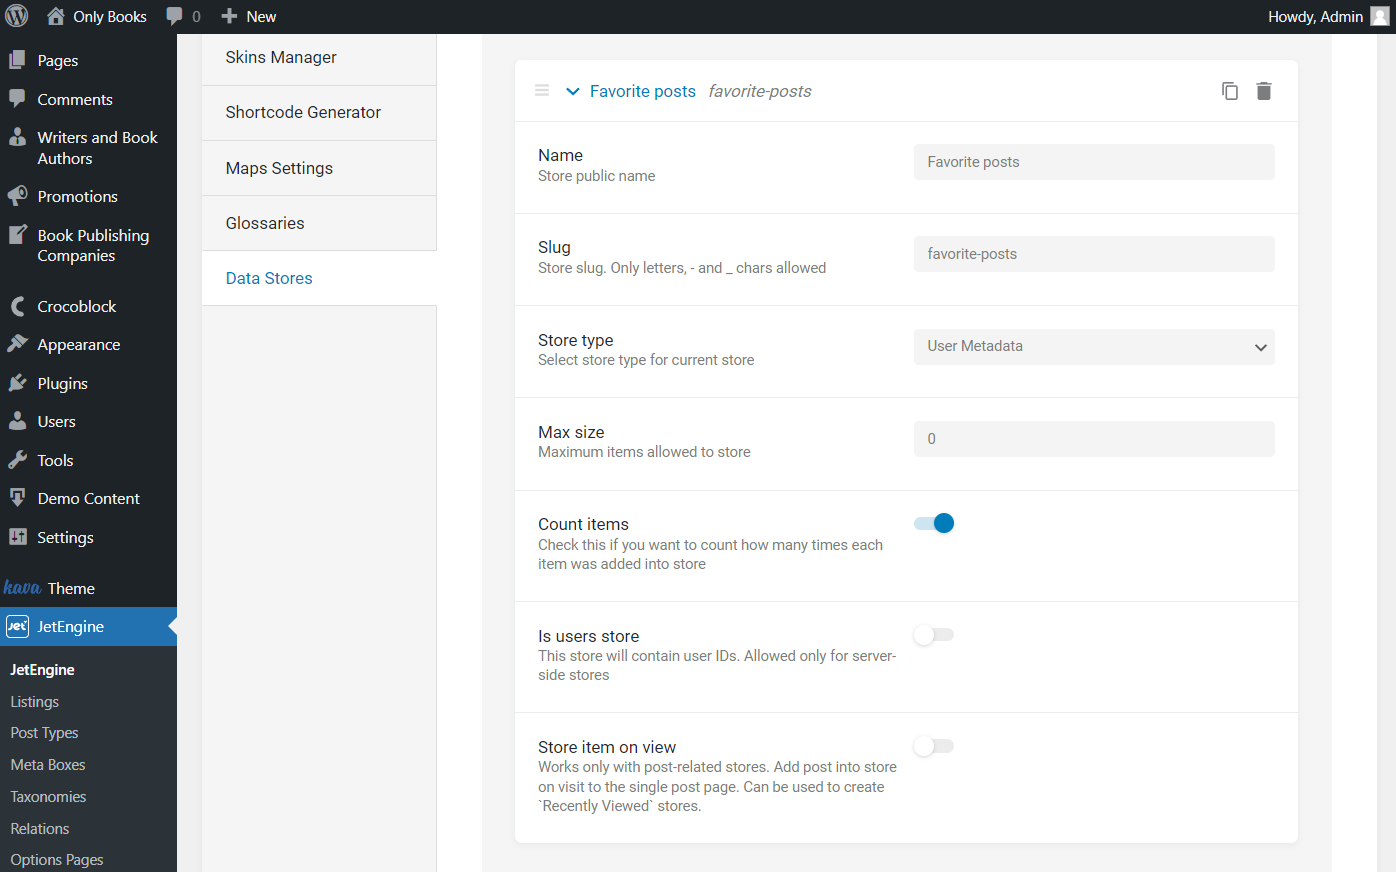
Complete its Name and Slug, and select the “User Metadata” Store type that has appeared after we have installed and activated the add-on.
Set the Max size; it is the maximum number of items allowed to keep in the data store. You can leave “0” in this field to have no limit for the data store items.
You can also activate the Count items feature to count how many times the item was added to the users’ data store.
Then decide whether you want to activate the Is users store feature to contain the user IDs in the store. It is allowed only for server-side stores.
The following Store item on view feature is to be activated if you want to create a “Recently Viewed” store, for instance. More precisely, it adds the item to the store once the user visits the single post page.
After adjusting the settings, click the “Save” button.
Build a Posts Listing
We will look through the settings of both Elementor and Gutenberg Page Builders.
Let’s create a listing to be able to add posts to the data store.
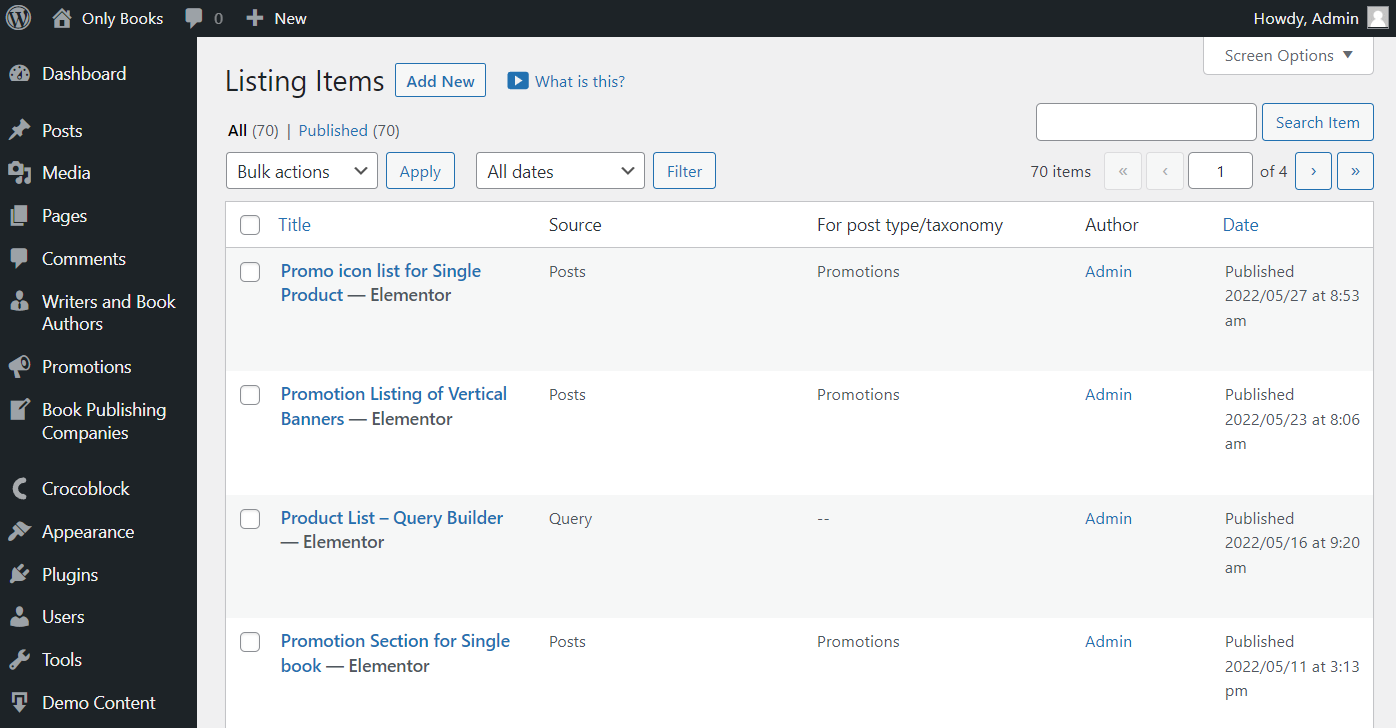
Go to WordPress Dashboard > JetEngine > Listings, open the posts listing you’ve created earlier, or click the “Add New” button to build a new one.
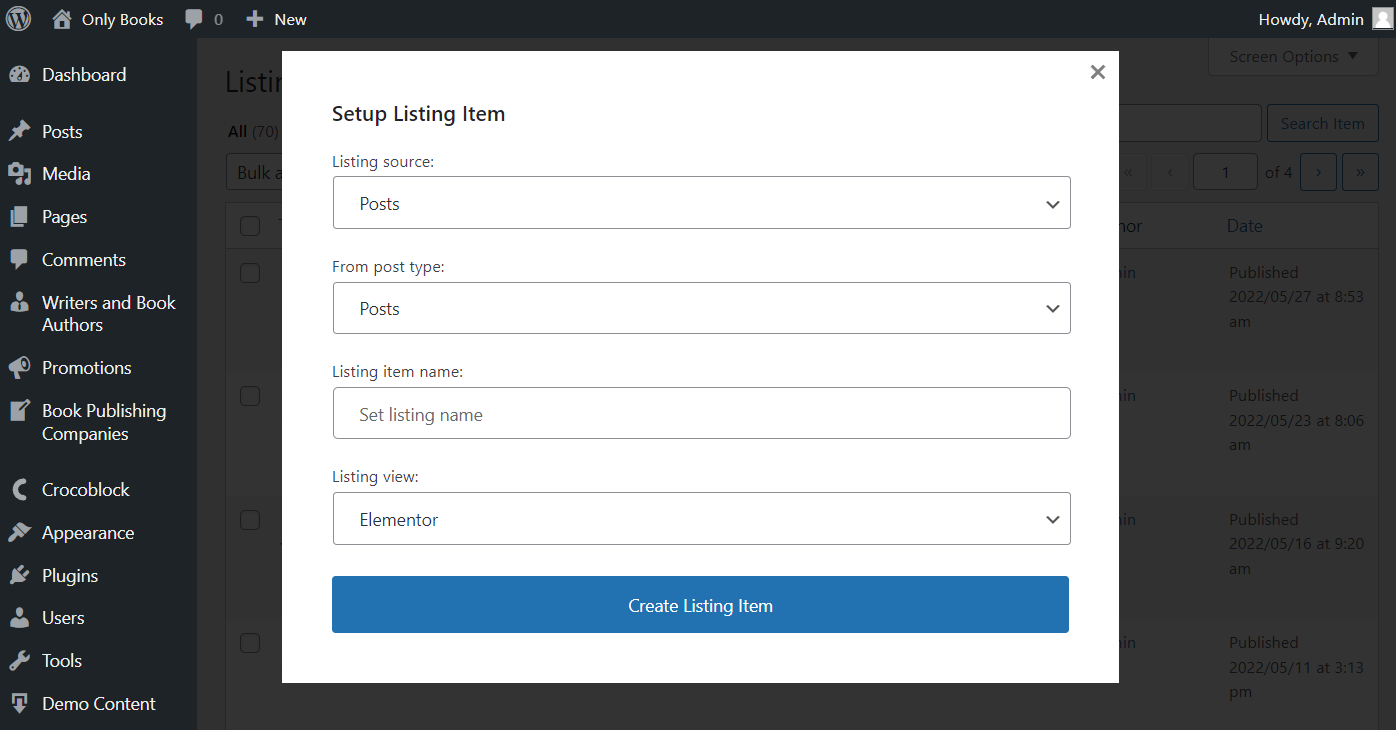
In the opened pop-up, select the “Posts” Listing source and pick the needed post type in the From post type field. In the described case, these are the default WordPress posts.
Set the Listing item name and select “Elementor” or “Blocks (Gutenberg)” Listing view.
Press the “Create Listing Item” button to open the chosen editor.
Adjust a listing in Elementor
Add the needed widgets to the page. For example, we place the Dynamic Image with a post thumbnail and Dynamic Field containing the post title.

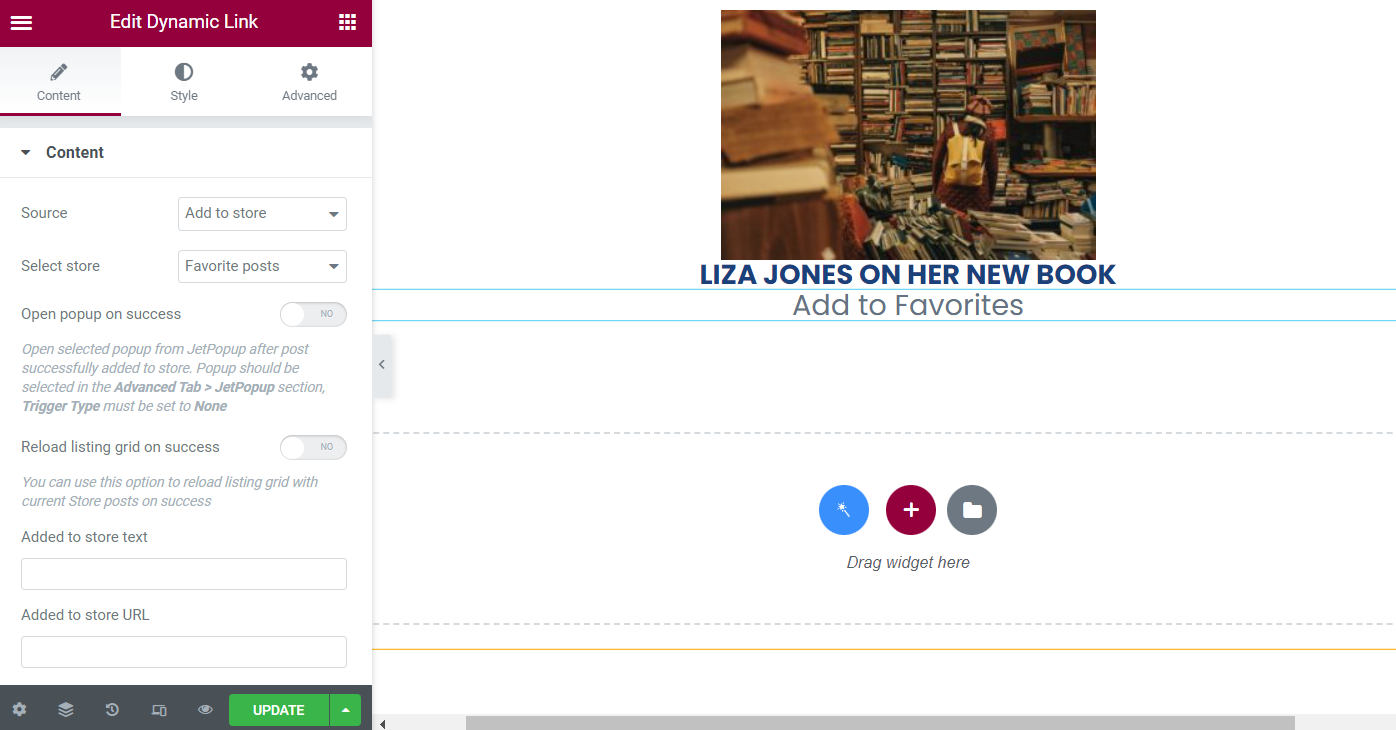
Then look for the Dynamic Link widget and place it on the page. Pick the “Add to Store” Source and choose the newly built item in the Select store field.
Work on the additional settings if needed.
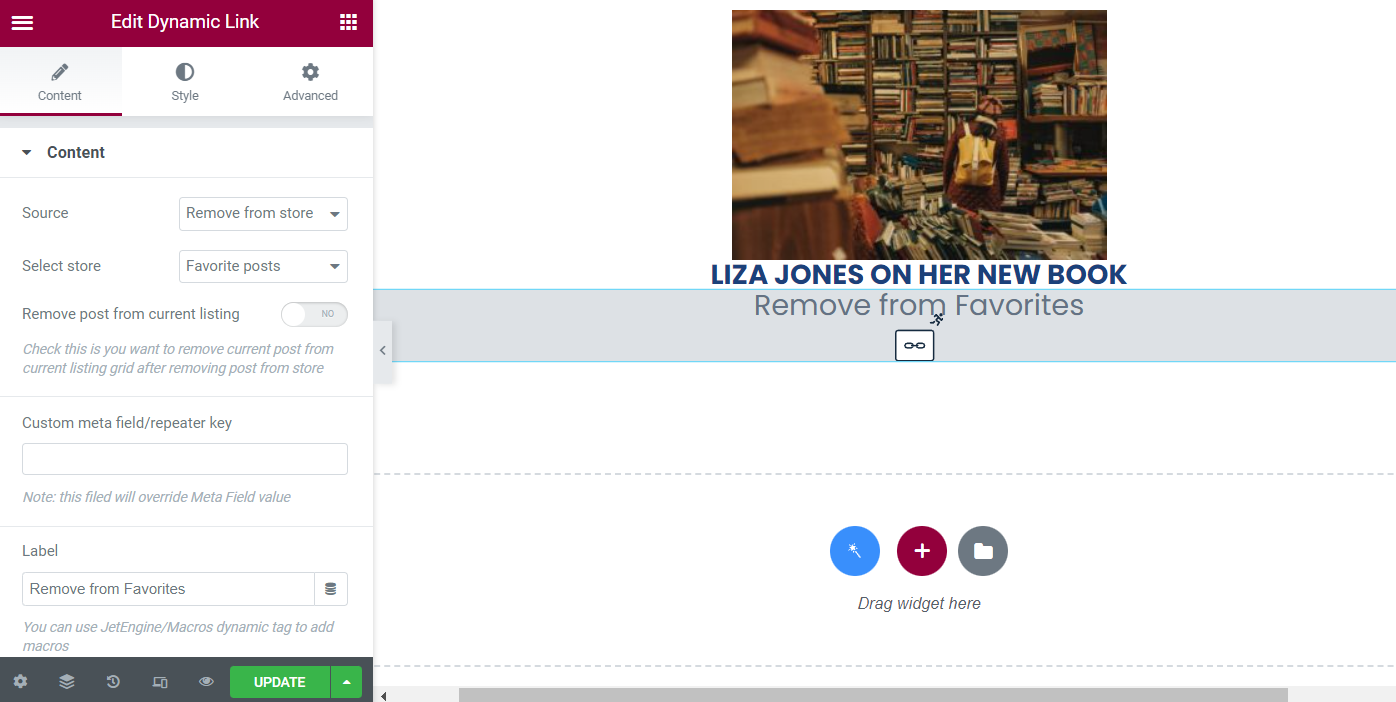
After that, add one more Dynamic Link widget. The Source should be defined as “Remove from Store.” Also, pick the needed data store in the Select store drop-down field.
You are free to add other widgets you need and press the “Update” button to save the changes.
Recreate a listing in Gutenberg
The same settings can be found in the Gutenberg Block Editor. Just select it as the Listing type in the primary setting pop-up.
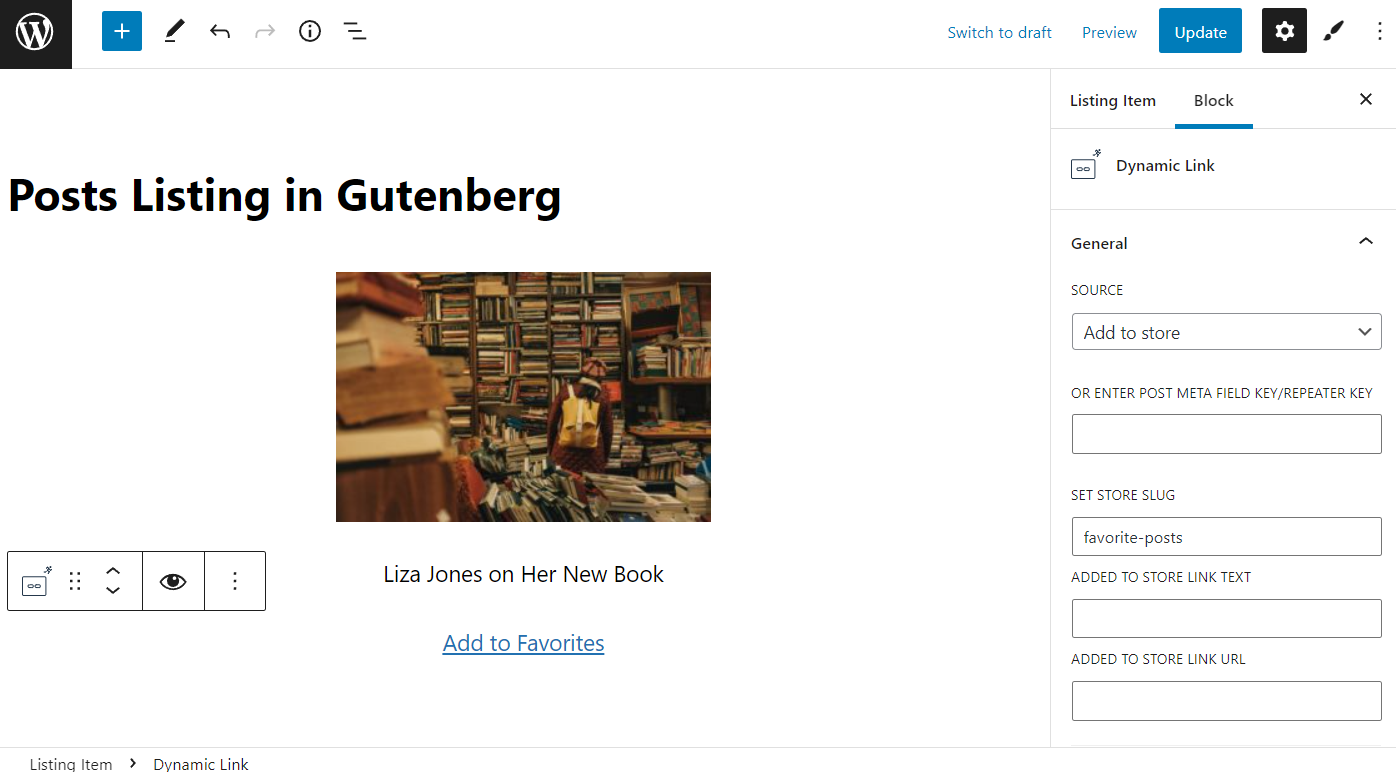
Here, add the Dynamic Link to add and remove the items from the store.
It differs a little from the Dynamic Link widget in the Elementor. Once you select the “Add to Store” Source, you can complete the Set Store Slug field with the slug you have entered in the Data Store settings before.
Click the “Update” button to save the changes.
Edit Profile Page
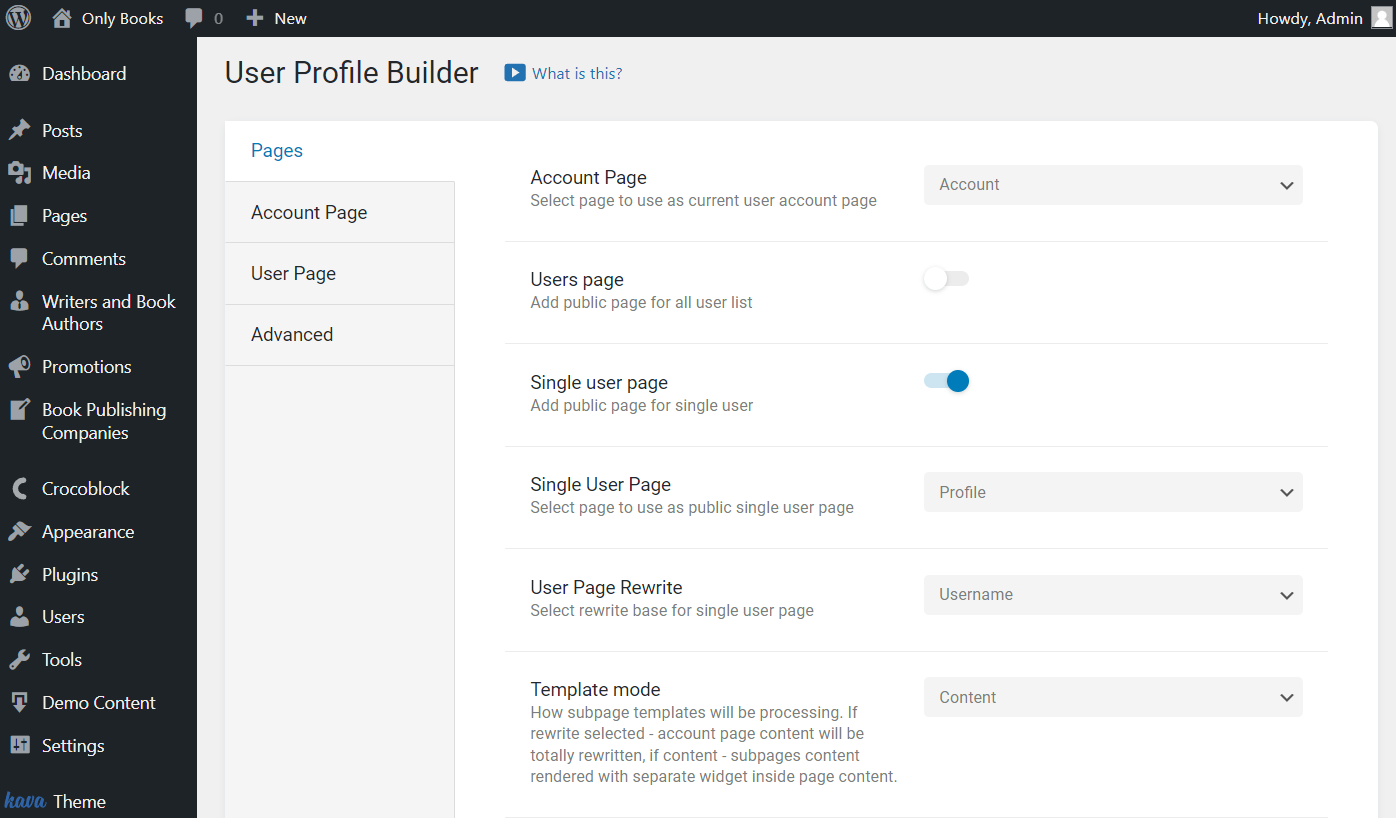
Move to the page you have set as the Single User Page in WordPress Dashboard > JetEngine > Profile Builder > Pages.
For instance, we have picked the page named “Profile.”
Head to WordPress Dashboard > Pages and open the needed page editor.
Modify a profile page in Elementor
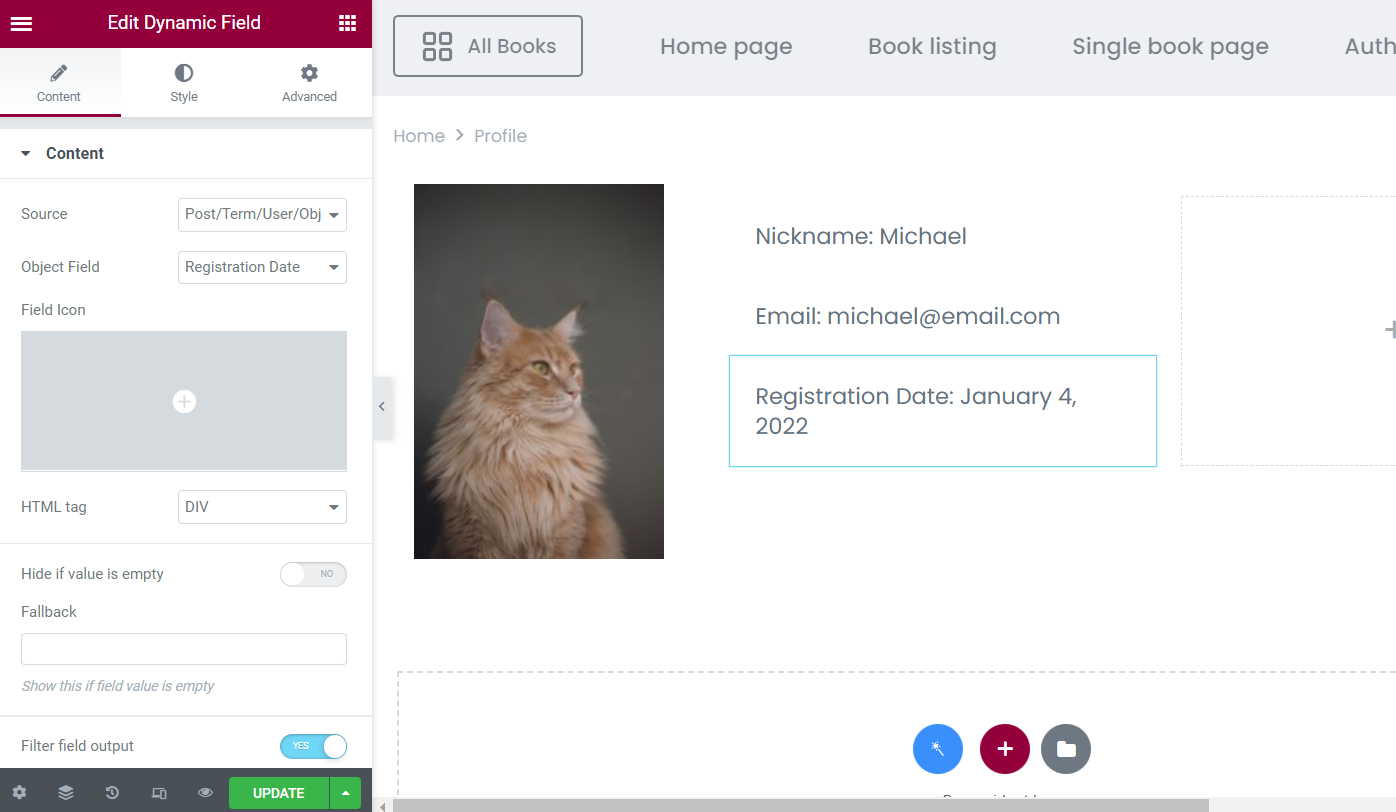
Complete the page with the desired widgets. In our example, you can see the Dynamic Image and several Dynamic Field widgets on the page.
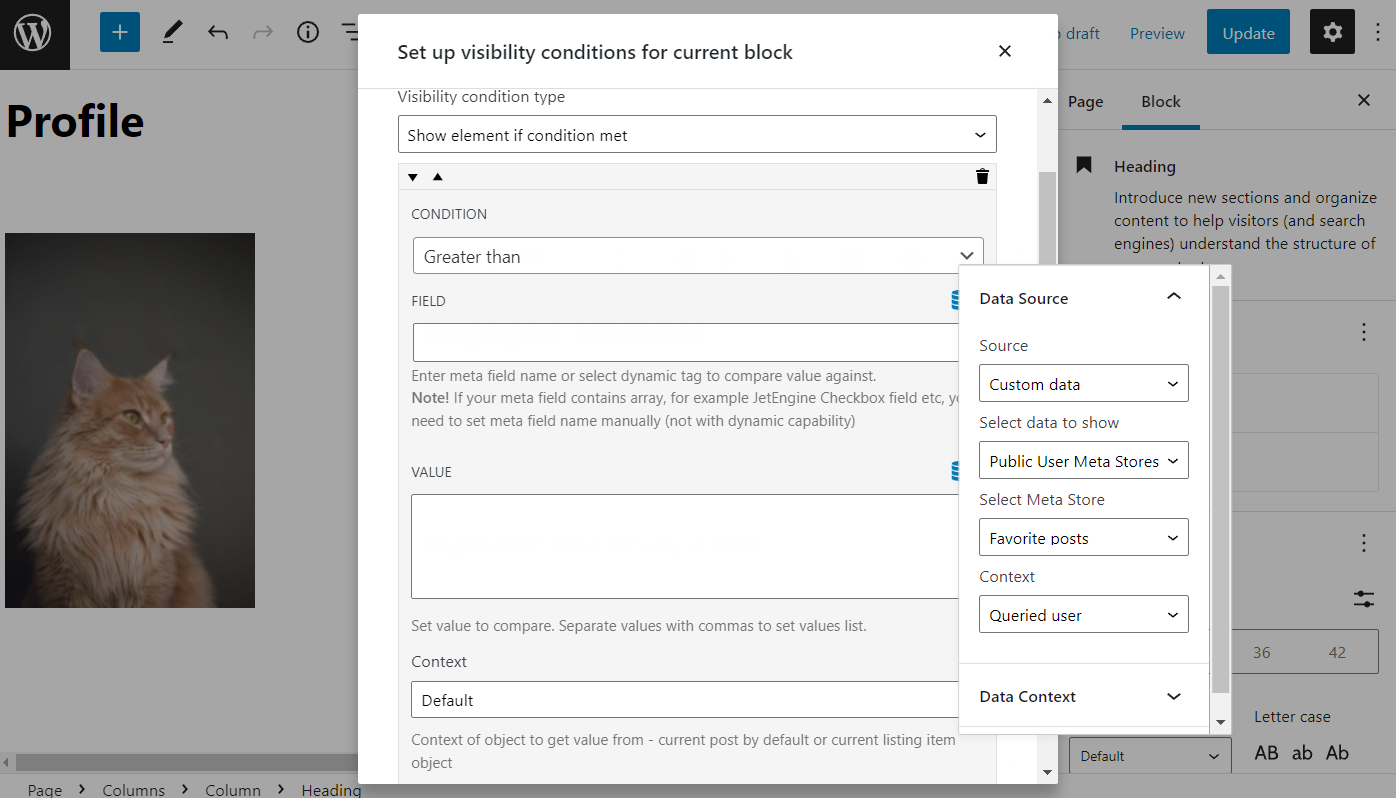
Then we add a Heading widget to make it a badge. Here we complete the Title field in the Content tab and open the Advanced tab.
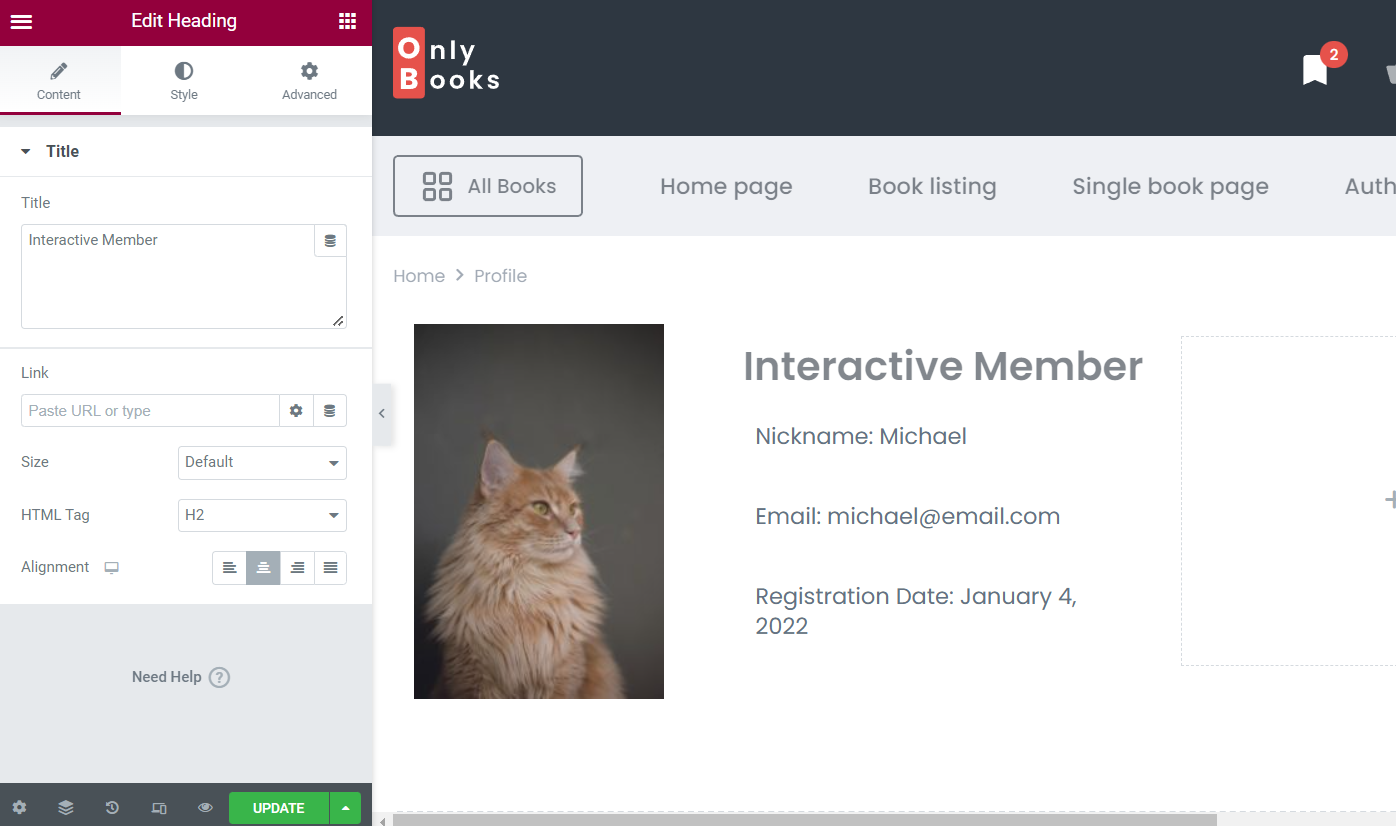
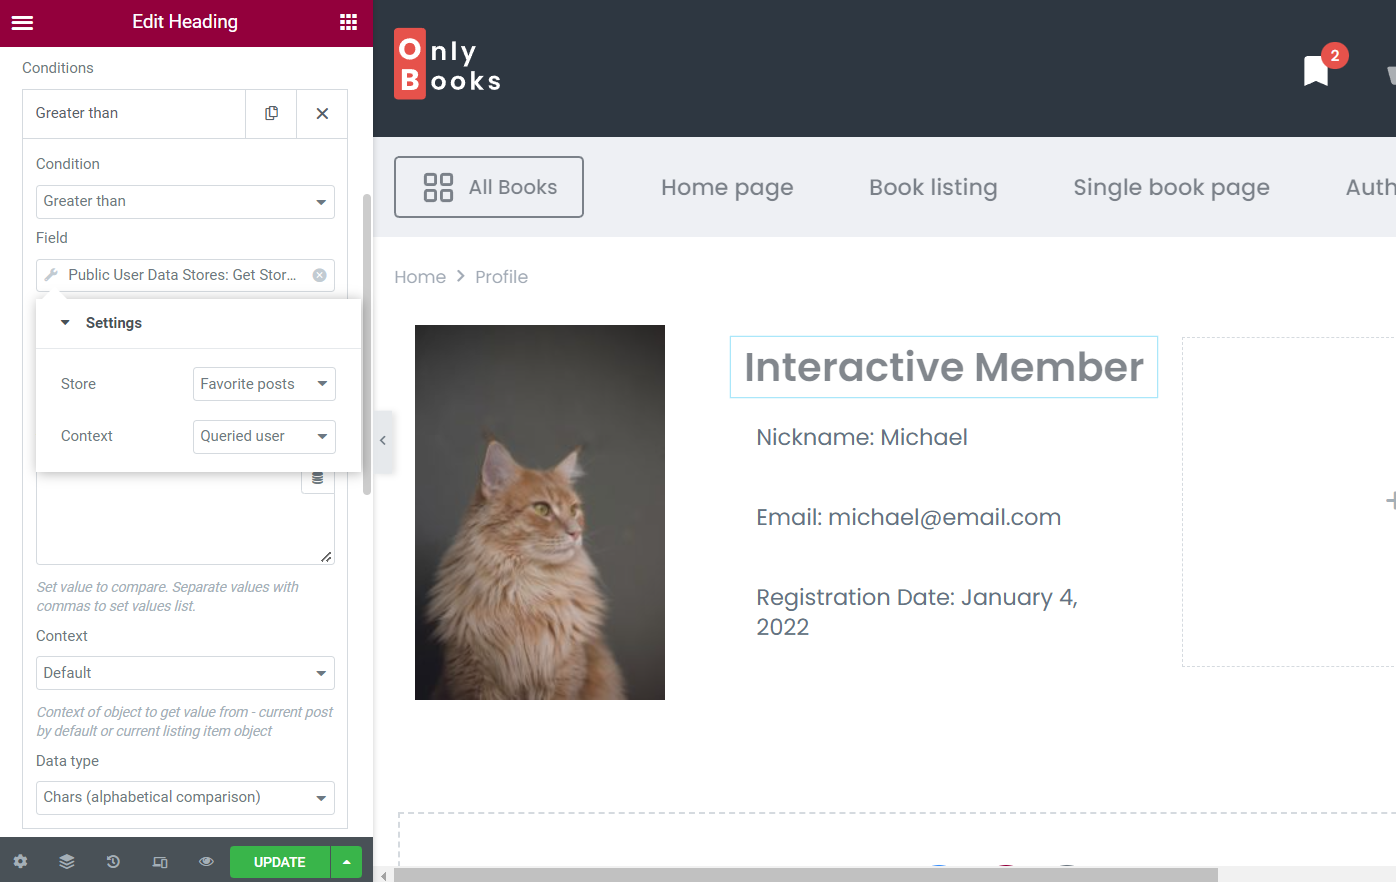
Switch on the Enable toggle. Select the “Show element if condition met” as the Visibility condition type and push the “Add Item” button.
It’s time to set the first Condition. Select the “Greater than” option in the corresponding field.
Press the “Dynamic Tags” button next to the Field.
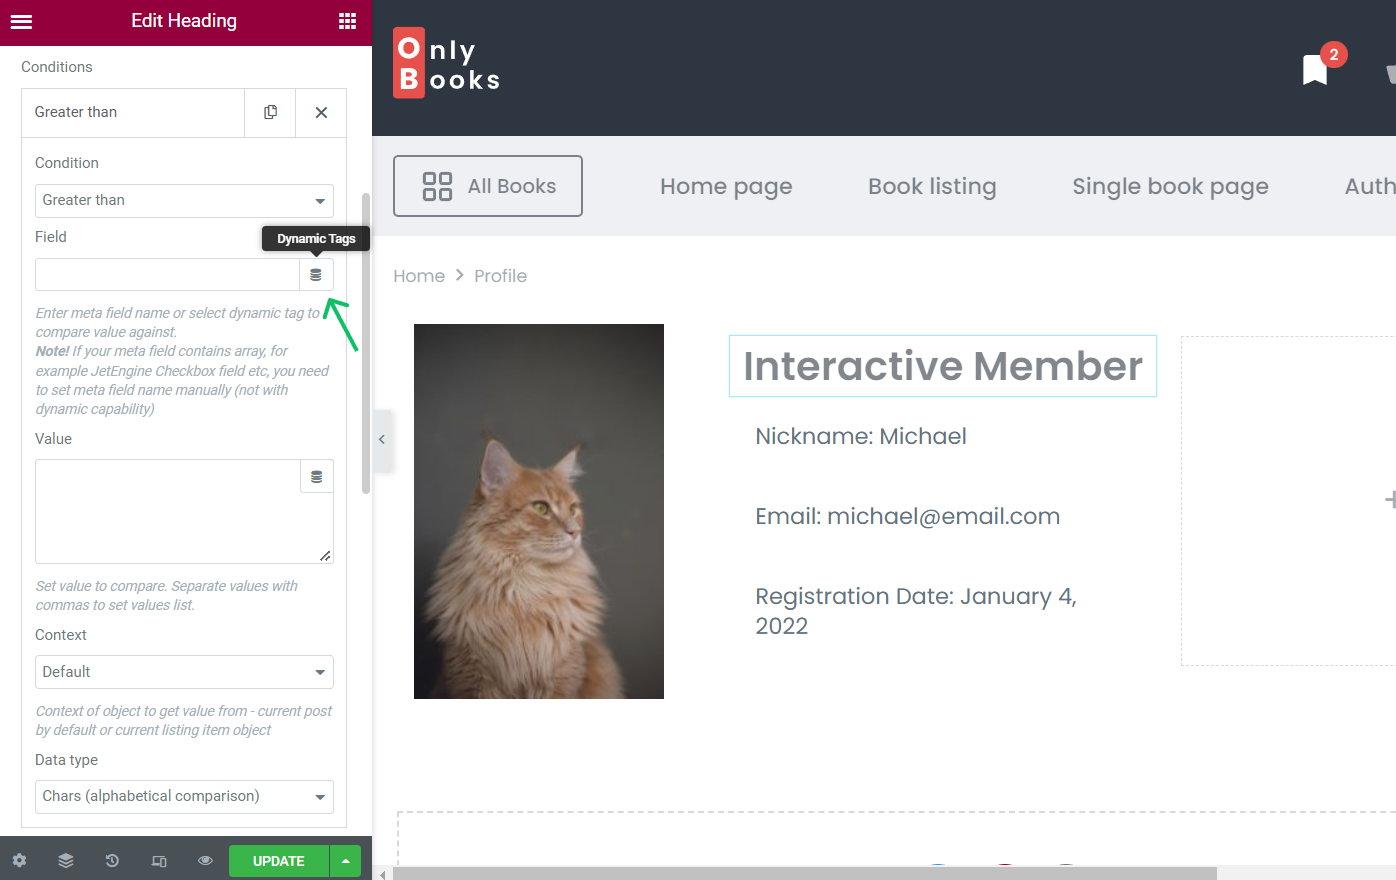
Select the “Public User Data Stores: Get Store Count” dynamic tag and press on it in the field to open its settings.
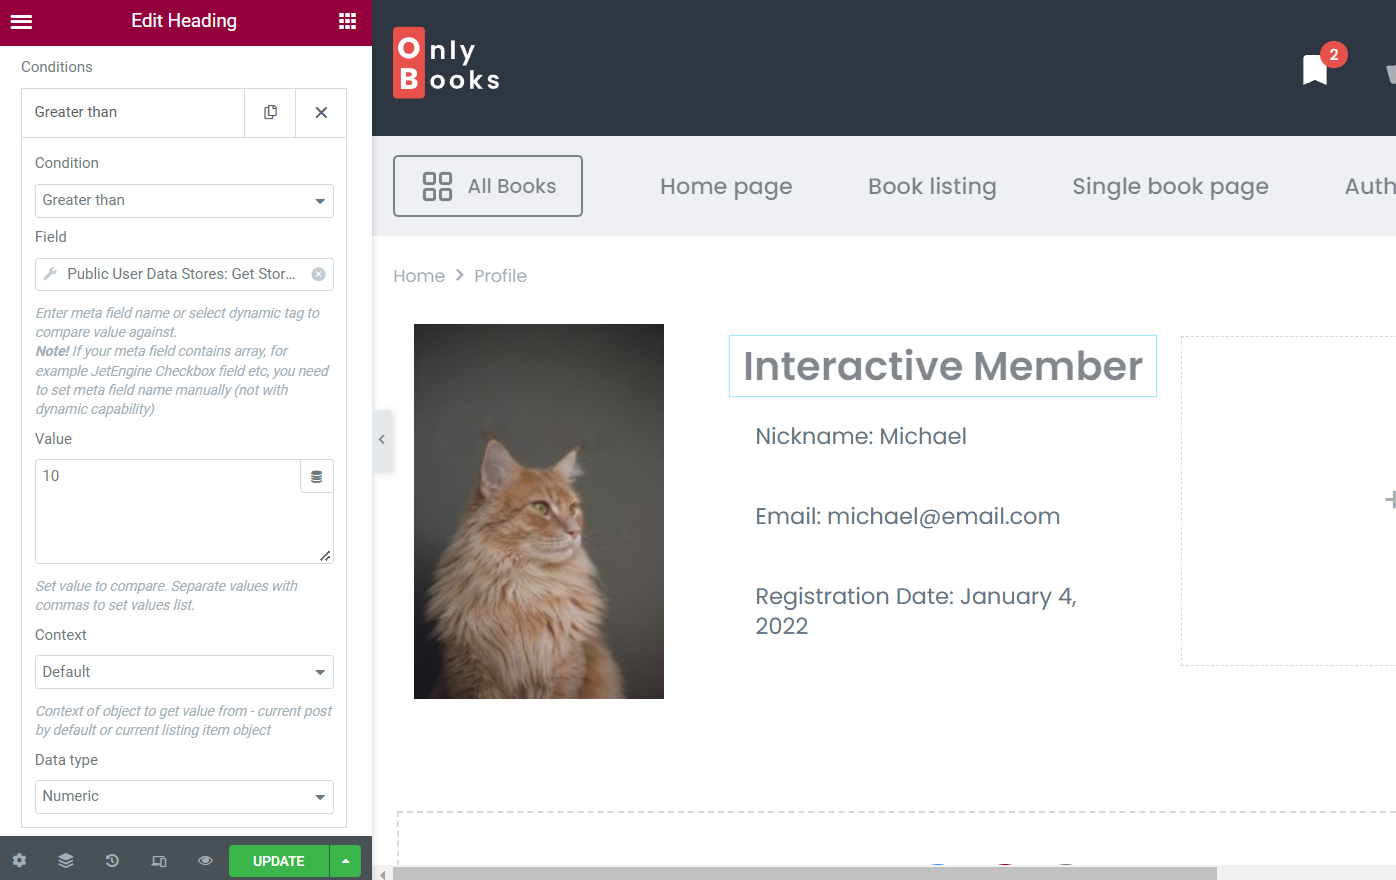
Choose the created Store and “Queried User” Context in the settings and head to the following Value field.
We complete this field with the “10” value, leave the “Default” Context, and set the “Numeric” Data type.
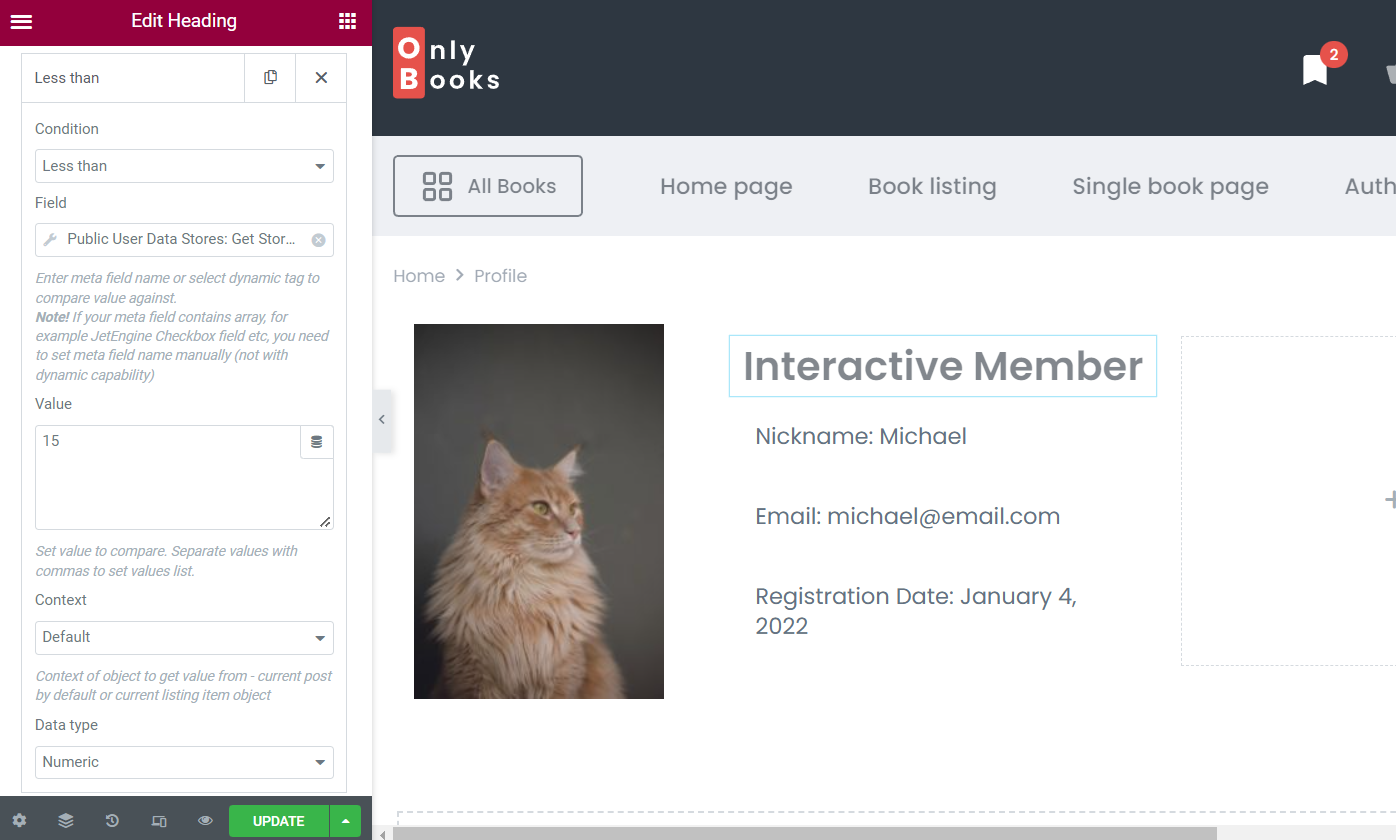
Afterward, we press the “Add Item” to adjust one more condition that will show the badge only if fewer than 15 items are added to the store.
This time, it will be the “Less than” Condition to hide this badge once the number of liked posts is more than 15.
In the “Dynamic Tags” menu, select the “Public User Data Stores: Get Store Count,” select the Store, and “Queried User” Context.
Set the needed Value (in our case, “15”) and the “Numeric” Data type.
Add one more Heading widget. Adjust the Content tab and move to the Advanced tab.

Find the Dynamic Visibility section and activate the Enable toggle.
Select the “Show element if condition met” Visibility condition type and “Greater than” Condition.
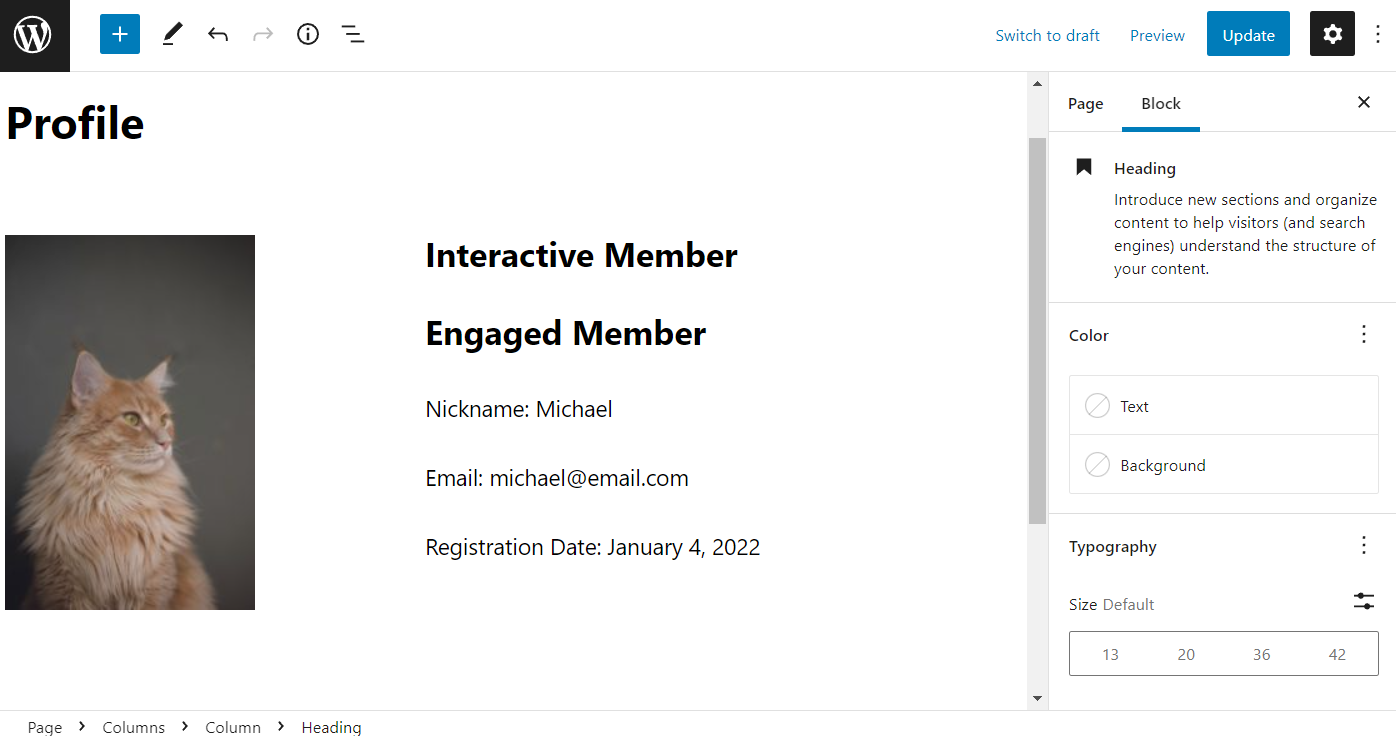
Choose the “Public User Data Stores: Get Store Count” Field and set the Value to the desired number. As an example, we selected “15.” Users who like more than 15 posts get the “Engaged Member” badge.
Besides, leave the “Default” Context and “Numeric” Data type.
Once done, you can style the listing and press the “Update” button.

Alter profile page content in Gutenberg
The same corresponding blocks can be found in the Block Editor.
Press the “Dynamic Visibility” icon to open its settings.
Now, you can add the visibility conditions by hitting the “Dynamic Tags” button.
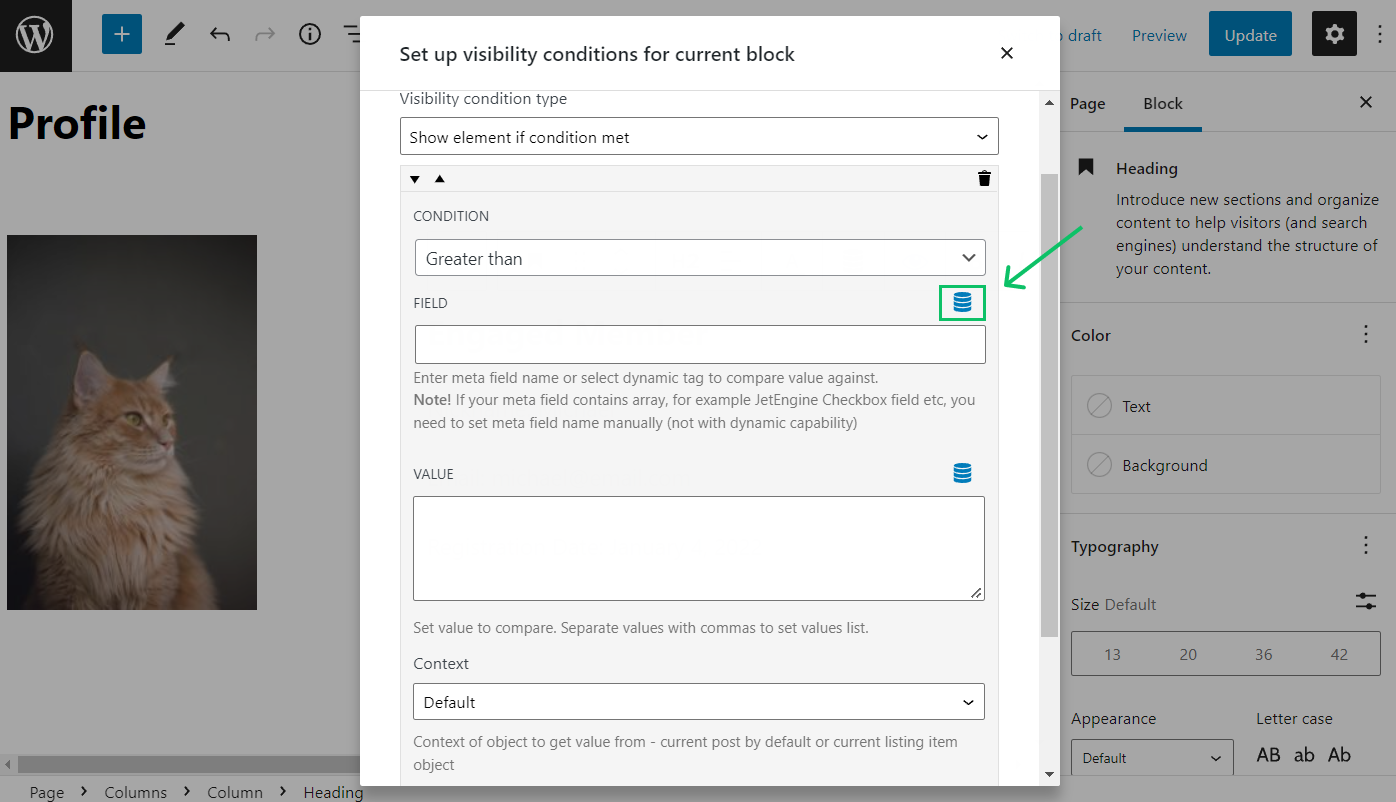
Adjust the Data Store tab as described in the previous article part about Elementor.
So, the final result looks like this:

Finally, you can adjust all the block settings and get the desired result. Click the “Update” button to save the page.
Place Posts Listing on the Page
Head to the page where you want to place the posts listing with the “Add to Store/Remove from Store” buttons.
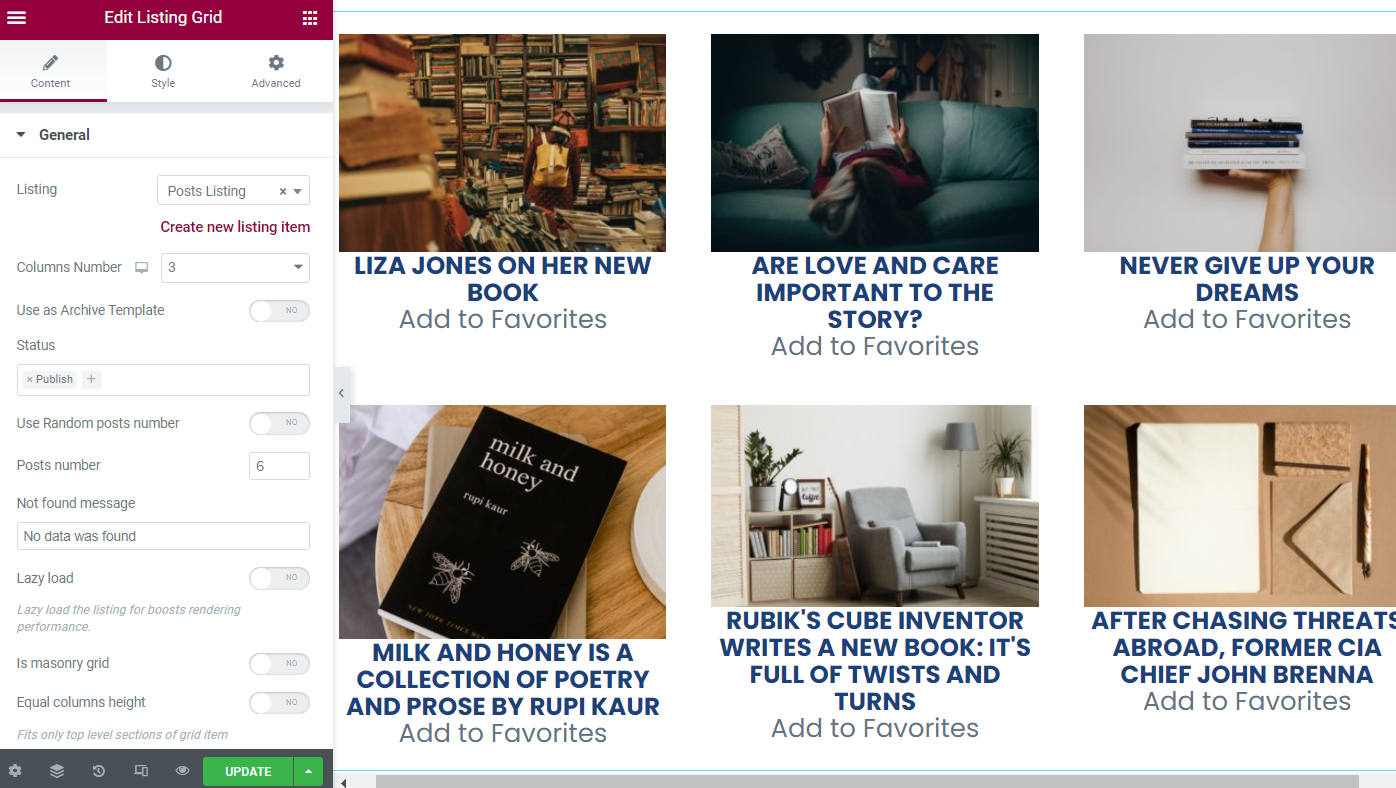
Find the Listing Grid widget and put it on the page. Select the needed posts listing and adjust the following settings if required.
Once done, press the “Update” button.
You can open this page and add as many posts to your favorites as you need.

Check the Result
Open the user profile to see the attached badge; now, you can add ten or more posts to the data store and see if the “Interactive Member” badge is shown.
And that’s how the profile page will look if the user adds 15 or more posts to their favorites.
Ultimately, you can see the badges attached to every user who liked more than ten posts.
That’s it; now you know how to show the needed badges on the WordPress User Profile page depending on the number of liked posts using JetEngine’s Public User Meta Stores add-on and its Profile Builder and Data Stores features.