How to Create Favorites Page Using Data Stores Module
From this tutorial, you will learn how to create data stores. Using the Data Stores module, you can create pages for users to add items to. This guide shows how to build such a page and make use of it.
The pages like “Favorites” or “Wishlist” can sufficiently improve the user experience on your website. While surfing through the site, users can add items to a separate store and come back to them anytime. When there’s no need to seek the objects you previously liked again, it makes the life of visitors easier and their impressions of the website better. The JetEngine Data Stores module gives you all the necessary tools to create a convenient and good-looking Wishlist and even show users how many times every item was liked by the others.
For this tutorial, you need to create two WordPress pages: the first one will contain the listing with all items that users can observe and add to the favorite page by clicking the “Add to Favorite” button; the second one will be the “Favorite” page where users can observe the favorite items and remove them from the list.
Creating a Data Store
Go to the admin control panel, proceed to JetEngine > JetEngine > Data Stores, and click the “New Store” button.
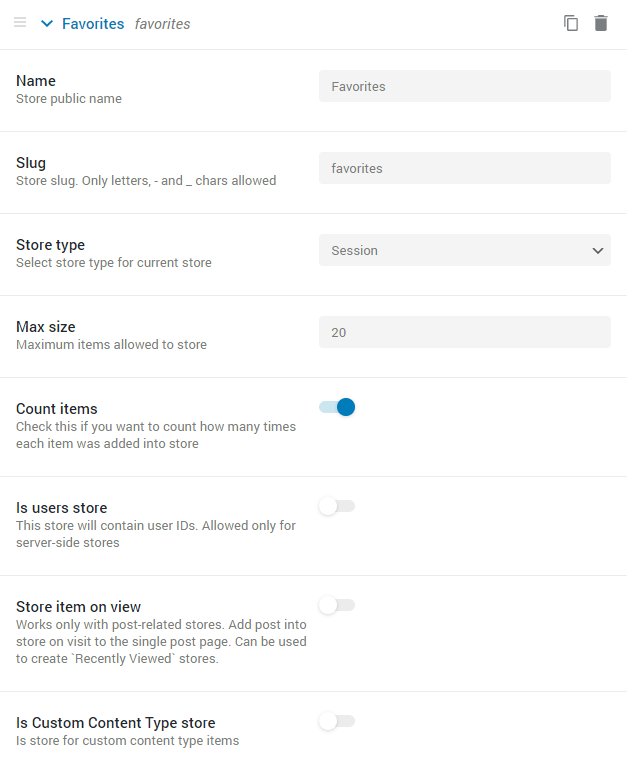
Let’s take a closer look at the features of a store:
- Name. Type in the title of your Data Store here. It will be shown publicly when you create a page for it.
- Slug. This is the inner name of the store that can be used by other modules. Don’t use spaces or other specialized characters there – only letters, dash, and underscore symbols.
- Store type. Here you can choose where the data saved by the user will be stored.
- Cookies – the data is stored as cookies and will disappear after clearing the cash data.
- Session – the data will be stored only until the user ends the session on the server.
- User Metadata – the information will be stored in the user’s metadata. This option is available only to authorized users because they have the option to save metadata on your website.
- Local Storage – the data will be stored in the user’s local browser.
- Max size. This option allows you to define how many items the user could store. If the user saves too many items, it could affect the loading speed. On the other hand, if the number is too small, it could annoy the user. If you set “0” in this field, it allows users to store an unlimited number of items;
- Count items. If you enable this function, the data store will count how many times each of the items were added to the store. For the details of this feature usage, see below;
- Is users store. If you want the users to able to save other user’s accounts in this store – enable this toggle;
- Store item on view. When this toggle is enabled, the posts fall into the store after the user visits them. This function is used to create “Recently Viewed” sections. Also, be aware when this option is enabled and you set a definite number in the Max size field, it works in that way: when a user adds a new item and the store has exceeded the limit, the first item will be deleted, and a new one will be saved instead of it;
- Is Custom Content Type store. Enable this toggle if you create a store for the Custom Content Type items.
When you are done with creating the store, hit the “Save” button.
Creating the “Add to Favorites” Button
It doesn’t matter how you show the items to the users. Be it a static gallery or a dynamically changed listing grid, you can add the “Add to Favorites” button with the help of the Dynamic Link widget (Elementor) or block (Gutenberg).
Let’s assume you used a listing grid.
Go to the JetEngine > Listings and choose the one where you’d like to add the “Add to Favorites” button. If you have created it with the help of Elementor, proceed to edit it with Elementor. Find the Dynamic Link widget and drop it to the page. We have a comprehensive overview of the Dynamic Link widget, so check it if you haven’t faced this widget yet. However, for the “Add to Favorites” button, you will need a specific type of dynamic link.

Let’s take a look at its features.
- In the Source drop-down list, choose the Add to store option. This type of link will automatically add the item you’ve chosen to the Favorites page.
- Select store. If you’ve created several Data Stores, you can choose the one you need here.
- Added to store text. This is the text the user will see after clicking the “Add to Favorites” button.
- Added to store URL. Copy the URL of the newly created Favorites page and insert it into this tab. It will be convenient for the user to have a quick link to the Favorites page right from the item they just added there.
- Added to store icon. This icon will be placed near the Added to store text value. You can either choose the ready-made icon from the Icon Library or upload your own SVG file.
If you created the Listing template via Gutenberg Editor, open it in the WP editing window. Press the “Add Block” button and find the Dynamic Link block. Click on it to add it to the Listing. Type the slug of the data store into the Set store slug bar. If you want the link to lead the user to the Favorites page, you can type the label of the link to the Added to store link text and the URL to Added to store link URL. In that case, after the user clicks on the “Add to favorites” button, the link will transform to be able to take the user to the data store page.

Afterward, type in the Label of the link (in this case, it is “Add to Favorites”) and choose the icon. Do the necessary styling in the Style of Block Style (available in the Gutenberg Editor if you installed the JetStyleManager plugin) tab and hit the “Update” button at the bottom of the customization menu.
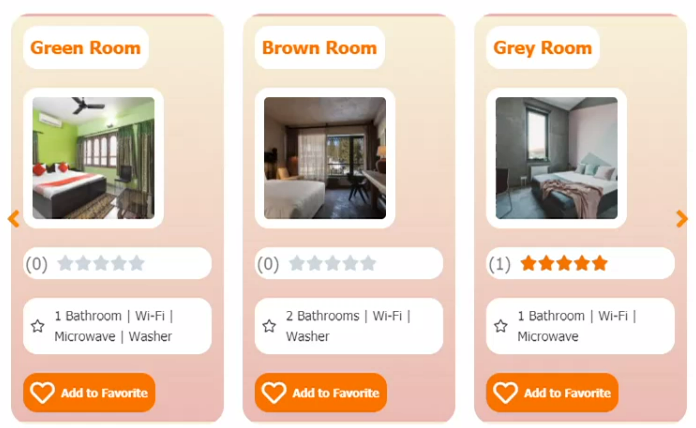
After adding a few items to the Favorites, you can go to the page and check if the chosen items are already there. Now, you would probably like to give users an option to remove the items from the Favorites page.
Creating the “Remove from Favorite” Button
This is why it is better to create a separate listing for the Favorites page. This way, you can add the “Remove from Favorite” button only for the items that are already added to Favorites.
Go to the Listing you’ve created and proceed to edit it. Find the Dynamic Link widget/block and add it to the work area.
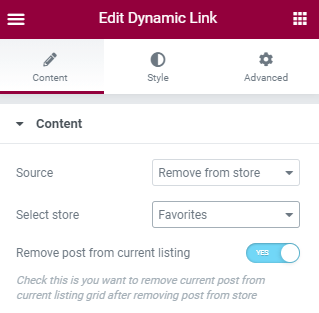
The settings are pretty much standard for the Dynamic Link. You just have to choose the Remove from store option in the Source row and set the Label (in this case, it will be “Remove from Favorite”). Elementor view:
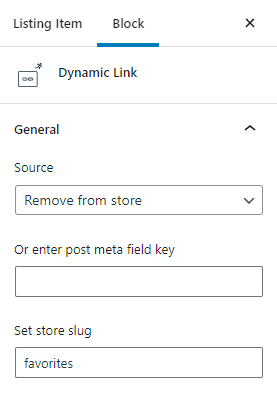
Gutenberg view:
After some appearance customization in the Style (Elementor) or Block Style (Gutenberg) tab and click the “Update” button. Here’s how it will look on the front end:
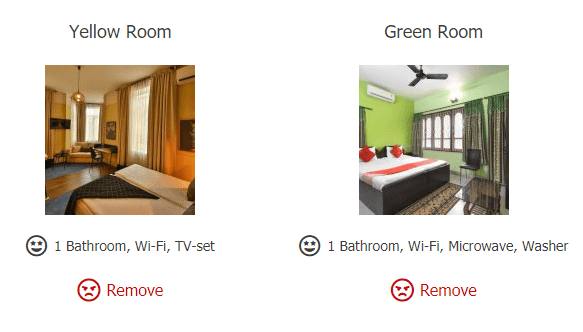
Creating a Posts Query via JetEngine Query Builder
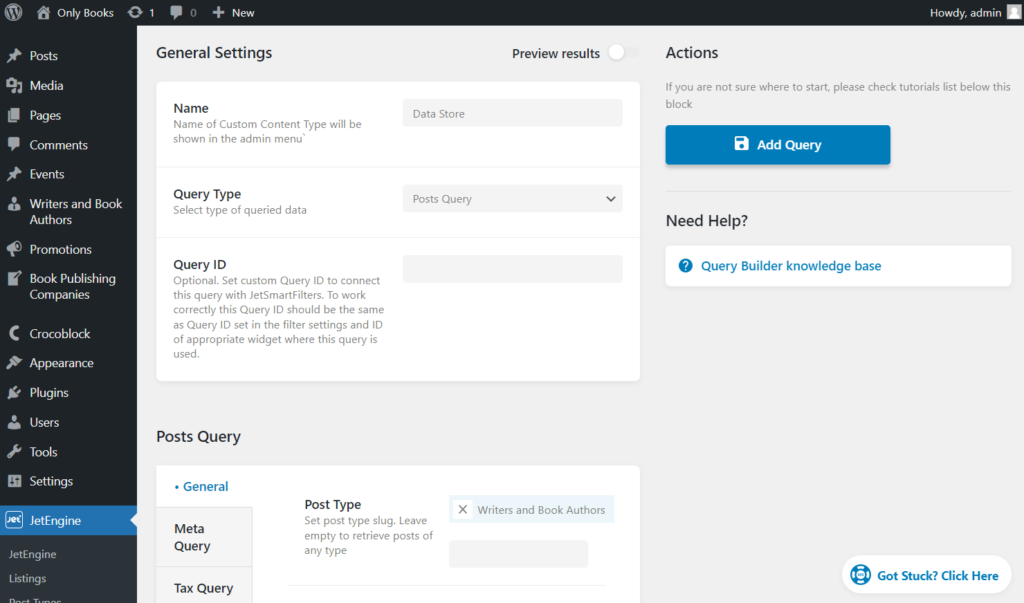
Proceed to JetEngine > Query Builder and press the “Add New” button. Give your new query a Name and choose the “Posts Query” Query Type in the General Settings section.
If you want to learn more about the Query Builder feature, go to the Query Builder Overview. Also, you can read the Query Builder Posts Query Type overview.
In the General tab of the Posts Query section, select the name of the Posts Type for which the data store was created.
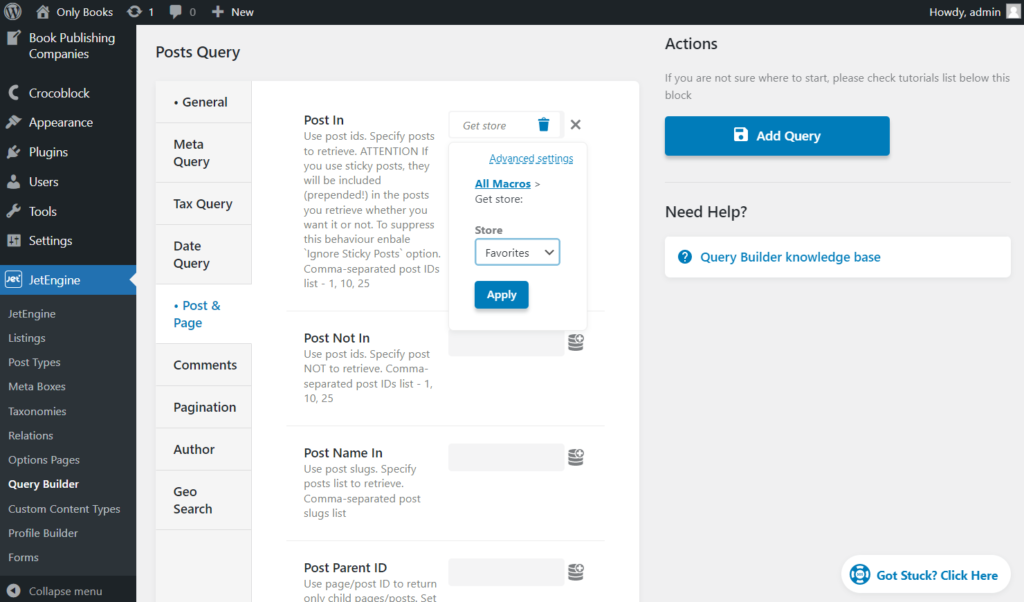
Open the Post & Page tab and hit the coin-stack-shaped button near the Post In field. Select the “Get store” macro from the drop-down menu, pick the needed Store, and push the “Apply” button. Then, click the “Add/Update Query” button.
Building the Page for the Data Store
Proceed to the “Favorite” page with the Listing Grid widget here.
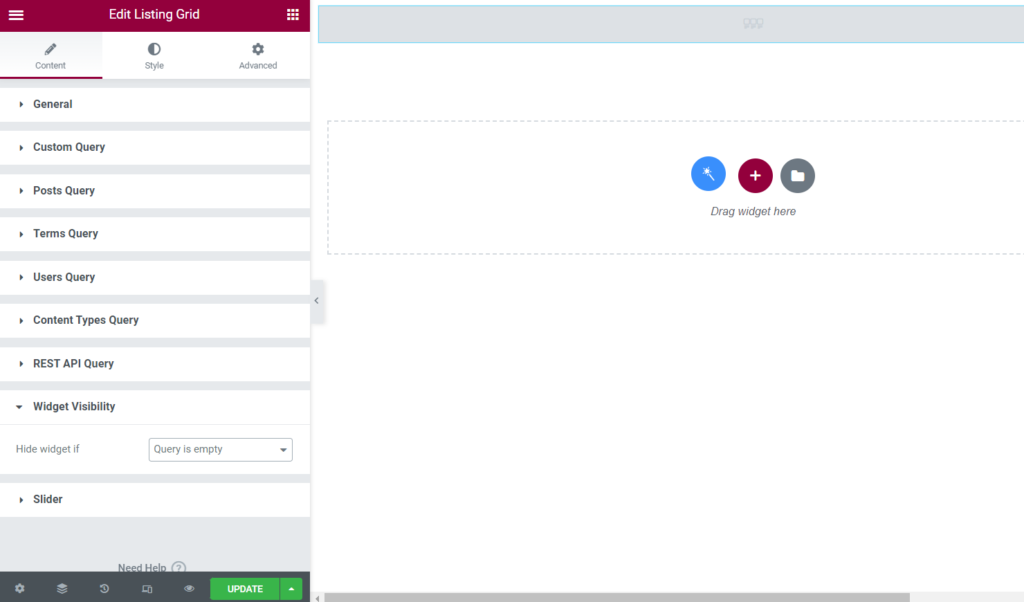
The next step is opening the Custom Query tab. Enable the Use Custom Query toggle and choose the name of the created post query for the Data Store in the Custom Query selector.
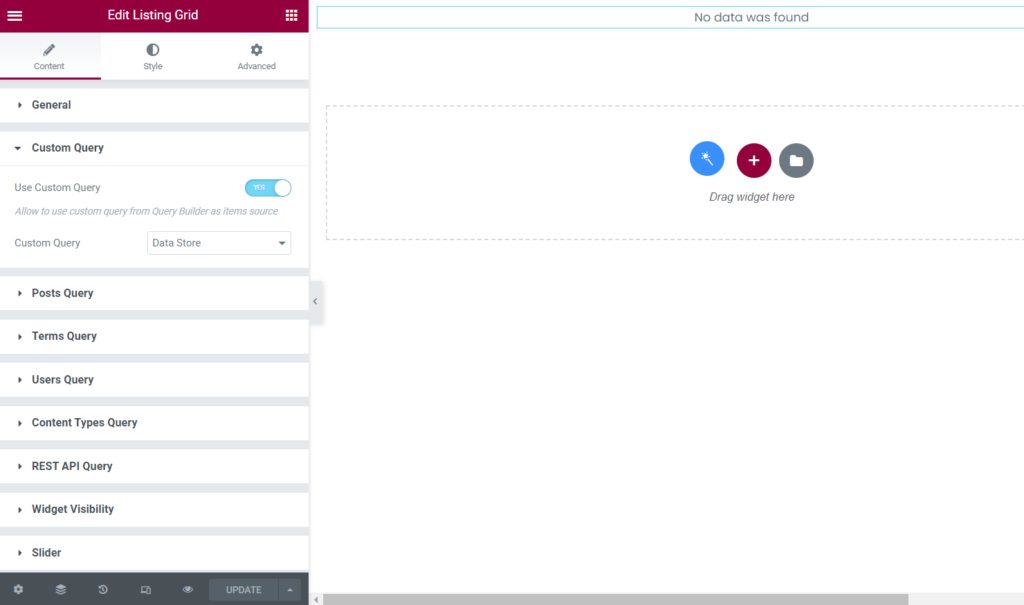
As I haven’t added any items to the store yet, it shows the message: “No data was found.” This message will also be shown on the front end, so let’s hide it.
Move to the Widget Visibility tab of the Listing Grid and set the Hide widget if “Query is empty” option. So, the listing will be hidden if the user hasn’t added any item to the favorite page.
After you finish customizing and stylizing the “Favorite” page, push the “Update” button.
Adding the Item Counter
With the help of Dynamic Tags and JetEngine functionalities, you can add an item counter to your Favorites page. It will automatically show how many objects the user added to the Favorites. This functionality can be used in the Elementor page builder only.
Go to the dashboard, find the Favorites page, and choose to edit it with Elementor. Pick up the Heading widget and drop it over to the Listing Grid. Instead of typing in the Title, click the Dynamic Tags button in the upper right corner of the text area. Choose the Data Stores: Store Count option.
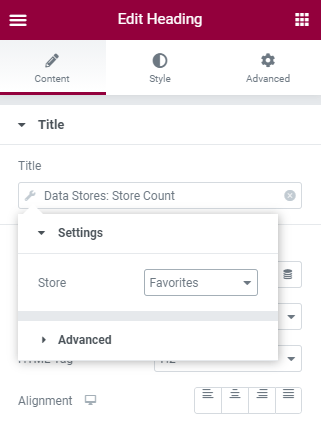
The drop-down menu has two sections – Settings and Advanced. In the Settings section, there is only one feature – Store. You can set the Data Store here (the counter will work only if you choose to turn on the Count post option of that Data Store).
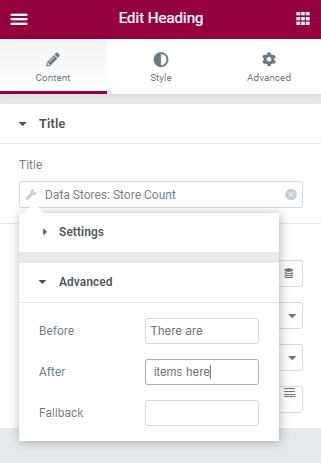
In the Advanced section, you type in the text that will be shown Before and After the counter. Also, you can write what to show to the user if there are no items in the store – it is the value of the Fallback bar.
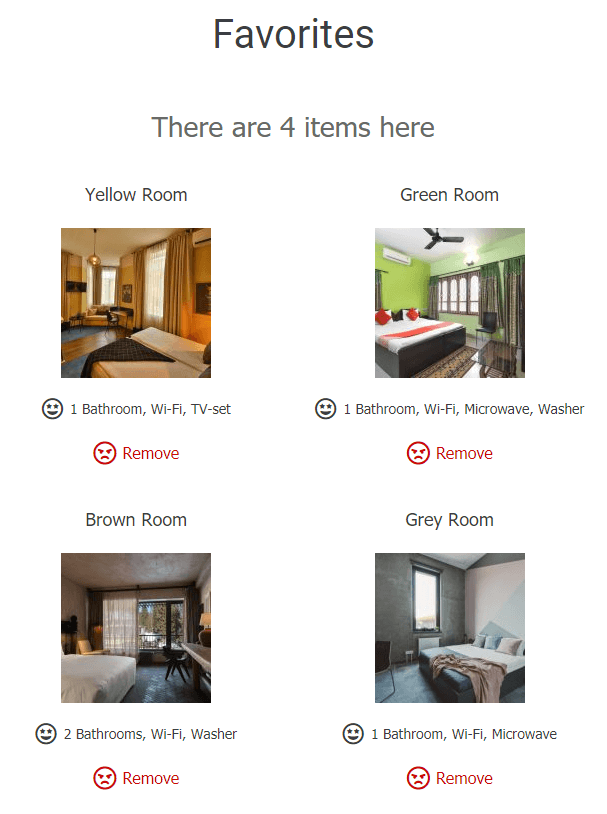
After you finish customization, hit the “Update” button. Here’s how it looks on the front end:
Add the “Likes” Counter
Besides showing the counter of the item number in the store, you can also show the counter of how many times a certain item was added to the user stores. It is possible to place this data on the Single Page or the items grid. You will be able to do it only in the Elementor page builder, it is not available in Gutenberg. Let’s assume you would like to show it in the grid.
Go to the listing you are showing in the grid and choose to edit it with Elementor. Pick the Heading widget and drop it into the listing. As for the item counter, instead of typing in the Title, click the Dynamic Tags button, and choose the Data Stores: Post Count option.
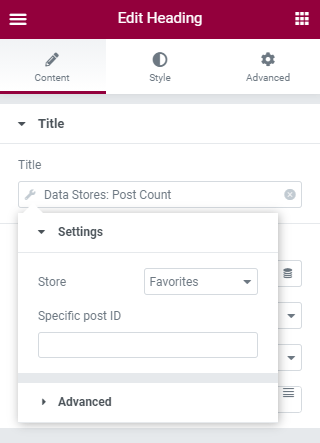
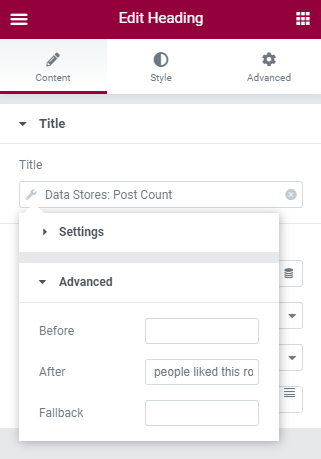
The tag settings are the same as for the item counter. The only difference is the Specific post ID feature. If you place an ID of a single item there, the counter will show how many times that specific post was added to the Data Store.
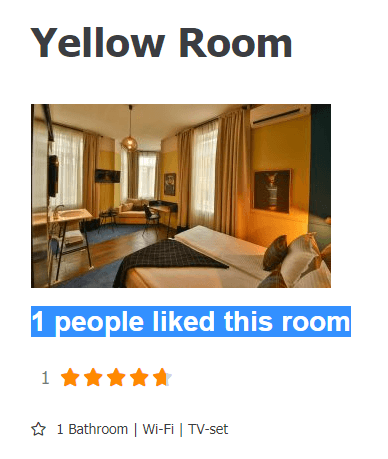
Here’s how it will look like in the front:
Voila, now you have an excellent Favorites page. You can also create Wishlists or any other data stores you need in the same way.