How to Display Queried Form Submissions in a Listing Grid
From this tutorial, you will discover how to create a query for the JetFormBuilder form submission records and display them on the front end with the help of the JetEngine WordPress plugin.
Before you start, check the tutorial requirements:
- Elementor (Free version) or Block editor (Gutenberg)
- JetEngine plugin installed and activated
- JetFormBuilder plugin installed and activated and a form with the Store Form Record Action.
With the JetEngine Query Builder and Listing Template features, you can display the JetFormBuilder form submission records on the front end. With such settings, users can observe their submission information, like date, total price, etc.
Set JetFormBuilder Records Query
Proceed to the JetEngine > Query Builder tab on the WordPress Dashboard and hit the “Add New” button.
Enter the query Name and select the “JetFormBuilder Records” Query Type.

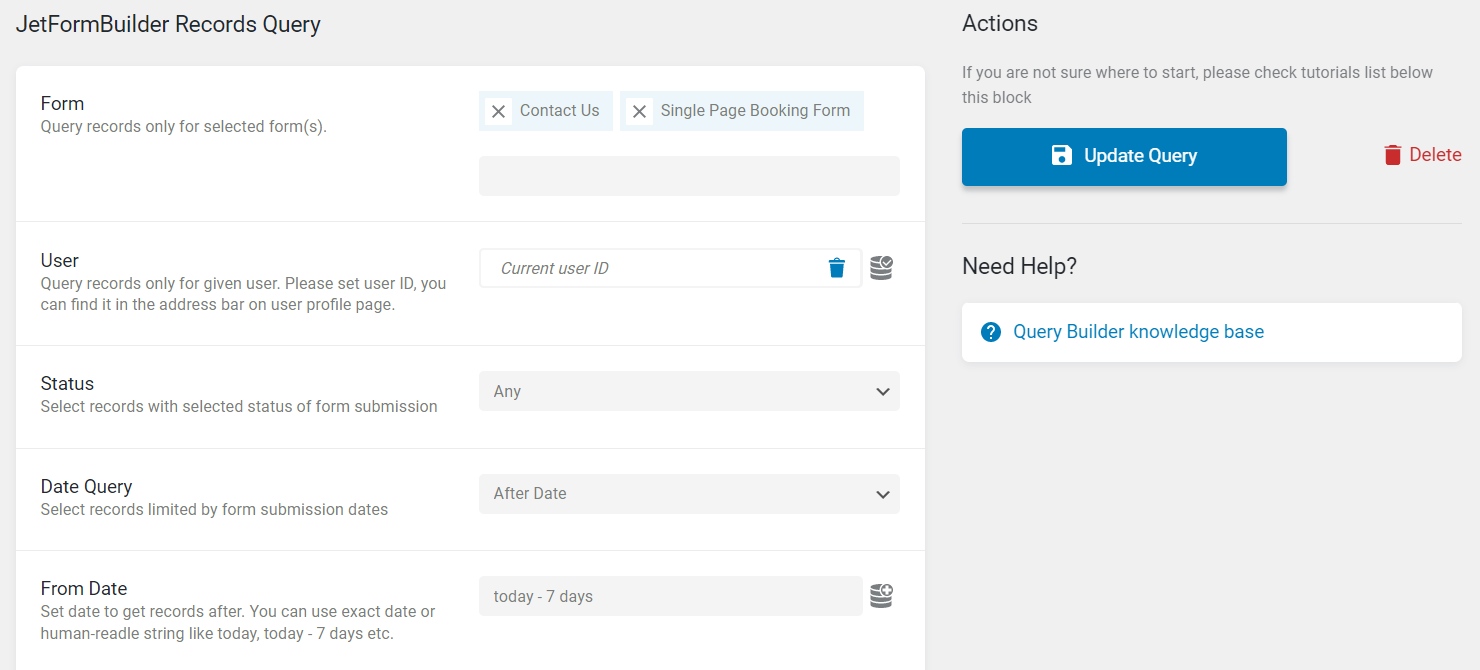
In the JetFormBuilder Records Query tab, there are such settings:
- Form. Select one or several JetForms, with records you want to display. Remember that the picked forms have to have the Store Form Record action;
- User. Enter the user ID for which you want to display form records. Be aware that you can enter only one user ID for one query. If you leave this field empty, the listing will display form records of all users. You can also hit the macros trigger and choose the “Current User ID” macro to display the records of the current user or the “Queried User ID” macro to display the records of the queried user on the Profile Builder pages;
- Status. Pick “Any,” “Success,” or “Failed” submit status;
- Date Query. Here you can limit the query result to a specific time period. Choose the “Before Date,” “After Date,” or “Between Dates” option. In the appeared From Date field, you can set the exact date or human-readable string like “today,” “today – 7 days,” etc.
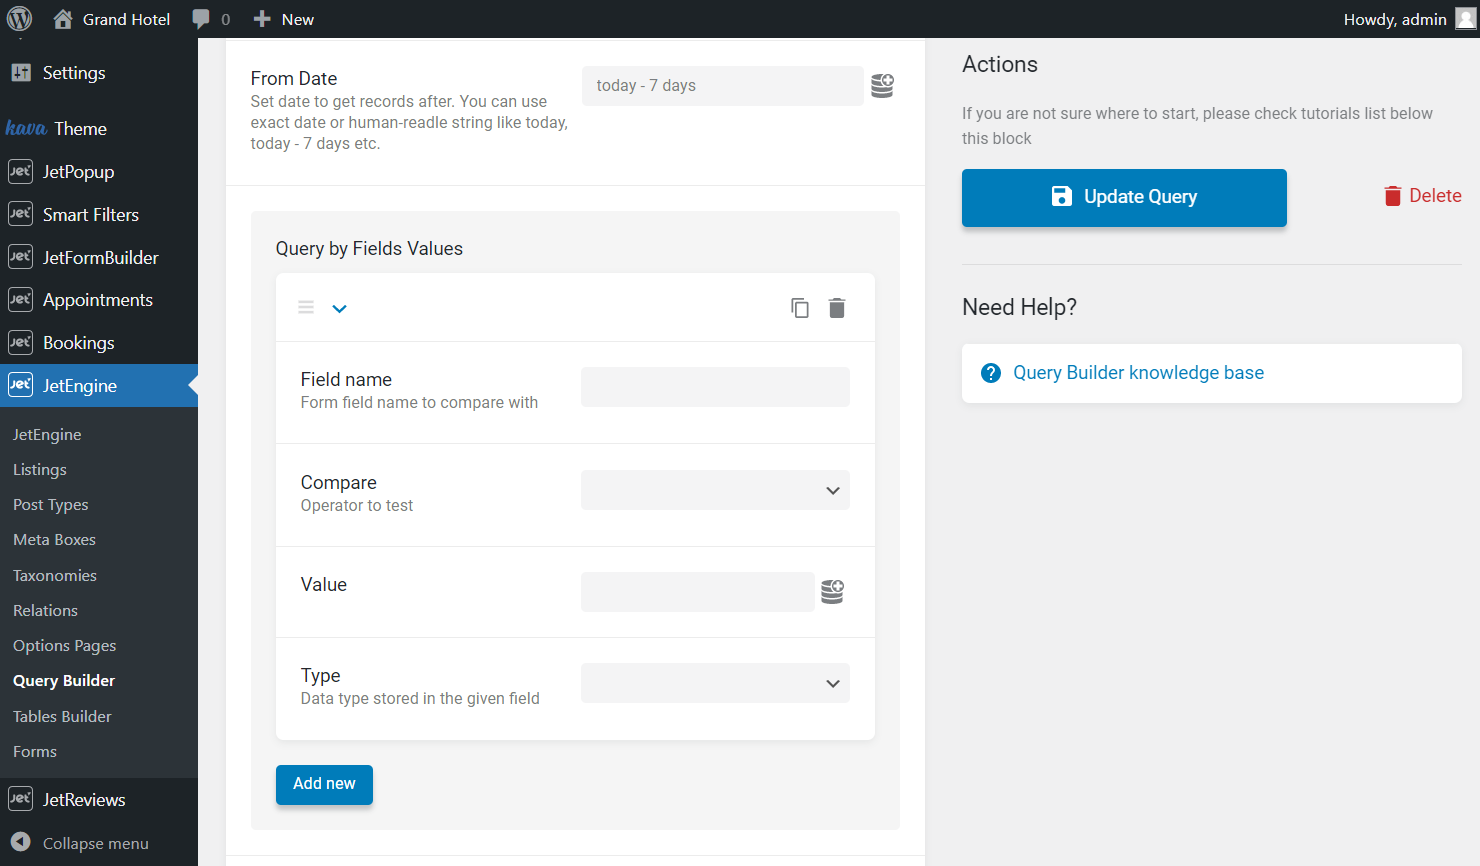
In the Query by Fields Values tab, if you hit the “Add New” button, you’ll see such settings:
- Form field. Enter the name of the needed field (don’t be confused with the field label);
- Compare. Here you can choose how the values will be compared:
- Equal – displays items having an equal value;
- Not Equal – shows items that don’t have an equal value;
- Greater than – shows items that have a greater value. It works with numeric values only;
- Greater or equal – displays items that have a greater or equal value. It also works only for numeric values;
- Less than – shows items that have a lesser value. For numeric values only;
- Less or equal – displays items that have a lesser or equal numeric value;
- Like – shows items that have the value you’ve set in the Value field mentioned in the content;
- Not like – displays only the items that don’t have the value you’ve set in the Value field mentioned in the content;
- In the list – after you add several values to the Value field, it shows the items that have at least one of them in their content;
- Not in the list – displays items that have any values except the ones you typed into the Value field;
- Between – displays items that contain the value between two, which are set in the Value field;
- Not between – shows all the items except the ones that contain a value that matches the set interval;
- Exist – shows all the items that contain the Key. You don’t need to set the Value in this case;
- Not exist – displays all the items that don’t contain the Key. You don’t need to set the Value either;
- Regexp – displays items whose regular expression matches with the values in the field;
- Not regexp – displays items whose regular expression doesn’t match with the values in the field;
- Value. The value you set here will be compared to the value of the field;
- Type. This drop-down allows you to specify what type of data is stored in the chosen field:
- Char – alphabetic data that is not sensitive to case;
- Numeric – whole numbers only;
- Date – date values;
- Datetime – date and time;
- Decimal – fraction number data;
- Time – time values;
- Binary – data that is sensitive to case;
- Signed – whole numbers, both positive and negative;
- Unsigned – whole numbers, only positive.
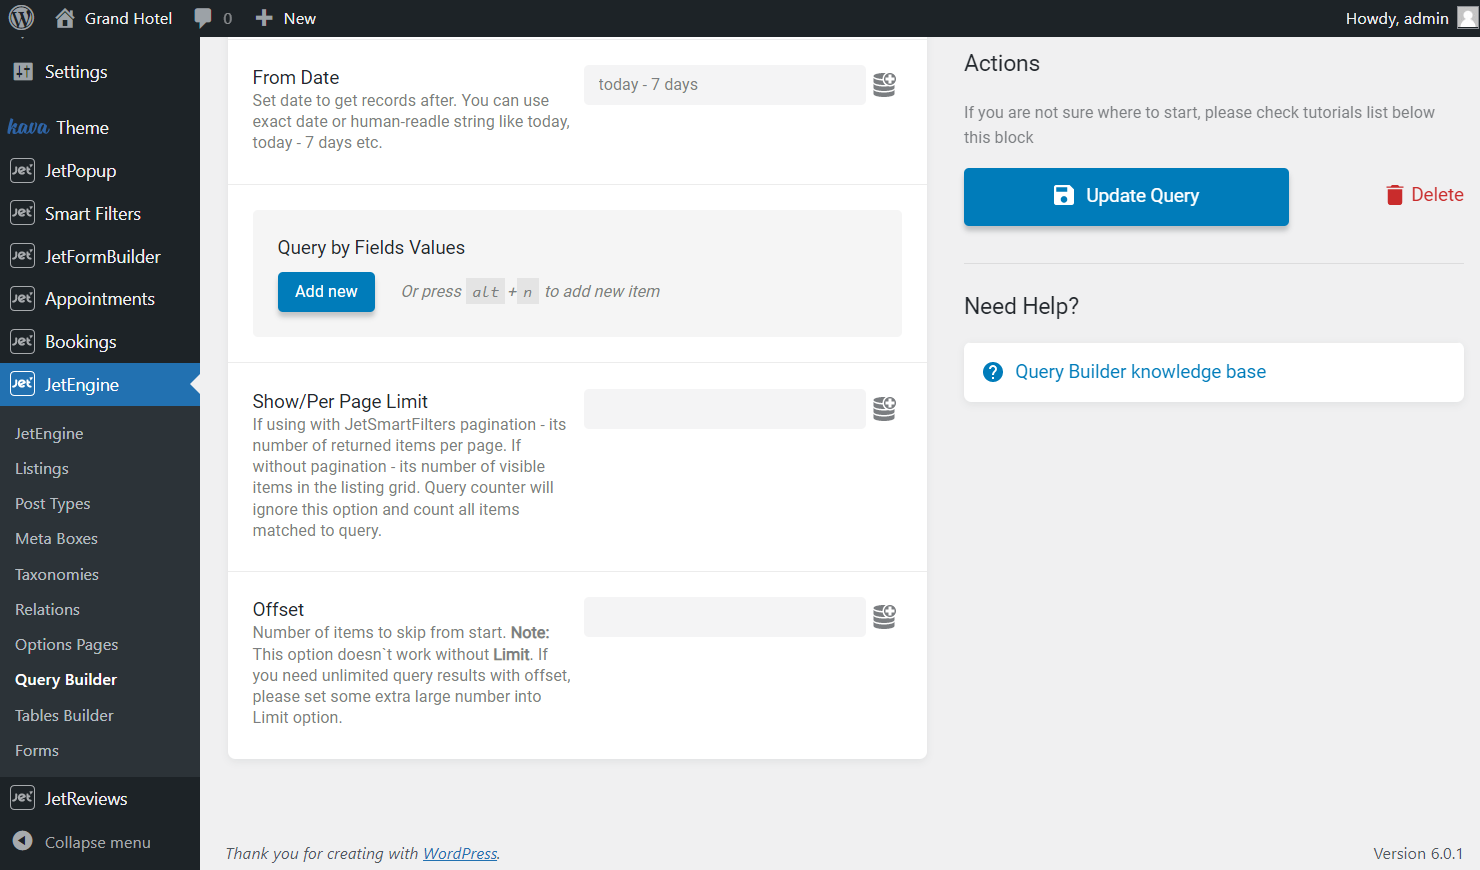
- Show/Per Page Limit. Here you can define how many items will be shown in the Listing Grid simultaneously. If you add the JetSmartFilters Pagination, this feature will specify the number of items on one page;
- Offset. Type the number of first items you would like to skip from the start. Be informed that this option doesn’t work if the Show/Per Page Limit field is empty.
When you finish customizing, hit the “Add/Update Query” button.
Create Listing Template
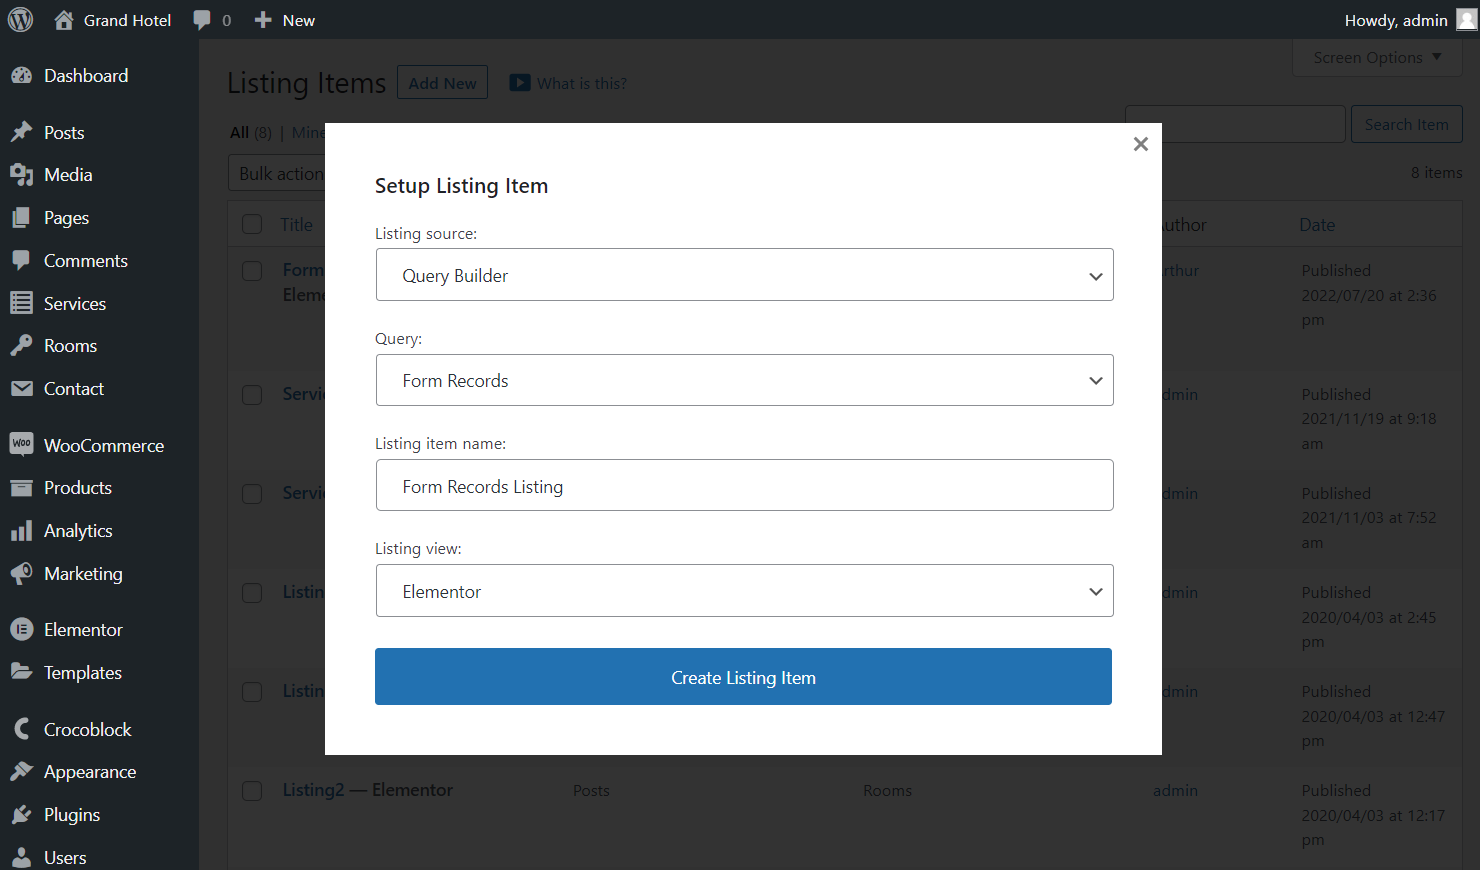
Go to JetEngine > Listings and press the “Add New” button.
In the appeared pop-up, select the “Query Builder” Listing source, the name of the recently created Query, enter the Listing item name, and pick the “Elementor” or “Blocks (Gutenberg)” Listing view. Hit the “Create Listing Item” button.
Displaying general form record information with Dynamic Field
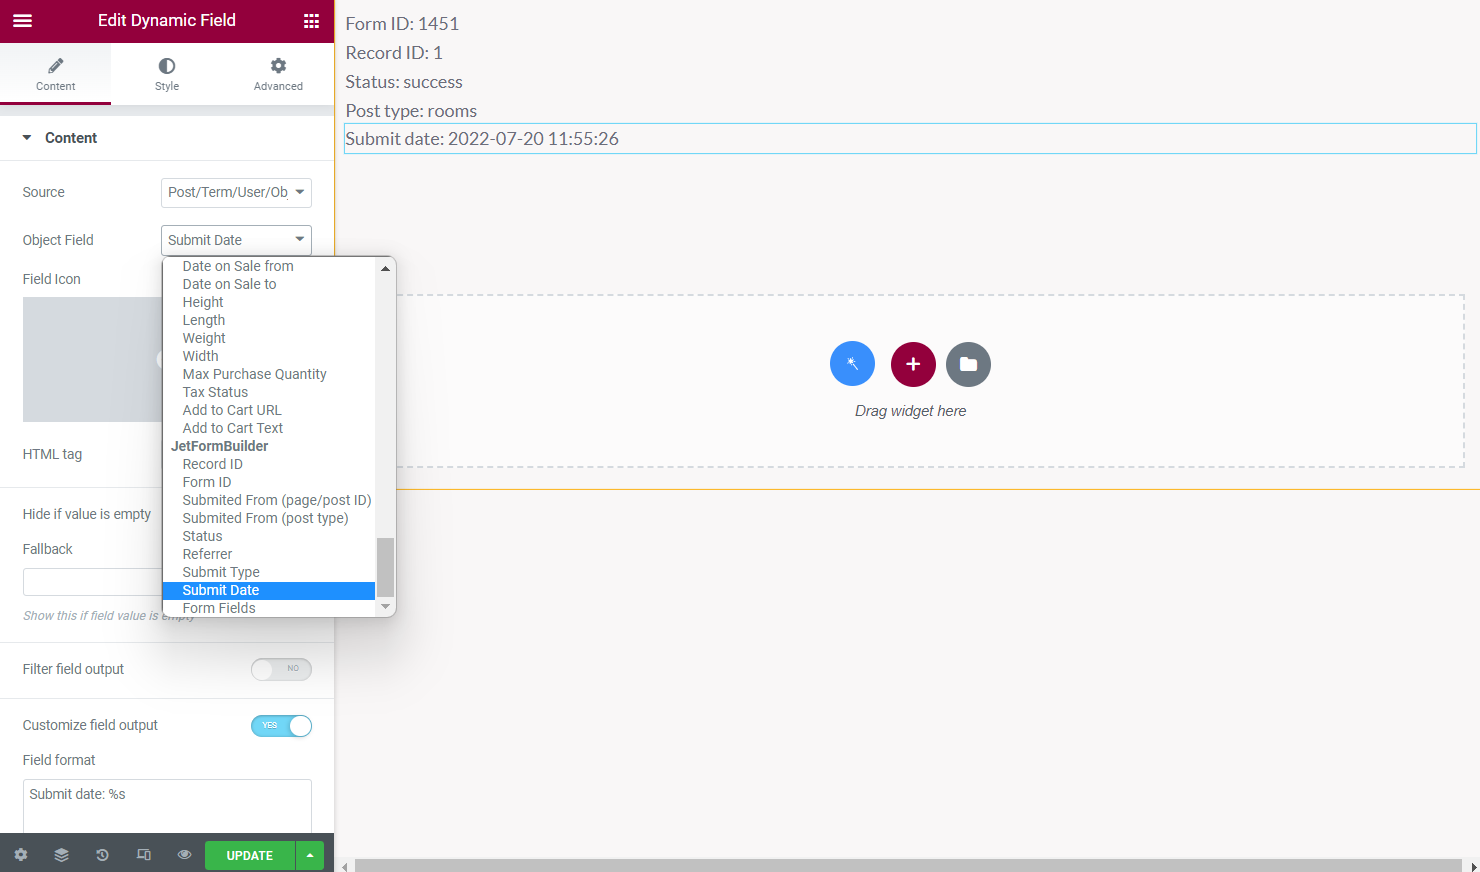
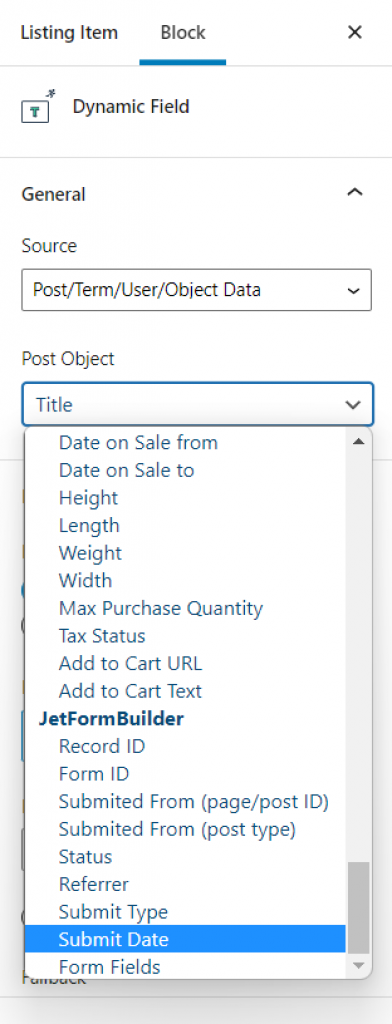
Placing the Dynamic Field widget or block, you can display the form record information. Select the “Post/Term/User/Object Data” Source and select the needed option in the JetFormBuilder section from the Object Field drop-down menu.
The identical settings are in the Dynamic Field block.
Displaying form field values with Dynamic Field
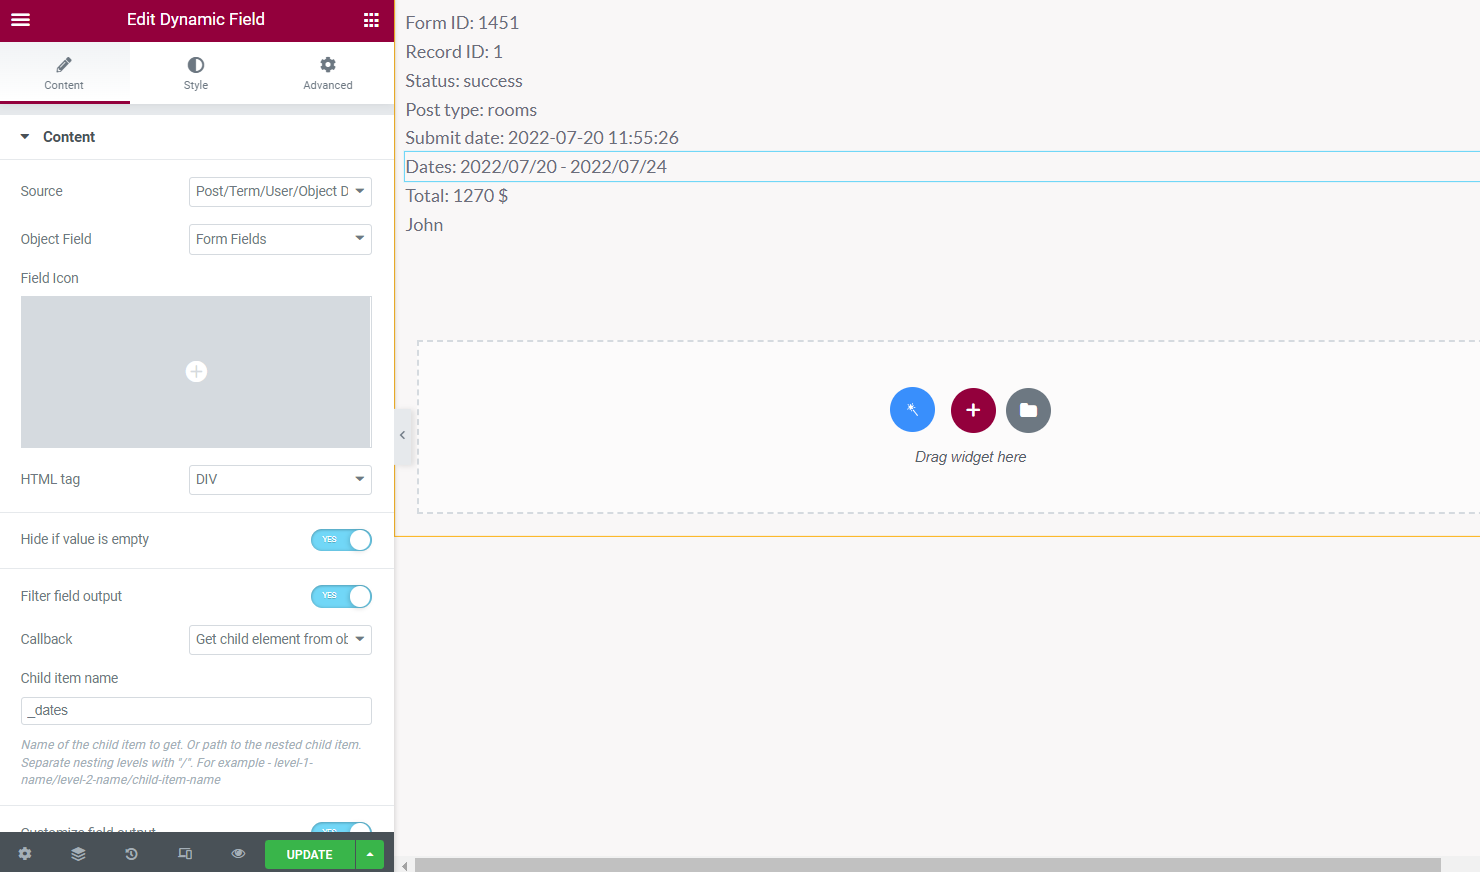
If you select the “Form Fields” option in the Object Field drop-down menu, you can display the value of the specified field.
Enable the Filter field output and select the “Get child element from object/array” Callback. In the Child item name field, enter the form field name (don’t be confused with the field label).
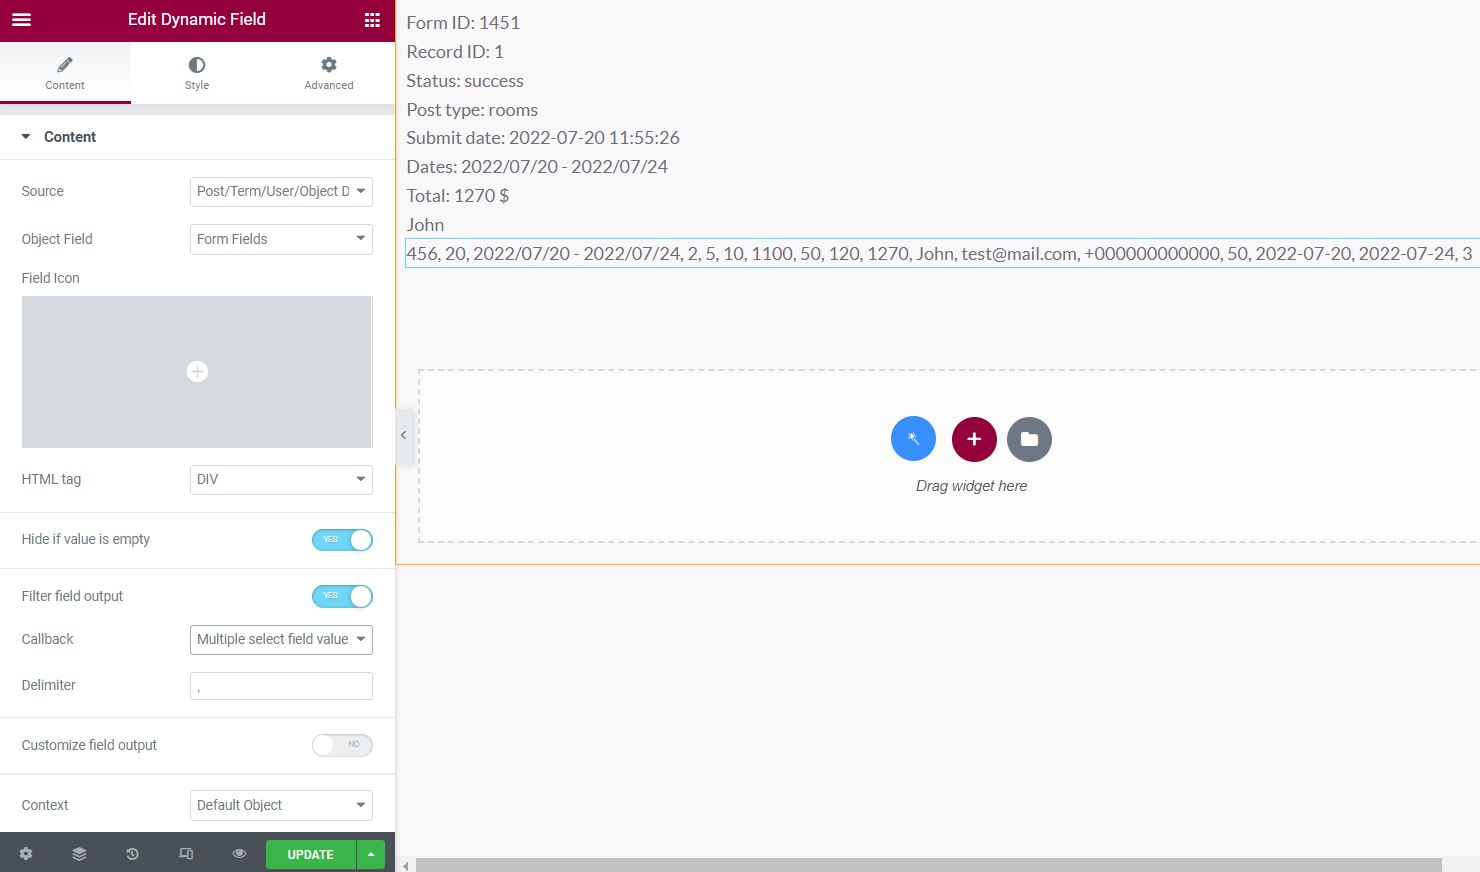
If you select the “Multiple select field values” Callback, you will display all form field values.
Displaying form field values with Dynamic Tag
You can also display the form values, drag-n-dropping the Heading or Text Editor widget and hitting the “Dynamic Tag” button.
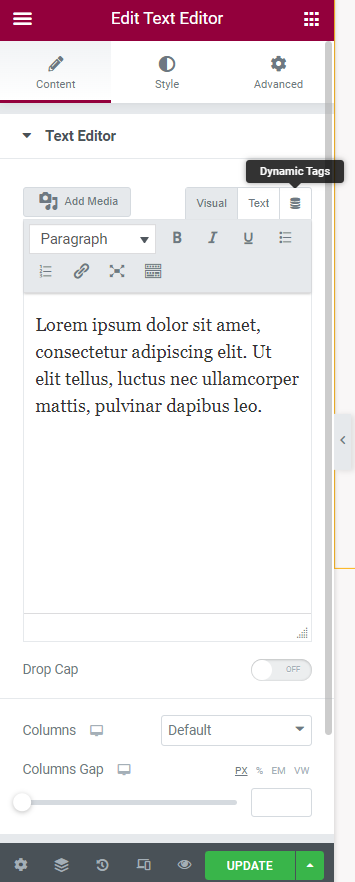
Select the “JetFormBuilder Record Field” dynamic tag and enter the needed Field Name.

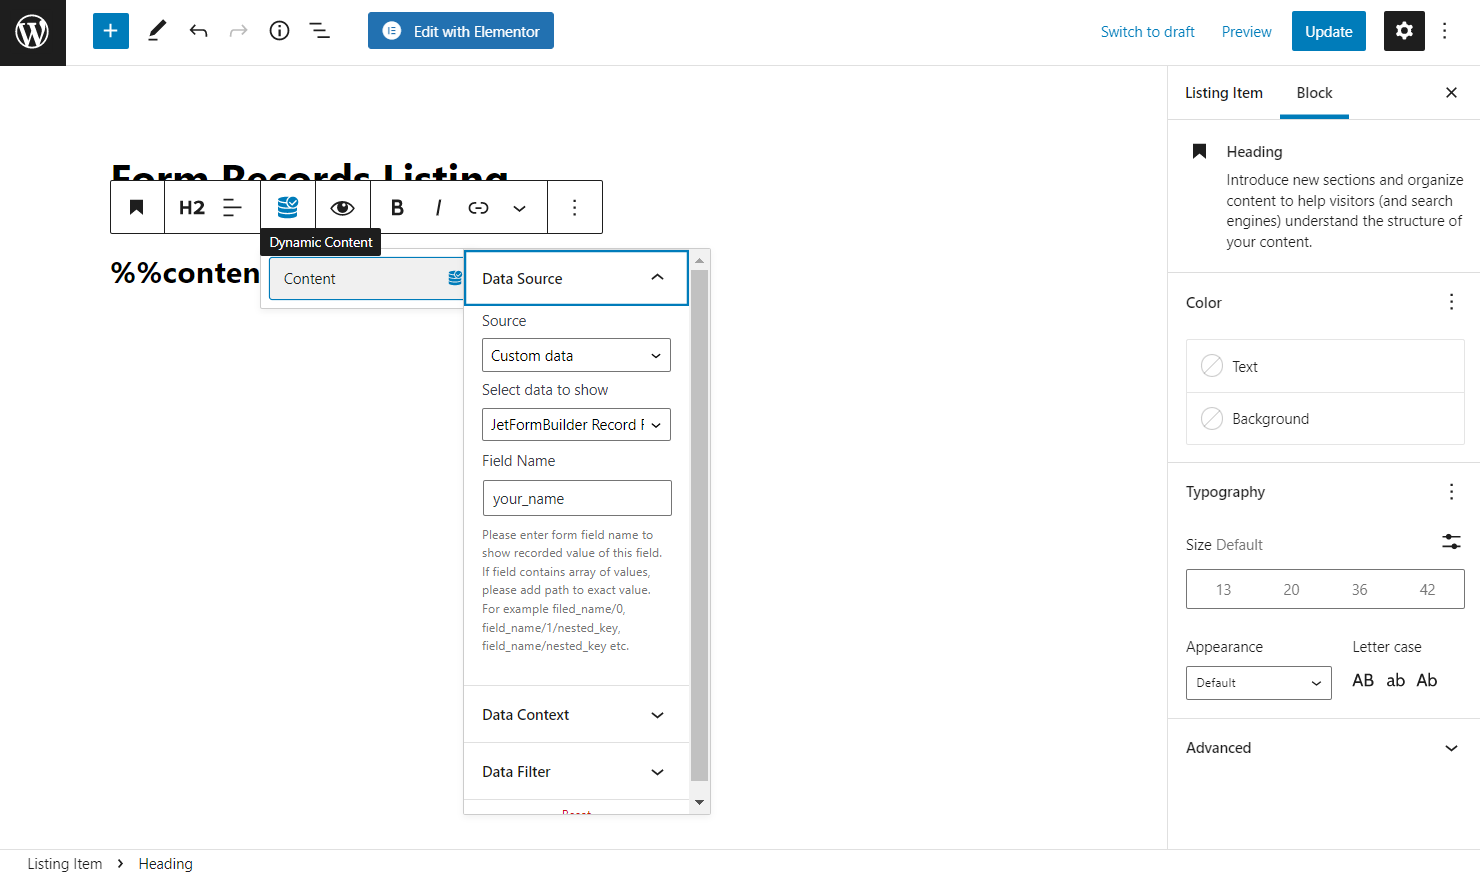
If you work in the Block editor, place the Heading block, push the “Dynamic Content” button, and click on “Content.” In the Data Source tab, pick the “Custom Data” Source, choose “JetFormBuilder Record Field” in Select data to show, and enter the needed Field Name.
When you finish customizing the listing template, press the “Publish/Update” button.
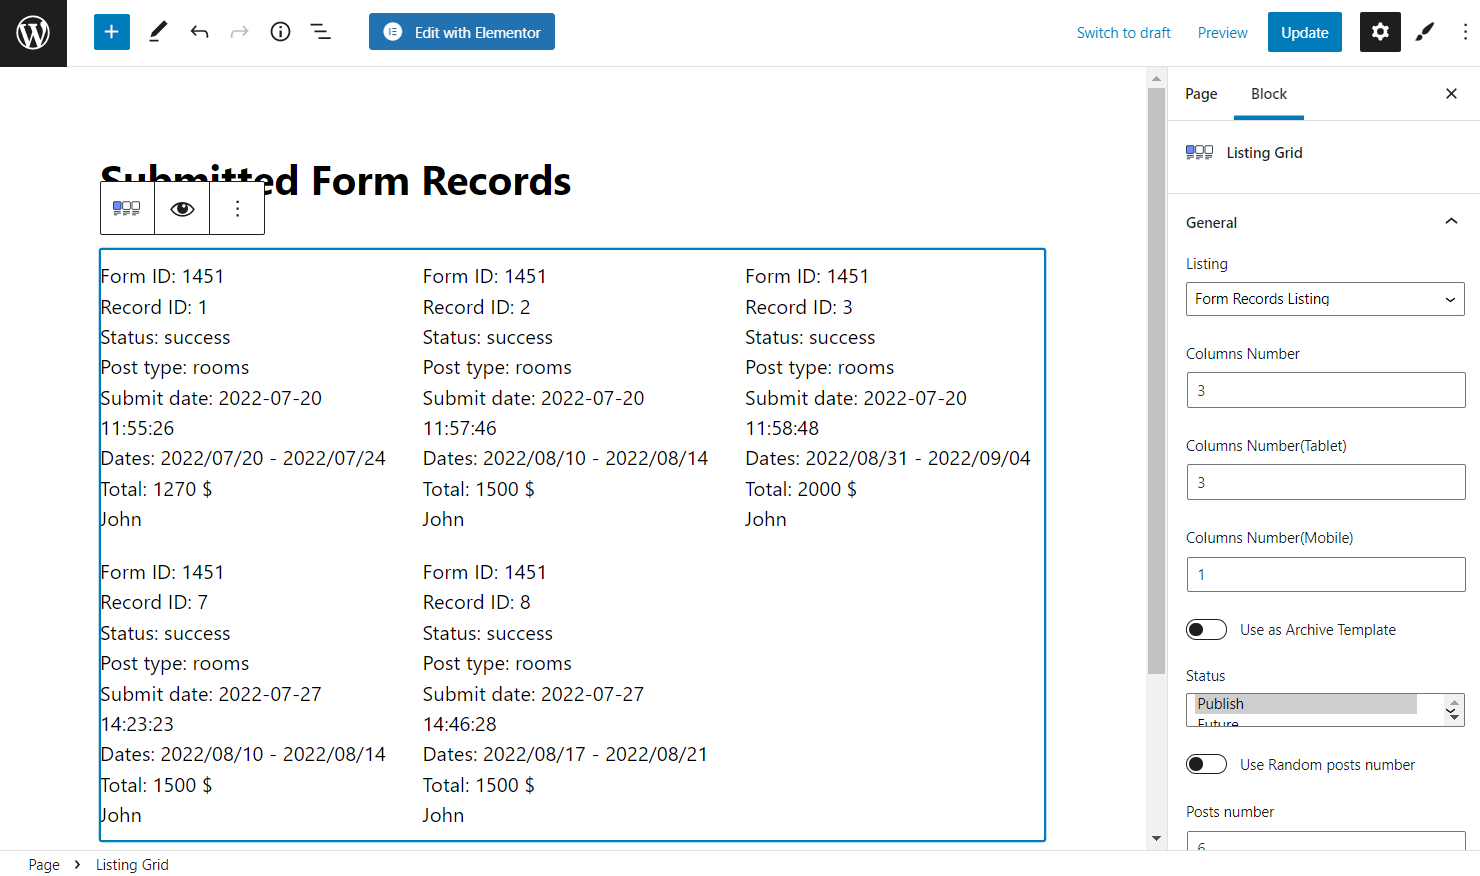
Place Listing Grid on Page
Proceed to the page where you want to display form submissions and click to edit it in the Gutenberg or Elementor editor.
Place the Listing Grid widget or block and select the needed Listing from the drop-down menu.
When you’re done, hit the “Publish/Update” button.
Finally, proceed to the page on the front end and have a look.
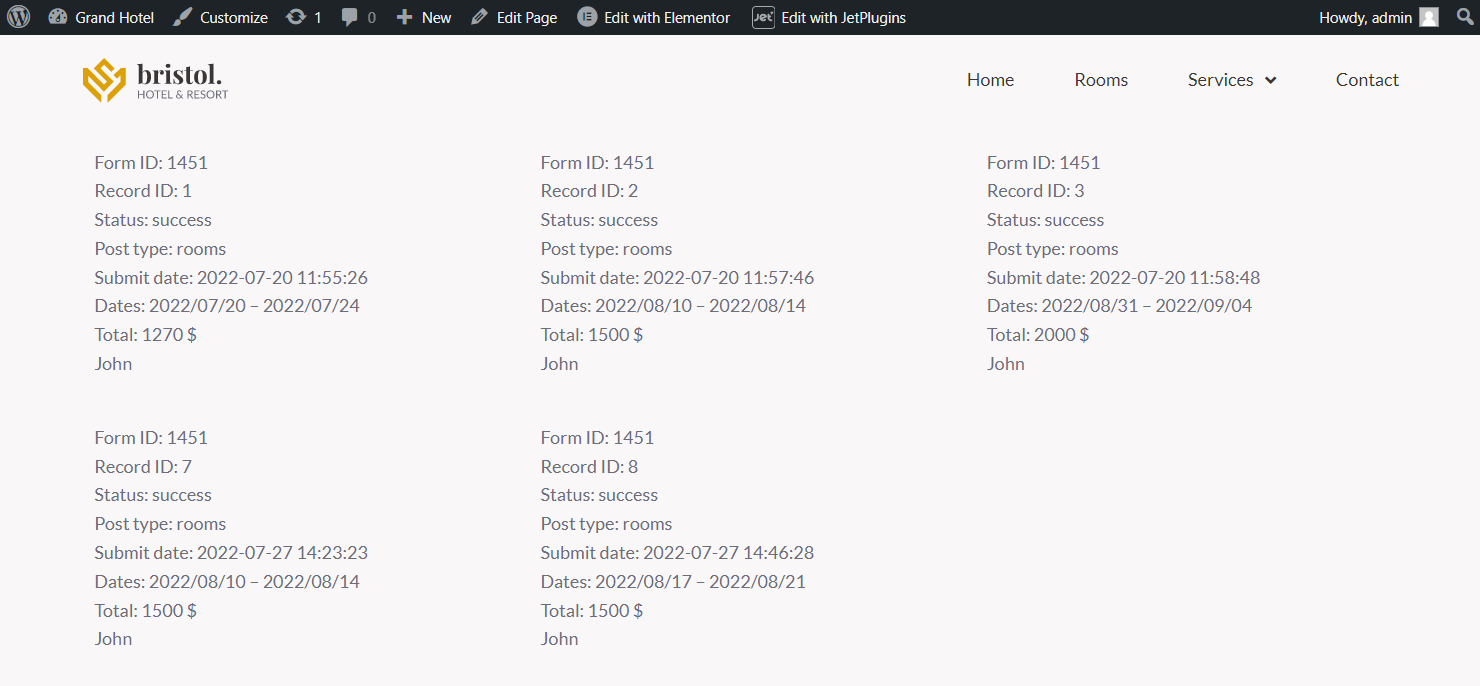
That’s all. Now you know how to create a query for the JetFormBuilder form submission records and display them on the front end with the help of the JetEngine plugin.