How to Fetch Data Dynamically Using a Component
Discover how to retrieve data dynamically using the dynamic button example with the JetEngine WordPress plugin’s Component module.
Before you start, check the tutorial requirements:
- Elementor (Free version), Block editor (Gutenberg), or Bricks
- JetEngine plugin installed and activated, with a Custom Post Type created.
In this guide, we will explore a use case where we have meta fields for the icon and link in the Custom Post Type. Using the Component feature, we need to display a dynamic button on a single post that pulls the icon and link from the meta fields. For that, we will use the Dynamic Field widget – the most relevant available solution.
Add Meta Fields
Proceed to WordPress Dashboard > JetEngine > Post Types, then click the “Edit” button next to the needed CPT. Move to the Meta fields tab, and click the “New Meta Field” button to add the “Text” field for the link. Type in the needed Label.
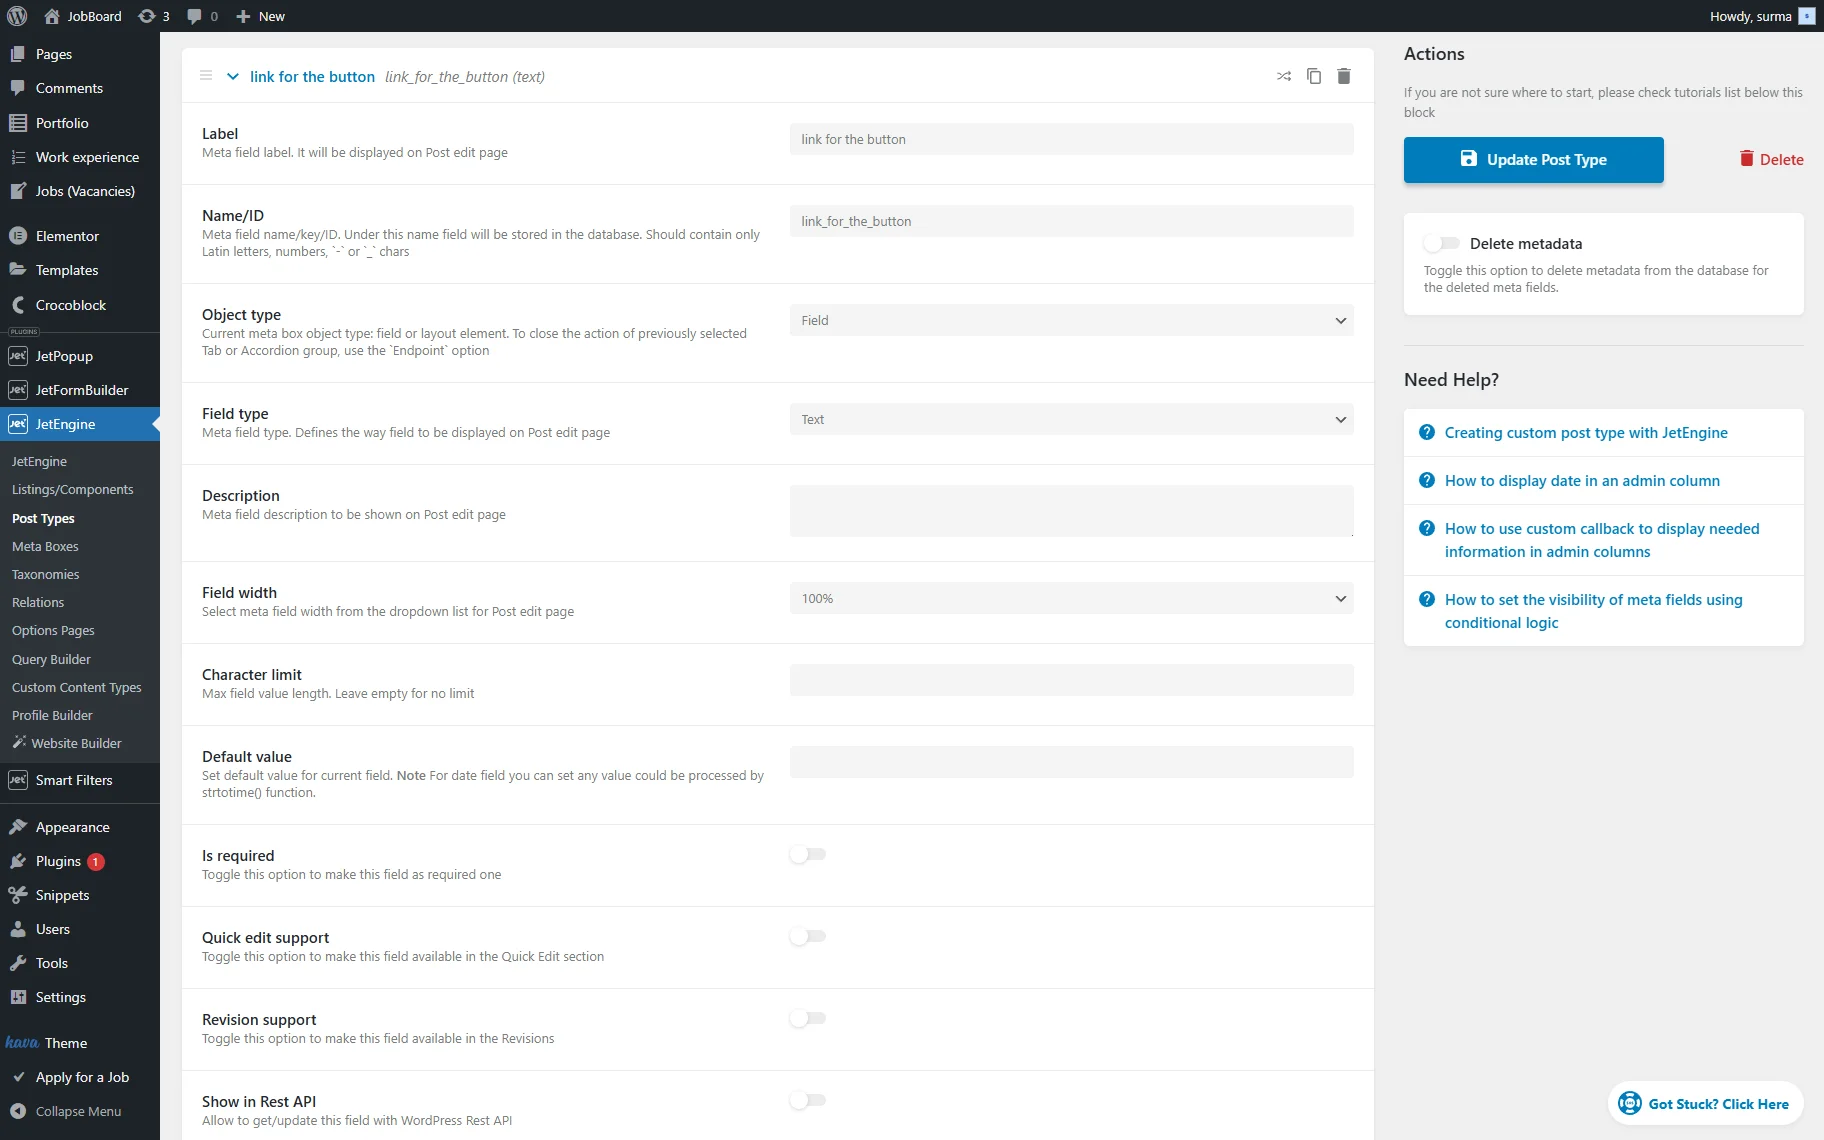
Add one more field and select the “Iconpicker” Field Type. Enter the Label for the field.
Click the “Update Post Type” button.
Then, go to the posts from the edited CPT and add the data to the newly created fields.
Ensure you saved the changes.
Build a Component
Now, navigate to WordPress Dashboard > JetEngine > Listings/Components and click the “Add New Component” button.
In the newly opened Setup Component pop-up, enter the Component name and select the Component view.
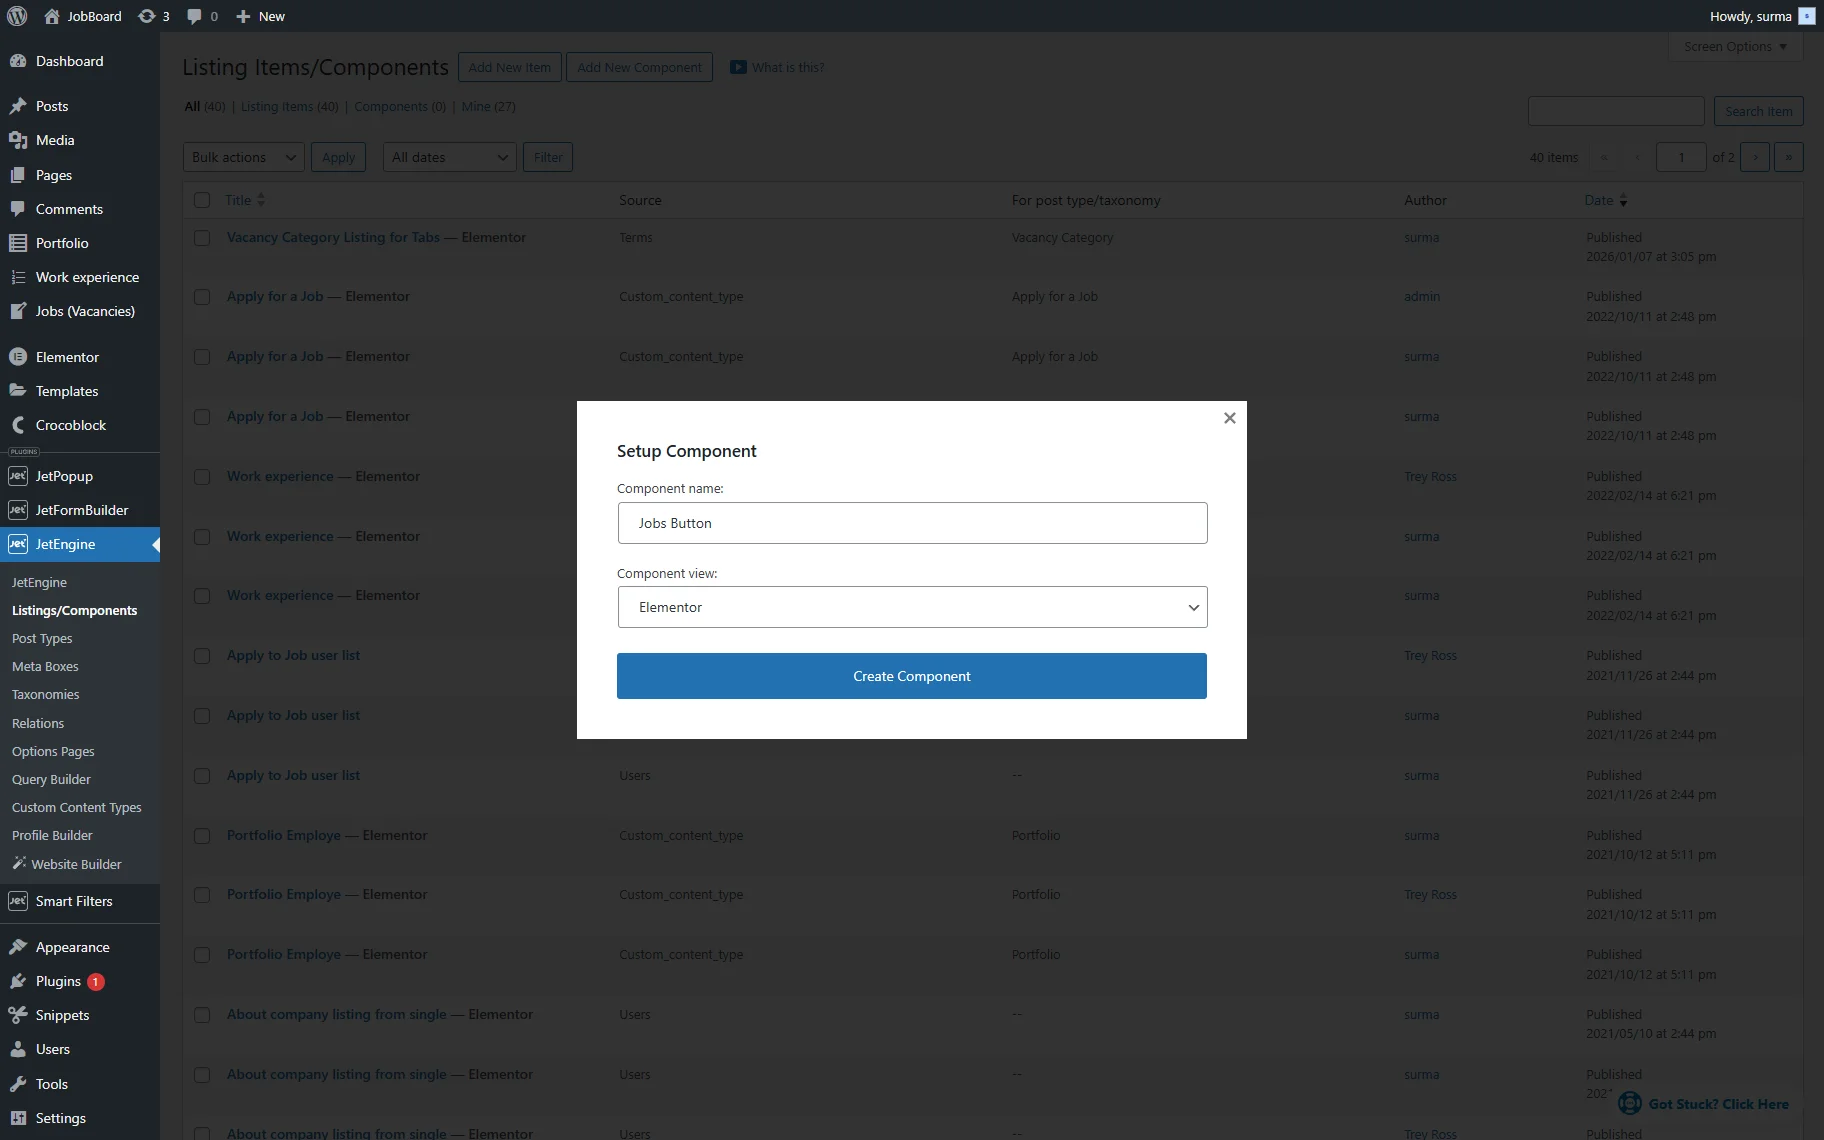
Click the “Create Component” button.
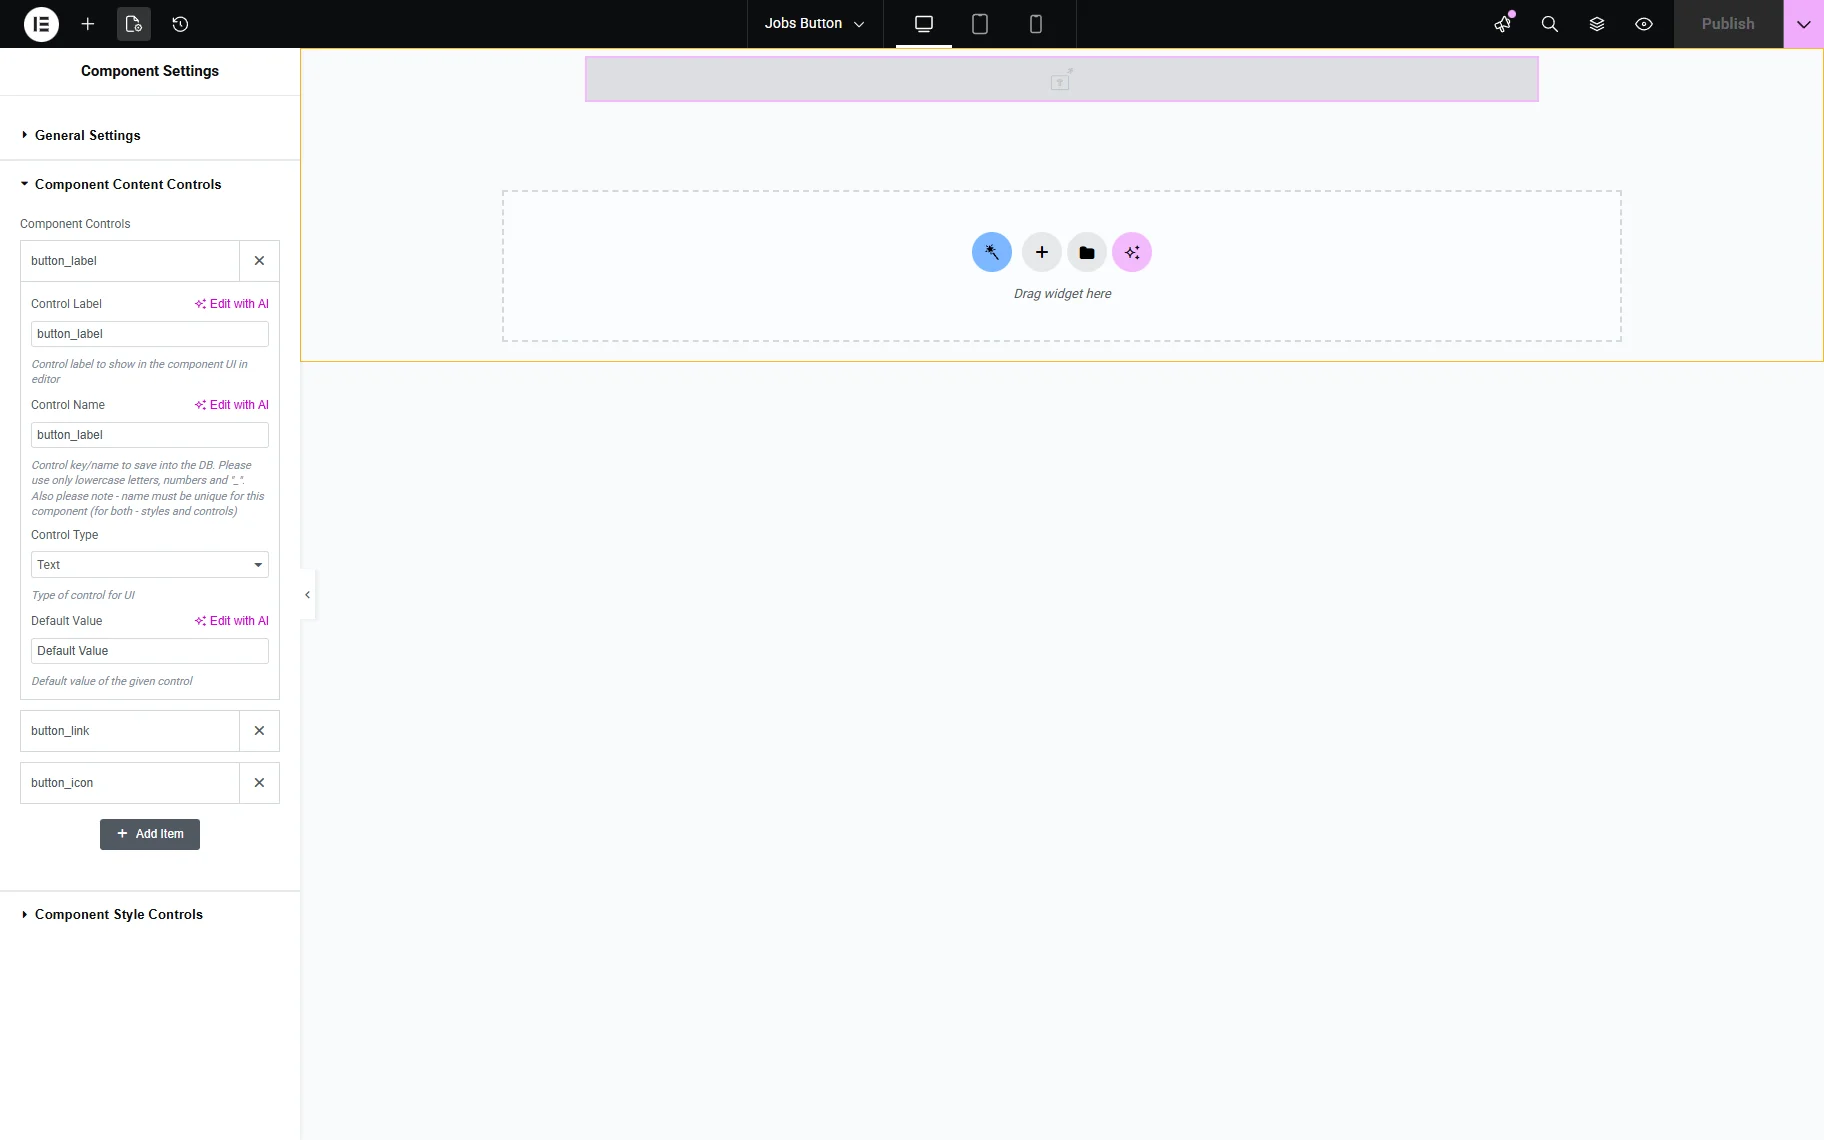
Click the file-shaped icon in the top panel and create three Text Component Controls in the Component Content Controls tab. There should be controls for button label, button link, and button icon.
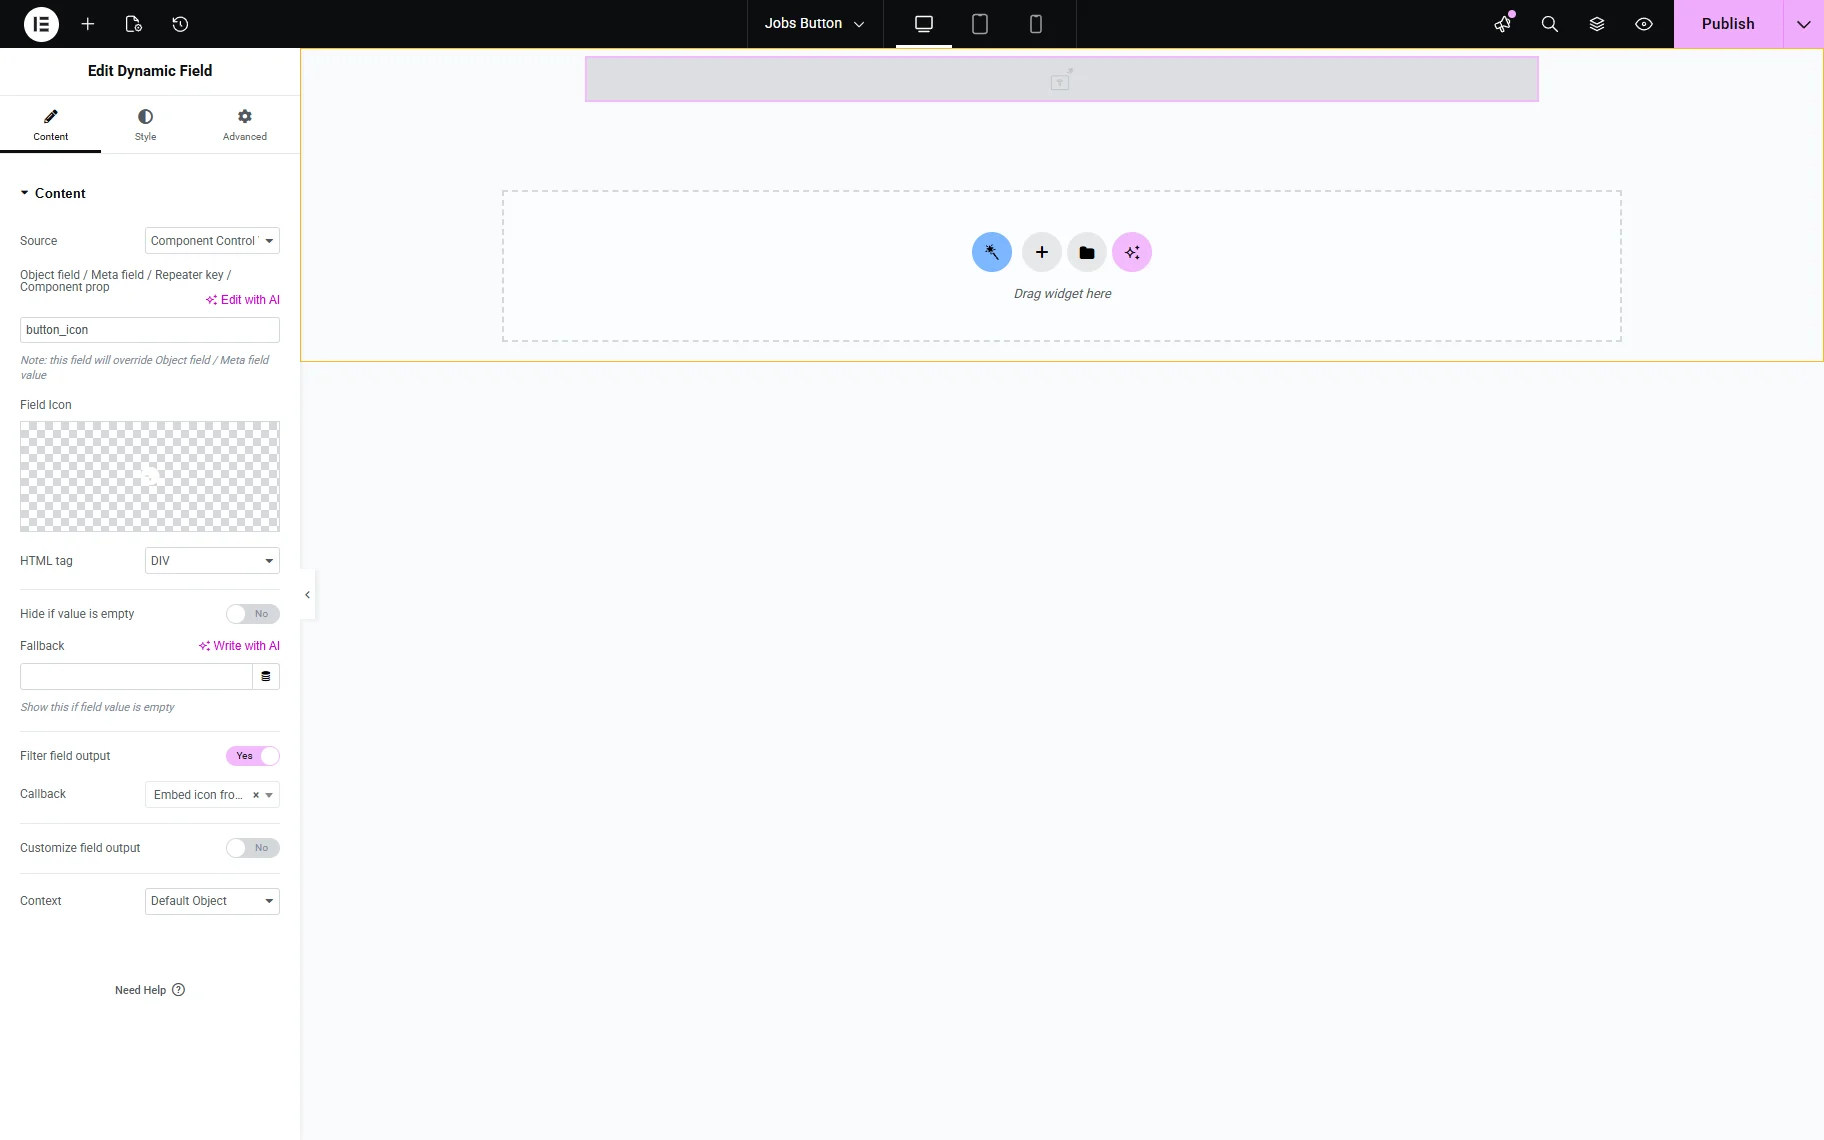
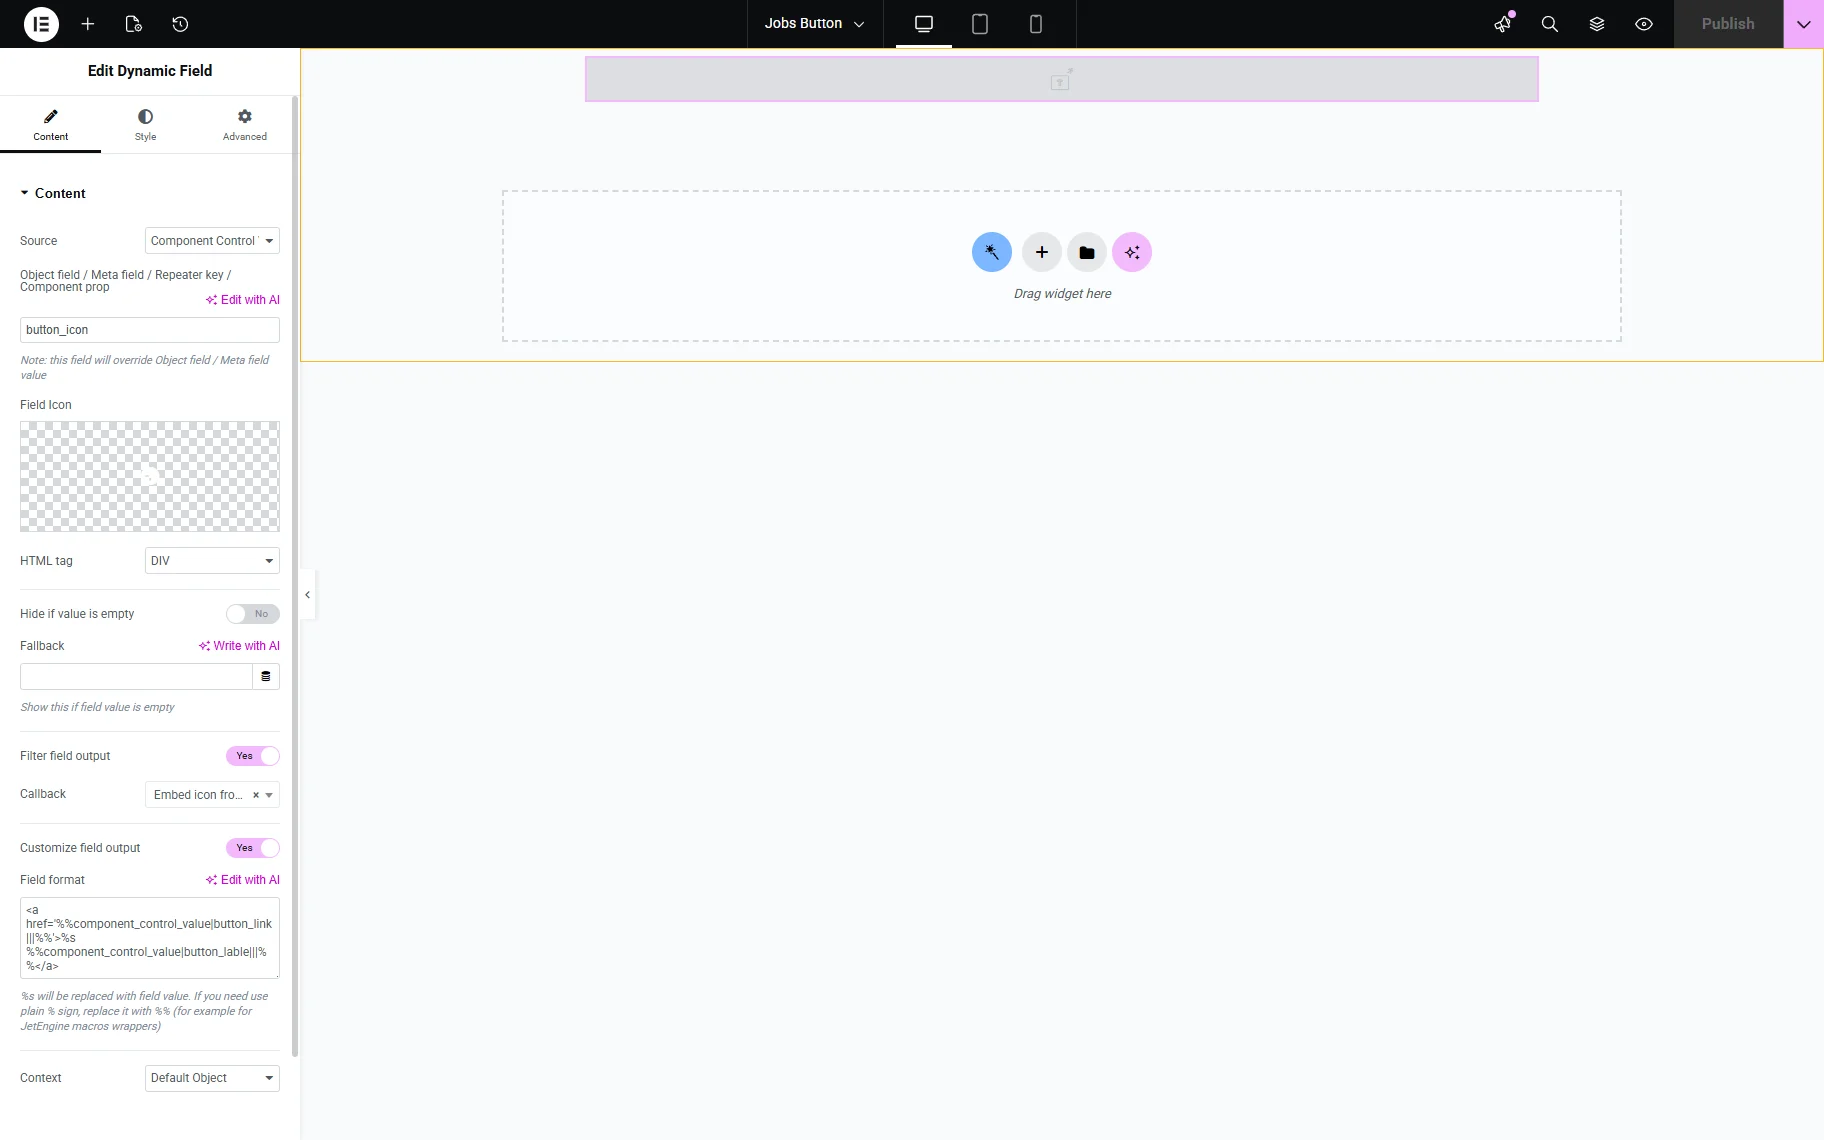
Then, inside the Component, add the Dynamic Field widget. In the Source, select the “Component Content Value” option. In the Object field / Meta field / Repeater key / Component prop input, enter the Component Name for the icon, which can be found in the Component Content Controls settings.
Then, enable the Filter field output toggle and select the “Embed icon from iconpicker” option from the Callback dropdown.
Now, open your site in a new window and proceed to WordPress Dashboard > JetEngine > JetEngine > Macros Generator.
For the Macros field, select the “Component Control Value” option, and for the Control Name, enter the name of the text control for the button link. Copy and keep the macro you get.

Change the Control Name to match the button label.
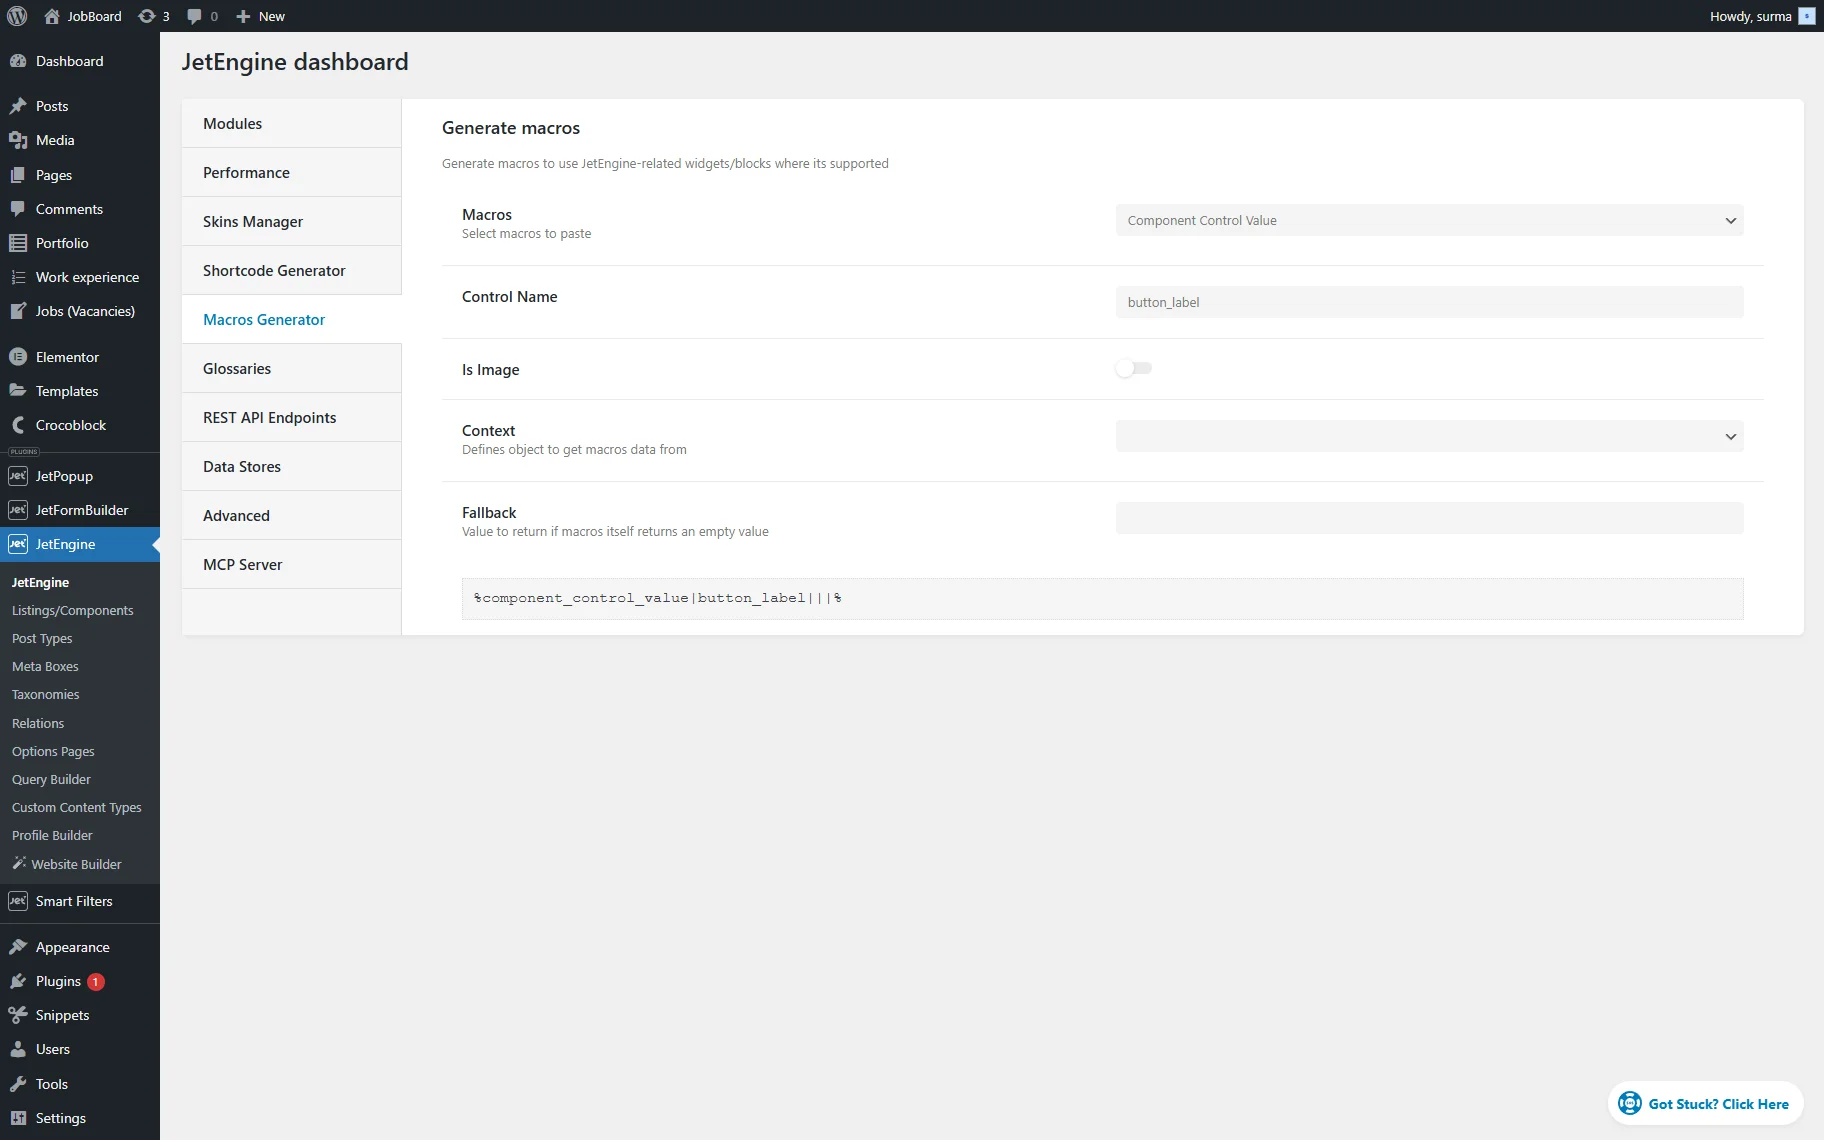
Copy and keep this macro as well for now.
Move back to the Component settings page. Turn on the Customize field output toggle, and in the newly appeared Field format field, enter the following piece of code:
<a href='%macro for button link%'>%s %macro for button label%</a>Instead of the “macro for button link” and “macro for button label”, paste the macros you created in the previous step.
Publish the template once you are ready.
Add the Component to the Page
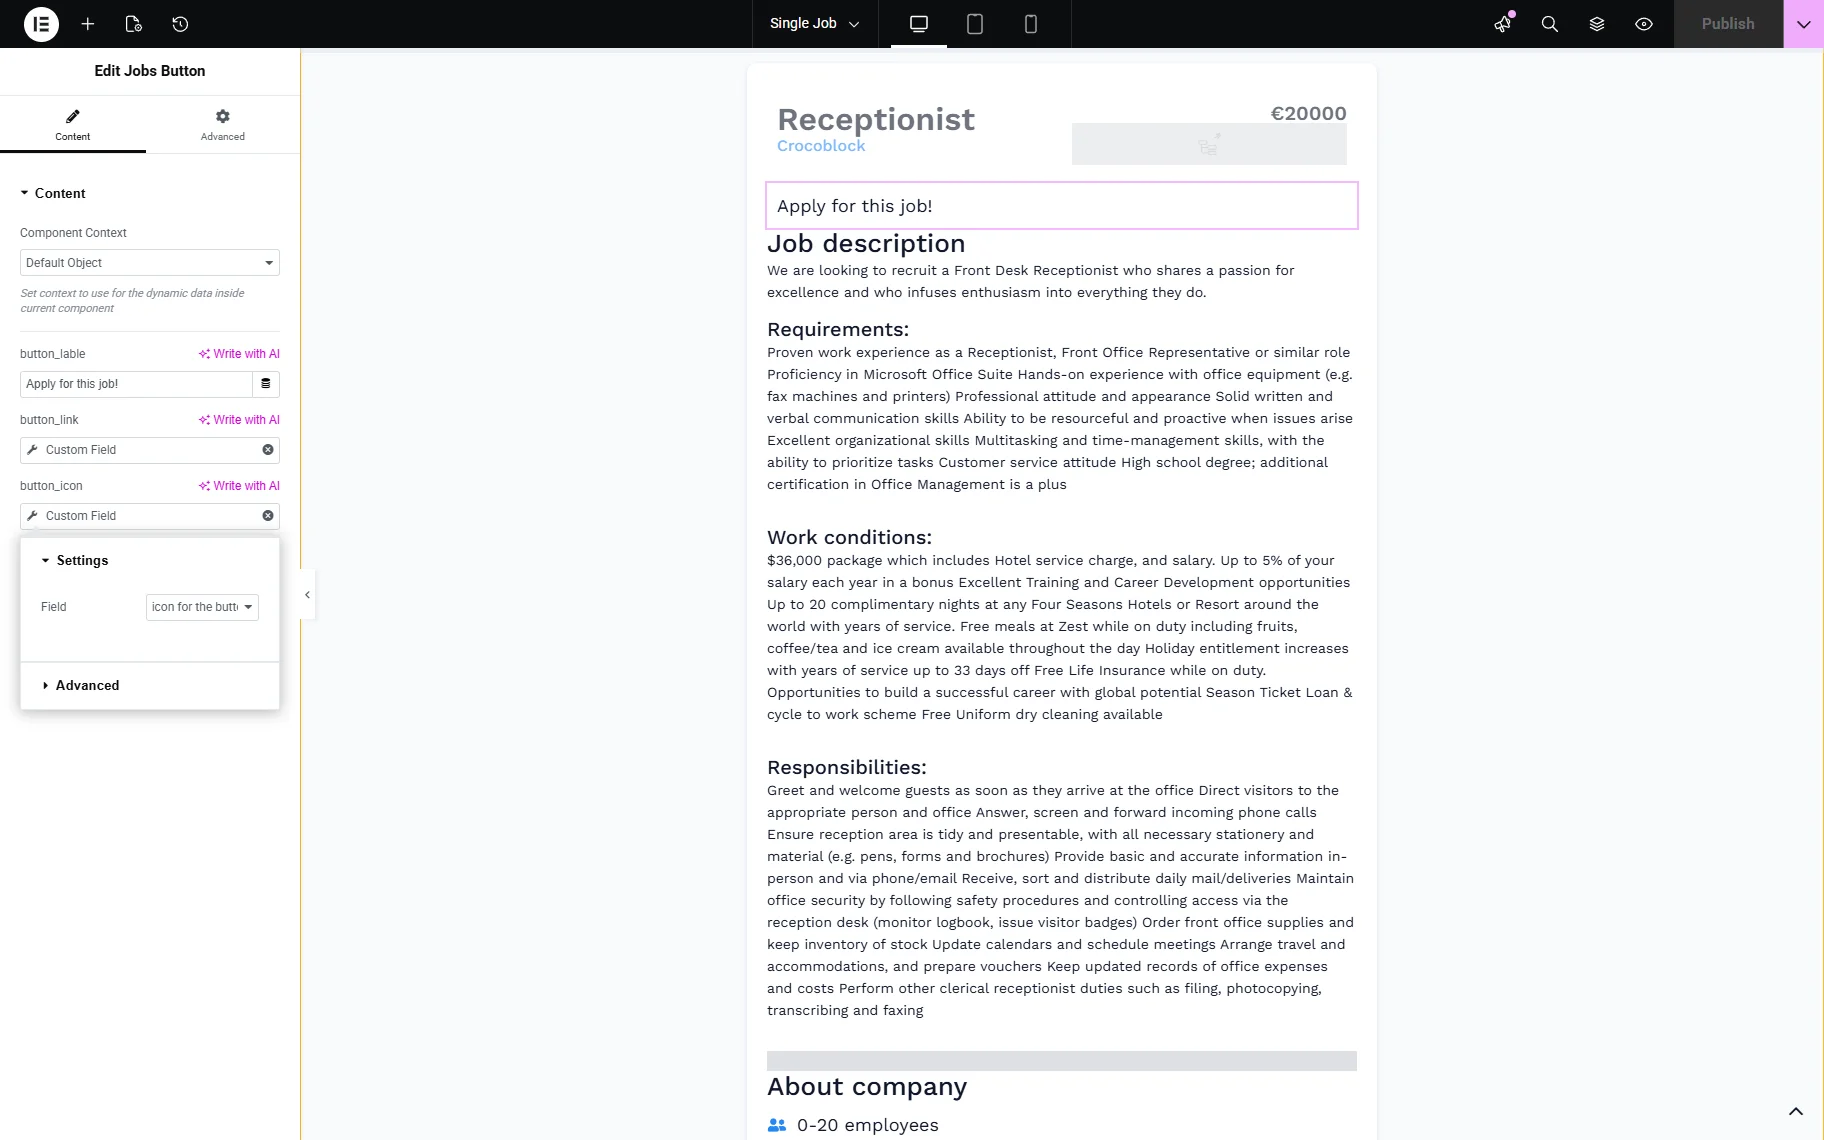
Move to the single template page where the button should be added. Add the Component you created (you can find it by the name you added during the step of creating the Component).
Now we need to set the controls. For the “button_label”, we want the same label displayed for all posts, so we just enter it.
For the link and icon, click the “Dynamic Tag” icon next to the field and select the “Custom Field” option from the dropdown. Then select the icon and link fields from the custom fields we created earlier.
Click the “Publish” button once you are ready.
Check the Result
Proceed to the front-end page of the posts from your CPT.
Here, the button with the defined text and icon is displayed. Additionally, when we hover over the button, we see that the link is attached to it.
That’s it. Now you know how to fetch data dynamically using the JetEngine WordPress plugin’s Component module.