How to Hide Contact Details Unless User Pays
Find out how to hide contact details on the WordPress page unless the user makes a payment. Use JetEngine and JetFormBuilder plugins with their features to get the needed result.
Before you start, check the tutorial requirements:
- Elementor (Free version)
- JetEngine plugin installed and activated with Dynamic Visibility for Widgets and Sections enabled
One of the essential features of a membership website is a so-called lead fee. For example, show the seller/provider’s contacts only to users that made specific payments. So here, you will find out how to do that using Crocoblock plugins.
Create Meta Fields for Users
First, we need to build the meta fields for the users. Here we will use the Meta Box feature.
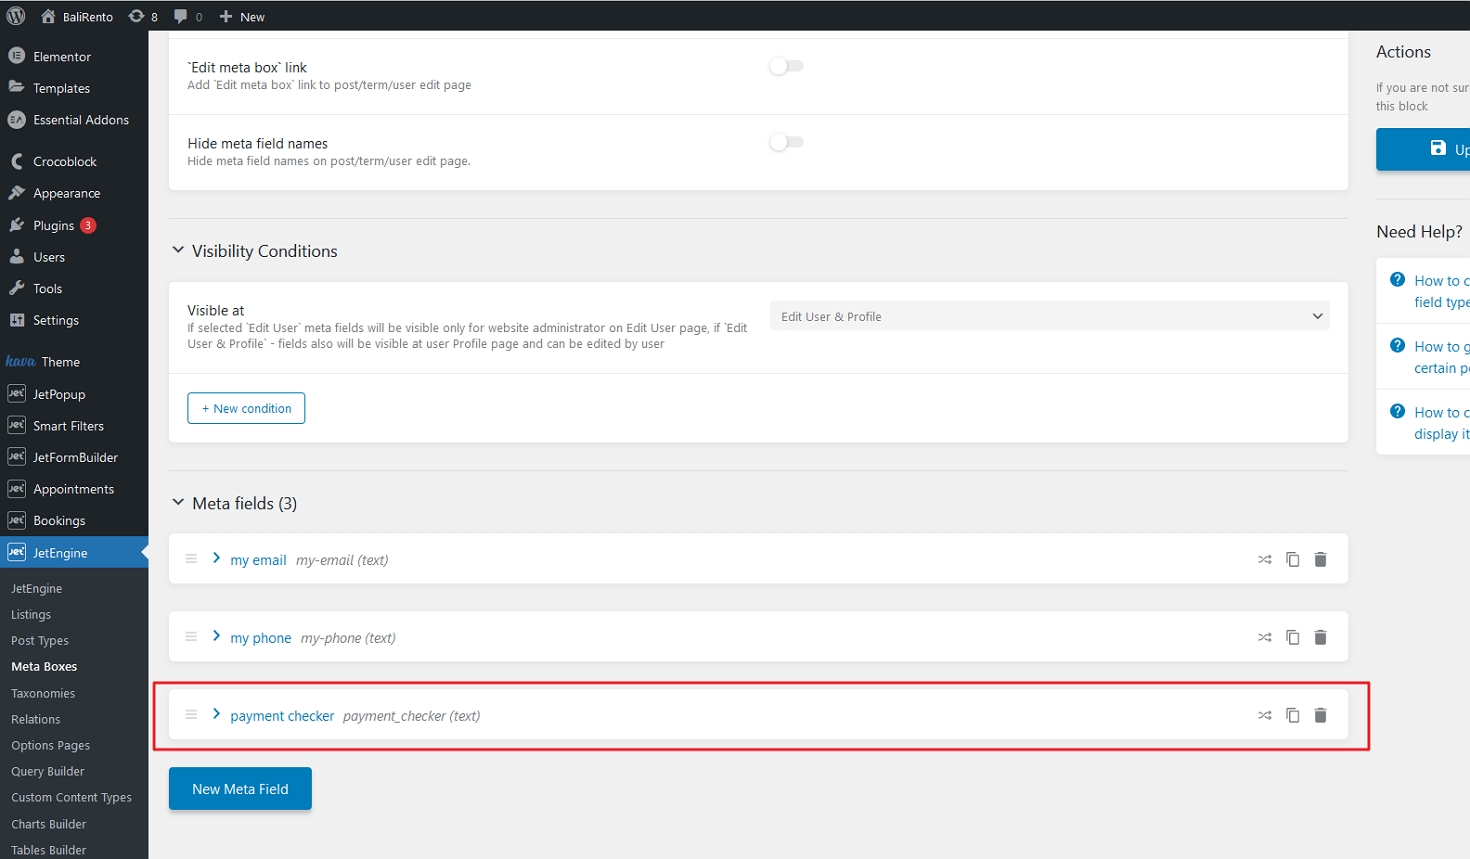
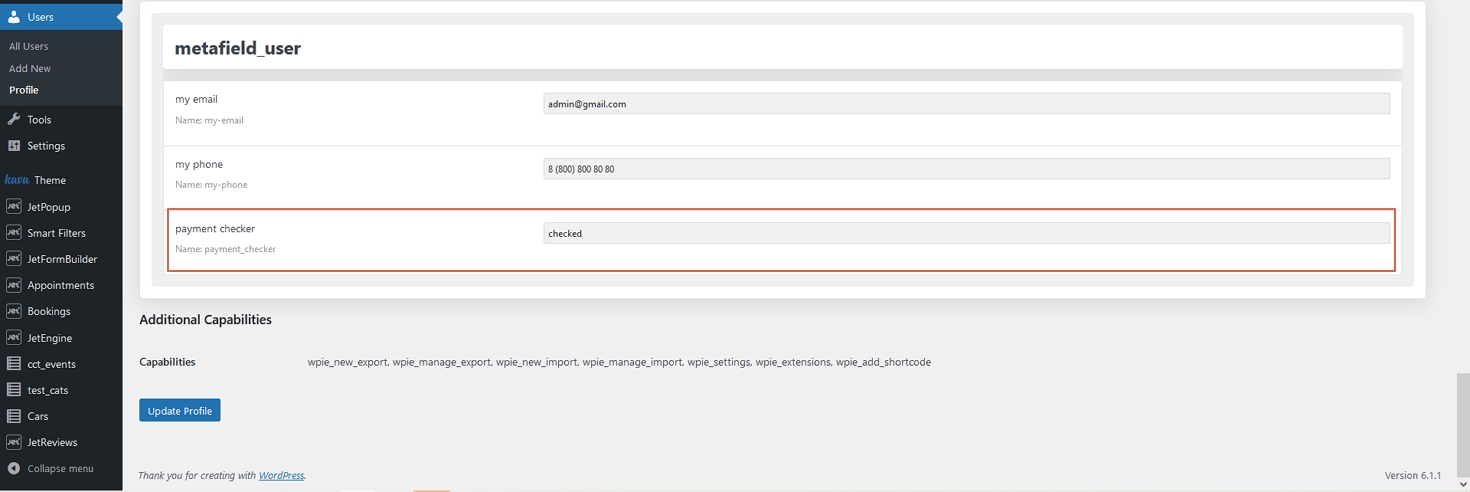
Once you finish with your meta fields (we added email and phone number), add one more Text field. You will need that in the future to differentiate users that made payments. In the described case, this field is called “payment_checker.”
Build Listing Items
Now we need to create two Listings of your content. One Listing item is for users that did not make any payments (content with restrictions), and the other is with fully opened content for users who have already paid.
The following listing will be with restricted content, so we place content partially covered with “*’ stars.
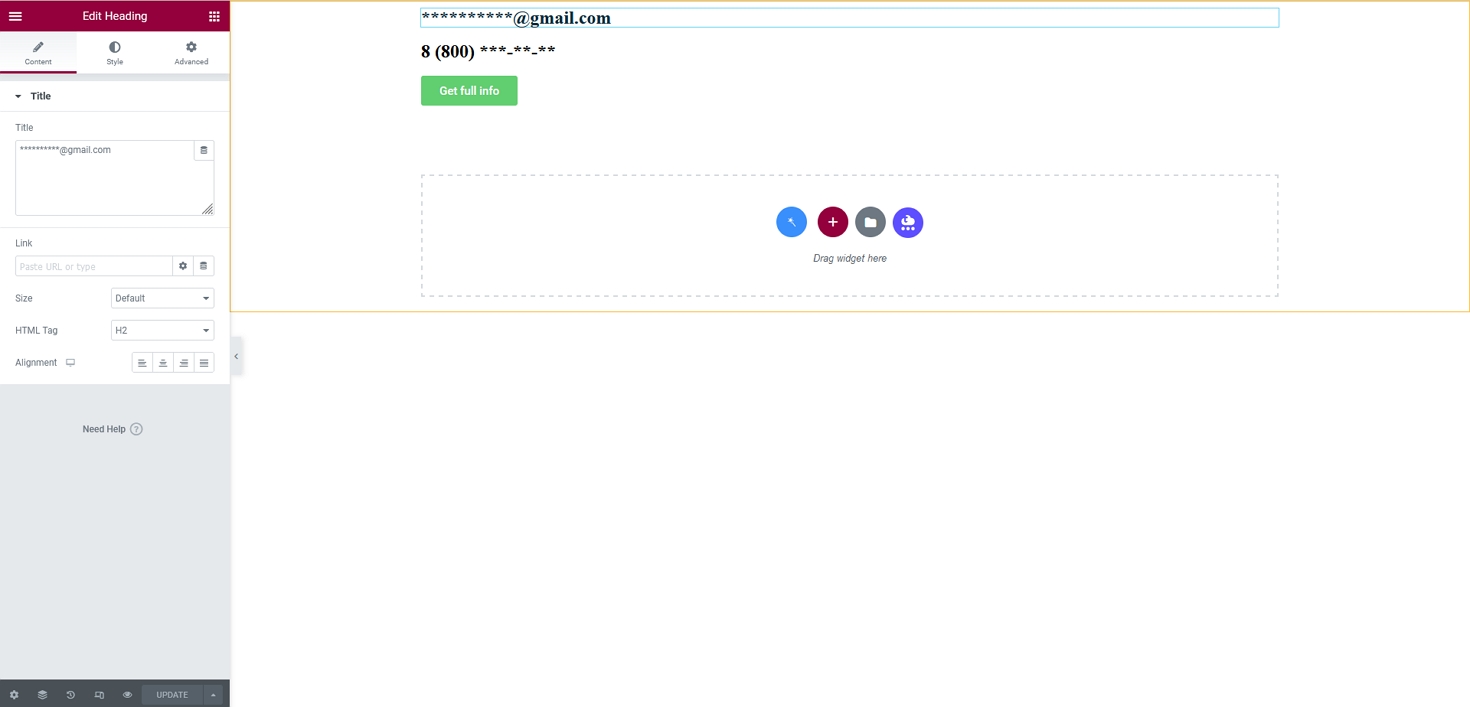
Be advised that we placed a static Heading widget with no dynamic content inside. It means that all users on the website have emails on Gmail and phone numbers starting from 8 (800), so it’s just an example.
And lower, we place a button that invites users to pay for access.
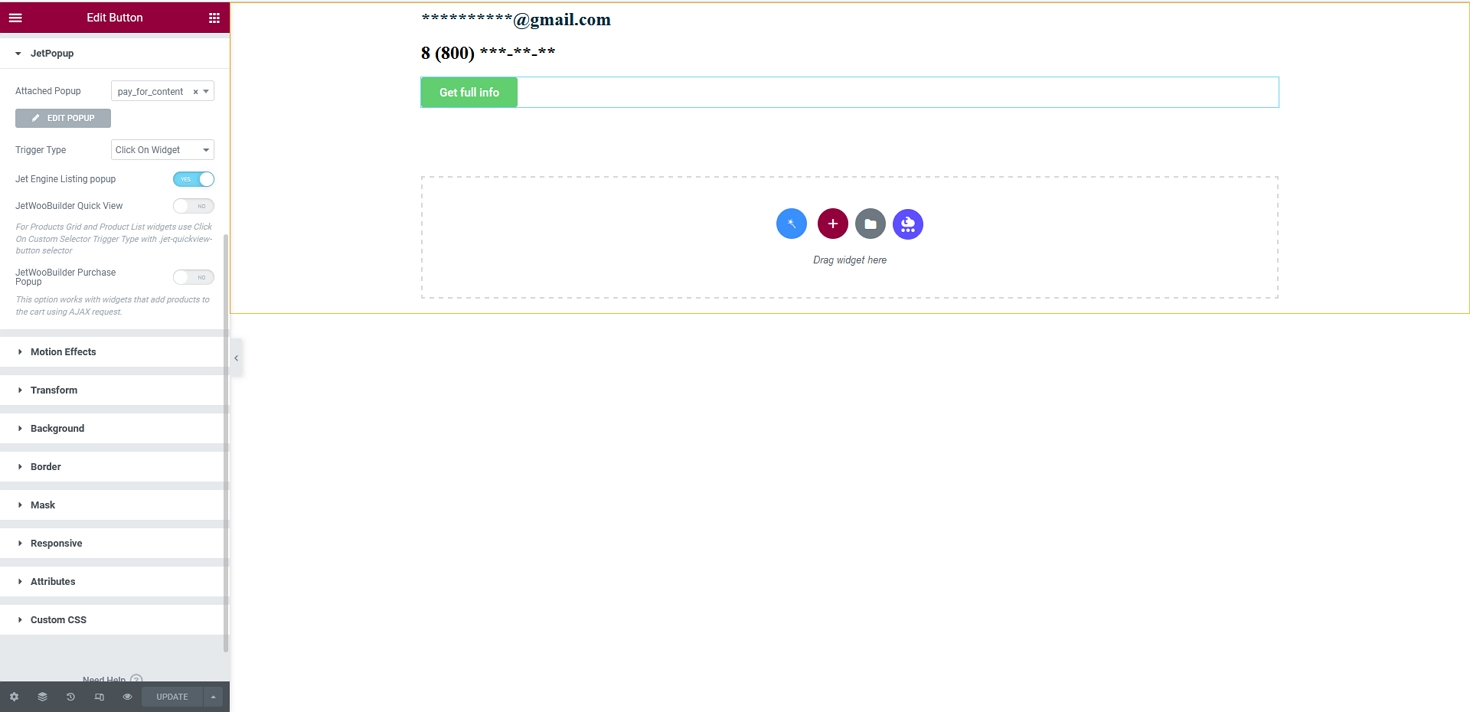
This button must be linked to the Listing Grid pop-up with the JetFormBuilder form. Here is more info about Pop-up and how to connect it with the form.
Don’t forget to press the “Publish/Update” button.
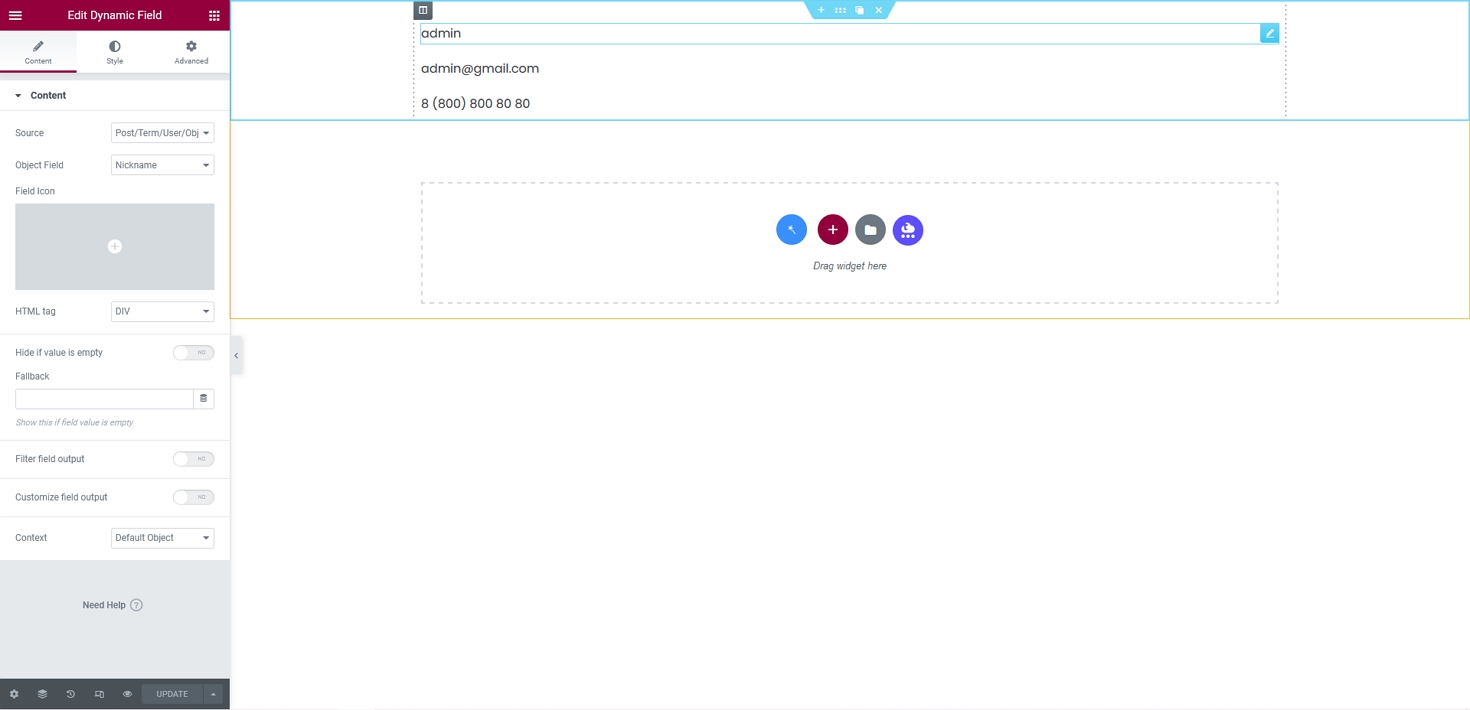
As for listing with fully opened content, you just need to place your meta fields with the Dynamic Field widget or any other that supports meta field placement.
Adjust Settings in JetFormBuilder Form
So you have a form that successfully submits and redirects to the payment page. But now, let’s make the payment to open access to restricted content.
Return to the different meta field we added to the user. As you remember, we called it “payment_checker.” So, your form must have a Hidden Field with a manual input value.
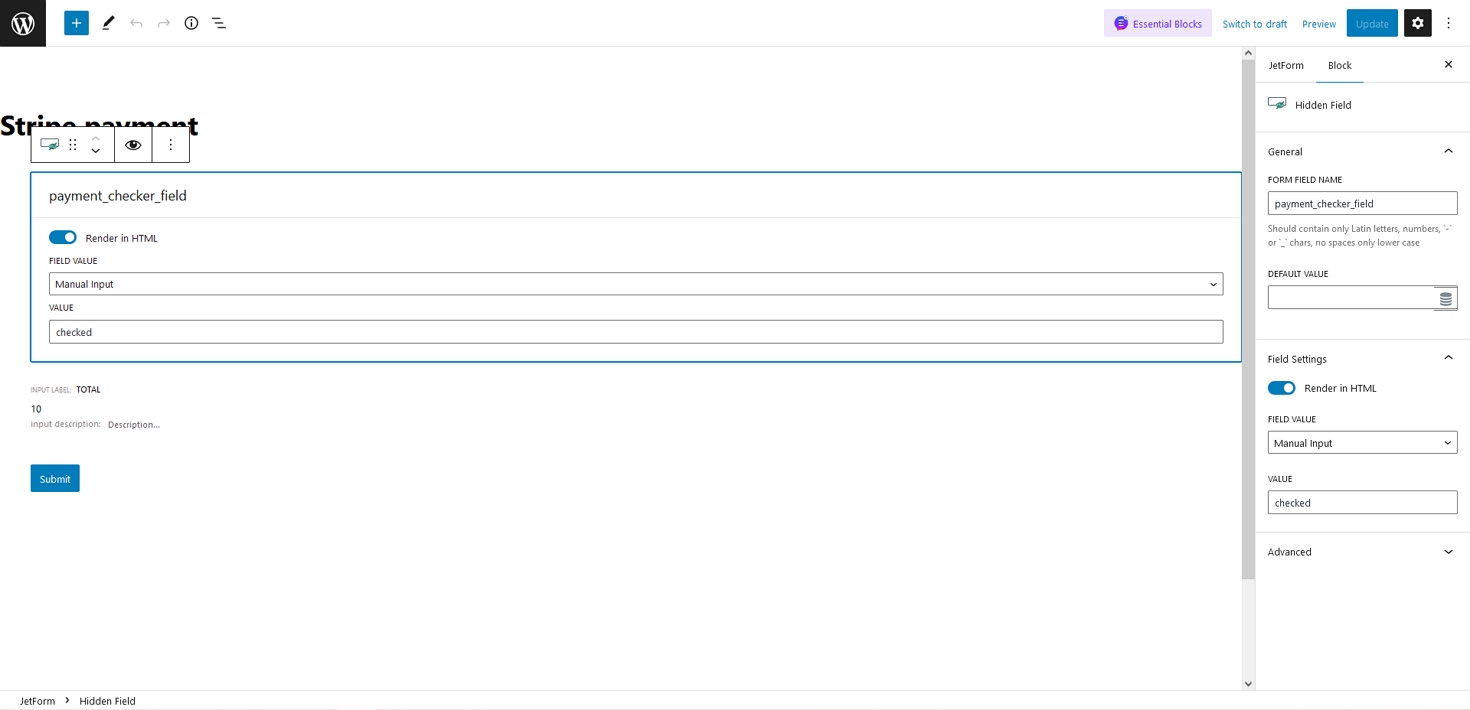
Let’s set here the “checked” value. And then, set post-submit action, where this value will be written at the “payment_checker” meta field of the user.
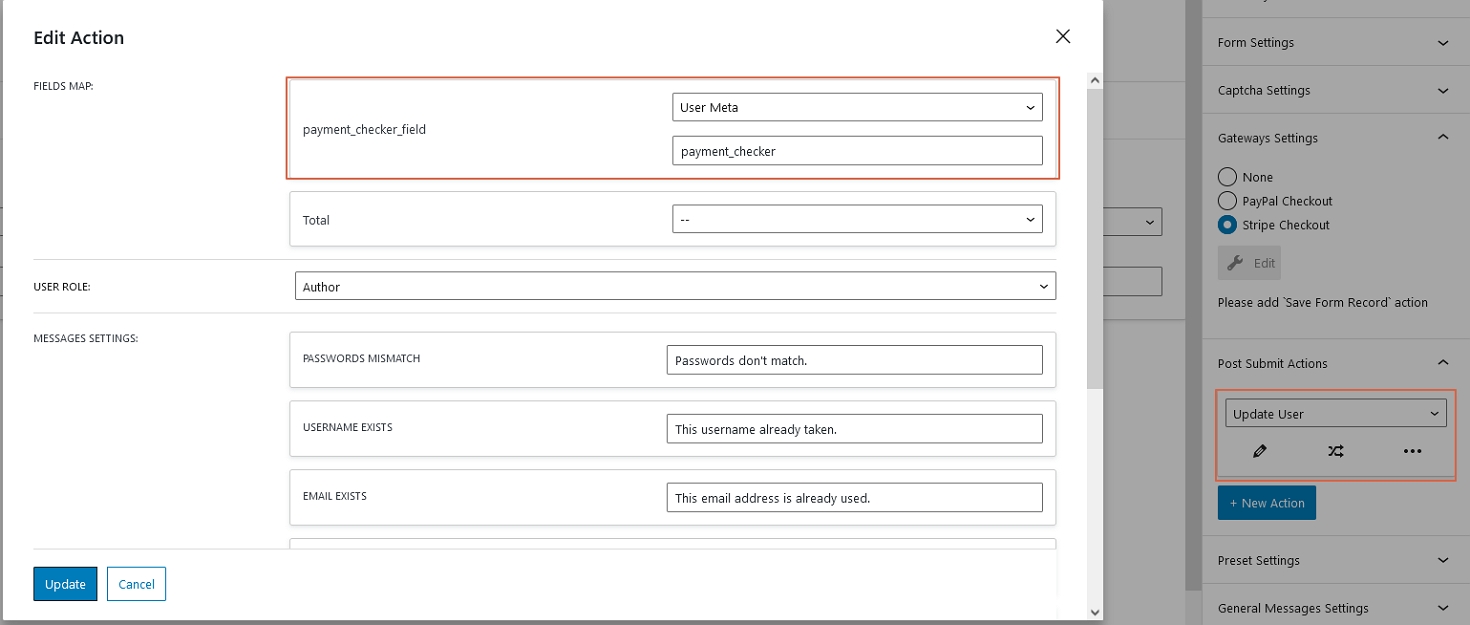
When the user enters the form, submits it, and then makes a successful payment, their meta field will have a specific value inside.
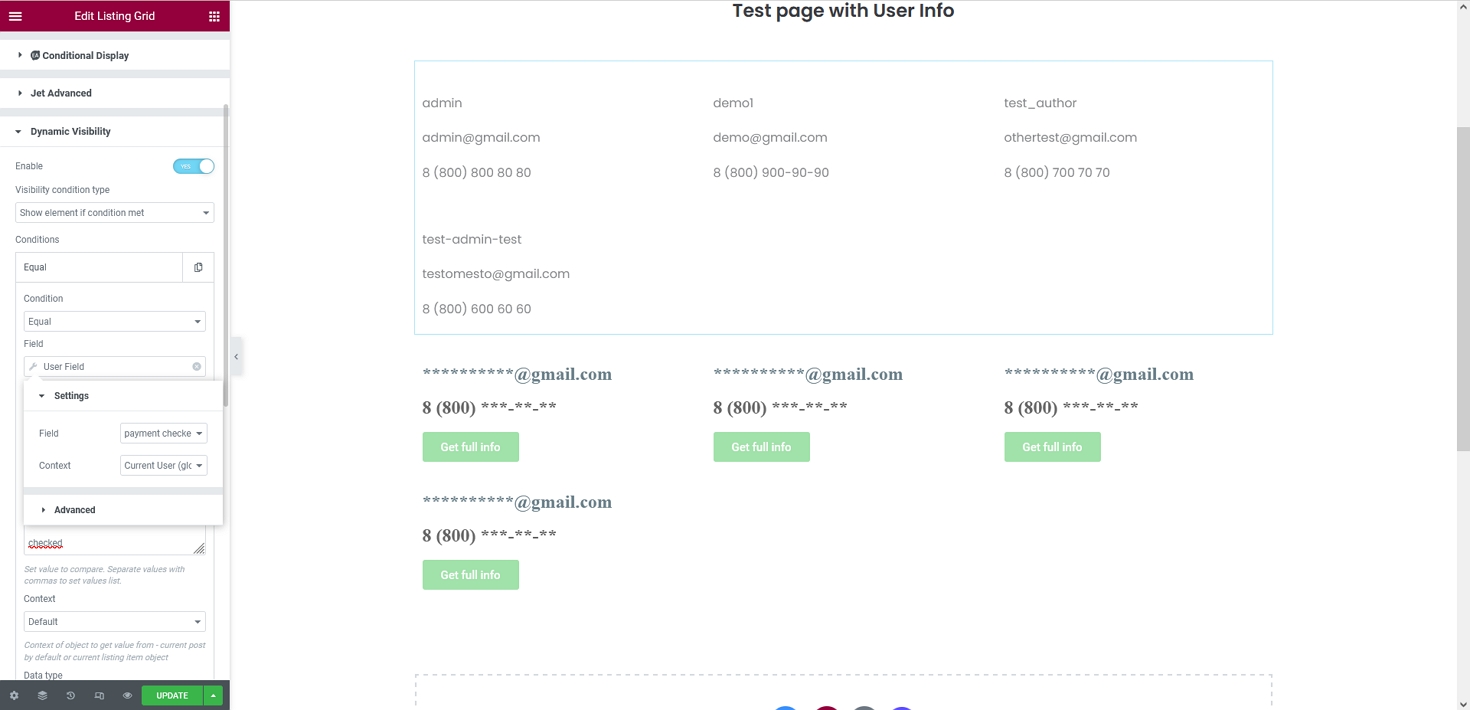
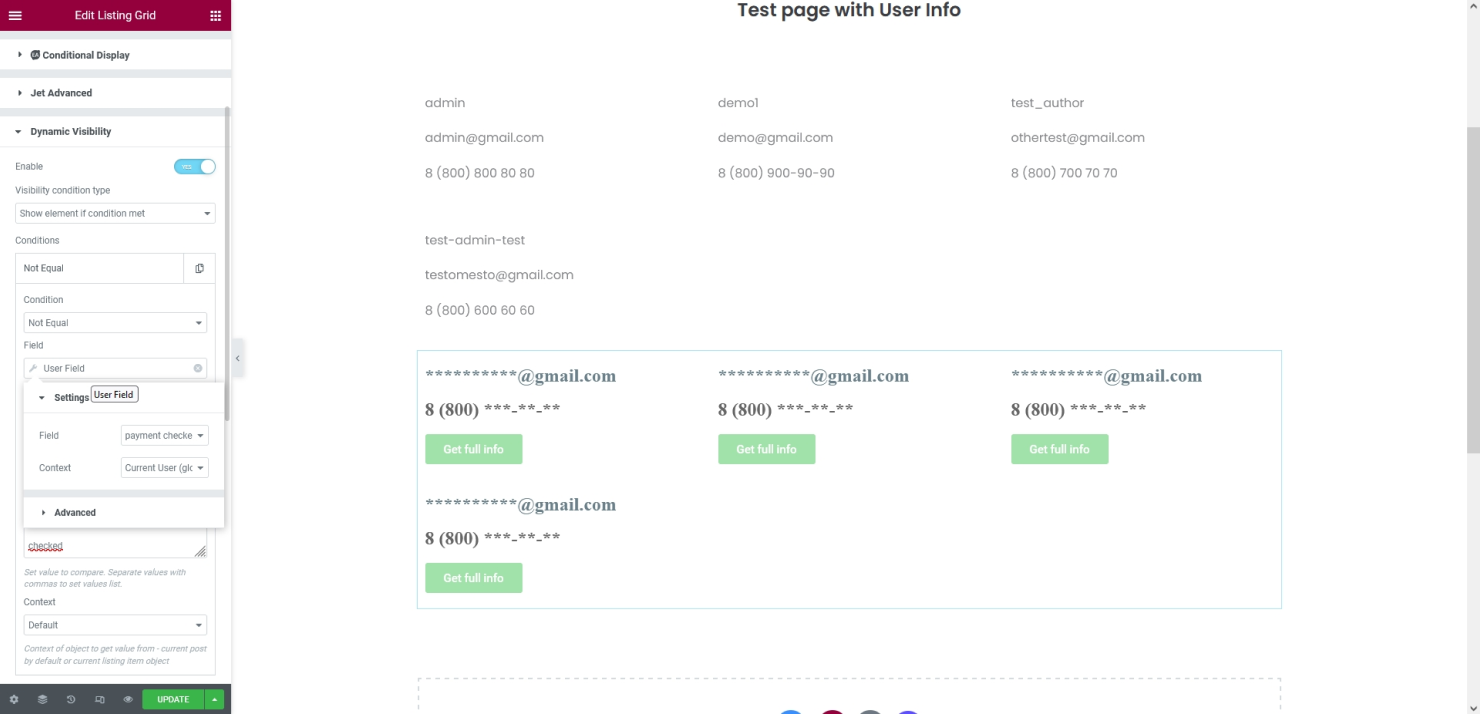
Set Dynamic Visibility Conditions
And the last step is to make content visible only for users with a “checked” value inside their “payment_checker” meta field. Open the page editor and set the following parameters to dynamic visibility options for Listing Grids.
Look at the condition for restricted content.
And the following picture shows the condition for opened content.
That’s it; now you know how to make paywalled content with the help of the JetEngine and JetFormBuilder plugins.