How to Transfer ACF Fields to JetEngine
Find out how to transfer ACF fields to JetEngine on your WordPress website.
Before you start, check the tutorial requirements:
- ACF plugin installed and activated
- JetEngine plugin installed and activated
Check ACF Fields
Go to WordPress Dashboard > ACF > Field Groups and open the field group settings you want to transfer.
Now, let’s check how to transfer a group with the “Text,” “Checkbox,” and “Image” fields.
“Text” field
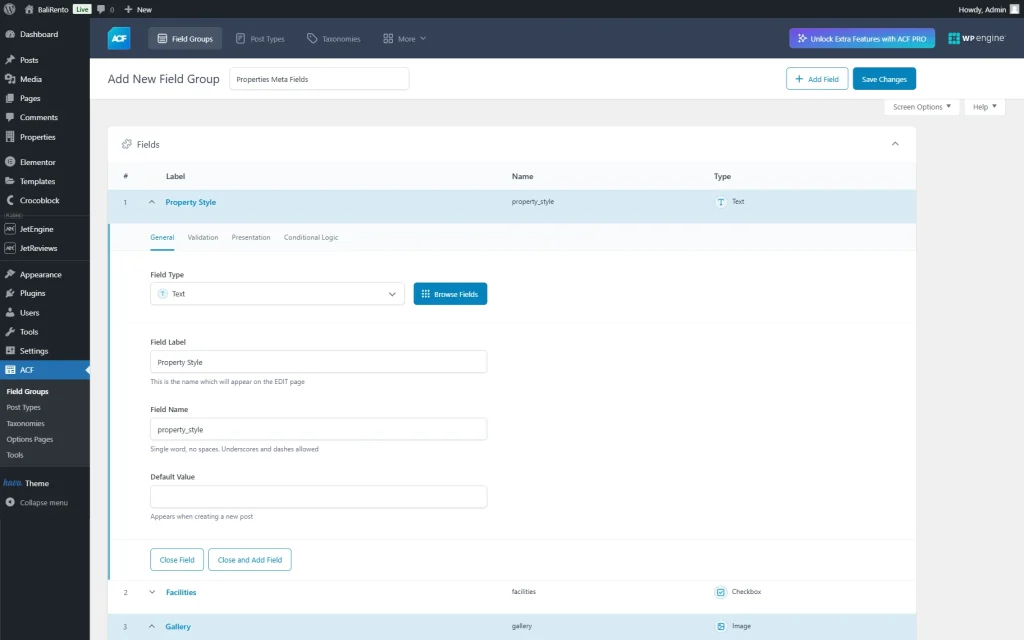
Open the “Text” field to check its settings. Pay attention to the Field Name value; you will need it when you set up JetEngine’s meta field.
In our case, we have a “Property Style” Field Label with a corresponding Field Name.
“Checkbox” field
Proceed to the “Checkbox” field settings.
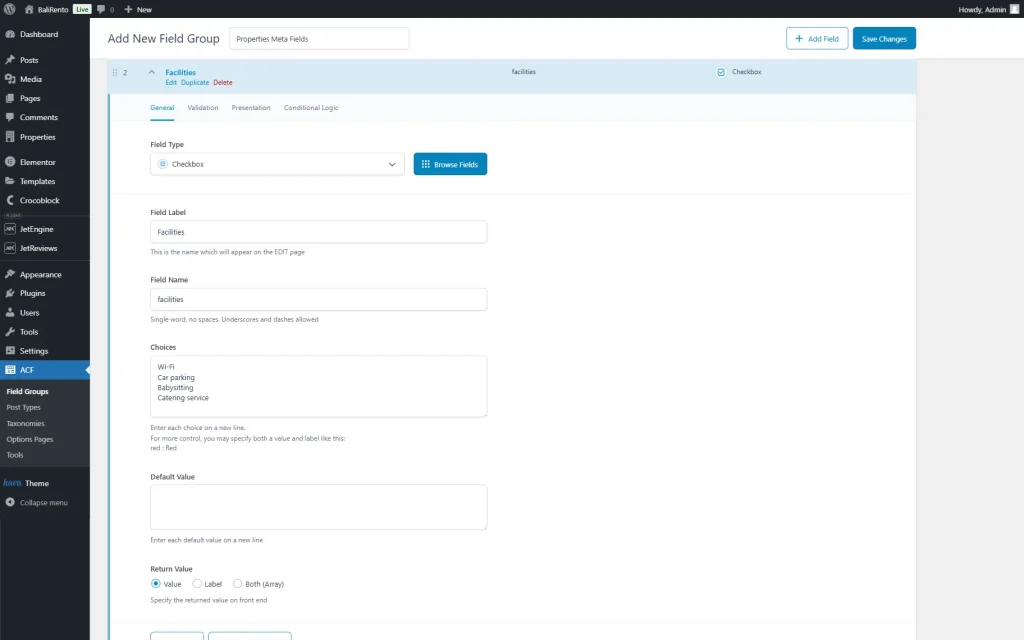
For this field, except for the Field Name (here, “amenities”), also pay attention to the Choices added; the same choices will be needed for the JetEngine’s meta fields.
In our case, we have such options completed in the Choices field:
“Free Wi-Fi
Swimming Pool
Car Parking
Outdoor Dining”.
Also, make sure that the Return Value is set to “Value.”
“Image” field
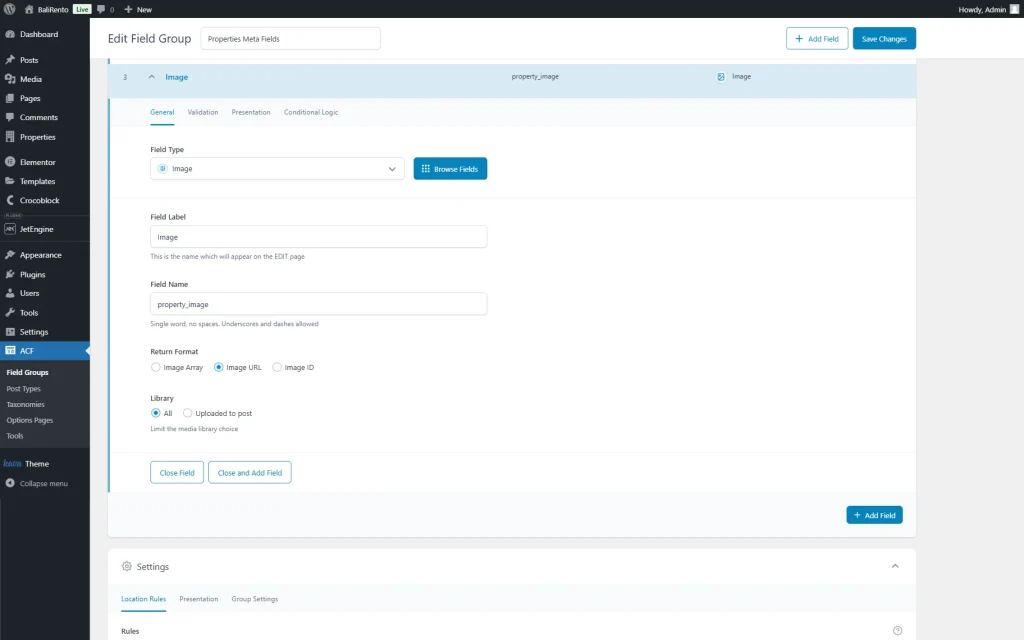
The next field is going to be an image. In this case, we added a field with the “property_image” Field Name.
For the field with the “Image” Field Type, also check that the Return Format is set to “Image URL.”
The option you choose in the Library field is up to you.
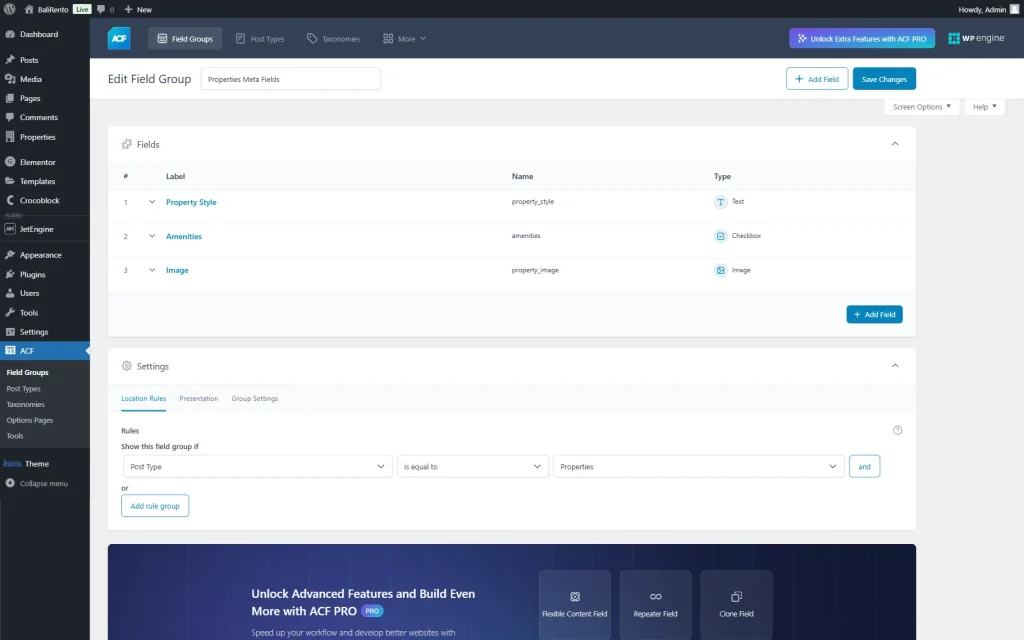
Then, check the Location Rules tab of the field group Settings. In our case, the fields group is attached to the “Properties” post type. So, later, we want to transfer meta fields to the same post type.
Create JetEngine Meta Box
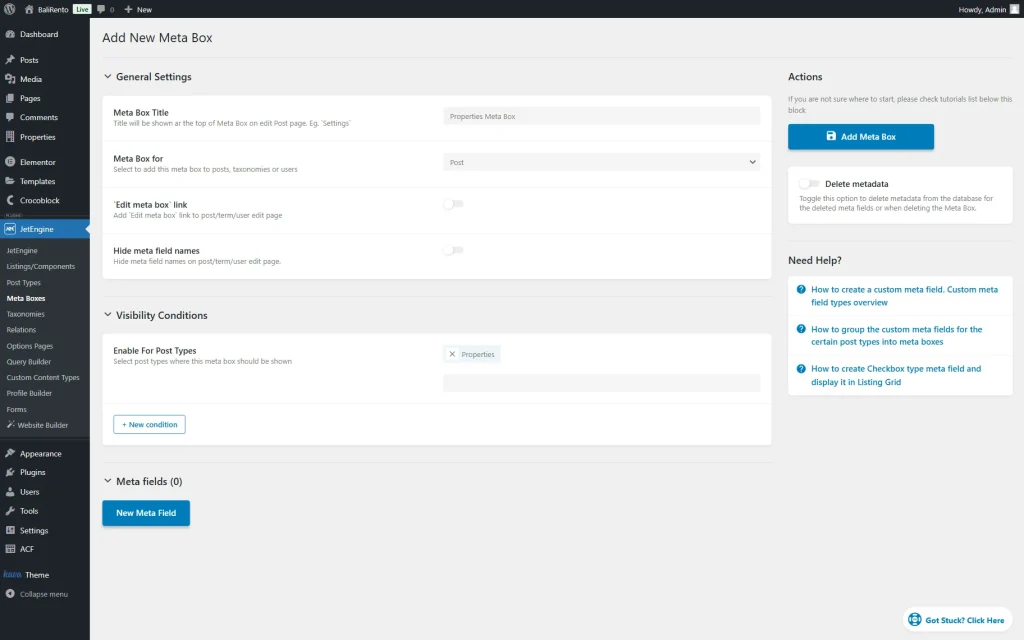
Now, head to WordPress Dashboard > JetEngine > Meta Boxes and click the “Add New” button.
Complete the Meta Box Title and set where the meta box will be attached to in the Meta Box for field. In our case, “Posts.”
Then, we pick the needed post type (here, “Properties”) in the Enable For Post Types field of the Visibility Conditions section.
Head to the Meta fields section and press the “New Meta Field” button.
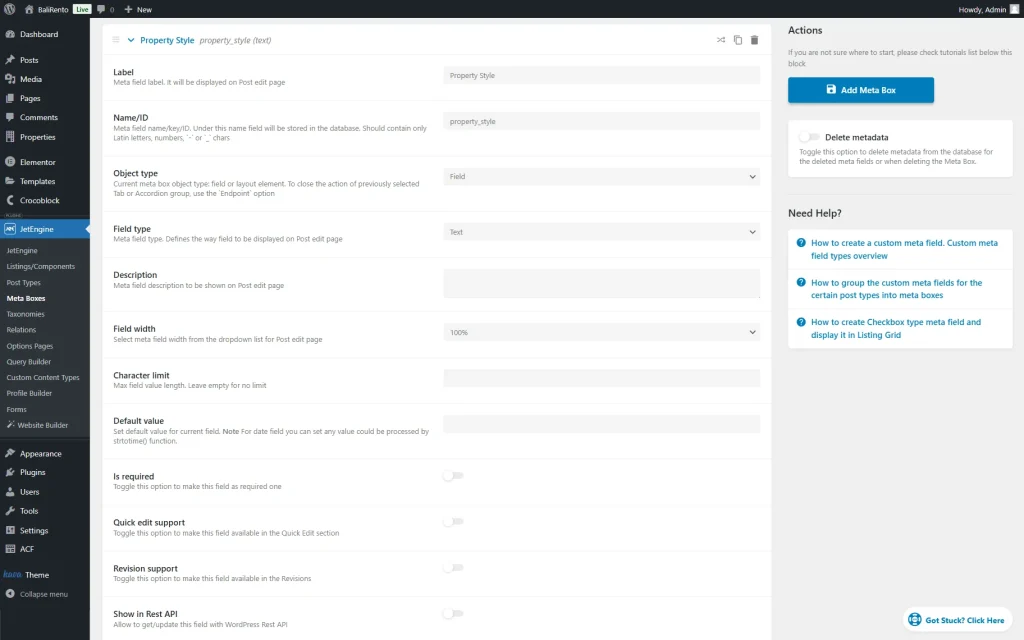
First, we add a Label and paste a Name/ID that was previously added to the ACF’s “Text” field into the Field Name field.
We also set the Field type to “Text.”
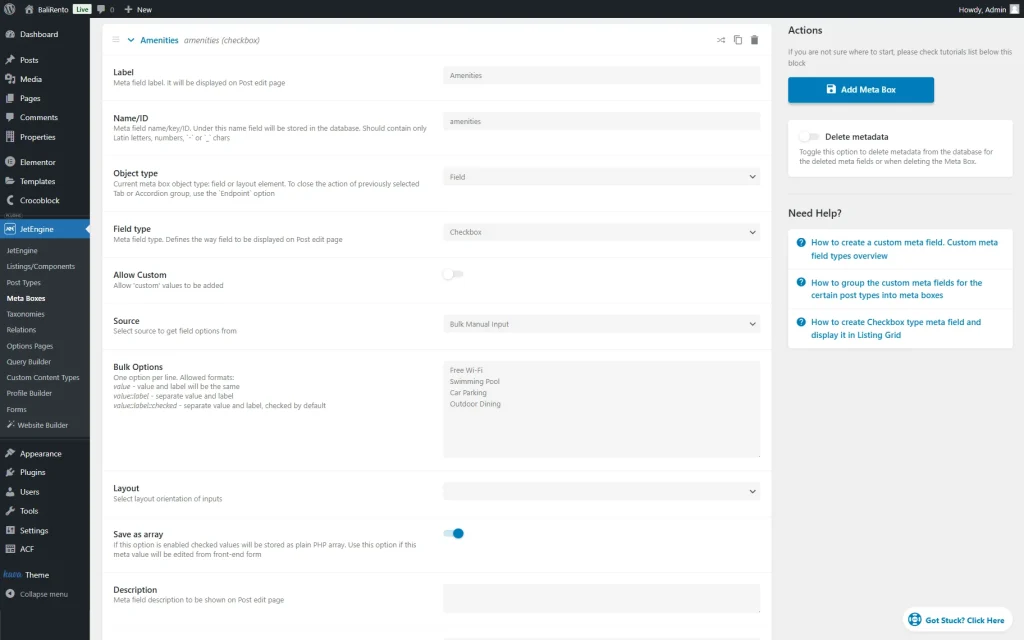
Press the “New Meta Field” button one more time. Complete the Label and ensure that the Name/ID field of the new field is the same as the Field Name of the corresponding “Checkbox” ACF field.
This field will be of the “Checkbox” Field type.
Also, we set the Source to “Bulk Manual Input” option to be able to add Bulk Options in one field in such format as for the previously added ACF field:
“Free Wi-Fi
Swimming Pool
Car Parking
Outdoor Dining”
Make sure you activate the Save as array toggle.
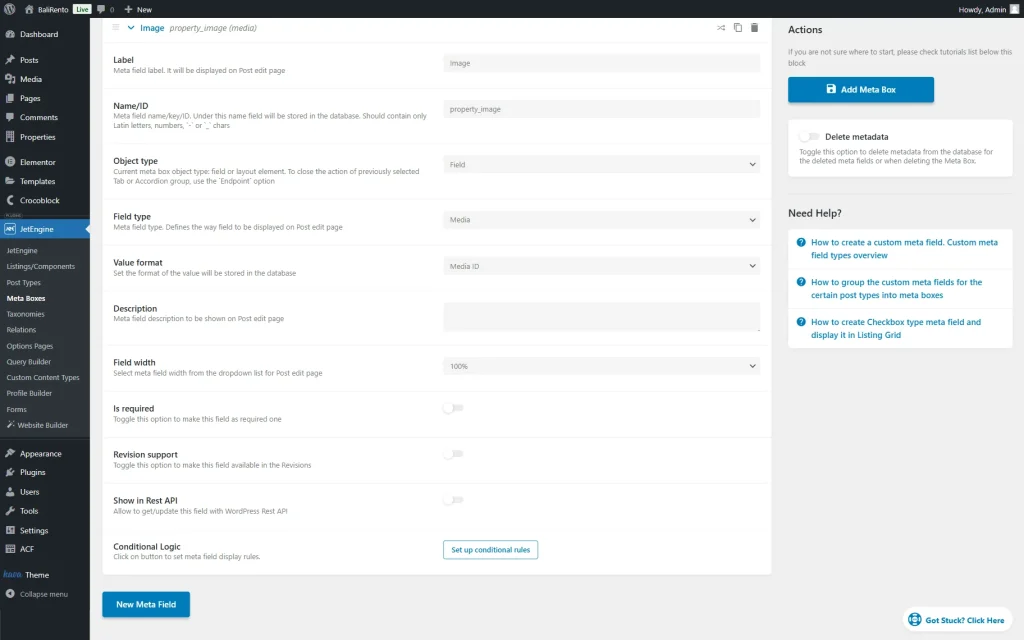
Now, add one more field, this time of the “Media” Field type. Ensure that the Name/ID of this field is the same as the one used in the Field Name field of the corresponding ACF field.
Set the Value format to the “Media ID” option.
Finally, click the “Add Meta Box” button to save the result.
Review Posts Meta
Proceed to one of the posts of the post type to which the meta boxes are attached.
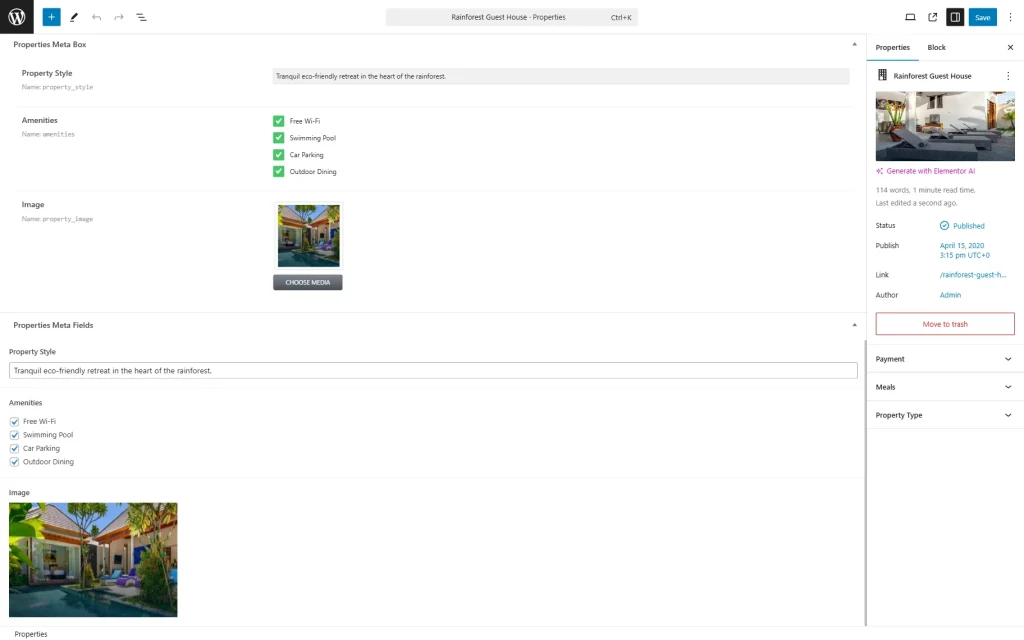
Now, you can check that the metadata is doubled both in the JetEngine and ACF fields because it was transferred from ACF to JetEngine.
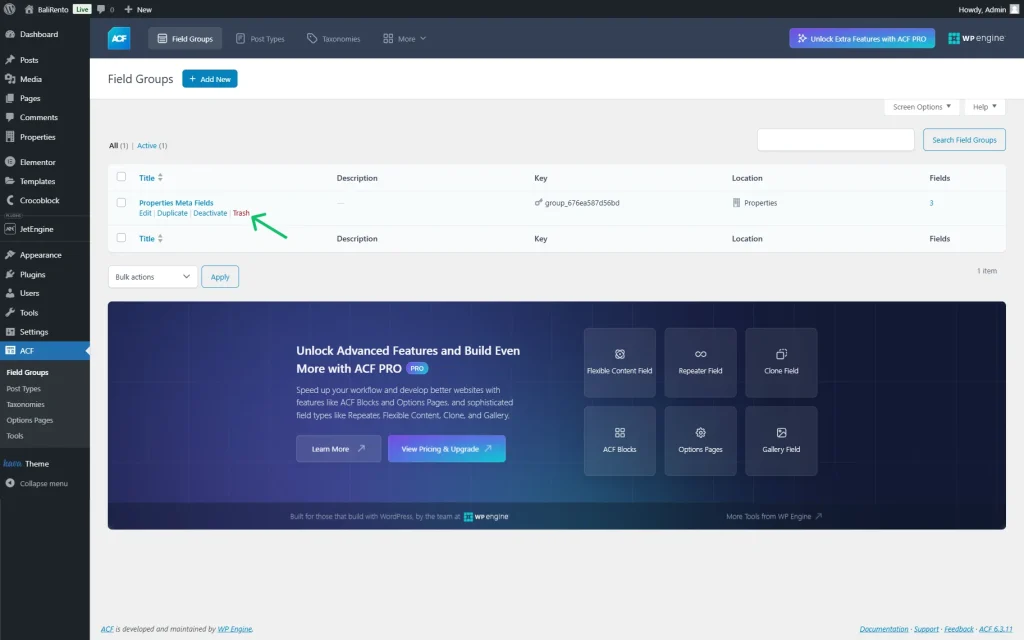
When you ensure everything works fine, you can head to WordPress Dashboard > ACF > Field Groups and delete the field group you transferred by hitting the “Trash” button.
That’s all; now, you know how to transfer ACF fields to JetEngine meta fields on your WordPress website.
