How to Use Filters With the ACF Meta Fields
From this tutorial, you will learn how to sort the data of the meta fields created with the ACF plugin by means of the JetSmartFilters functionality for WordPress.
Before you start, check the tutorial requirements:
- ACF plugin installed and activated with Field Group for JetEngine’s Custom Post Type (CPT) built and custom meta fields added and completed;
- JetSmartFilters plugin installed and activated
- JetEngine plugin installed and activated with a Custom Post Type created and posts added.
The JetSmartFilters plugin is compatible with the Advanced Custom Fields plugin, so you don’t have to re-insert the data you’ve already added to the ACF meta fields.
You can create a JetEngine listing and Listing Grid using the ACF meta fields and afterward sort the shown results via JetSmartFilters. This tutorial will show you how to combine those plugins most efficiently.
Build Listing Template
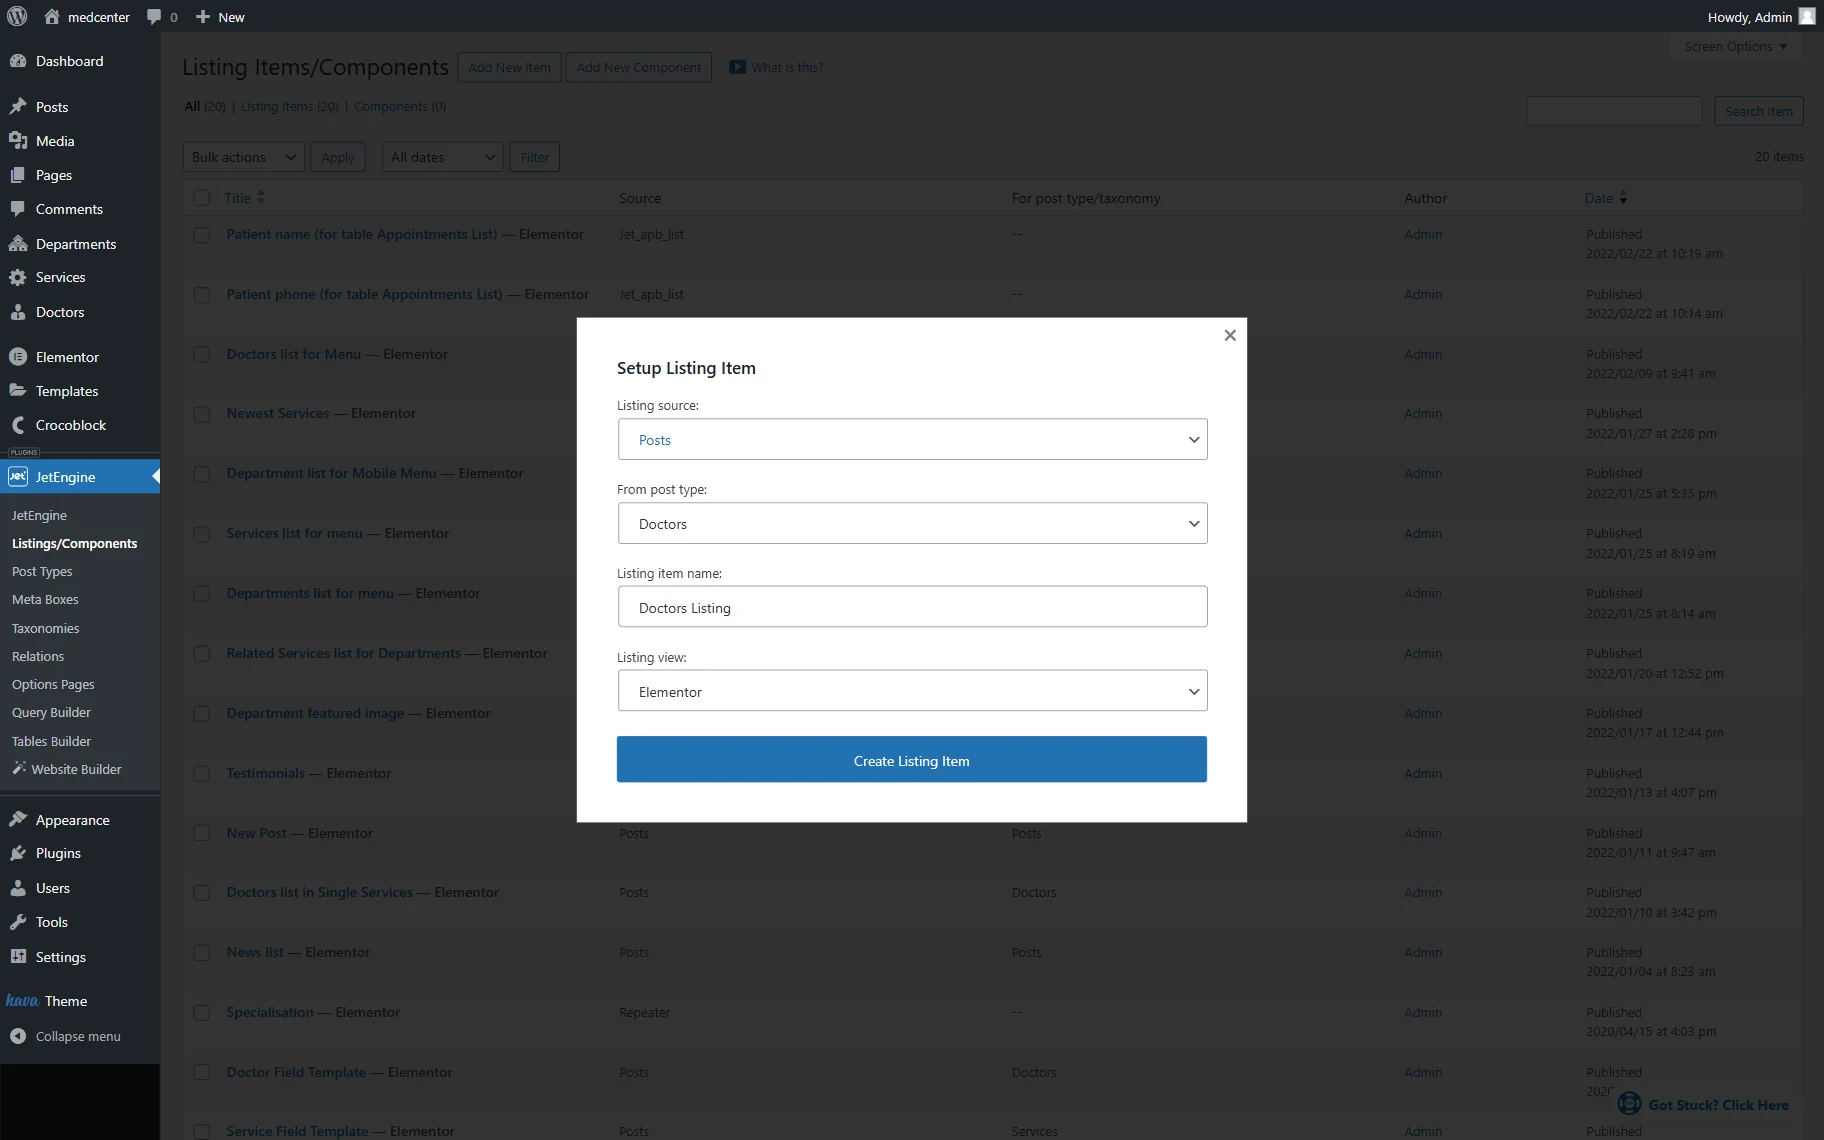
Go to WordPress Dashboard > JetEngine > Listings and hit the “Add New” button to build a listing template.
In the Listing source drop-down menu, choose the “Posts” option, set From post type to the custom post you’ve created, give the listing a name, and press the “Create Listing Item” button.
You will also need the Dynamic Field widget to add the ACF meta fields. Find it in the widget menu and drop it on the page.
Open the Content menu section and choose the “ACF” option in the Source drop-down. Choose the field you want to add to the ACF Field drop-down list.
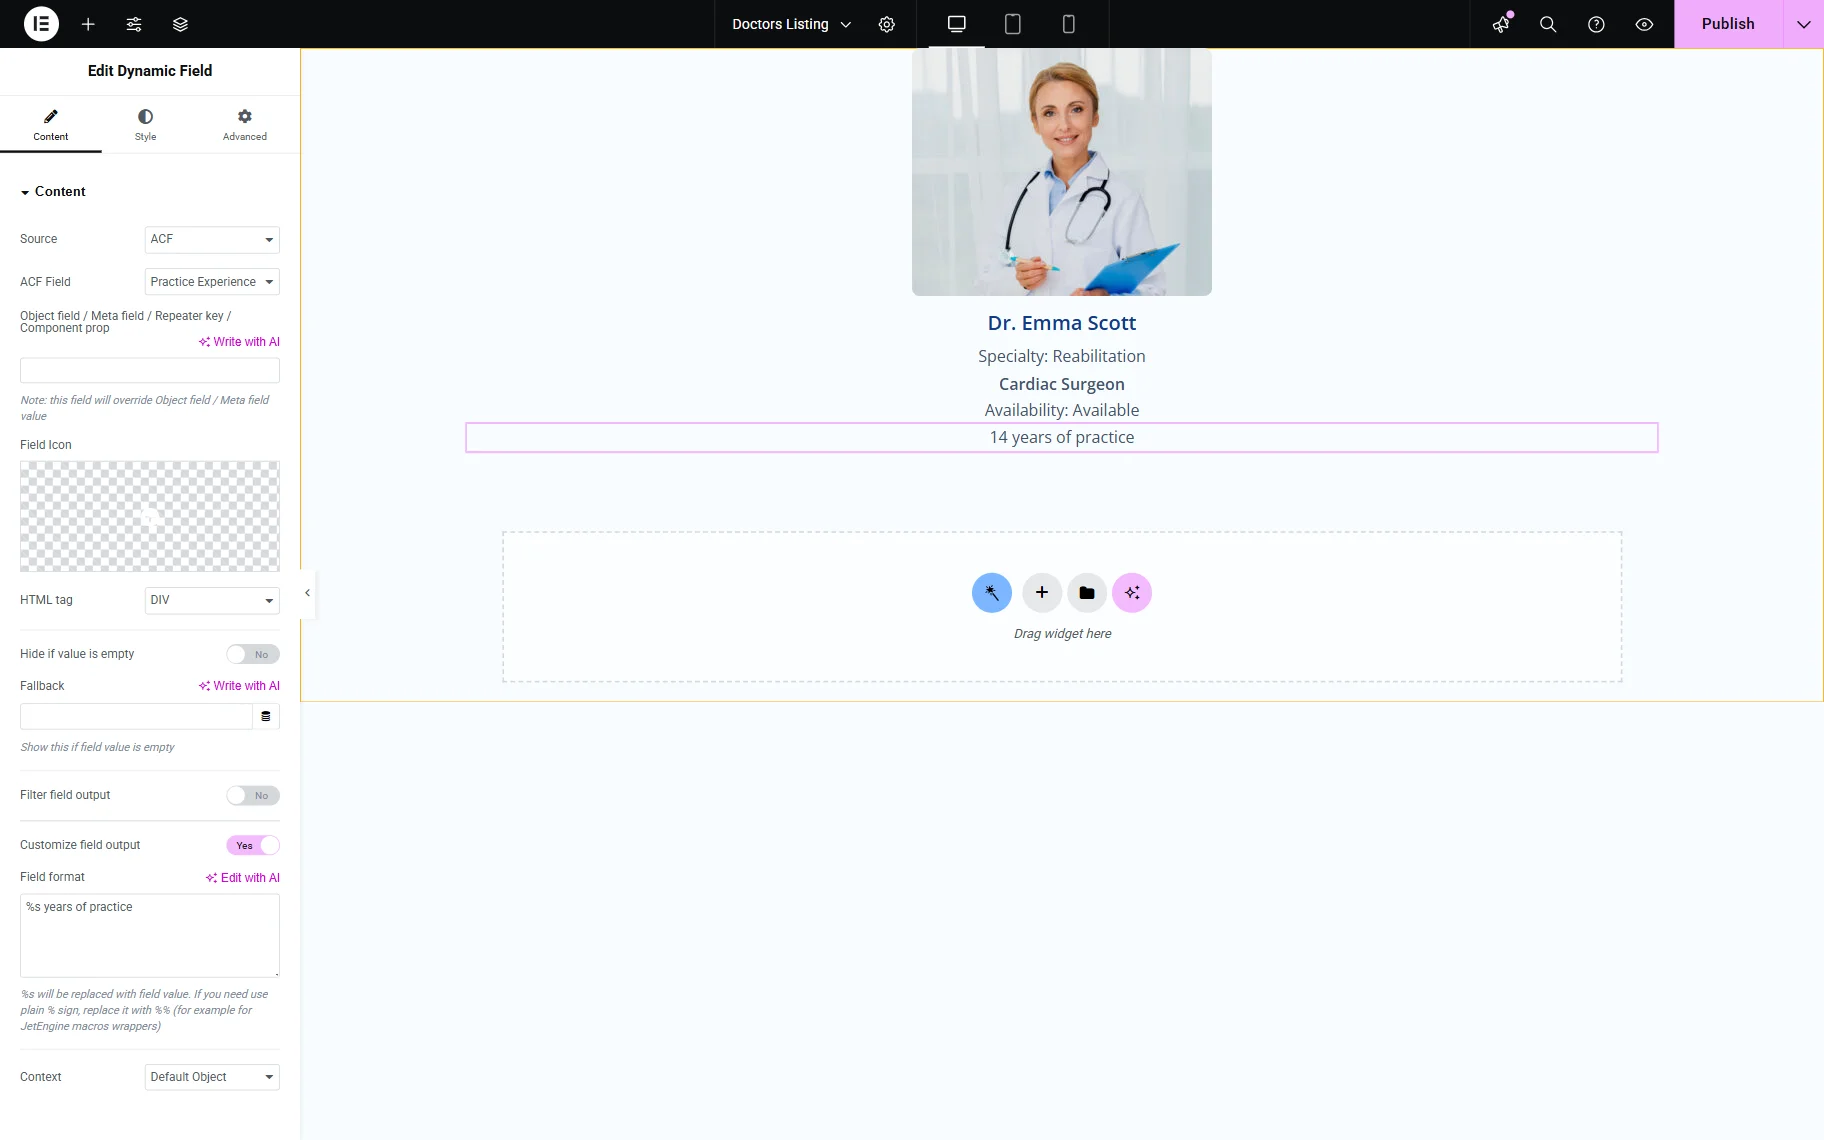
You can also customize the output just like for the JetEngine meta fields.
Add all the widgets you need and hit the “Publish” button.
Create Listing Grid
Open the page where you would like to place the Listing Grid in the Elementor Page Builder.
Find the Listing Grid widget and drop it to the page. In the Listing drop-down menu, choose the listing template you’ve just created.

Do the customization and make the Listing Grid fit your needs. Afterward, click the “Publish” button to save the changes.
Add Filter Based on the ACF Meta Field
If you add those fields to the post and try to sort the Listing Grid items according to them right after, it won’t work. That is because the “Date” ACF fields store the date in a way that JetSmartFilters can’t use. You can still use those meta fields and add them to listings but don’t try to filter posts according to them.
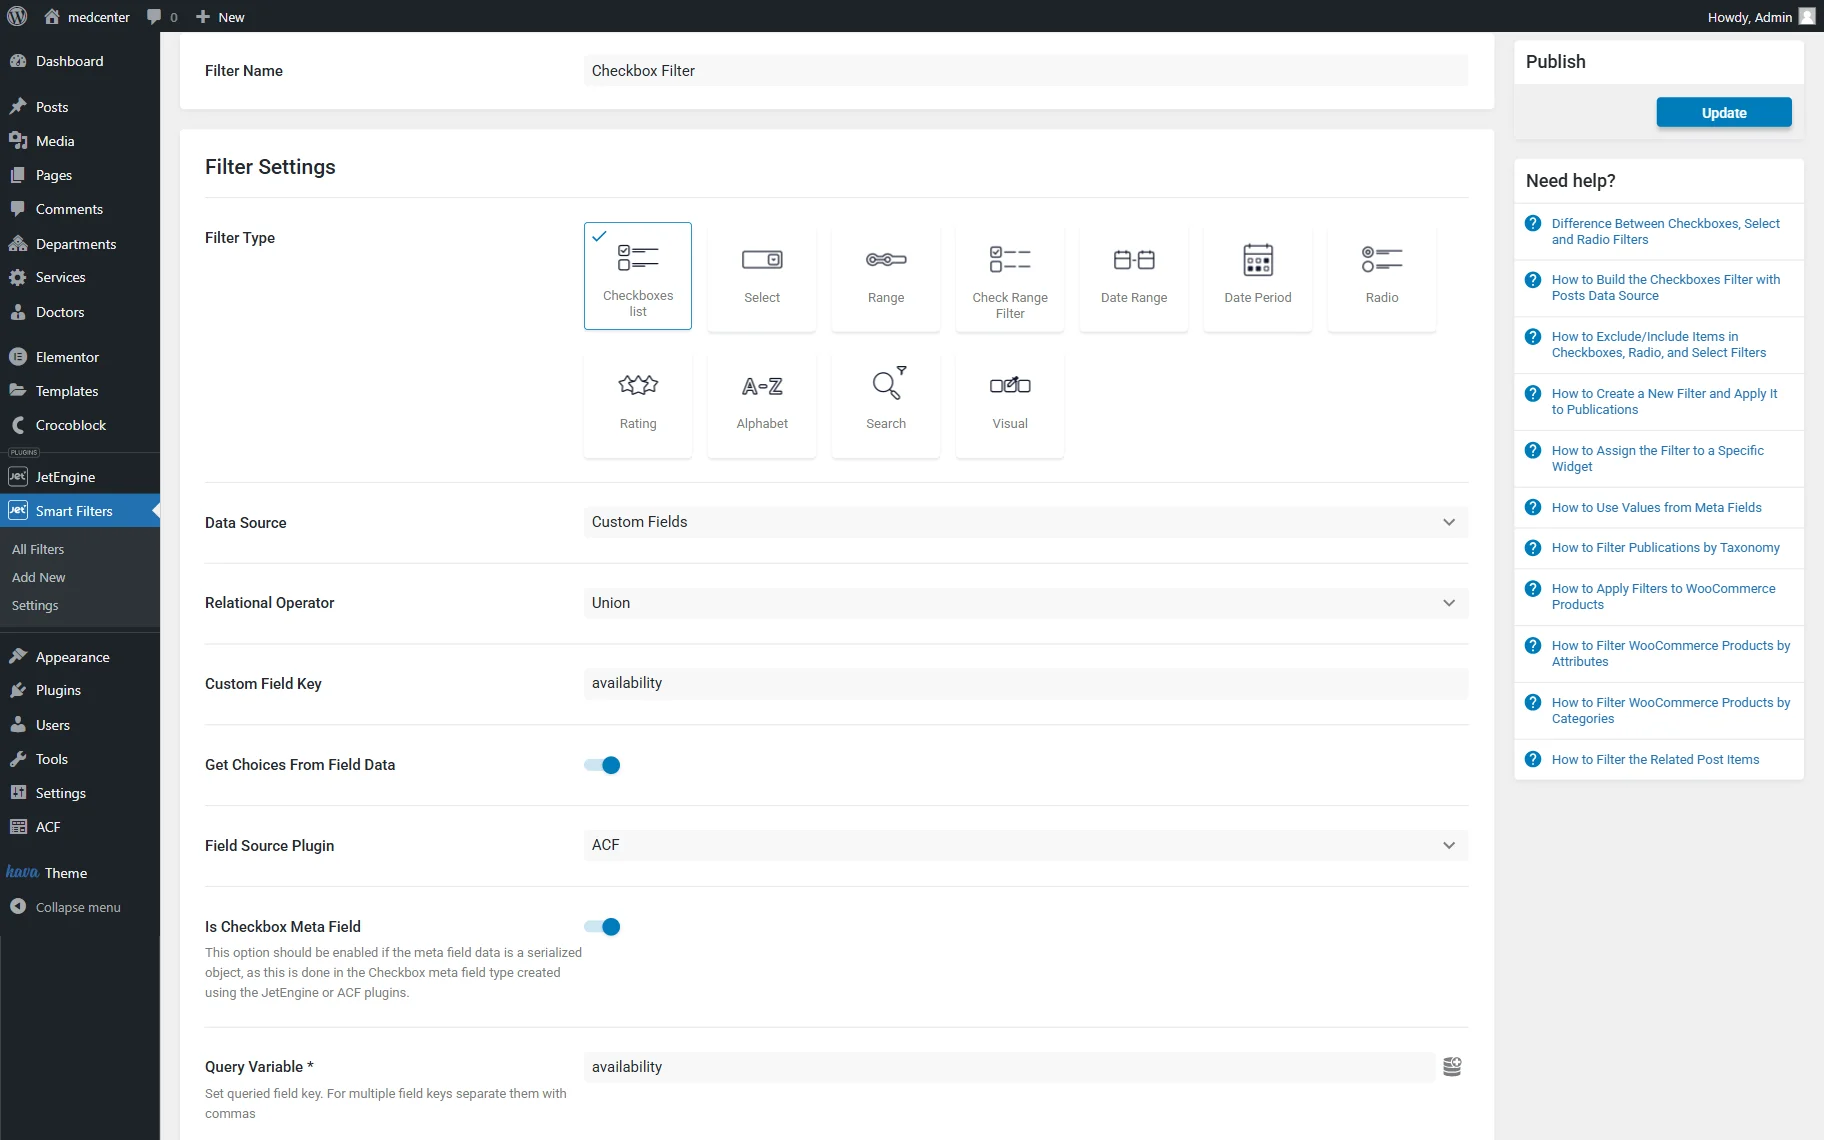
Go to the WordPress Dashboard > Smart Filters > Add New.
Choose the Filter Type (except “Date Range” and “Date Period” filters.)

Checkbox
As for the “Checkboxes list” filter settings, mind activating the Get Choices From Field Data toggle and select “ACF” as the Field Source Plugin.
Also, don’t forget to paste the Field Name of the Checkbox field created earlier with ACF into the Query Variable field.
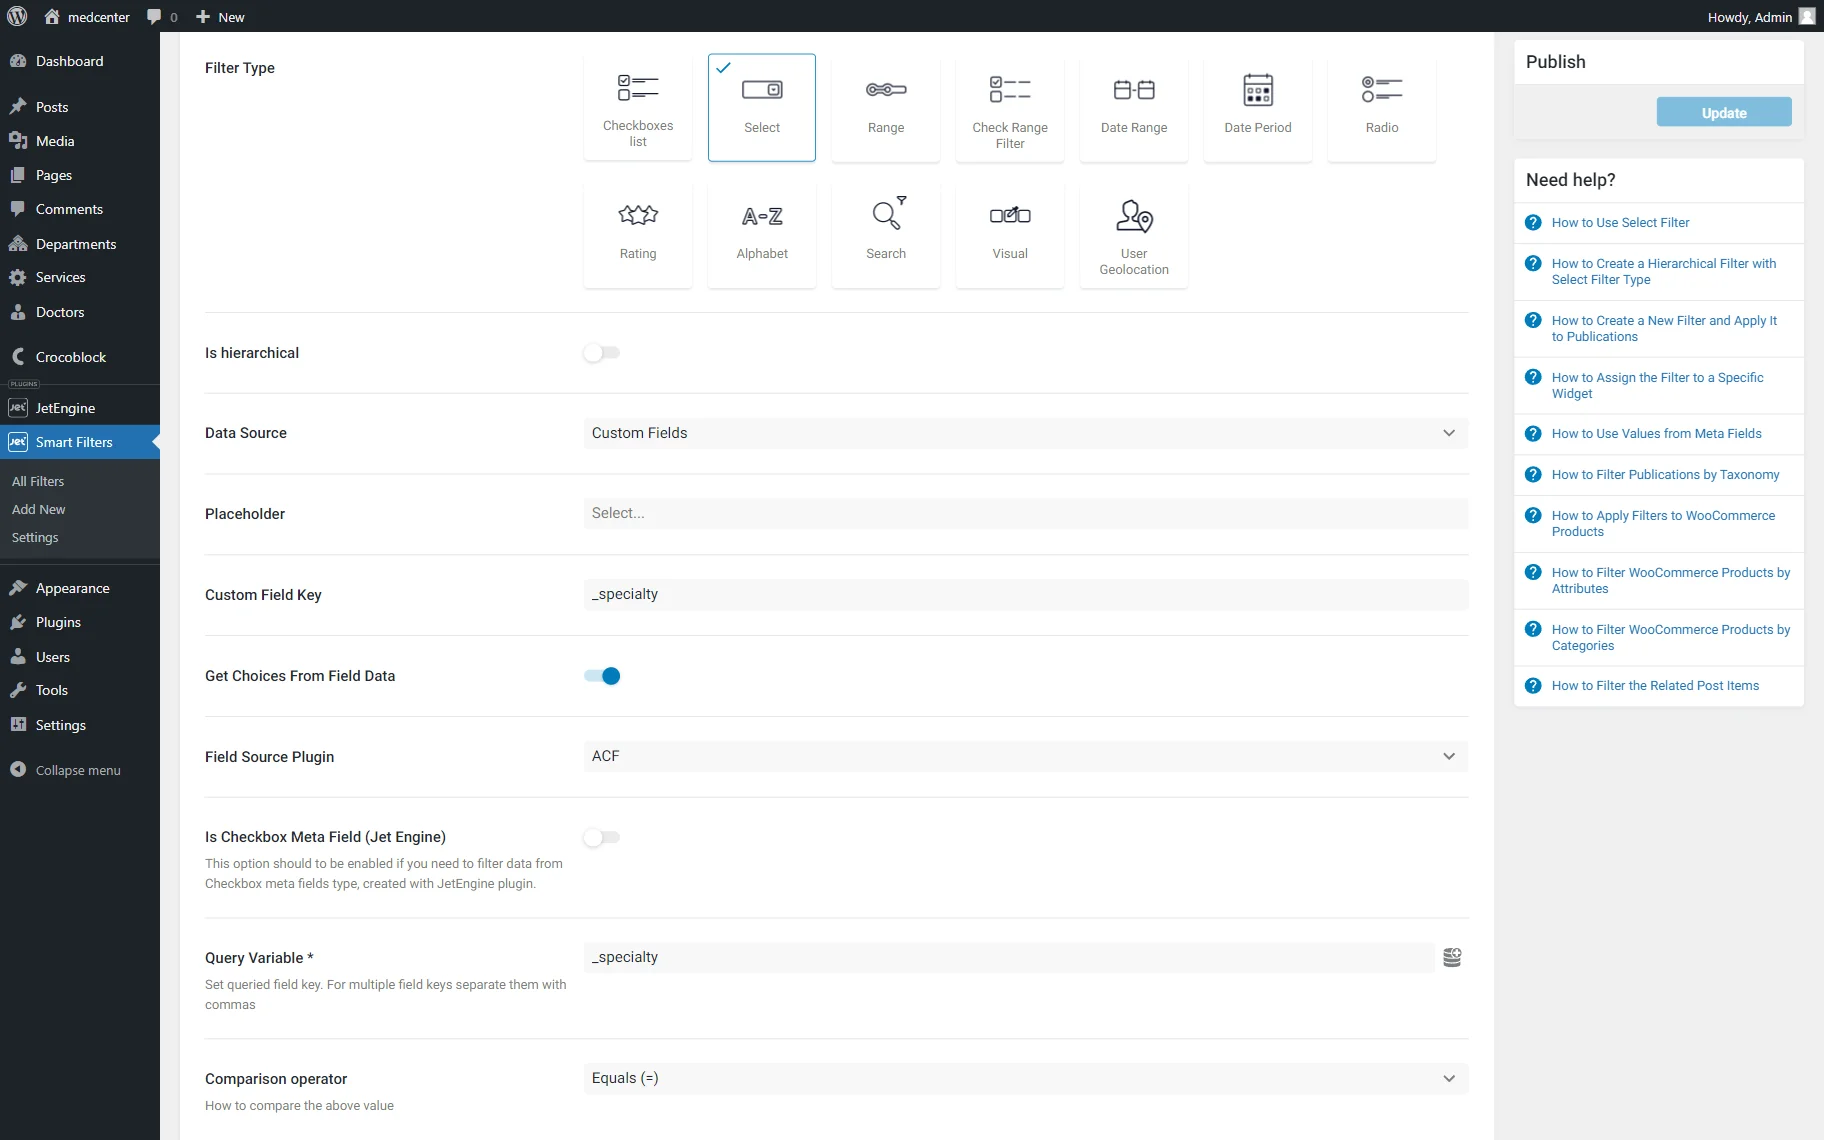
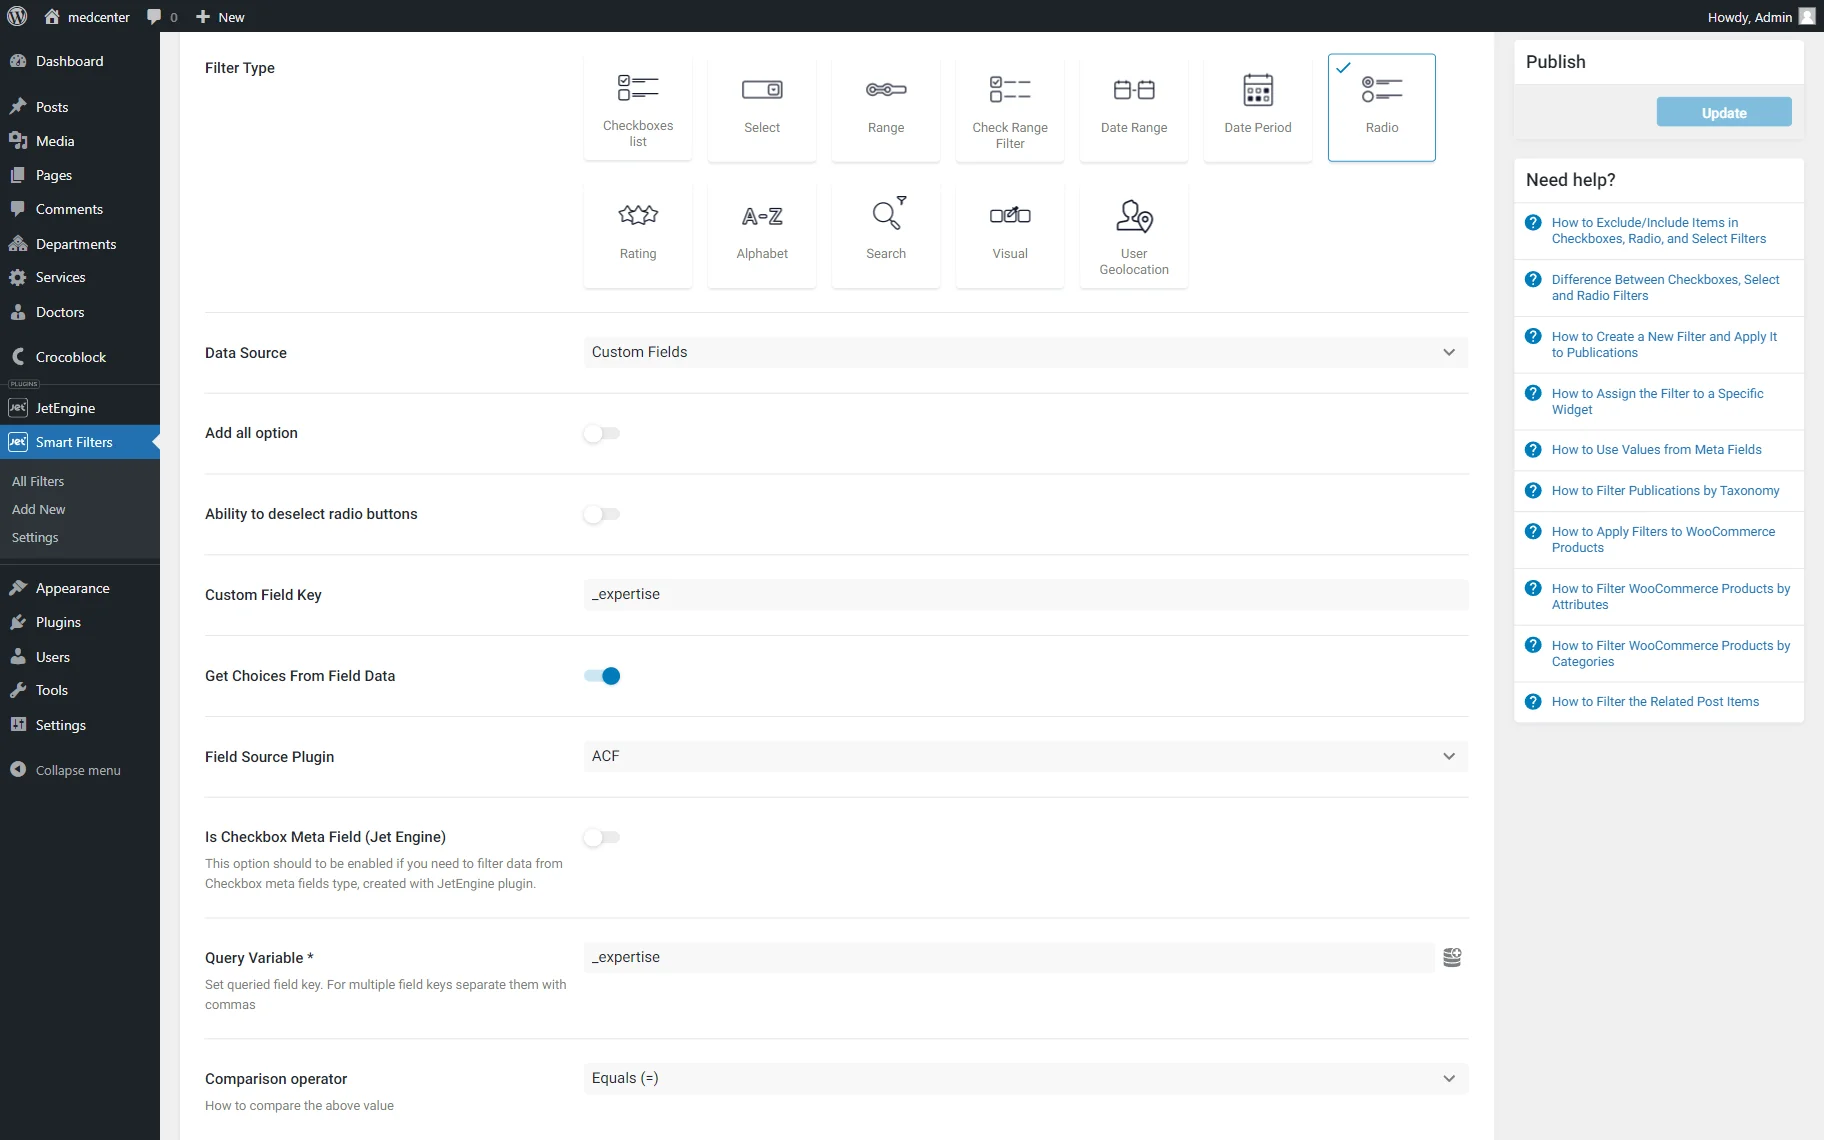
Select and Radio
The “Select” filter has similar settings to the “Checkbox” one.
Initially, you can activate the Is hierarchical toggle if there is a need to create some hierarchy in the ACF Select filter. Also, check the How to Create a Custom Taxonomy Hierarchical Filter with Select Filter Type tutorial.
Then, pick the “Custom Fields” option as the Data Source.
Change the text that will be displayed as a Placeholder on the filter. And necessarily, insert the Custom Field Key (the Field Name of the necessary ACF meta field).
Then, repeat the steps described above for the “Checkbox” filter. However, the Is Checkbox Meta Field (Jet Engine) toggle does not need to be switched on.
The Comparison operator can be set here as well.
As for the “Radio” Filter Type, it has the same fields for completion. Although there are Add all option and Ability to deselect radio buttons toggles.
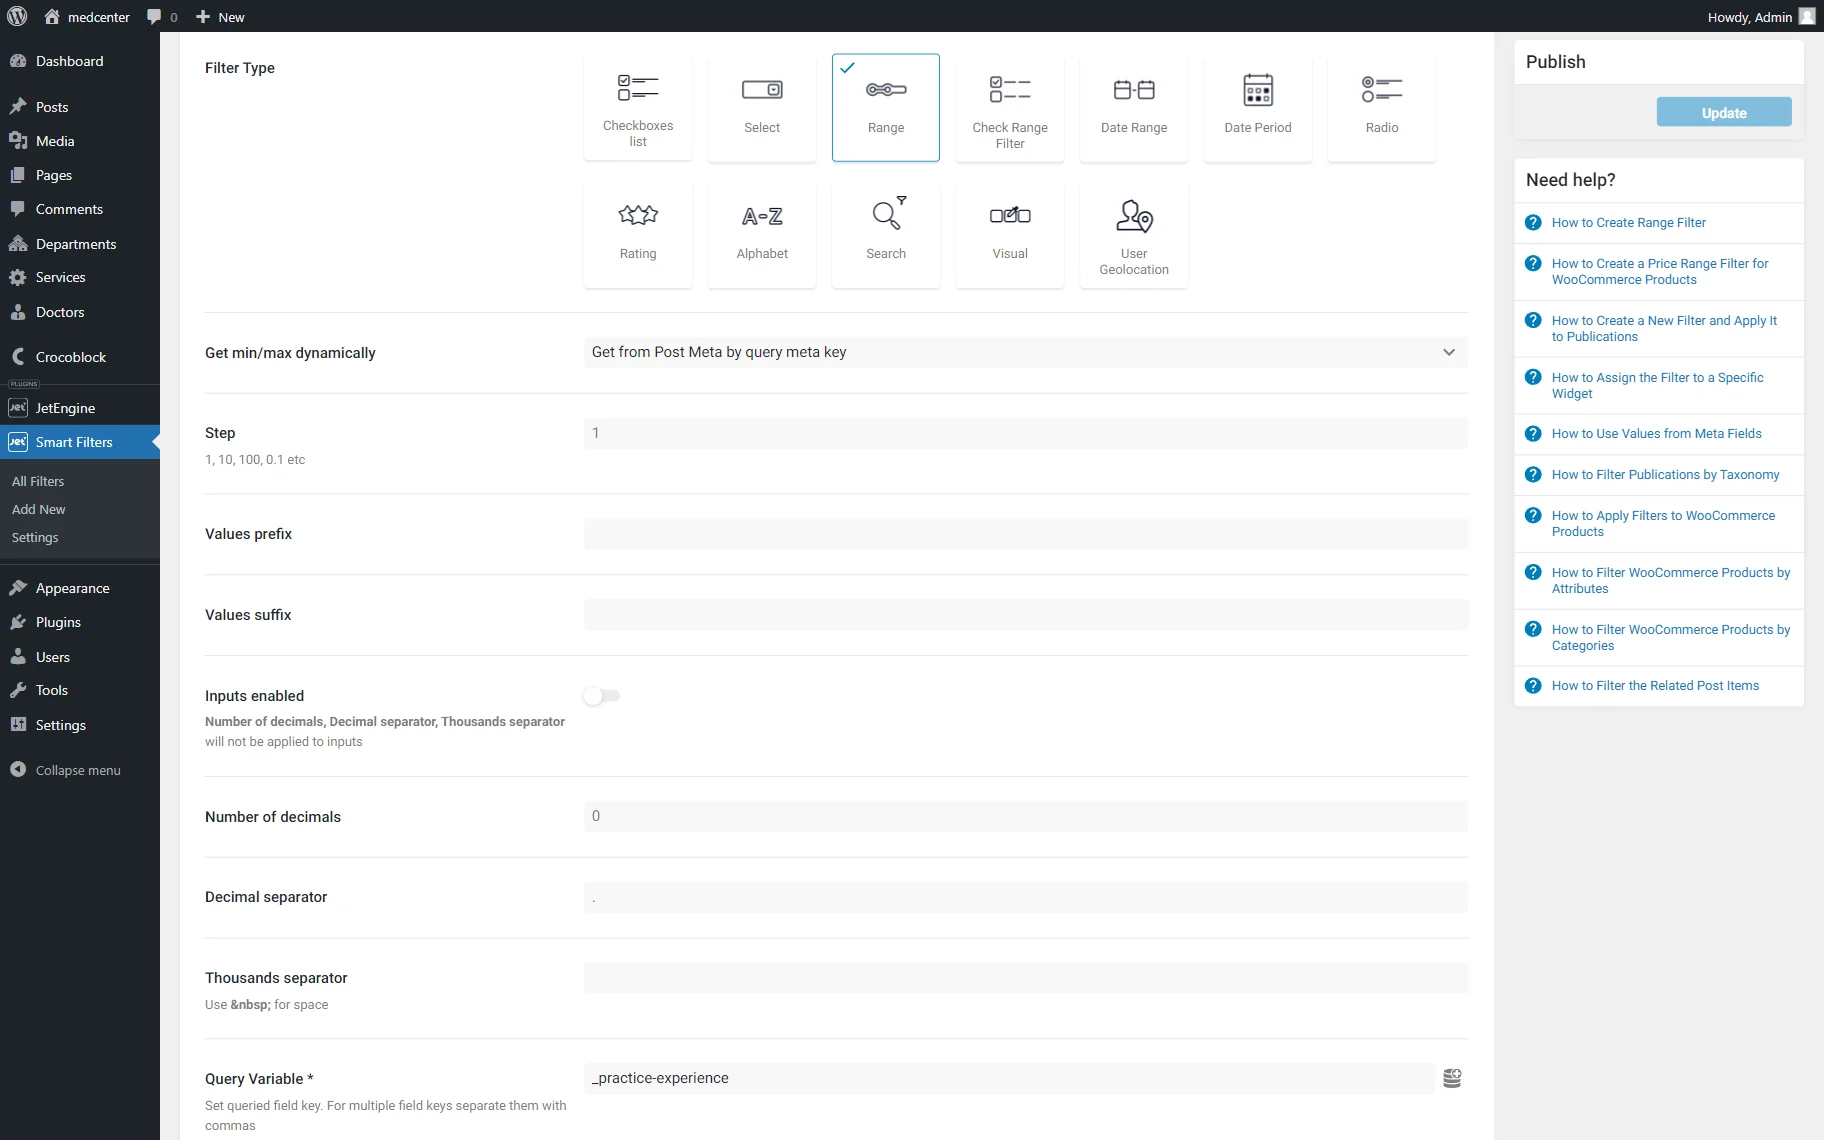
Range
To set the max and min values of the “Range” filter automatically from the ACF field, you have to choose the “Get from query meta key” option in the Get min/max dynamically drop-down menu.
Afterward, type in the Field Name of the meta field in the Query Variable bar.
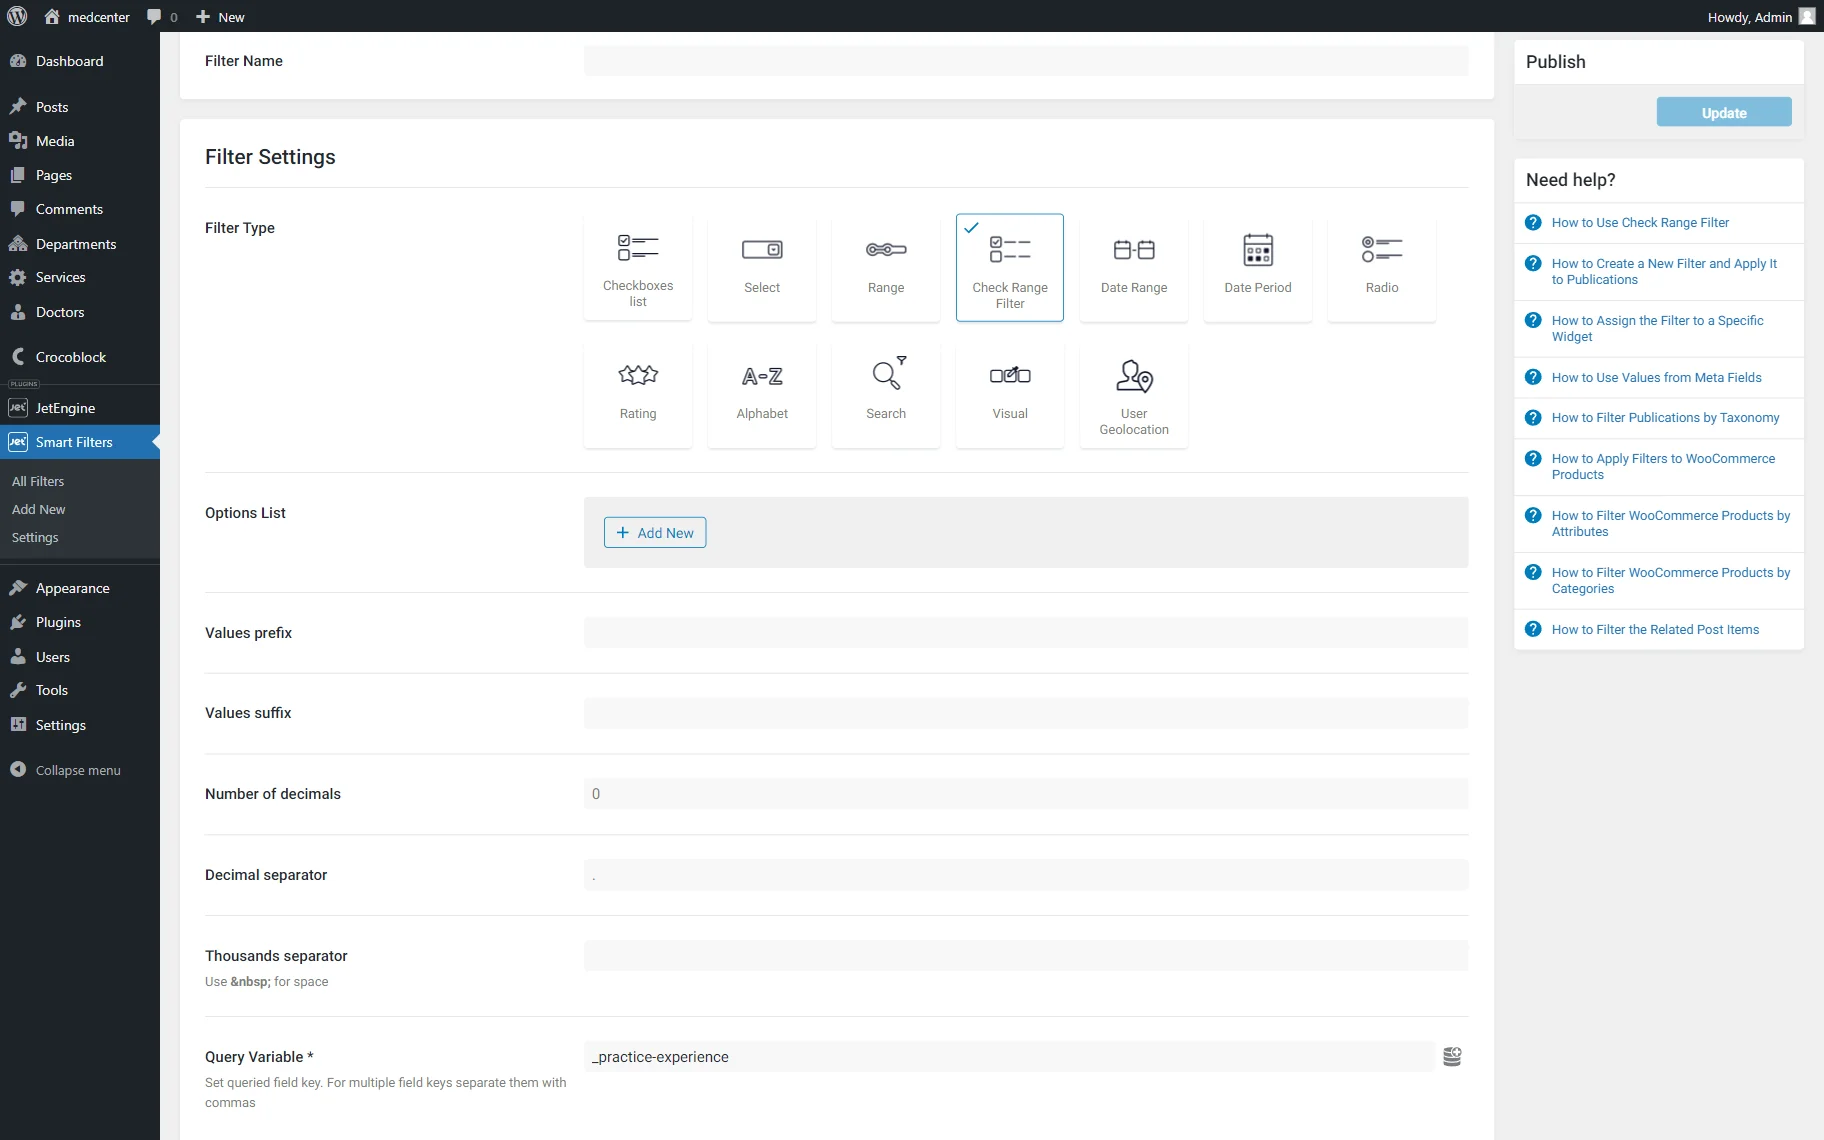
Check Range
To apply the data from the ACF meta field in the “Check Range” filter, you just have to paste the meta field’s Field Name to the Query Variable bar. All the other settings can be set the same way as for the JetEngine meta fields.
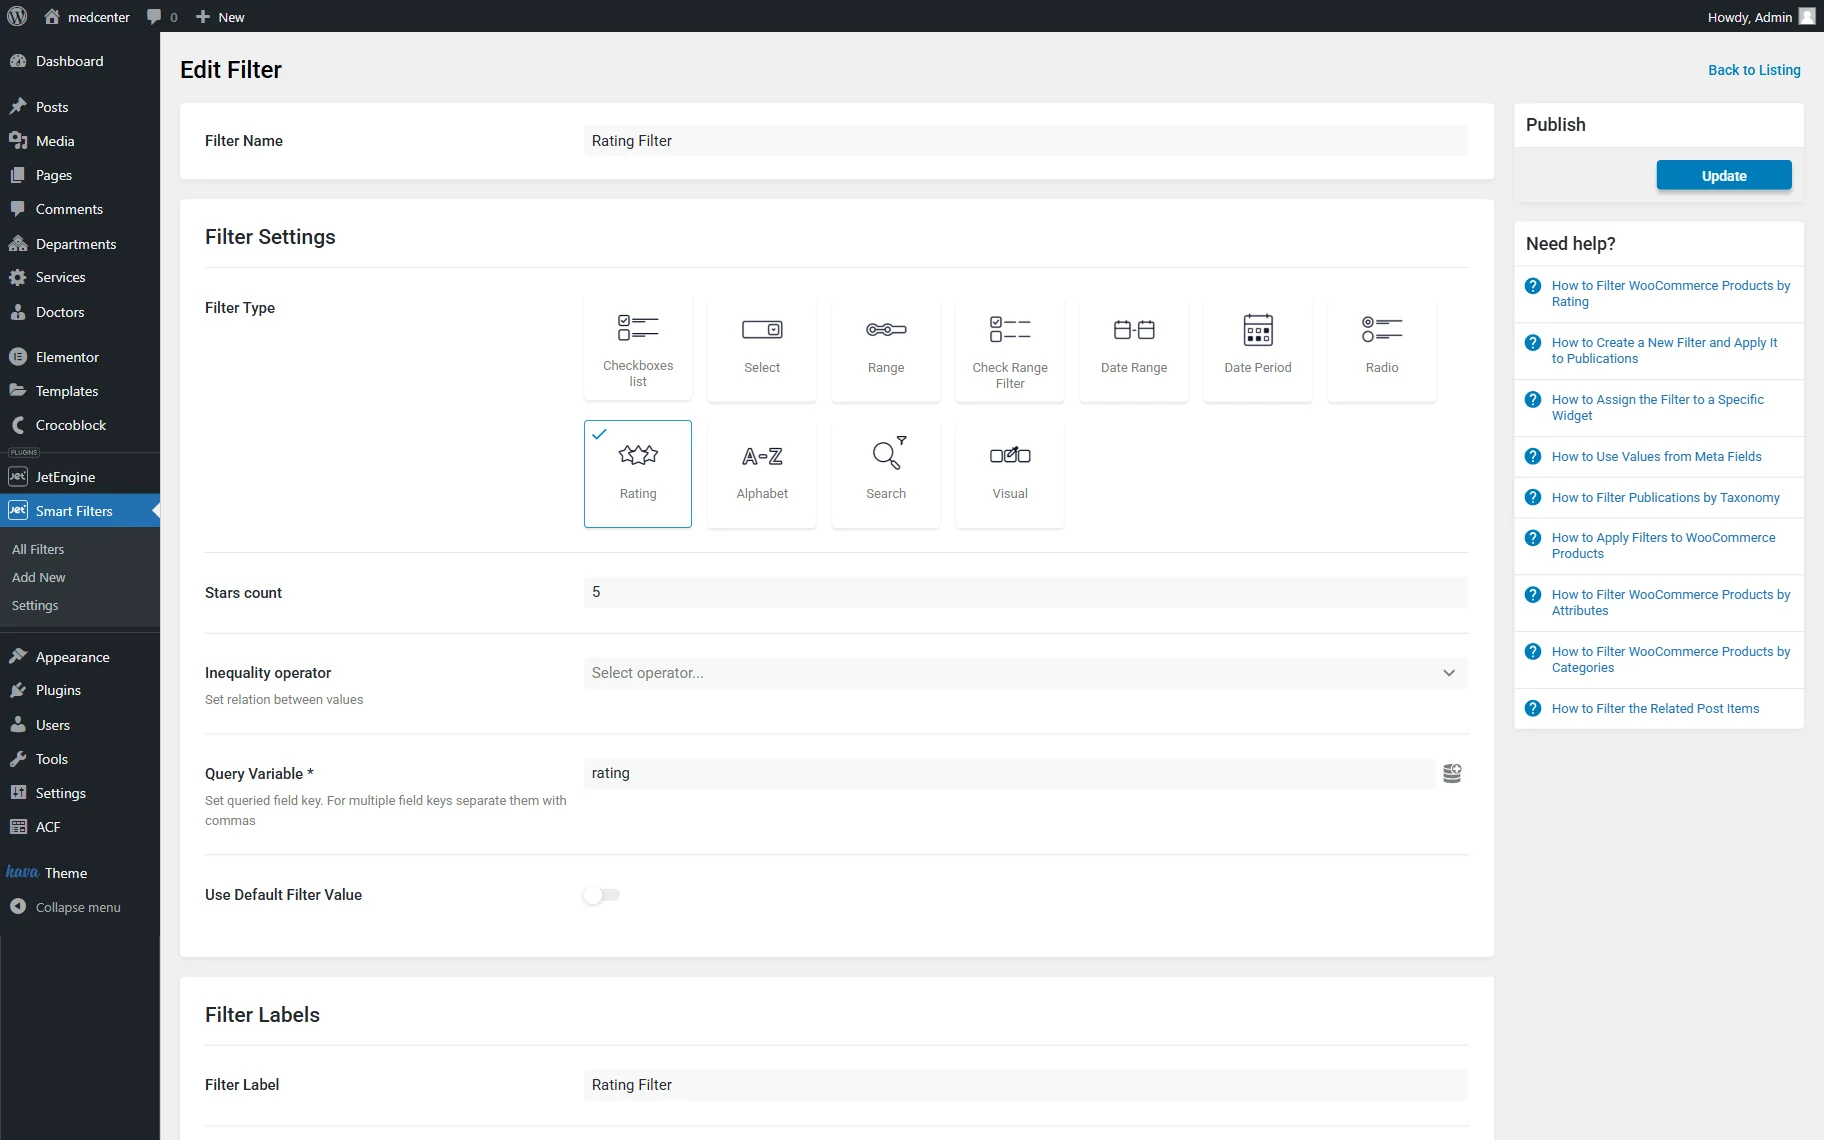
Rating
As for the “Rating” filter, the Stars count bar, you have to set the maximum number of stars the user can give to an item. Set the Inequality operator to the “Equals (=)” option to sort out only the posts with the same number of stars as you set in the filter.
In the Query Variable bar, type in the Field Name of the ACF field with the rating.
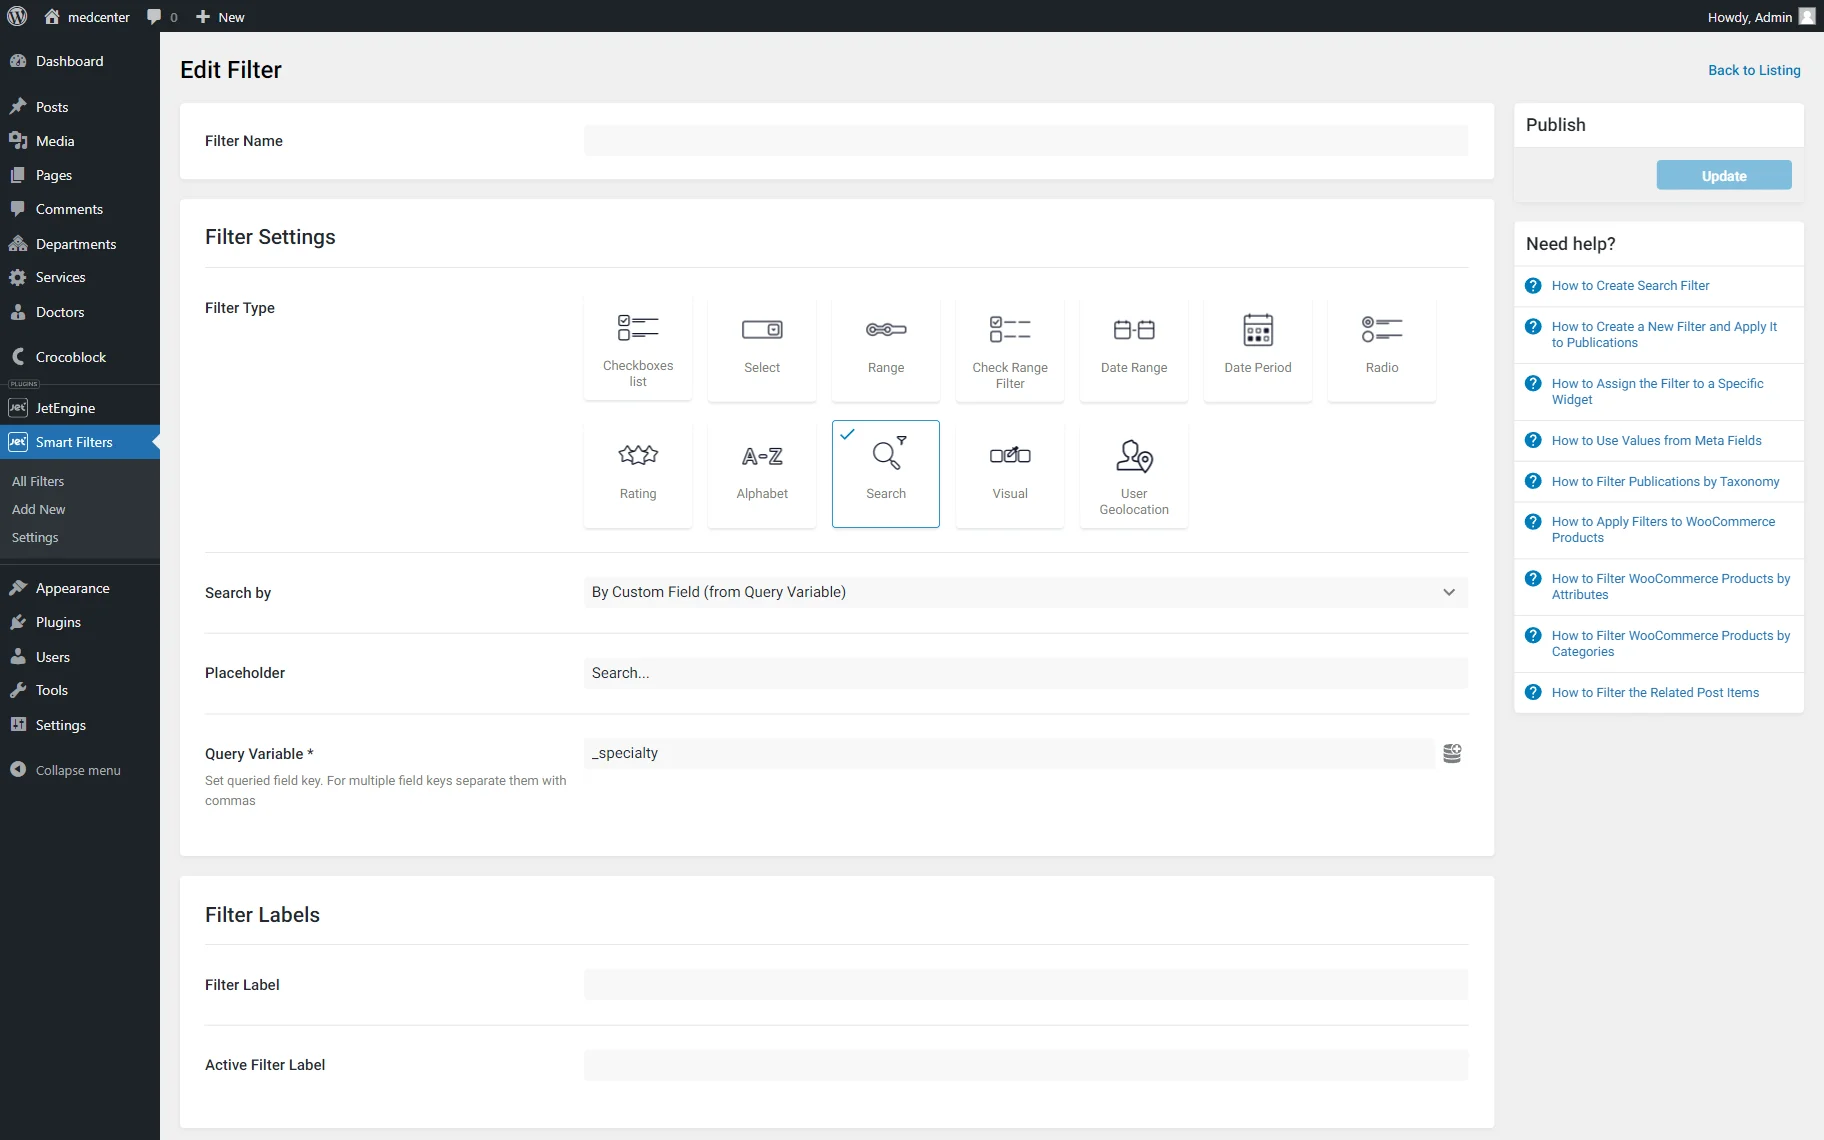
Search
You can make the “Search” filter seek the words not through the titles and general content but only in a specific field, such as an ACF text meta field.
In the Search by drop-down menu, choose the “By Custom Field” option and define the field in the Query Variable bar.
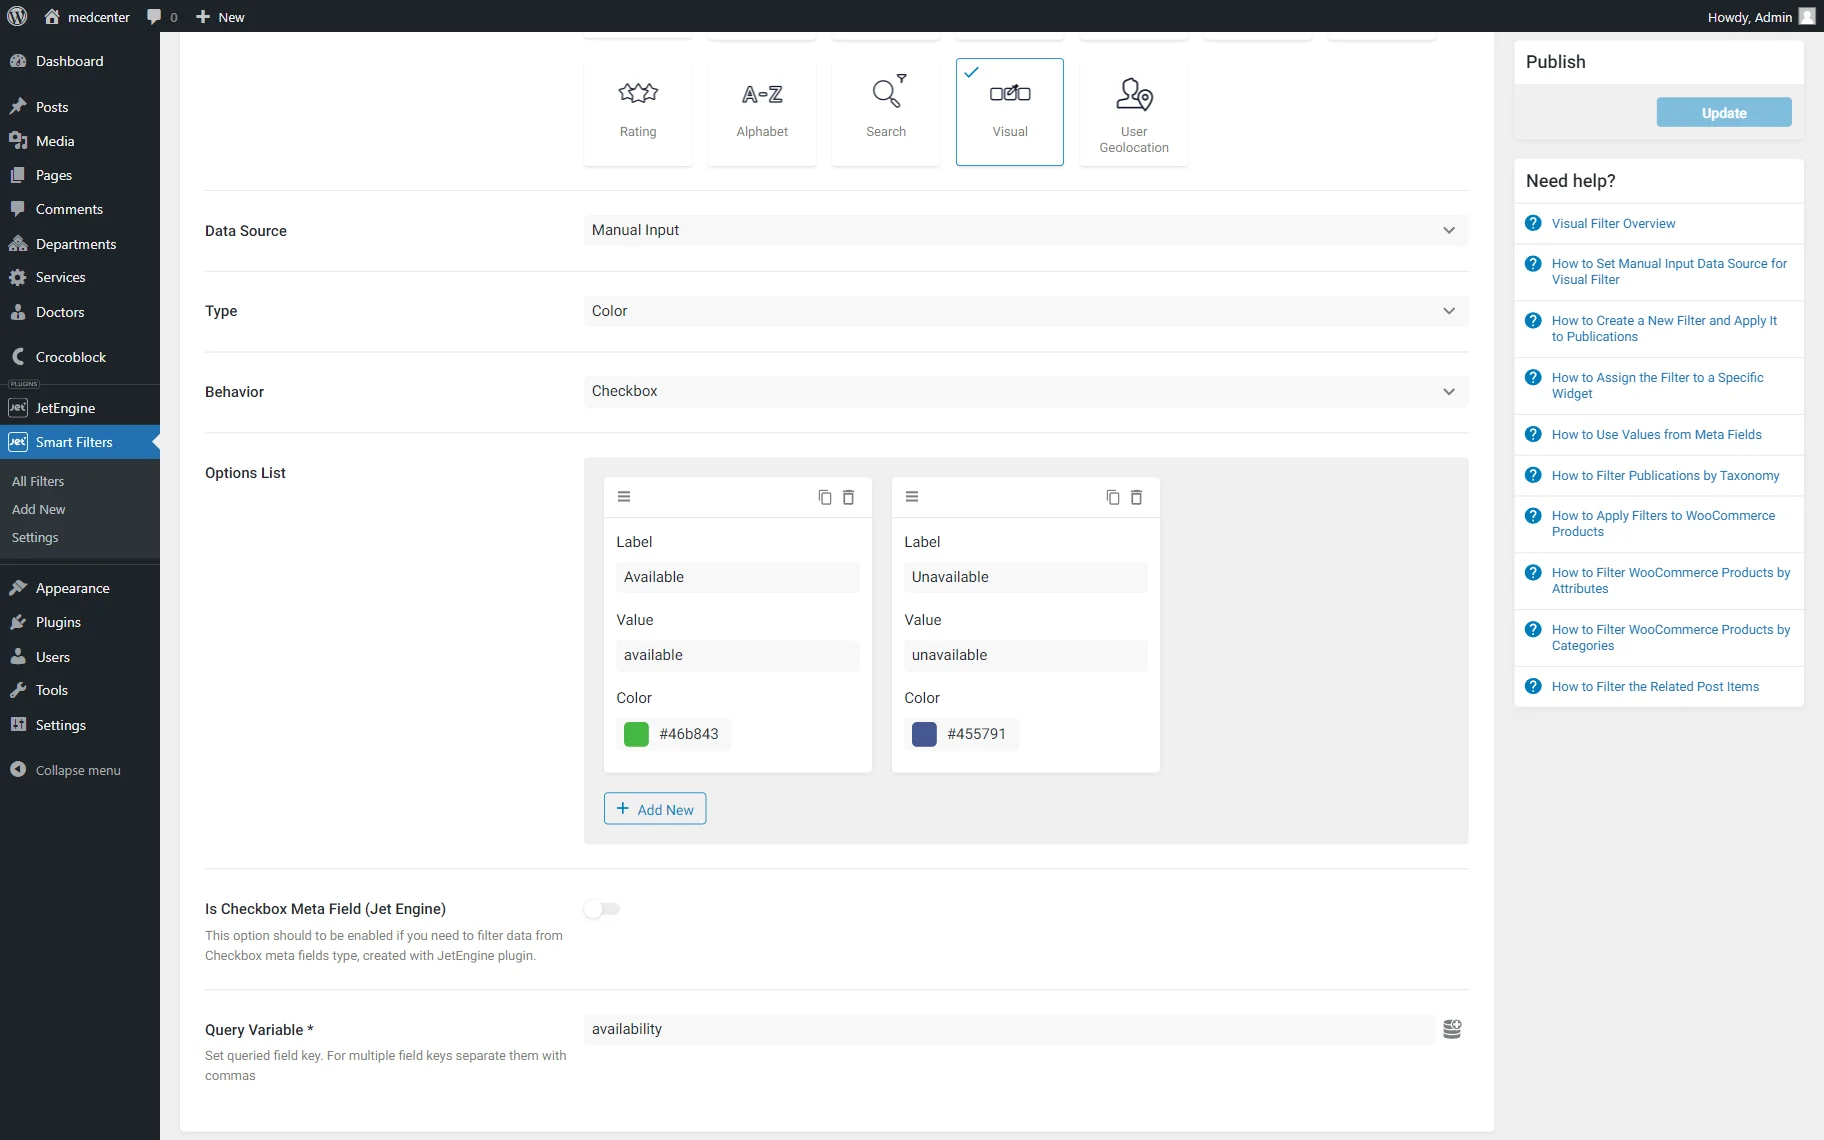
Visual
You can combine the “Visual” filter with any ACF “Select” or “Radio” meta field.
In the Data Source drop-down menu, choose the “Manual Input” option. Its Type can be “Image” or “Color,” so choose the one you like and select the needed option in the Behavior drop-down list.
Now, you have to add the options manually by clicking the “New Option” button in the Options List field.
The field you will use is not the “Checkbox” JetEngine field, so ignore the Is Checkbox Meta Field toggle.
In the Query Variable bar, paste the name of the field you would like to use.
Apply the Filter to the Listing Grid
Once you create an ACF filter, it is time to apply it to the Listing Grid.
Open the page where you’ve placed the Listing Grid in the Elementor Page Builder. Find one of the filter widgets in the widget menu and drop it to the page near the Listing Grid.
In the Select filter drop-down menu, choose the ACF filter you’ve created. You will apply this filter to the JetEngine Listing Grid, so select the “JetEngine” option in the This filter for drop-down list.

If several JetEngine elements are on the page, you need to click on the Listing Grid and go to the Advanced menu tab. Set the CSS ID, copy it, and paste it to the Query ID bar of the filter.

The other settings can be customized according to your needs. Press the “Publish” button once all the changes are made.
That’s it; now you know how to combine the ACF and JetSmartFilters plugins to build ACF filters on your WordPress website.