How to Get and Update Relation Data via REST API
Discover how to get the relation data list and update or replace the children or parent items via REST API with the JetEngine WordPress plugin.
The Public REST API for Relations feature allows you to get and update relations data through REST API with the help of the JetEngine WordPress plugin.
Public REST API for Relations Settings Overview
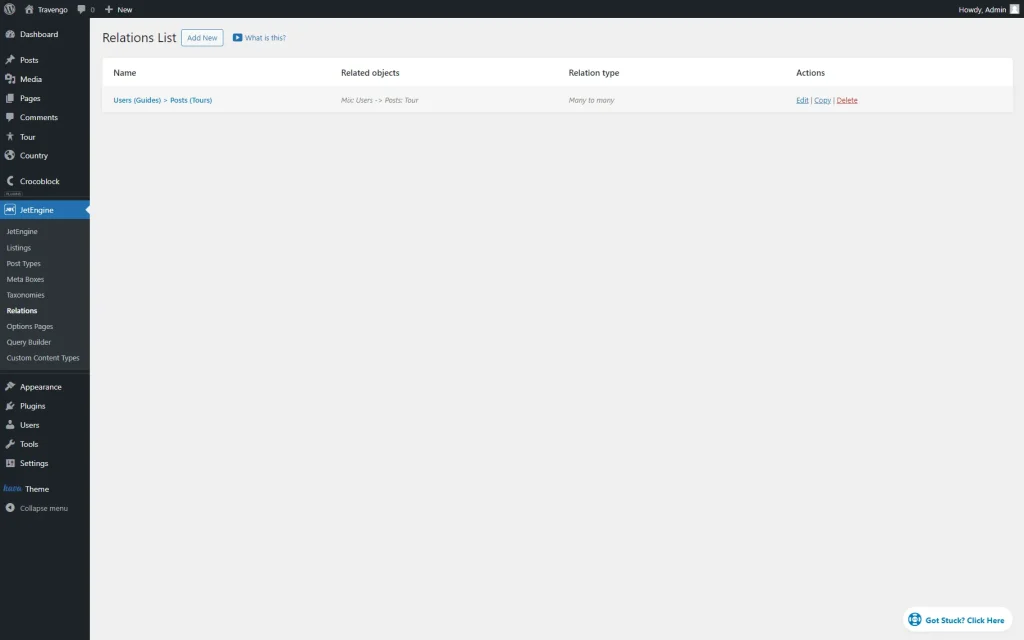
Navigate to the WordPress Dashboard > JetEngine > Relations tab and click the “Edit” button next to the needed relation.
We will work with the “Users (Guides) > Posts (Tours)” relation.
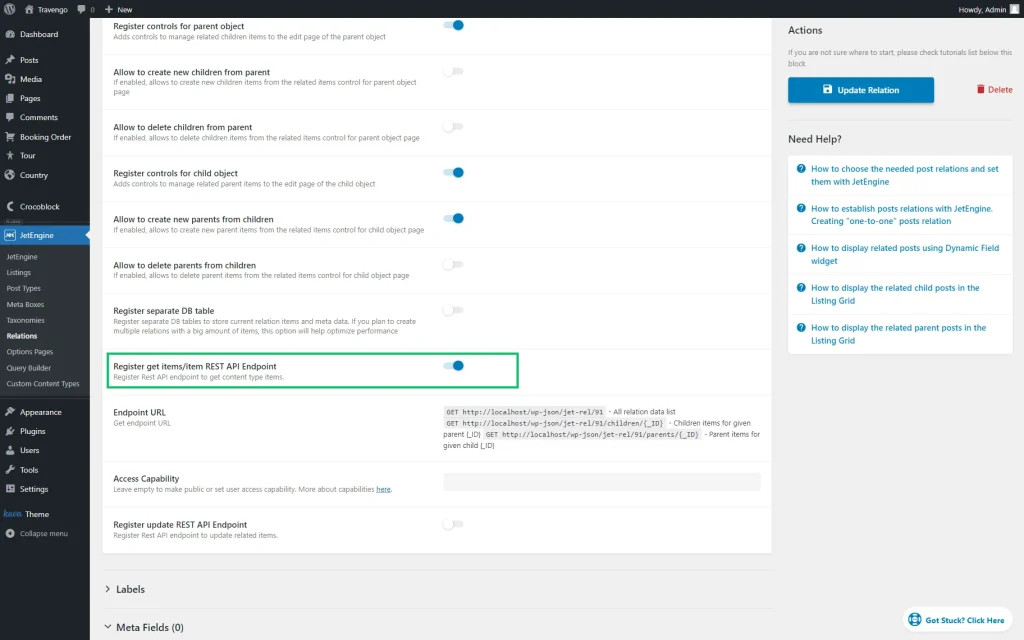
Go to the Register get items/item REST API Endpoint toggle and enable it.
In the Endpoint URL field, you will see three URLs that can be copied and used for the connection between two websites:
- GET – /wp-json/jet-rel/<relation ID> — retrieve all data for the selected relation;
- GET – /wp-json/jet-rel/<relation ID>/children/<item ID> — retrieve child items for the selected item ID;
- GET – /wp-json/jet-rel/<relation ID>/parents/<item ID> — retrieve parent items for the selected item ID.
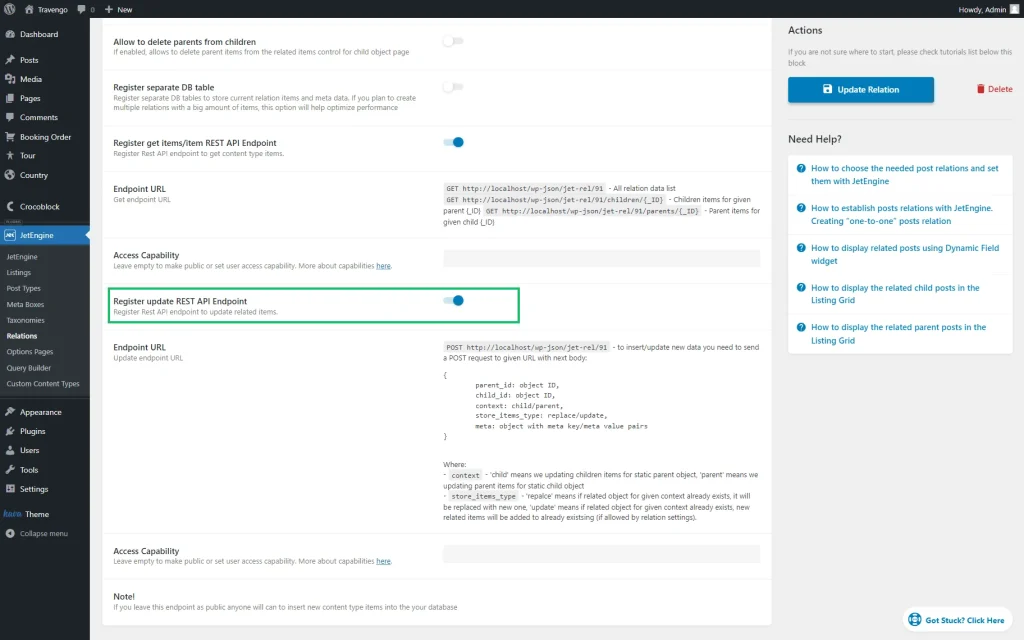
Enable the Register update REST API Endpoint toggle.
POST – /wp-json/jet-rel/<relation ID> — specify the required data. The body of the query post must contain the following data:
{
	parent_id: ID/IDs,
	child_id: ID/IDs,
	context: child/parent,
	store_items_type: replace/update
}
In this piece of code, you need to enter the ID/IDs of the parent item/items, ID/IDs of the child item/items; the context can be “child” or “parent,” where “child” means updating the child item from the parent and “parent” – updating the parent item from the child. The store_items_type row can be “replace” or “update,” where “replace” deletes existing elements and inserts the new ones instead when updating, and “update” adds the new elements to the existing ones.
When you finish, hit the “Update Relation” button.
Update Relation Data via REST API
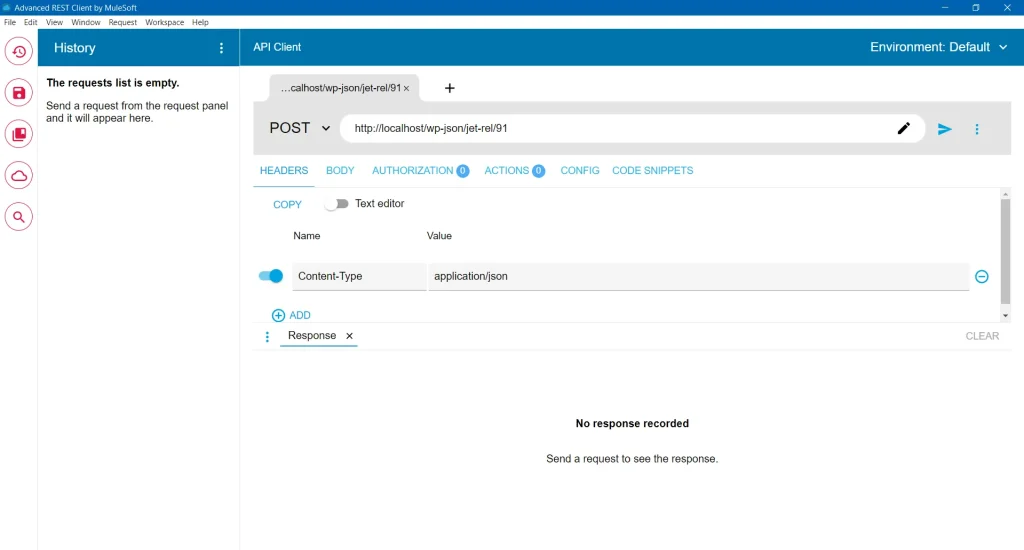
We will show how to update and replace related items using the Advanced REST Client application as an example.
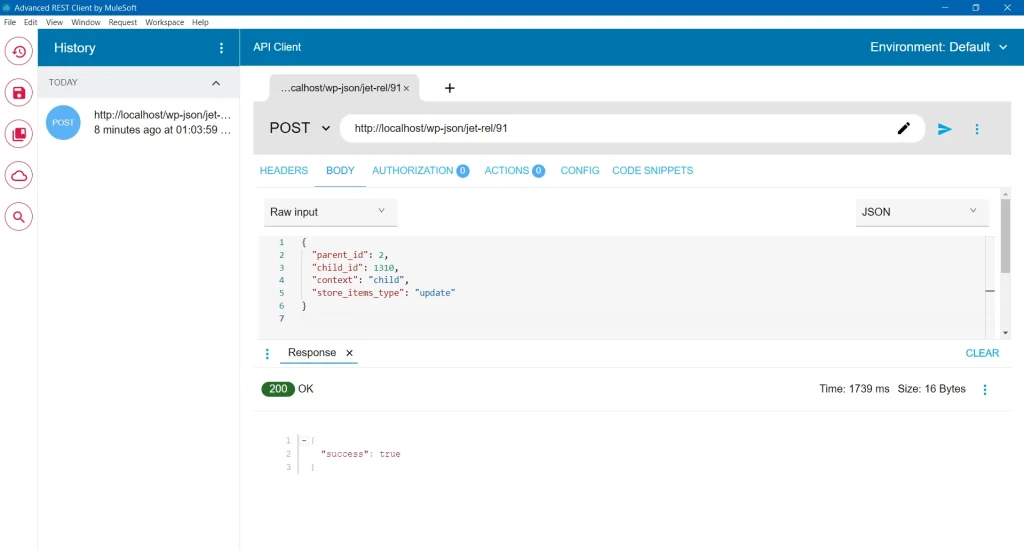
We select the “POST” Method and enter the relation endpoint URL in the Request URL field.
In the Headers tab, we add a Header with the “Content-Type” Name and “application/json” Value. If you want, you can also add the “Authorization” Header.
Updating the child item from the parent
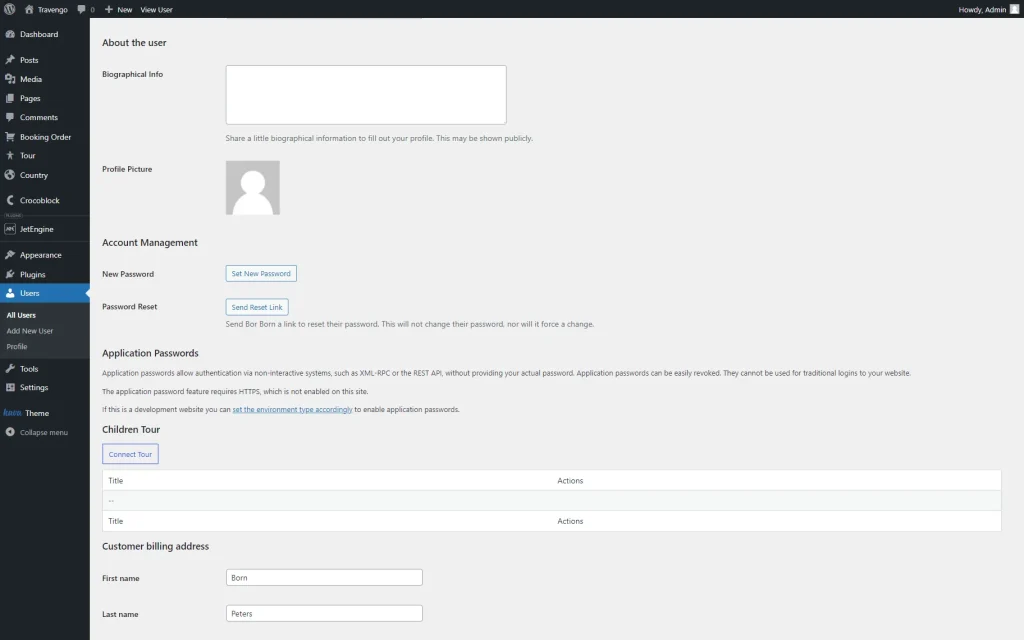
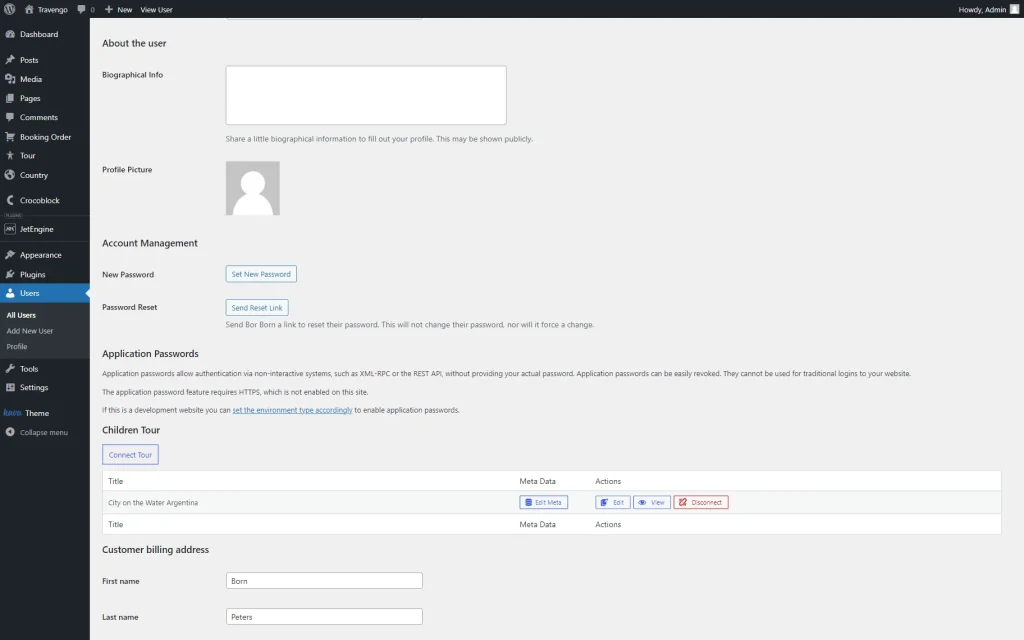
We decided to add a new child tour to the parent guide. Now, the current user doesn’t have any related posts.
In the Body tab, we leave the default “JSON” Body content type and “Raw input” Editor view.
In the following textarea, we enter such a JSON code:
{
  "parent_id": 2,
  "child_id": 1310,
  "context": "child",
  "store_items_type": "update"
}
Where “2” is an ID of a parent guide; “1310” is an ID of a child tour that has been created earlier and we want to add to the guide; “child” indicates that we want to update the child item from the parent. Lastly, “update” is a command that will update the relation and add a new item instead of replacing the old one.
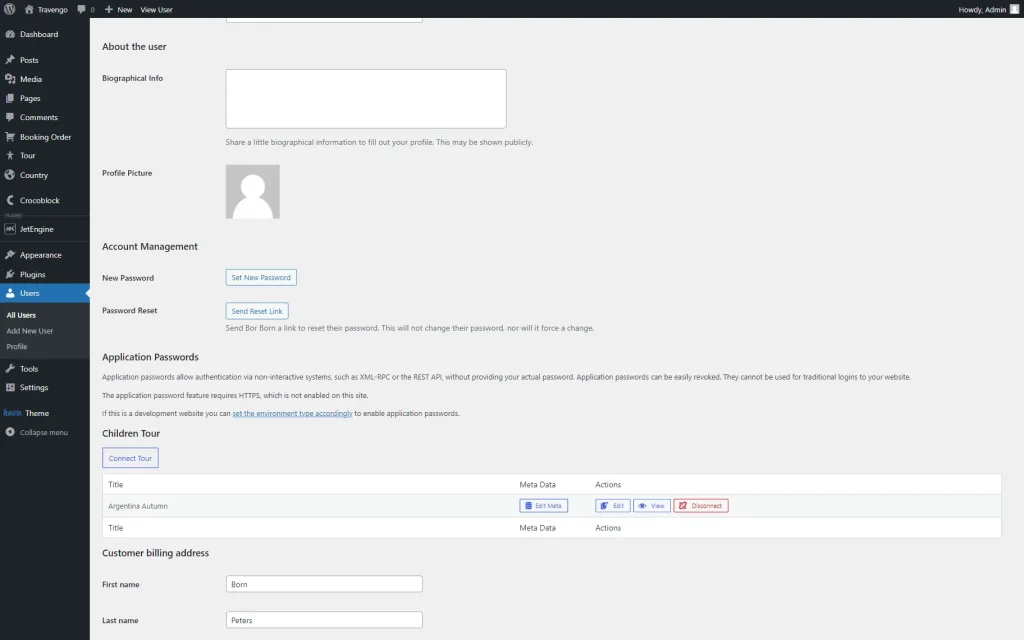
Click the “Send the request” button. The request is successful, so we add a new child item to the parent object.
Updating relation meta fields
You can also update the relation meta field via the REST API.
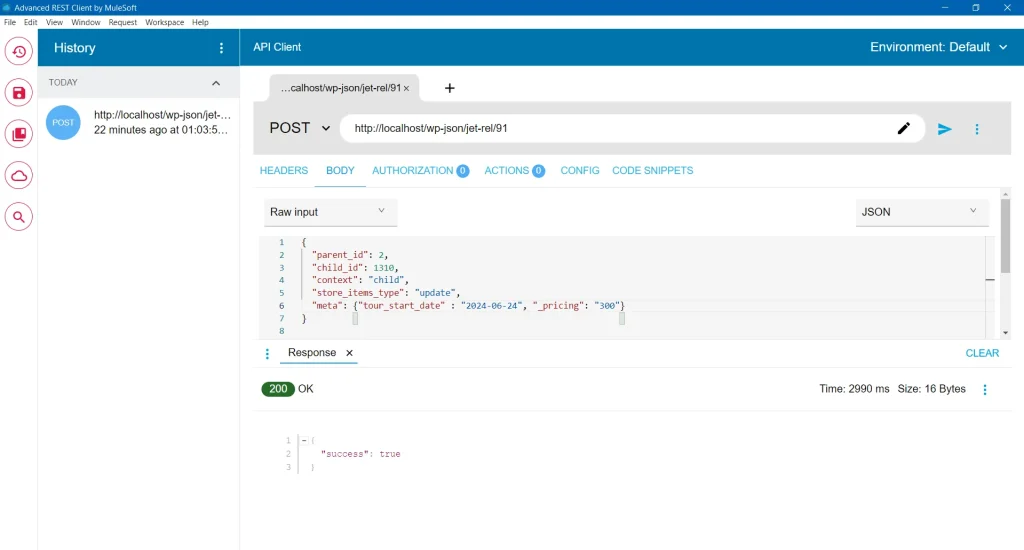
We add a new stroke to the code:
"meta": {"tour_start_date" : "2024-06-24", "_pricing": "300"}Where “tour_start_date” and “_pricing” are “Text” and “Date” meta fields from the relation, and “2024-06-24” and “300” are values. You can update all types of meta fields that are available for relations.
Click the “Send the request” button.
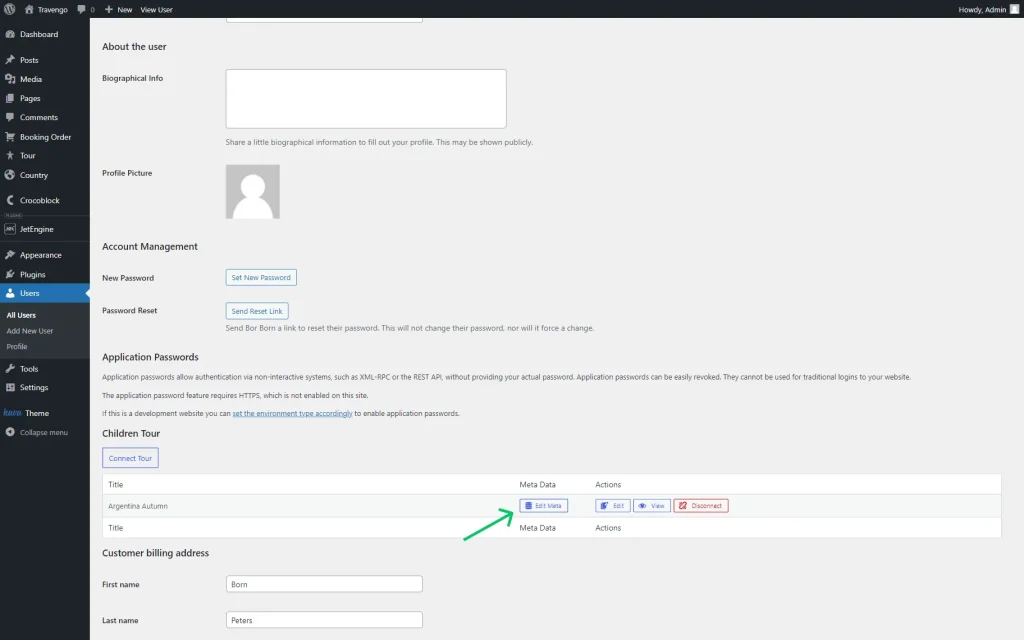
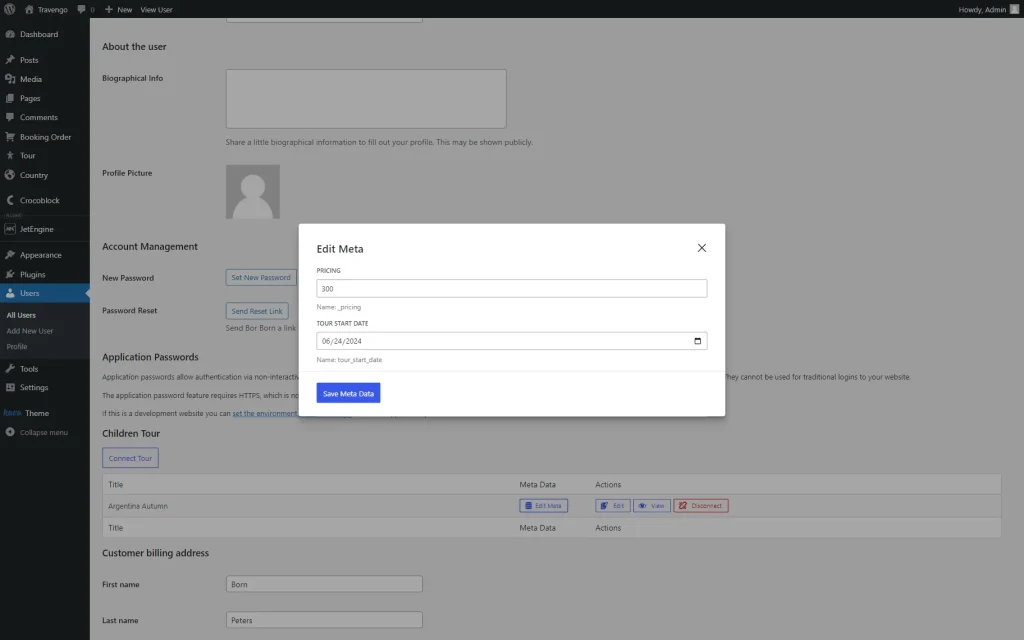
To check the results, hit the “Edit Meta” button next to the connected child post.
As we can see, values have been saved via the REST API.
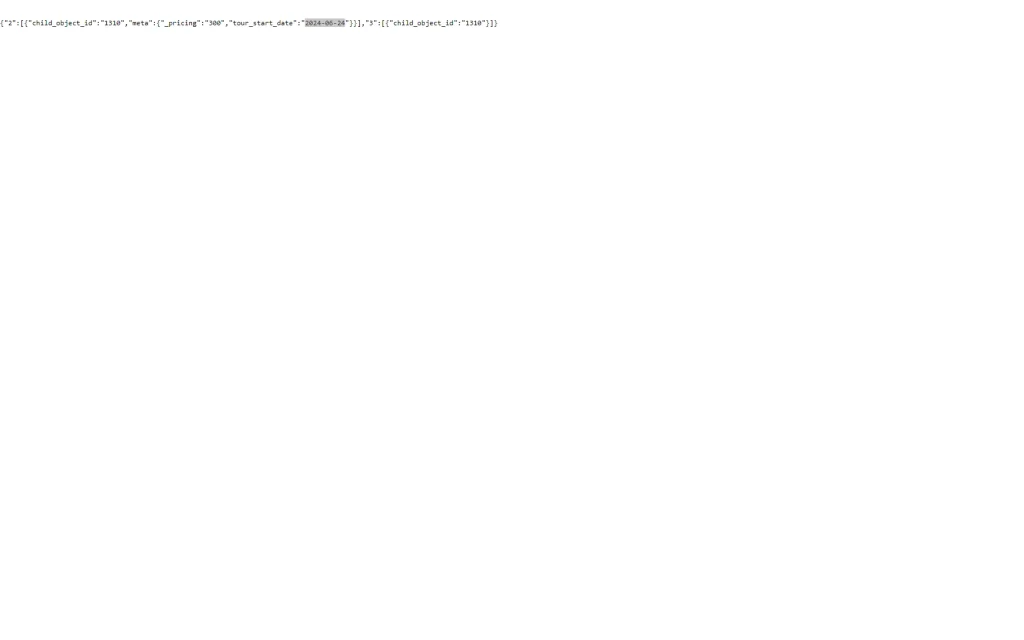
Save the meta data and enter the Endpoint URL into the search bar.
Here you can see in what format the date is saved. So, when updating or replacing the relation items, enter the value in the same format.
Replacing relation items
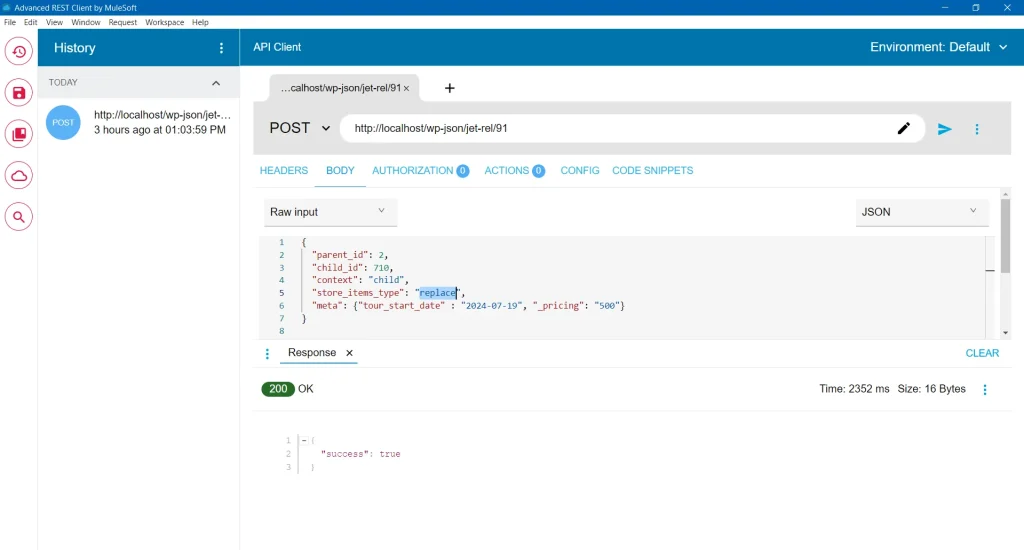
If you want to replace all related items with a new one, you need to enter “replace” instead of “update”:
"store_items_type": "replace",After the “Send the request” button is pressed, the new related item will replace the old ones.
Updating the parent item from the child
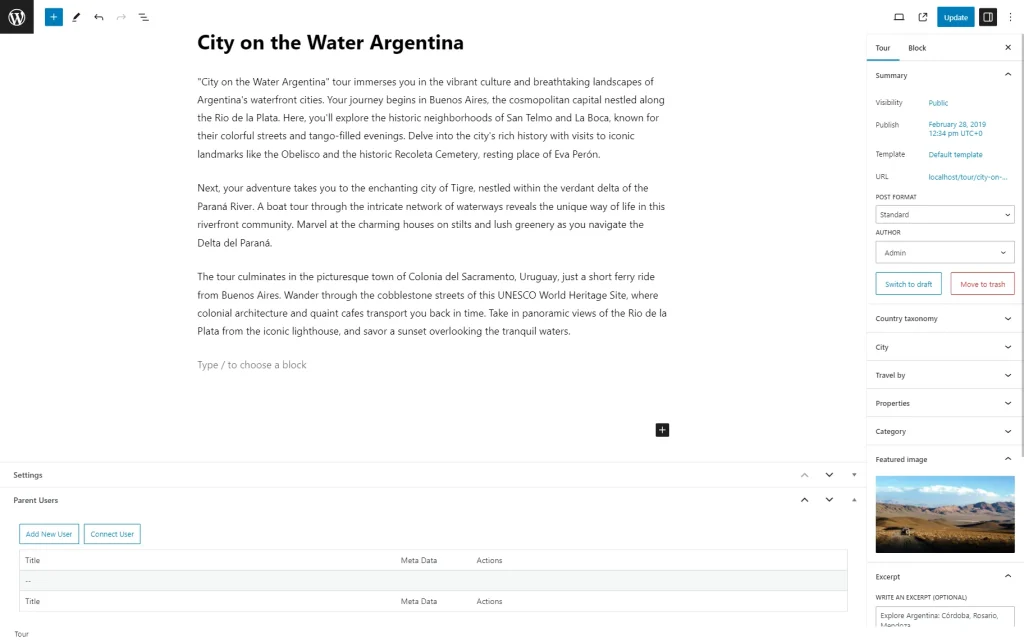
Now, we want to add a new guide to the tour; in other words, update the parent items (users) for the child object (post).
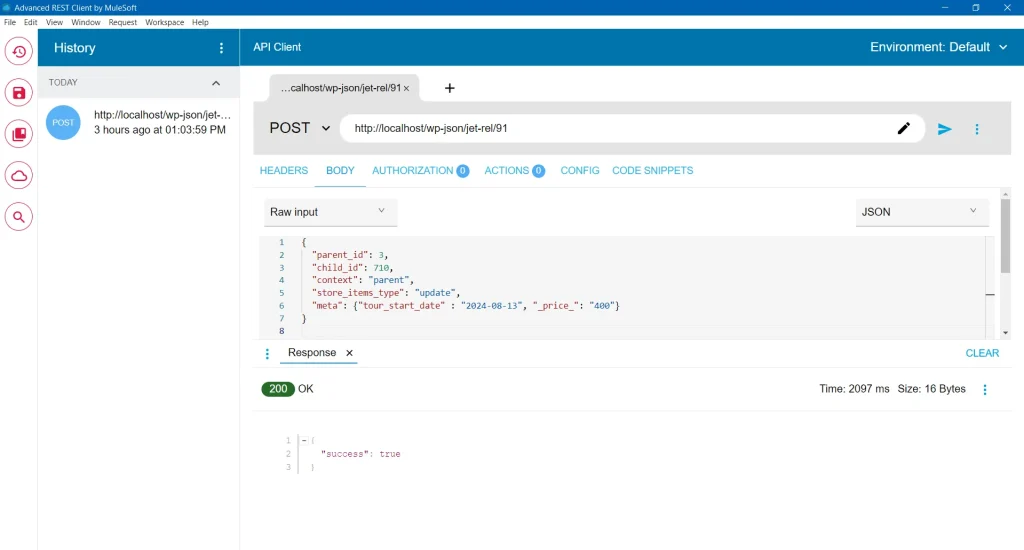
JSON code is similar to the one that we used for adding a child item to the parent object, but you need to change the context:
{
  "parent_id": 3,
  "child_id": 710,
  "context": "parent",
  "store_items_type": "update",
  "meta": {"tour_start_date" : "2024-08-13", "_price_": "400"}
}
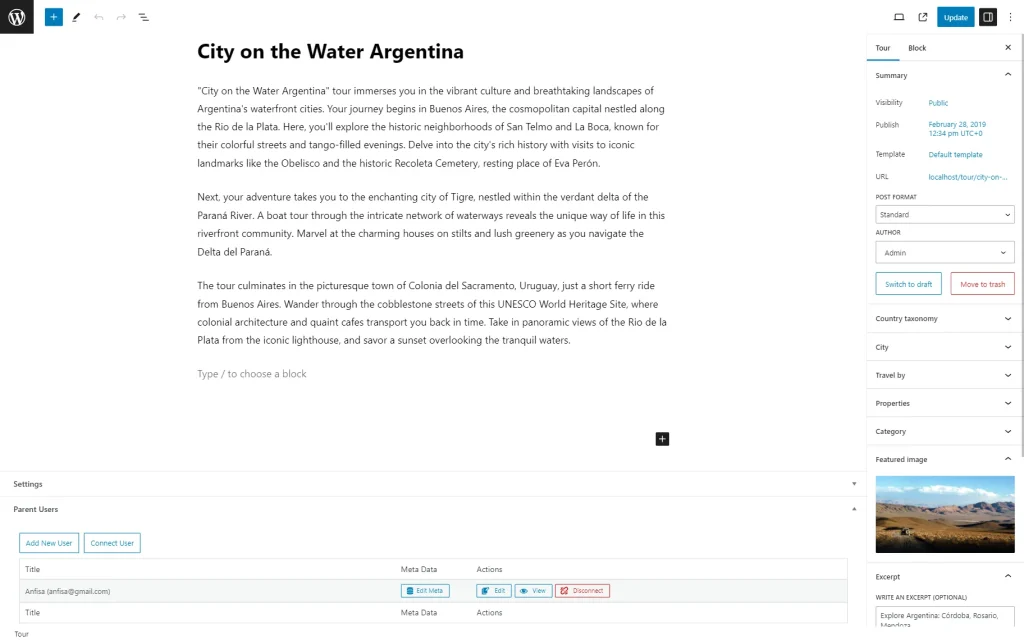
Parent user with the “3” ID has been added to the post with the “710” ID.
Adding several children to the parent or vice versa
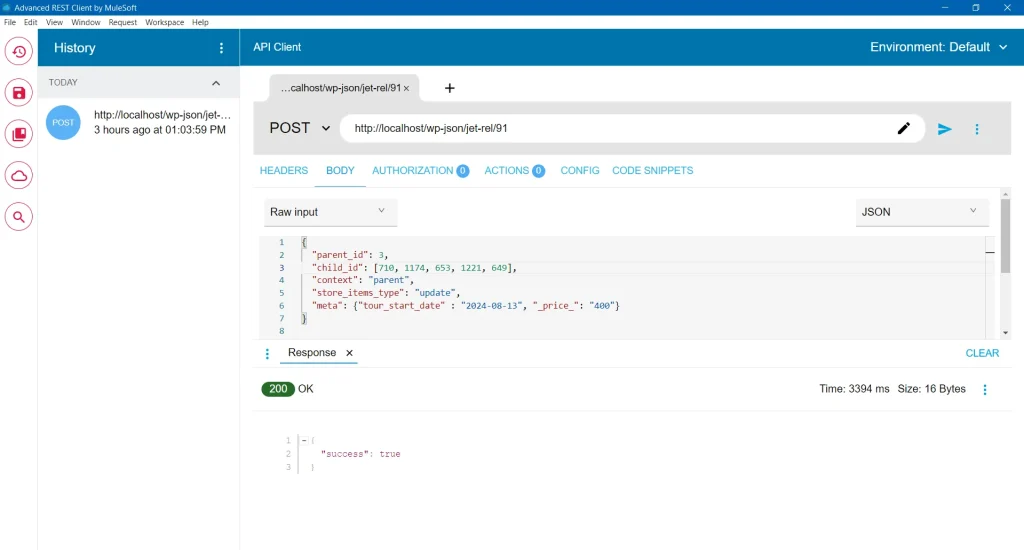
To add several children to the parent, you need to put IDs into the array:
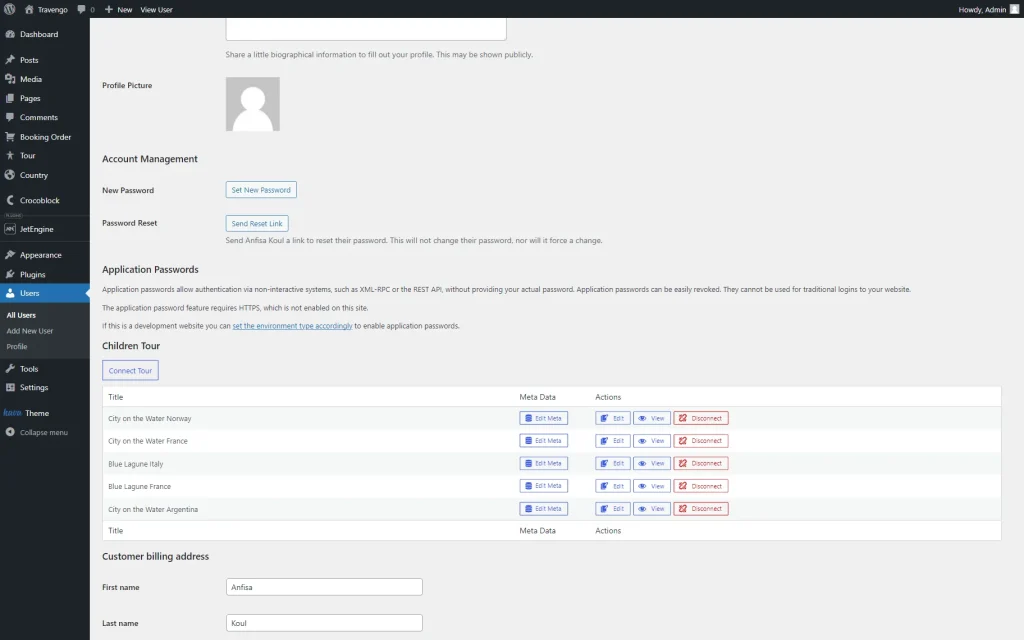
"child_id": [710, 1174, 653, 1221, 649],Click the “Send the request” button and proceed to the parent page.
New children items have been successfully added to the parent object.
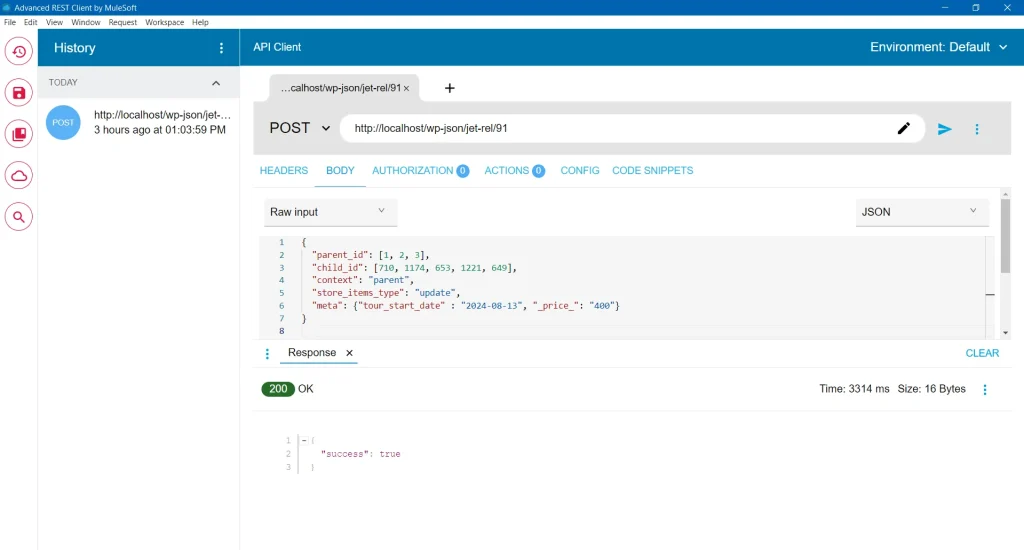
You can also add several parents to one child by putting several parent IDs in the array.
It’s also possible to connect several parents and children, so each parent in the code will have five children.
That’s all. Now you know how to get the relation data list and update or replace the children or parent items via REST API with the JetEngine WordPress plugin.
