How to Add and Use Dynamic Repeater in the Form
This tutorial will teach you how to add a Dynamic Repeater to any Form using the JetEngine plugin.
Before you start, check the tutorial requirements:
- Elementor (Free version) or Block editor (Gutenberg)
- JetEngine plugin installed and activated
Static forms with a defined number of fields are useful in many cases. However, sometimes you need to give users an opportunity to add as many additional rows as they want. With the help of JetEngine, you can create a form with repeatable rows that can be added or removed by the user. Besides that, you can insert the information from the form repeater into the meta field and dynamically show it on the other page.
Adding a Repeater to the Form
Create a form
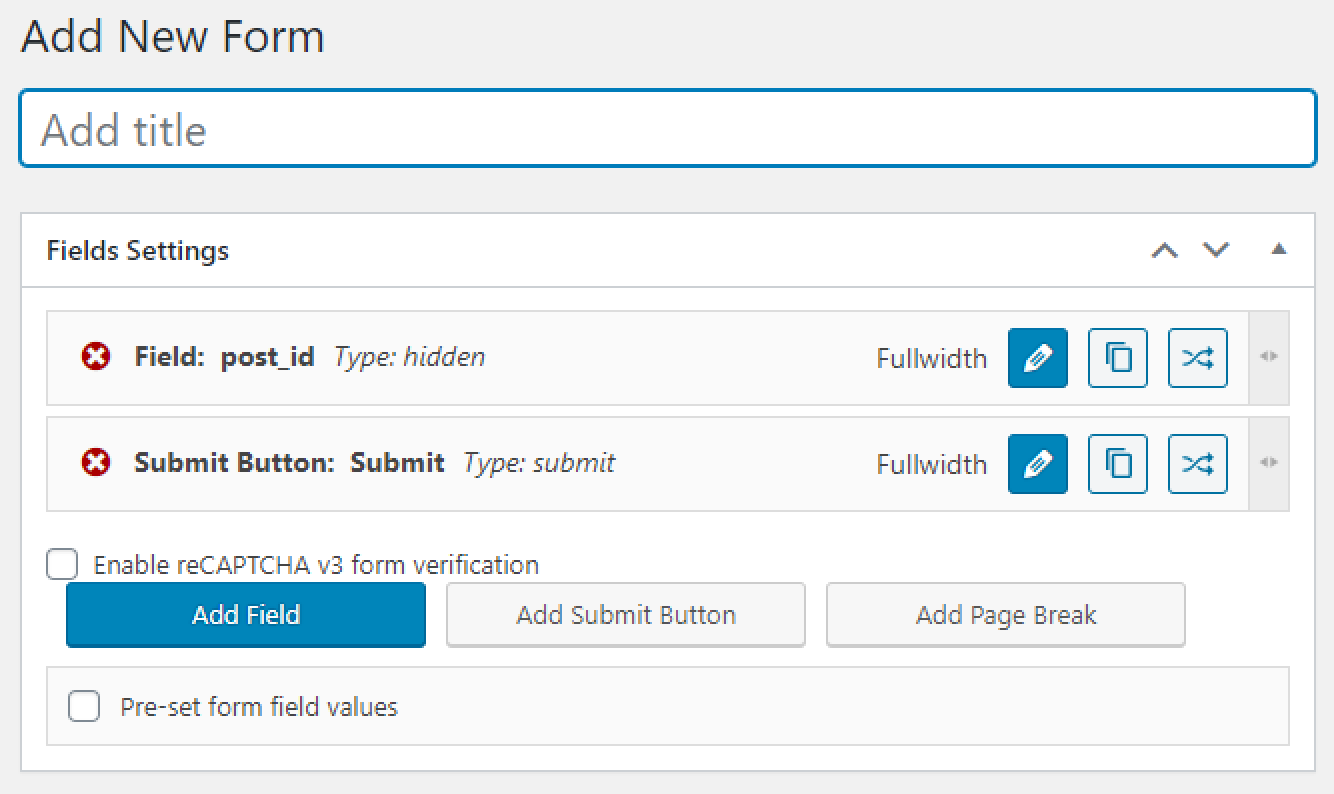
Open your admin dashboard and go to JetEngine > Forms. Click the “Add New” button. Build the main part of the form by adding new fields and customizing them. If you don’t know how to compose the form, go through the Form Layout tutorial.
Add repeater framing
Form’s repeater consists of two parts – Repeatable Field Group Start and Repeatable Field Group End. All the fields you place between them will be the body of the repeatable part of the form. So, first of all, click the “Add Field” button and proceed to edit that new field.

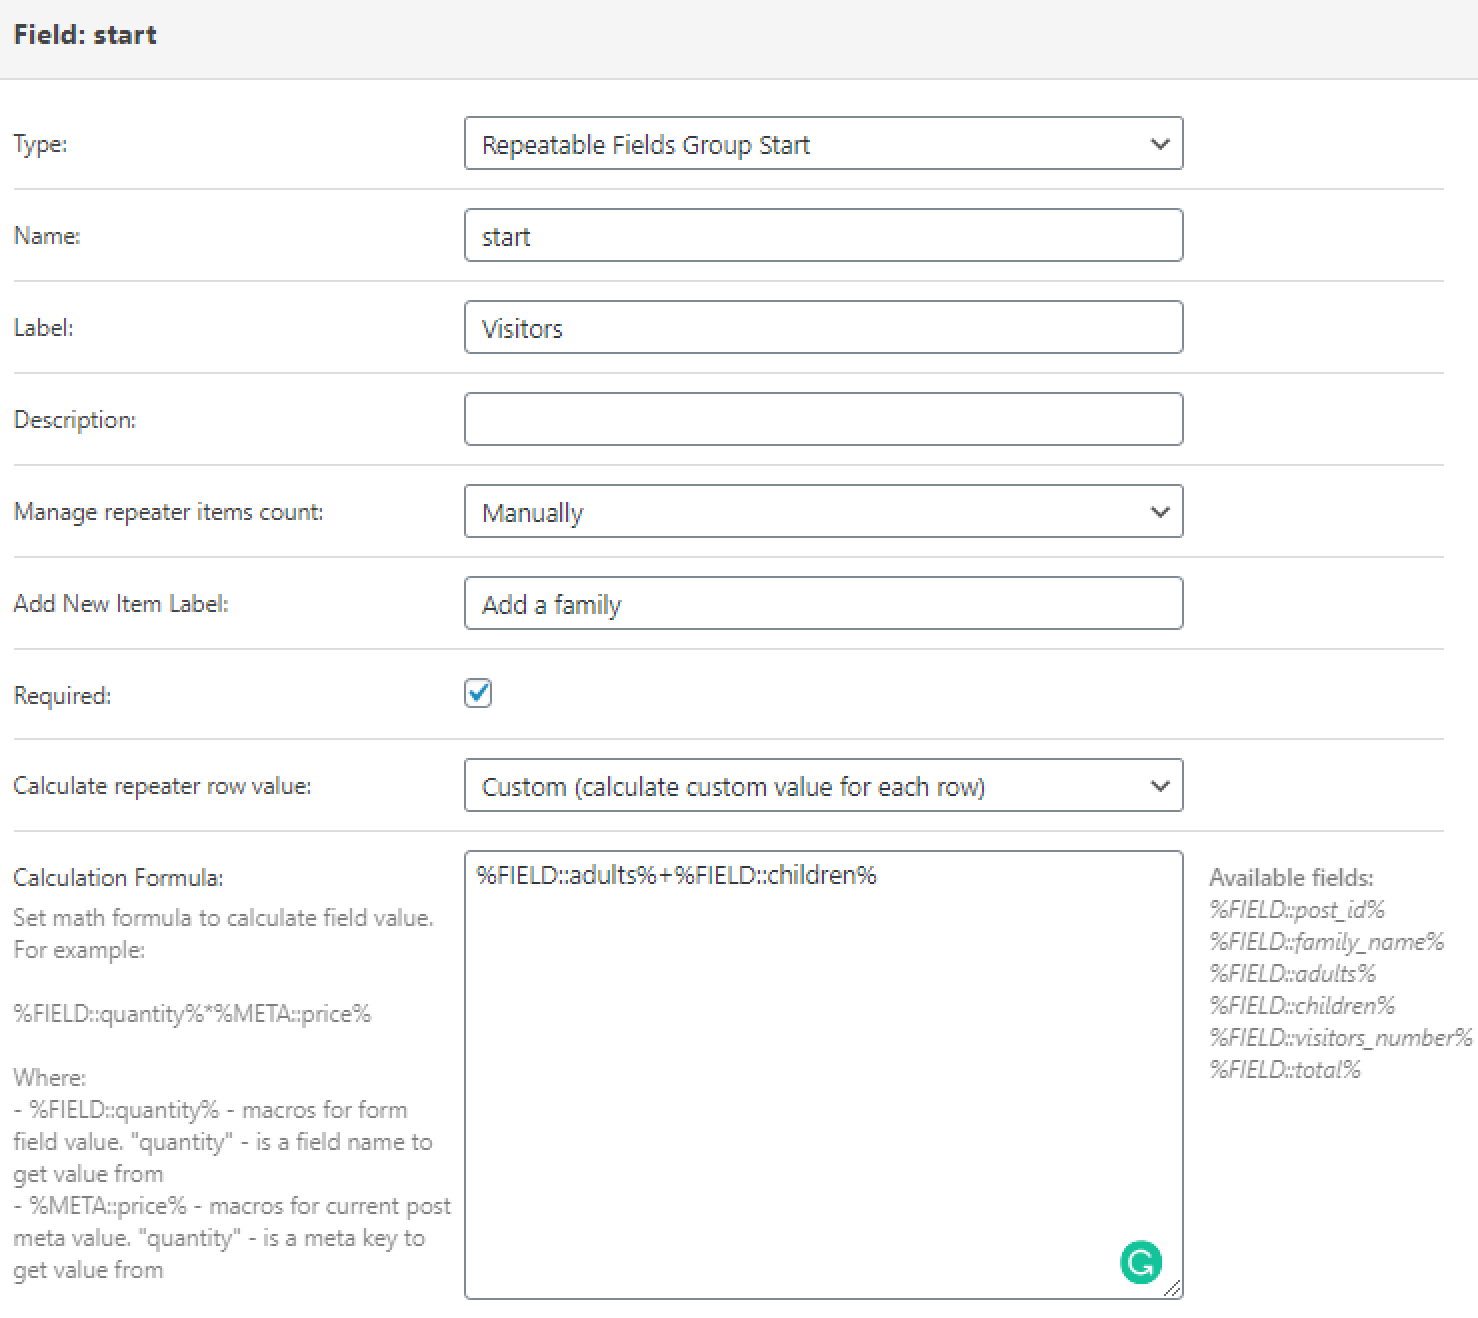
Set the Type to Repeatable Field Group Start. The other options are:
- Name. It is recommended to write the Name in lowercase and without spaces (replace them with dashes or underscores). Remember that value, you’ll need it further.
- Label. This is the name of the row that will be visible for users.
- Description. A short text that will explain to the users what this row is necessary for.
- Manage repeater items count. Using this option, you can set the way the rows of the repeater will be added. There are only two options in the drop-down menu.
- Manually means that users can click a special button and add as many rows as they need. The name of that button must be inserted in the Add New Item Label bar.
- Dynamically (get a count from the form field) means that the number of rows will be equal to the value of the form meta field you choose in the drop-down menu that goes next.
- Required defines if users can ignore this field or won’t be able to submit the form without filling it in.
- Calculate repeater row value. Here you can set how the data in the repeater will be calculated. The resulting value could be further used in other fields (for example, the Calculated fields; for details, see below).
- By Default, it will only count the number of rows a user added.
- The Custom option allows you to set a formula that will calculate the value for each row. The outcome value, in this case, will be a sum of the values of all added rows.
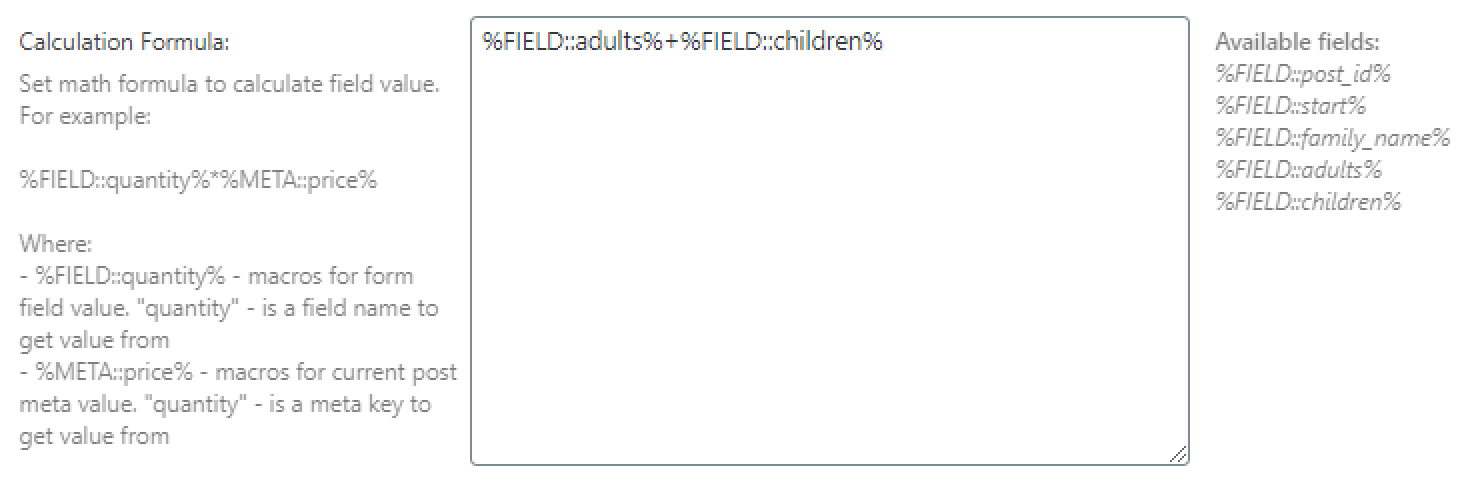
- Calculation formula. In the list on the right, there are the names of all available fields of the form. You can just copy them and create a formula. It is possible to add, subtract, multiply, divide the values, and build any other formulas with them.
- Default. Here you can define the default value for the repeater fields.
- Add Prev Page Button. If the previous page exists, this checkbox will add a “Previous Page” button to the form.
- Field Visibility. This drop-down menu allows you to determine who will see this part of the form – all users, only those logged-in or not-logged-in ones.
- Custom CSS Class allows you to customize the appearance of the form by adding custom code.
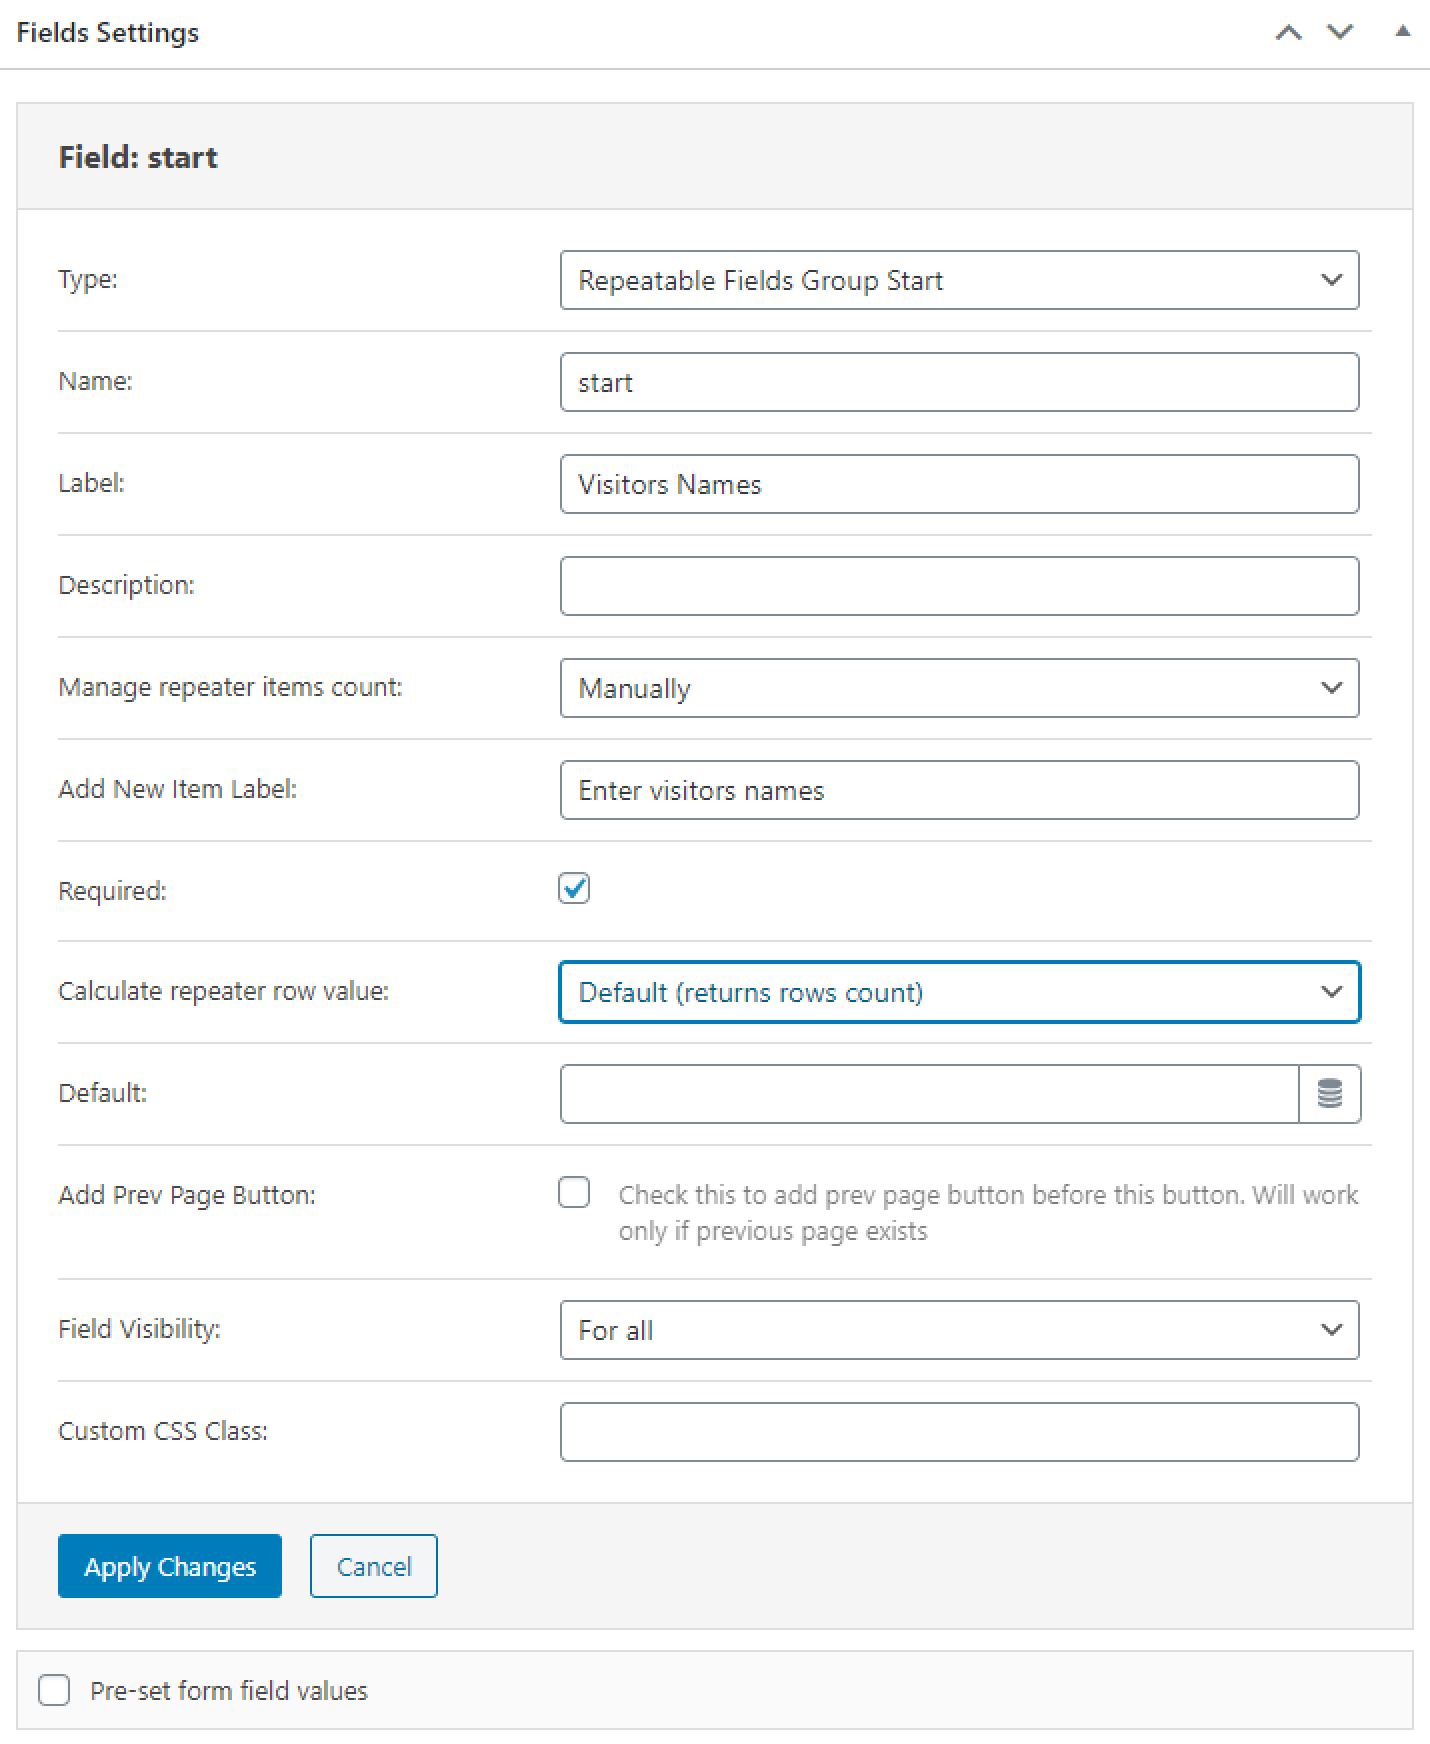
When you’re done, click the “Apply Changes” button.
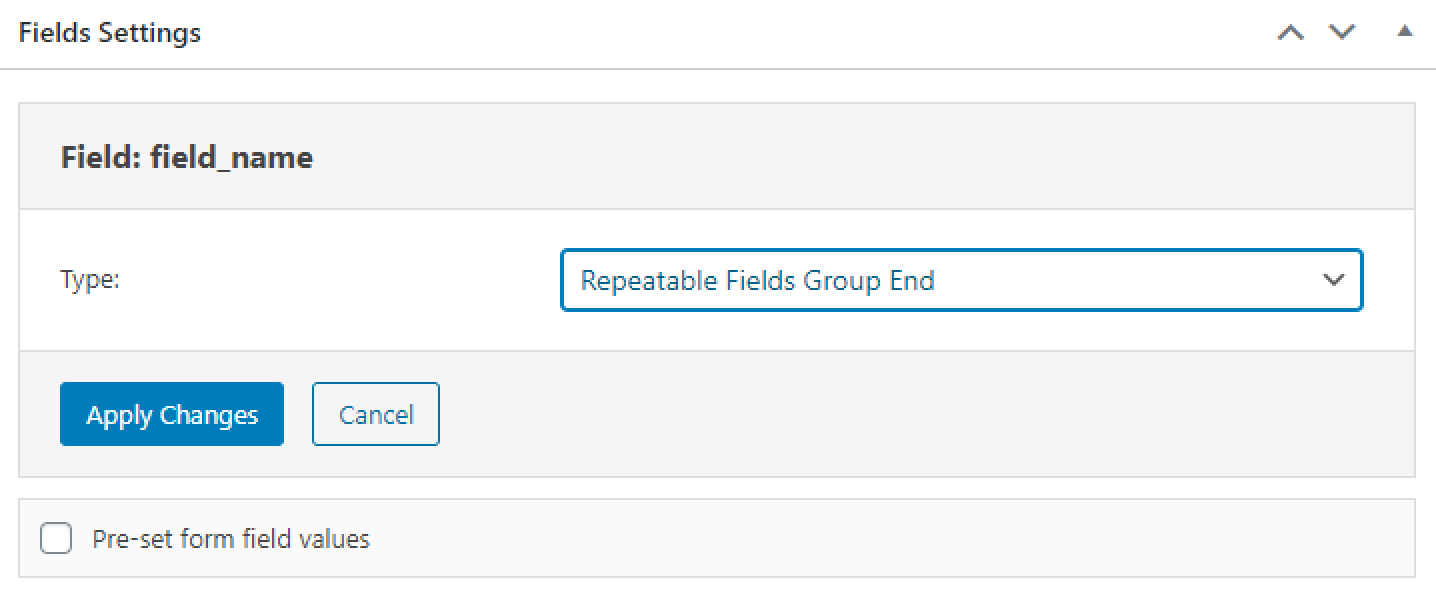
Add a new field and choose the Repeatable Field Group End type for it. Hit the “Apply Changes” button, and here it is, you have created an empty repeater.
Compose a repeater form
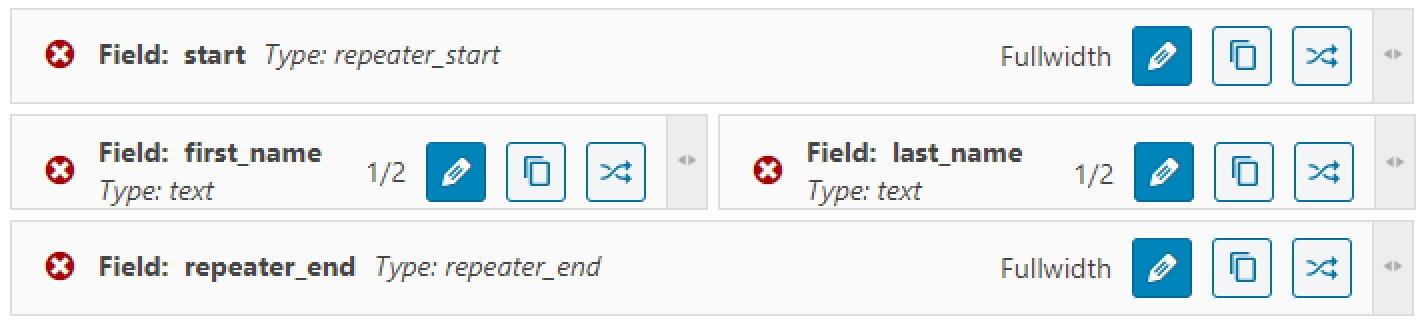
As said previously, Repeatable Field Group Start and Repeatable Field Group End are a kind of wrapping. All the fields you put between them will actually constitute the repeater form. For example, let’s put there two text fields where users will be able to type their First and Last Names.
Click the “Publish” (or “Update”) button, and let’s proceed to customization.
Customize with Elementor
Go to the Post or Page where you would like to put the form and click “Edit with Elementor.” Add the form to the page (you can find more details about the form addition in this tutorial) and go to the Style tab. There is a separate drop-down customization section for repeaters.
Combining with Calculated Fields
As was said before, the Repeatable Field Group Start field has the functionality to count the value for every row. There are two ways to use Calculated fields with the repeater in the form.
The first one is to put it inside the repeater. With its help, you will be able to do the calculations with the values users insert into fields and show the result immediately. The Calculated field will be repeated as many times as a user adds a new row and will show the resulting calculation for each of them separately.
Let’s add two Number fields and one Calculated field to the repeater and assume you want to add the numbers entered by users and show the result.
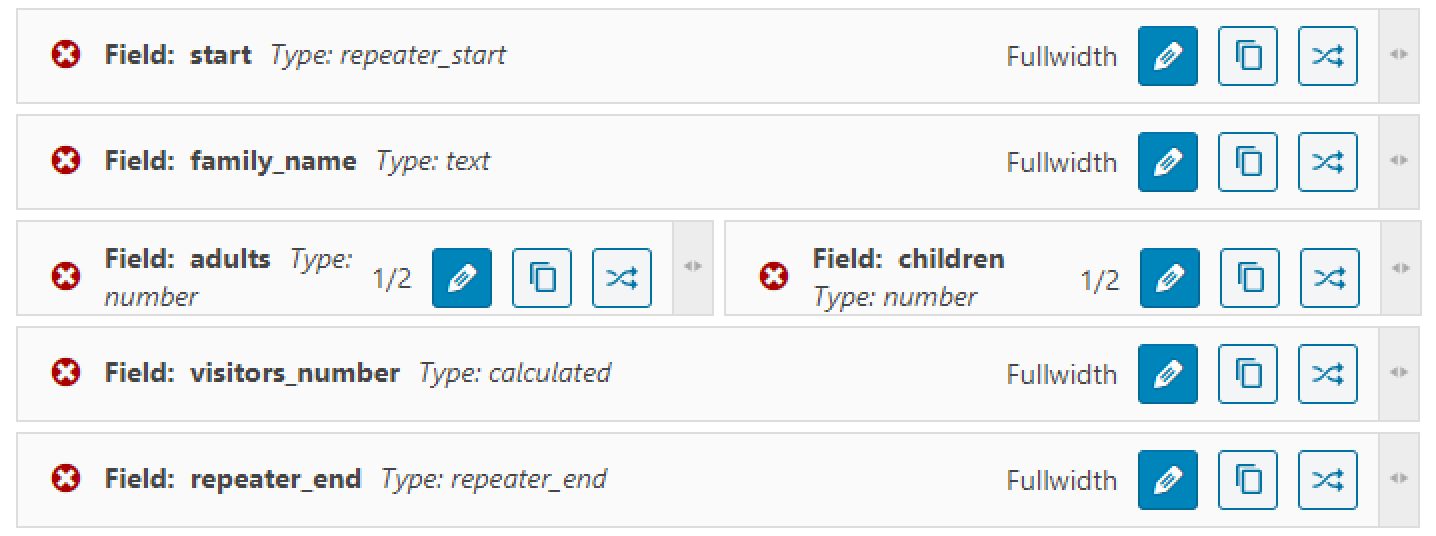
The formula will be:
%FIELD::adults%+%FIELD::children%
This means that the value of the “adults” field will be added to the value of the “children” field.
The second way is to put the Calculated field outside the repeater.
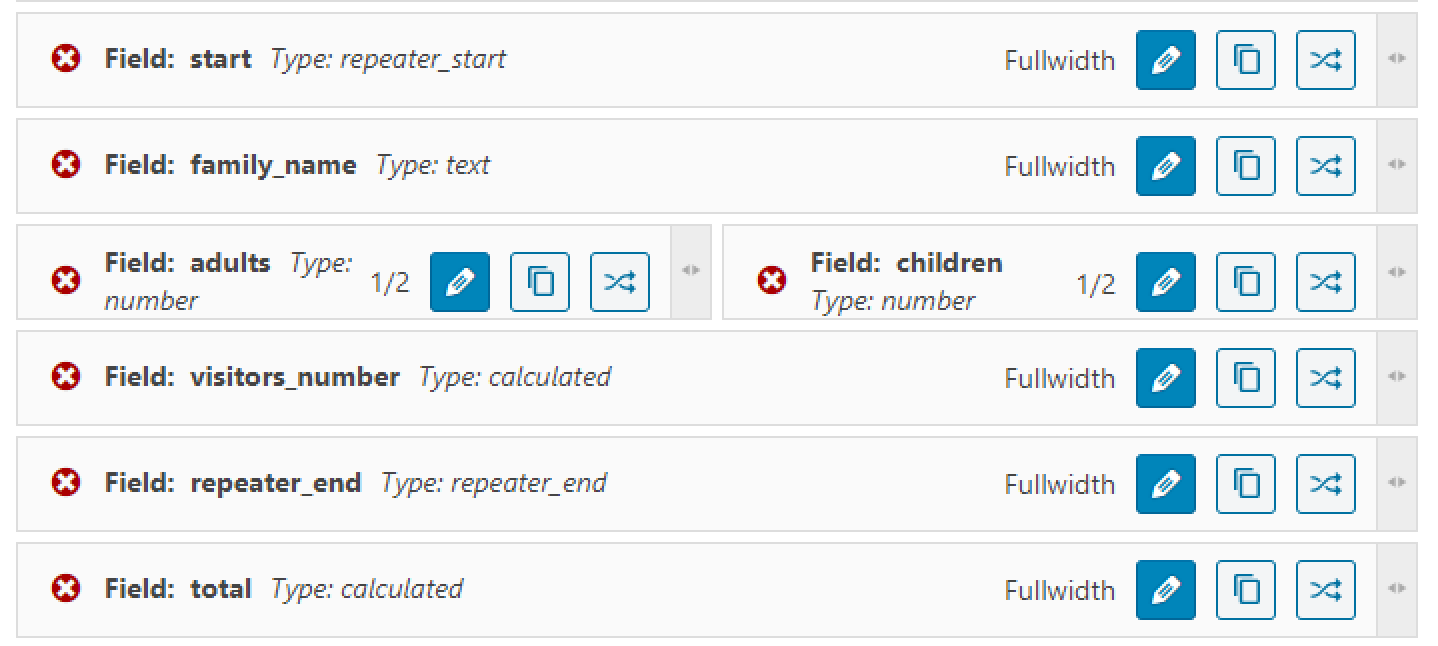
Instead of formula, just paste the %FIELD::start% value to the Calculation Formula text area.

In this case, the Calculated field will show the sum of calculations done by the repeater. The values a user inserts to the fields will be counted according to the formula you put into the Calculation Formula text area of Repeatable Field Group Start. Then those results will be summed and shown to the user.
Linking the Form and Meta Repeater Fields
The data users insert into the repeater fields of the form could be automatically displayed in the post meta fields.
Create the repeater meta field
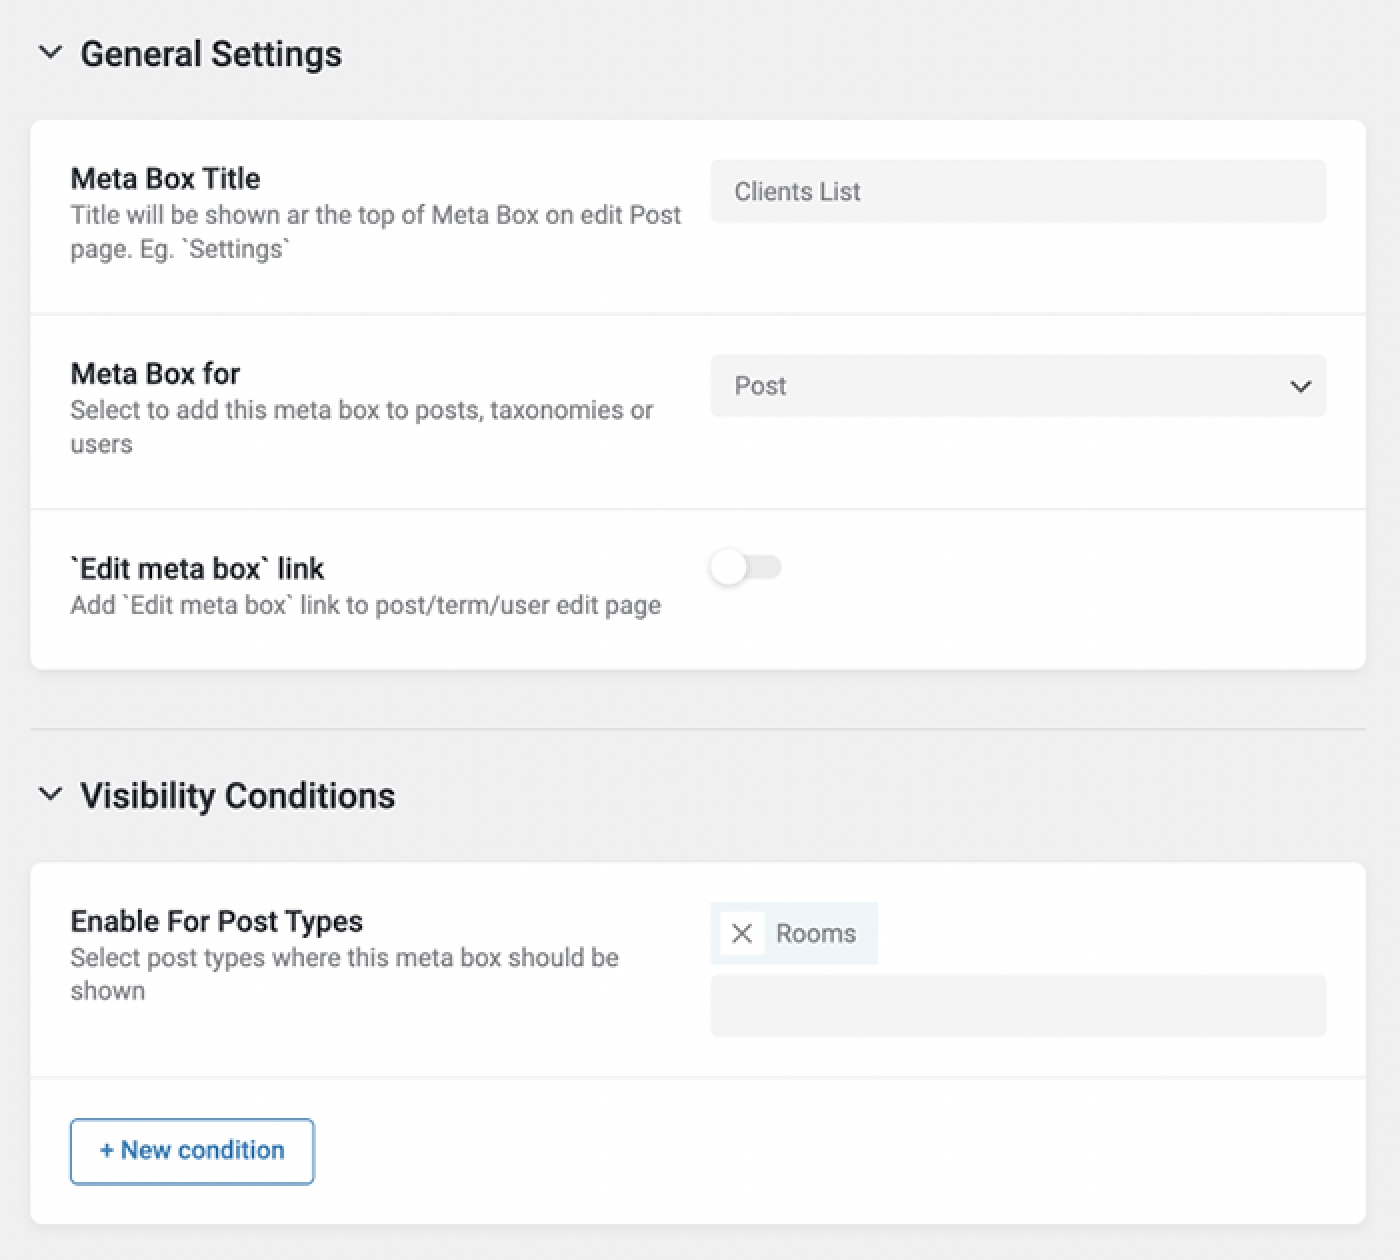
Open the dashboard, go to JetEngine > Meta Boxes, and hit the “Add New” button. Type in the Meta Box Title, Meta Box for, and choose the post type where the meta box will be shown. If you need more details, go through our Meta Box tutorial.
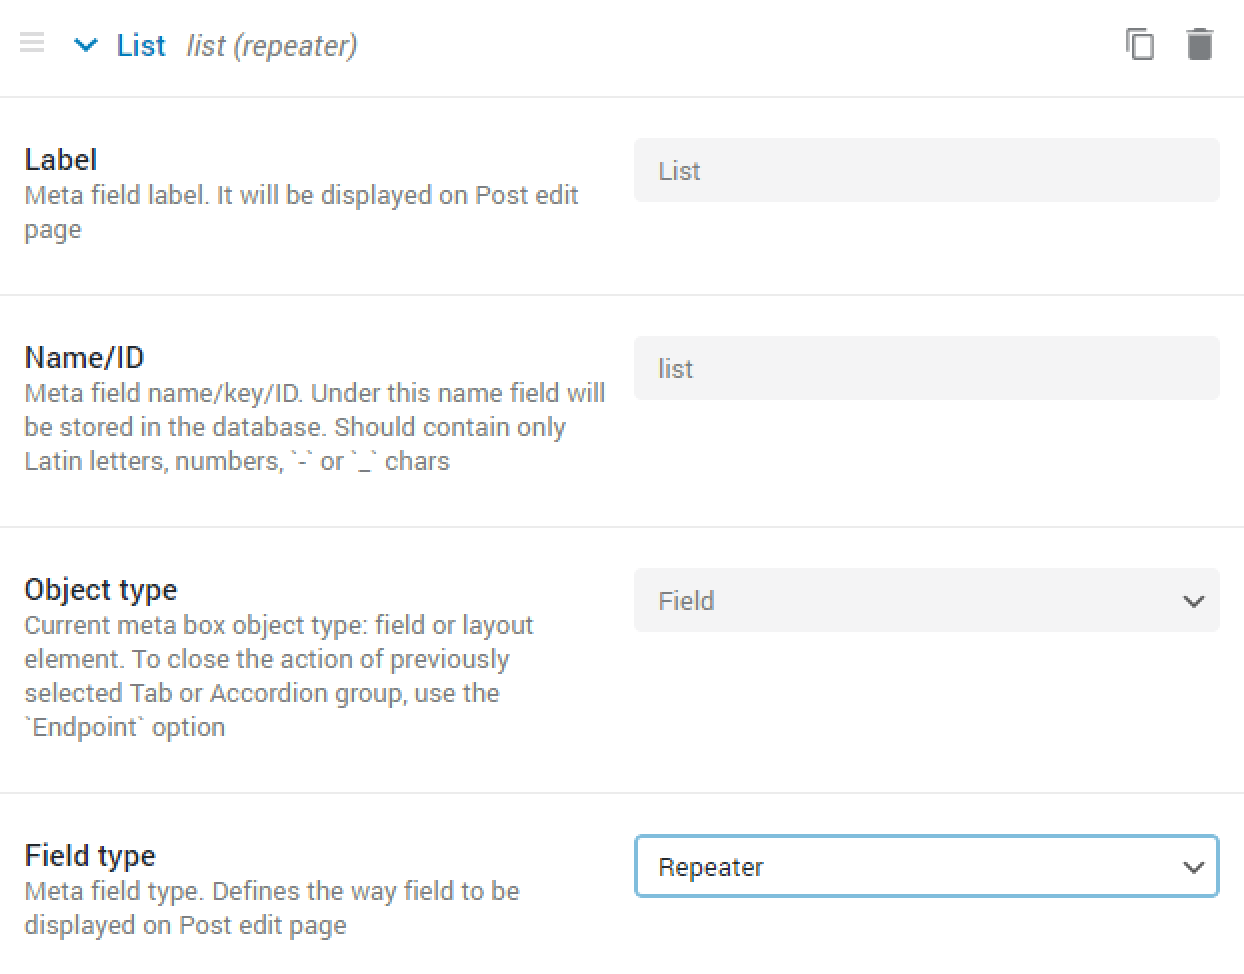
Click the “New Meta Field” button. Fill in the Label, Name/ID (you will need that name, so keep it in mind), and choose the Object type. The Field type has to be “Repeater.”
You need to add as many repeater fields as you would like to show in the meta field. In this case, there are two of them – the “First Name” and the “Last Name.” Define the Label, Name, and Type of those fields. The Type has to be similar to the form repeater fields you would like to show. Remember the names of the fields – you will need them soon.

Add Description, if needed, choose the Field width and press the “Add Meta Box” button.
Link the form
Now go to JetEngine > Forms and open the form you added the repeater to. Scroll to the Post-submit Actions / Notifications Settings window, click the “Add Notification” button and proceed to edit.
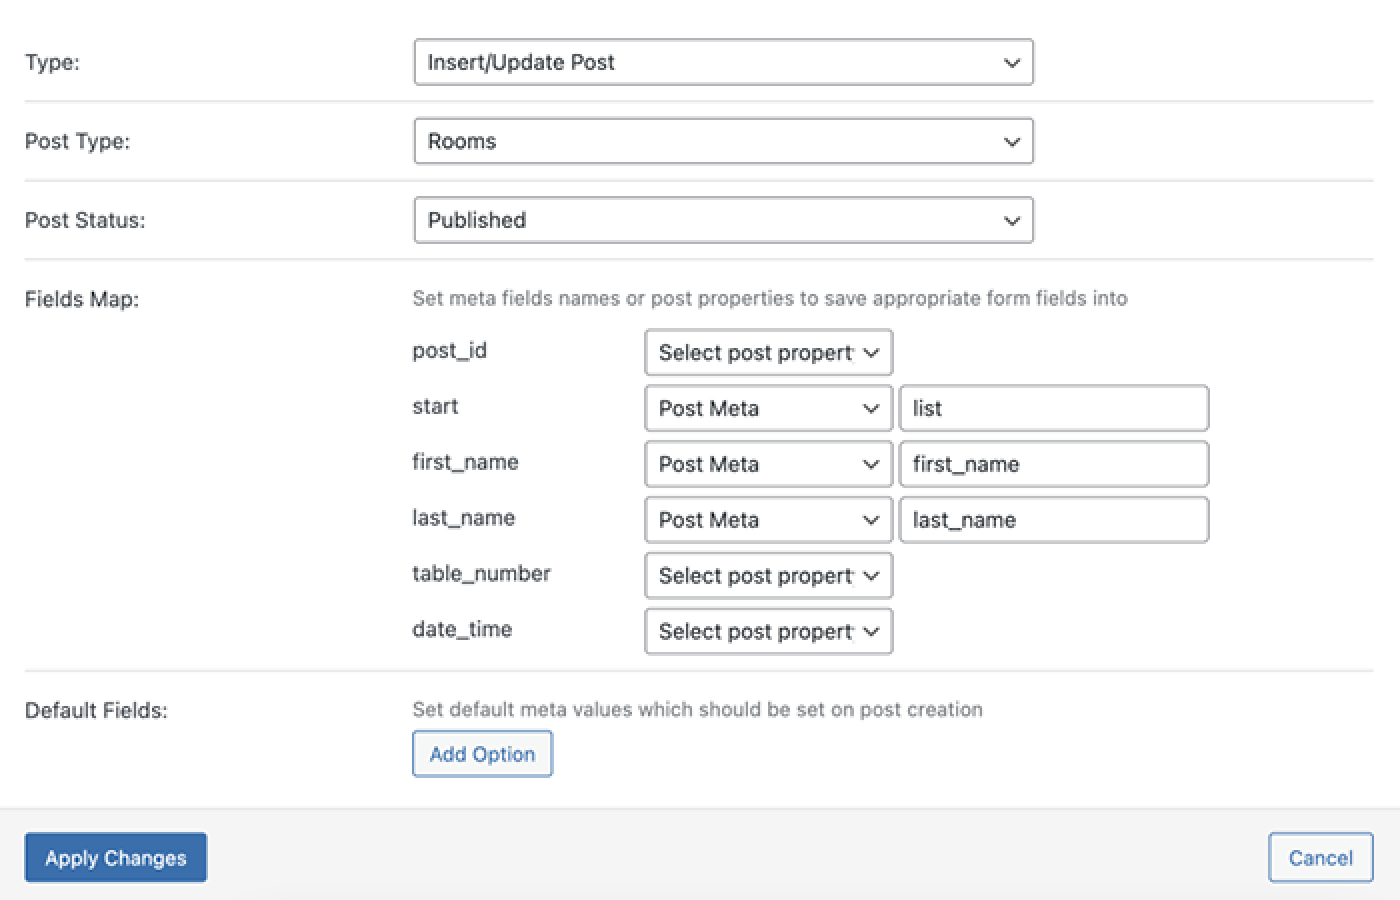
- Type. Choose the Insert/Update Post option. More details about Notification types you can learn from our Form tutorial.
- Post Type. Select the post type you would like to add this information to (it has to be the same one you chose for the meta field in the previous step.
- Post Status. In this case, the Published option was chosen, but you can choose any other.
- Fields Map. Here you can see all the fields you added to your form. For this particular case, you need the repeater ones. Choose the Post Meta option for all the fields you want to link. In the newly-appeared bars, type in the Name of the meta field and repeater fields you created previously.
Hit the “Apply Changes” button and update the form.
Check the result
Open the page or post with the form and add a few repeaters. Submit the form.
Go to the list of posts you linked the form to. After every form submission, the data you wanted to show will be saved in a new post.
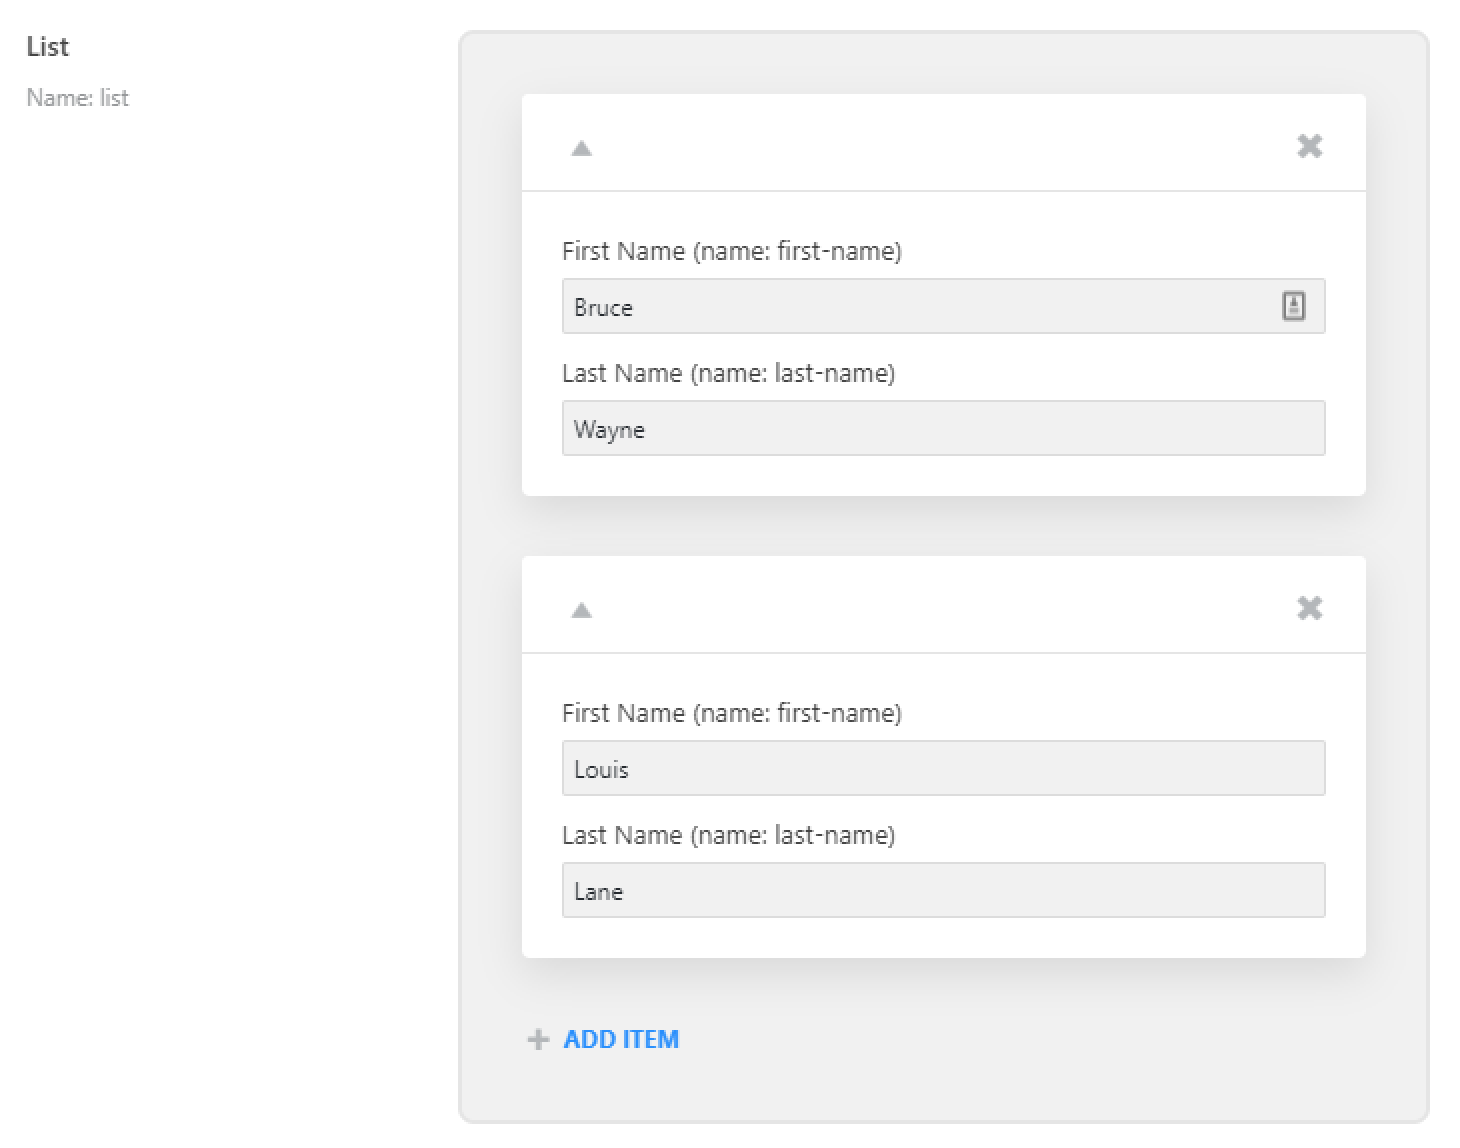
If you now open the latest post, you will see the data you typed into the form is already added to the repeater meta field.
Dynamic Repeater added to a form will make it more flexible and convenient both for you and your clients. They will be able to add as many repeaters as they need, and you won’t have to create large forms. Besides that, you can use the data elsewhere, for example, to collect emails and names.