How to Add Meta Boxes to WooCommerce Products
Discover how you can attach JetEngine meta boxes to WooCommerce products on your WordPress products.
Before you start, check the tutorial requirements:
- Elementor (Free version) or Block editor (Gutenberg)
- WooCommerce plugin installed and activated
- JetEngine plugin installed and activated
Meta Boxes allow you to make WooCommerce Shop management more convenient. Broaden the information about the products and attach fields according to which you can filter the content. Personalize the control settings of your website using the JetEngine plugin and its Meta Boxes.
Collect all the needed meta fields in one meta box and apply them only to the desired sections.
Adding New Meta Box
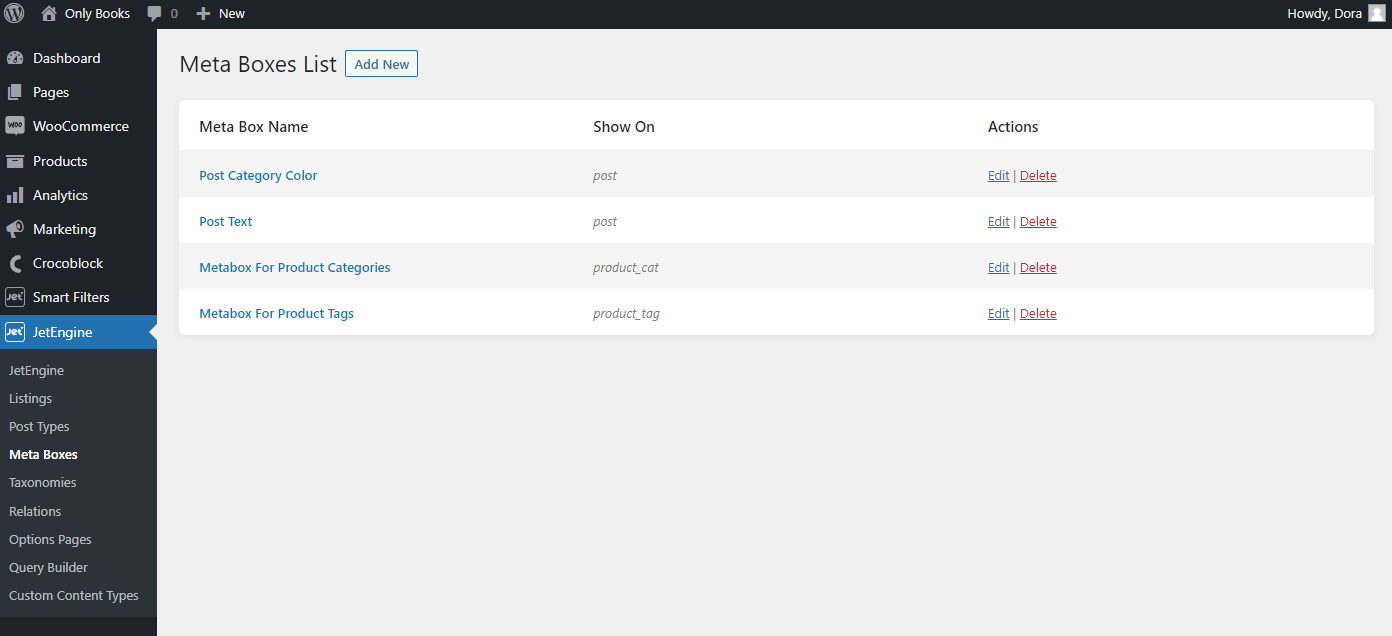
Navigate to JetEngine > Meta Boxes and click on the “Add New” button.
General settings
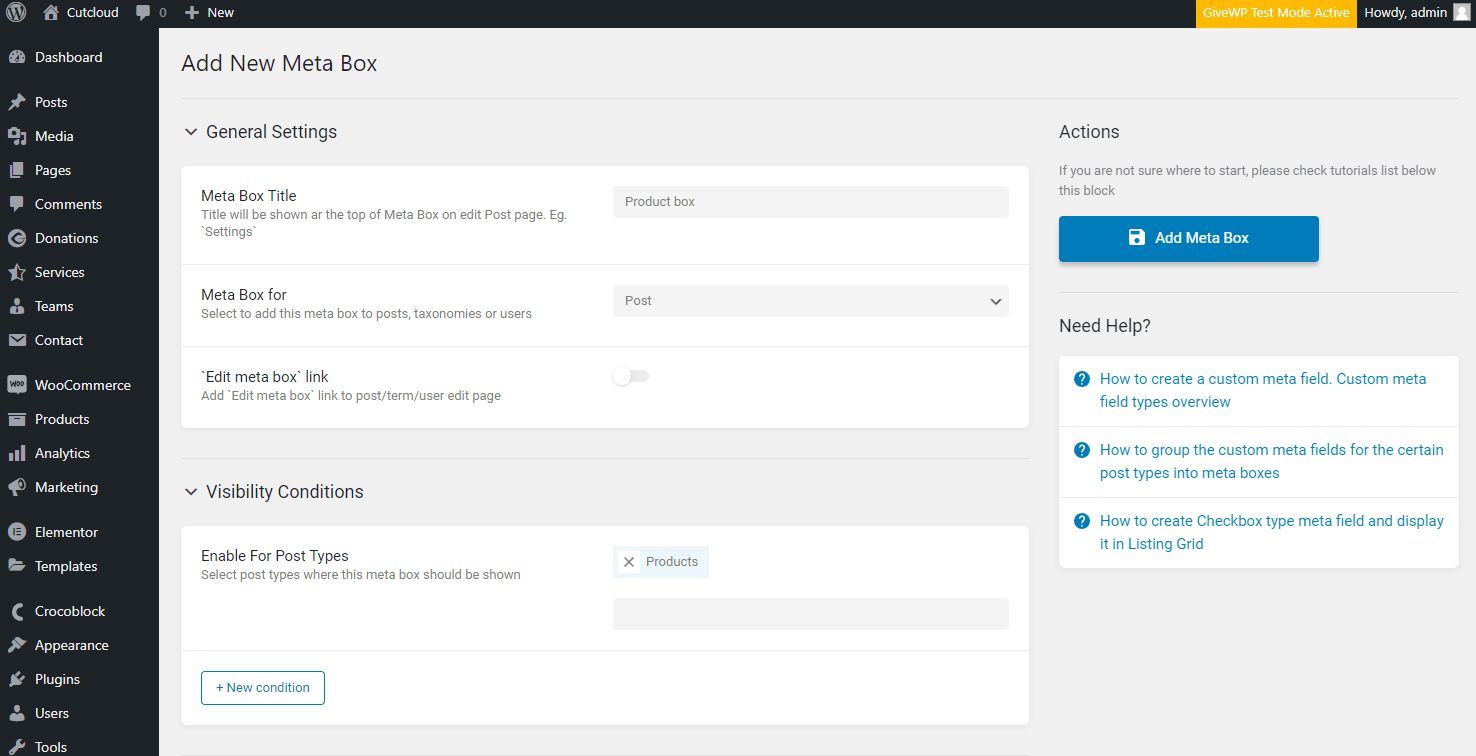
- Type a Meta Box Title that will be displayed in the post/taxonomy/user profile the meta box will be attached to;
- Appoint which content type will be the Meta Box assigned to in the Meta Box for drop-down list;
- Toggle the ‘Edit meta box’ link to display a gear button during the product customization. When clicking on the button, it will redirect you to the meta box editing.
Visibility Conditions
Select the “Products” option in the Enable for Taxonomies field in the Visibility Conditions tab. More about the Visibility Conditions you can read here.
Meta fields
The following vital customization point is to add Meta Fields. You can set as many meta fields as you need to make the product editing more comfortable.
There are already some WooCommerce default meta fields attached to the products. Set some custom meta fields that will also be displayed during product editing.
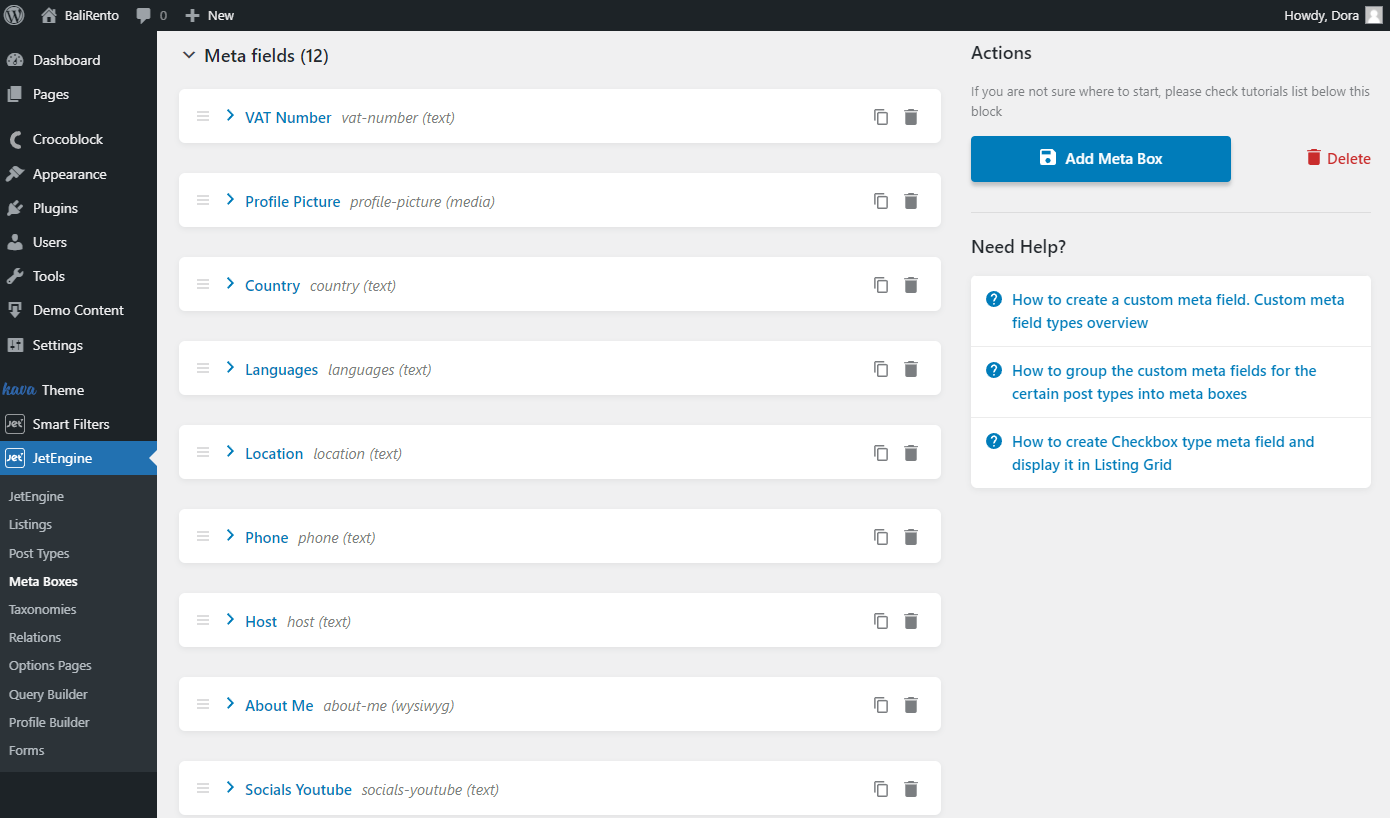
Do not hesitate to create a new meta field if needed. “Add Meta Box” by pushing the similarly named button.
Go to Products > All Products and select any product to check the created meta boxes. Open the product editor, and there they are, the meta fields that were added.
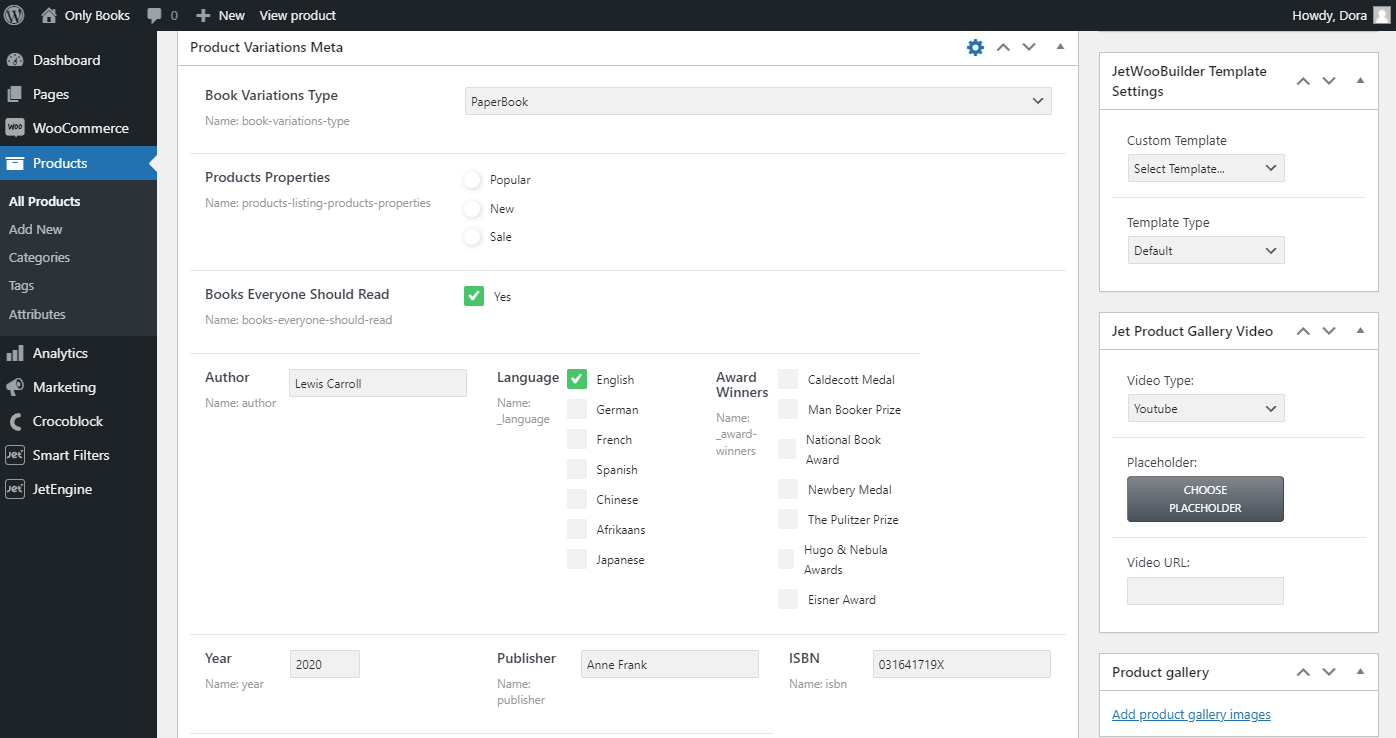
Place there the desired content and upload the product. Enhance all the needed products with meta field content.
Display Product Data Added with Metaboxes
Now let’s find out how we can display the meta field-inserted information on the front end.
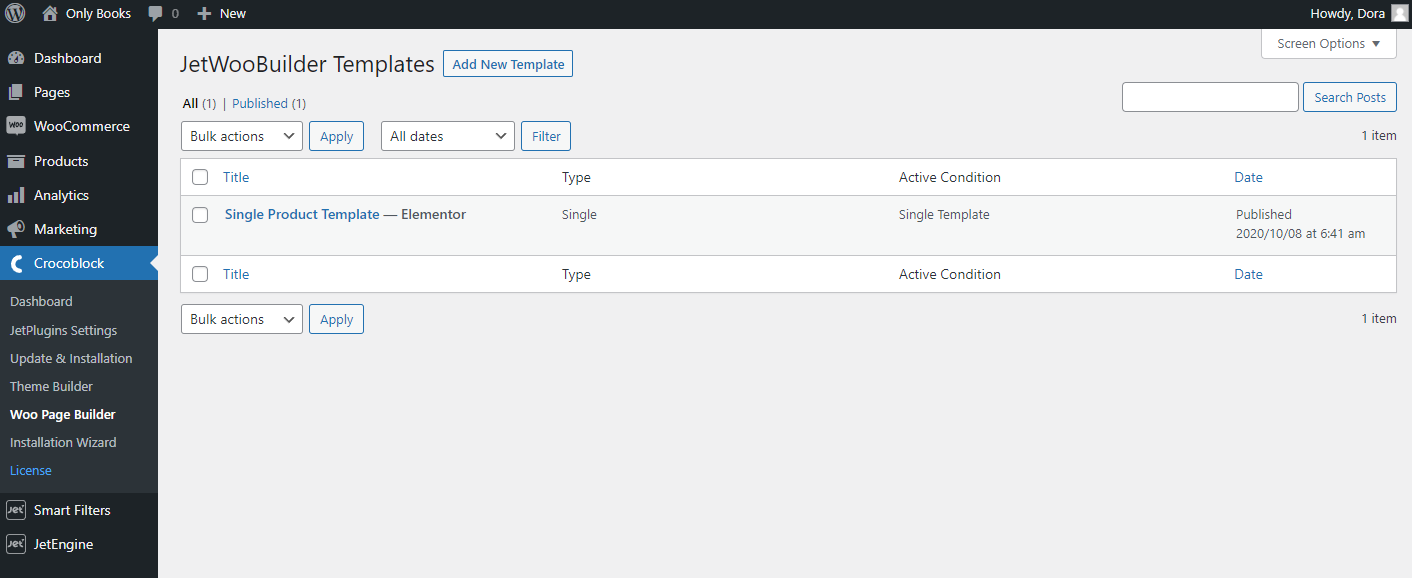
After adding a meta field to the product, we can display it using a Product Listing Item or a Single Product Template. To check the last one, head to Crocoblock > Woo Page Builder and find the template to display the products.
Show the product meta fields with the widgets that can pull out the meta data. For example, you can use the Price List widget from the JetElements plugin to display the meta field with the help of the Dynamic tag feature.
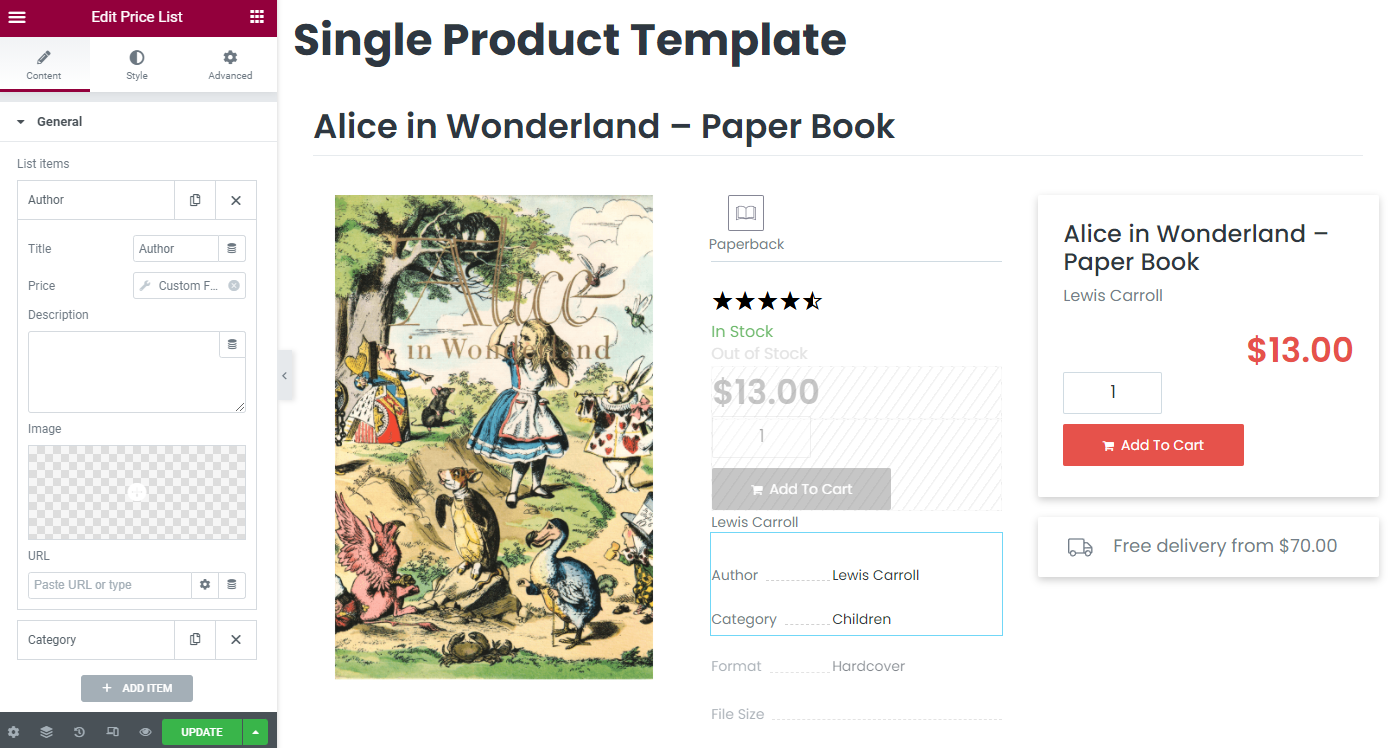
Set all the items by completing all the fields and putting the needed Custom Field as the Price via JetEngine Dynamic Tag. Customize the information in the Elementor, and click on the “Update” button. Go to the product page to check the results.
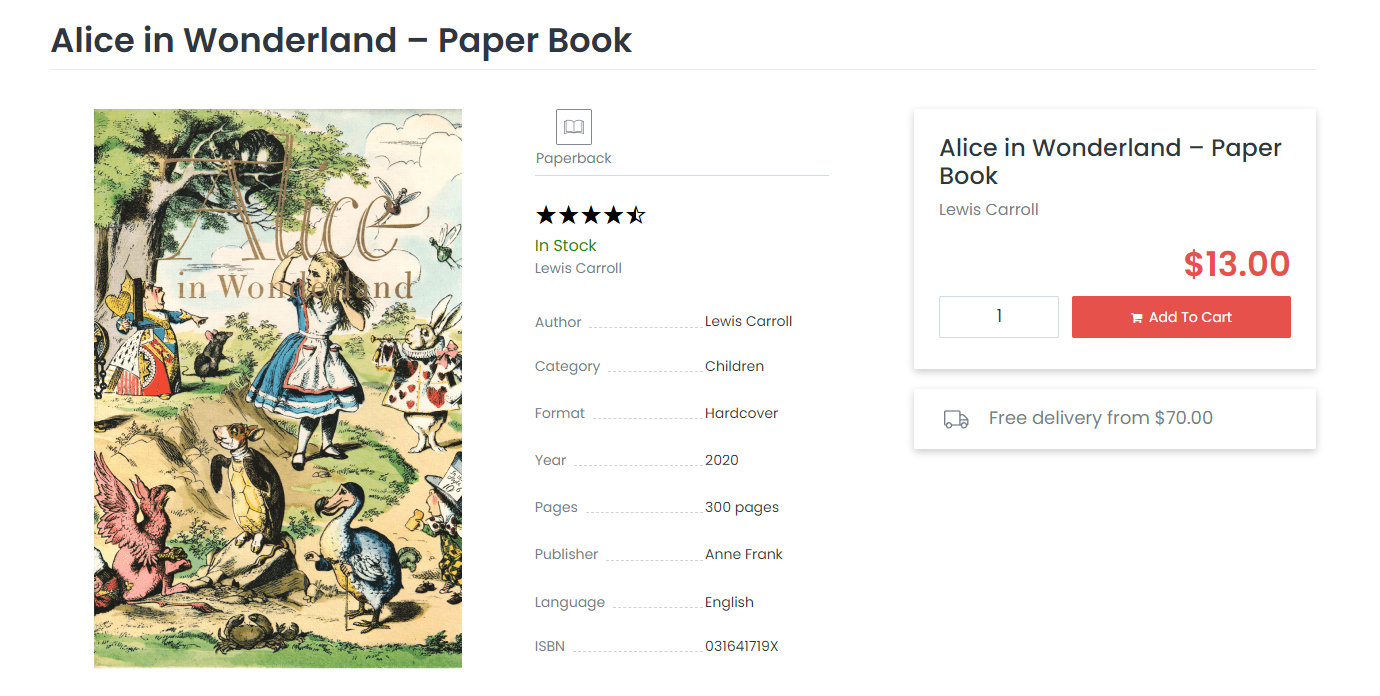
For now, all the WooCommerce products accompanied by the additional meta field input information will be displayed the same way. Apply the Dynamic Field widget whenever you want to display the Meta Box content.
Read about how to add the needed meta fields to the WooCommerce categories.
Apply Meta Data to Other Sources
Use products meta boxes data in smart filters
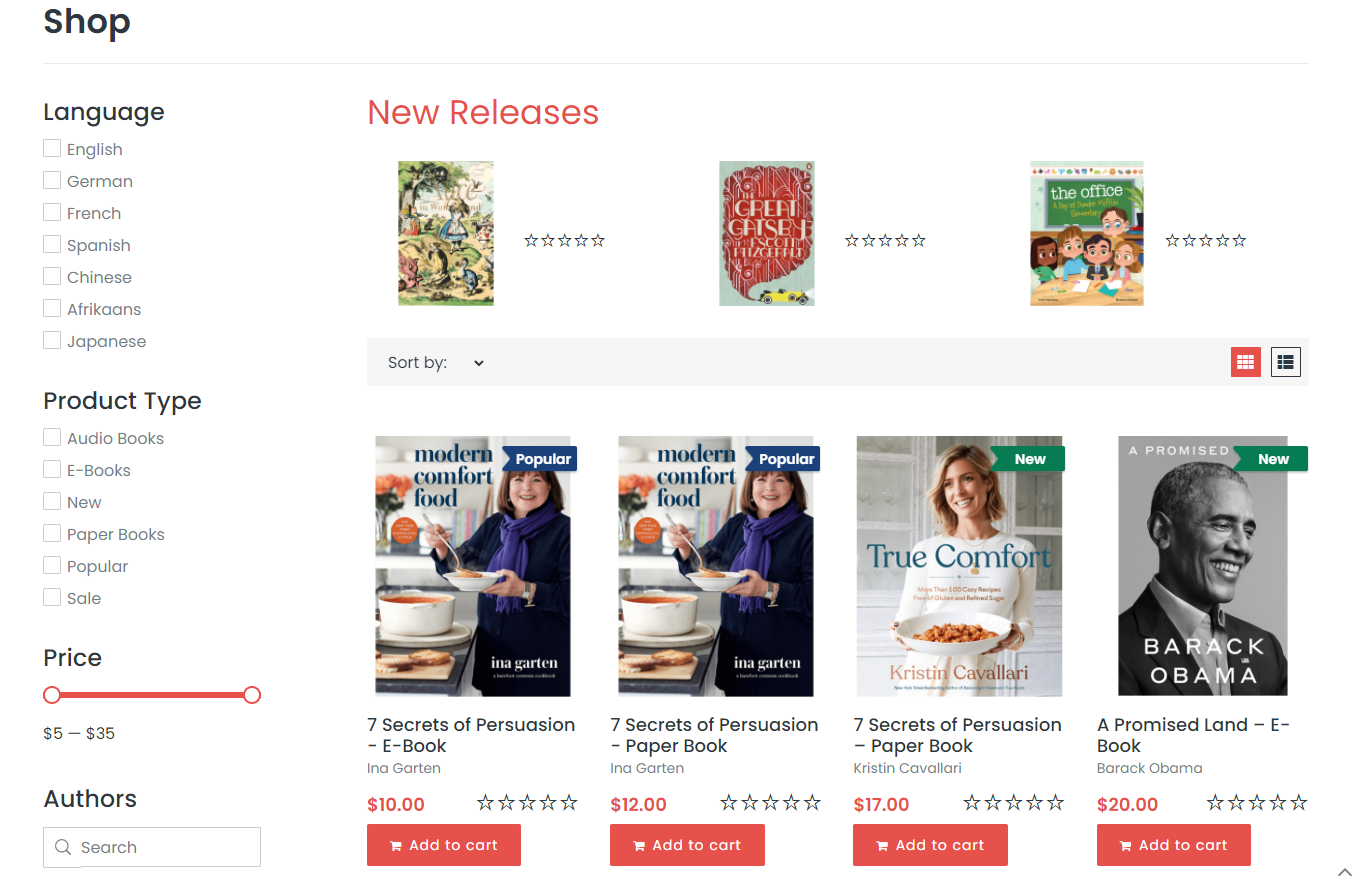
If you have a Shop Page, you may want to filter the content with meta fields. You can do it freely using the JetEngine meta fields and JetSmartFilters combo.
For instance, let’s create a checkboxes filter for the language of books.
Navigate to Smart Filters > Add New.
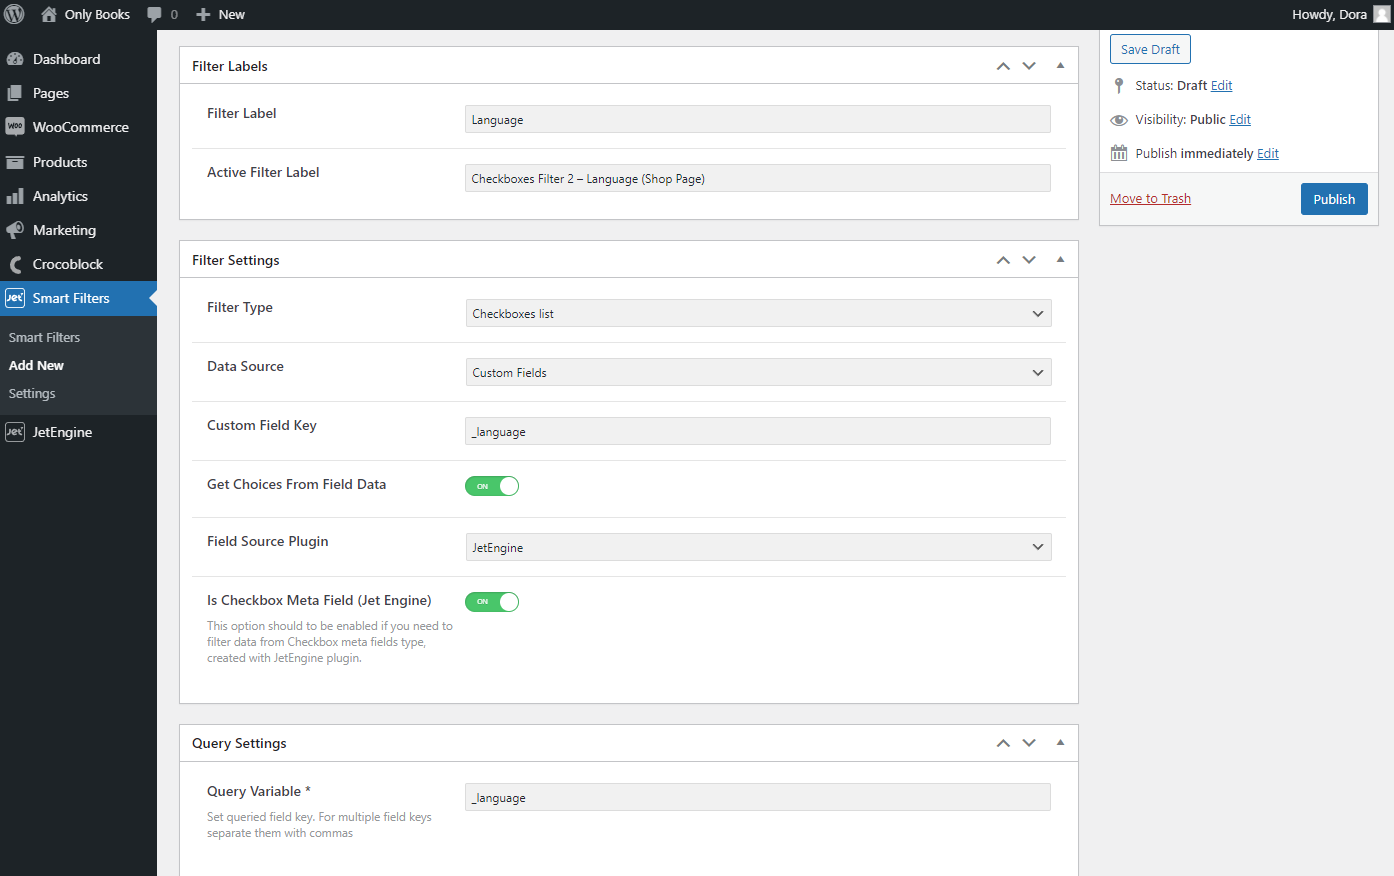
- Type the Filter Label and Active Filter Label that will define the checkboxes filter;
- Set Filter Type; in this case, it can be a Checkboxes list that will show several options to choose from;
- Use “Custom Fields” as Data Source for the filter and put the Custom Field Key that you have written in the Name/ID field while creating meta fields;
- Enable Get Choices From Field Data to pull out the subfields of the meta field;
- Pick the Field Source Plugin, and set the JetEngine value;
- The Is Checkbox Meta Field toggle is responsible for filtering the data from the Checkbox meta fields type;
- Complete the Query Variable field with the Name/ID field. This field is required.
Once you are ready to fill out the fields, publish the filter and proceed to the Crocoblock > Woo Page Builder. Create or edit the existing Shop Page Template.
Add the Checkboxes Filter widget to the page and set the created filter as the source.
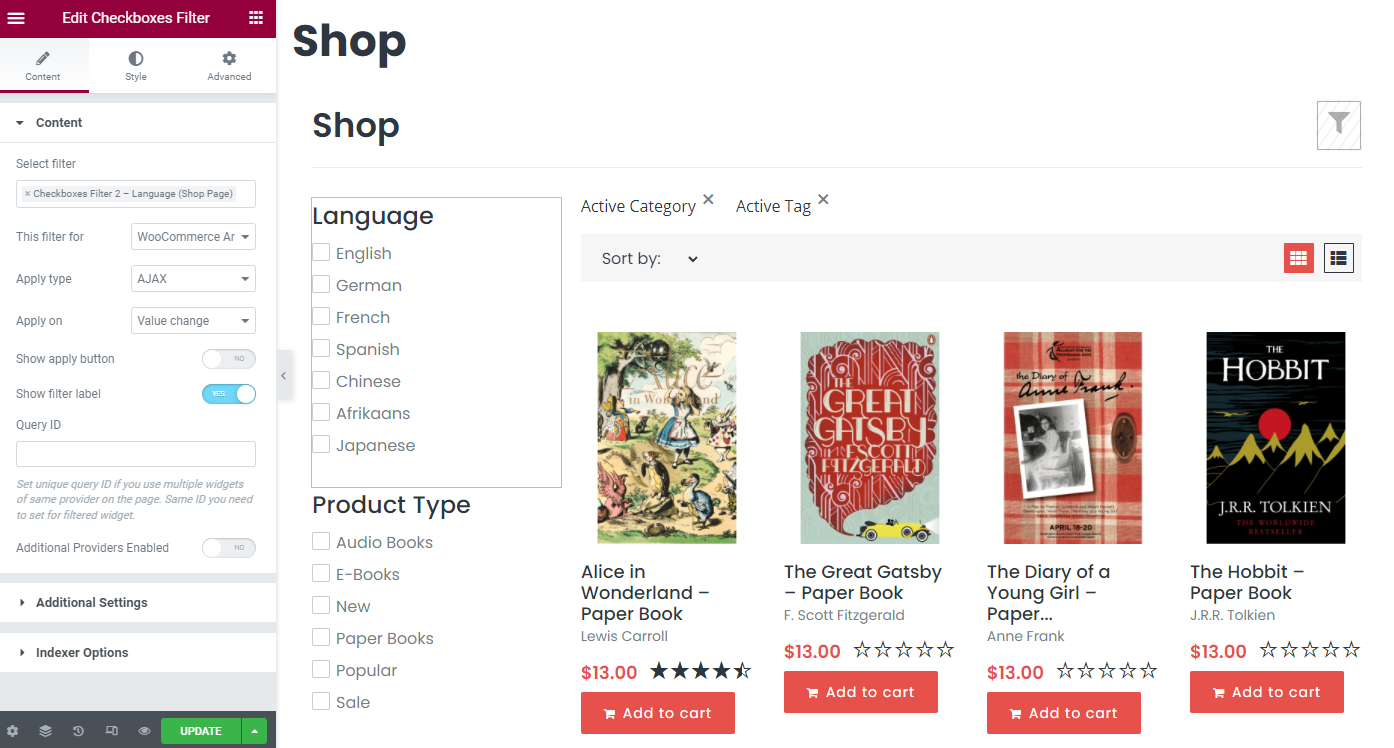
Adjust all the required settings, update the page, and check the results on the front end.
 Set a query for products based on the Meta Boxes’ meta field data
Besides the filter customizations, you can query the products by meta field options. Go to JetEngine > Query Builder and add a new query.
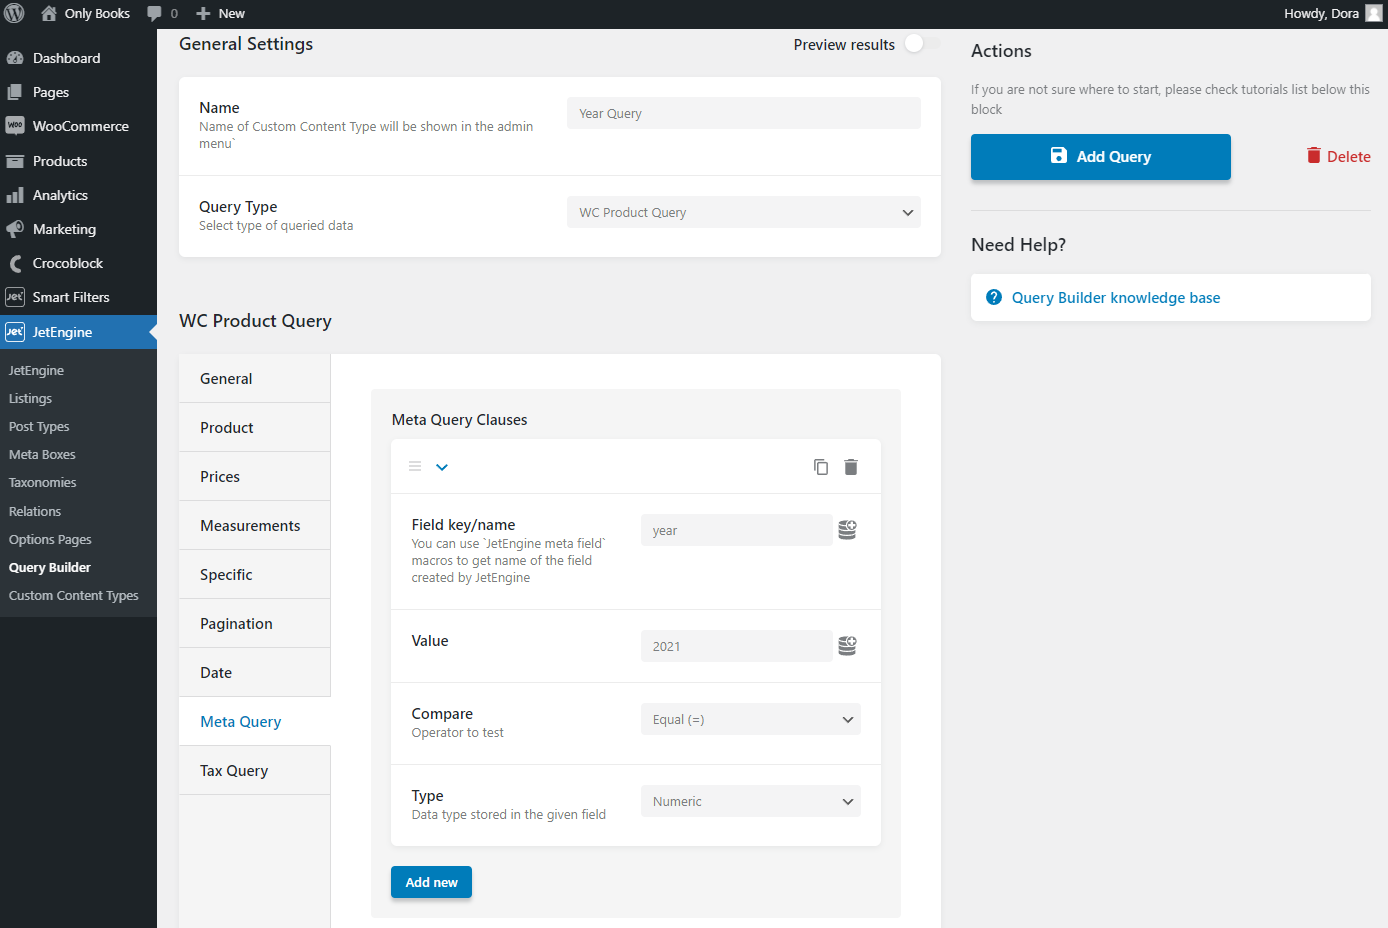
Begin with the General Settings by typing Name and choosing “WC Product Query” as Query Type. For instance, we will create a Year Query.
Since we don’t need General WC Product Query settings, you can adjust or skip them and proceed to the Meta Query Tab.
- Fill in the Field key/name. Find this field in the created meta box under a Name/ID label;
- Set the Value you want to compare. Note that the written value should be contained in some of the products. Otherwise, the value can’t pull out the missing data;
- Pick the Compare option that will be operated on the page;
- Define the Type of value you wrote down. Now we choose “Numeric” as the Value is “2021.”
Click on “Add Query” once all the settings are proper for you, and head to the Shop Template.
Place the Listing Grid widget to display the queried products.
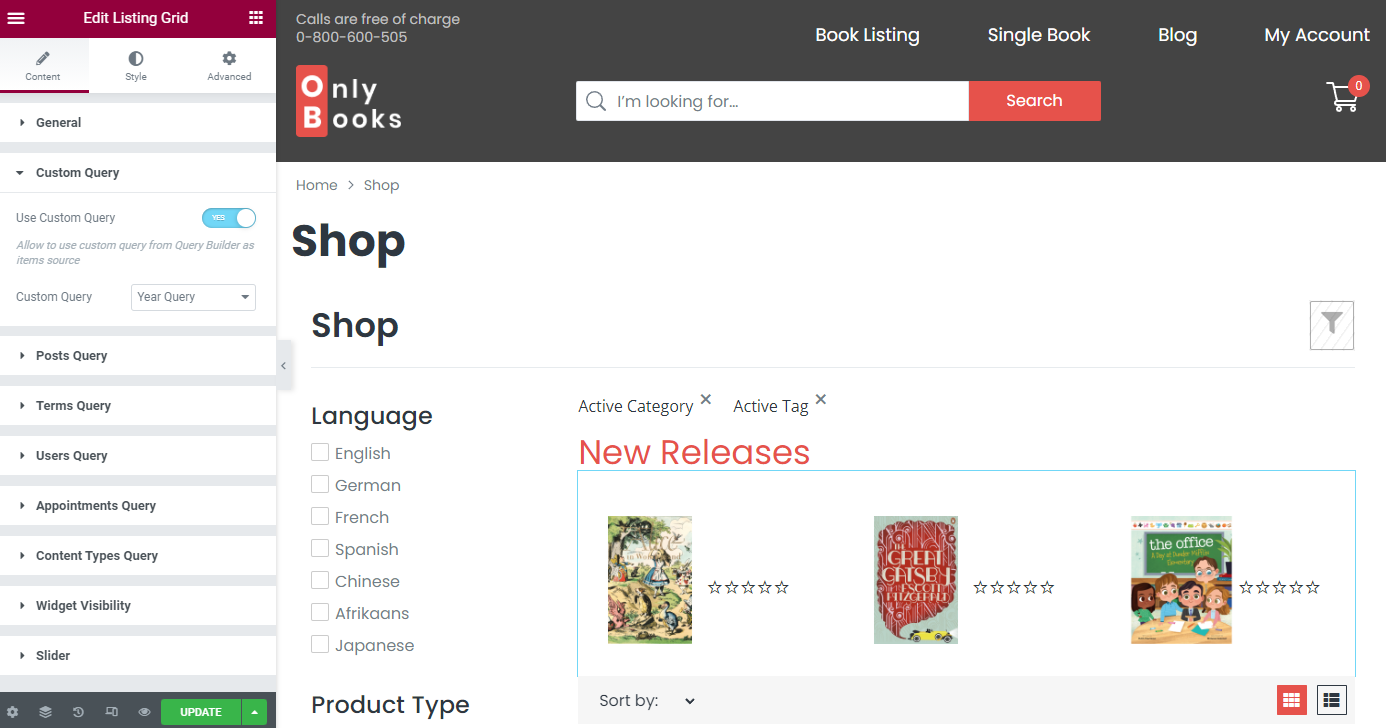
Set the General Settings and pay attention to the Custom Query field. Enable Use Custom Query to connect the newly created Custom Query.
When the editing is done, update the page and check the changes on the Shop Page.
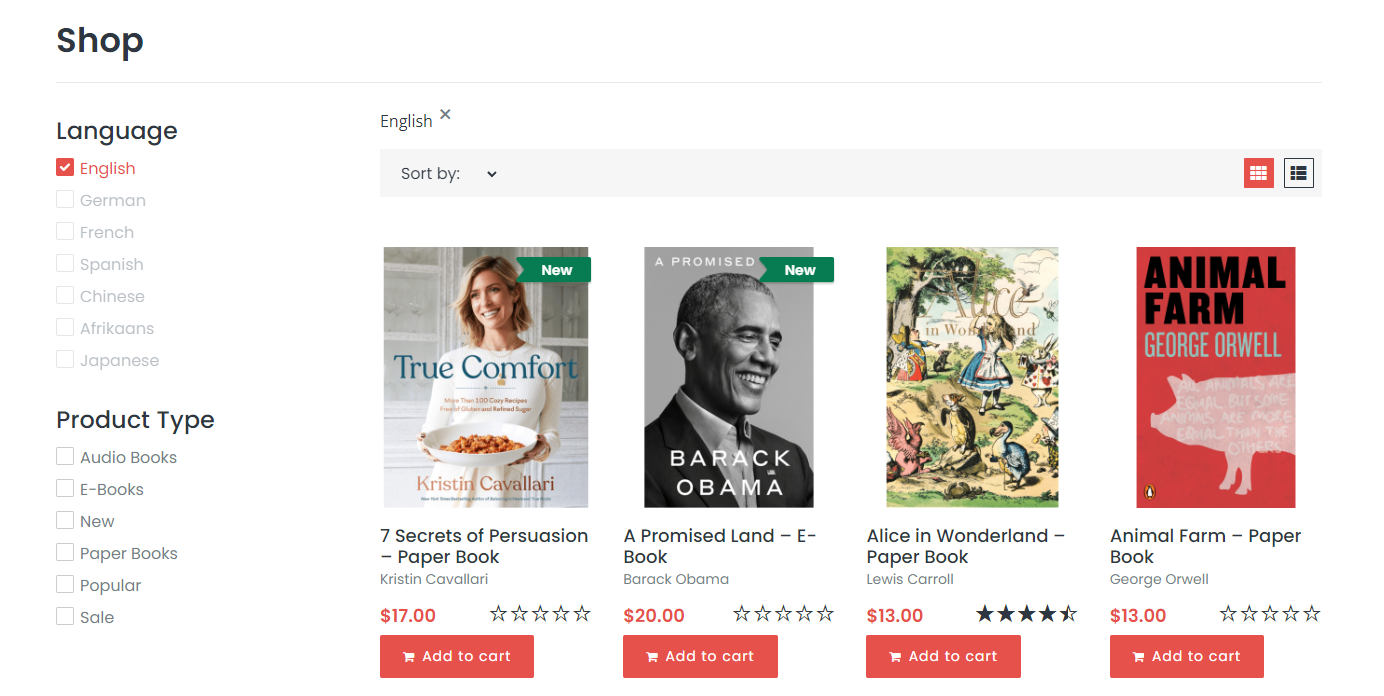
There they are, books that we have set as released in 2021.
Everything is ready. You have learned how to add Meta Boxes to WooCommerce products, filter products using meta data, and query them by meta field options.