How to Limit User's Access With Profile Builder
This tutorial describes how to limit user access to the WordPress Dashboard, account, and profile subpages and set the maximum allowed post count for different user roles using the JetEngine Profile Builder feature.
You can manage access for default user roles provided by WordPress, but if you want to add custom roles, you can manage them with different plugins, such as the free third-party User Role Editor.
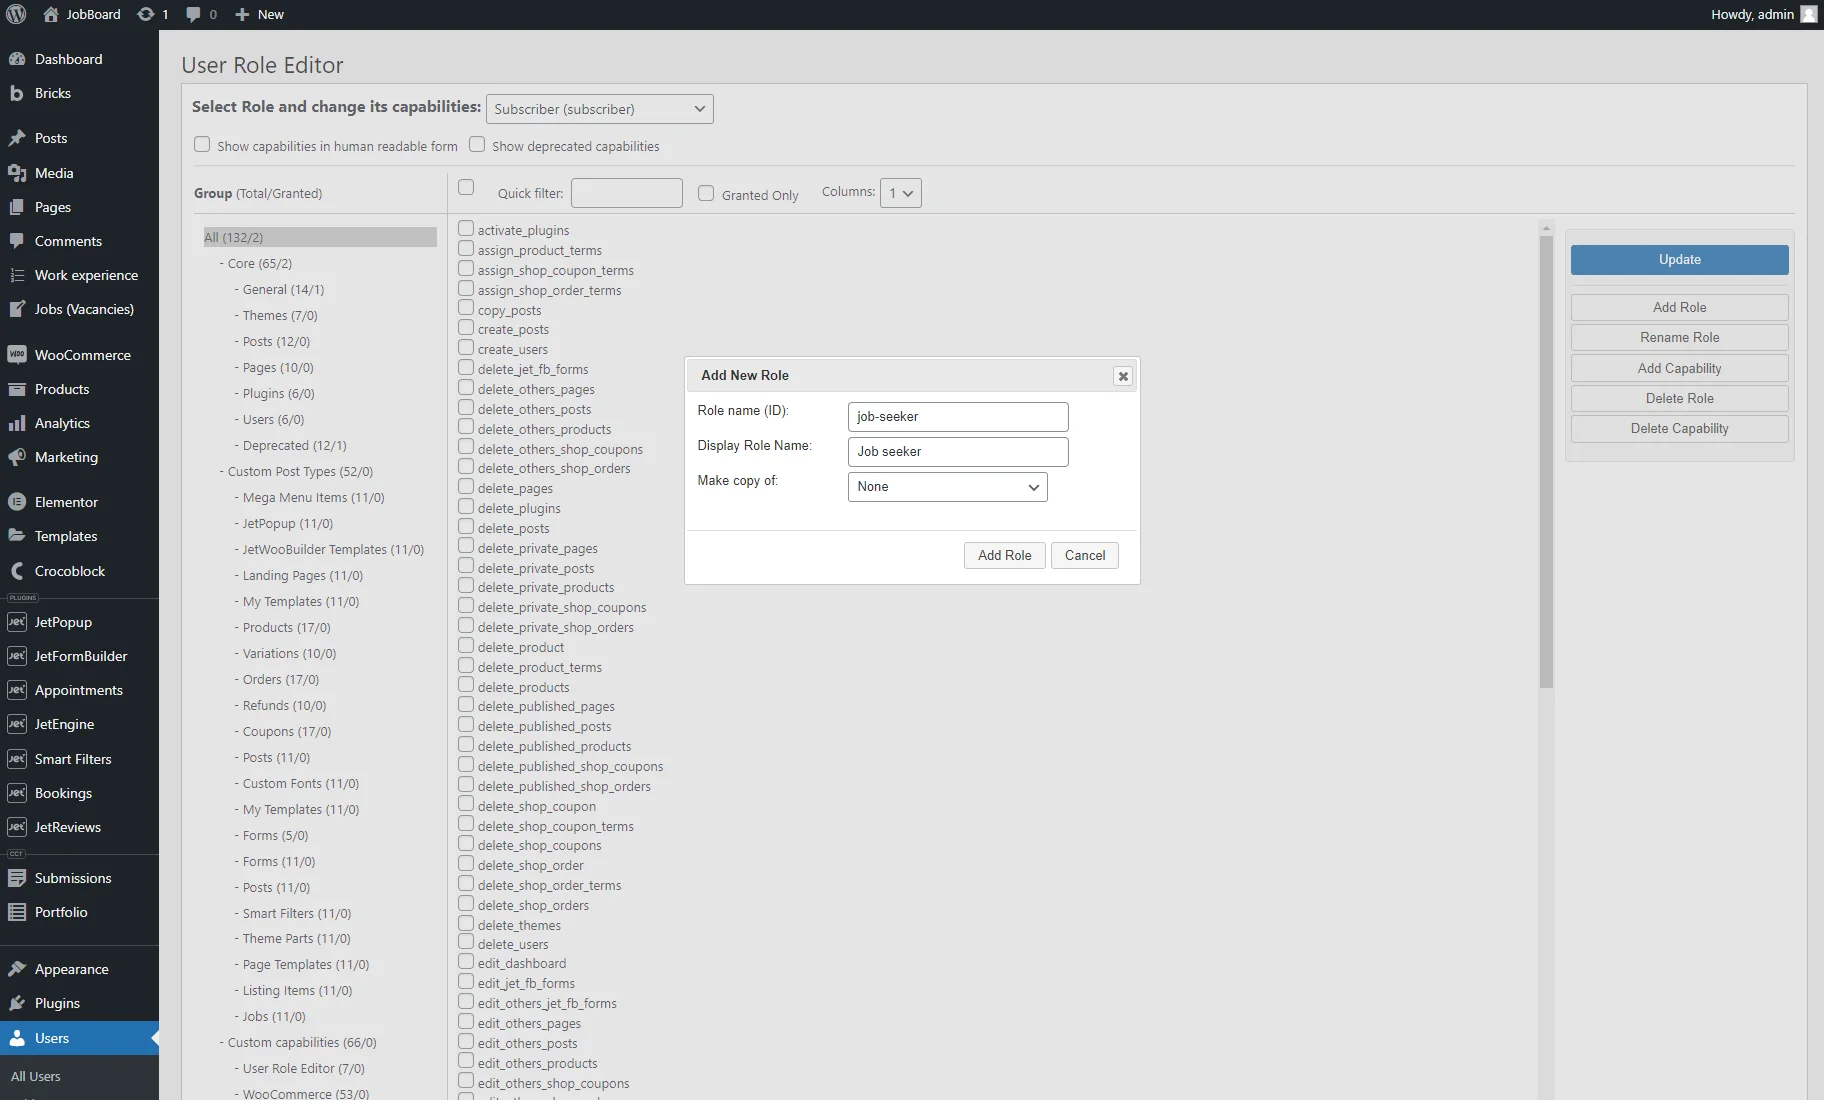
To add new roles with the User Role Editor plugin, install and activate it, proceed to the Users > User Role Editor tab, and click the “Add Role” button from the toolbar on the right side. In the “Add New Role” pop-up, enter the Role name (ID) (ensure the ID consists only of letters and numbers and doesn’t include spaces), the Display Role Name, and hit the “Add Role” button.
For this tutorial, we created the “Job Seeker,” “Company,” and “Employee” user roles.
Limiting the User’s Access to the Dashboard
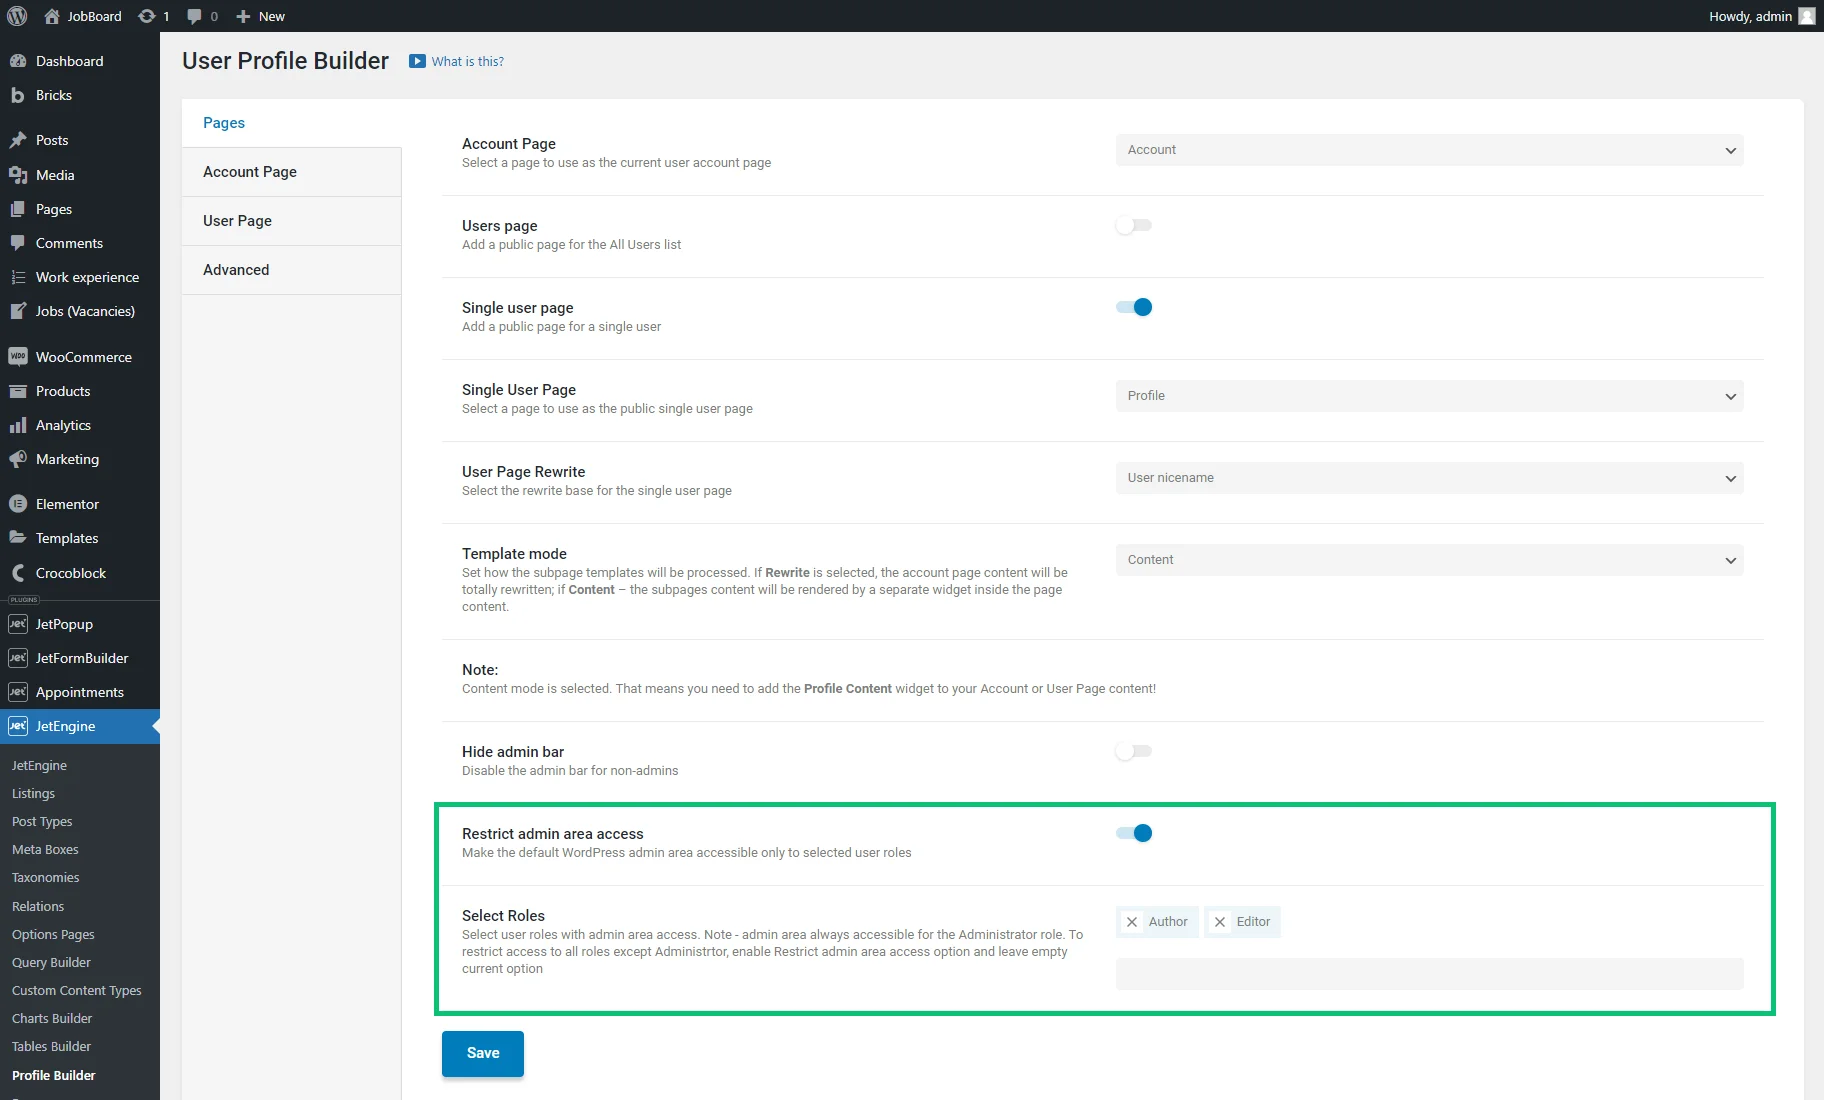
Go to JetEngine > Profile Builder. Enable the Restrict admin area access toggle and select roles that should have access to the admin area from the drop-down.
Be aware that the admin area is always accessible for the “Administrator” role. To restrict access to all roles except “Administrator,” enable the Restrict admin area access option and leave the Select Role field empty.
According to our settings, if we log in as an “Author,” we will proceed to the WordPress Dashboard.
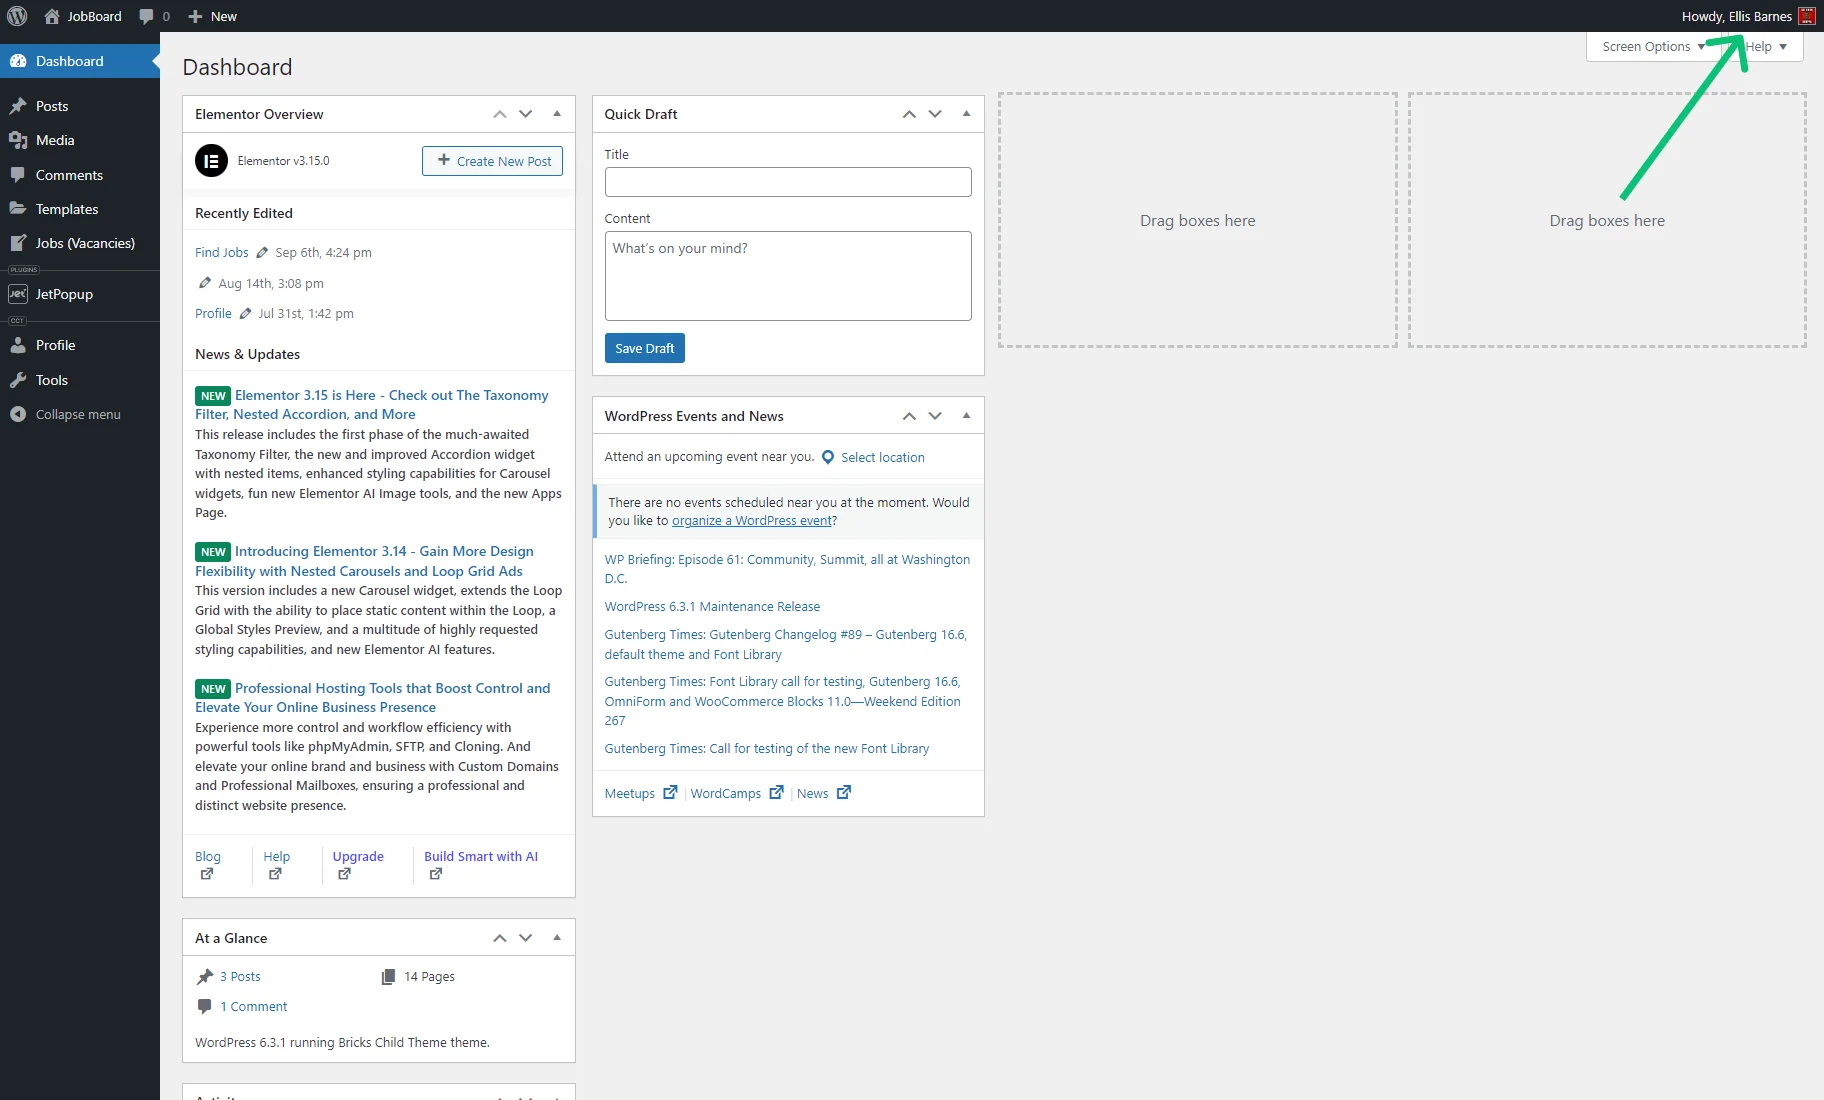
If we log in as a “Job Seeker,” we will be redirected to the Account page.

Limiting the User’s Access to the Account Subpages
Follow the JetEngine > Profile Builder path and open the Account Page tab. Unfold one of the subpages tab and set the user roles to see and access the page in the Available for the user role field. All the variants are listed in the drop-down, so you just have to choose the ones you need. You can select several roles if required.
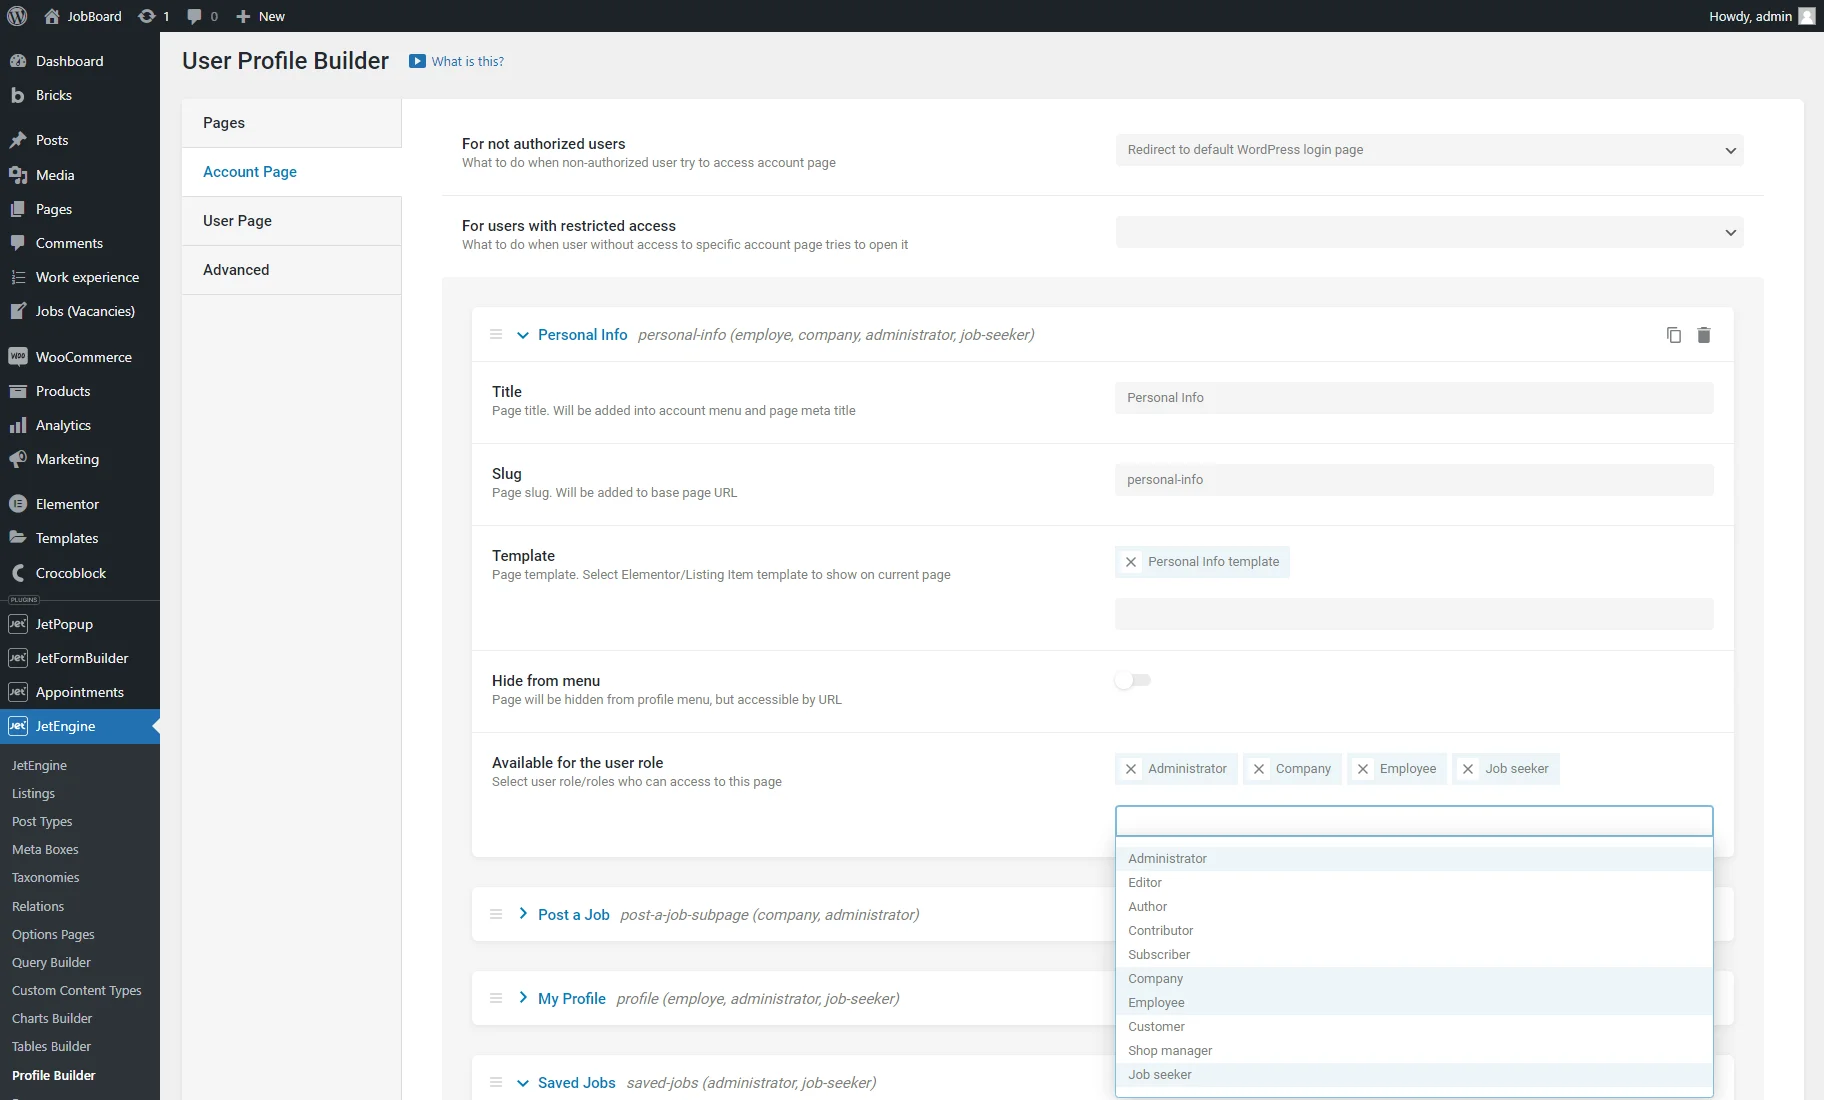
Manage the user access for every subpage. When you finish, push the “Save” button at the end of the page.
Now, let’s check the result on the Account page on the front end.
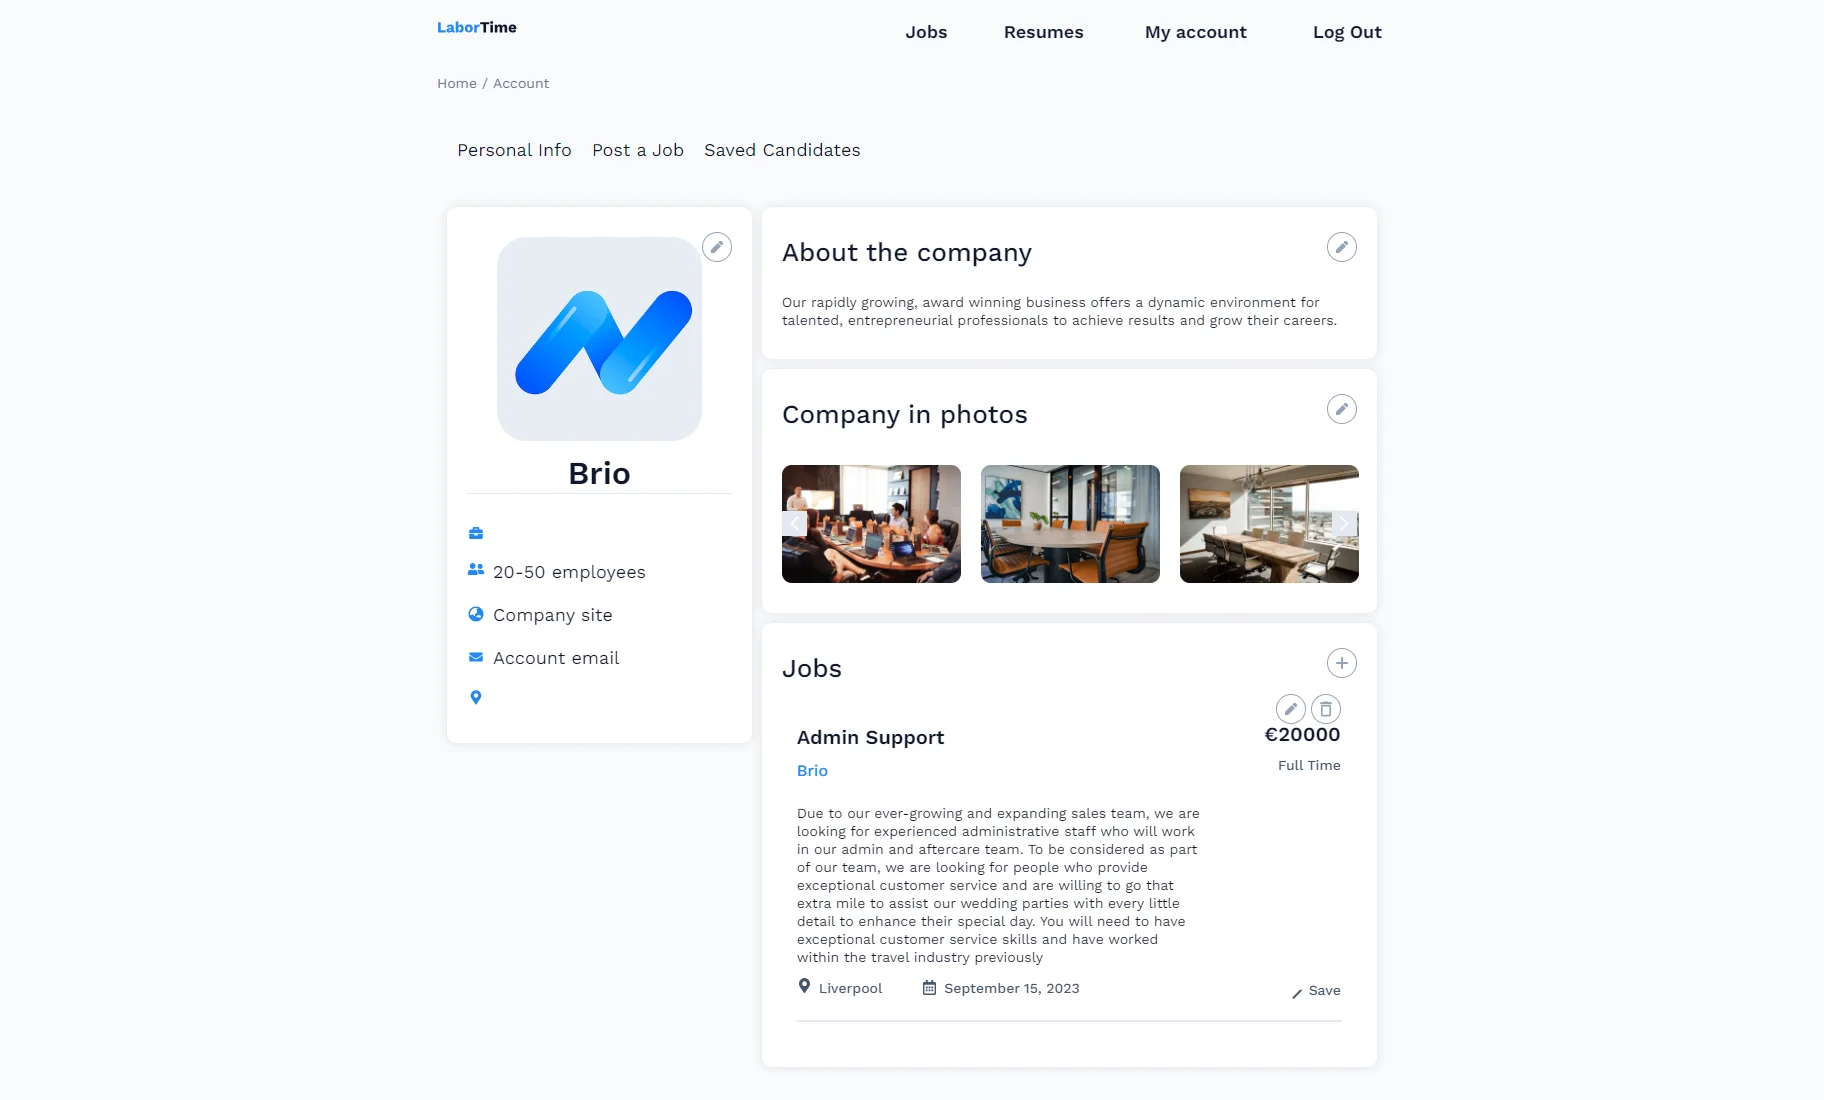
We allowed access to all subpages to the “Administrator” role and logged in as an administrator so we could see all subpages displayed with the Profile Menu.

When logged in as a user with the “Company” role, we can access only four subpages for which we selected the “Company” option in the Available for the user role field.

When logged in as a “Job Seeker,” we have access to a different set of subpages according to our settings.
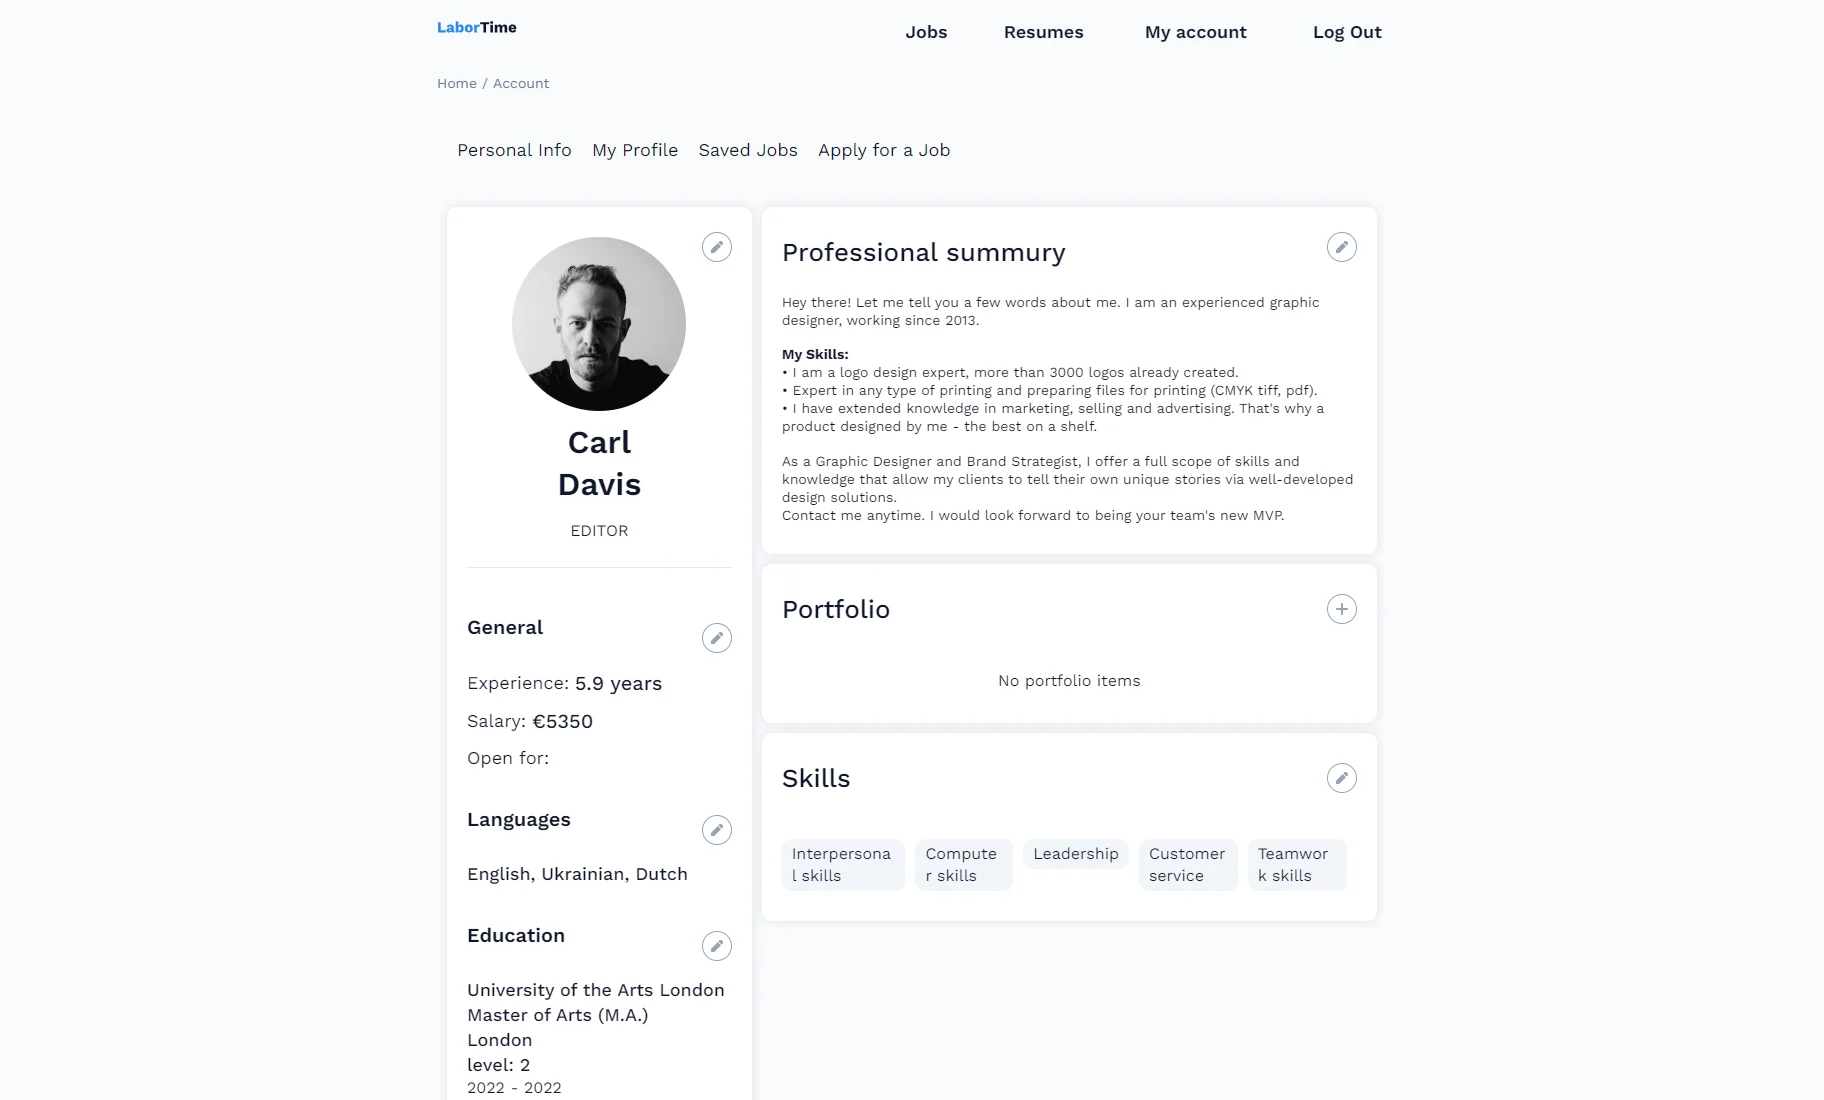
As you can see, different users can access different profile subpages allowed to their roles.
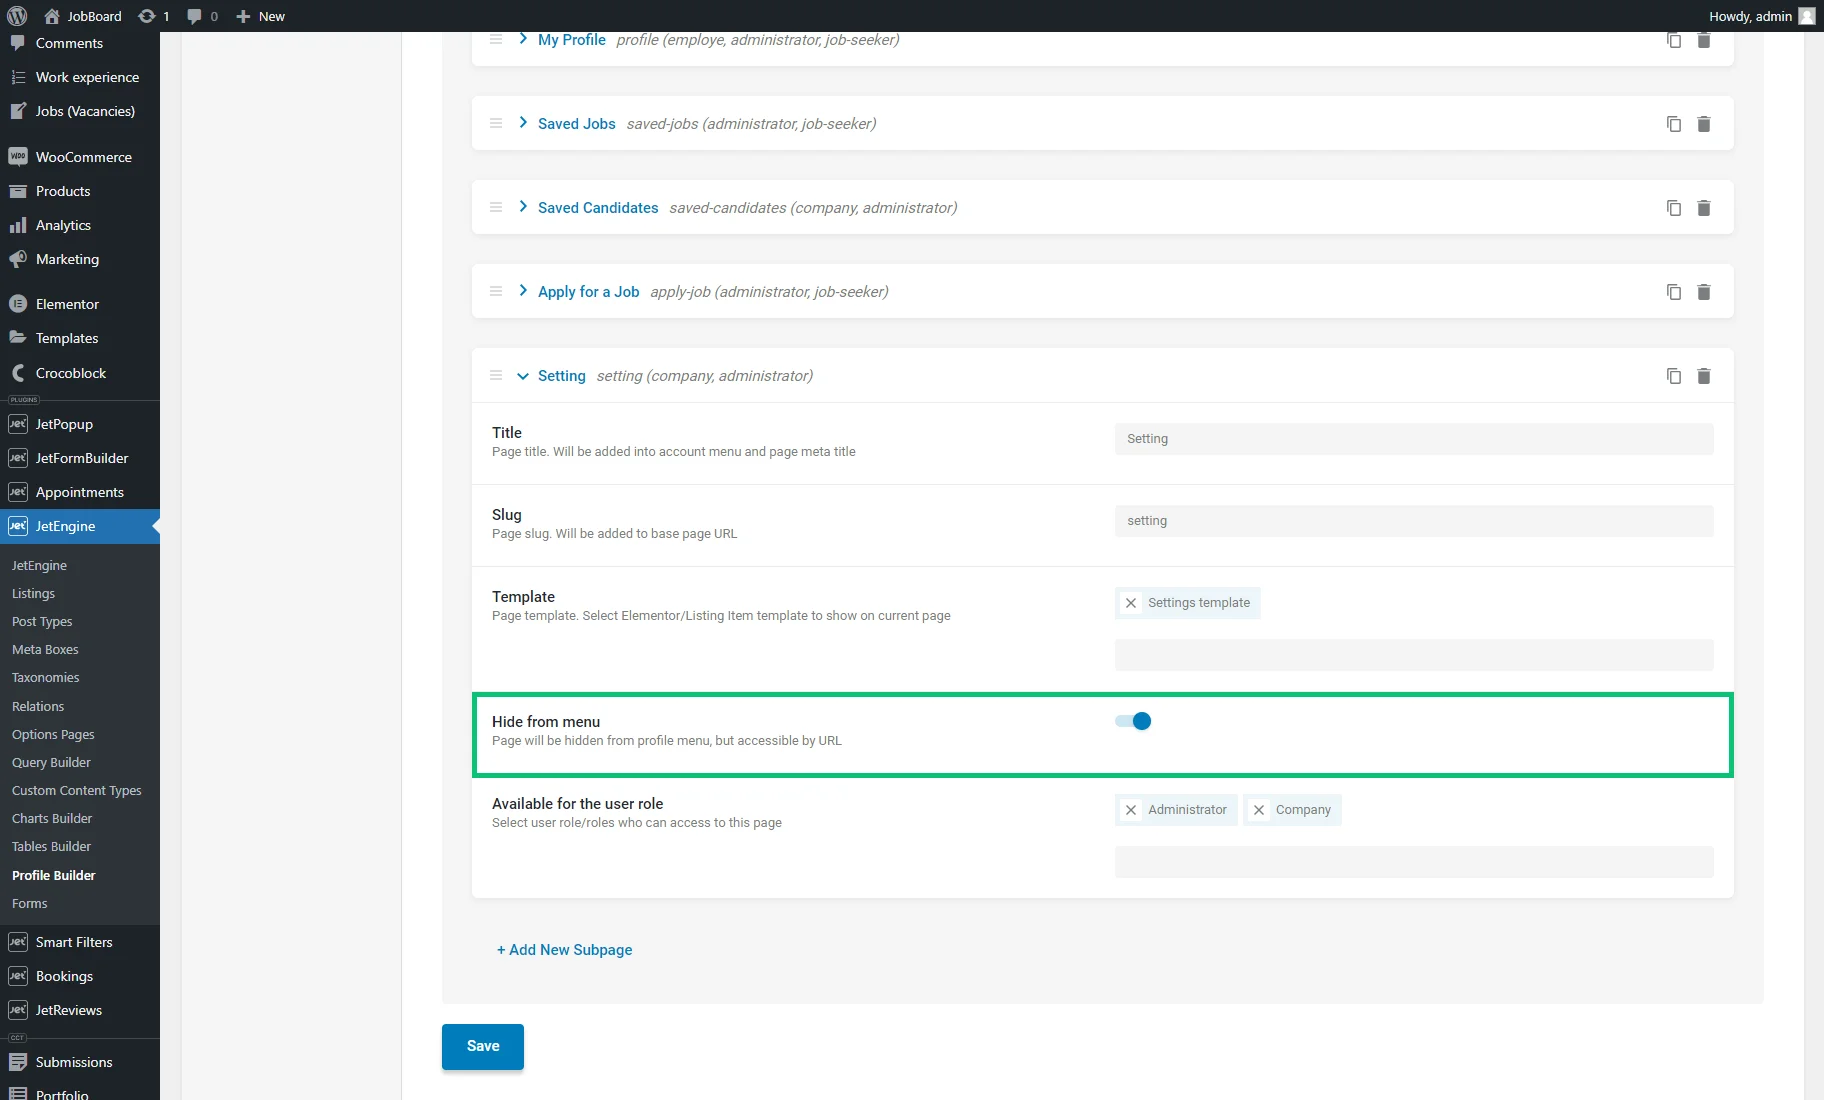
You can hide a subpage item from the Profile Menu by enabling the Hide from menu toggle and hitting the “Save” button. We enabled this option for the “Settings” subpage.
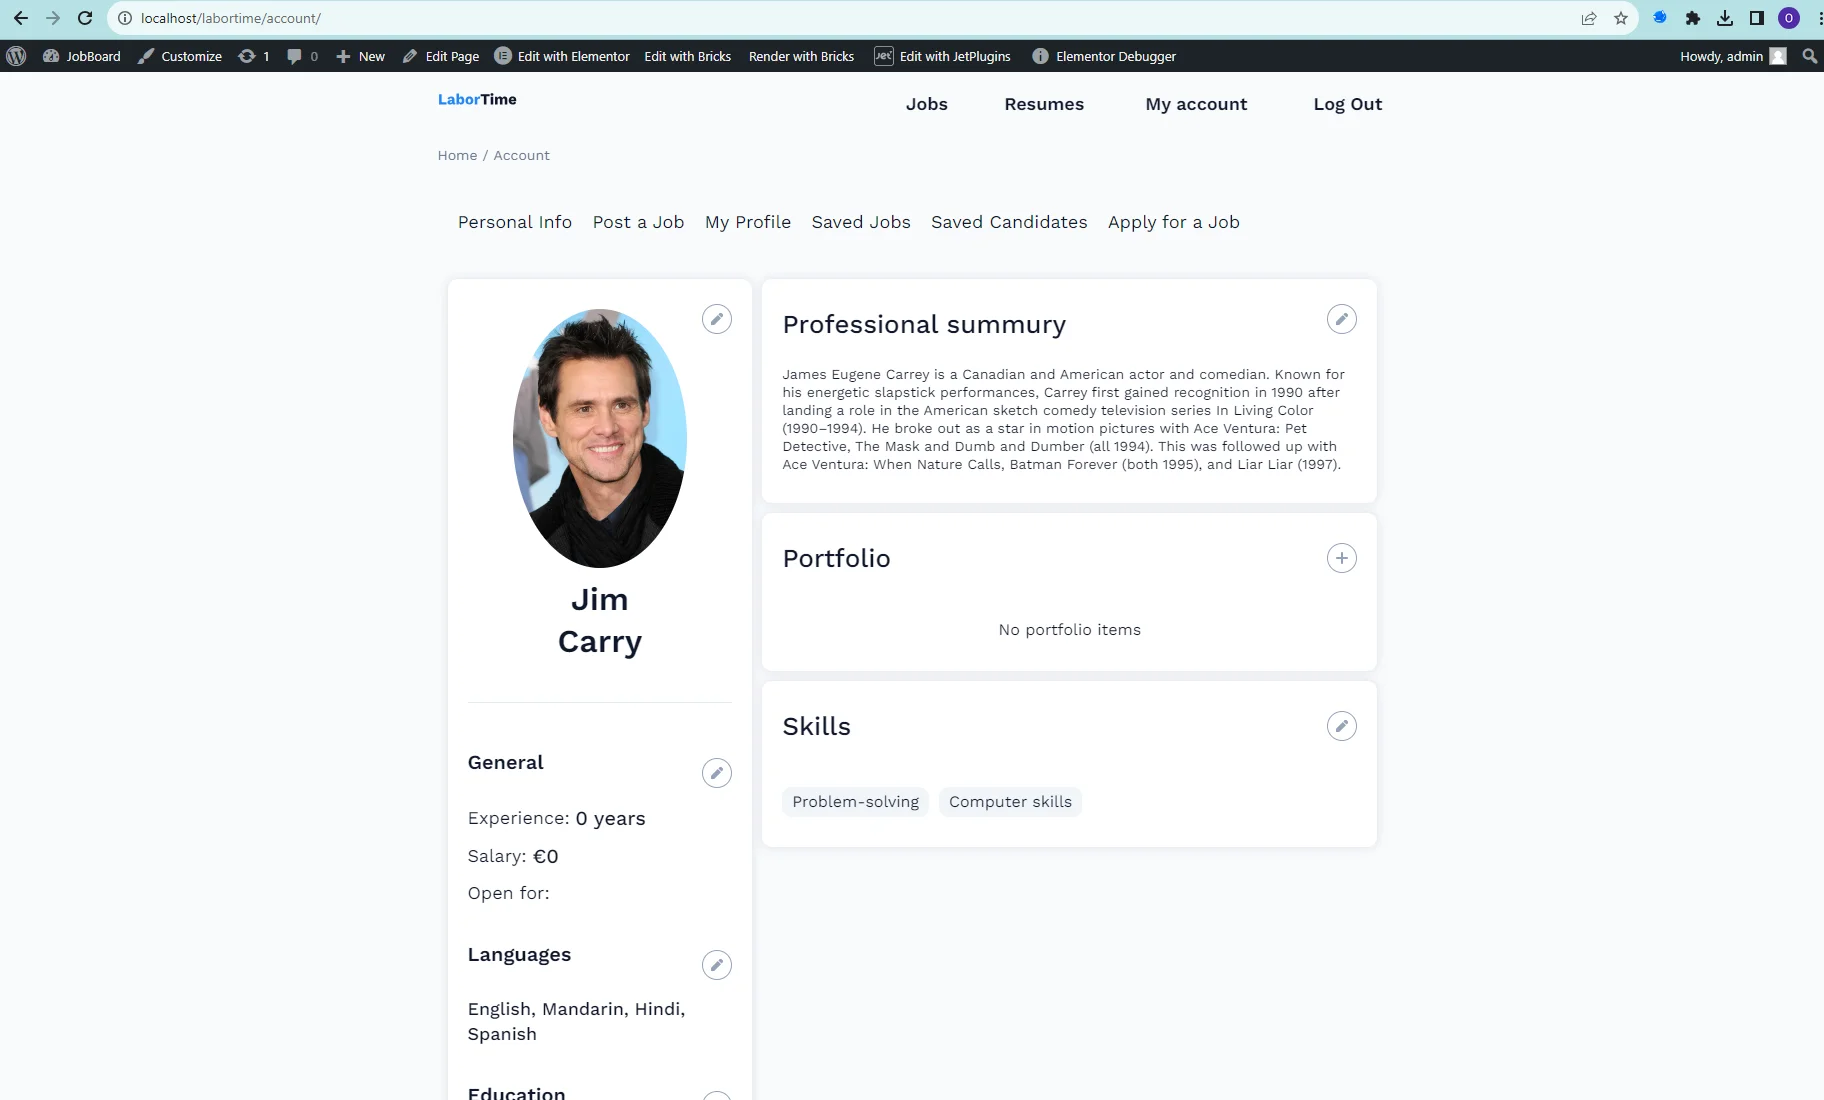
After opening the Account page on the front end, all subpage items are visible in the Profile Menu, except the “Settings” tab.
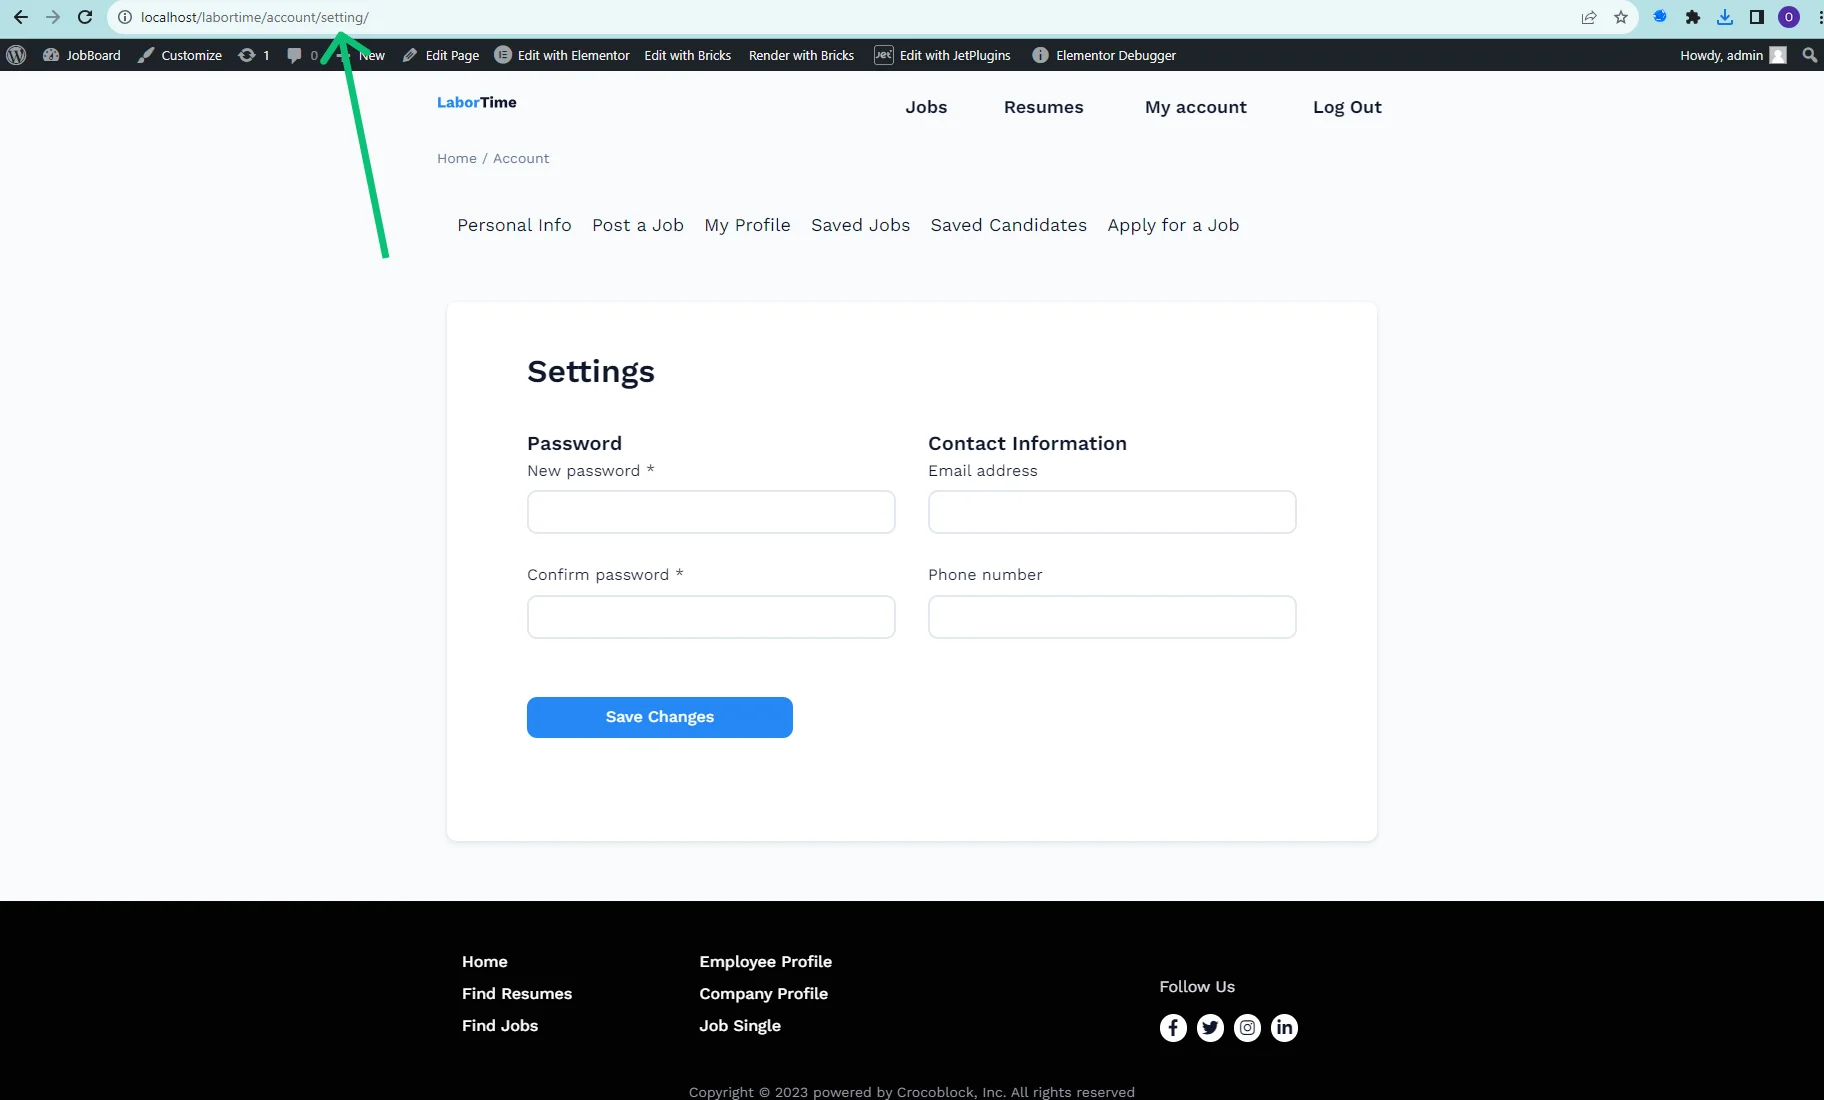
But be aware that users can reach the subpage on the front end by entering the slug into the permalink even if their roles aren’t chosen in the Available for the user role field.
Limiting the User’s Access to the Single User Subpages
Enabling the Single User Page toggle in the Pages tab allows you to proceed to the User Page tab and set the user accessibility here as well.

The subpage tabs in the User Page tab have two options for limiting access:
- Page visibility. The “Owner” option limits the subpage content to users who are logged into their account, while the “All” option allows other users to observe it;
- Show this page for the user role. Pick user roles from this drop-down that can access this subpage.
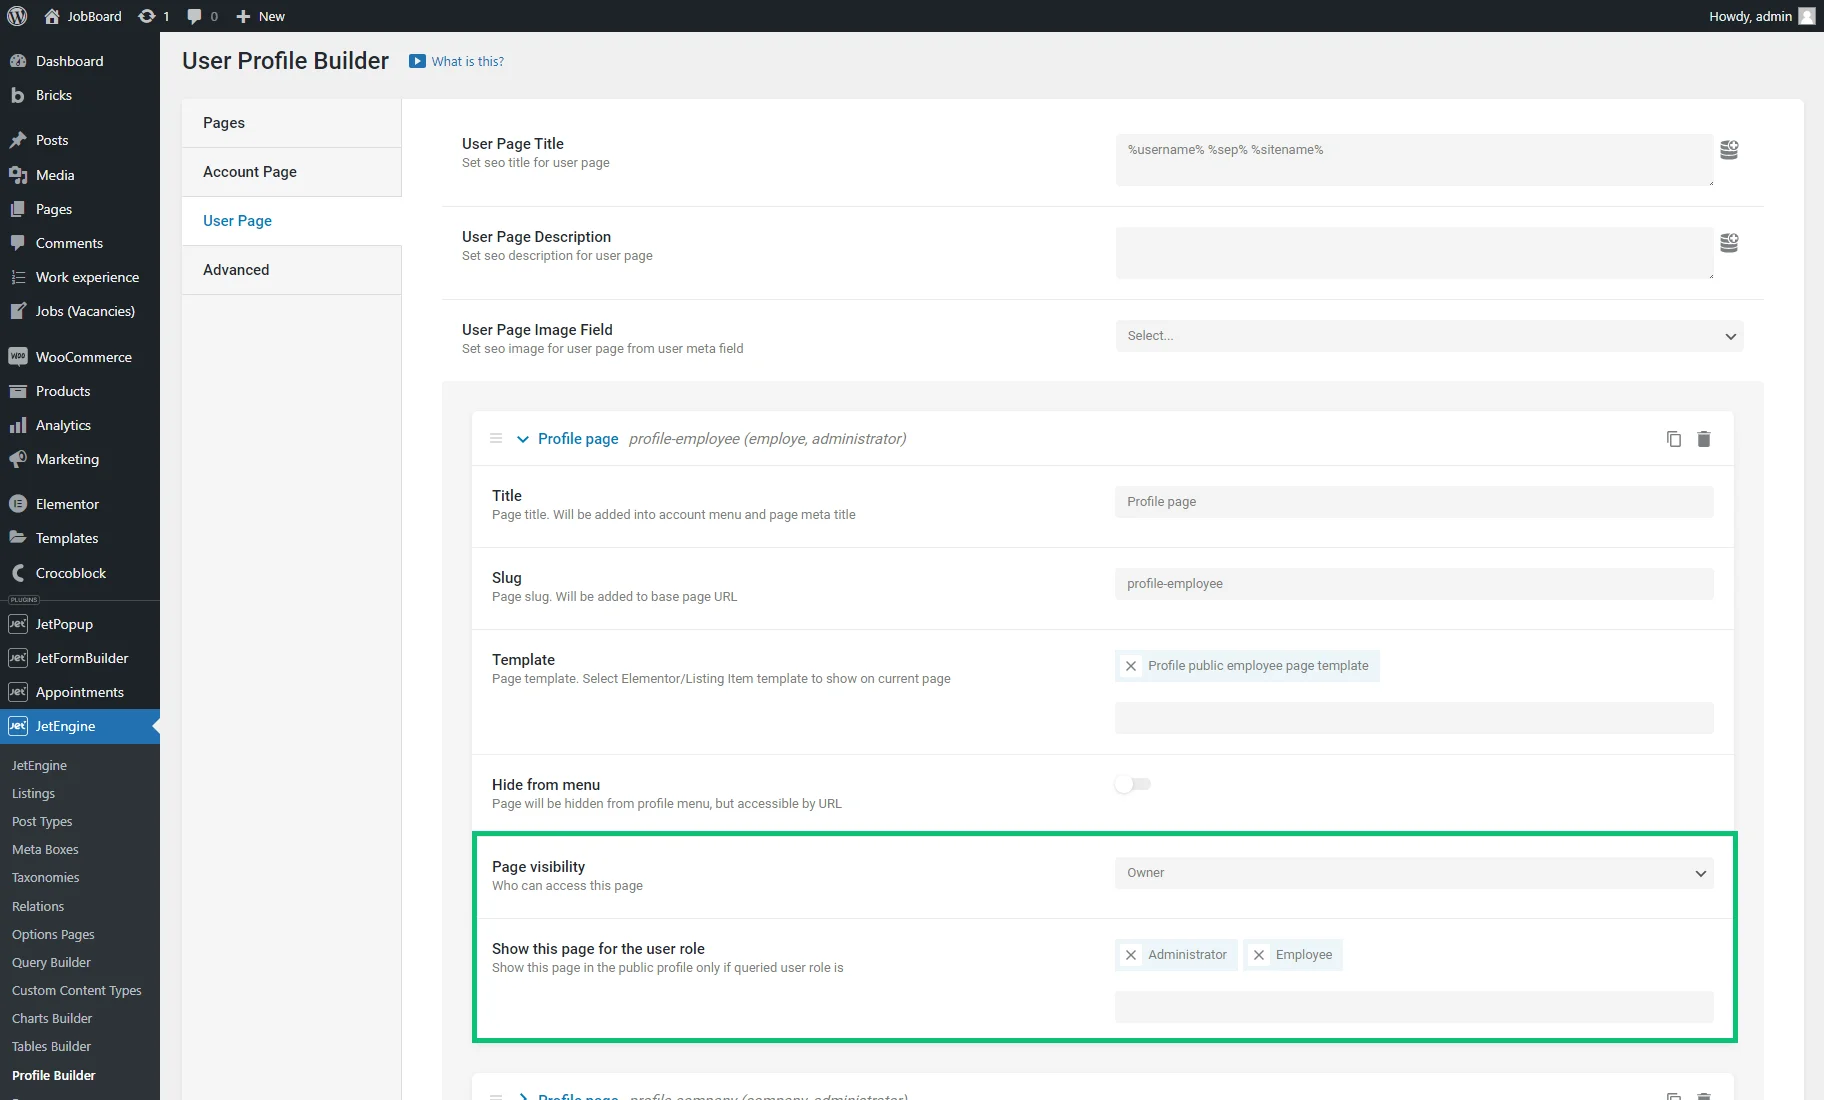
In our case, we used such settings for the subpages:
- Profile page (for employees) – “Owner” Page visibility and “Administrator,” “Employee” Show this page for the user role;
- Profile page (for companies) – “Owner” Page visibility and “Administrator,” “Company” Show this page for the user role;
- Registration of employee – “All” Page visibility and “Administrator,” “Company” Show this page for the user role.
After that, we pushed the “Save” button at the end of the page.
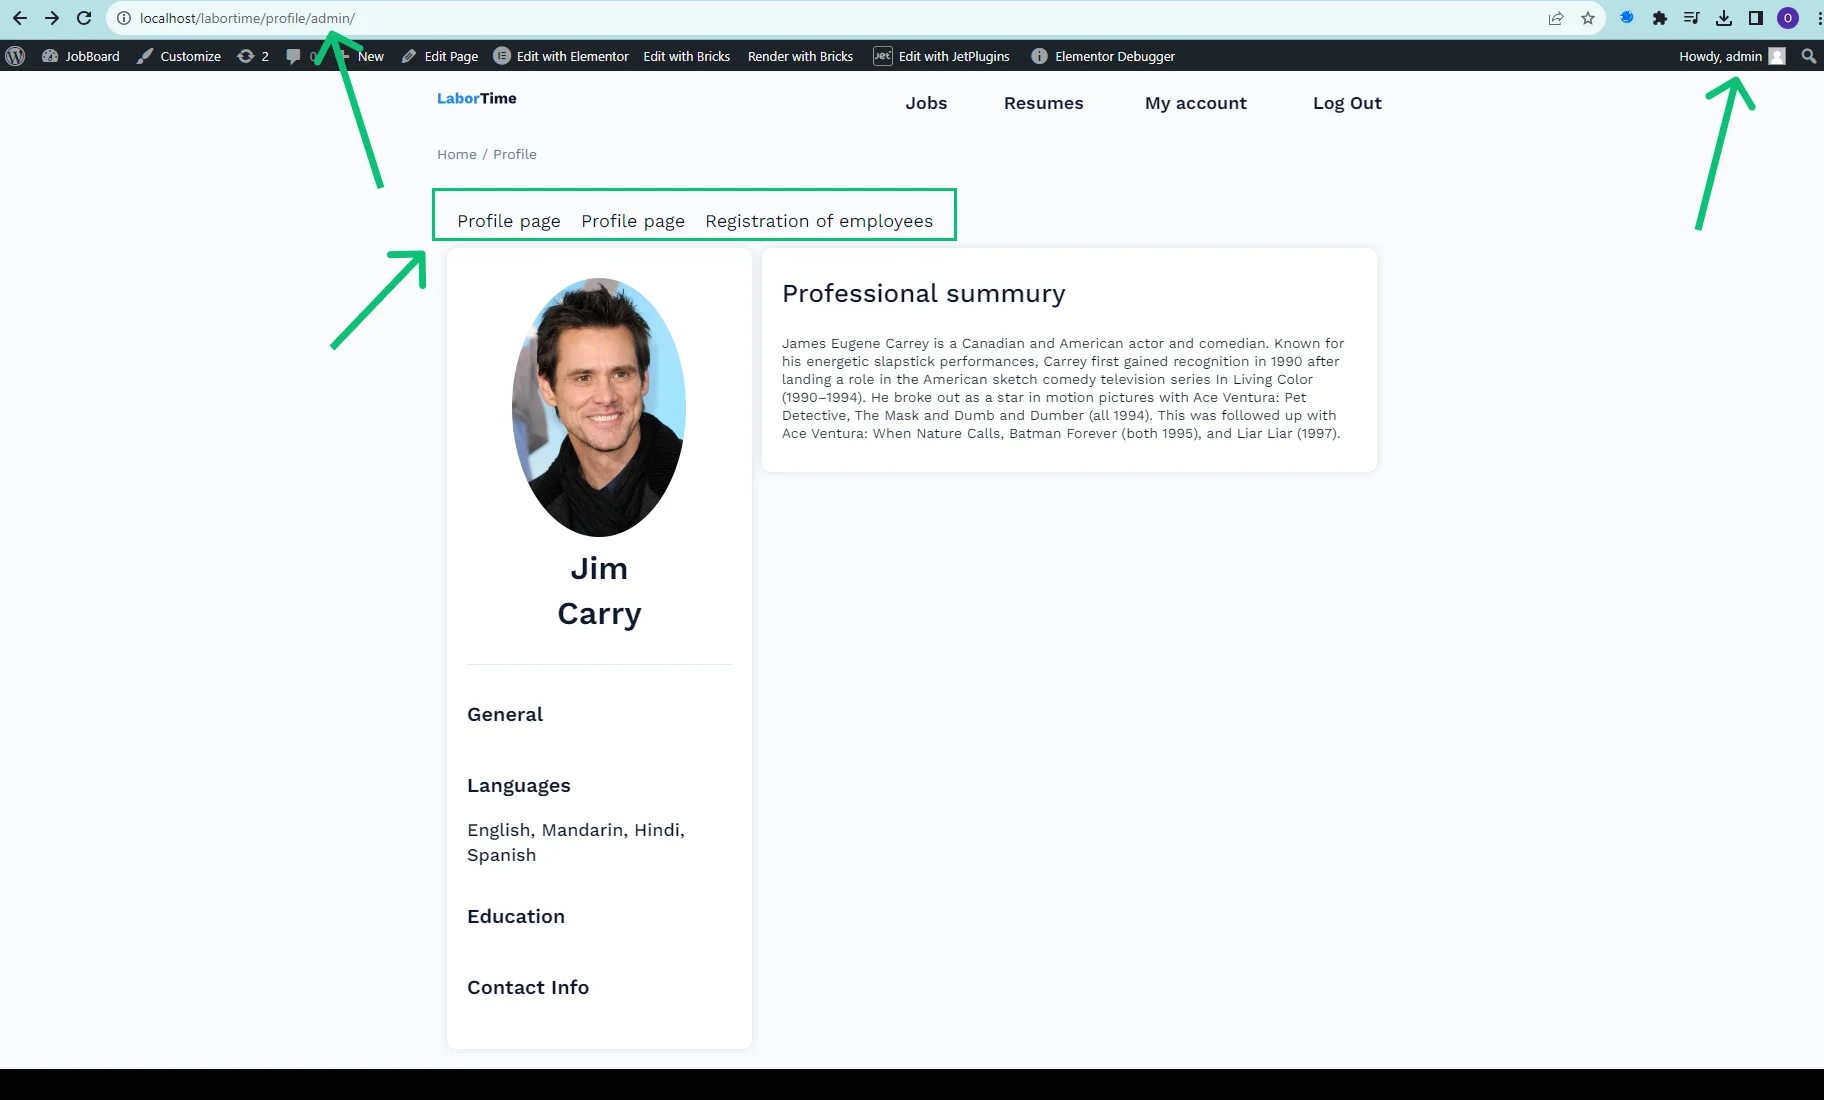
When logged in as an administrator, we can access all three subpages on the Profile page.
Let’s open another user’s Profile page with the “Employee” role. According to the Show this page for the user role option, the “Profile page” (for the “Employee” user role) subpage is assigned to such a role, but we cannot access it since the Page visibility is set to “Owner.”
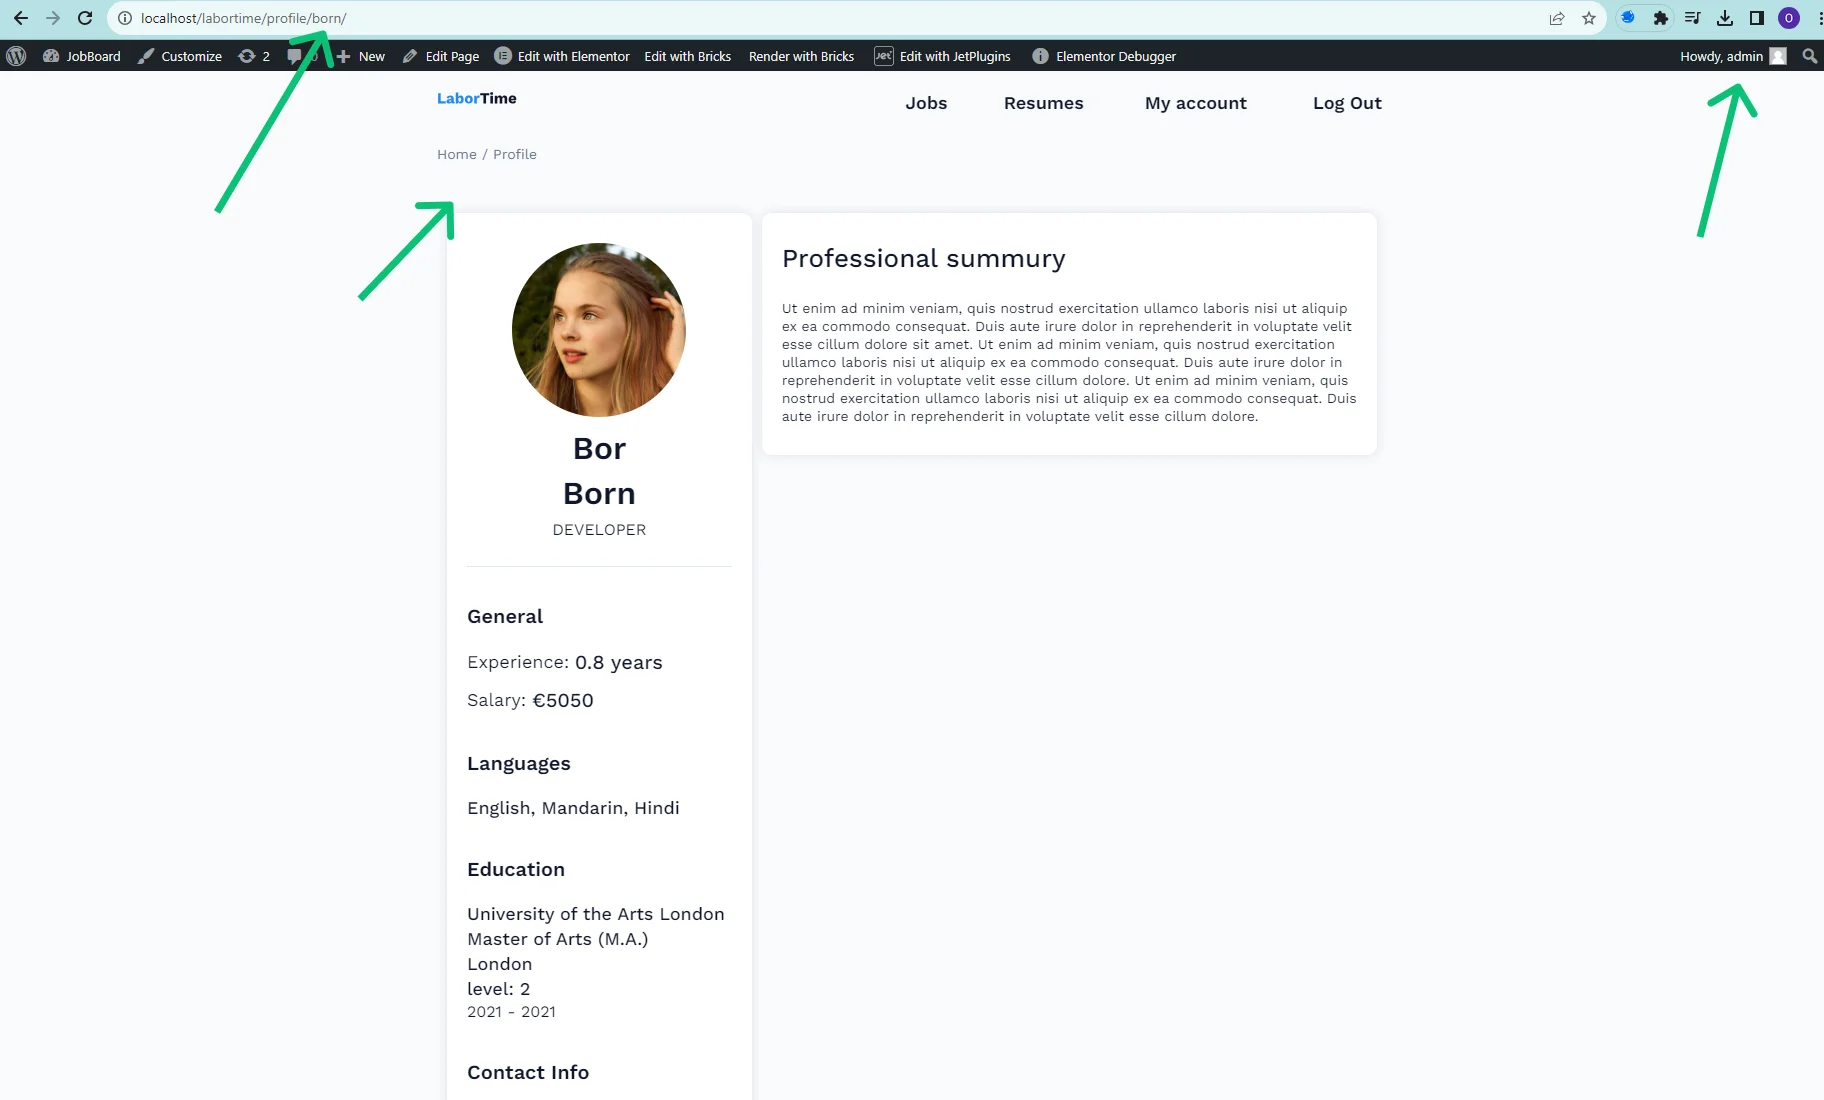
If we log in as a user with the “Employee” role, we can see the “Profile page” (for the Employee user role) subpage according to the settings.
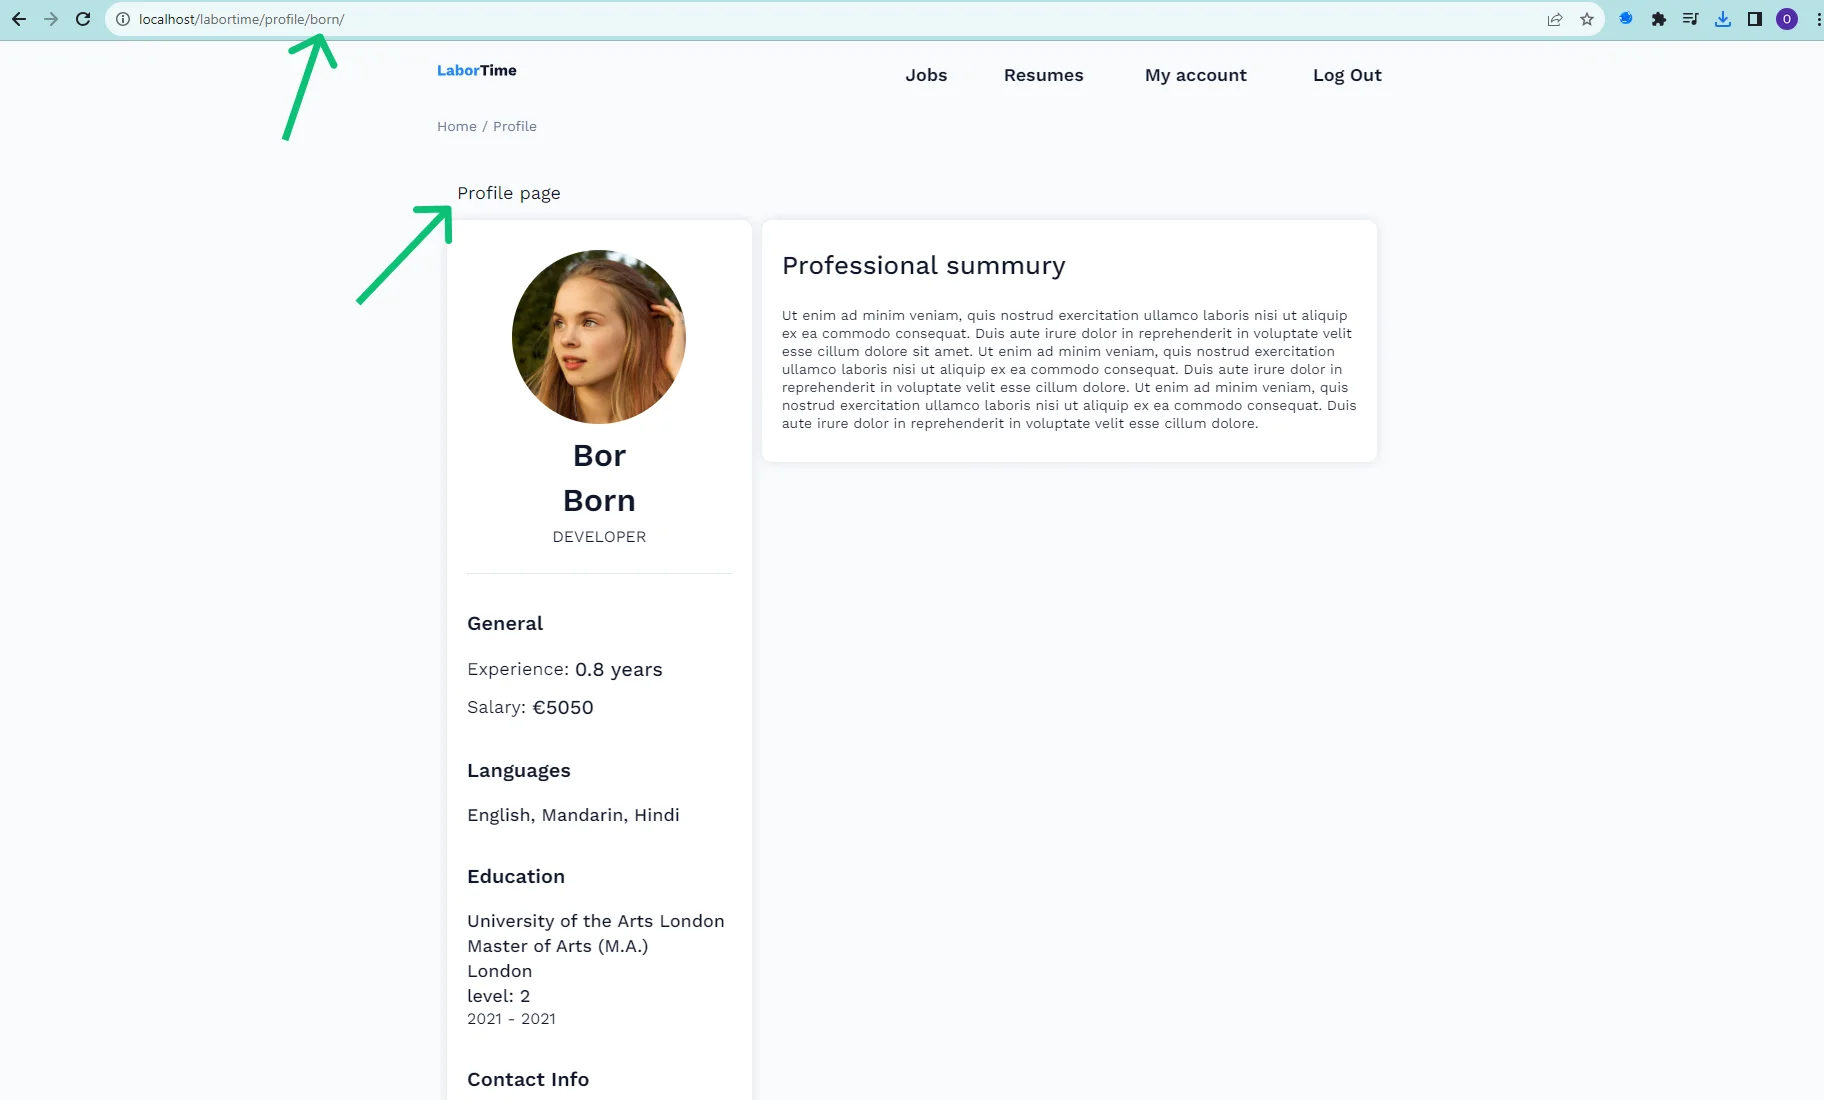
Let’s check the Administrator Profile page as a user with an Employee role. There is only one “Registration of employee” subpage available. It is visible because the Page visibility of this subpage is set to “All.” In the Show this page for the user role drop-down, we picked “Administrator” and “Company” roles – that’s why this subpage is displayed on the Profile page of the user with the Administrator role and isn’t displayed on the Employee Profile.

Limiting User’s Posting Capabilities
This feature allows setting the maximum number of posts that users with different roles can create.
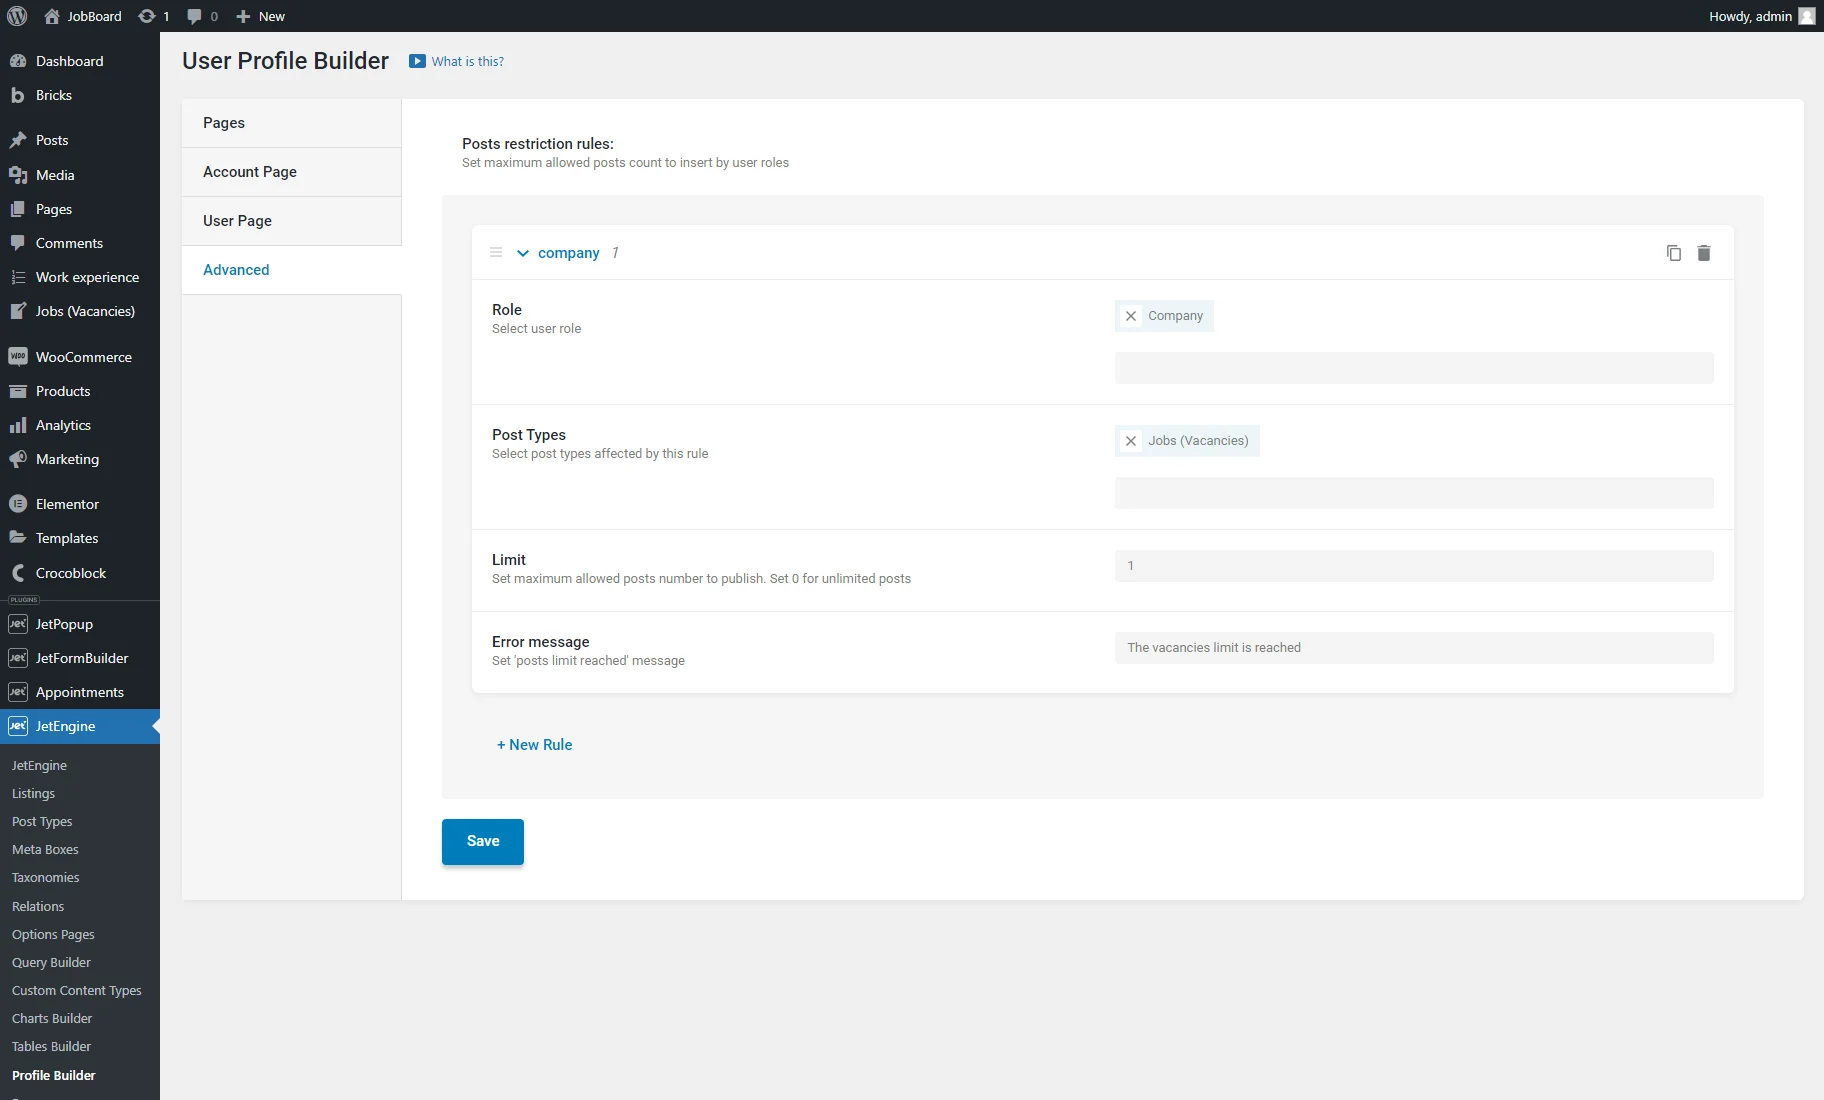
Move to JetEngine > Profile Builder > Advanced tab.
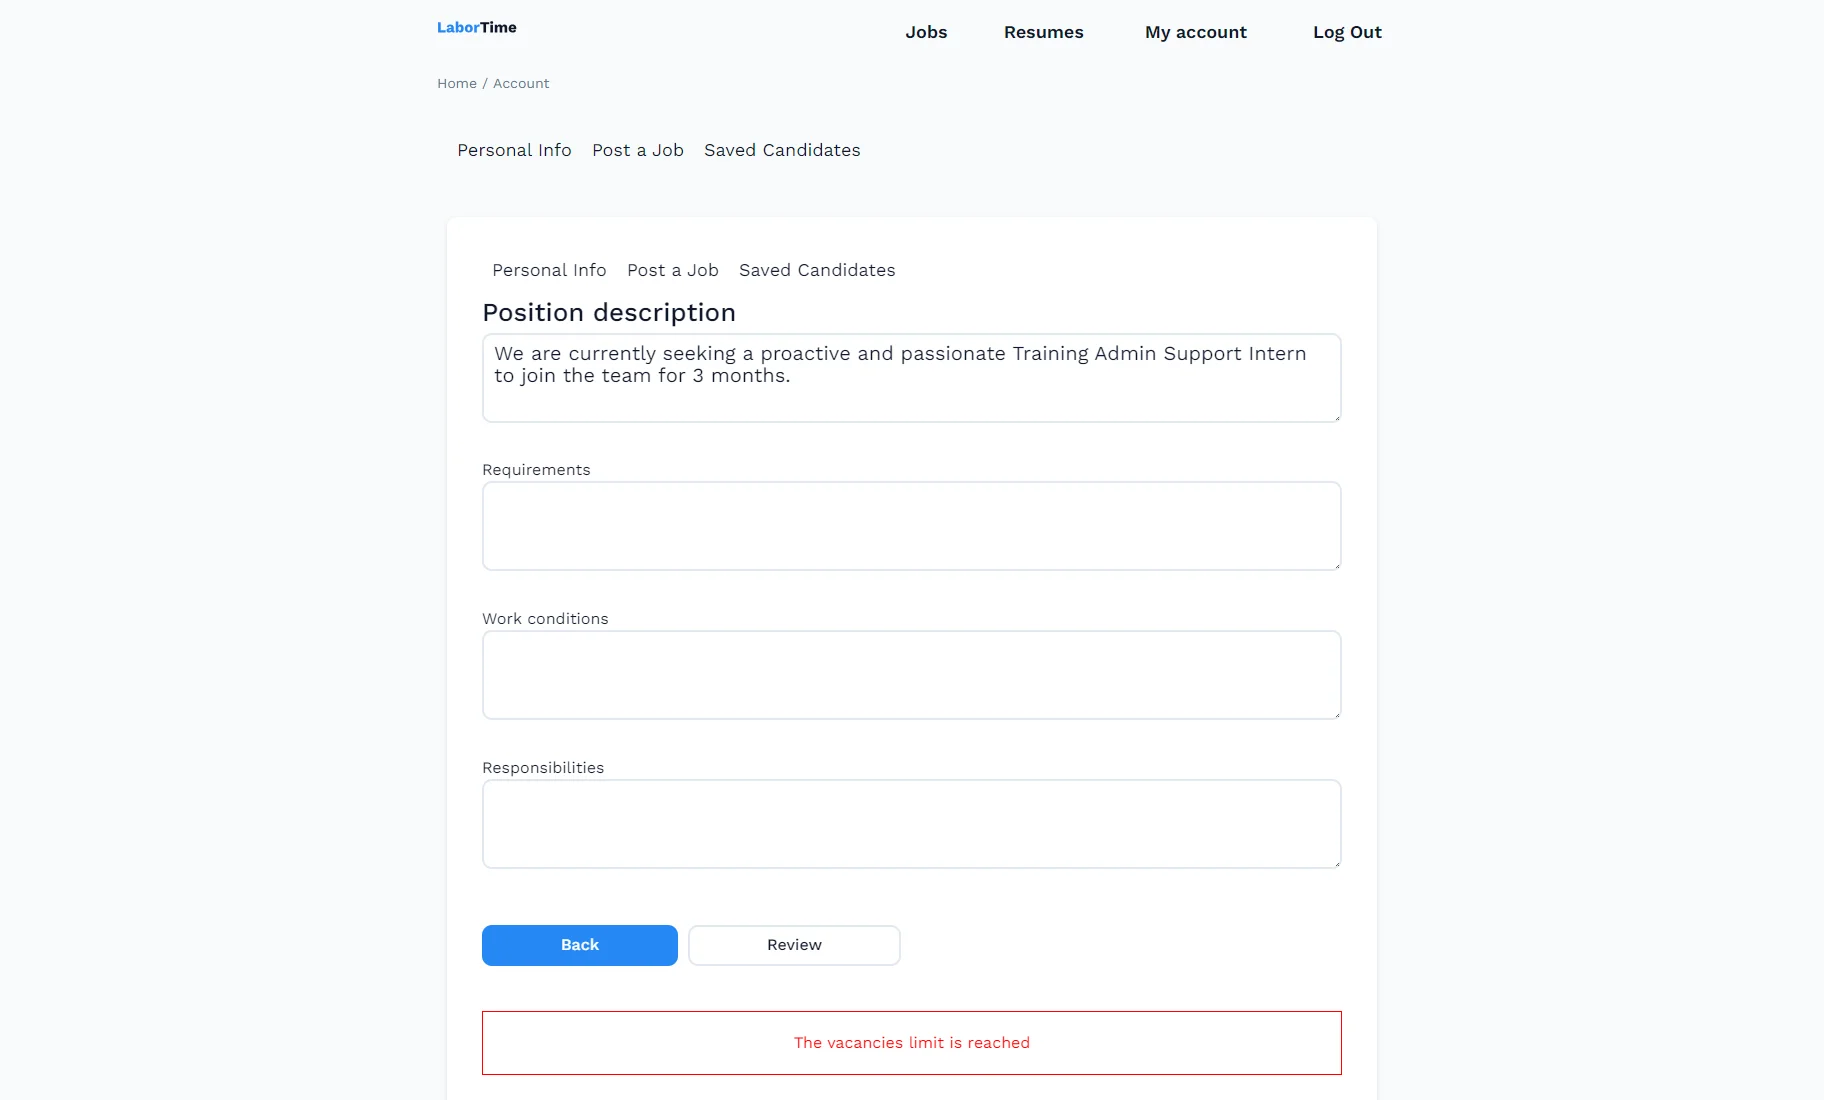
Let’s set a restriction rule for the “Company” user role so employers can post a limited number of vacancies.
We selected the “Company” Role and the “Job (Vacancies)” Custom Post Type, set the “1” Limit, and entered the “The vacancies limit is reached” Error message.
You can add another restriction rule by clicking the “+ New rule” button. To save changes, push the “Save” button.
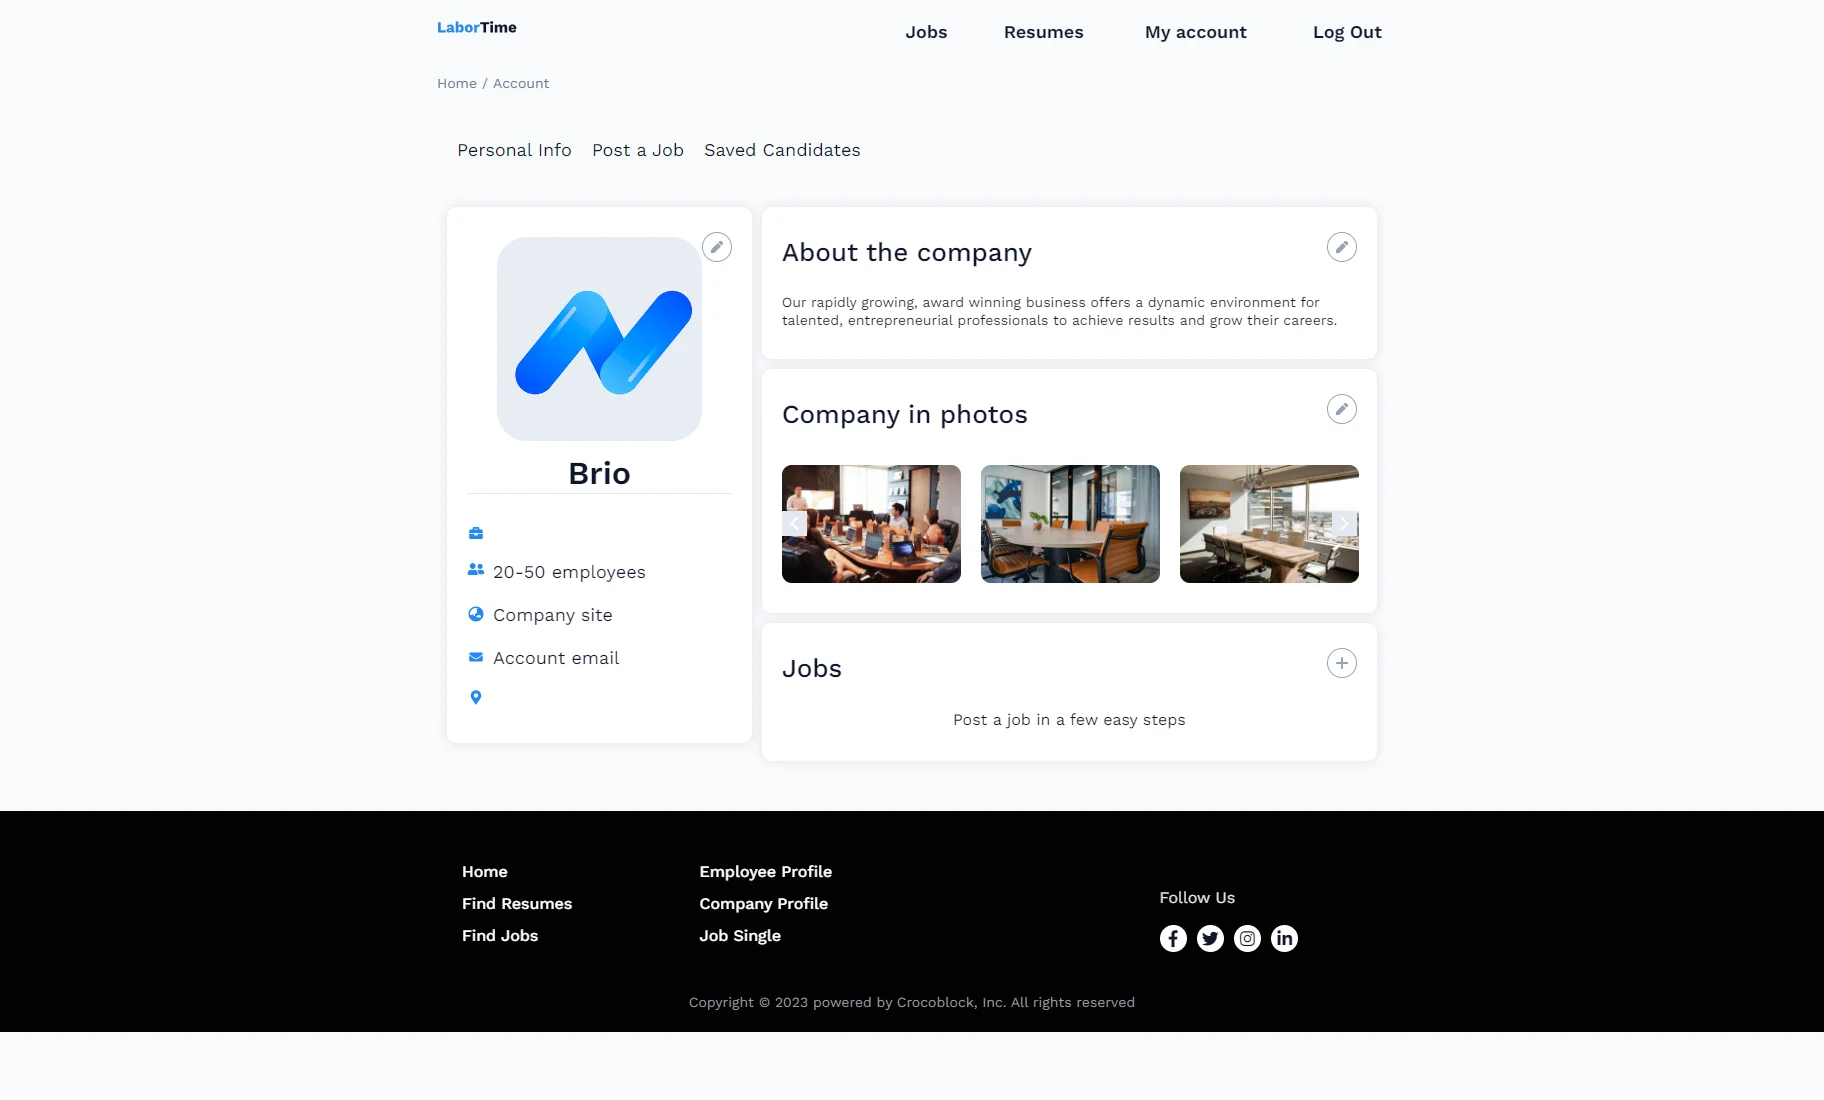
To test this functionality, we logged in as a user with the “Company” role and opened the Account page.
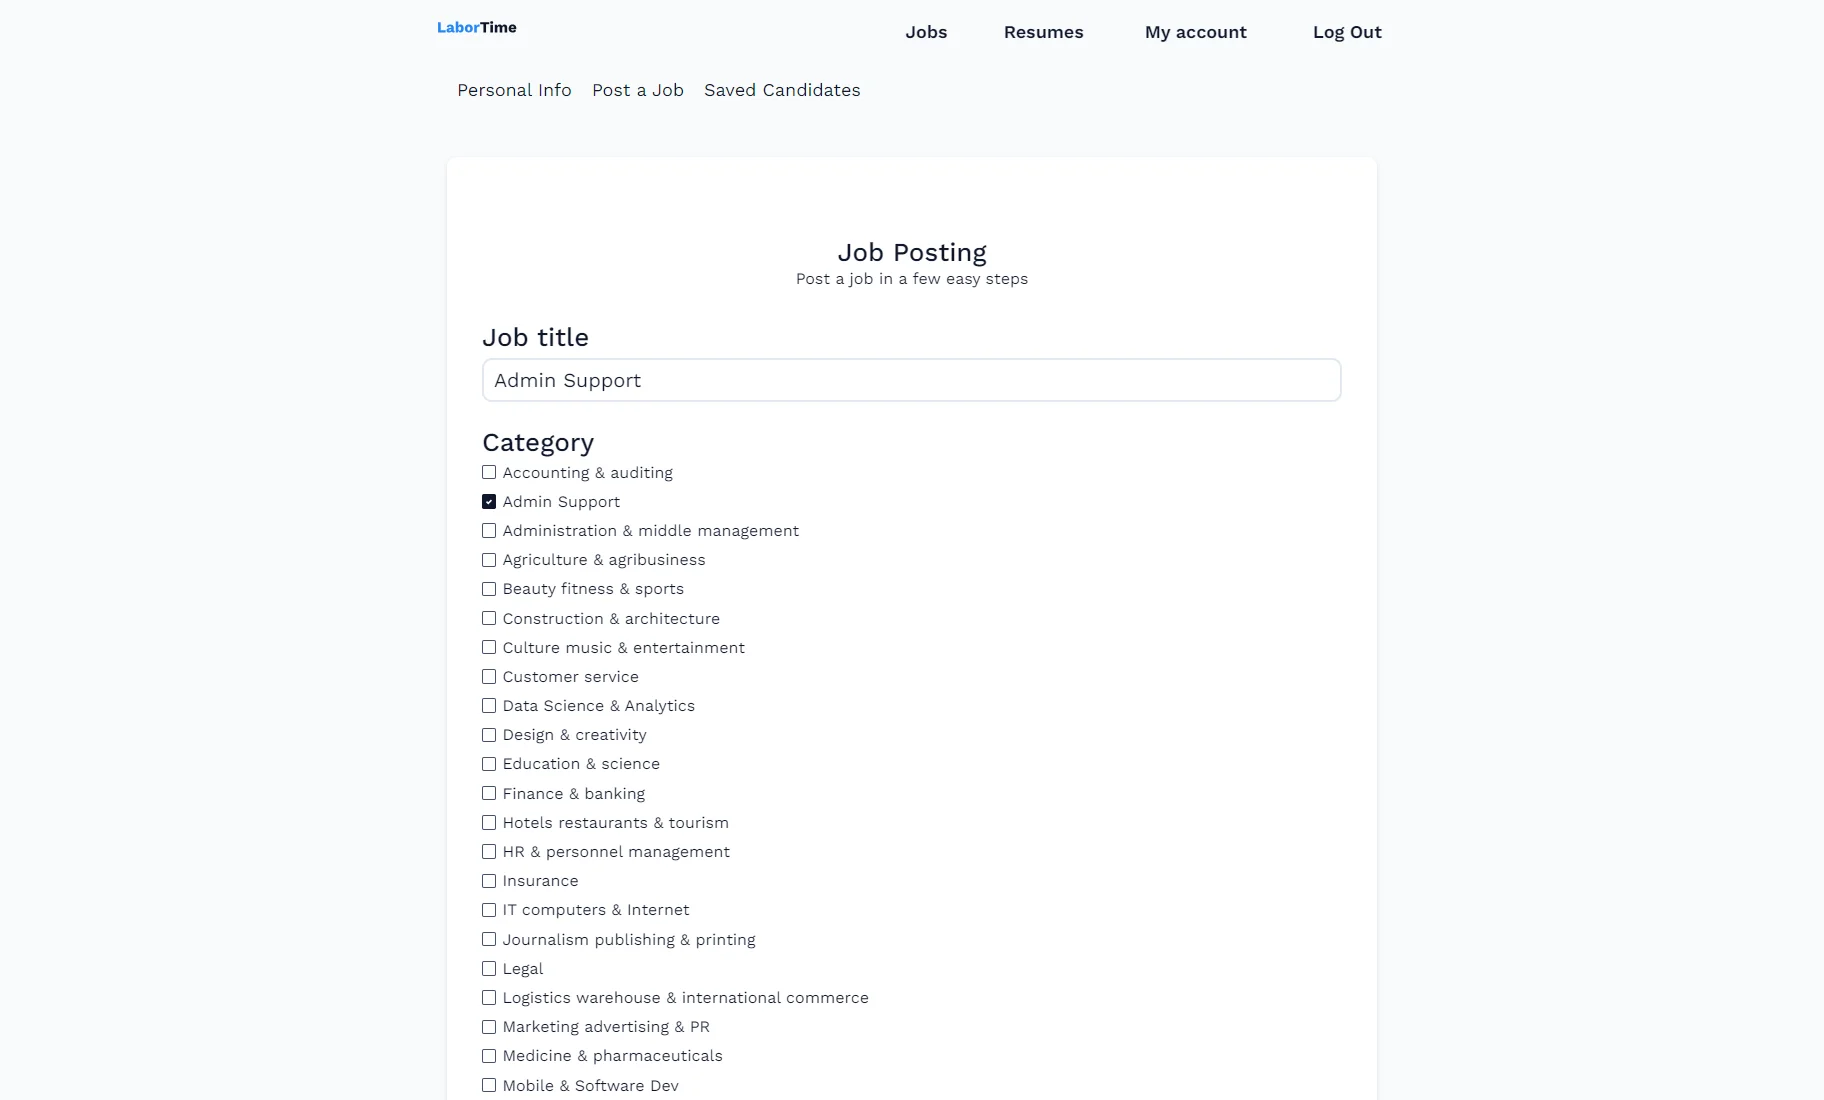
One of the Account subpages contains a JetFormBuilder form that allows posting a job into the “Job (Vacancies)” CPT. Learn more from the Front-End Post Submission Form tutorial.
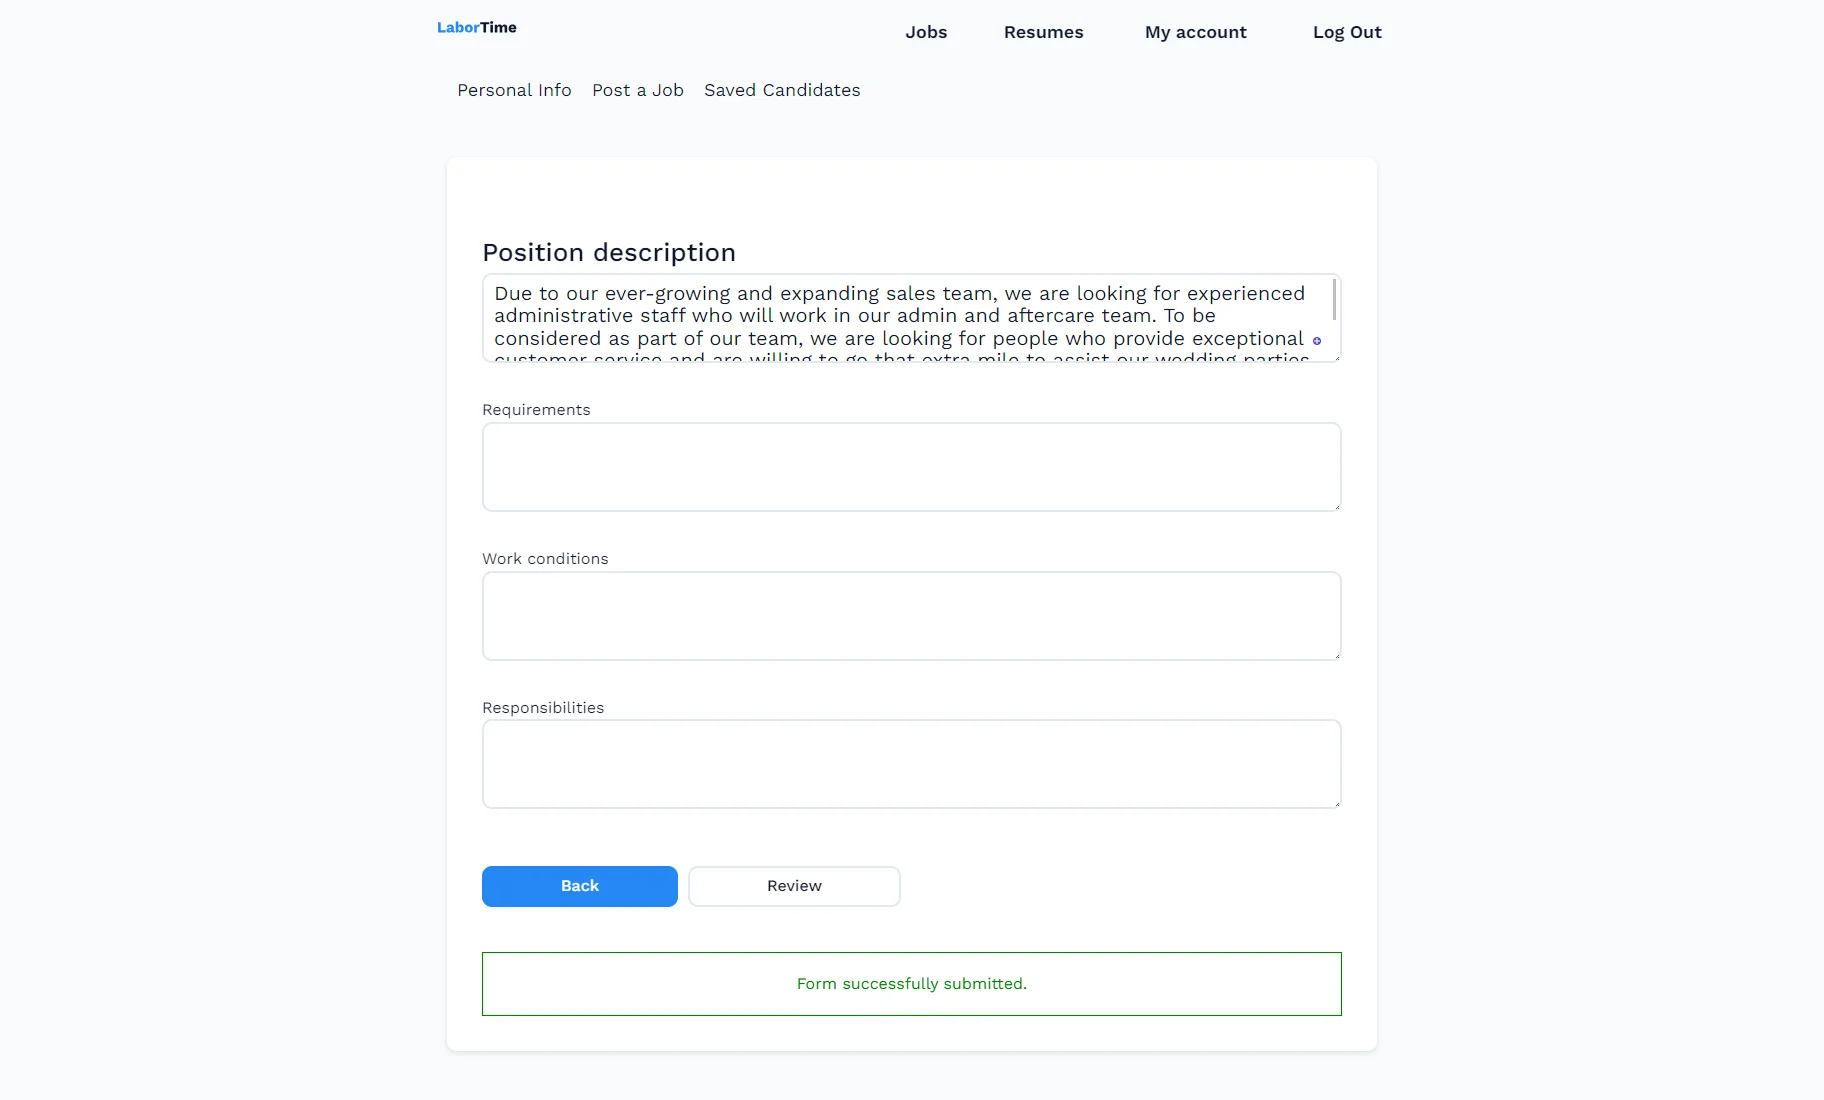
After filling in the form fields and pressing the “Review” button, the form is successfully submitted.
After proceeding to the “Personal info” subpage, we can see the vacancy is published.
Let’s try to publish another vacancy. After hitting the “Review” button, the error message appeared, and the post failed to be published.
That’s all. Now you know how to limit user access to the WordPress Dashboard, account, and profile subpages and set the maximum allowed post count for different user roles using the JetEngine Profile Builder feature.