How to Create User Account Page With Different Dashboard Structures
This tutorial will describe how to create the WordPress Account page with the Content or Rewrite mode of the JetEngine Profile Builder feature.
Before you start, check the tutorial requirements:
- Elementor (Free version)
- JetEngine plugin installed and activated
The Account page is the central user dashboard where users can add and edit information, publish and edit posts, and save favorite items. This tutorial reveals how to set the Account page with the “Content” and “Rewrite” Template Modes, create subpages for the Account page, and set the Profile Menu.
In this tutorial, we will present how to create the Account page using the example of the job board website.
What’s the Difference Between Content and Rewrite Template Modes?
With the “Content” Template Mode, you need to set the Profile Menu widget once on the Account page. The Profile Menu displays the titles of the subpage templates set for the Account page with the Profile Builder. Content will be displayed dynamically with the Profile Subpage Content widget when users click the corresponding menu items.
With the “Rewrite” Template Mode, the page is rewritten with the content from templates. If you want to add a menu, you need to place the Profile Menu widget in the templates. You can customize templates differently: you can place the Profile Menu in different places on different templates, and you can decide not to add the Profile Menu to some templates.
Activate the Profile Builder
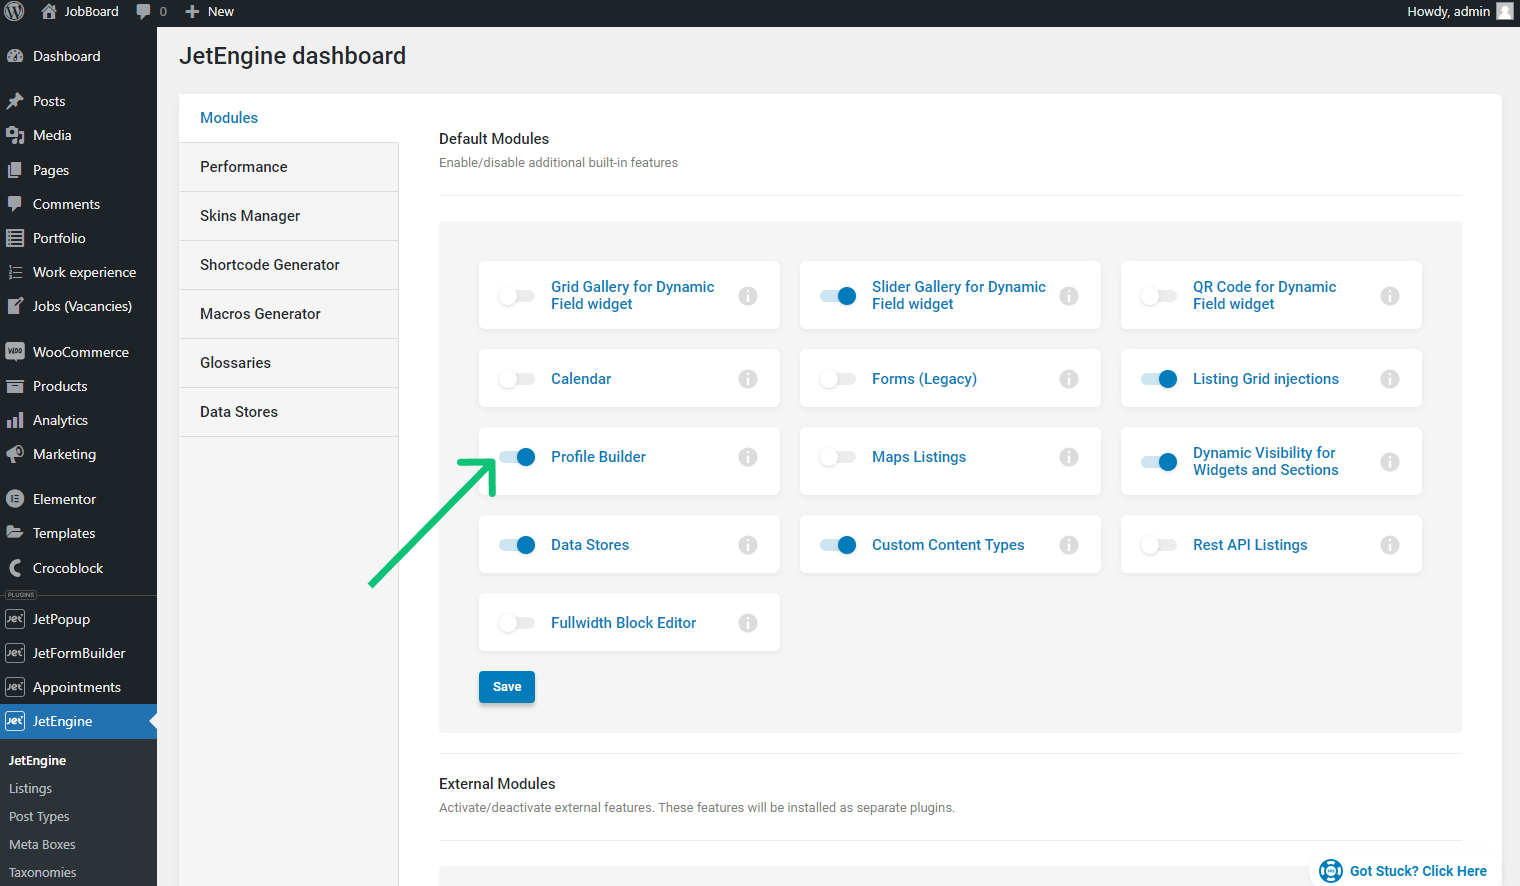
Before you start, proceed to the WordPress Dashboard > JetEngine > JetEngine tab, enable the Profile Builder toggle in the Default Modules section, and hit the “Save” button. Wait until the page reloads.
Content Template Mode
Create the Account page
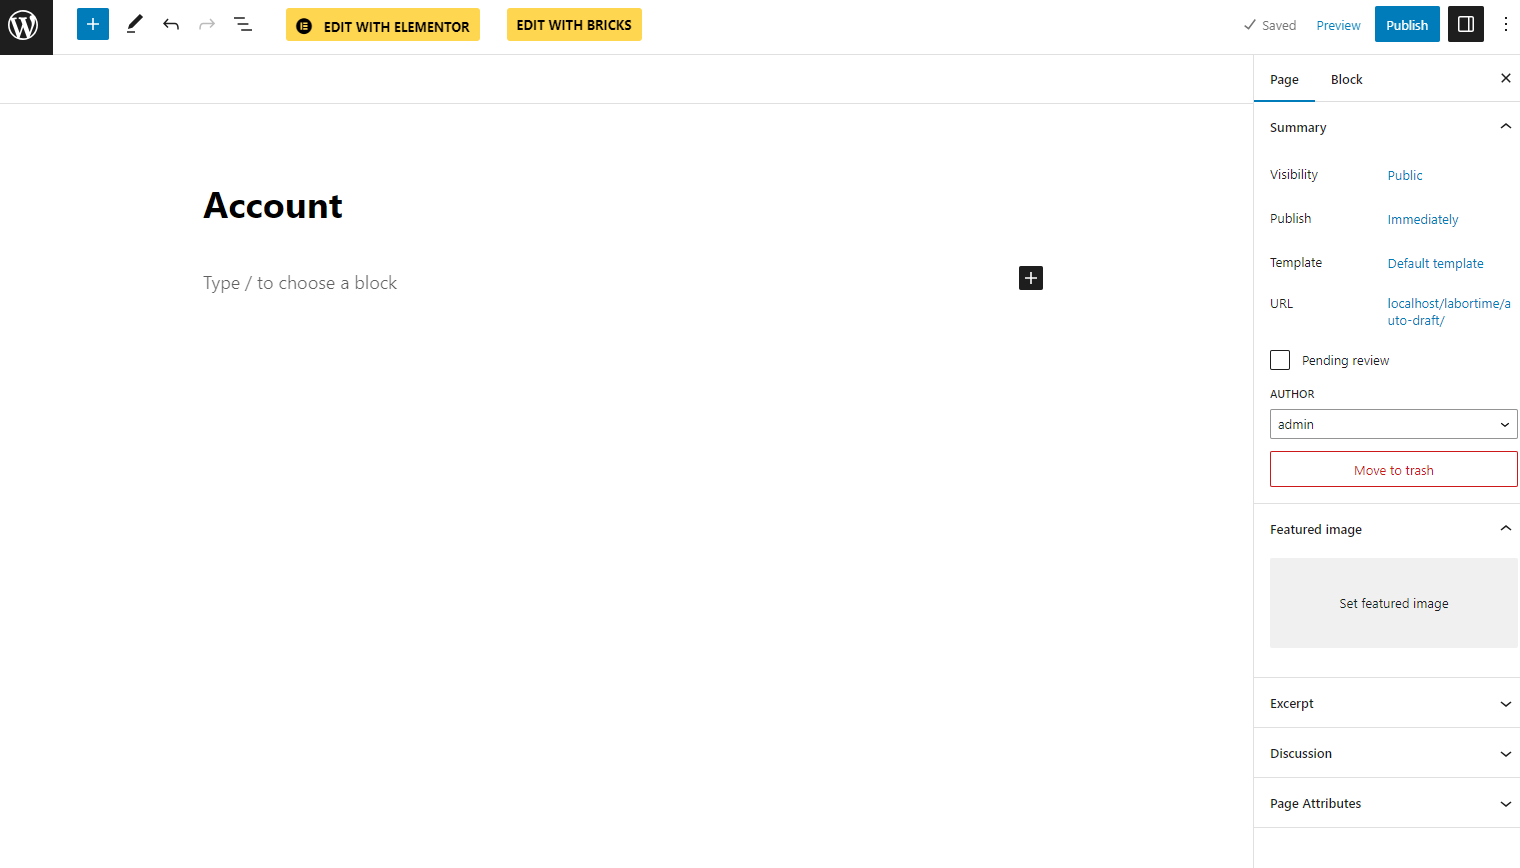
Follow the WordPress Dashboard > Pages > Add New pathway. Name the page and hit the “Publish” button. For now, leave the page empty.
Create the subpages for the Account page with the “Content” template mode
The Account page will contain the Profile Menu, allowing users to click and access various subpages.
Subpage templates can contain such content:
- Displaying the user info;
- Displaying the “Update User Account” form;
- Displaying “Create Post” and “Edit Post” forms;
- Displaying the user’s favorite items. To learn more about that, proceed to the How to Create Favorites Page Using Data Stores Module tutorial;
- Displaying the user’s recent comments;
- Displaying the user’s booked items.
You can create subpage templates with Elementor or JetEngine listing items.
Create a subpage template with a form
Create a template with Elementor
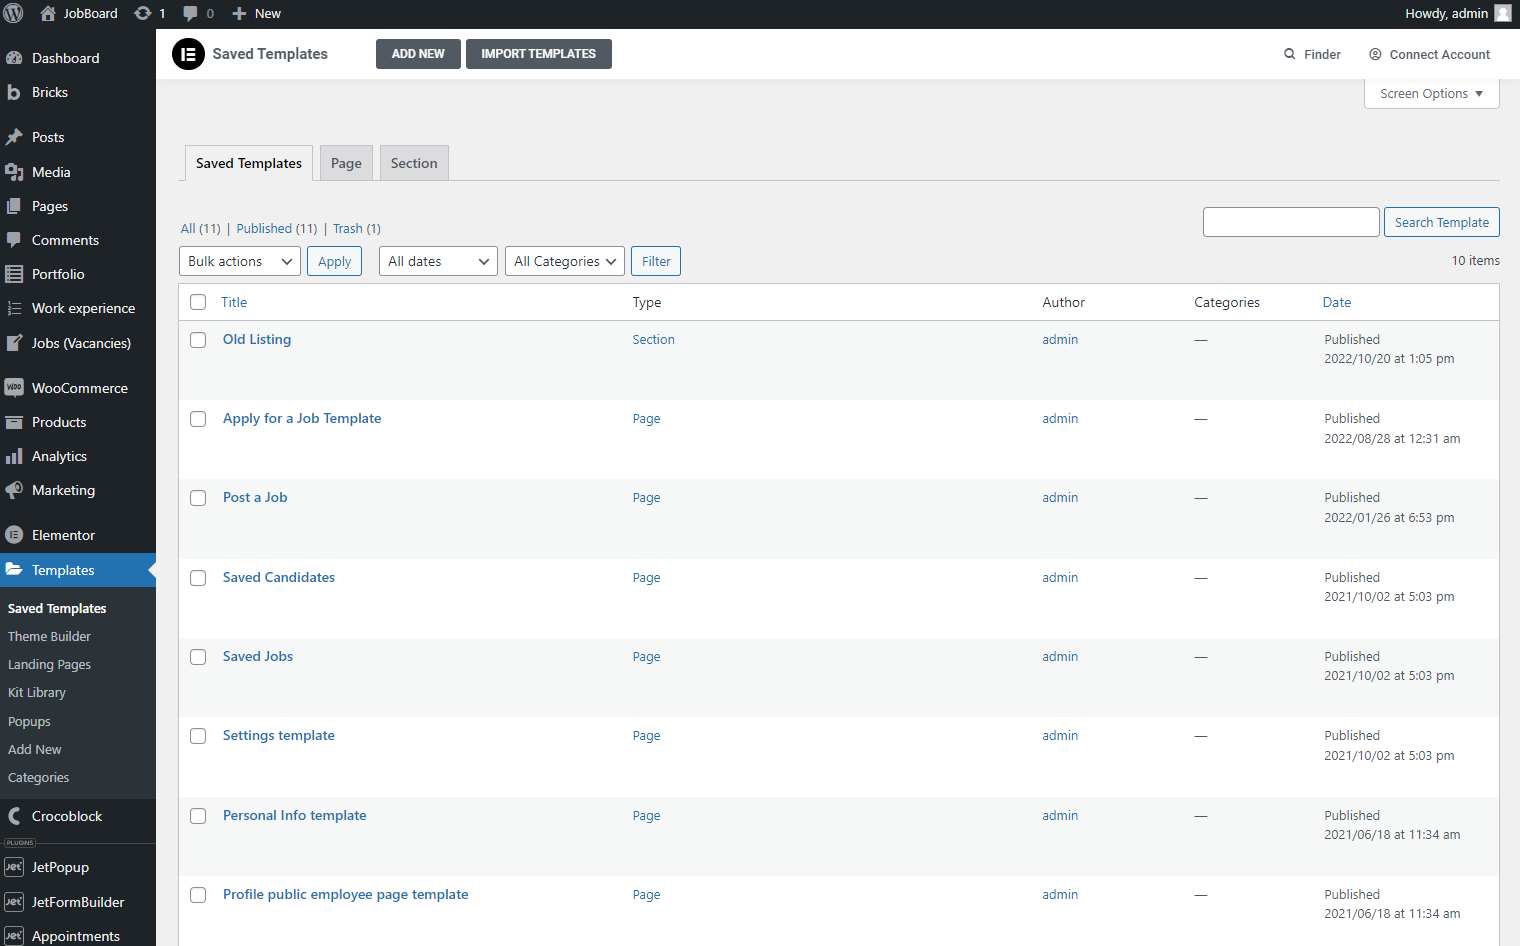
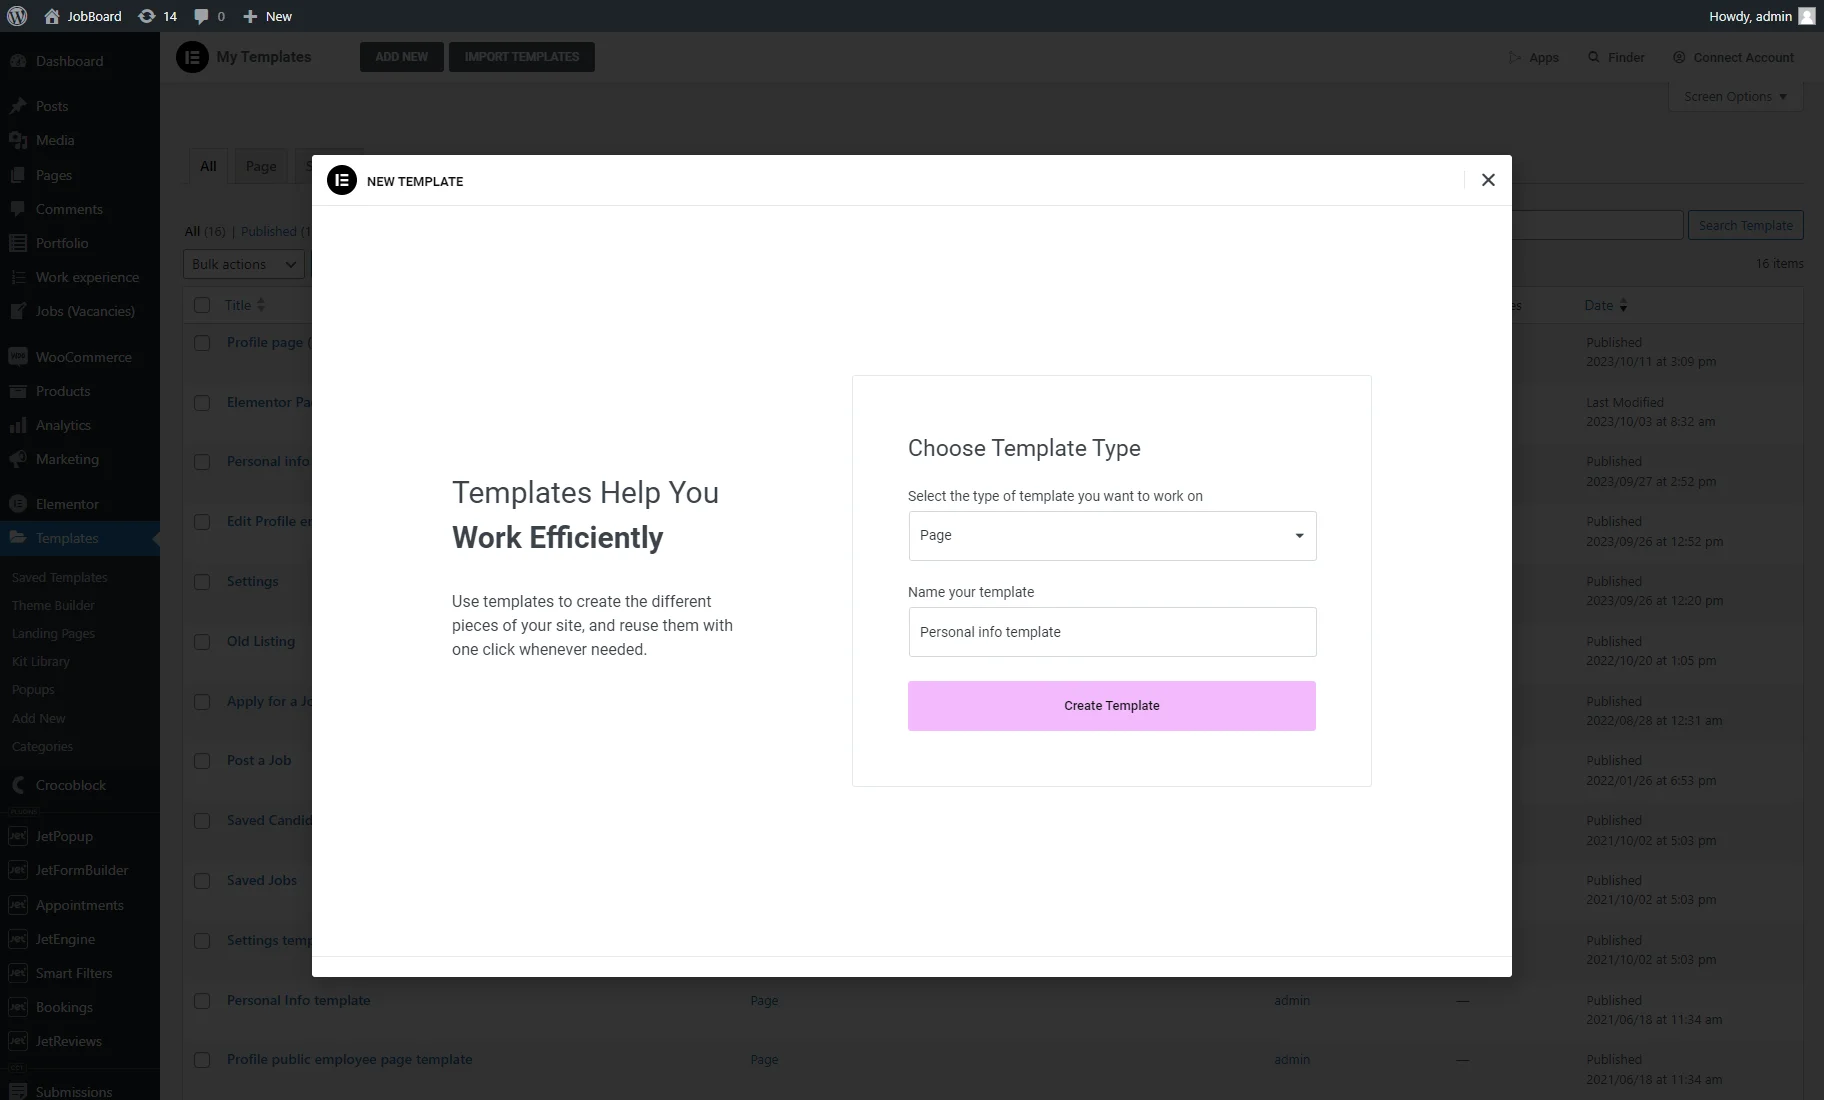
If you decide to create templates with Elementor, move to the Templates tab under the Elementor tab on the WordPress Dashboard.
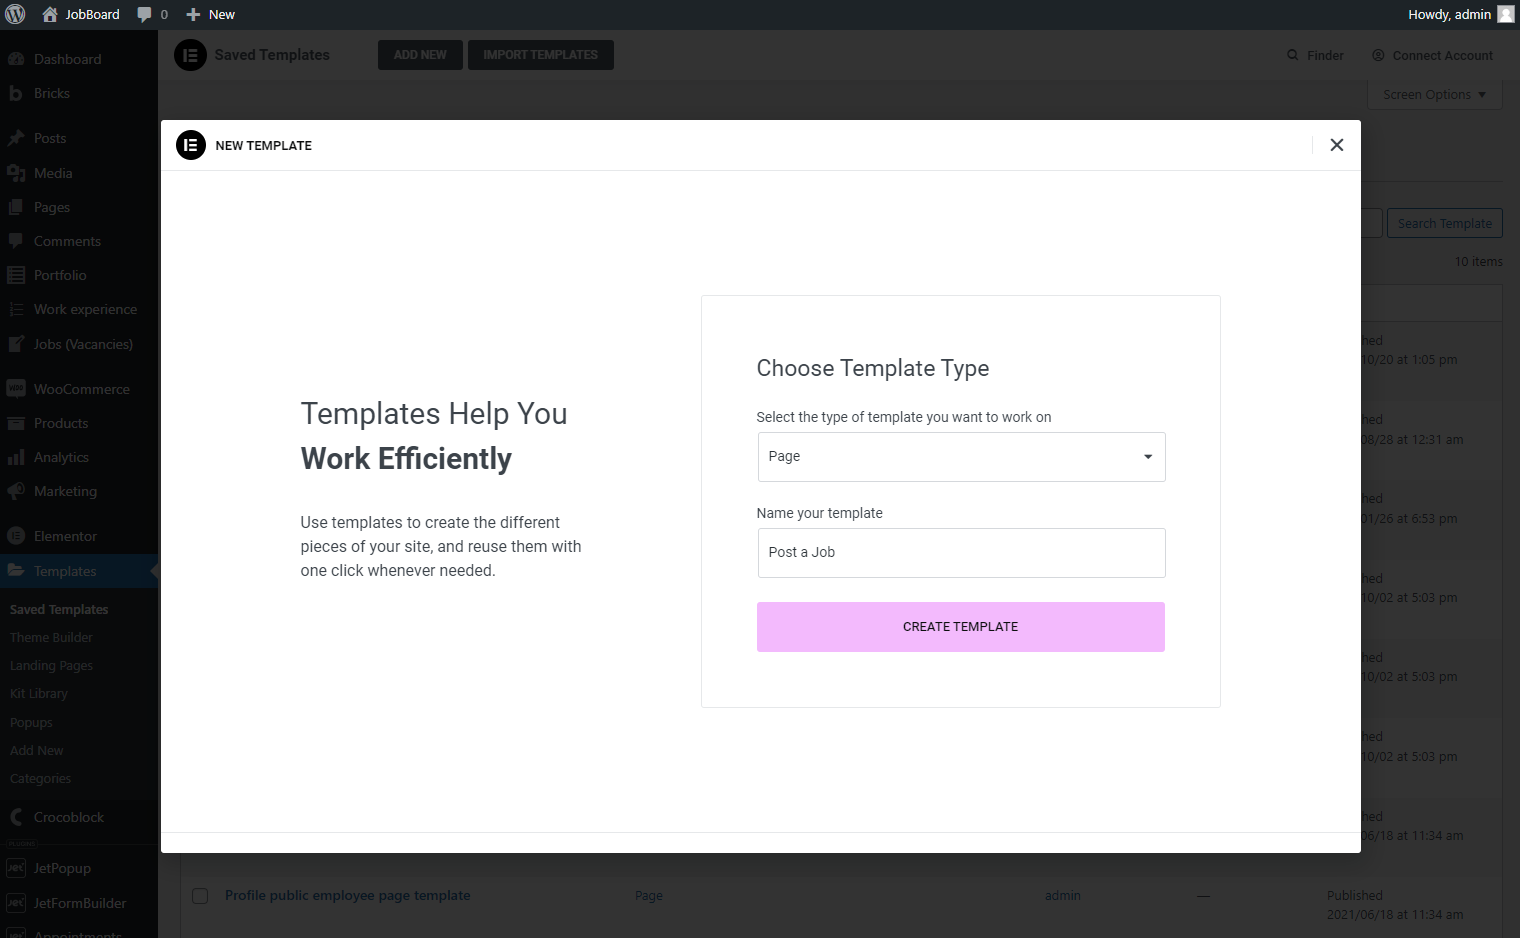
Push the “Add New” button. Choose the “Page” Template Type and enter the Name. Then, hit the “Create Template” button.
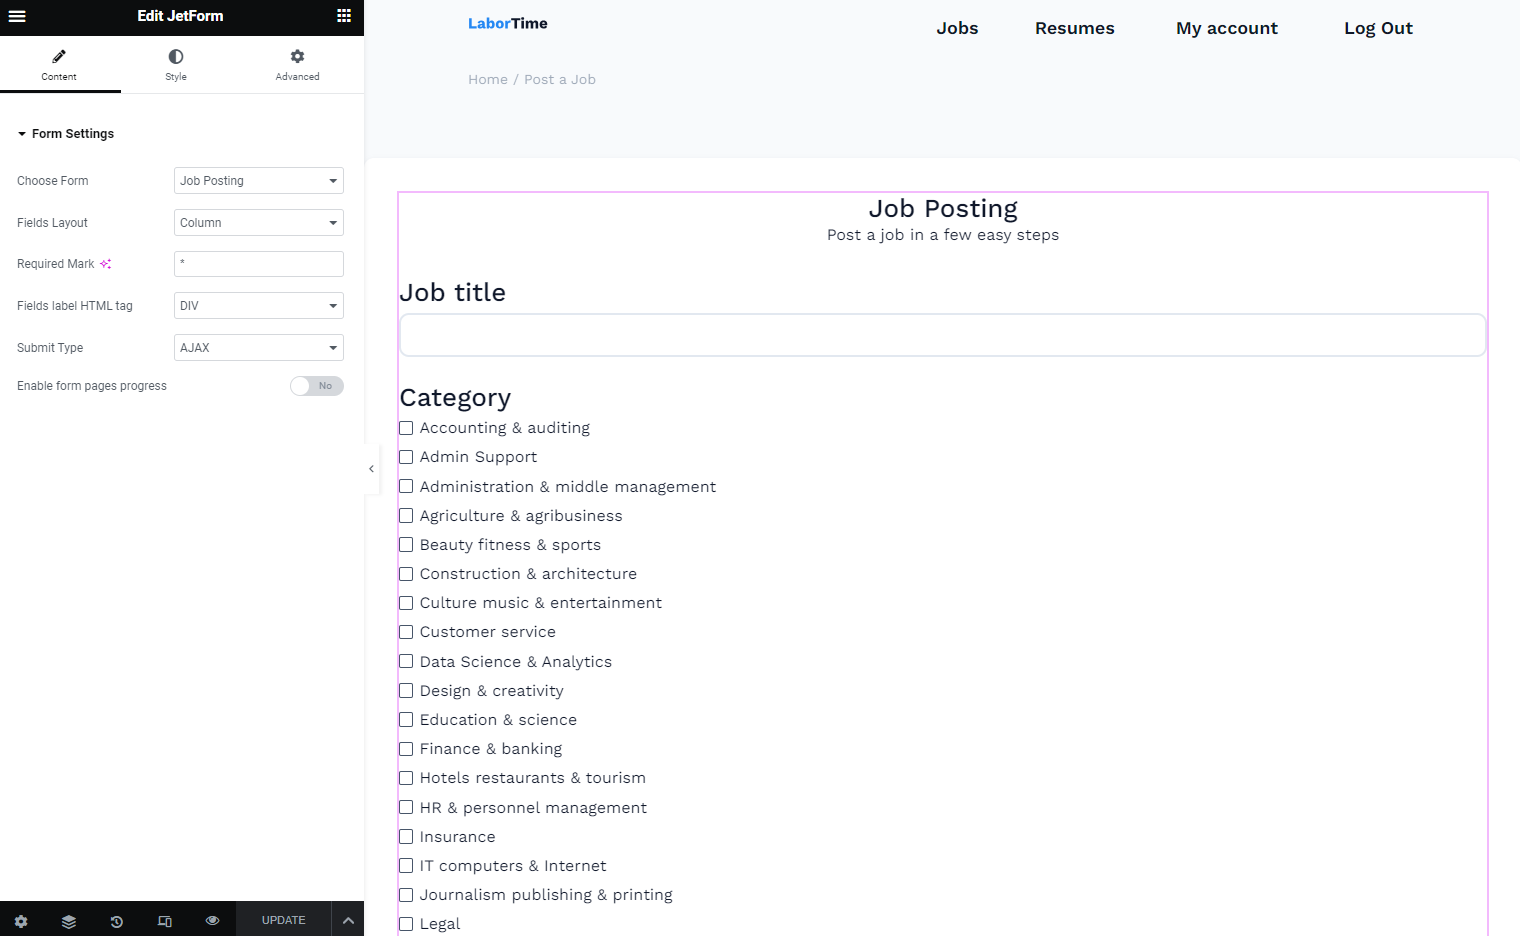
In the Elementor editor, fill the template with the needed content. For example, I placed the JetFormBuilder form using the JetForm widget.
When you finish customizing the template, hit the “Update” button.
Create as many templates as you need.
Create a JetEngine listing item
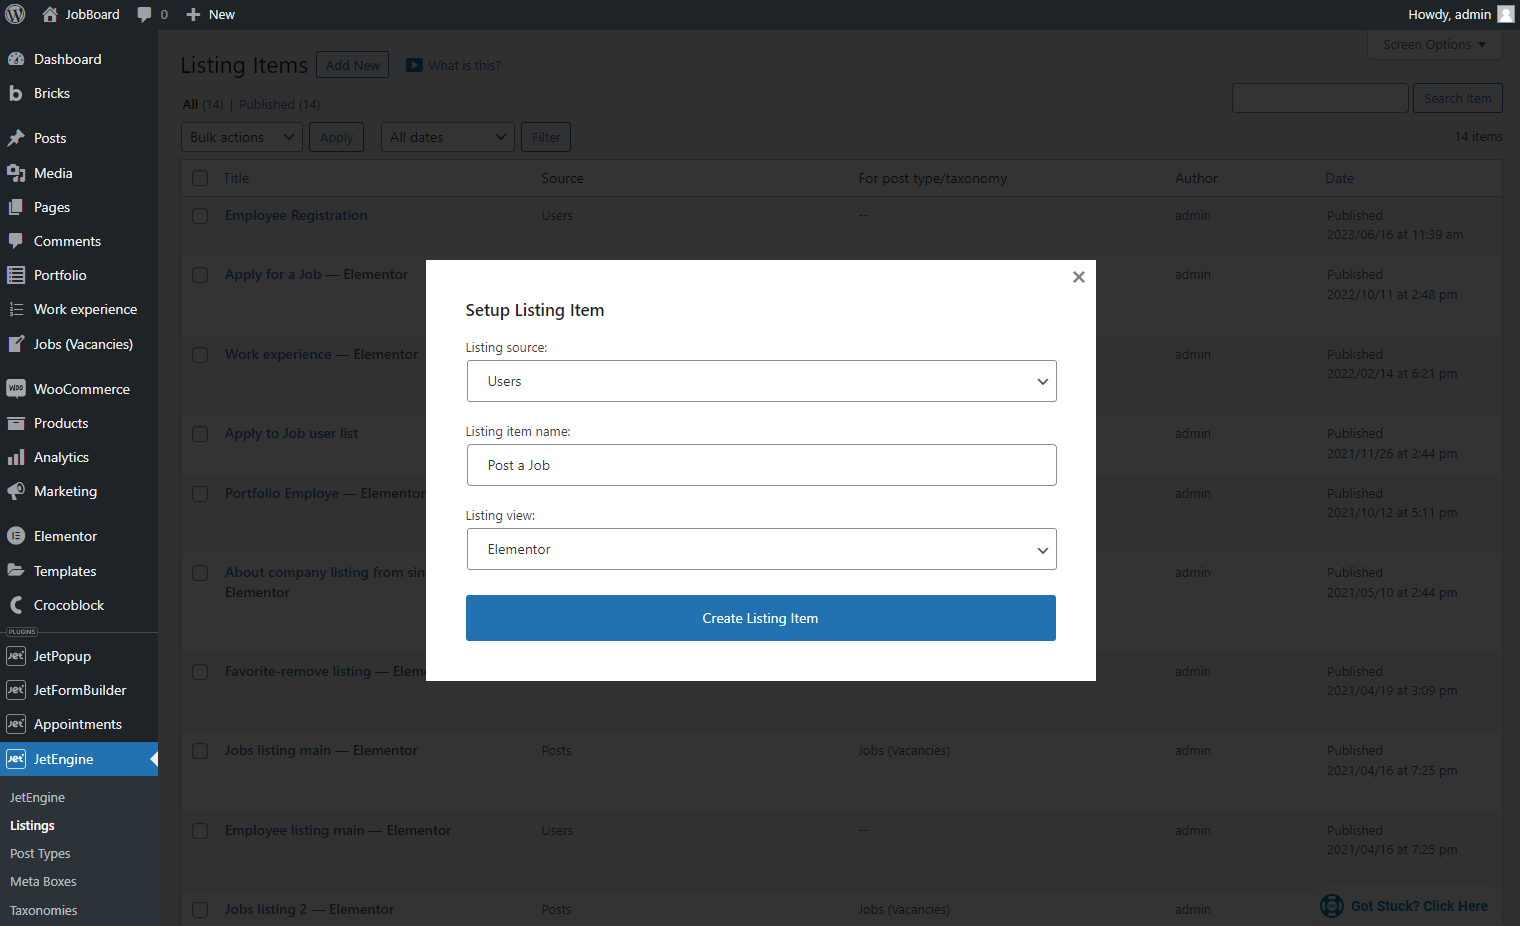
If you decide to create a JetEngine listing item, go to the JetEngine > Listings tab and push the “Add New” button.
In the Setup Listing Item pop-up, select the “Users” Listing Source, enter the Listing Item name, pick the “Elementor” Listing view, and click the “Create Listing Item” button.
Fill the template with the content and click the “Update” button.
Create as many items as you need.
How to display user information
Firstly, create the Meta Box for users. More detailed information can be found in the How to Apply Meta Boxes to Users tutorial.
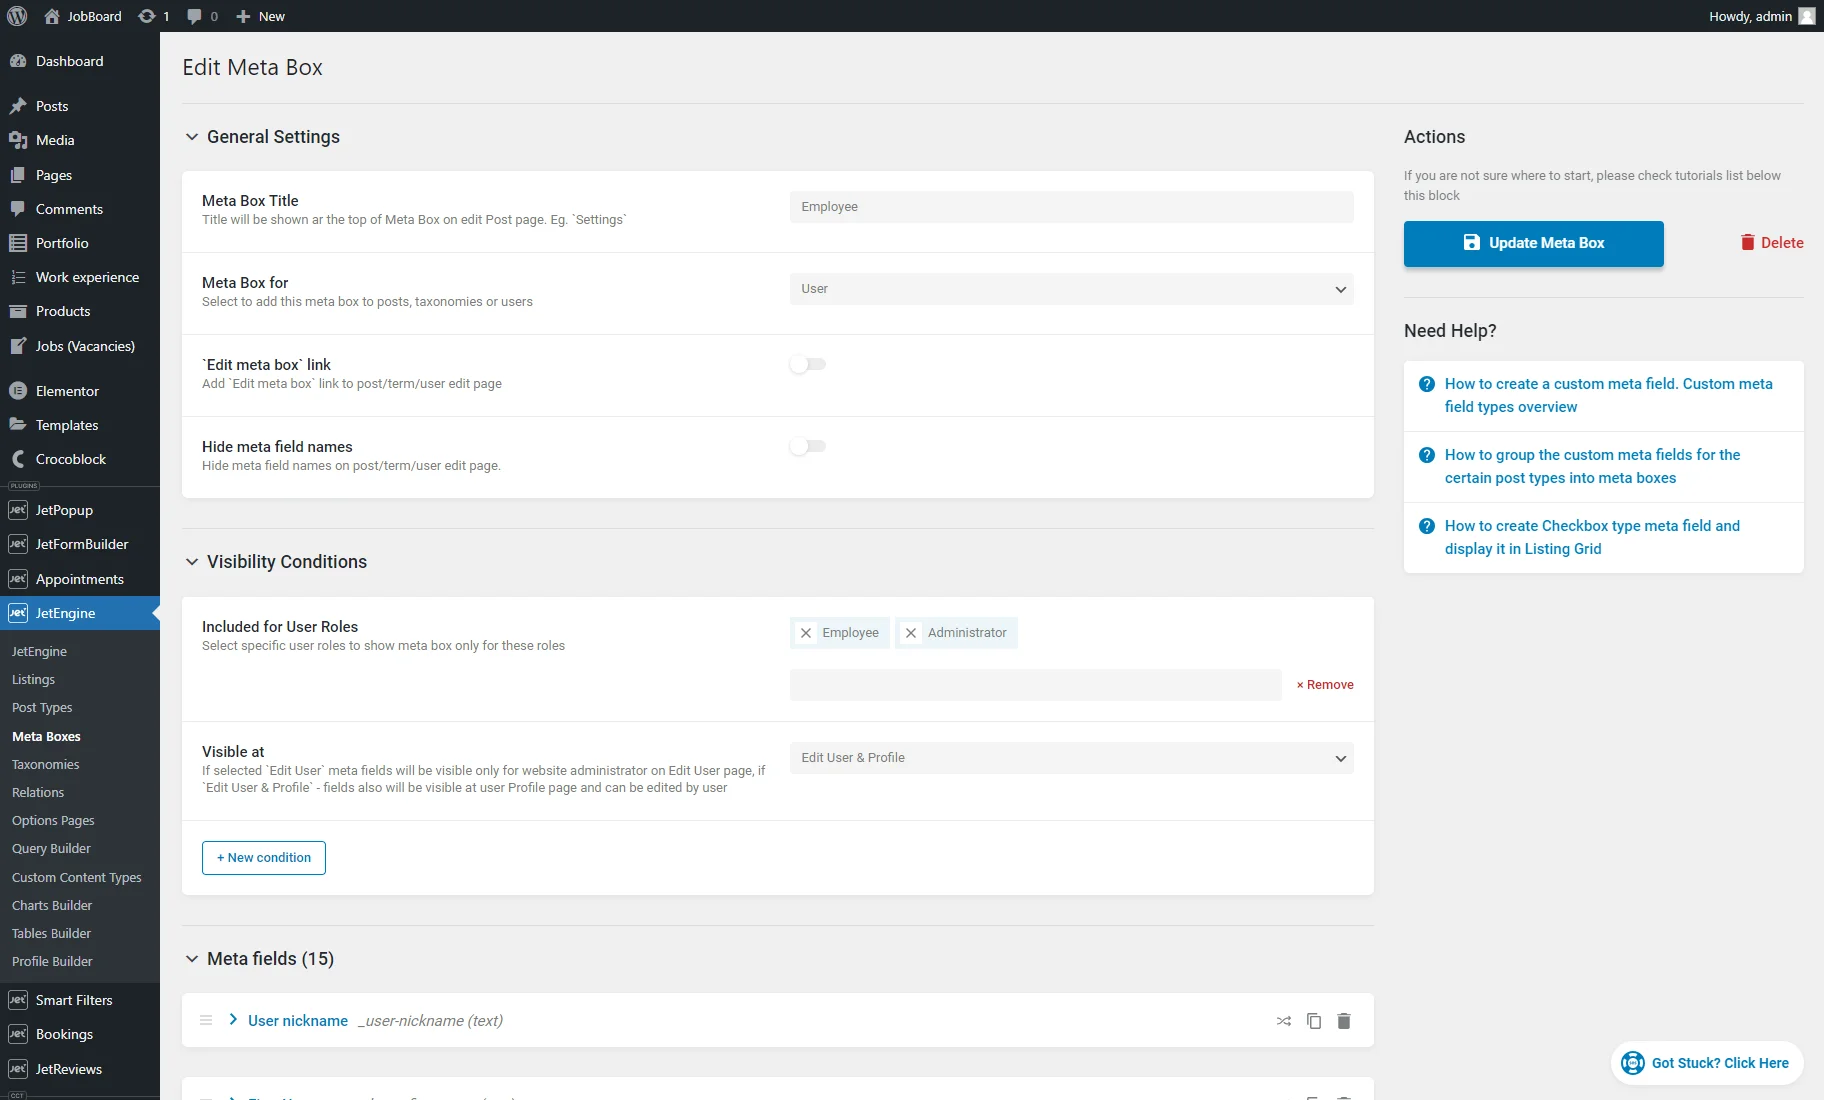
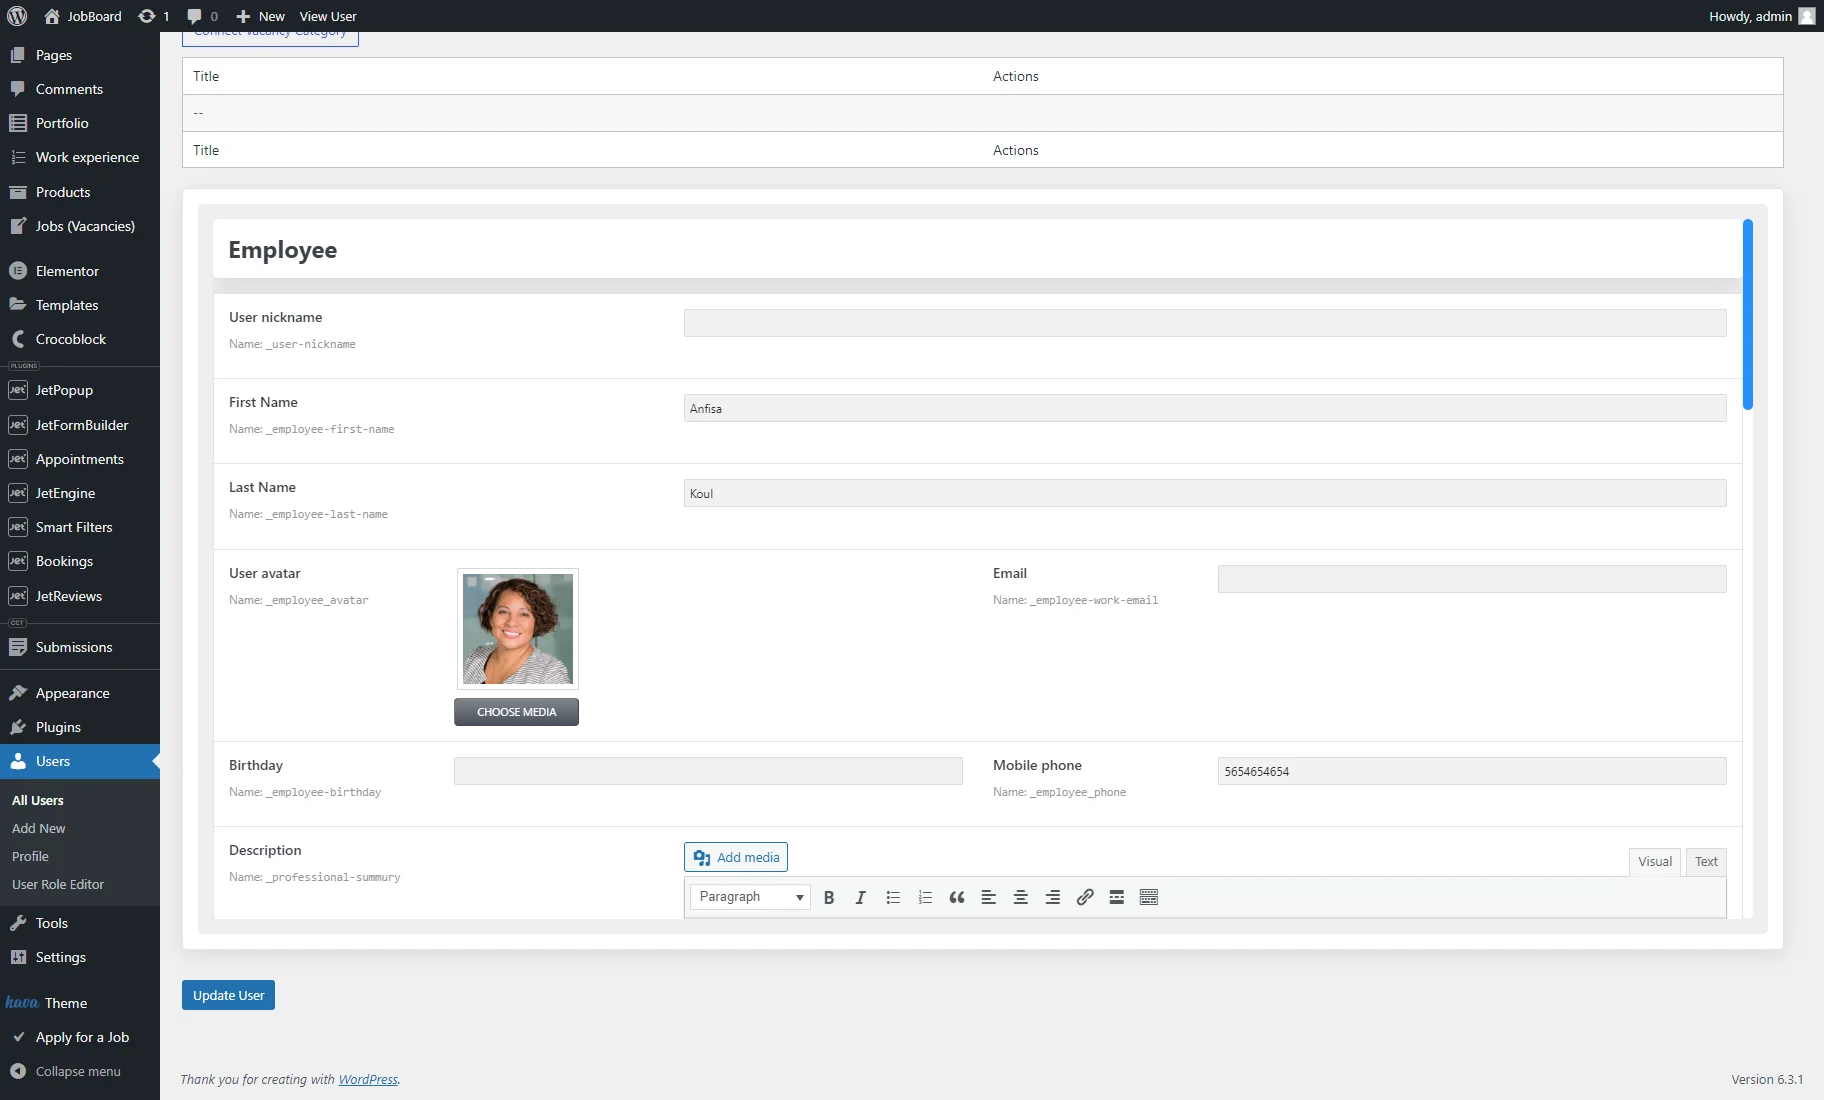
Also, add some custom meta fields, for example, user nickname, first and last name, email, mobile phone (Text fields), user avatar (Media field), birthday (Date field), professional summary (WYSIWYG field), experience (Number field), language (Checkbox field).
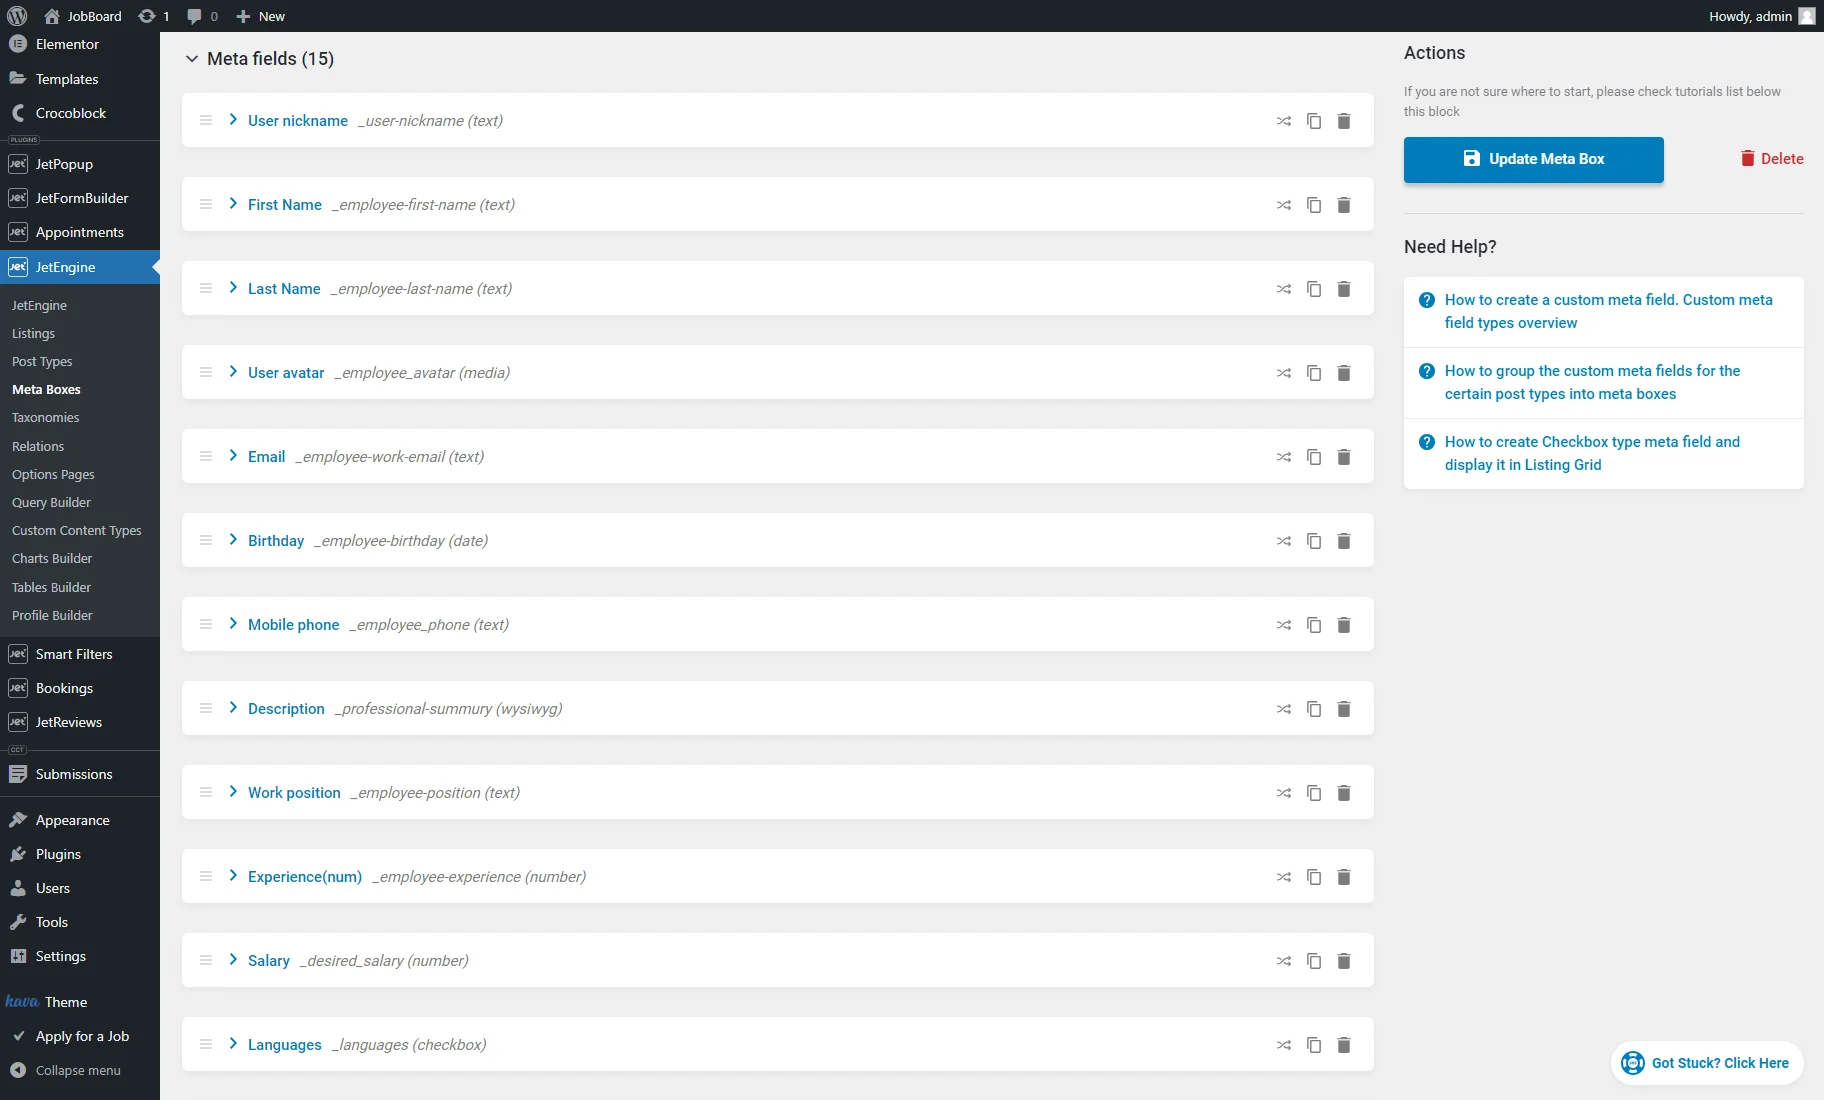
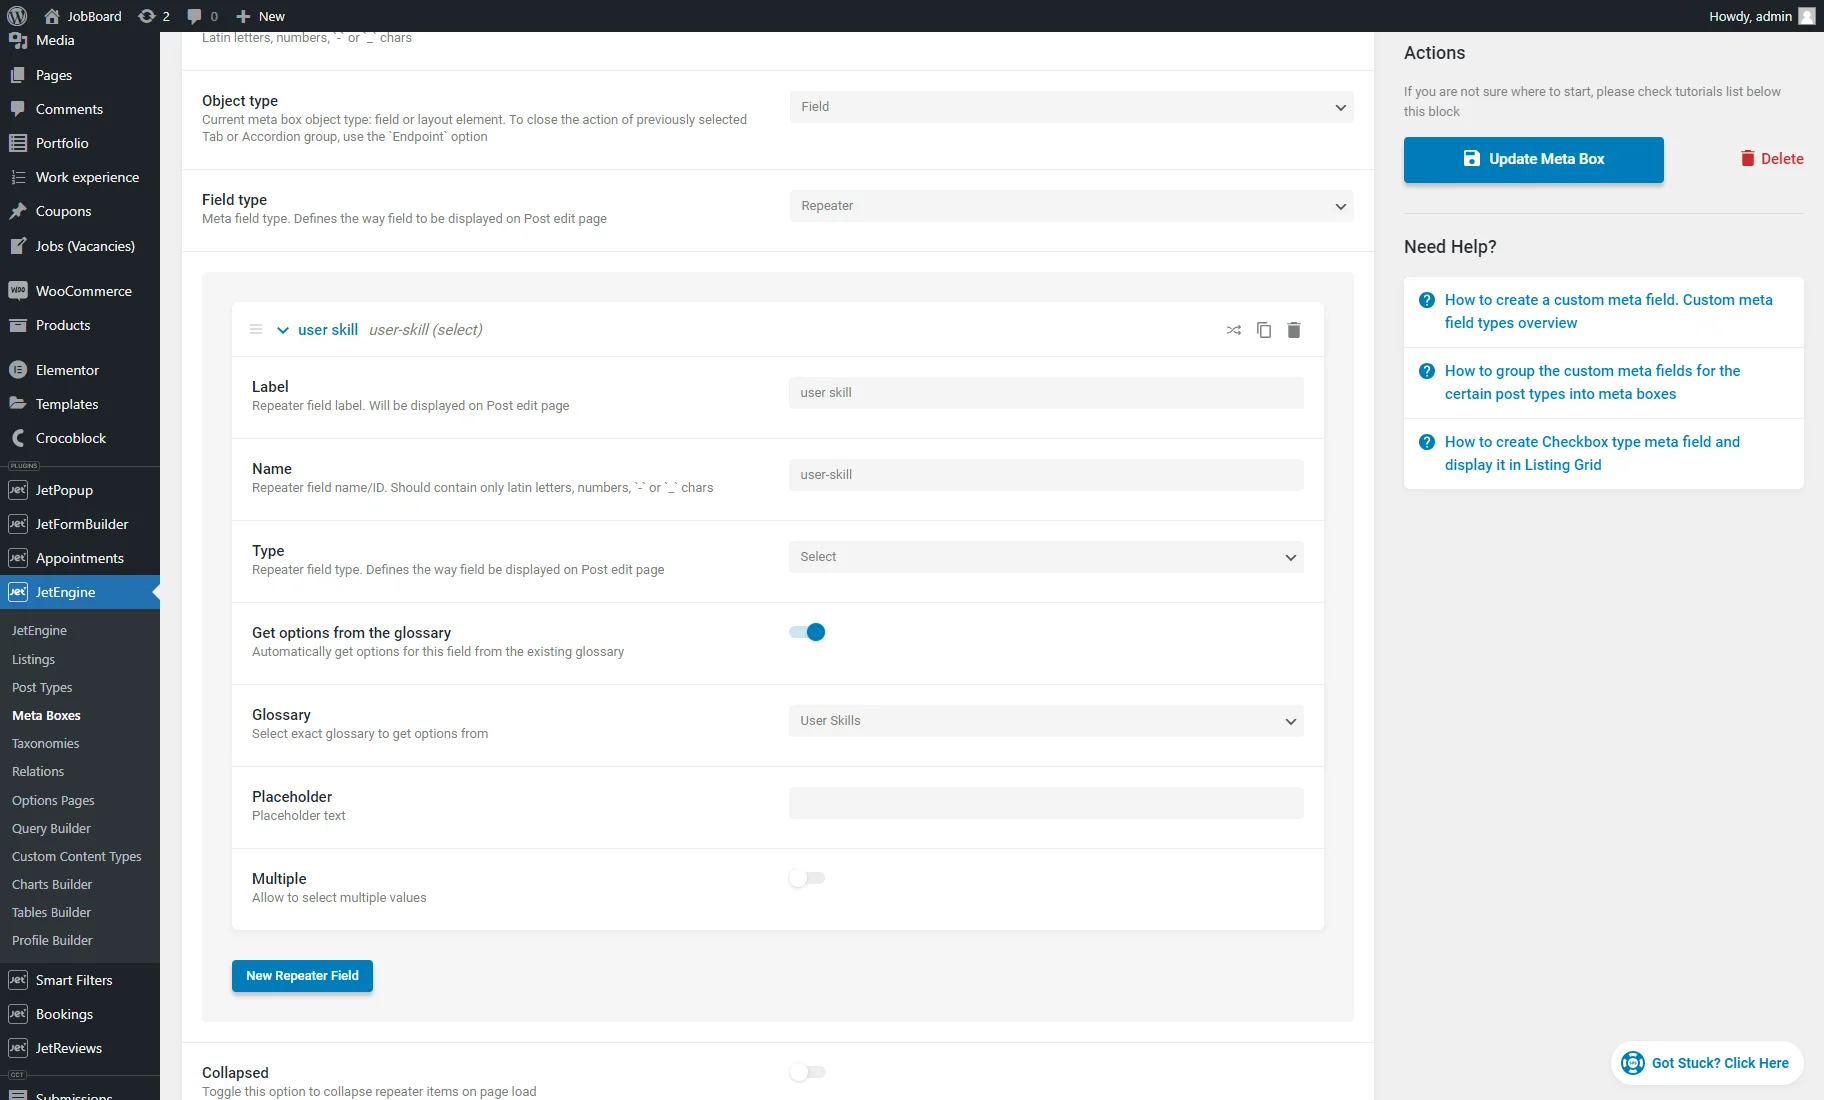
To display user professional skills, we created a meta field with the “Repeater” Field type and the “Skills” Label. Then, we hit the “New Repeater Field” button to create a new field inside the Repeater field, entered the Label, and picked the “Select” Type.
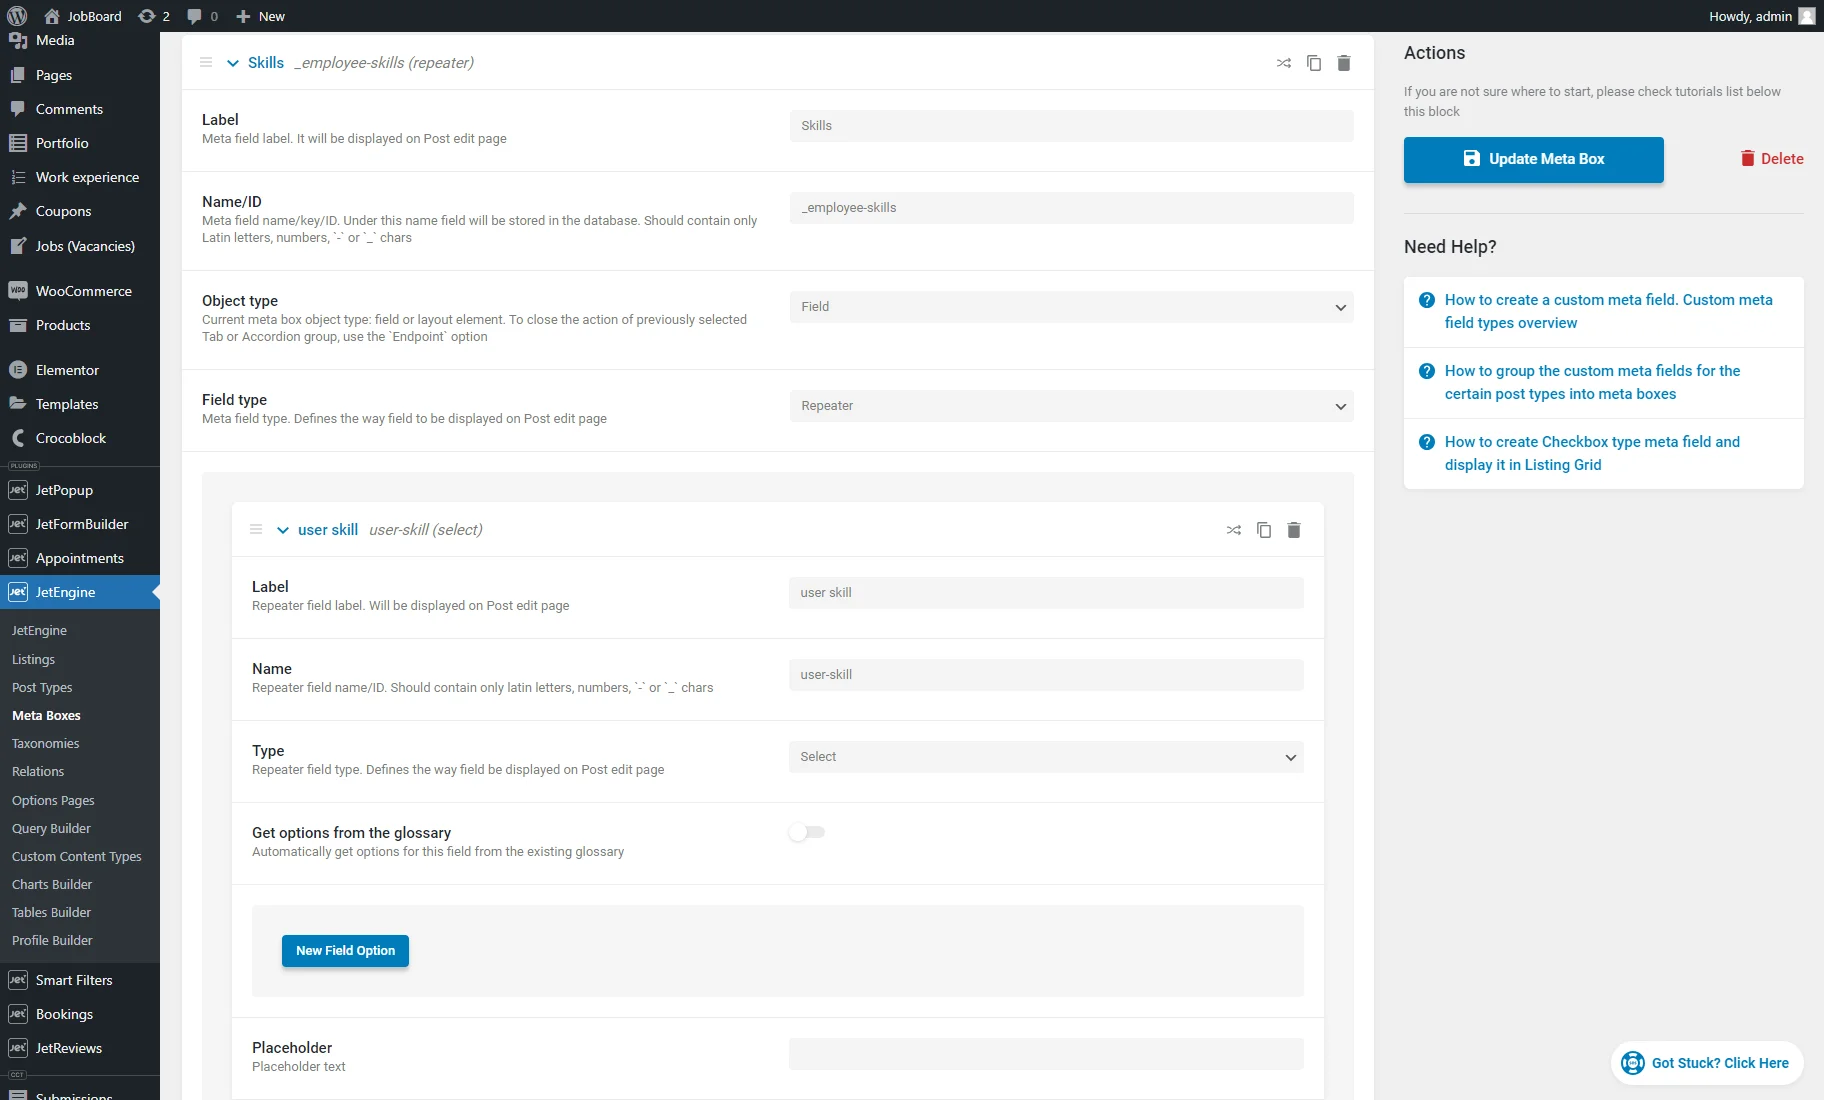
By clicking the “New Field Option” button, you can add options to the Select field manually.
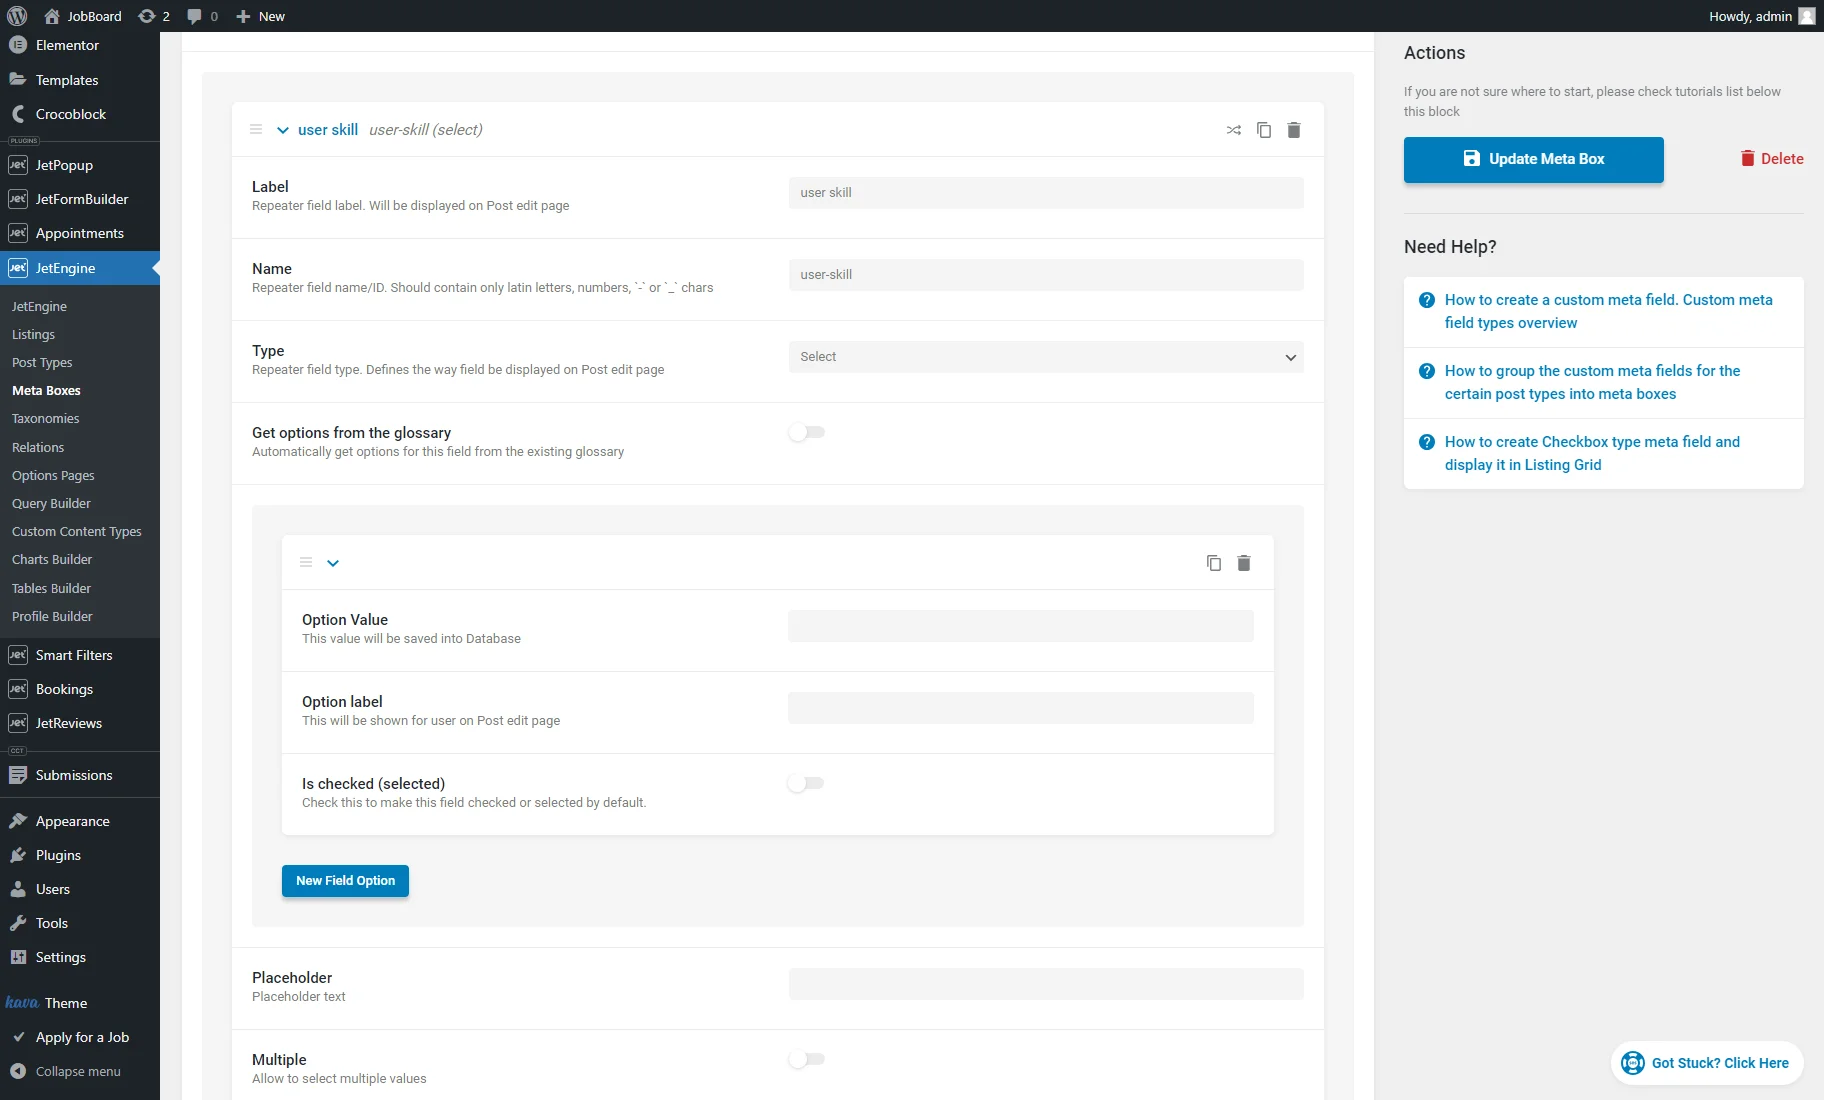
Also, you can enable the Get options from the glossary toggle and select the needed Glossary from the drop-down menu.
If you create options manually, you can use them once in the current Select field. The Glossary functionality allows you to create a list of items with labels and values and use it as many times as you need.
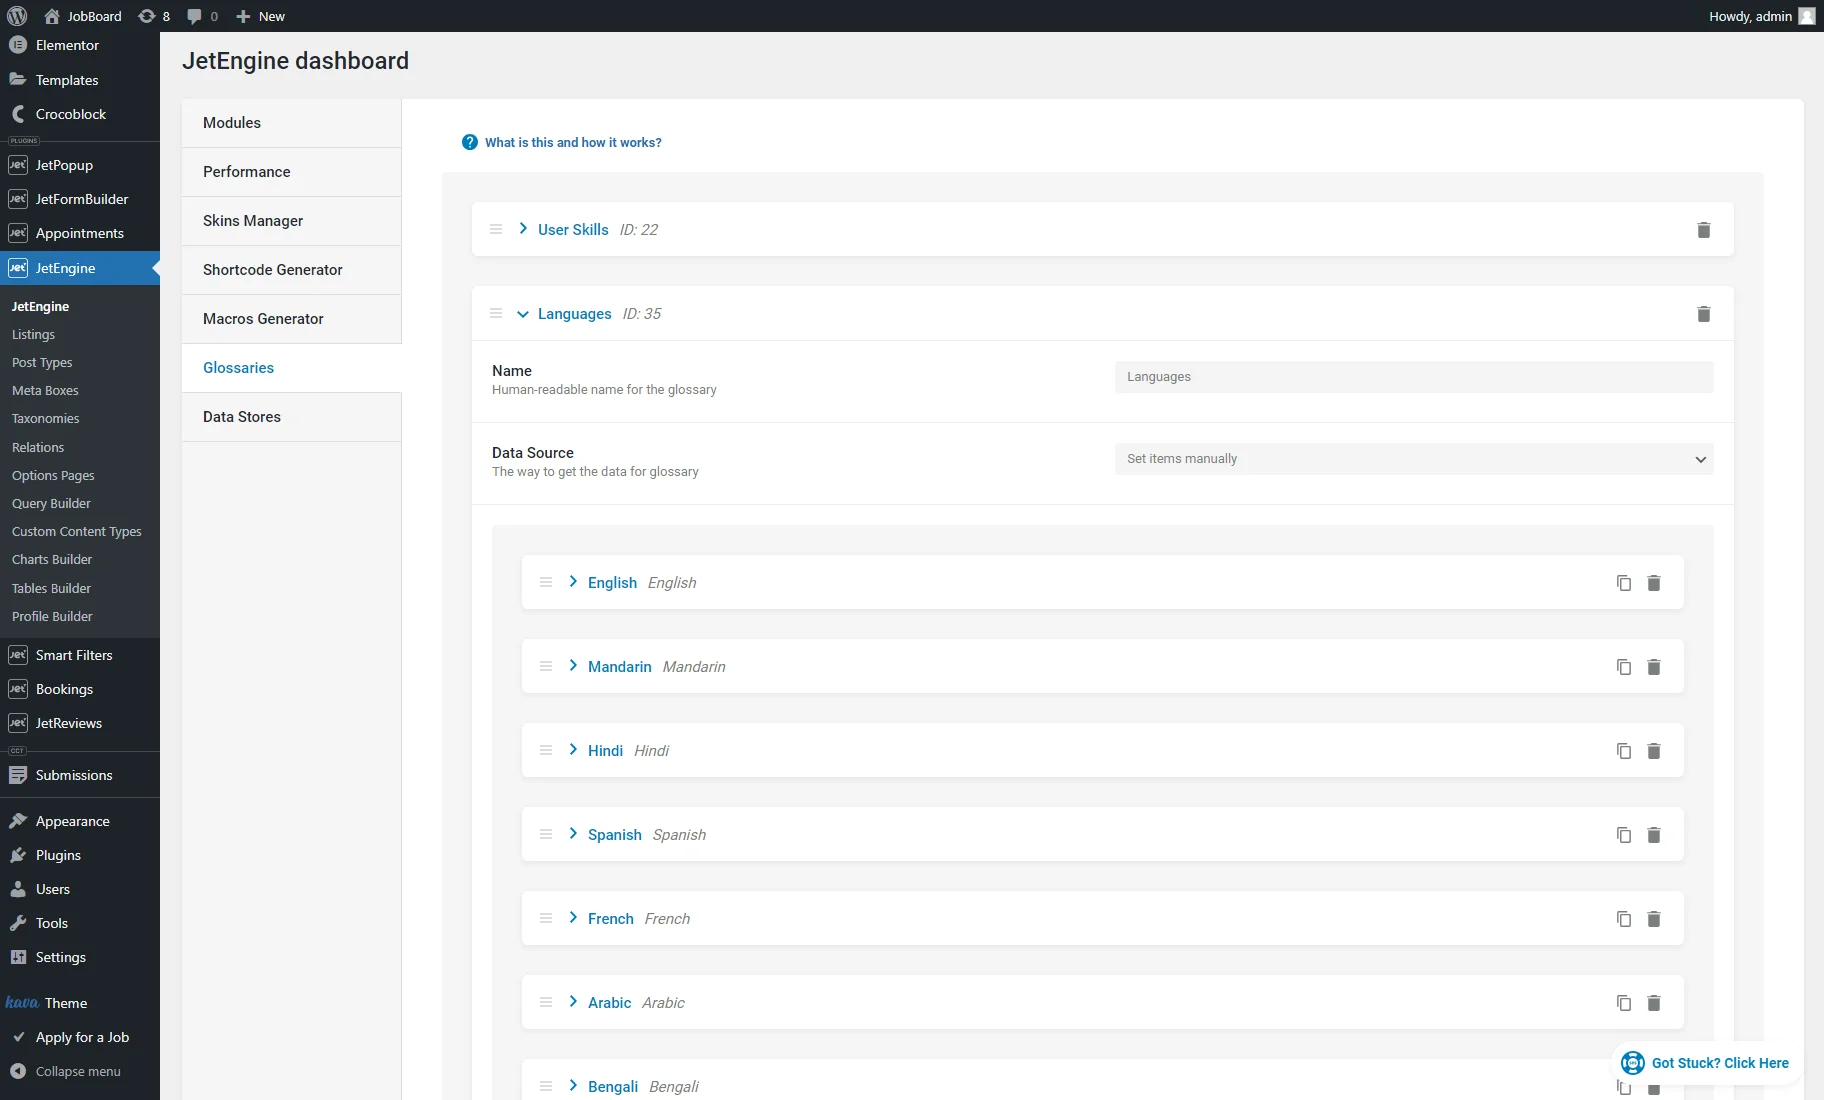
To create a Glossary, follow the JetEngine > JetEngine > Glossaries path. Learn more about the Glossary settings from the Glossaries Overview.
We hit the “+ New Glossary” button, typed the Name, selected the “Set items manually” Data Source, and set the needed options by clicking the “New field” button.
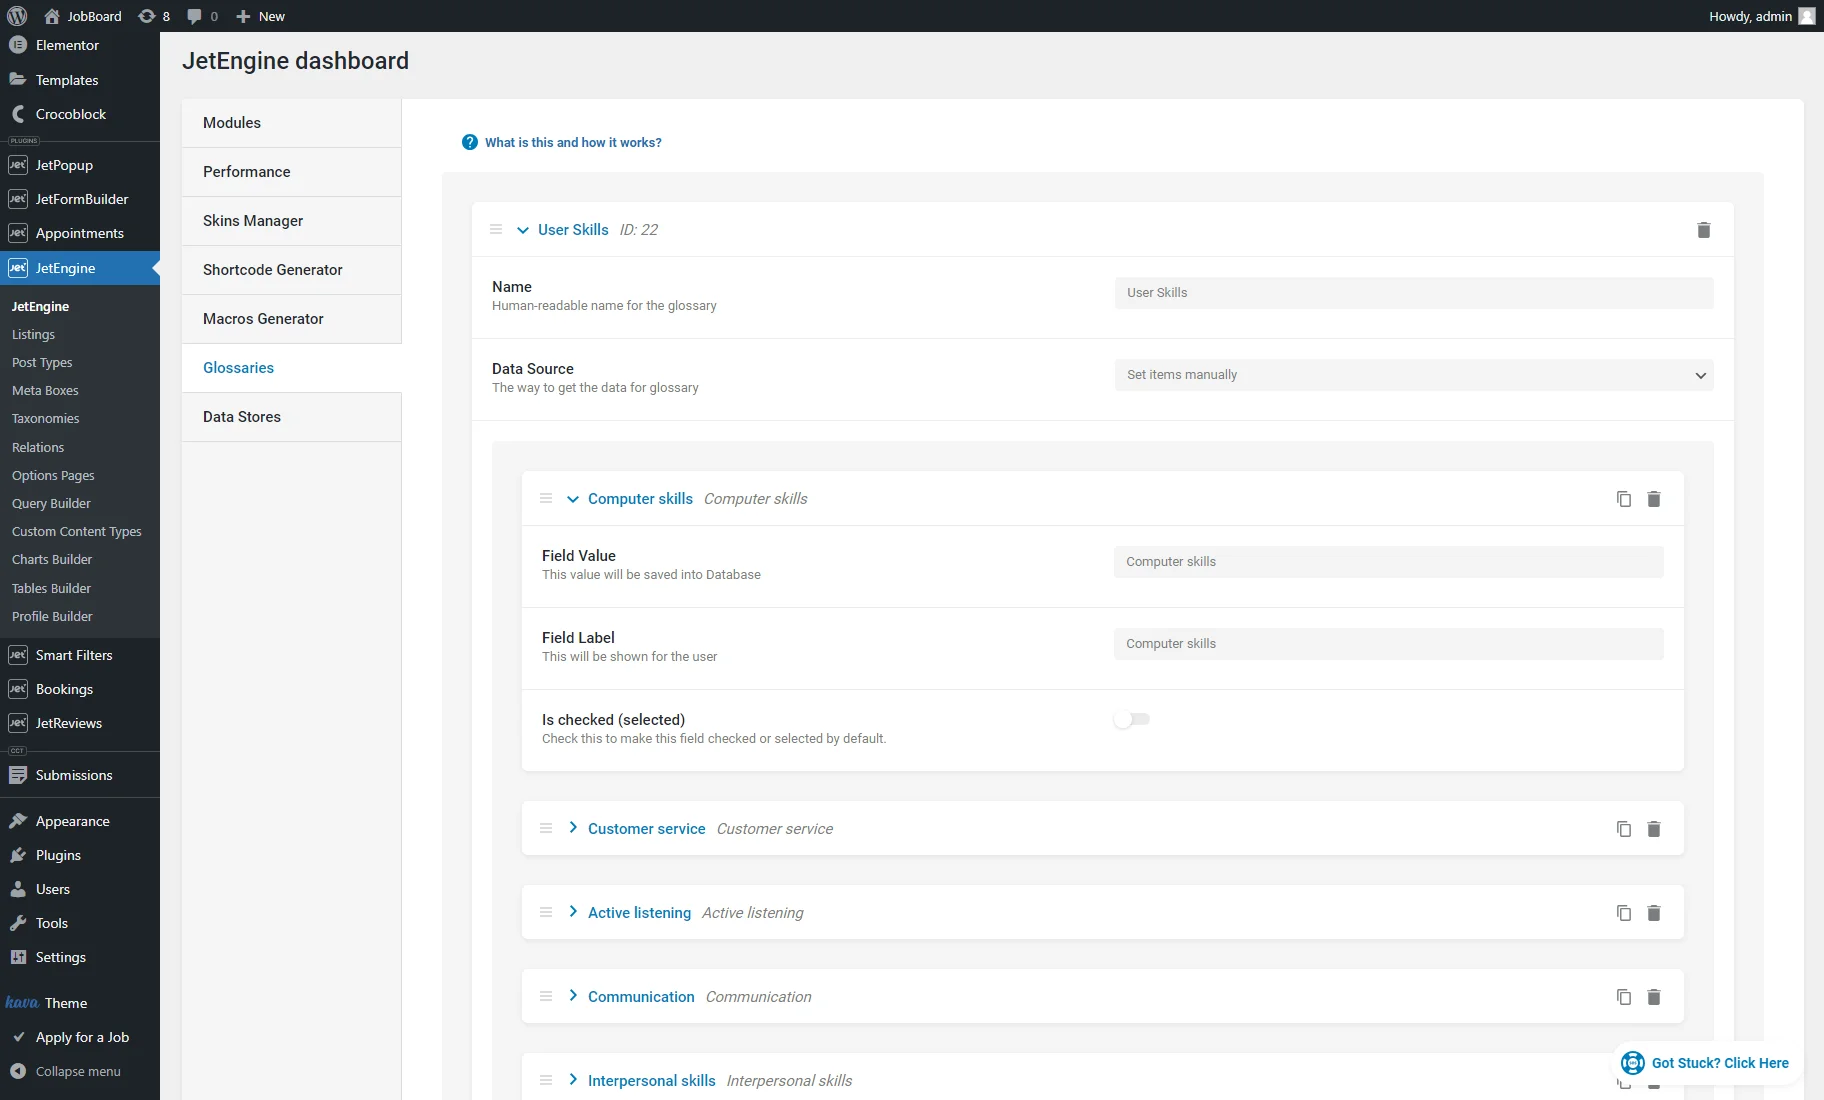
After creating the options, we pushed the “Save” button.
Also, we created the “Languages” Glossary.
Return to the user Meta Box and set the created Glossary for the Select field.
Also, we set the “Language” Glossary for the Checkbox field.
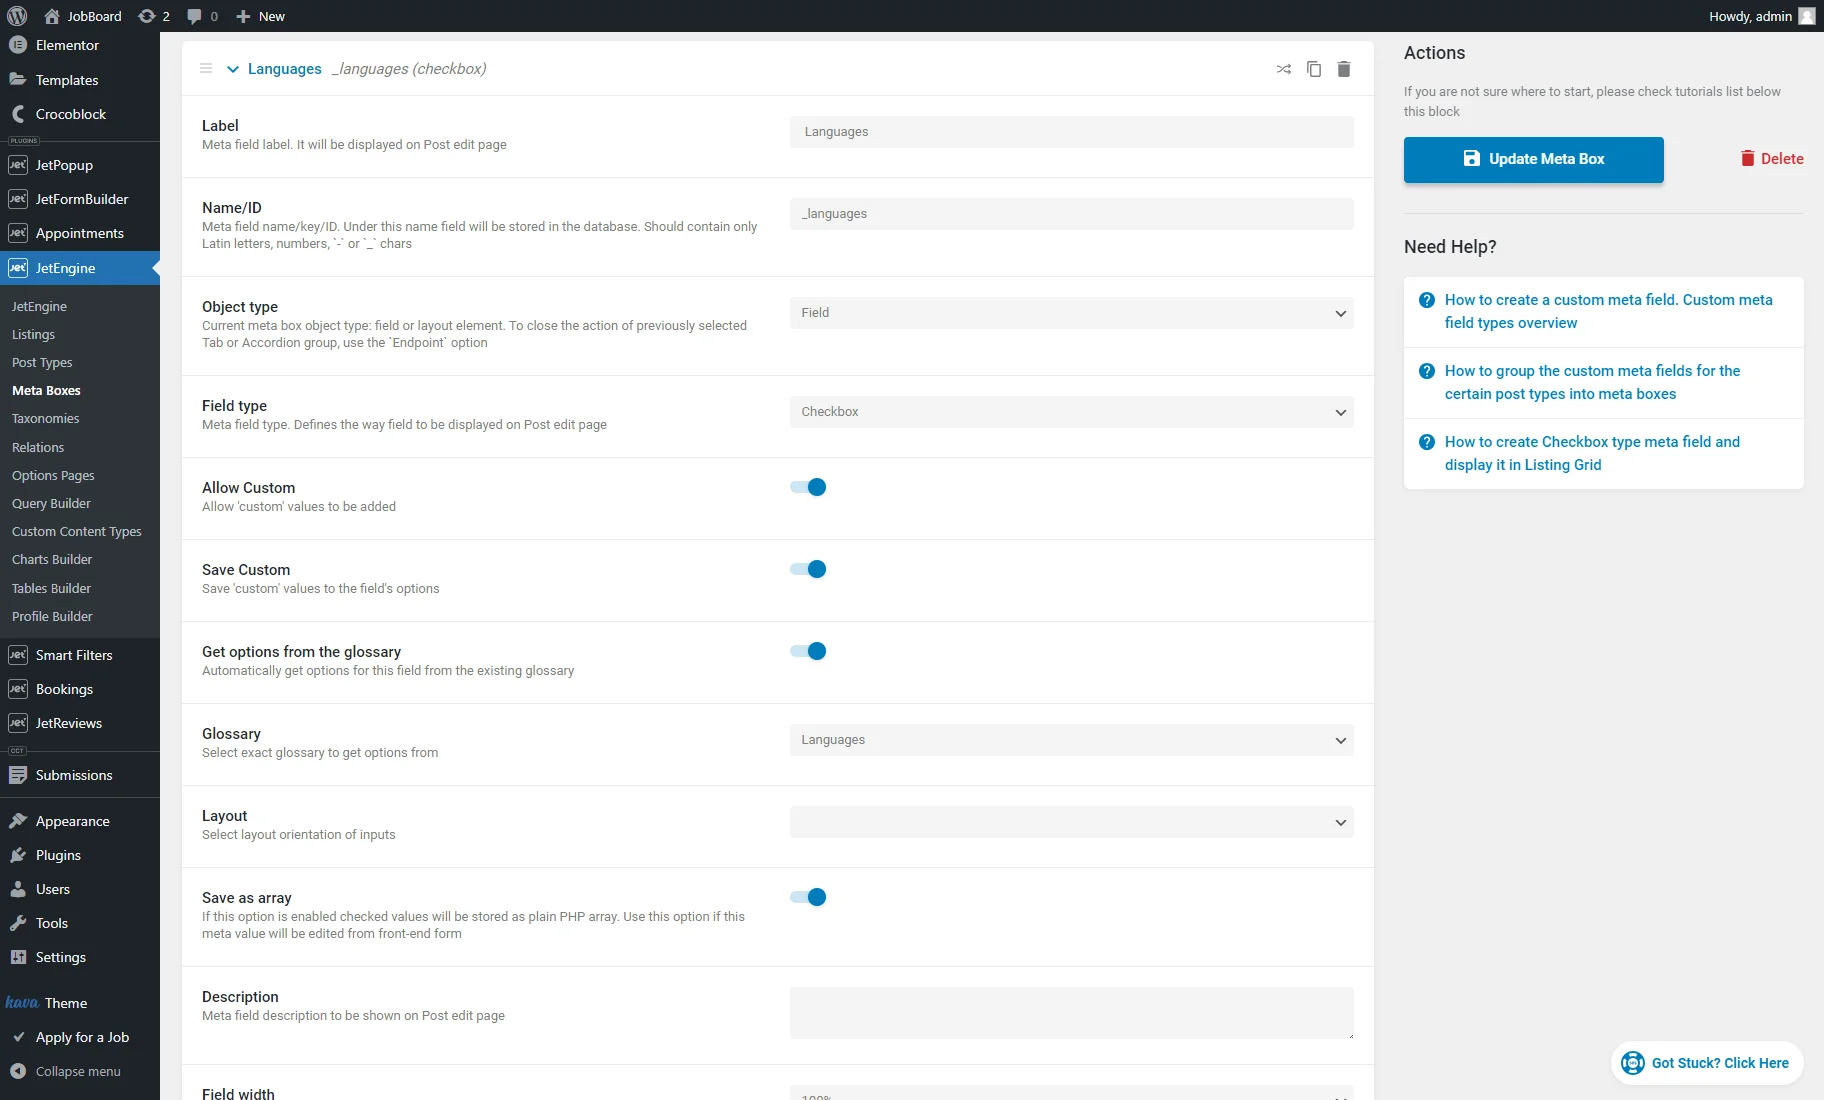
When you finish customizing, hit the “Add/Update Meta Box” button.
To check where meta fields are displayed, head to Users > Profile. You can see the custom meta fields under the WordPress user profile fields you can fill in.
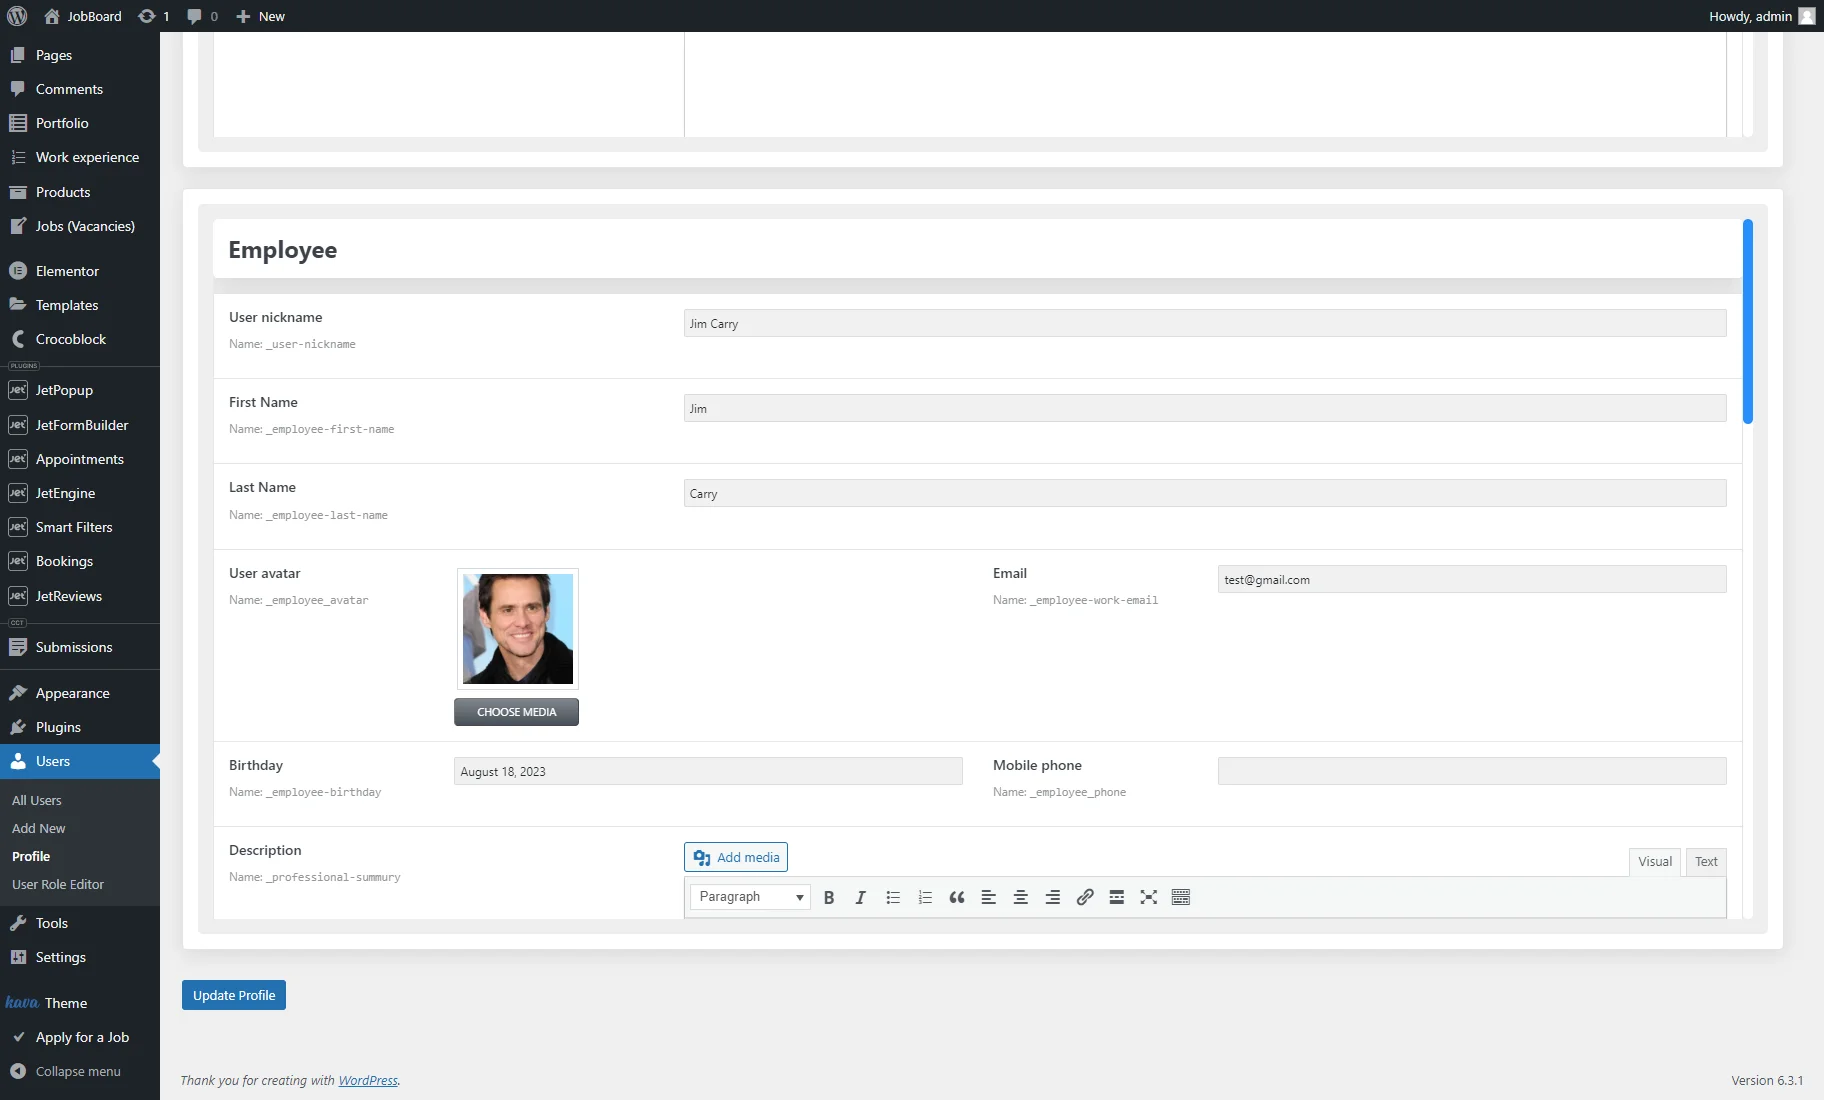
To set the Repeater fields, hit the “+ Add Item” button and select the needed option from the drop-down. Repeat this step to add as many options as you need.
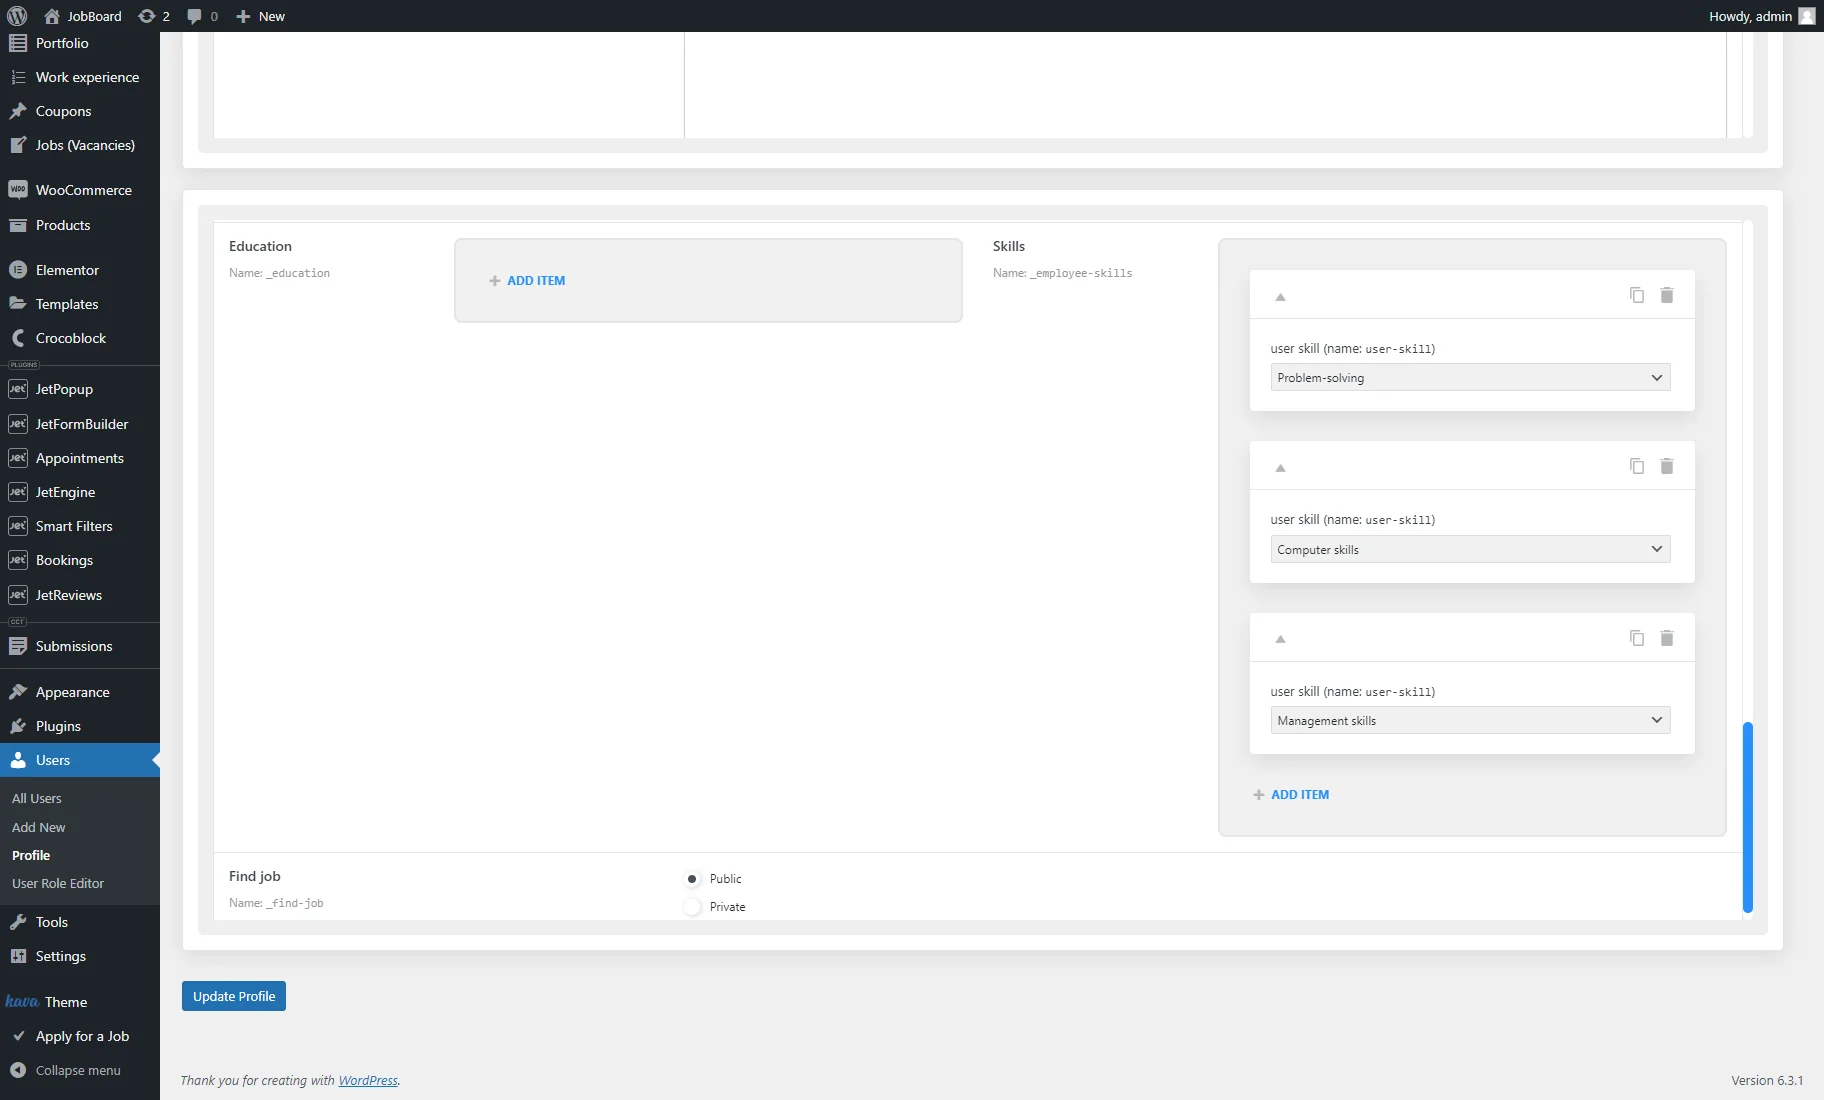
When you are done, push the “Update Profile” button.
In the Profile tab, you can fill in custom fields for yourself. To fill in custom meta fields for other users, go to the Users > All Users tab and click to edit one of the needed users.
Now, let’s create a subpage with user information. You can create a template with Elementor or JetEngine listing items; the creation process is described above.
Currently, we will create a subpage template via the Elementor Theme Builder.
Navigate to the Templates > Saved Templates tab and hit the “Add New” button.
Select the “Page” template type, enter the name, and press the “Create Template” button.
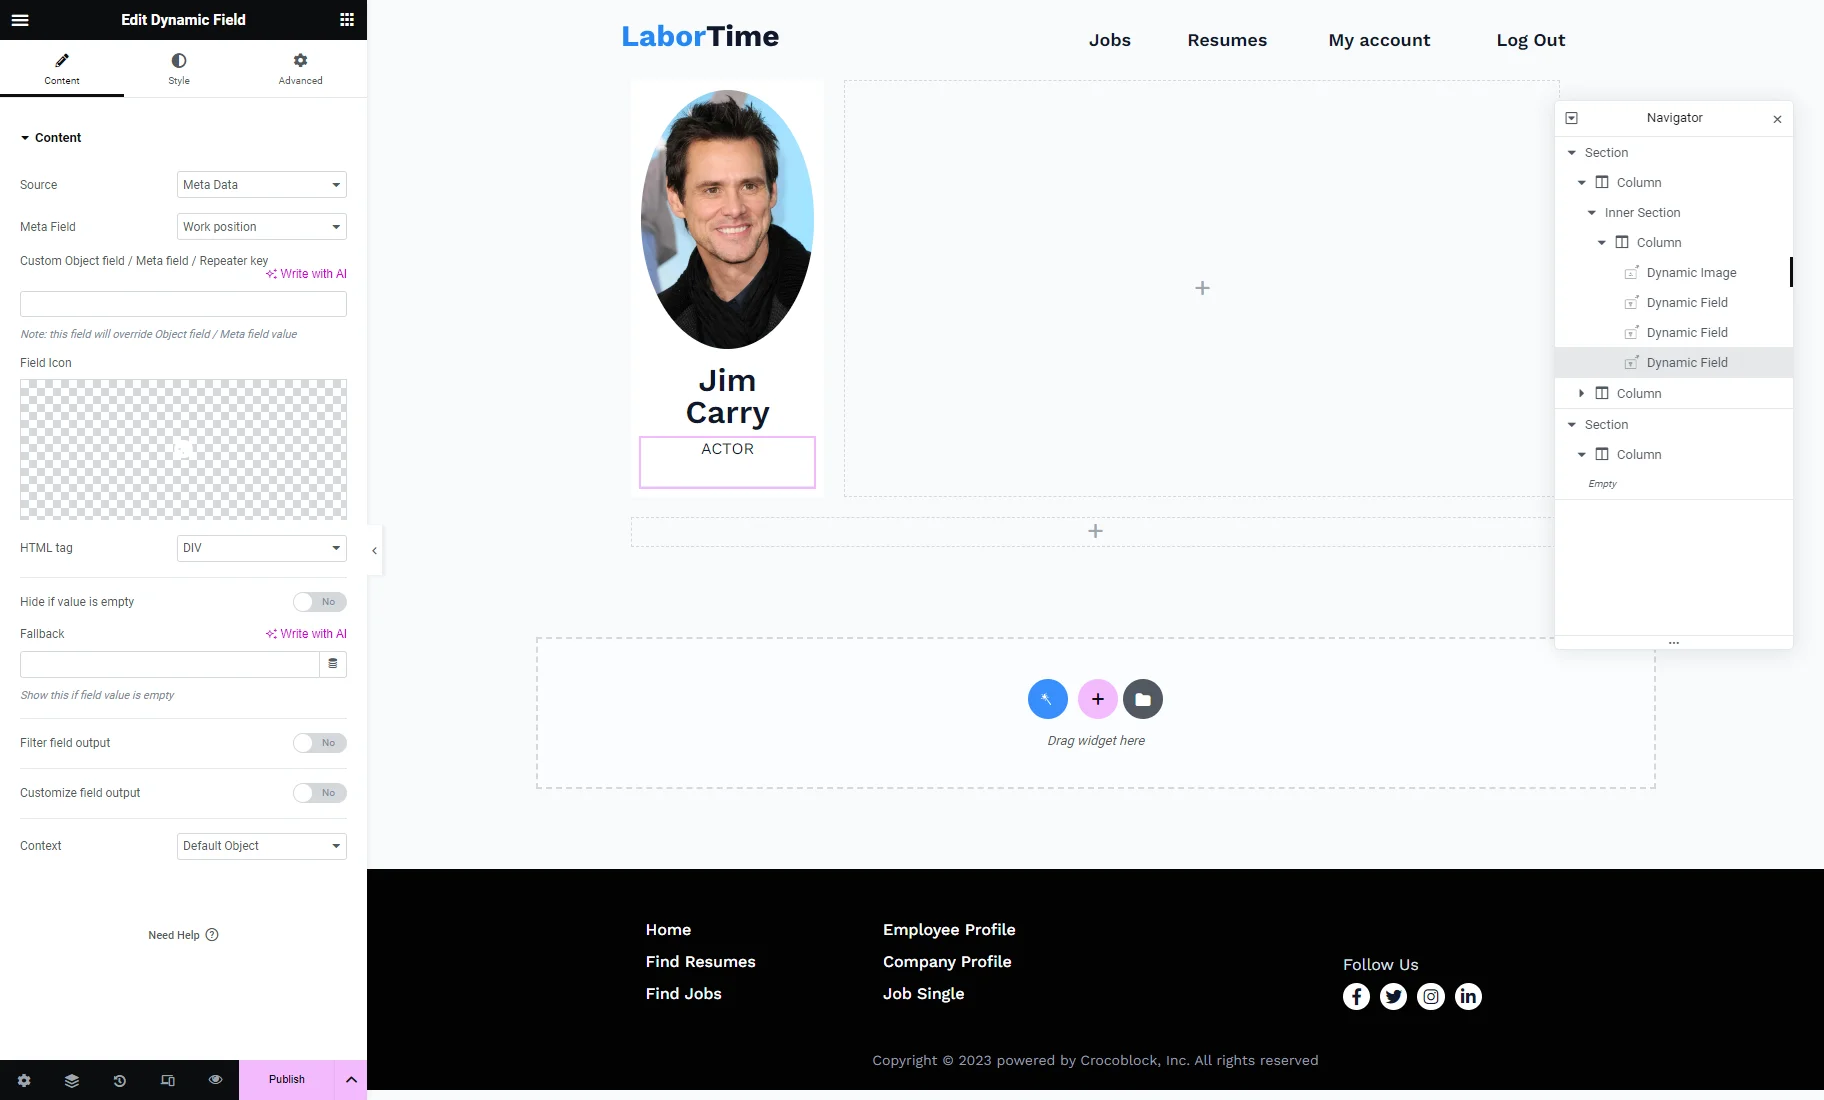
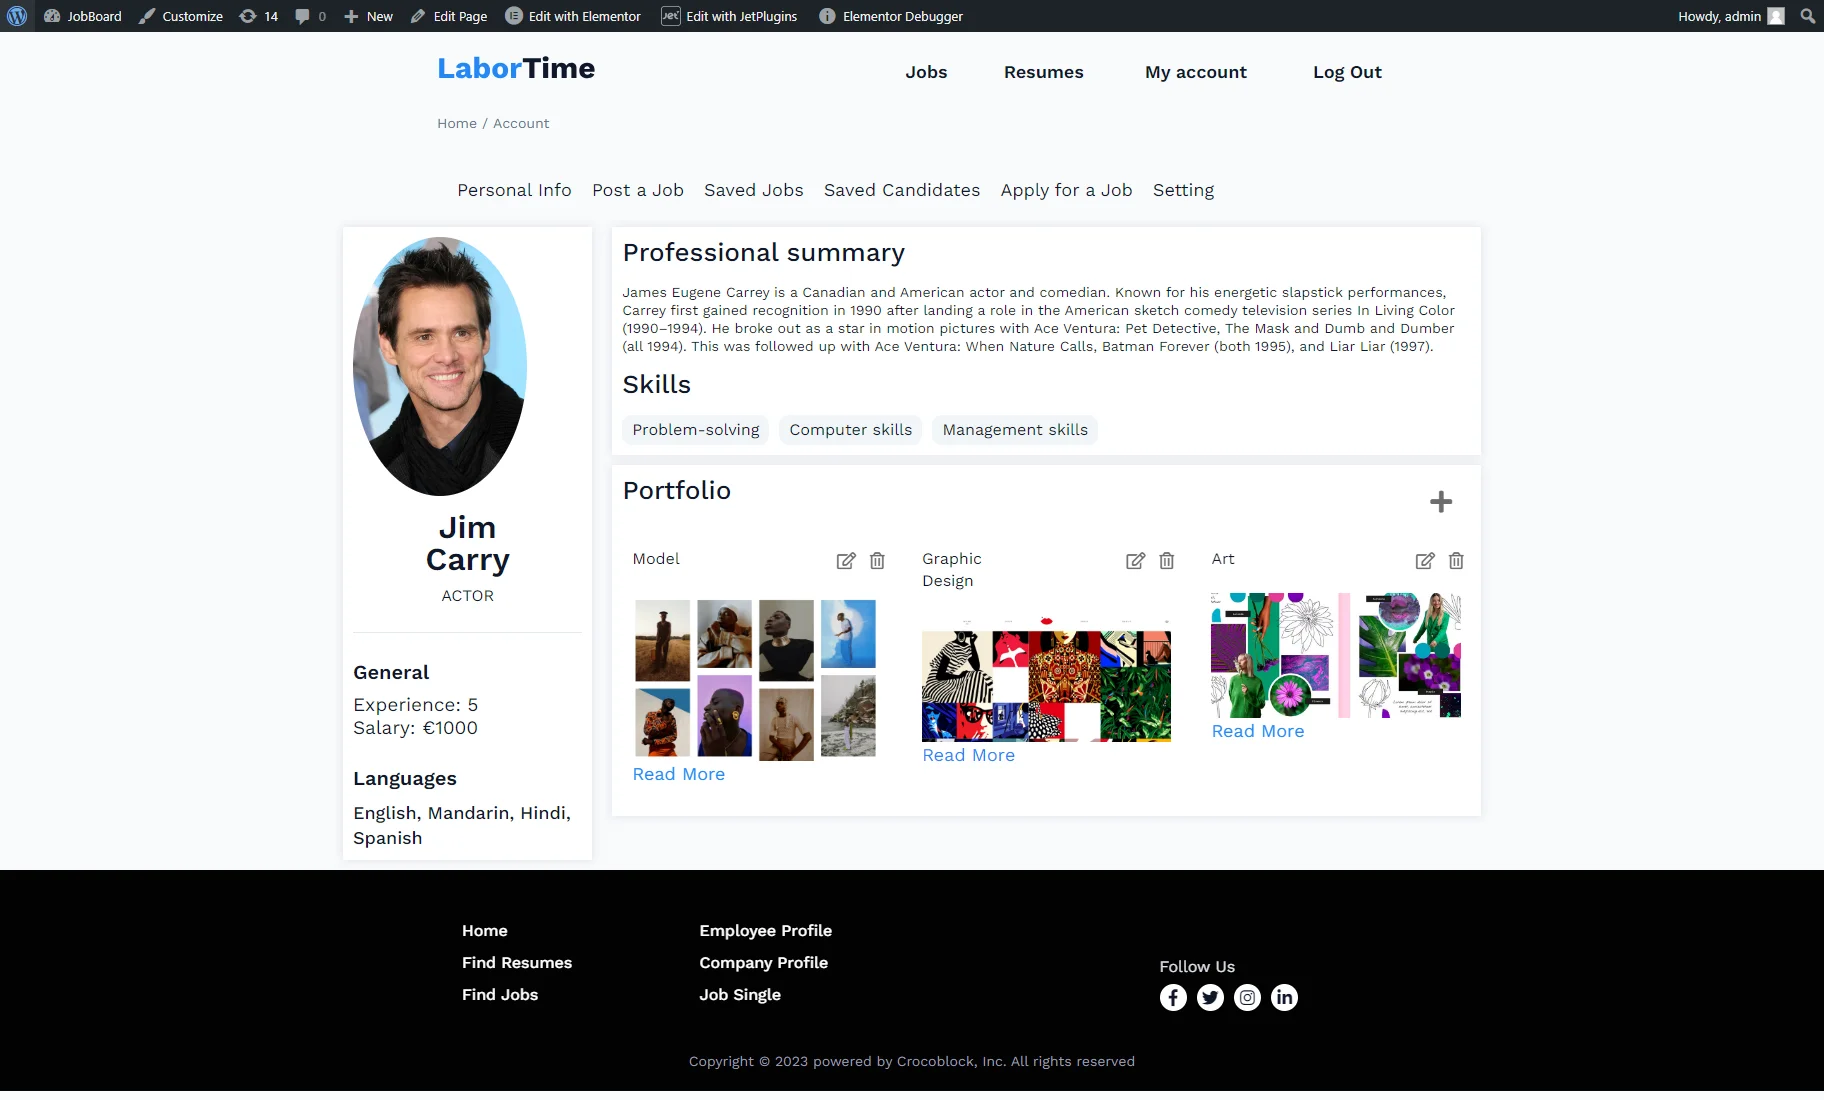
In the Elementor editor, we added two columns on the page and inserted the Dynamic Image widget into the first one. As the Source, we selected the meta field from the user Meta Box.
Under the Dynamic Image, we added three Dynamic Field widgets with the “Meta Data” Source. They display the user’s first and last name and work position from the meta fields from the user Meta Box.
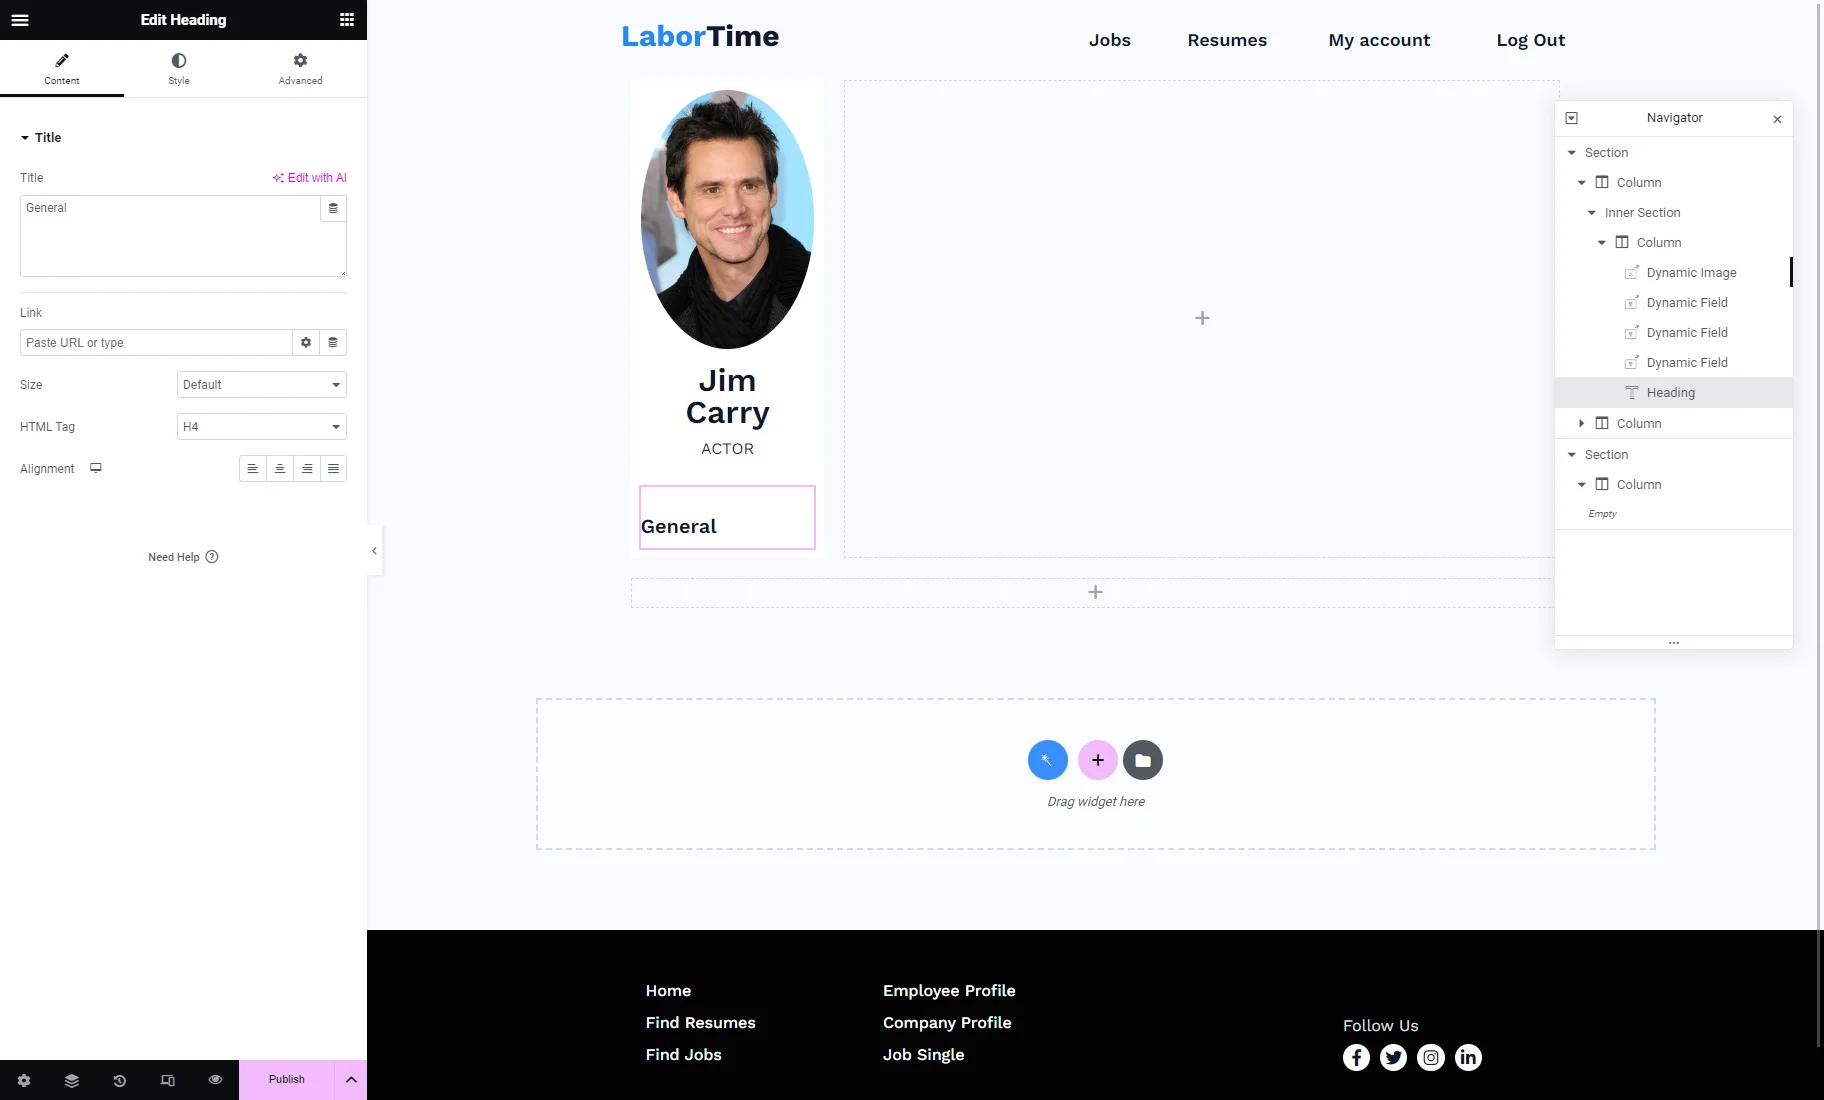
Let’s add the Heading widget with the “General” text to highlight the general user information.
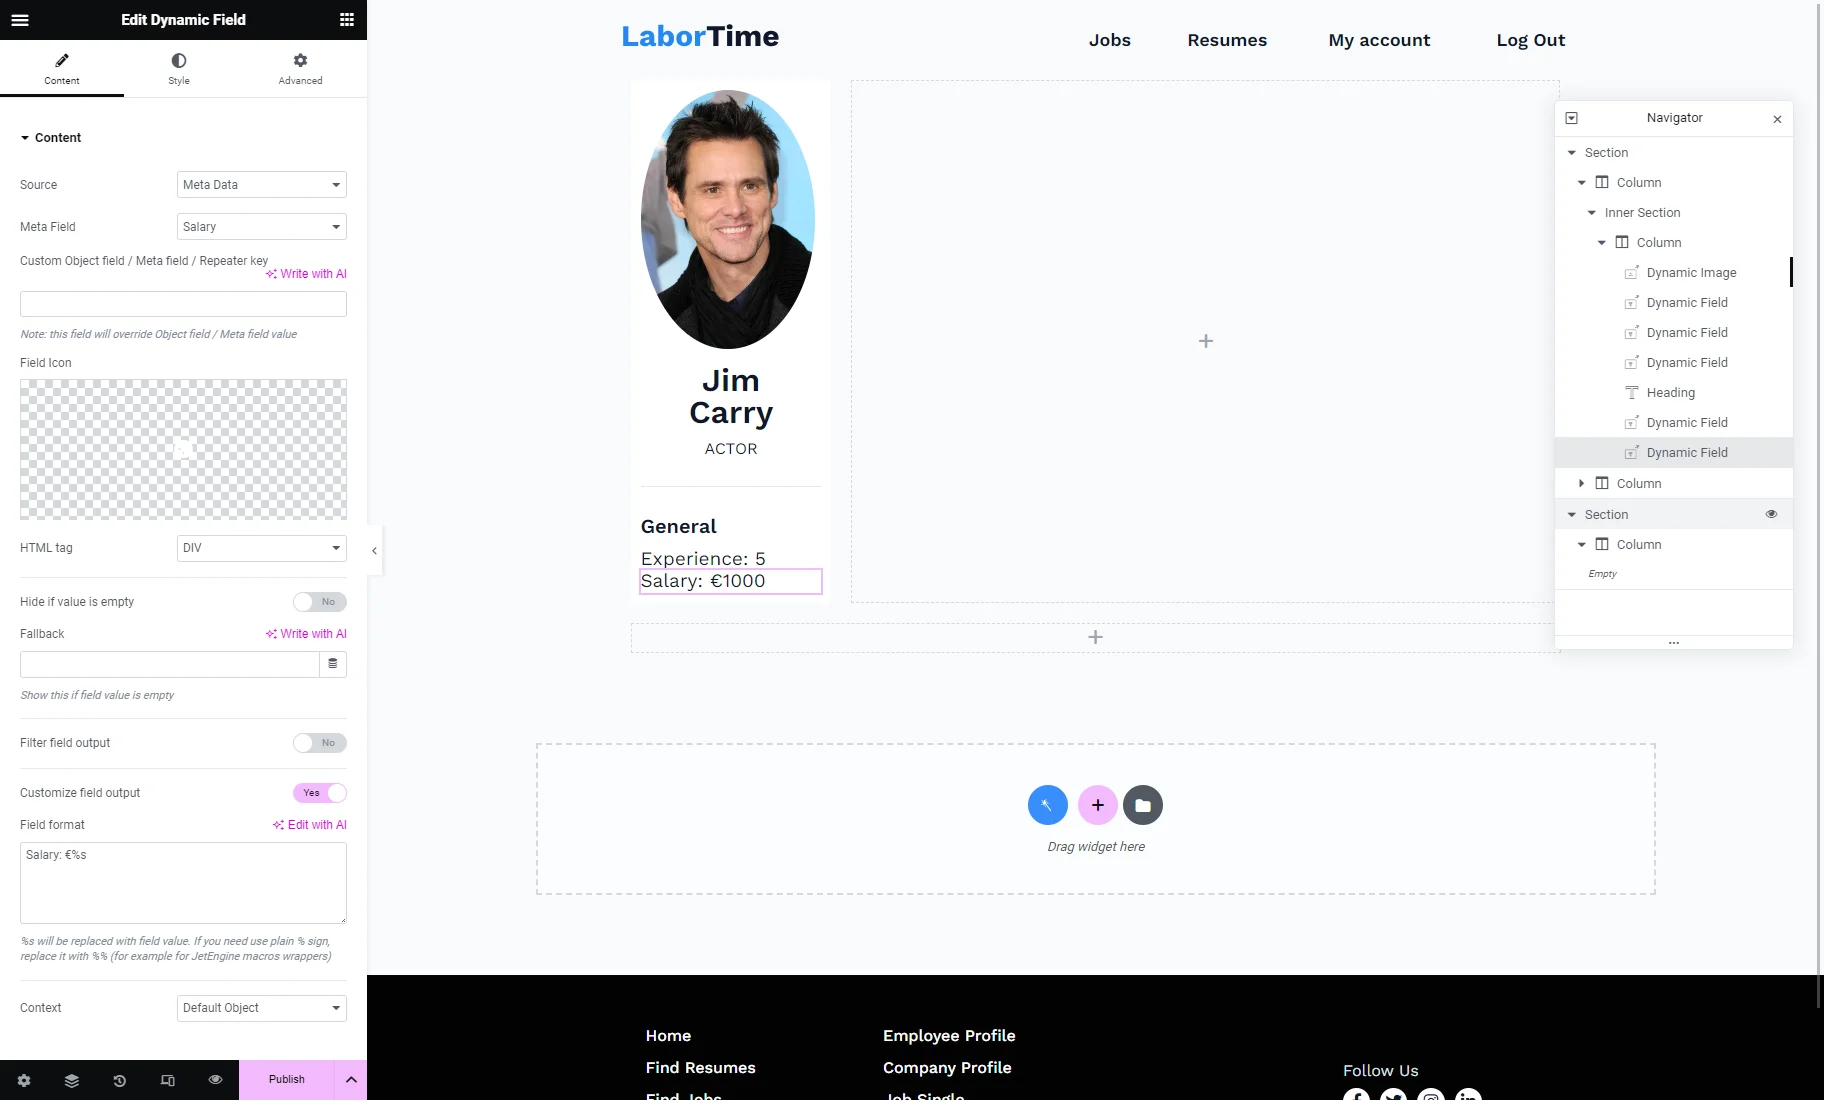
Under the Heading widget, we added two Dynamic Field widgets with the “Meta Data” Source. They display the user’s experience and salary from the meta fields from the user Meta Box.
We enabled the Customize field output toggle for both widgets and added custom text before the dynamic value (e.g., “Salary: €%s,” where %s stands for the value pulled from the custom meta field).
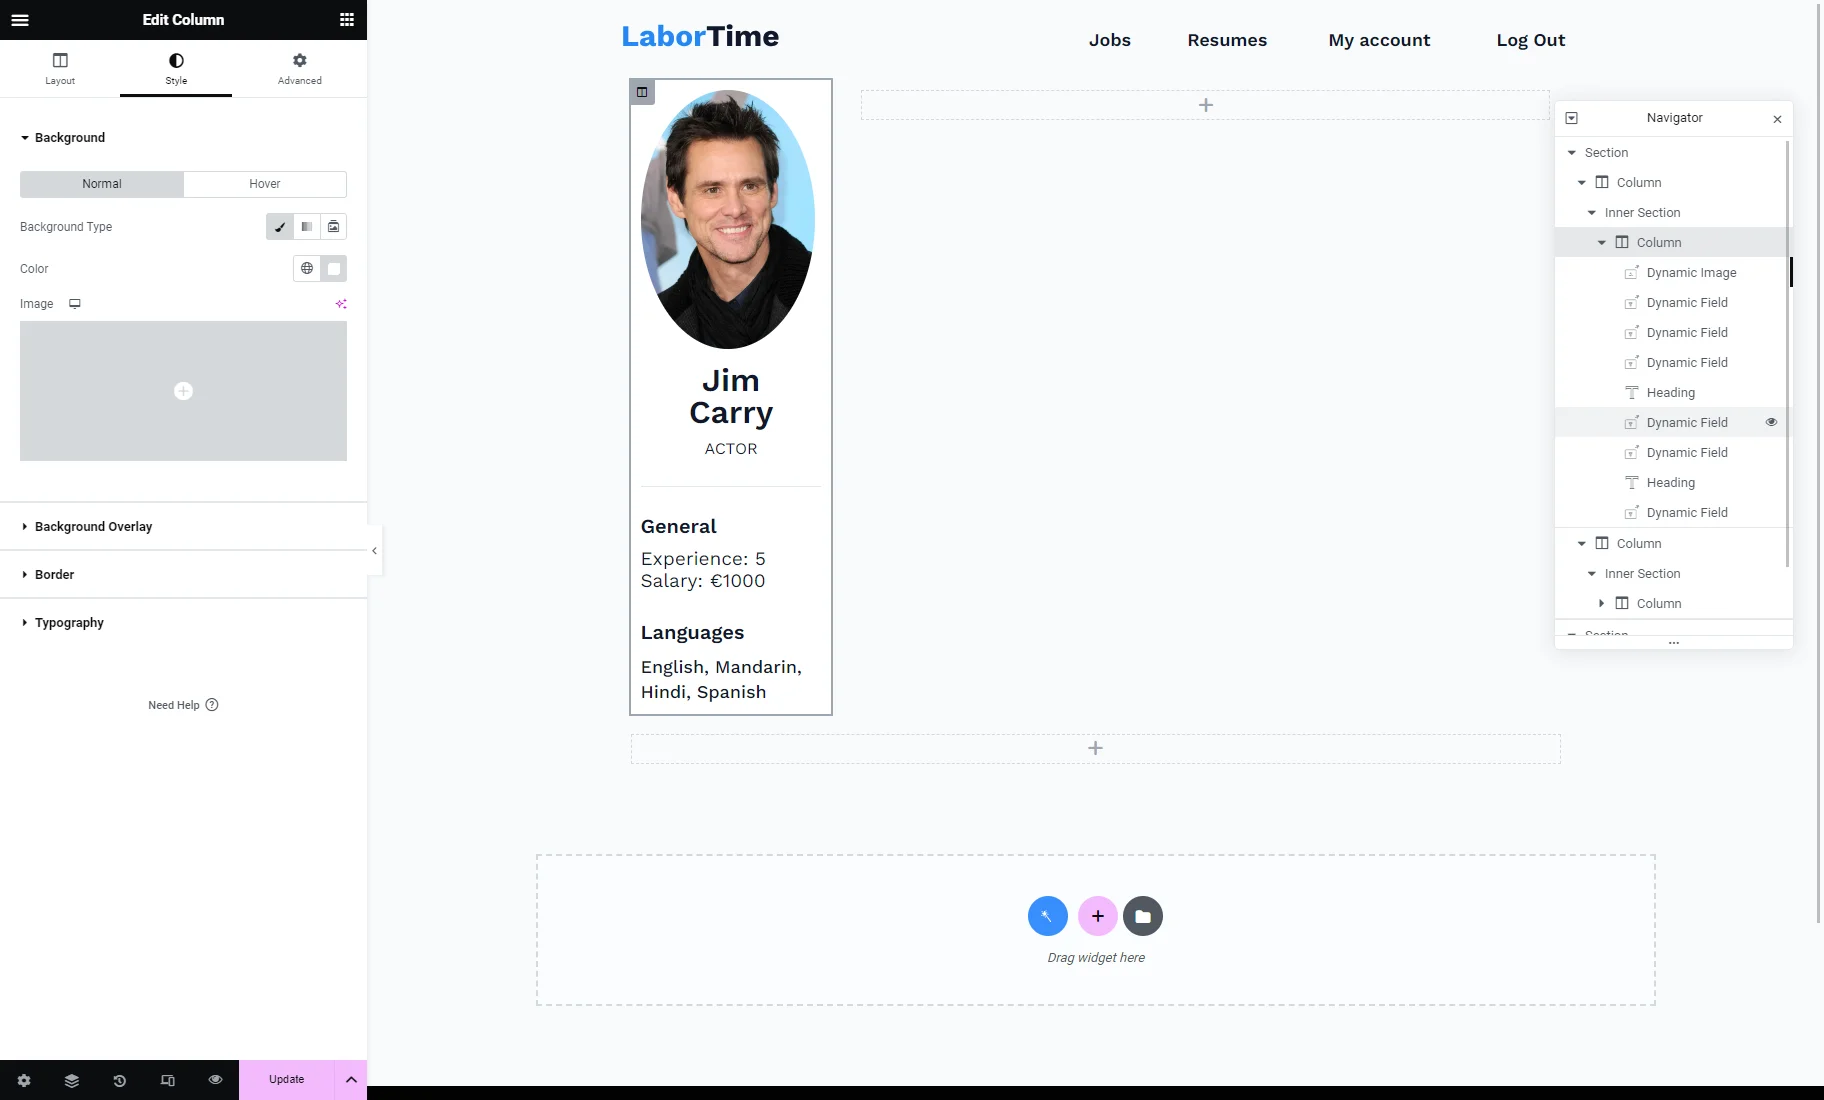
We added another Heading widget with the “Languages” text.
Under that, we drag-n-dropped the Dynamic Field widget with the “Meta Data” Source. It displays the value from the Checkbox meta field from the user Meta Box and shows how many languages the user knows.
Also, we enabled the Filter field output option and picked the “Checkbox field values” Callback.

We opened the Style settings tab of the Column in the Inner Section and set the “Classic” Background with the white color to highlight this column.
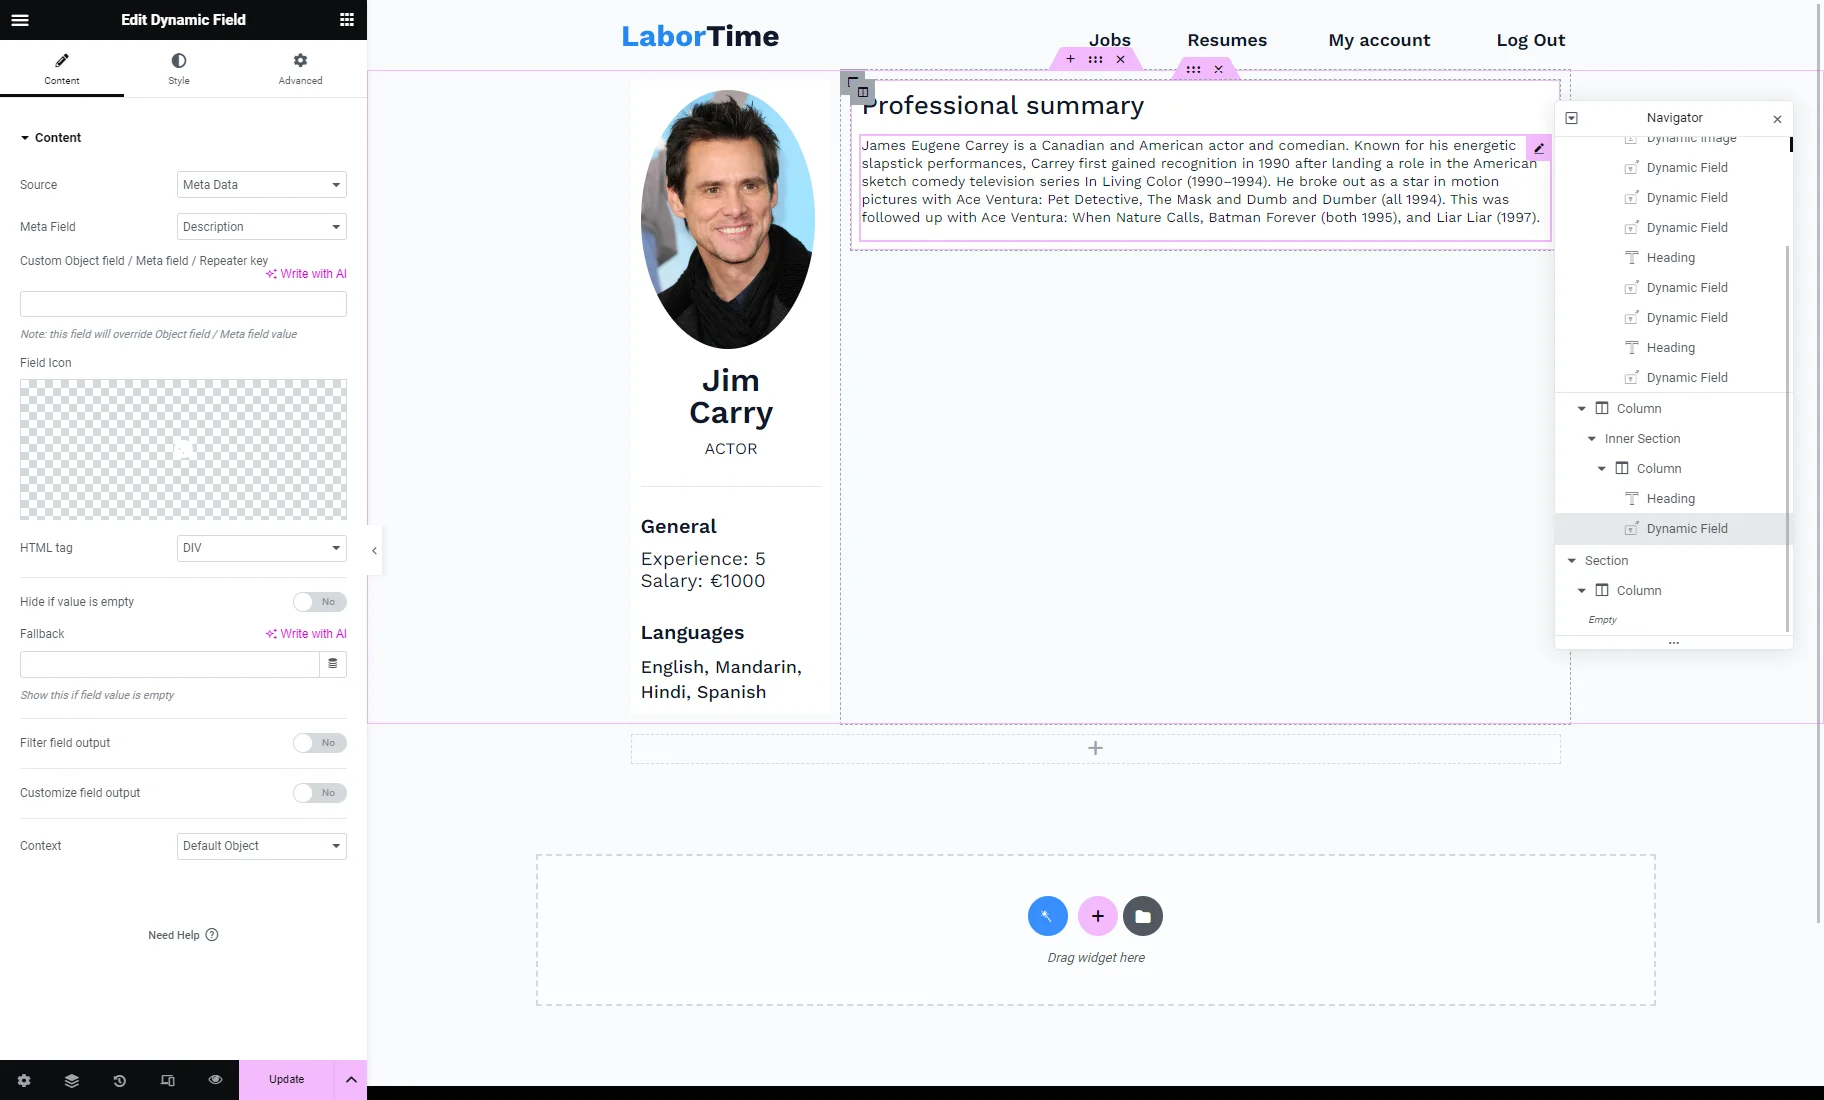
Now, let’s customize the second column. We drag-n-dropped the Heading widget with the “Professional Summary” text and the Dynamic Field widget with the “Meta Data” Source that shows the user’s description.
Also, we set the “Classic” Background with the white color in the Style settings tab of the Column in the Inner Section.
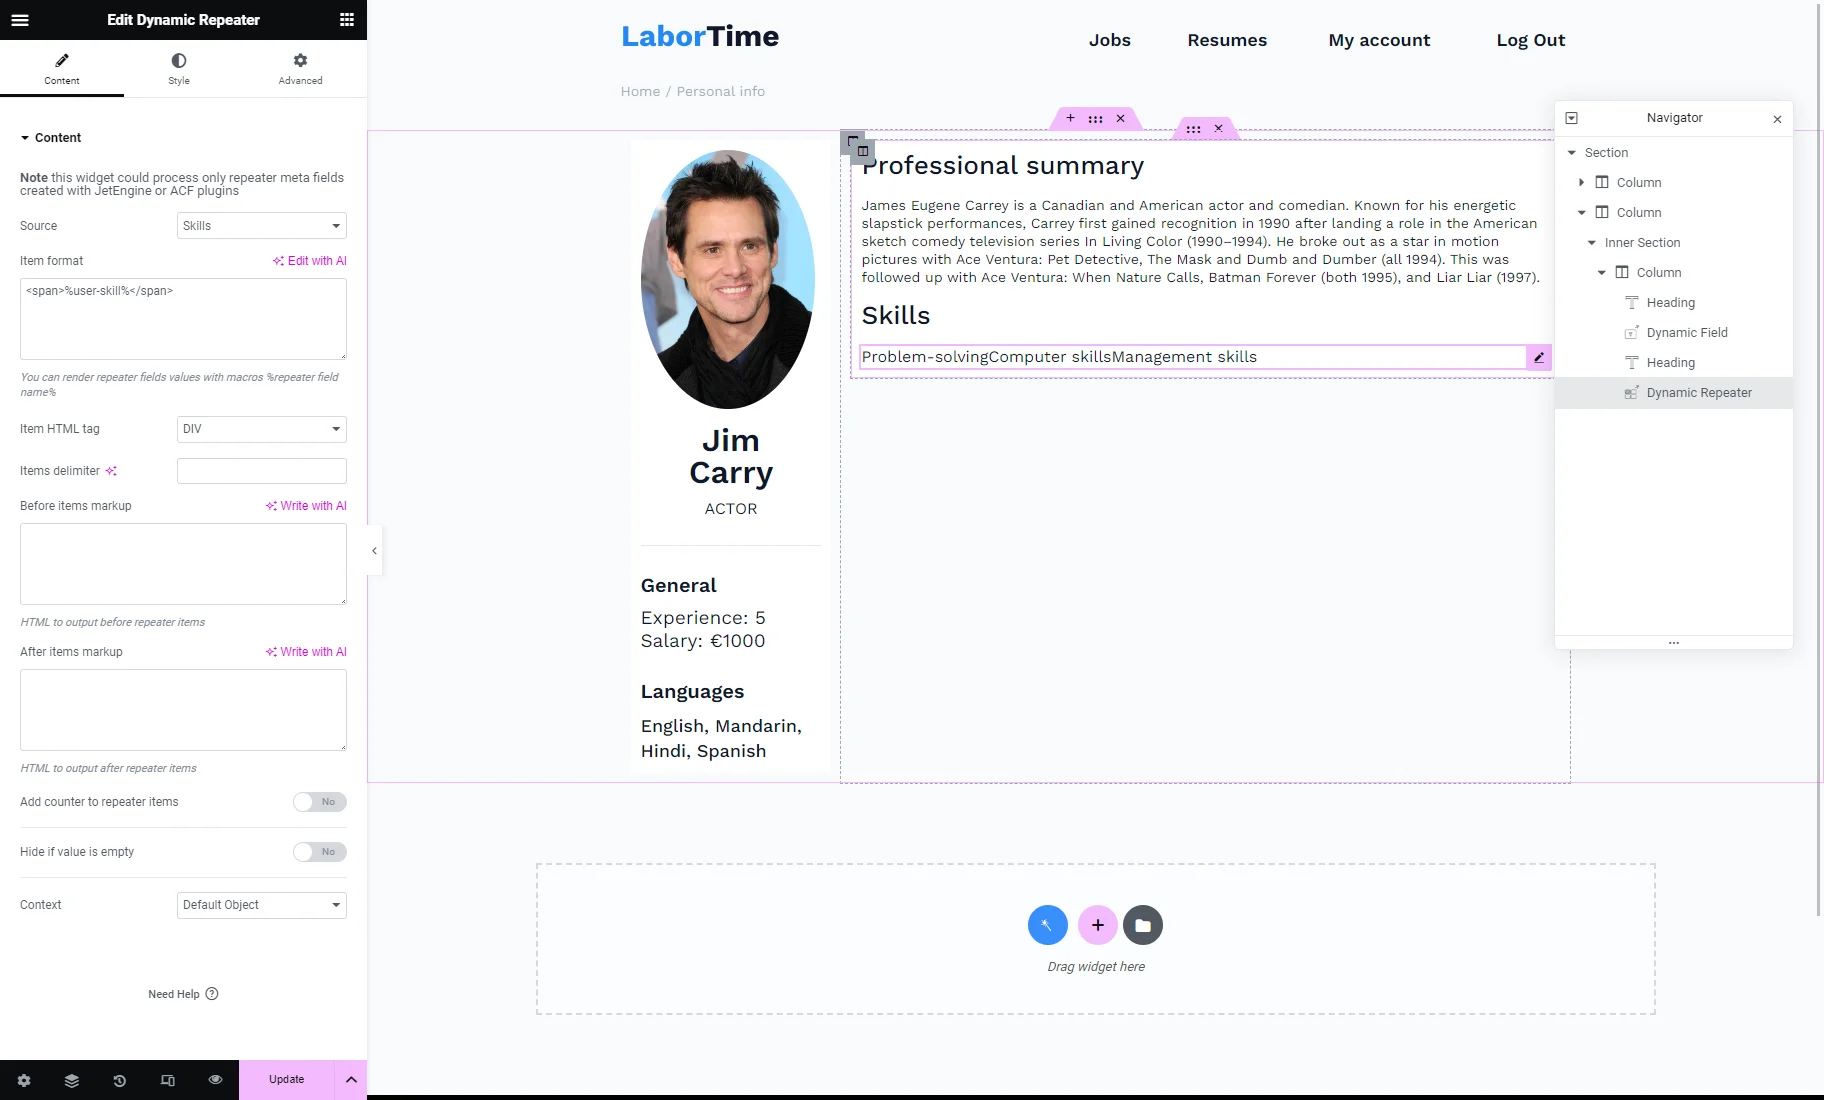
Then, we added the Heading with the “Skills” text. To display the values from the Repeater fields, we added the Dynamic Repeater widget.
We selected the needed Repeater meta field as the Source. In the Item format textarea, we replaced “name” in the <span>%name%</span> macro with the name of the Repeater field. In our case, it’s <span>%user-skill%</span>.
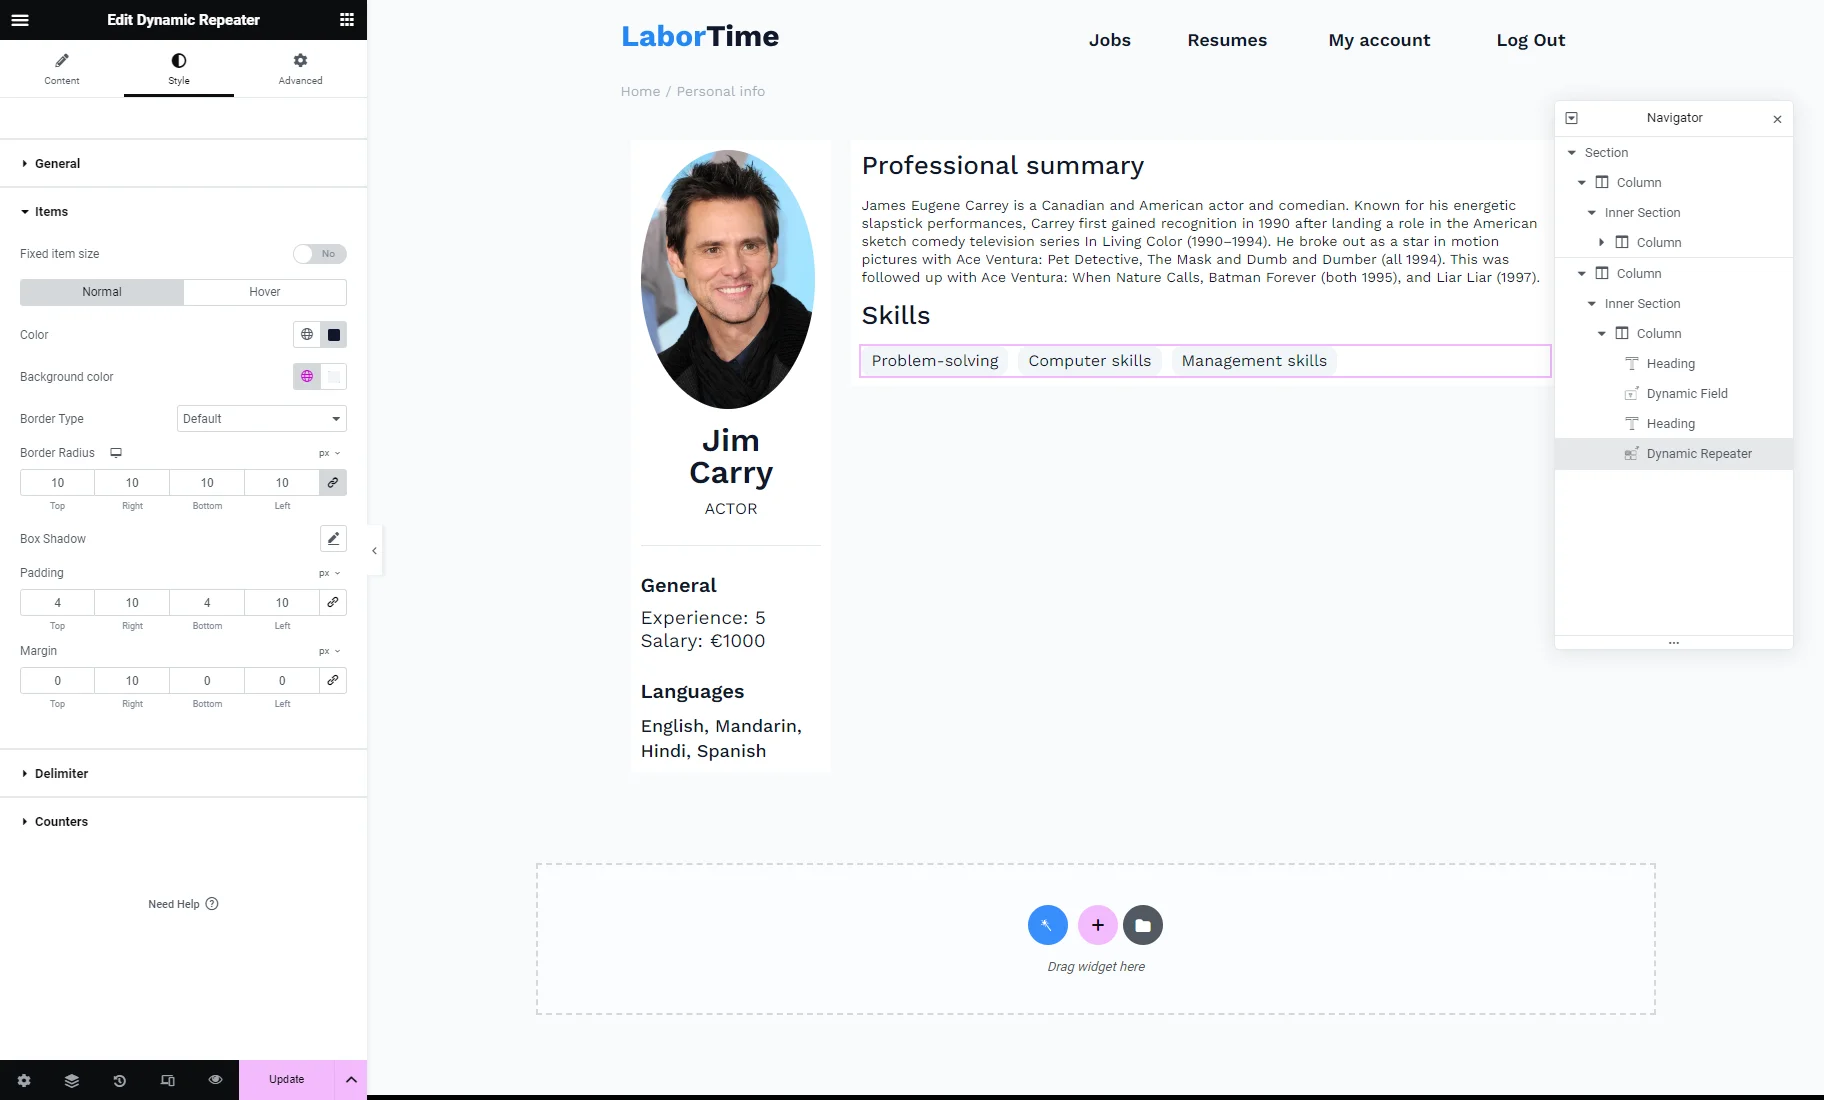
Then, we opened the Style settings tab of the widget. In the Items tab, we set the Color of the text to black and the Background Color to light grey. We set the Border Radius to: “10” Top, “10” Right, “10” Bottom, and “10” Left to round the corners of the item’s outer border edges. Then, we set the Padding to: “4” Top, “10” Right, “4” Bottom, and “10” Left to set the space size around the items. Finally, we set the Margin to “10” Right to set the distance between items.
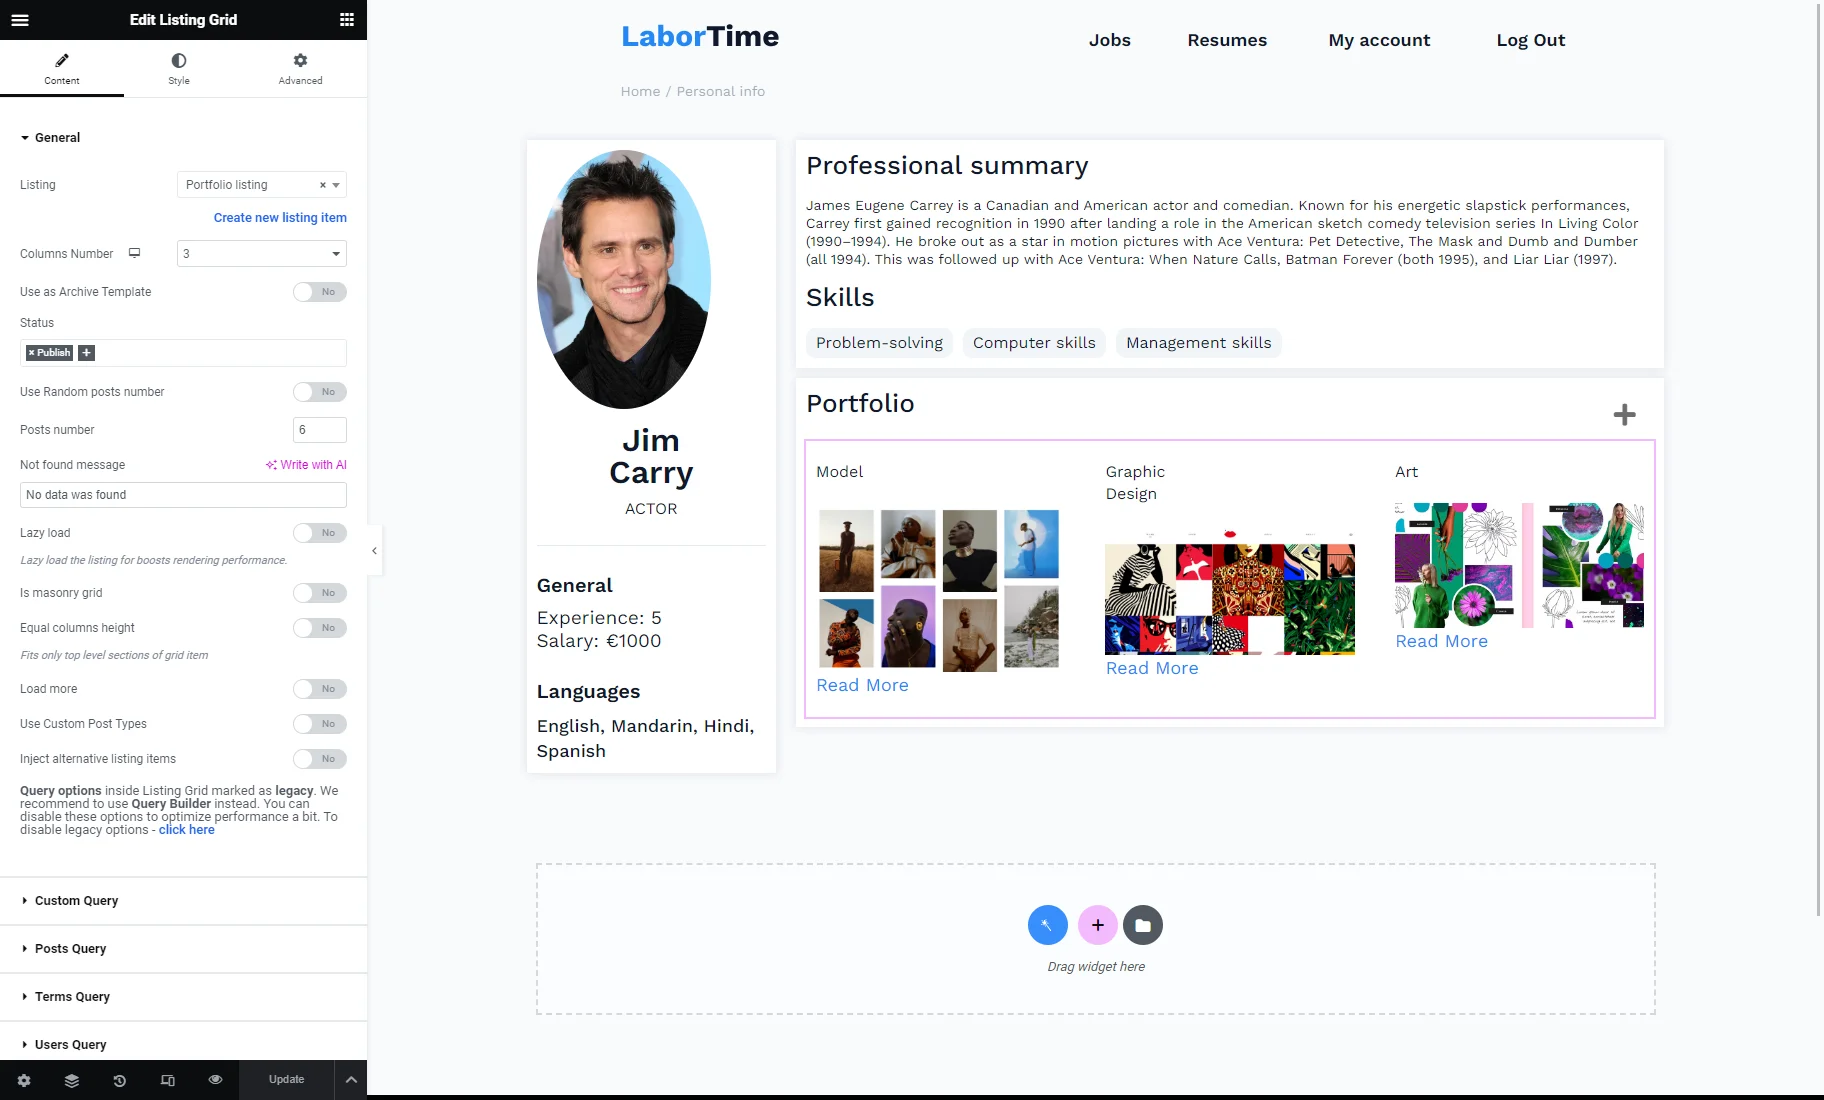
Also, we added another Inner Section widget with the user portfolios. To learn more about how to set that, proceed to the How to Allow Users to Add Portfolio With the Front-End Form tutorial.
Finish customizing the template and hit the “Publish/Update” button.
Profile Builder dashboard
Proceed to the JetEngine > Profile Builder tab.
Set the newly created page as the Account Page and select the “Content” Template mode.
Then, click the “Save” button.
To create subpages for the Account page, open the Account Page tab and hit the “+Add New Subpage” button.
In the new repeater item, add the Title and Slug, and set the Elementor template or JetEngine listing item as the Template.
You can also hide the subpage from the menu on the Account page and select user roles allowed to access this page.
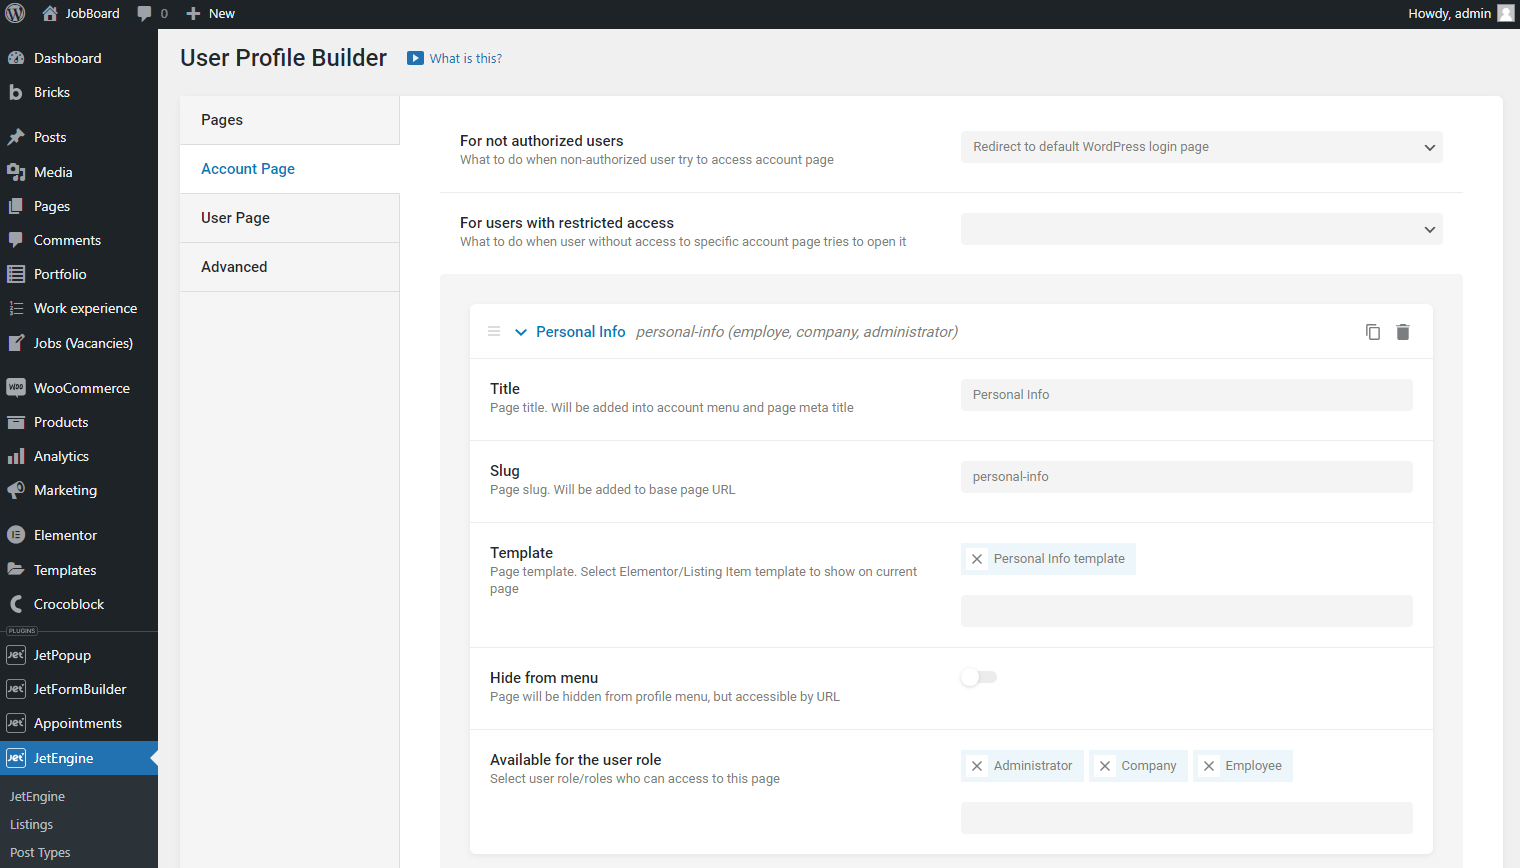
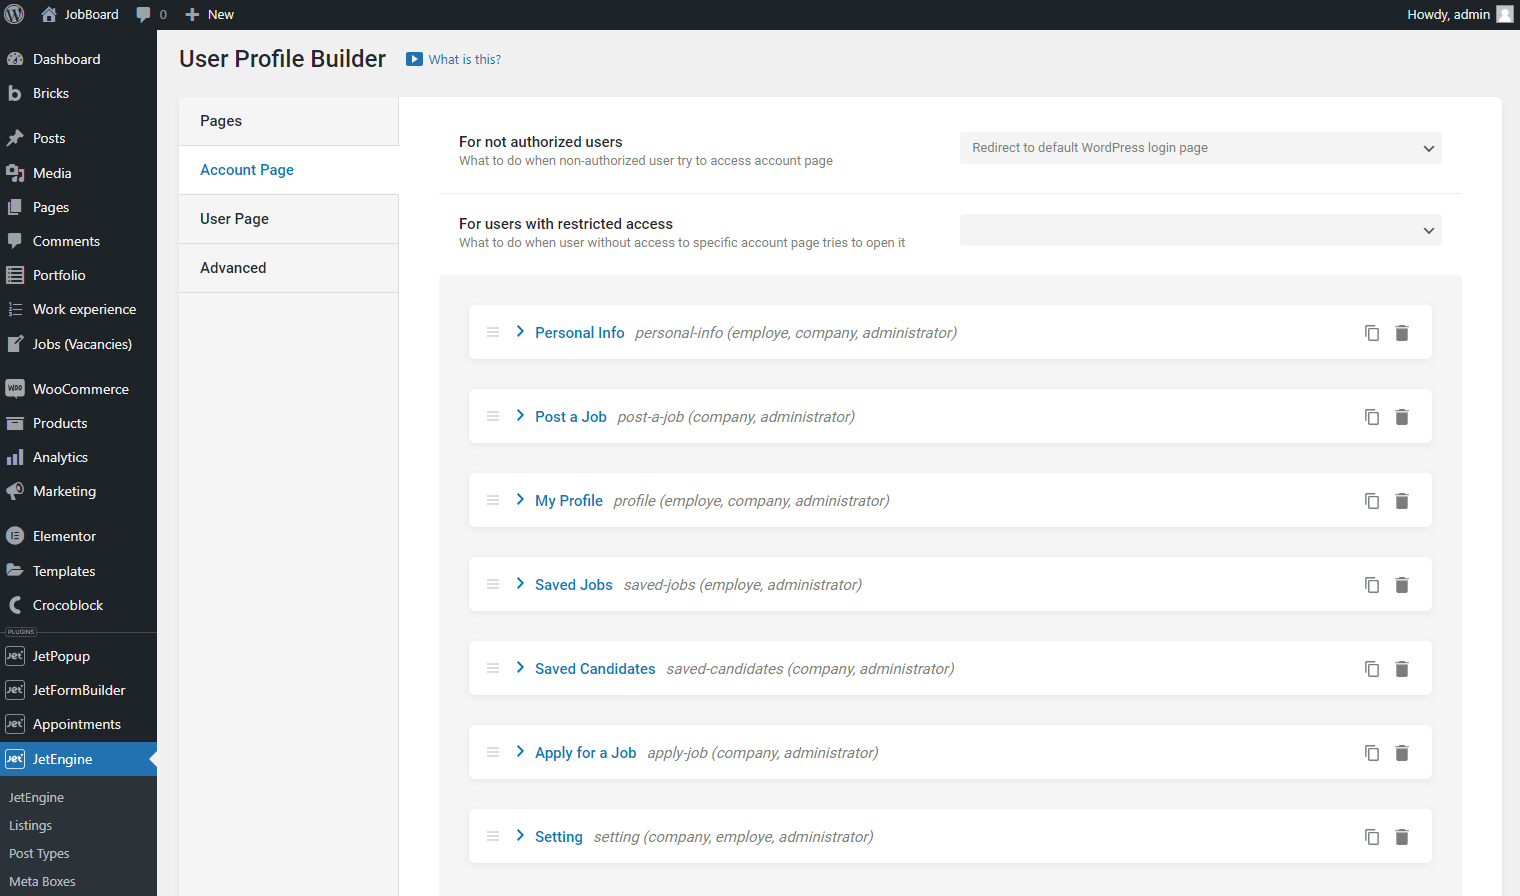
Add as many subpages as you need. When you finish, hit the “Save” button.
Customize the Account page
Open the Pages tab and click to edit the Account page in the Elementor editor.
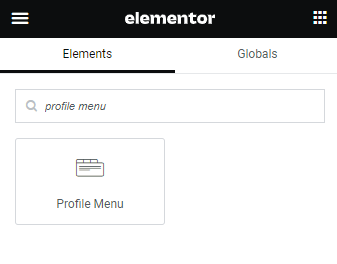
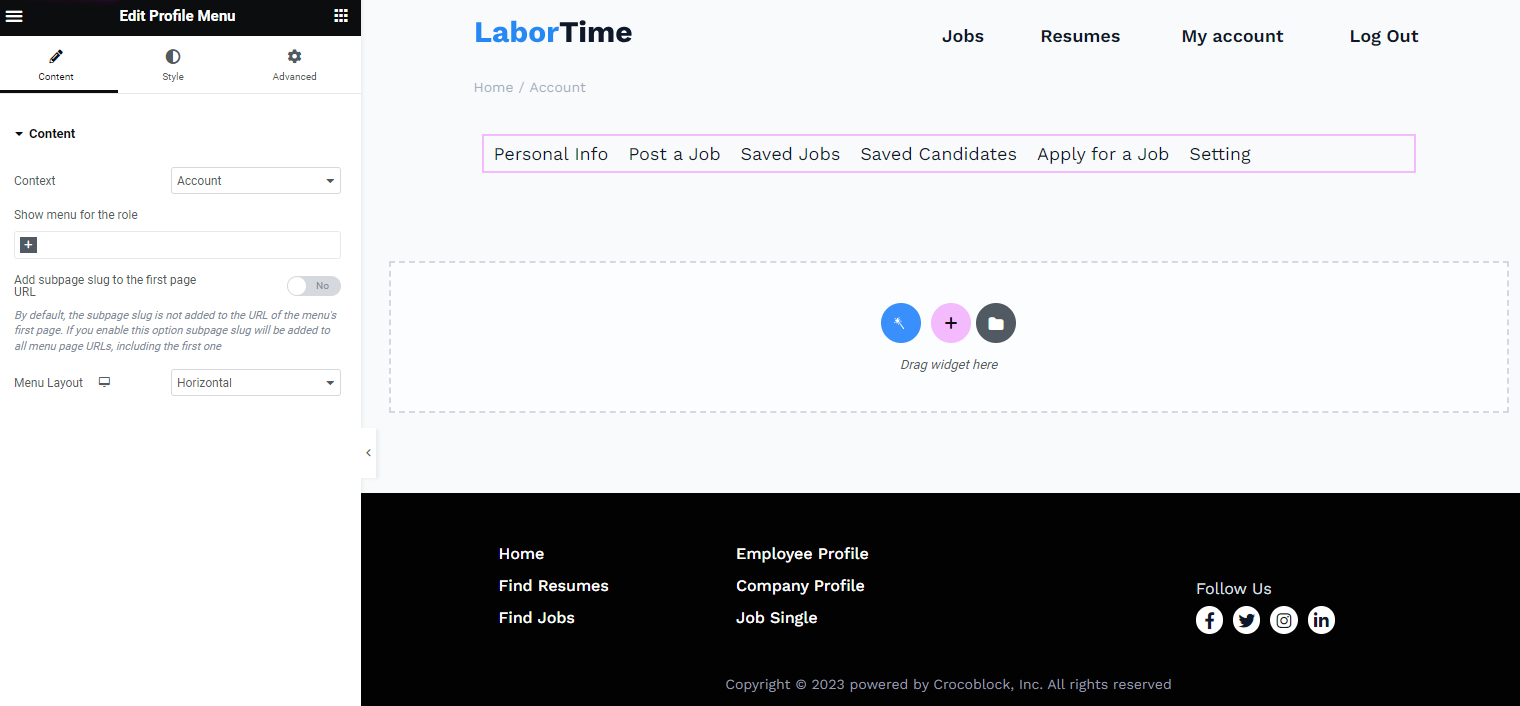
Drag and drop the Profile Menu widget.
As you can see, the widget shows the subpages’ titles.
Ensure to pick the “Account” Content and then customize other widget settings.
For more information about the Profile Menu settings, check the Profile Menu Widget Overview for Elementor.
After customizing the Profile Menu settings, place the Profile Subpage Content widget.
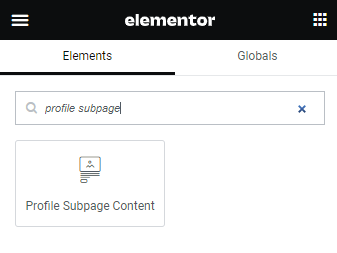
This widget will show the content of every subpage when users will click on the corresponding Profile Menu item.
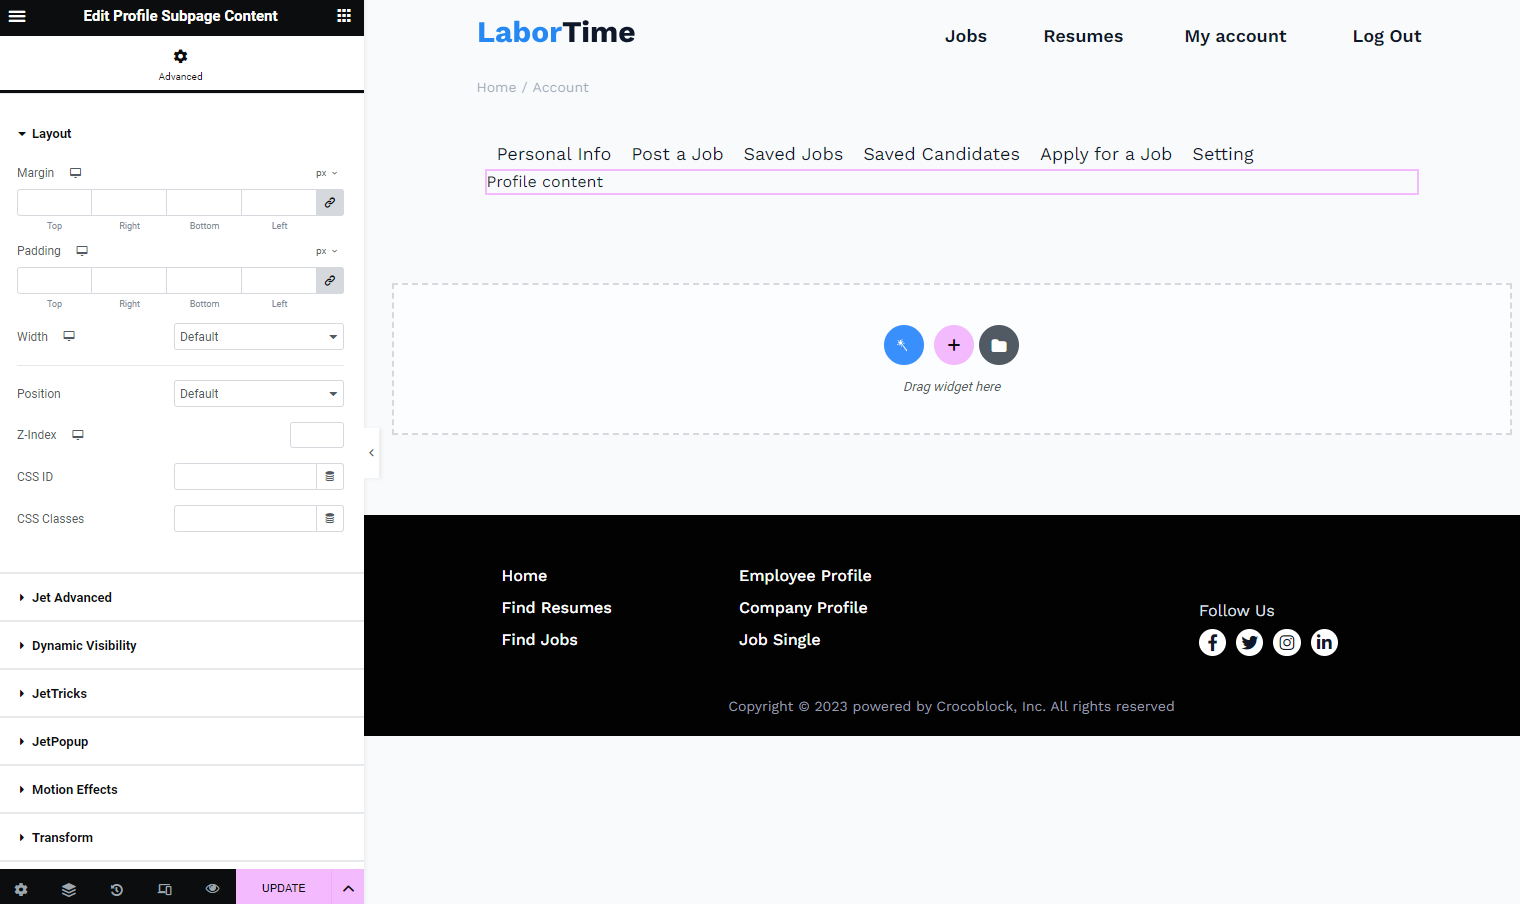
Hit the “Update” button.
Check the Results
Open the Account page on the front end.
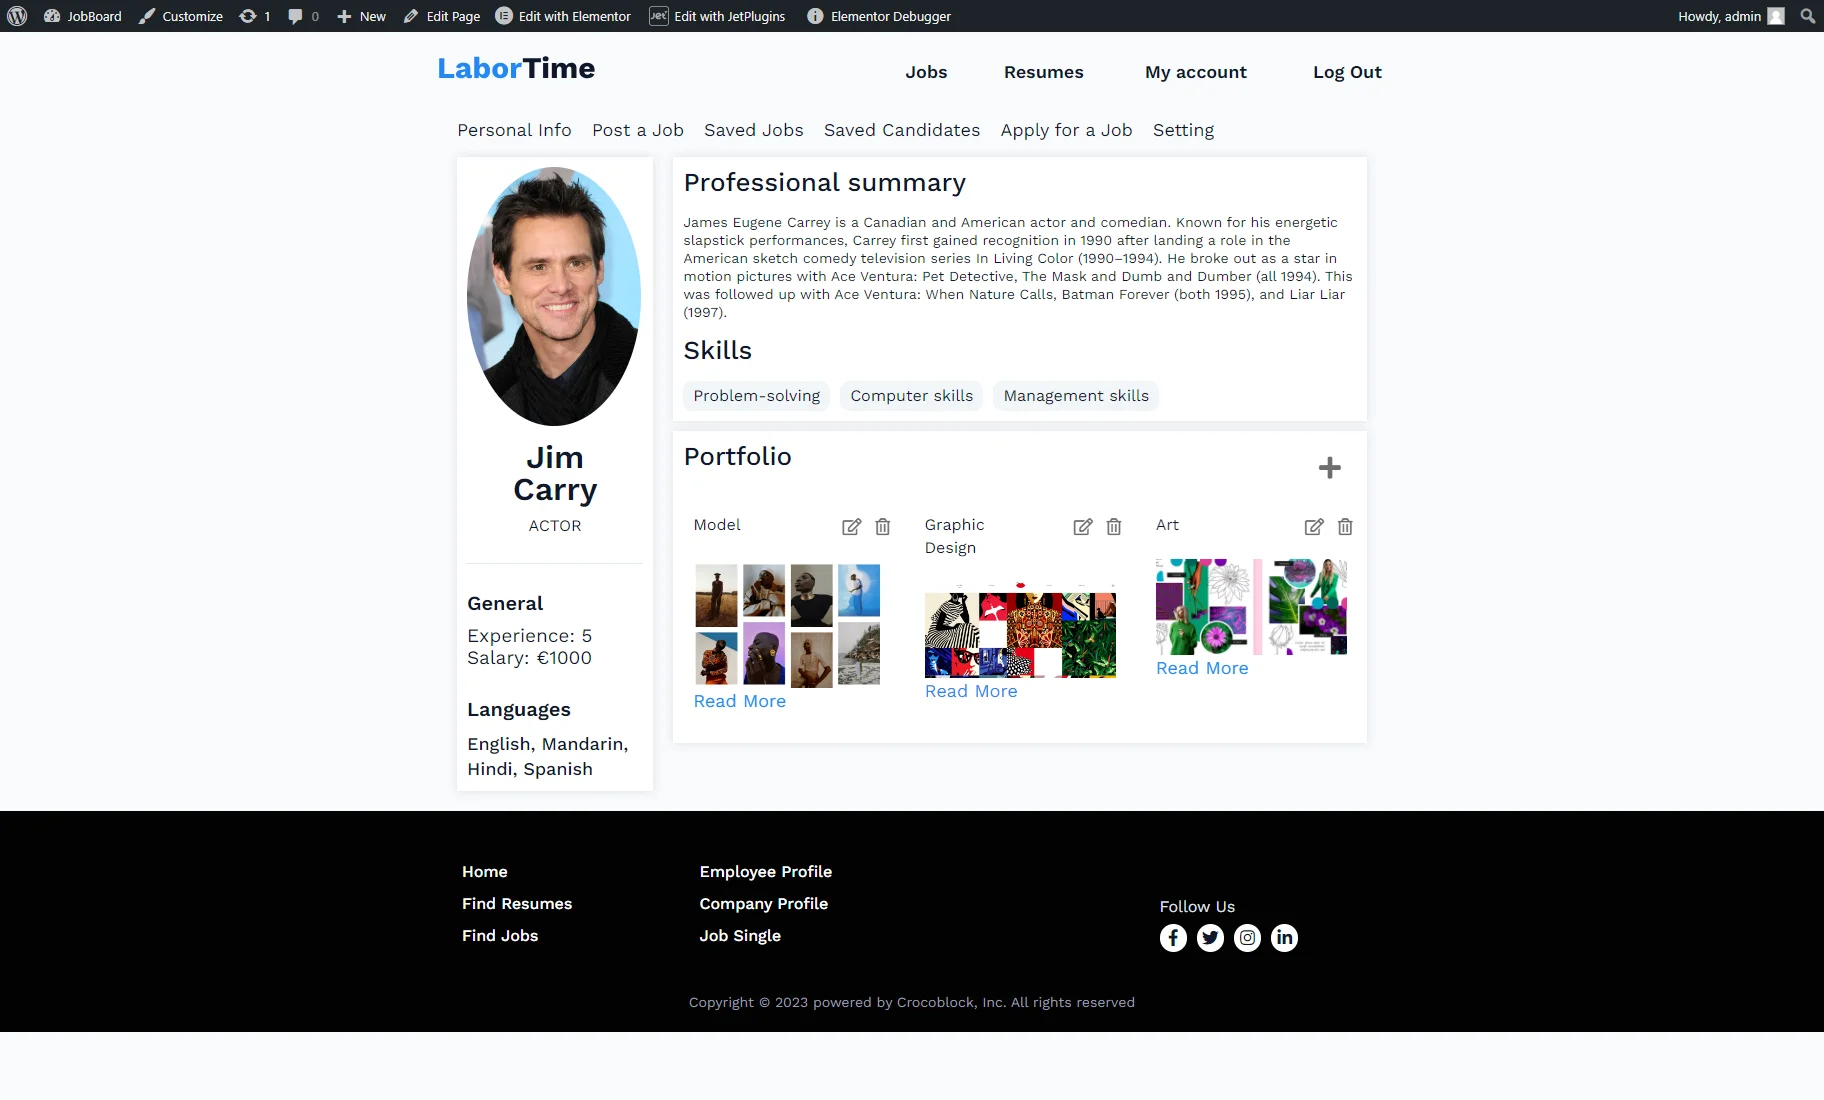
Now, users can click on the menu items in the Profile Menu, and the Profile Subpage Content shows the corresponding subpage content.
Rewrite Template Mode
Account page creation
Follow the WordPress Dashboard > Pages > Add New pathway. Name the page and hit the “Publish” button. You can leave the page empty since the content will be displayed from the templates.
Creating the subpages for the Account page with the “Rewrite” template mode
The Account page will contain the Profile Menu, allowing users to click and open different subpages.
Subpage templates can contain such content:
- Displaying the user info;
- Displaying the “Update User Account” form;
- Displaying “Create Post” and “Edit Post” forms;
- Displaying the user’s favorite items. To learn more about that, proceed to the How to Create Favorites Page Using Data Stores Module tutorial;
- Displaying the user’s recent comments;
- Displaying the user’s booked items.
You can create subpage templates with Elementor or JetEngine listing items.
Subpage template with a form
Elementor template creation
If you decide to create templates with Elementor, move to the Templates tab under the Elementor tab on the WordPress Dashboard.
Push the “Add New” button. Choose the “Page” Template Type and enter the Name. Then, hit the “Create Template” button.
In the Elementor editor, fill the template with the needed content. For example, I placed the JetFormBuilder form using the JetForm widget.
Then, drag-n-drop the Profile Menu widget to the editing page.
With the “Content” Template mode, you can set and style the Profile Menu when you are on the Profile page. The advantage of the “Rewrite” Template mode is that you can style the Profile Menu widget differently for every template. Also, you can decide not to add the Profile Menu to some templates at all.
Ensure to pick the “Account” Content and then customize other widget settings.
For more information about the Profile Menu settings, check the Profile Menu Widget Overview for Elementor.
When you finish, hit the “Update” button.
Create as many templates for the Account page as you need, and ensure to add and customize the Profile Menu widget to these templates where you need it.
JetEngine listing item creation
If you decide to create a JetEngine listing item, go to the JetEngine > Listings tab and push the “Add New” button.
In the Setup Listing Item pop-up, select the “Users” Listing Source, enter the Listing Item name, pick the “Elementor” Listing view, and click the “Create Listing Item” button.
Fill the template with the content and add the Profile Menu widget.
Ensure to pick the “Account” Content and then customize other widget settings.
With the “Content” Template mode, you can set and style the Profile Menu when you are on the Profile page. The advantage of the “Rewrite” Template mode is that you can style the Profile Menu widget differently for every template. Also, you can decide not to add the Profile Menu to some templates at all.
When you finish, hit the “Publish/Update” button.
Create as many listing templates for the Account page as you need, and ensure to add and customize the Profile Menu widget to these templates where you need it.
Displaying user information
Proceed to the How to display user information chapter of this tutorial to learn how to create the template to show the user information for the account.
When you finish creating the template with the corresponding content, you can add the Profile Menu widget and pick the “Account” Context.
With the “Content” Template mode, you can set and style the Profile Menu when you are on the Profile page. The advantage of the “Rewrite” Template mode is that you can style the Profile Menu widget differently for every template. Also, you can decide not to add the Profile Menu to some templates at all.
Finish customizing the template and hit the “Publish/Update” button.
User Profile Builder dashboard
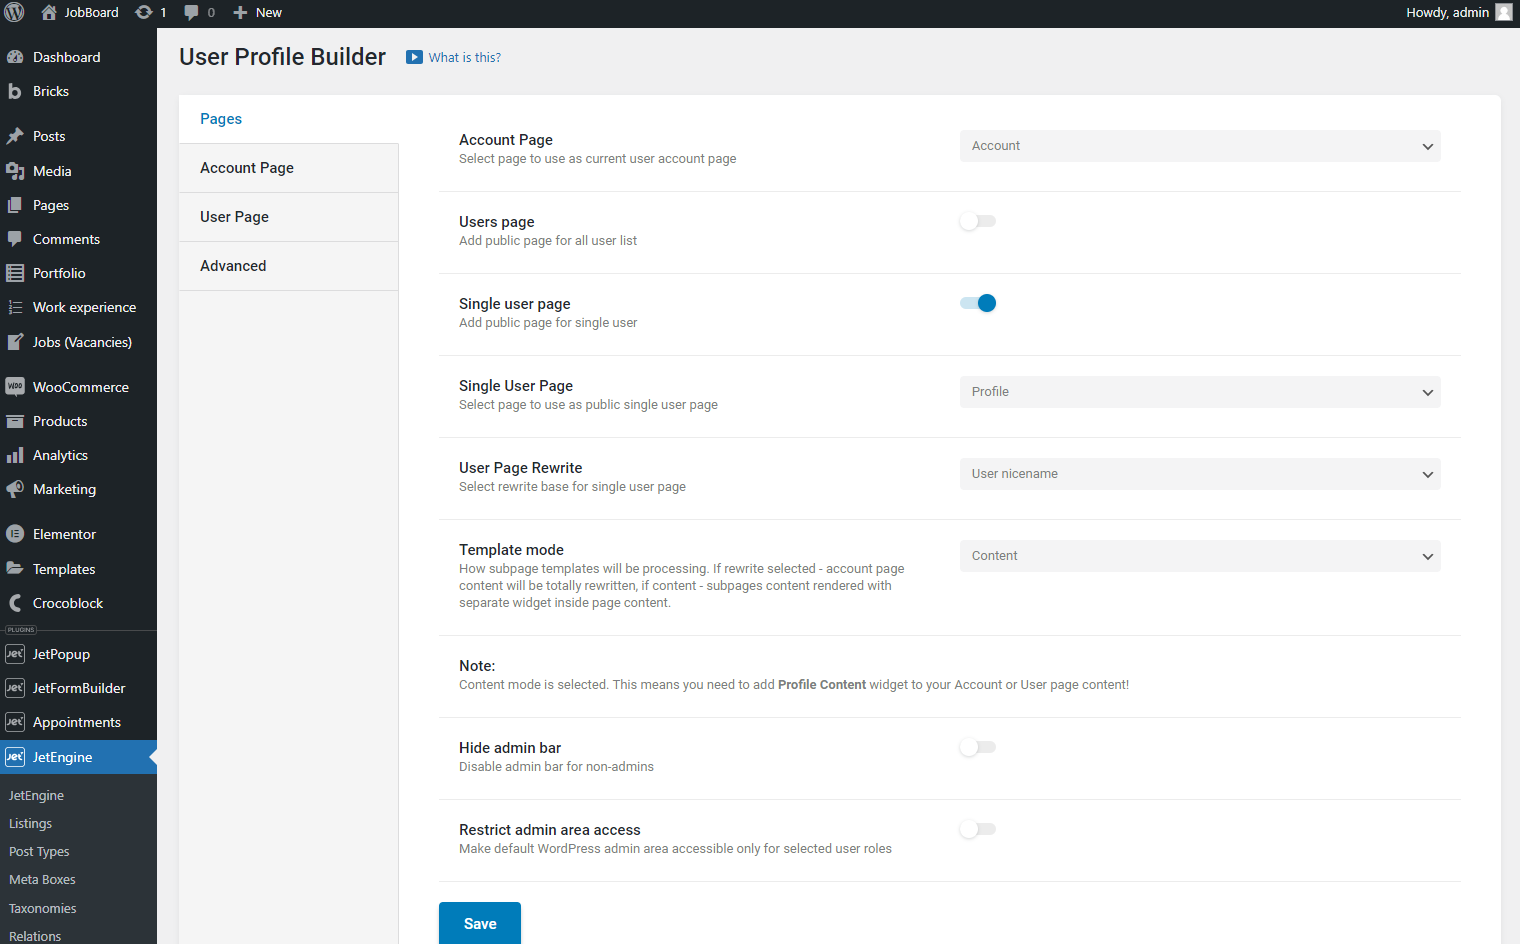
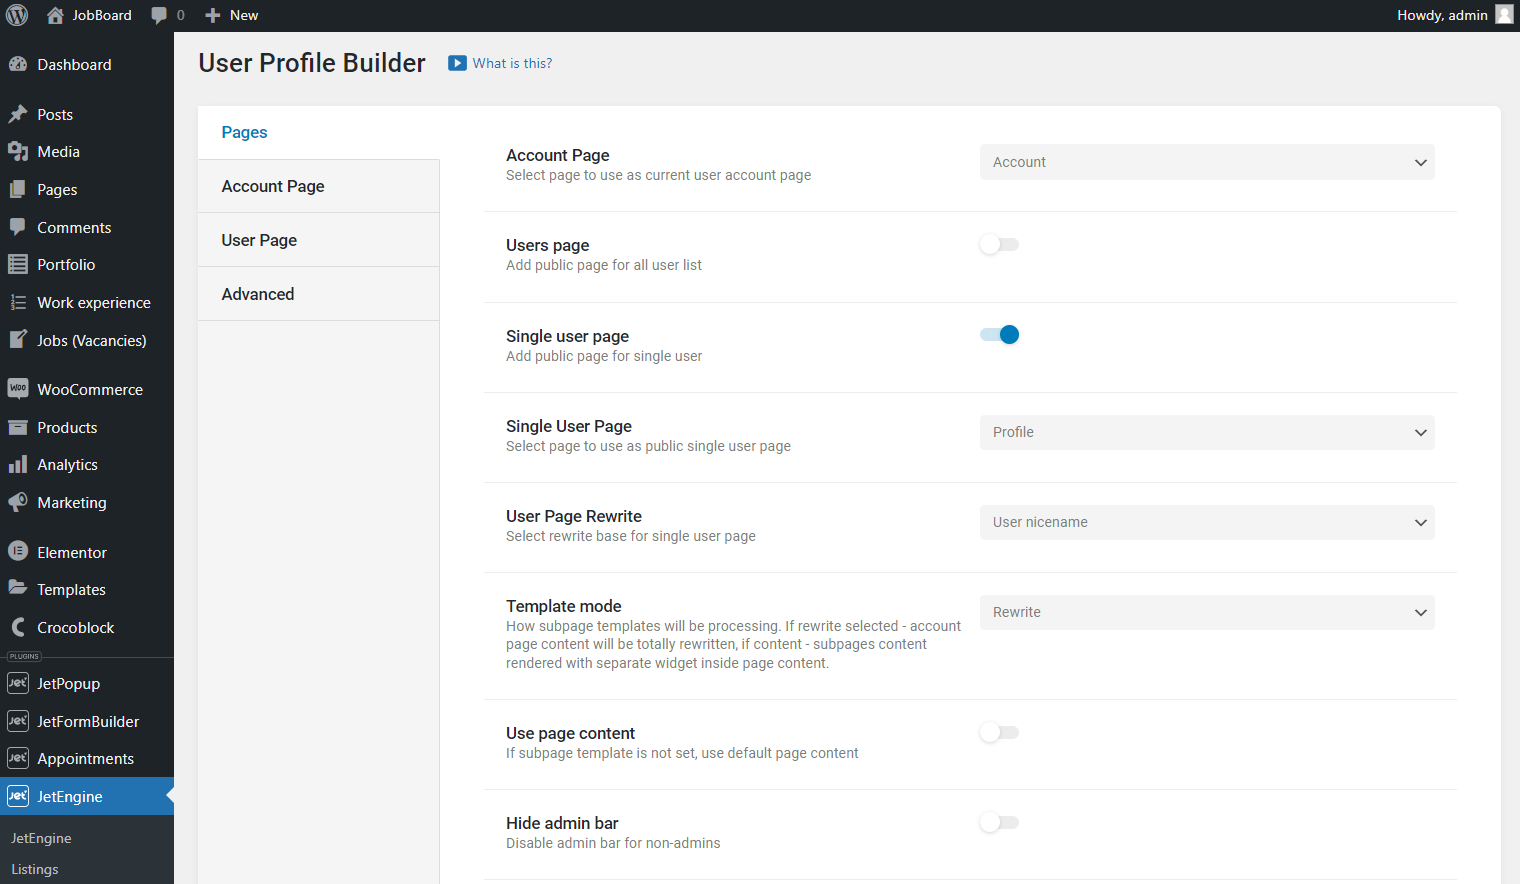
Proceed to the JetEngine > Profile Builder tab.
Set the newly created page as the Account Page and select the “Rewrite” Template mode.
The Use page content option is available with the “Rewrite” Template Mode. Enable it to show the Account page content if subpage templates are not set.
Then, click the “Save” button.
Open the Account Page tab to create subpages for the Account page, and hit the “+Add New Subpage” button.
In the new repeater item, add the Title, Slug, and set the Elementor template or JetEngine listing item as the Template.
You can also hide the subpage from the menu on the Account page and select user roles allowed to access this page.
Add as many subpages as you need. When you finish, hit the “Save” button.
Results Checking
Open the Account page on the front end.
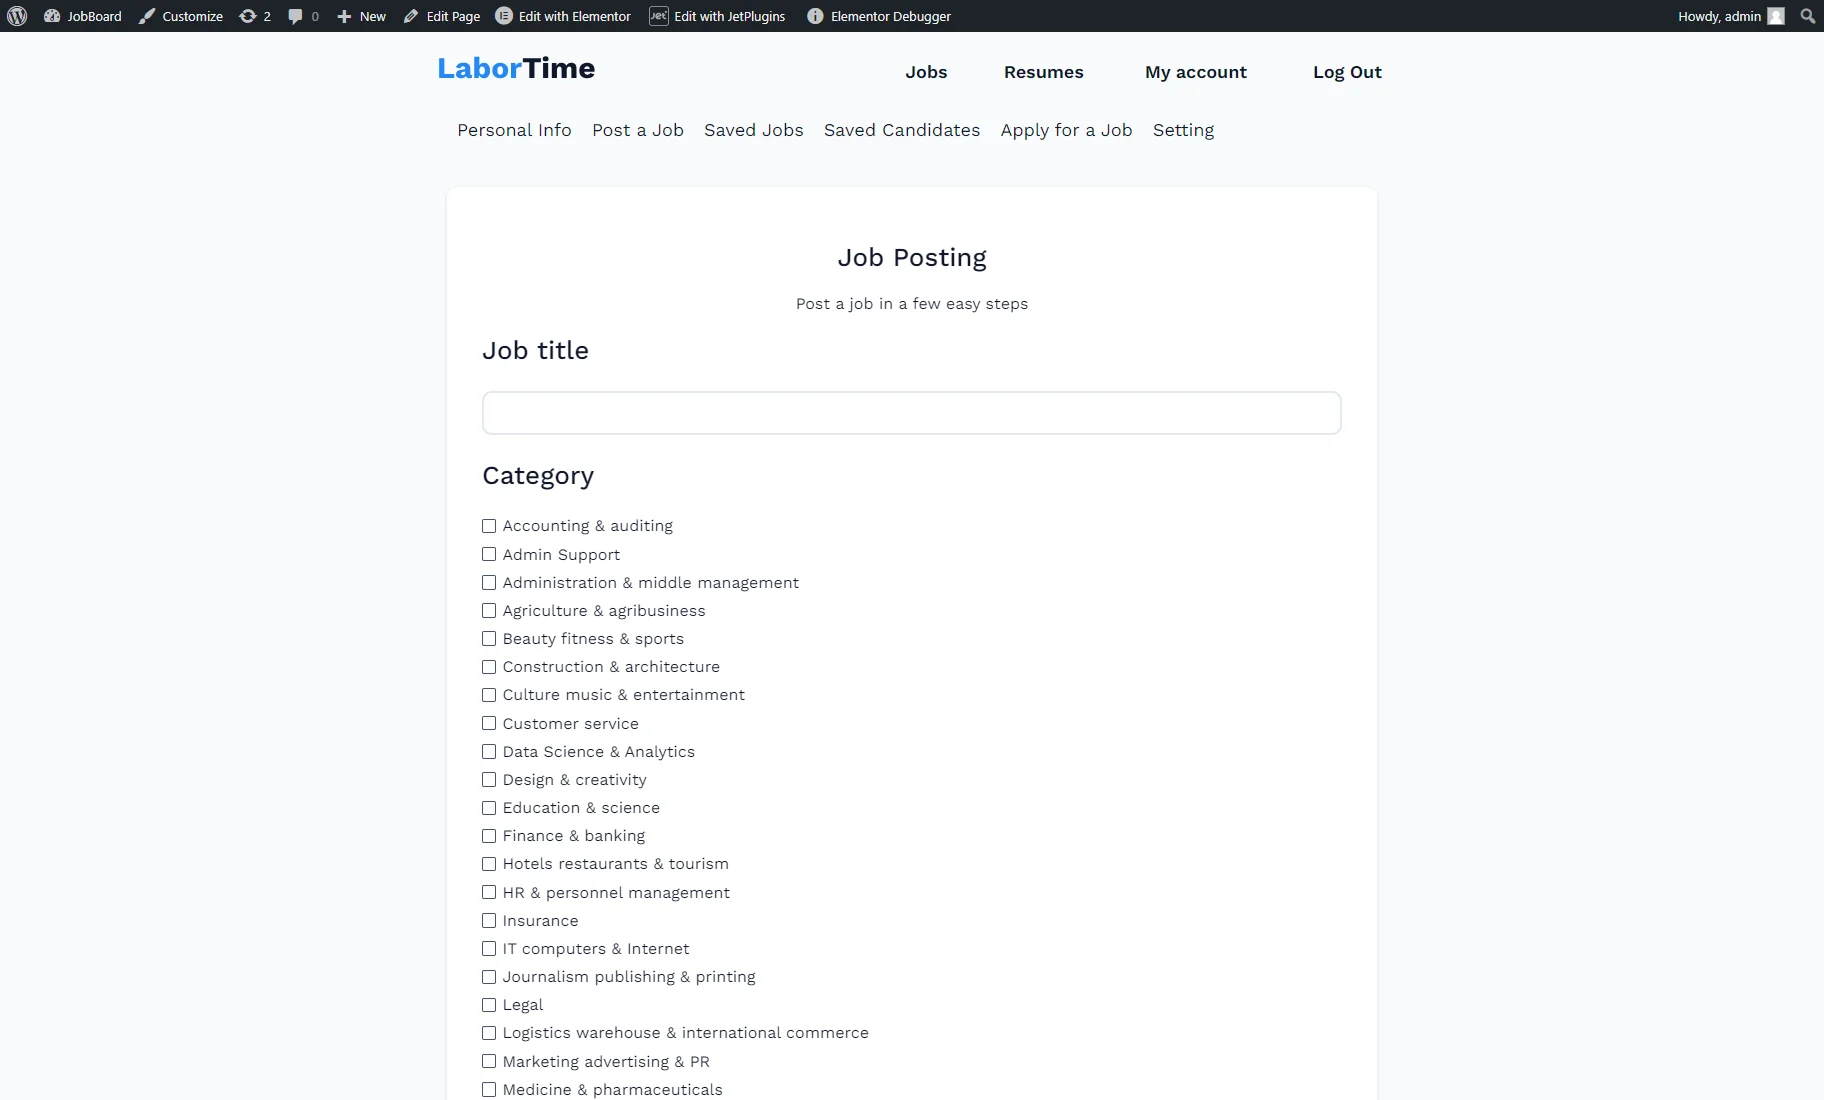
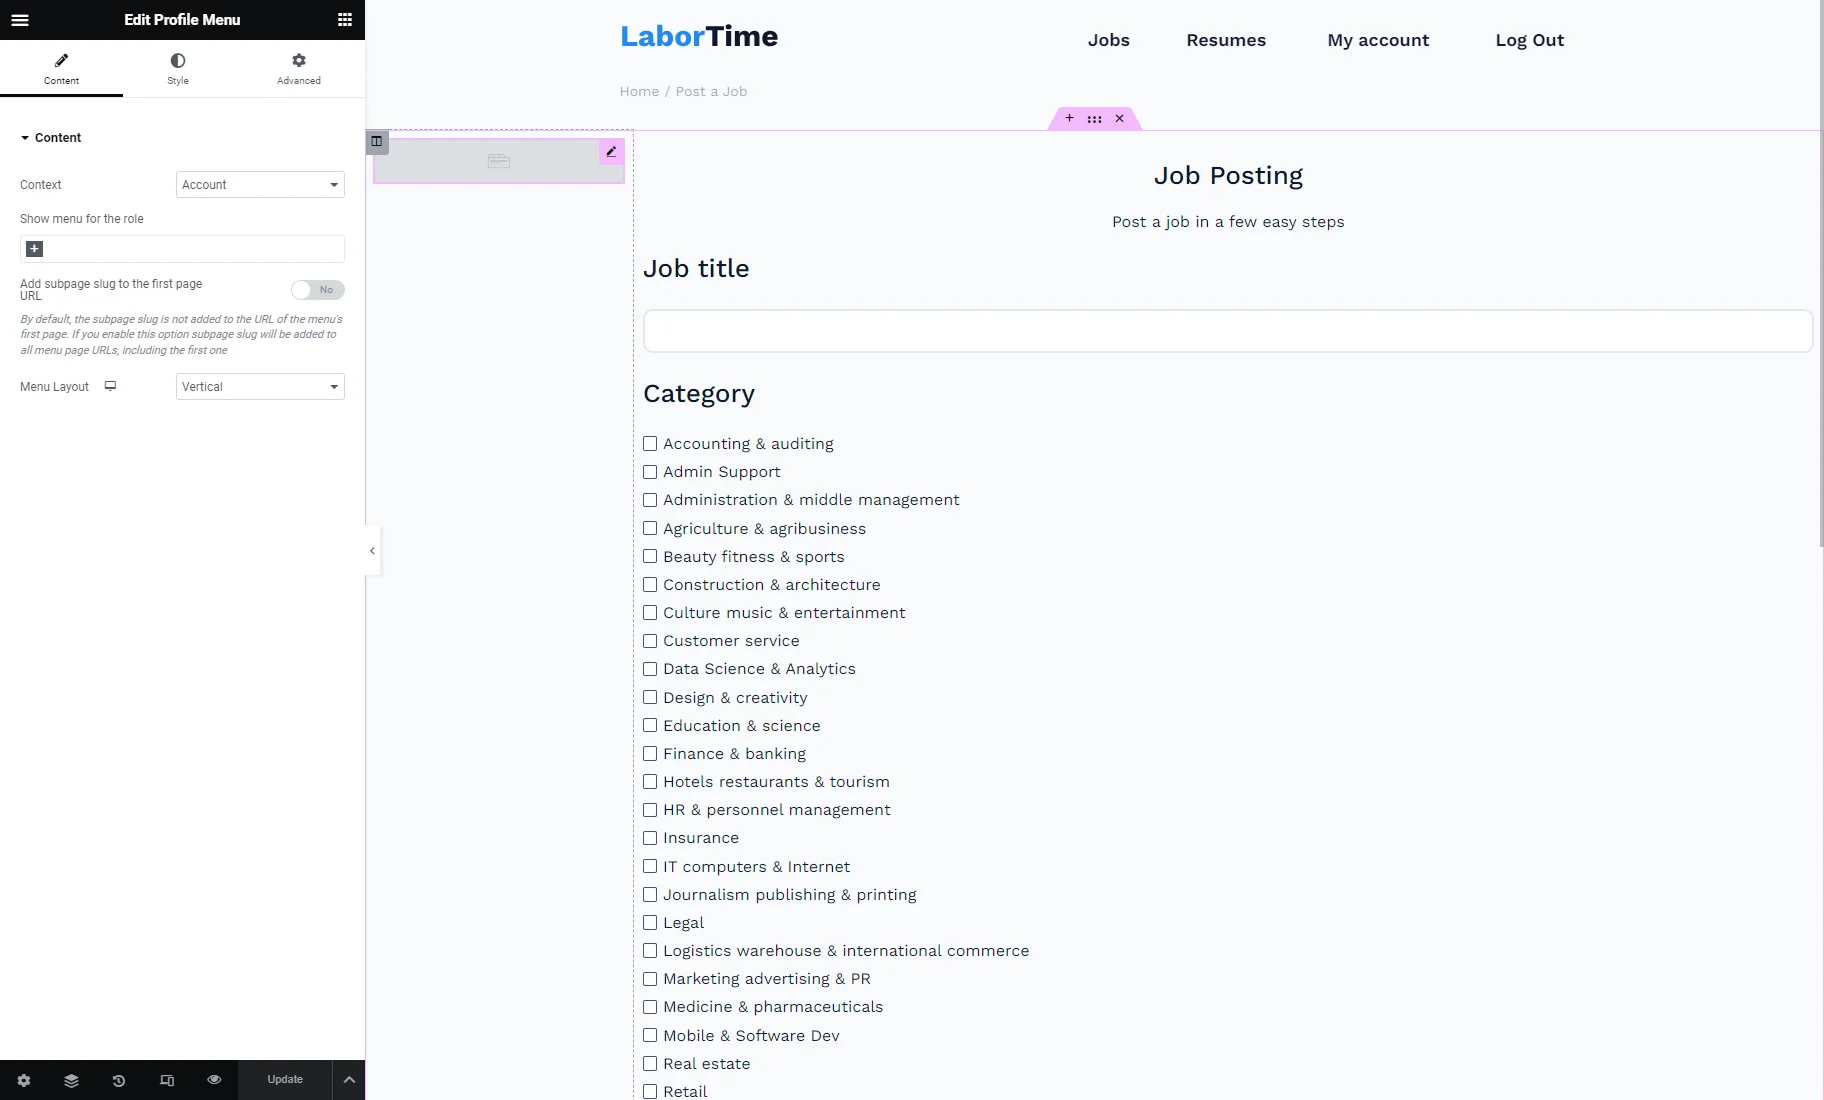
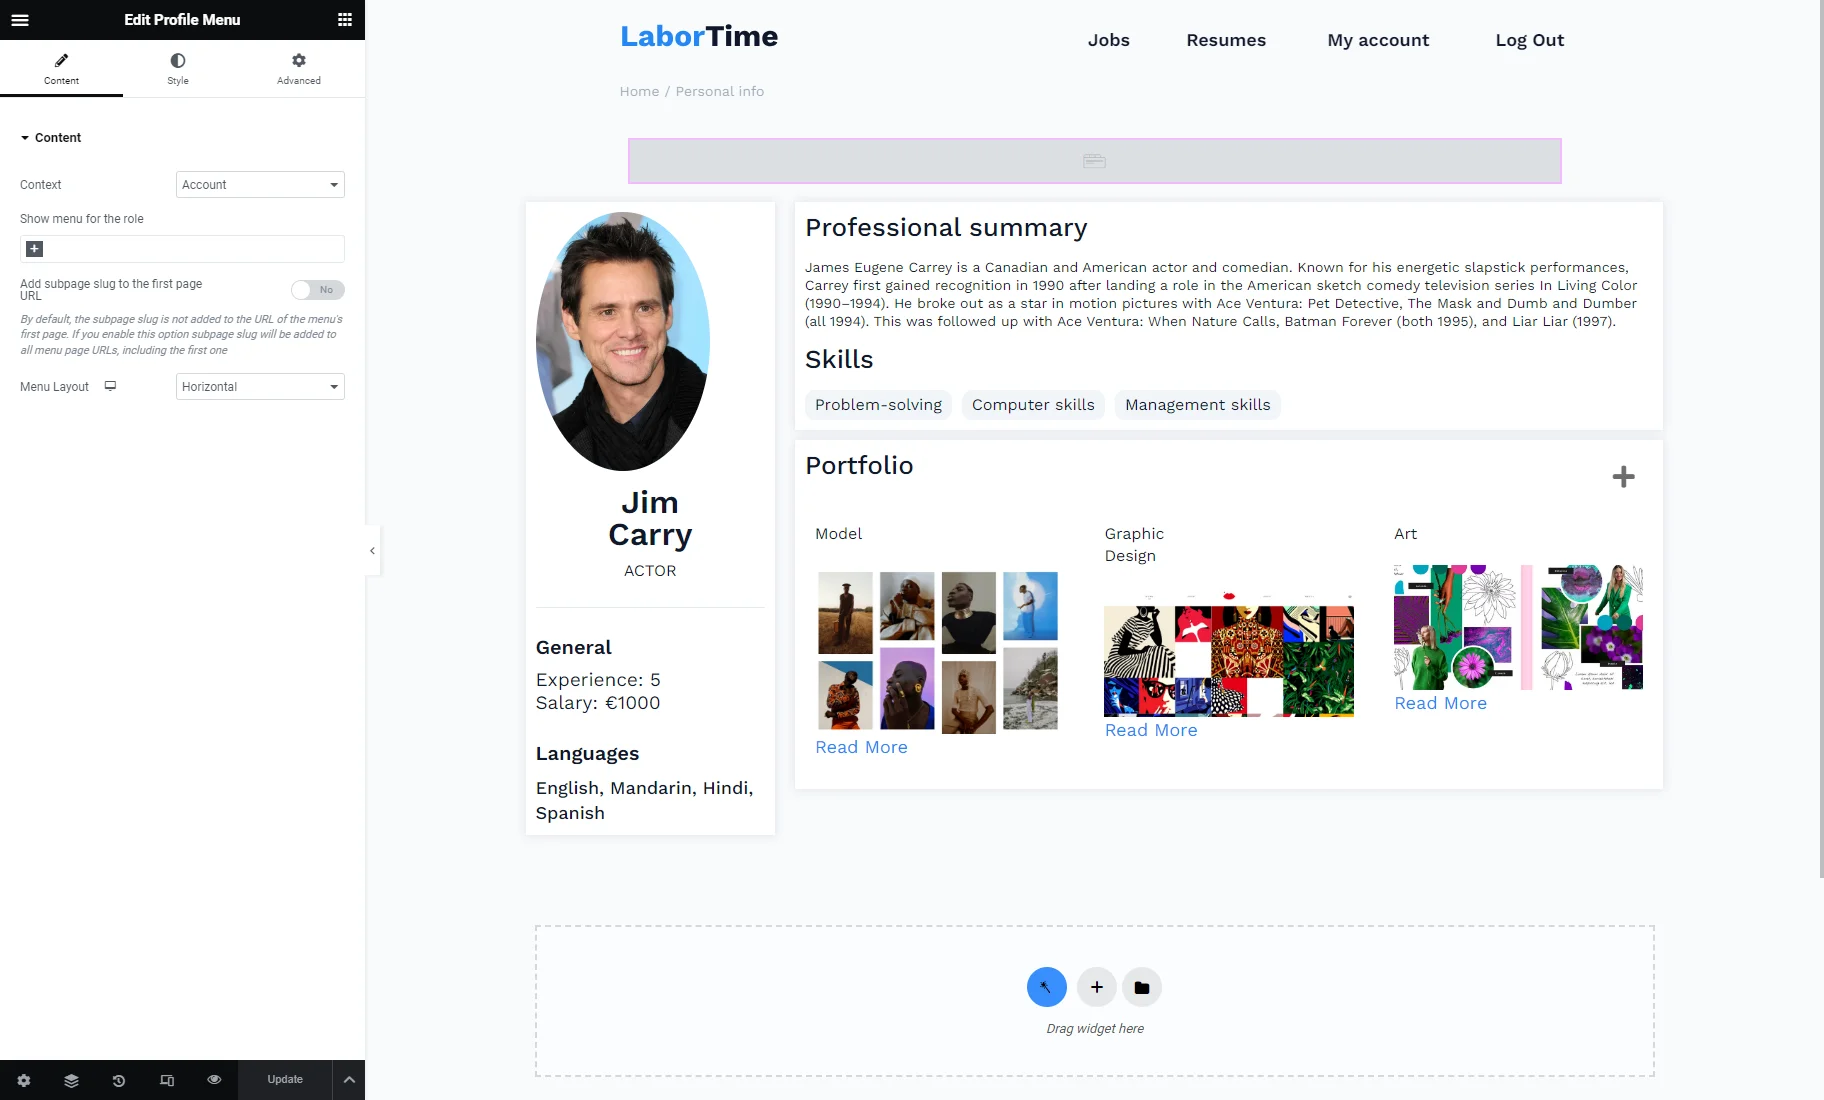
For the Profile Menu widget in the template with the user information, we set the “Horizontal” Menu Layout.
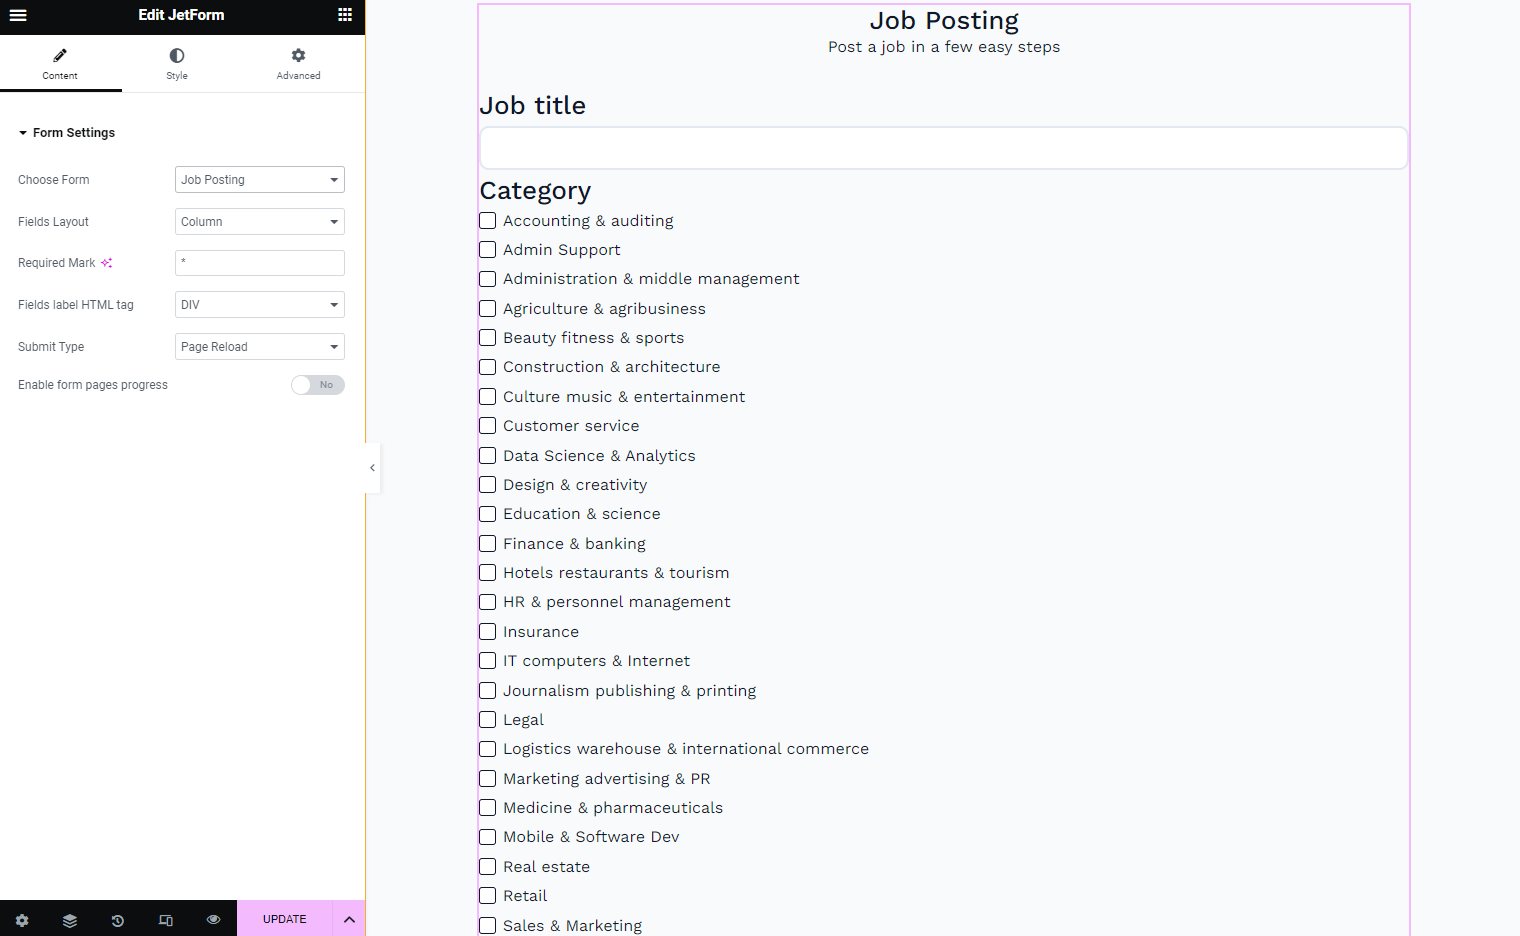
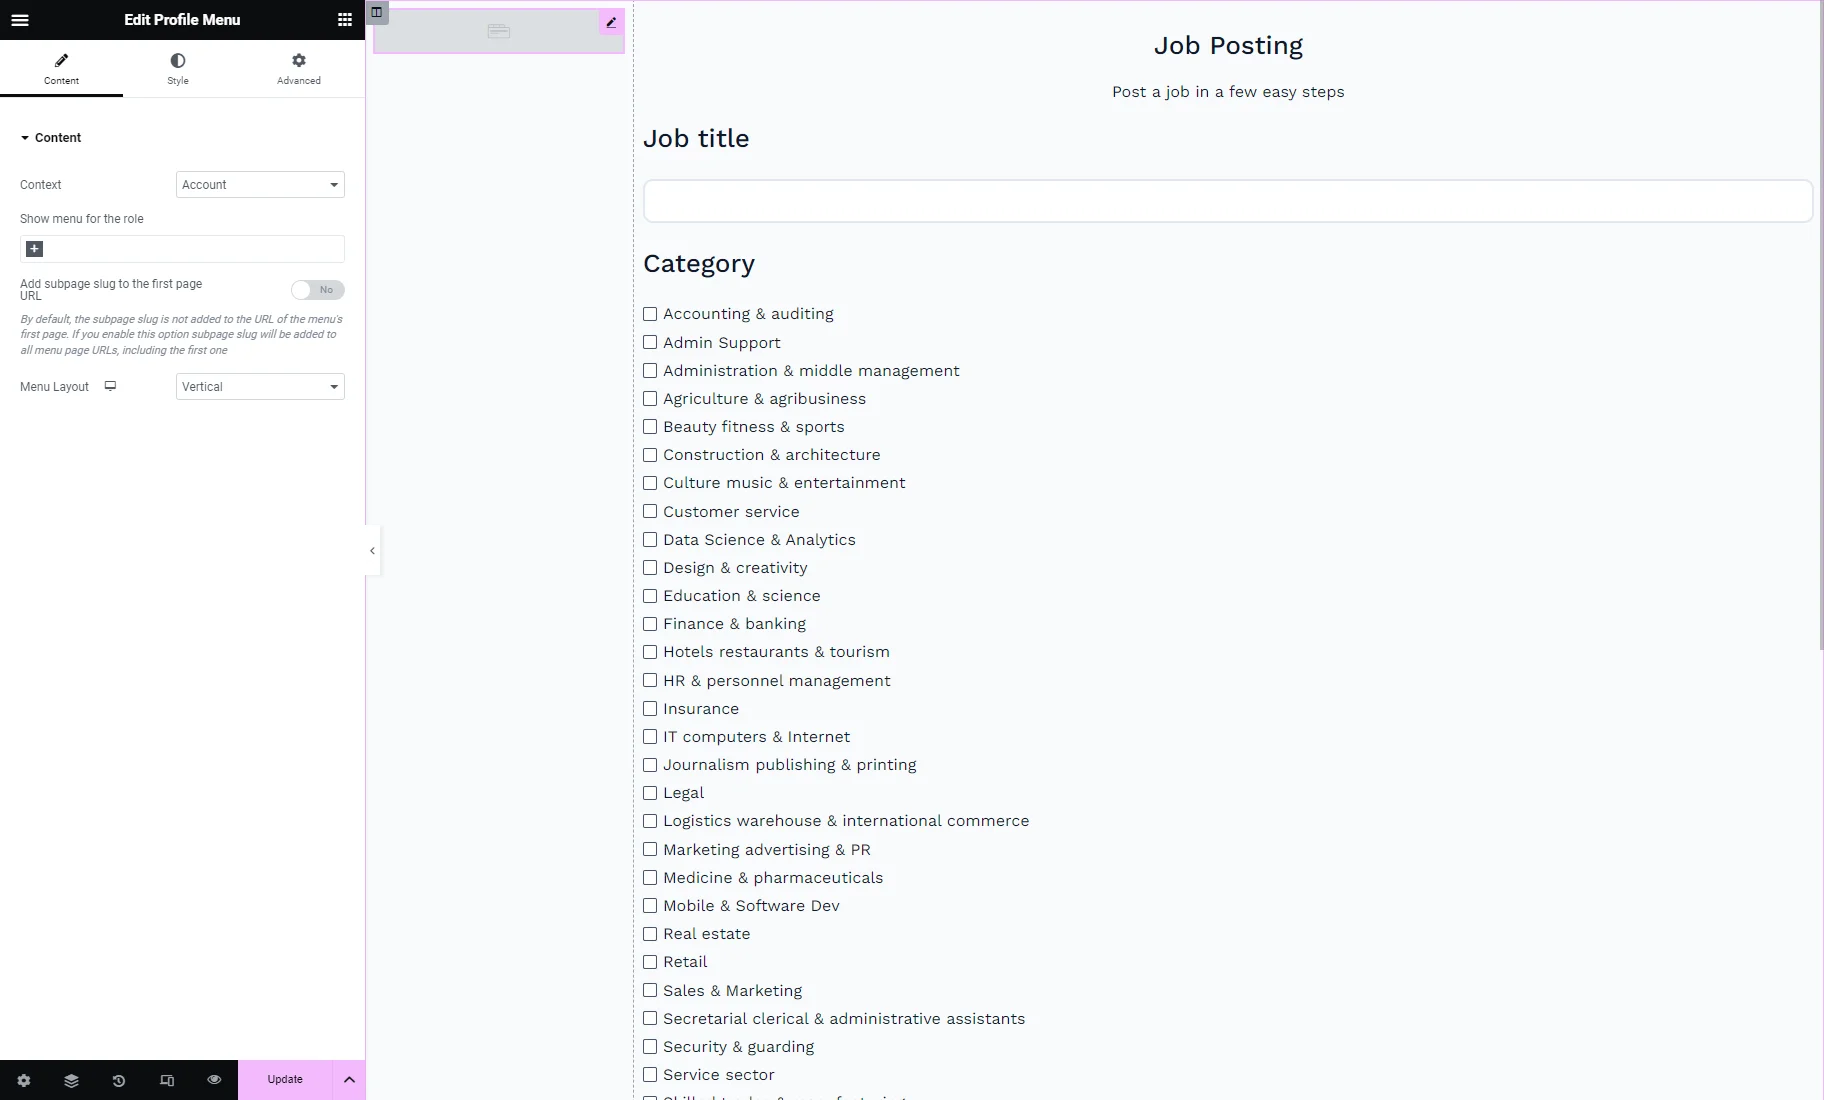
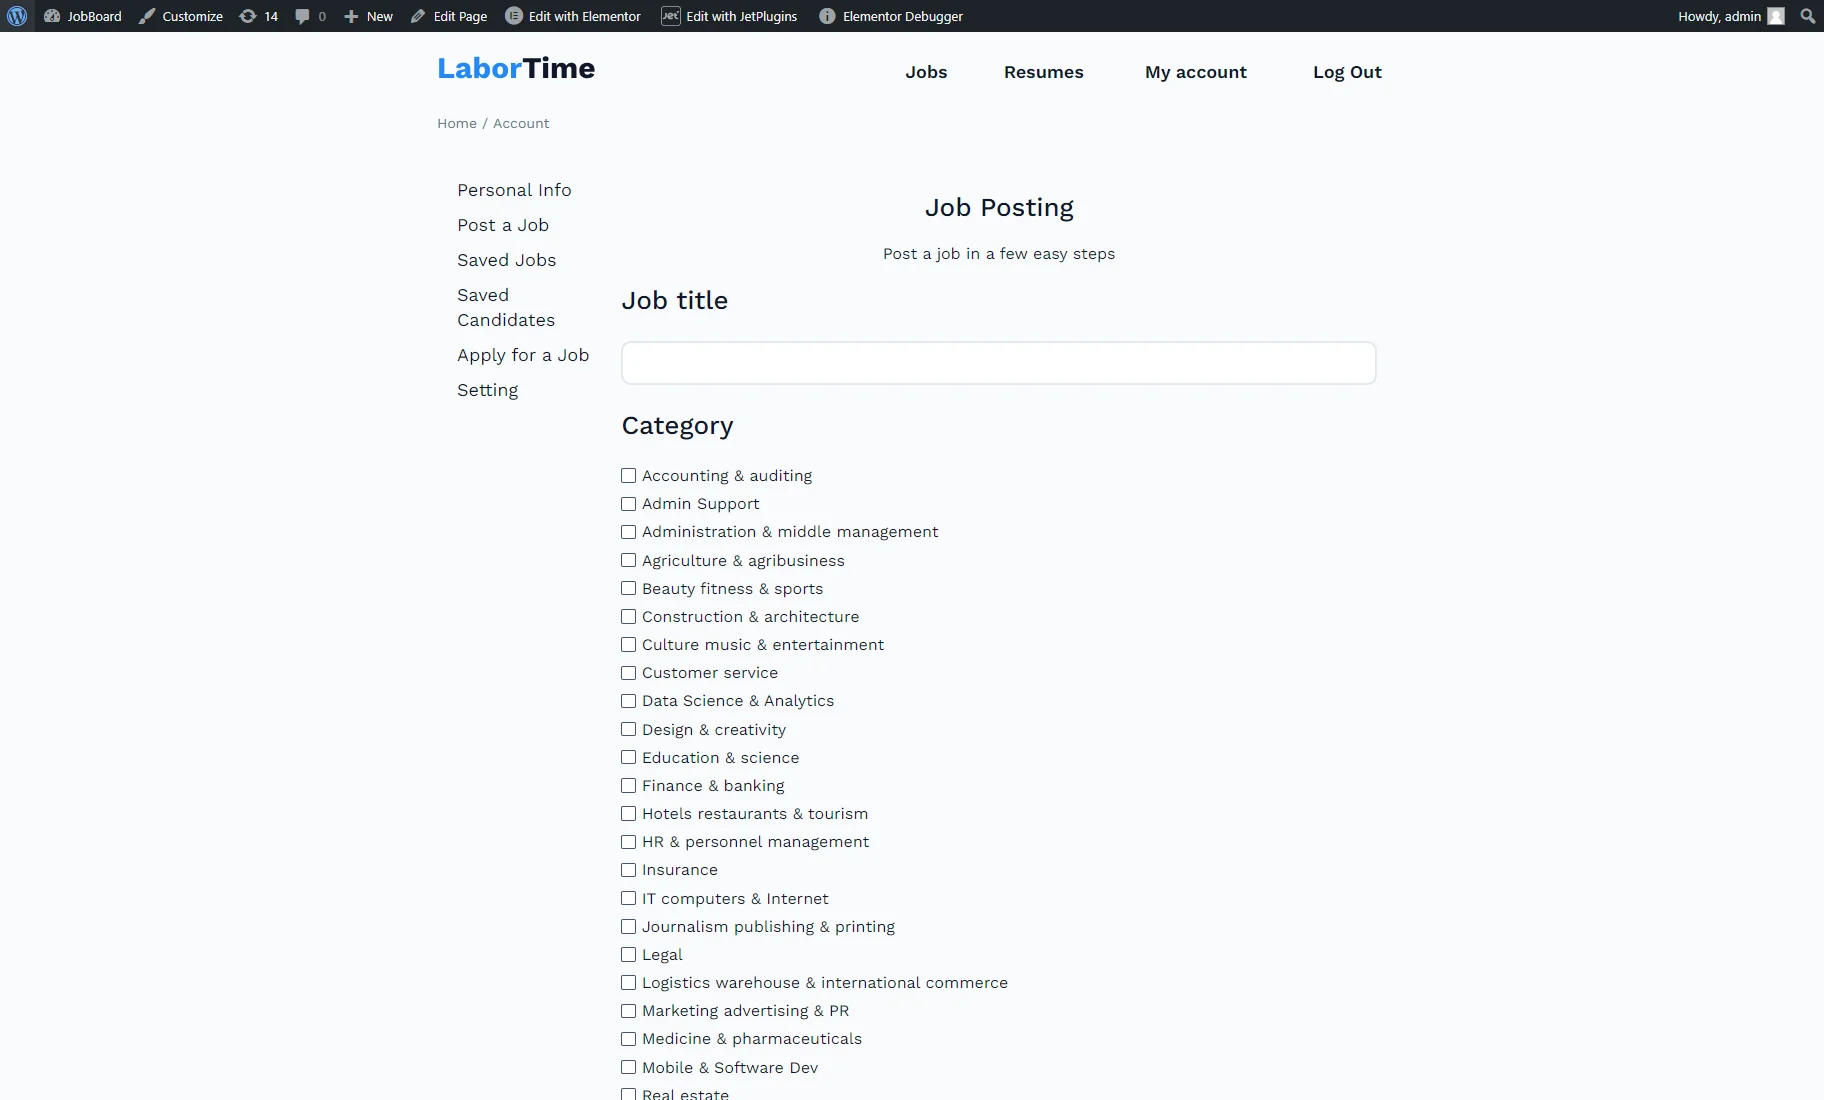
By clicking on the “Post a Job” menu item, we proceeded to the template with the form. Here, we set the “Vertical” Menu Layout for the Profile Menu widget. As you can see, with the “Rewrite” Template mode, you can apply different settings to the Profile Menu for different subpages.
That’s all. Now you know how to create the WordPress Account page with the Content or Rewrite mode of the JetEngine Profile Builder feature.