How to Display Terms in the Search Results Area
This tutorial explains how to display terms in the search results area along the posts using the JetSearch plugin on the example of the WooCommerce products categories on the WordPress e-commerce site.
Before you start, check the tutorial requirements:
- Elementor (Free version), Block editor (Gutenberg), or Bricks
- JetSearch plugin installed and activated
The Ajax Search widget/block/element is the JetSearch feature that allows fast search on WordPress websites.
By default, Ajax Search displays posts in the results area. The Additional Results settings allow the search and display of the terms or/and users along with posts.
In this tutorial, we describe how to display terms in the search results area using the example of the WooCommerce product categories on the bookstore e-commerce website.
Be aware that such a tutorial isn’t case-sensitive, and you can display custom taxonomies along with posts of the Custom Post Type.
How to Display Terms in the Search Results Area
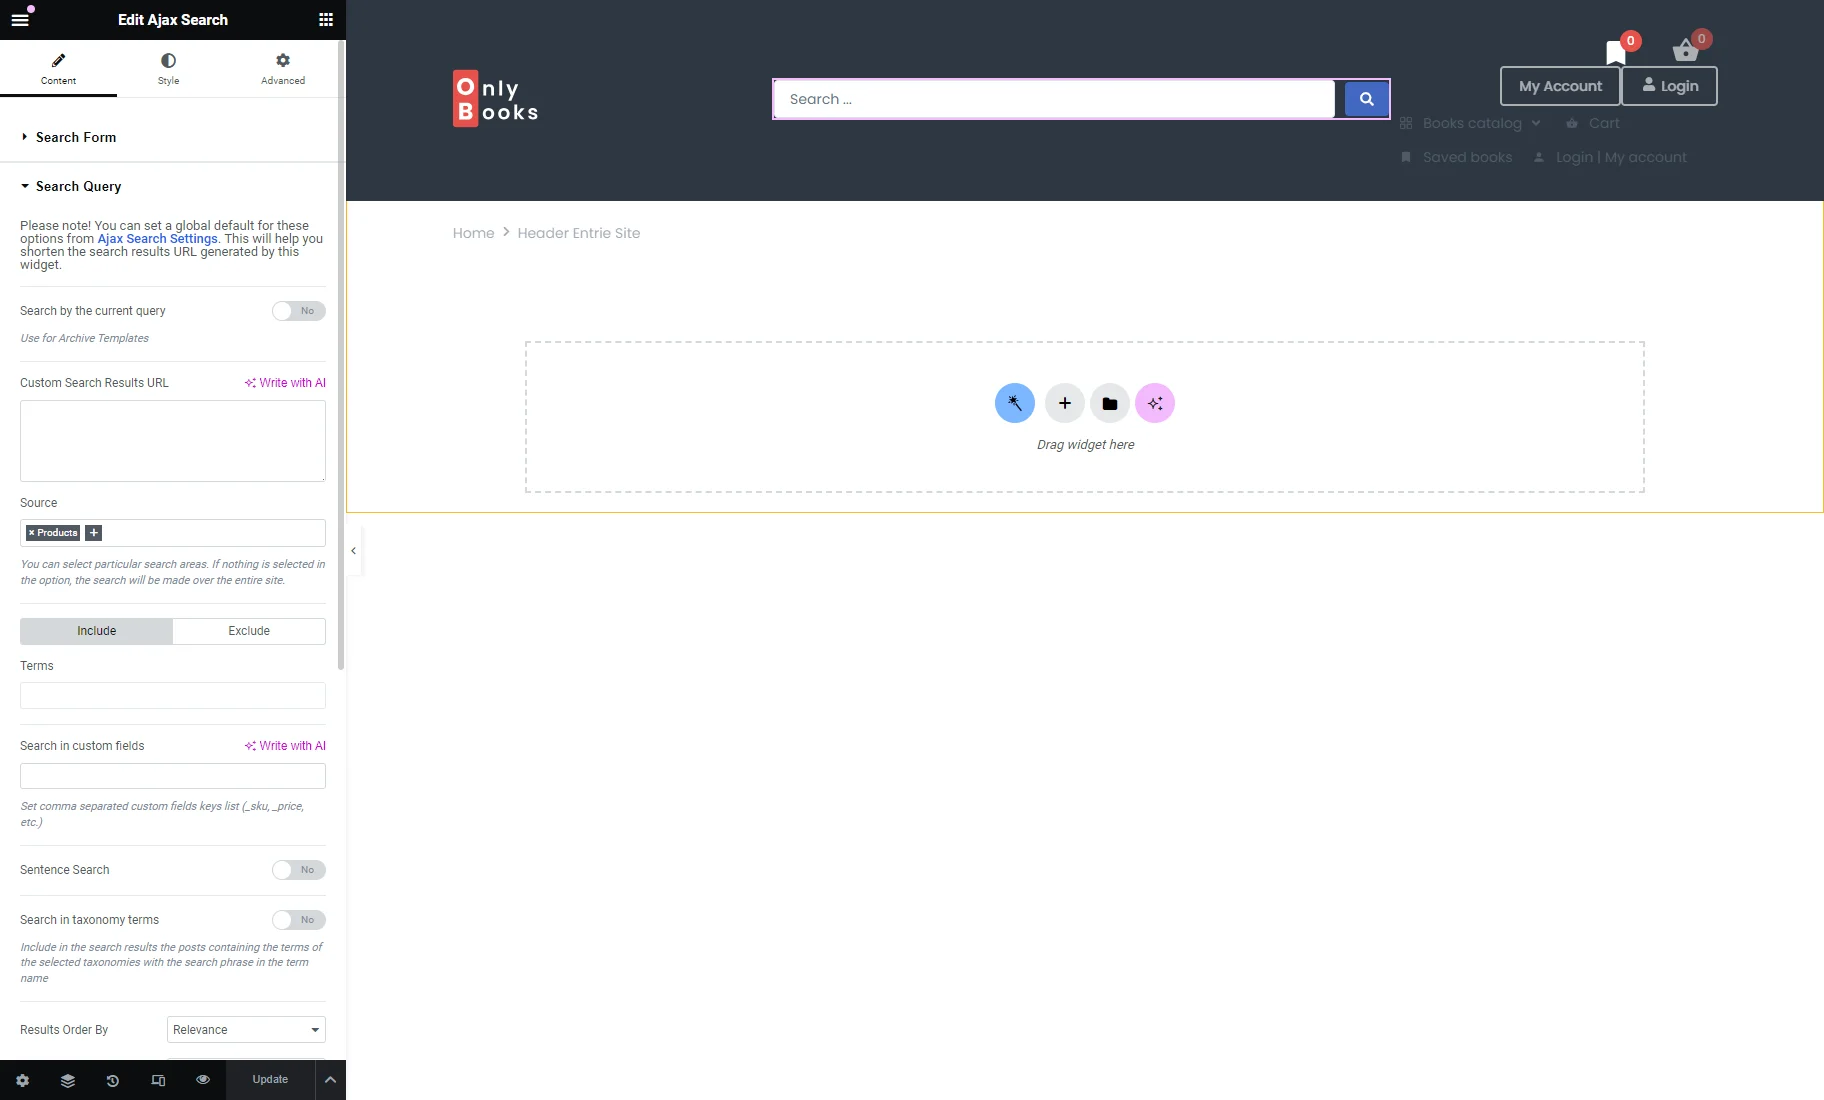
As described in the How to Add an AJAX Search to a Website’s Header tutorial, we place the Ajax Search widget to a header in the Elementor editor.
Initially, you can open the Search Query tab and select the required post types as the Source. For example, we set the WooCommerce “Products” post type.
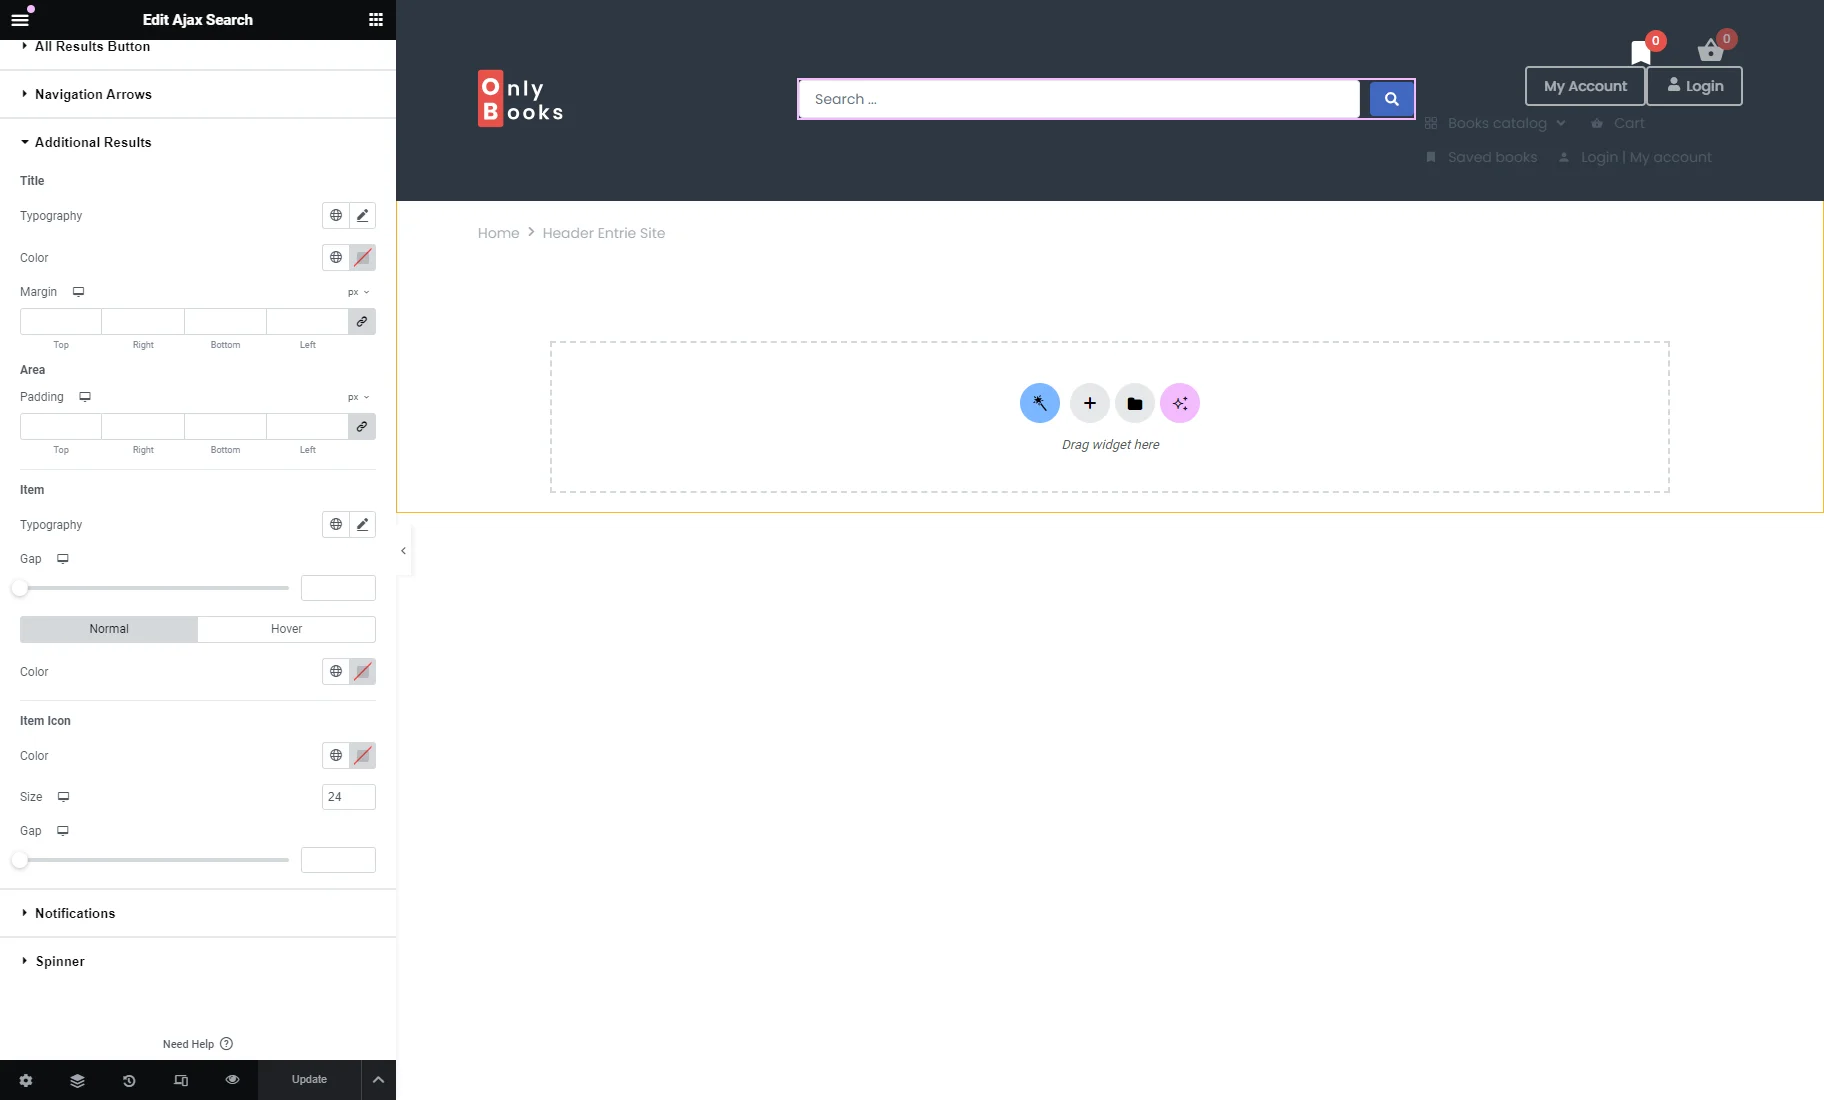
We unroll the Additional Results tab and enable the Terms Search Source toggle to adjust extra settings.
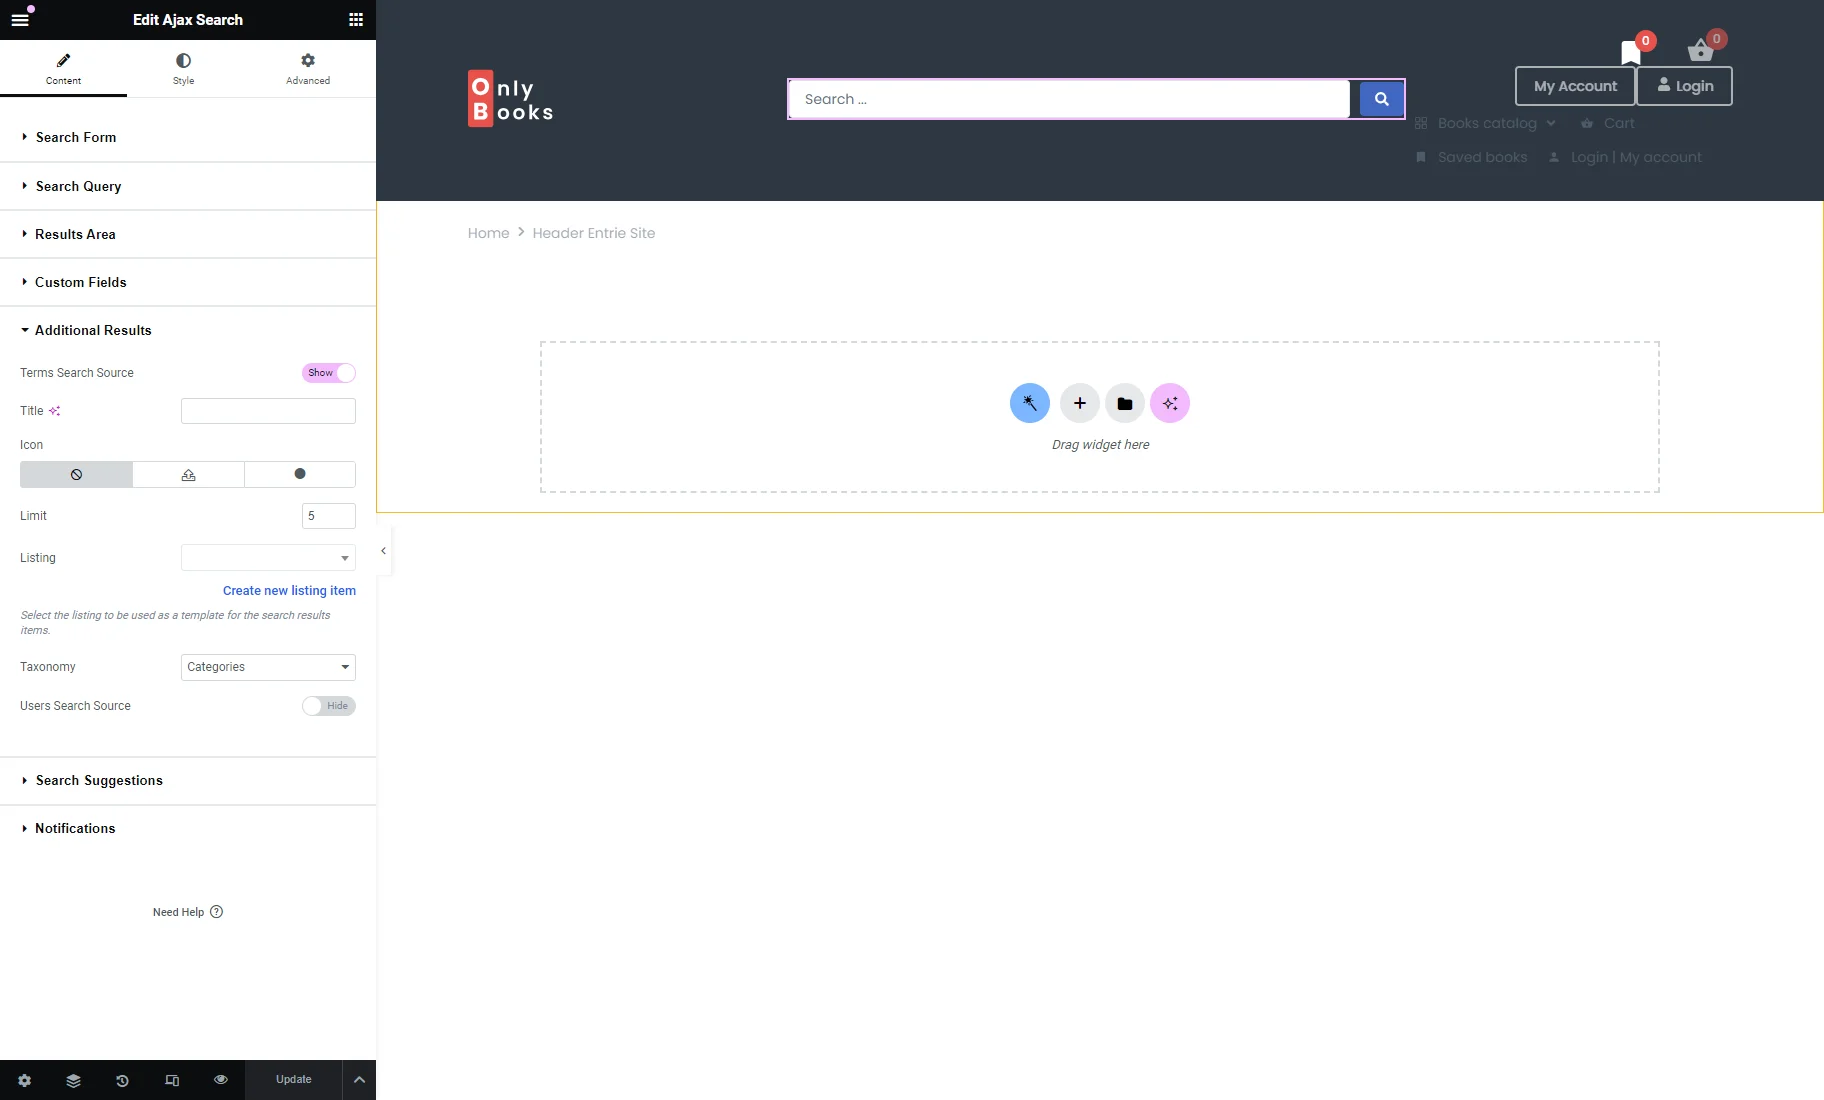
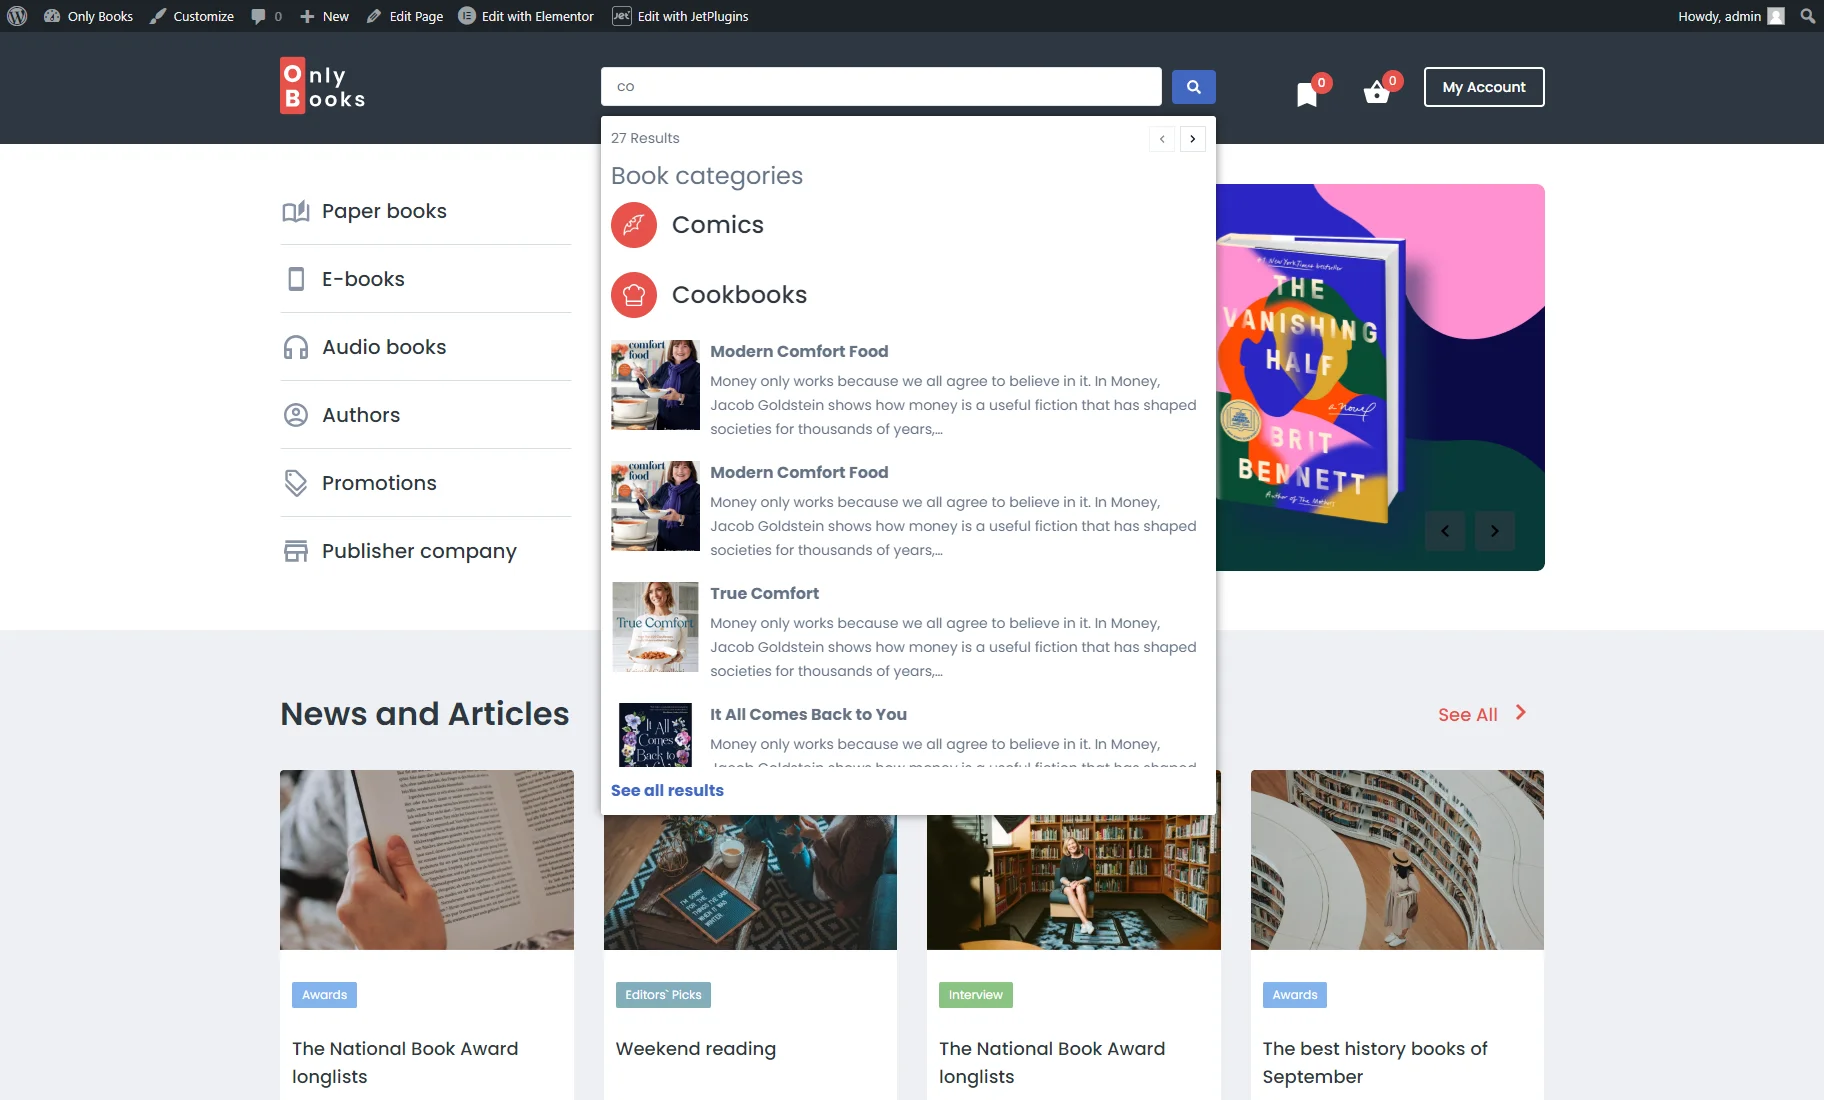
First, we pick the needed Taxonomy in the namesake drop-down (“Product categories”), and the term names appear in the search results area if they match the request.
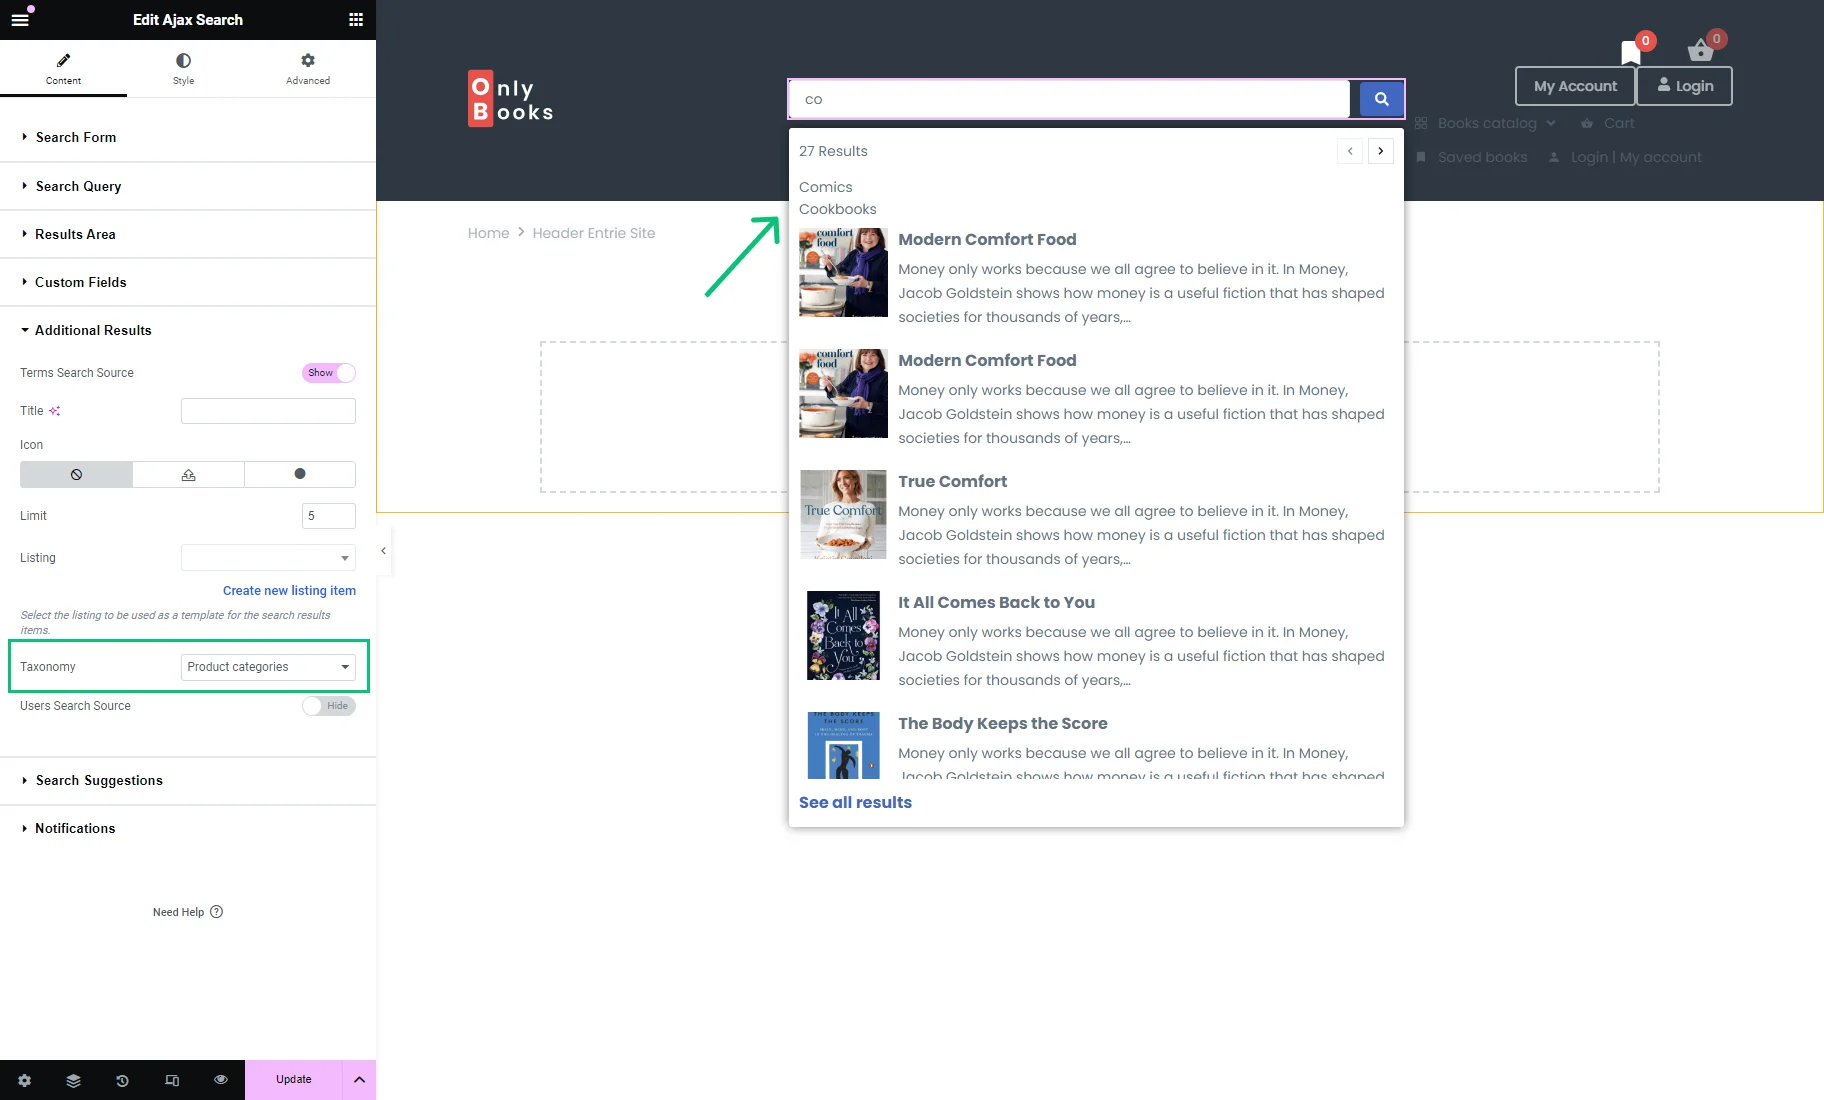
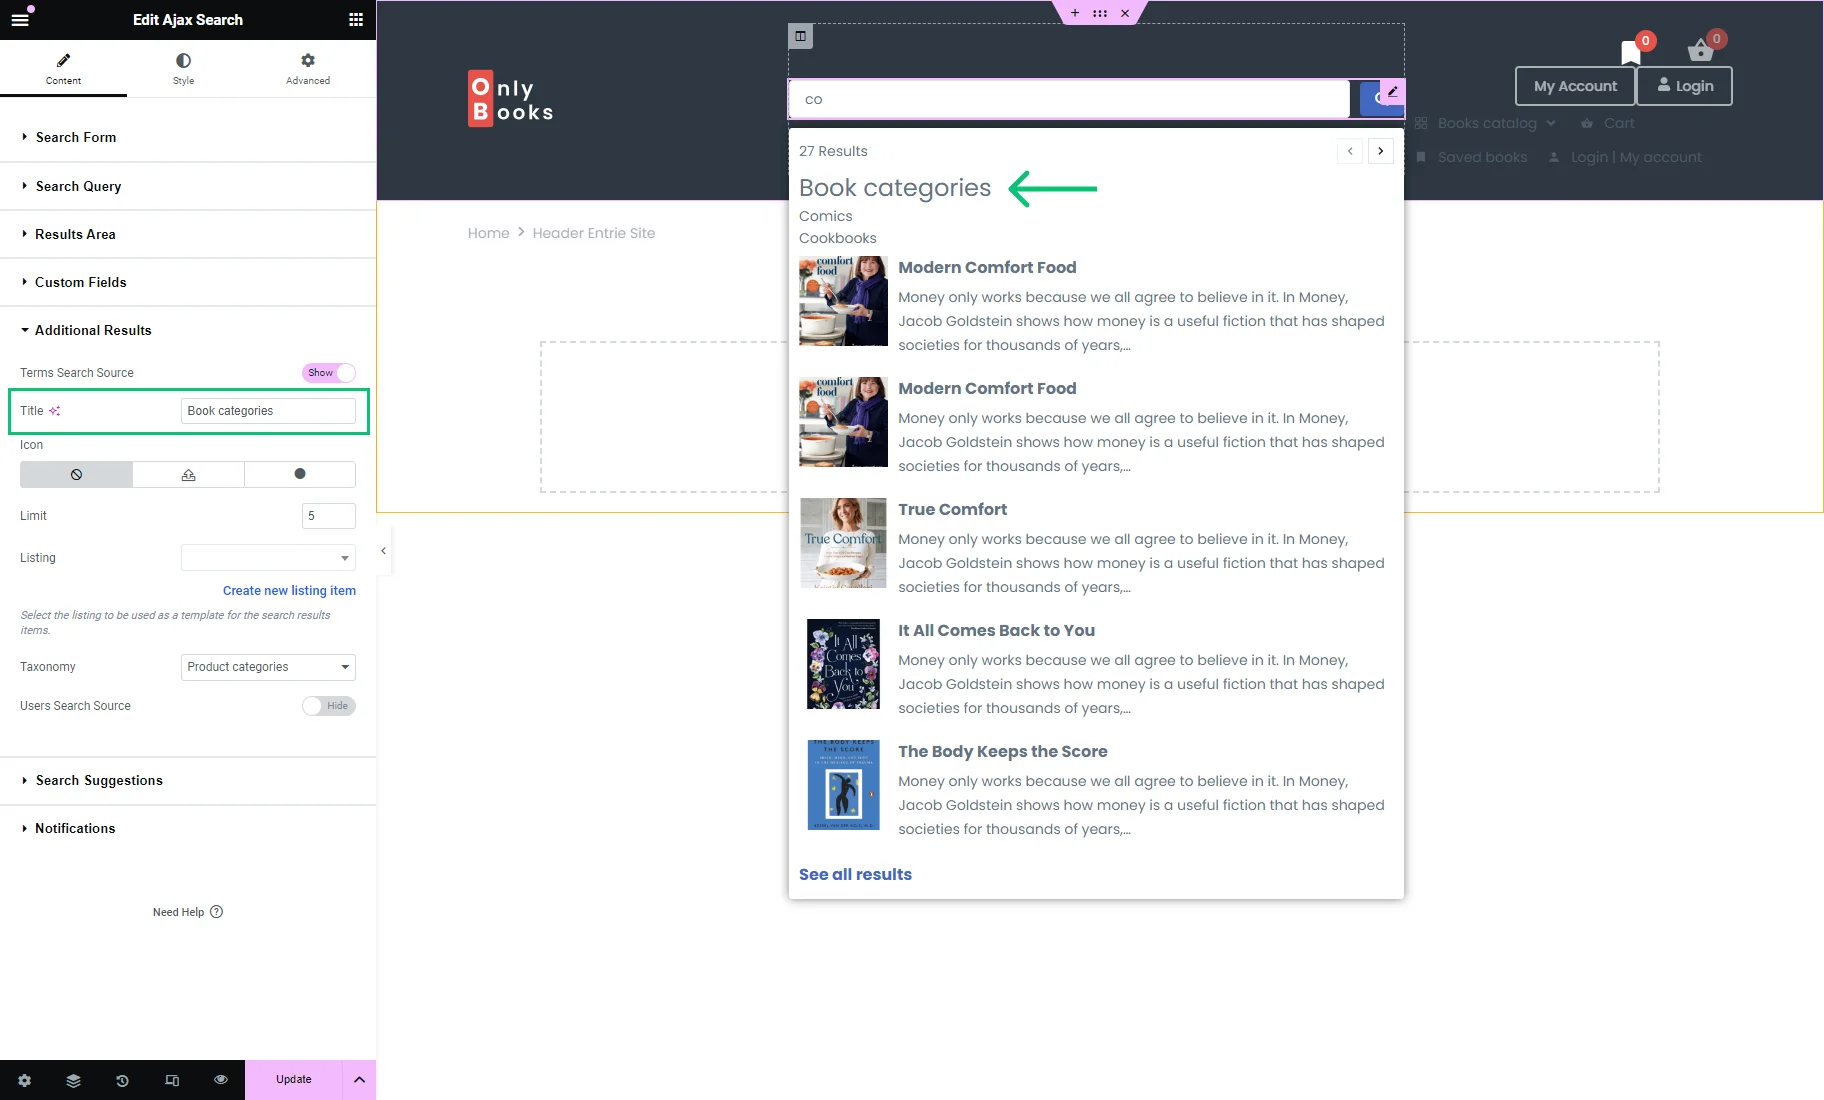
Then, we fill in the Title field (“Book categories”).
Next, in the Icon section, we click the “Icon Library” option, pick the suited icon, and press the “Insert” button.
The icon we set appears on the left of the term name in the search results area.
We keep the Limit as it is set by default (“5”). It means the search results area will display a maximum of five terms results.
Using Listing Template for the Terms Search Results
With a listing template, you can customize the display of the terms as you wish. For example, you can display different icons for each term (with the Icon option in the Additional Results tab of the Ajax Search widget, you can set only one icon for all terms) and extra information for each term, such as a description.
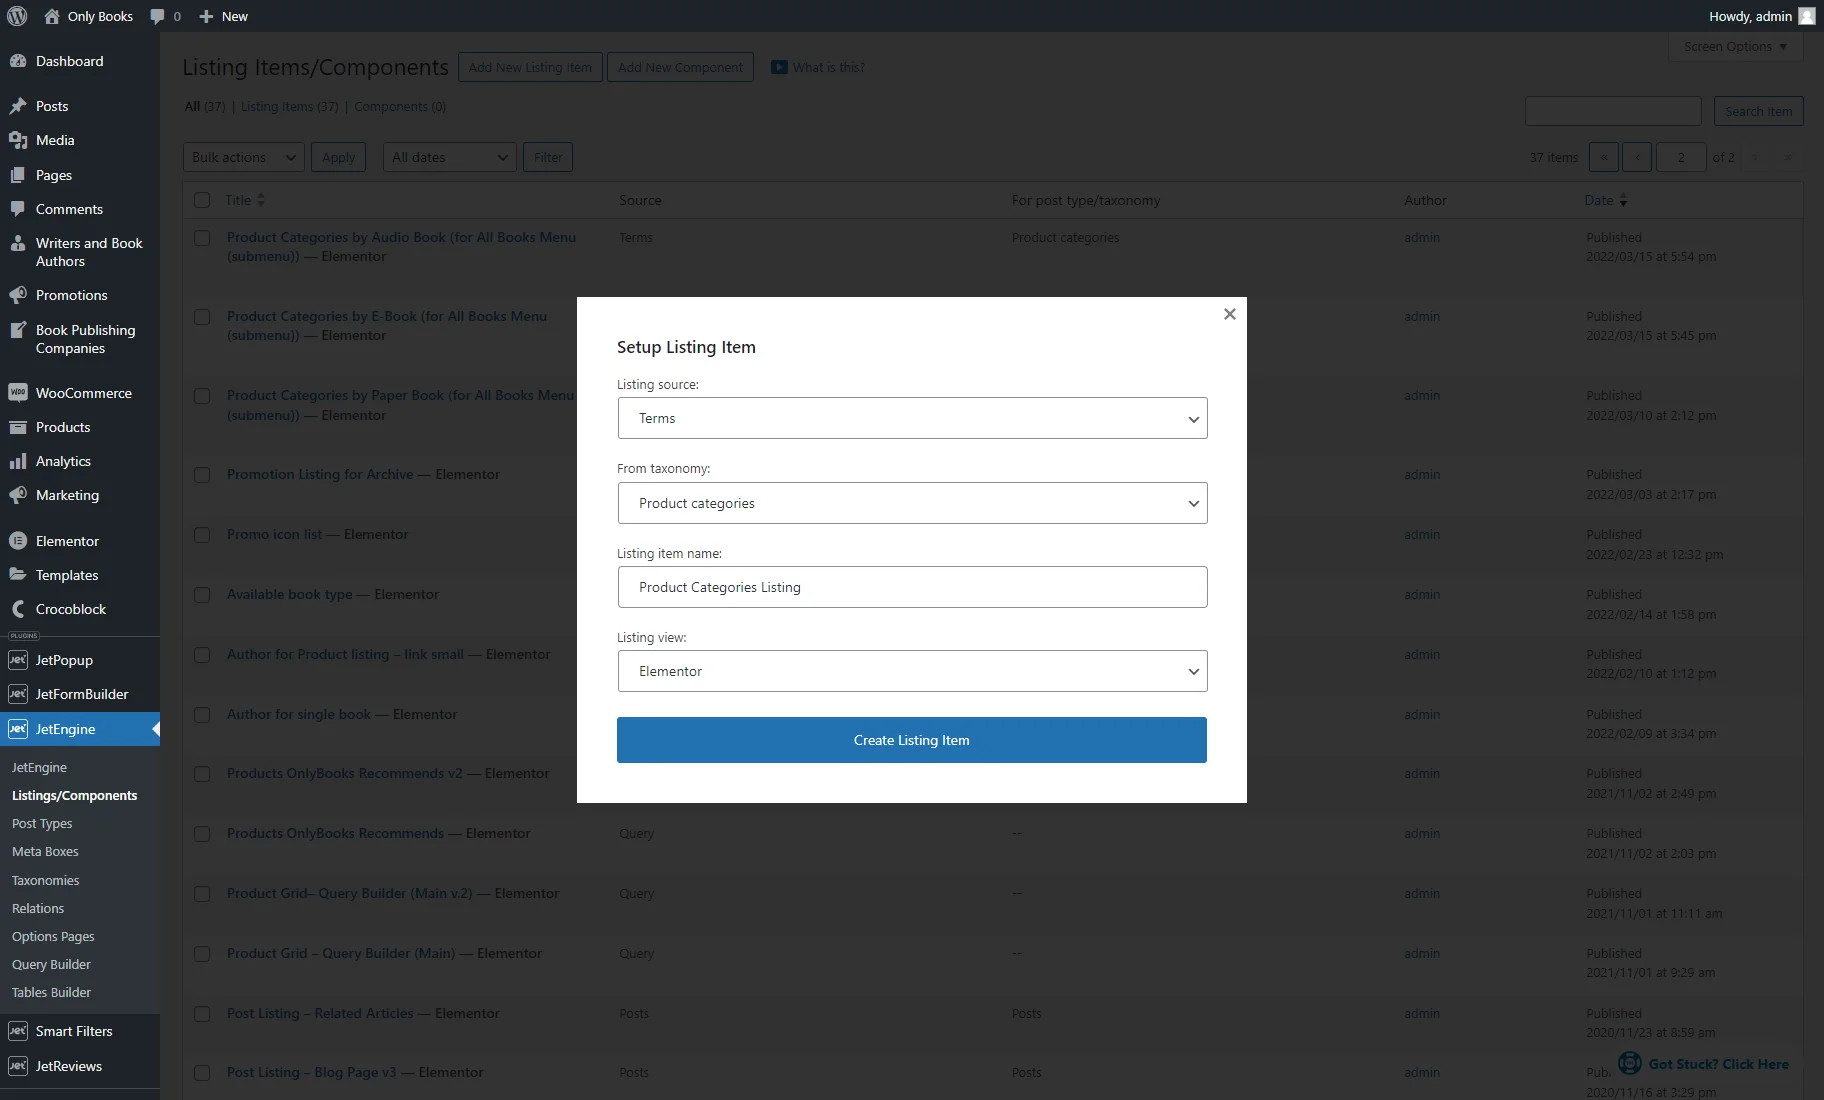
To create a Listing template for taxonomies, we go to the WordPress Dashboard > JetEngine > Listings/Components tab and click the “Add New Listing Item” button.
In the Setup Listing Item pop-up, we pick the “Terms” option as the Listing source, set the required taxonomy in the From taxonomy field (“Product categories”), enter the Listing item name (“Product Categories Listing”), and choose the Listing view (for this case we choose “Elementor”).
Afterward, we click the “Create Listing Item” button.
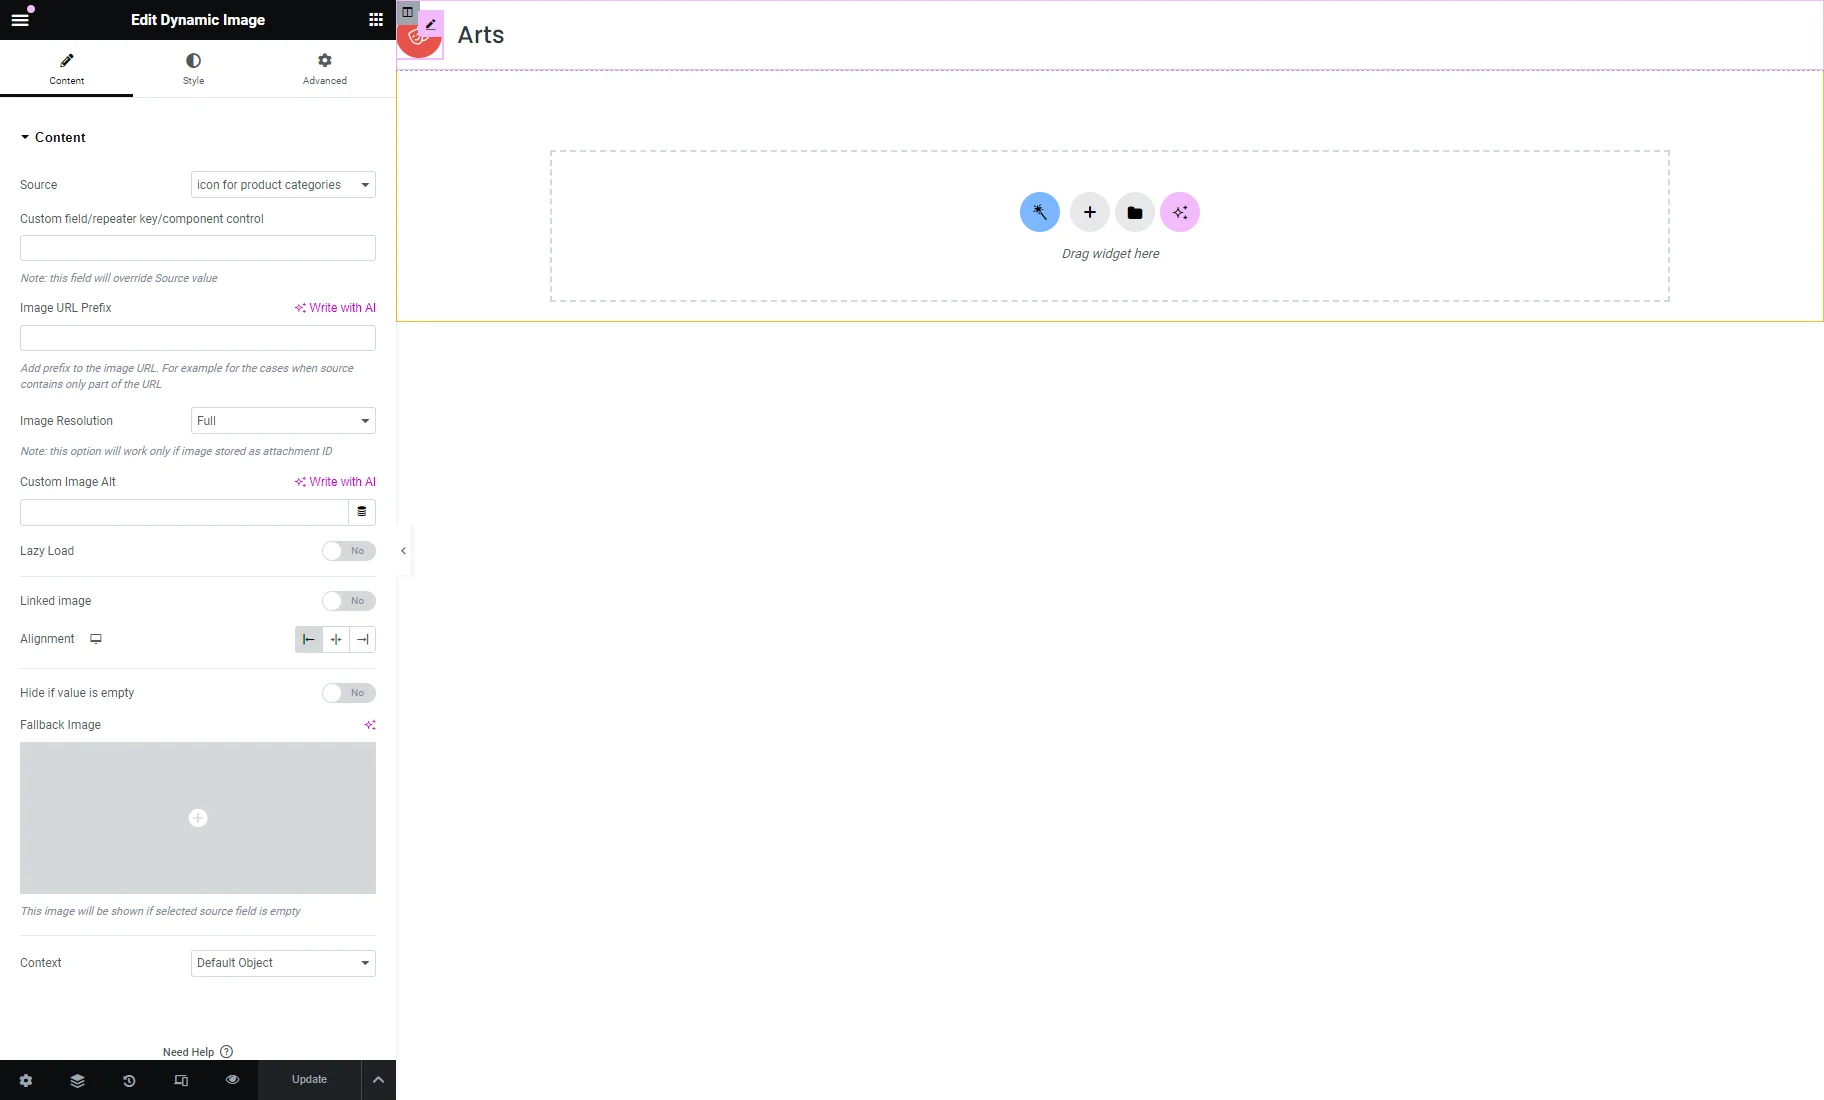
You can customize the listing template using different elements, such as Dynamic Widgets.
We place such widgets in the Elementor editor:
- Dynamic Image with the custom “Media” field for taxonomy as the Source. Learn more from the How to Add Meta Boxes to WooCommerce Product Categories tutorial;
- Dynamic Field with the “Post/Term/User/Object Data” Source and “Term name” Object Field.
To learn more, proceed to the How to Create a Listing Template for Custom Taxonomy in Elementor tutorial.
After customizing the listing template, we save the changes by hitting the “Publish/Update” button.
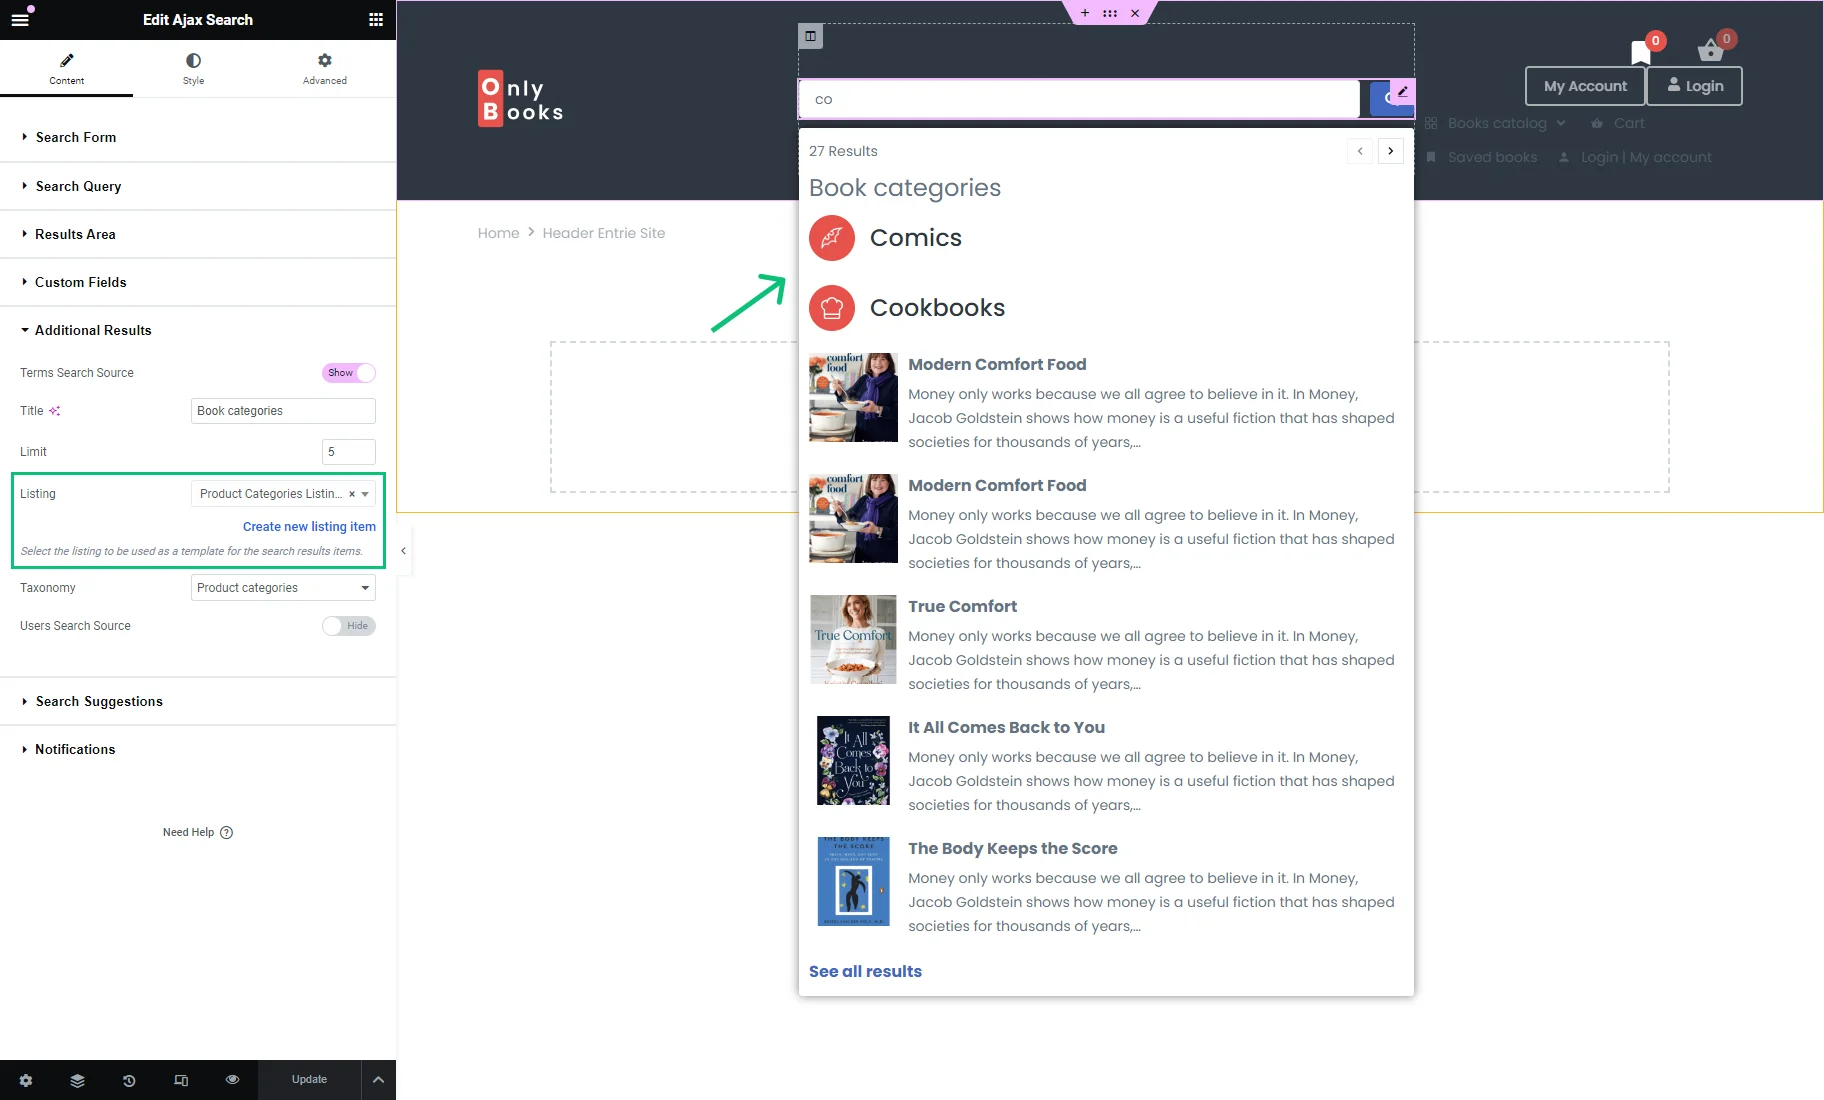
We return to the header template and select the just-built listing item in the Listing drop-down menu in the Additional Results tab of the Ajax Search widget.
Afterward, the design set in the listing template will be applied to the terms in the search results area.
After adjusting the Ajax Search widget settings, we push the “Update” button.
How to Display Terms on the Search Results Page
To display the terms on the Search Results page, you need to create a custom query that can be achieved with the Query Builder feature of the JetEngine plugin.
To craft the Search Results page, proceed to the How to Make the Custom URL for the Search Results Page tutorial.
Since we work with WooCommerce products, we complete the steps described in the Displaying WooCommerce Products chapter of the mentioned tutorial.
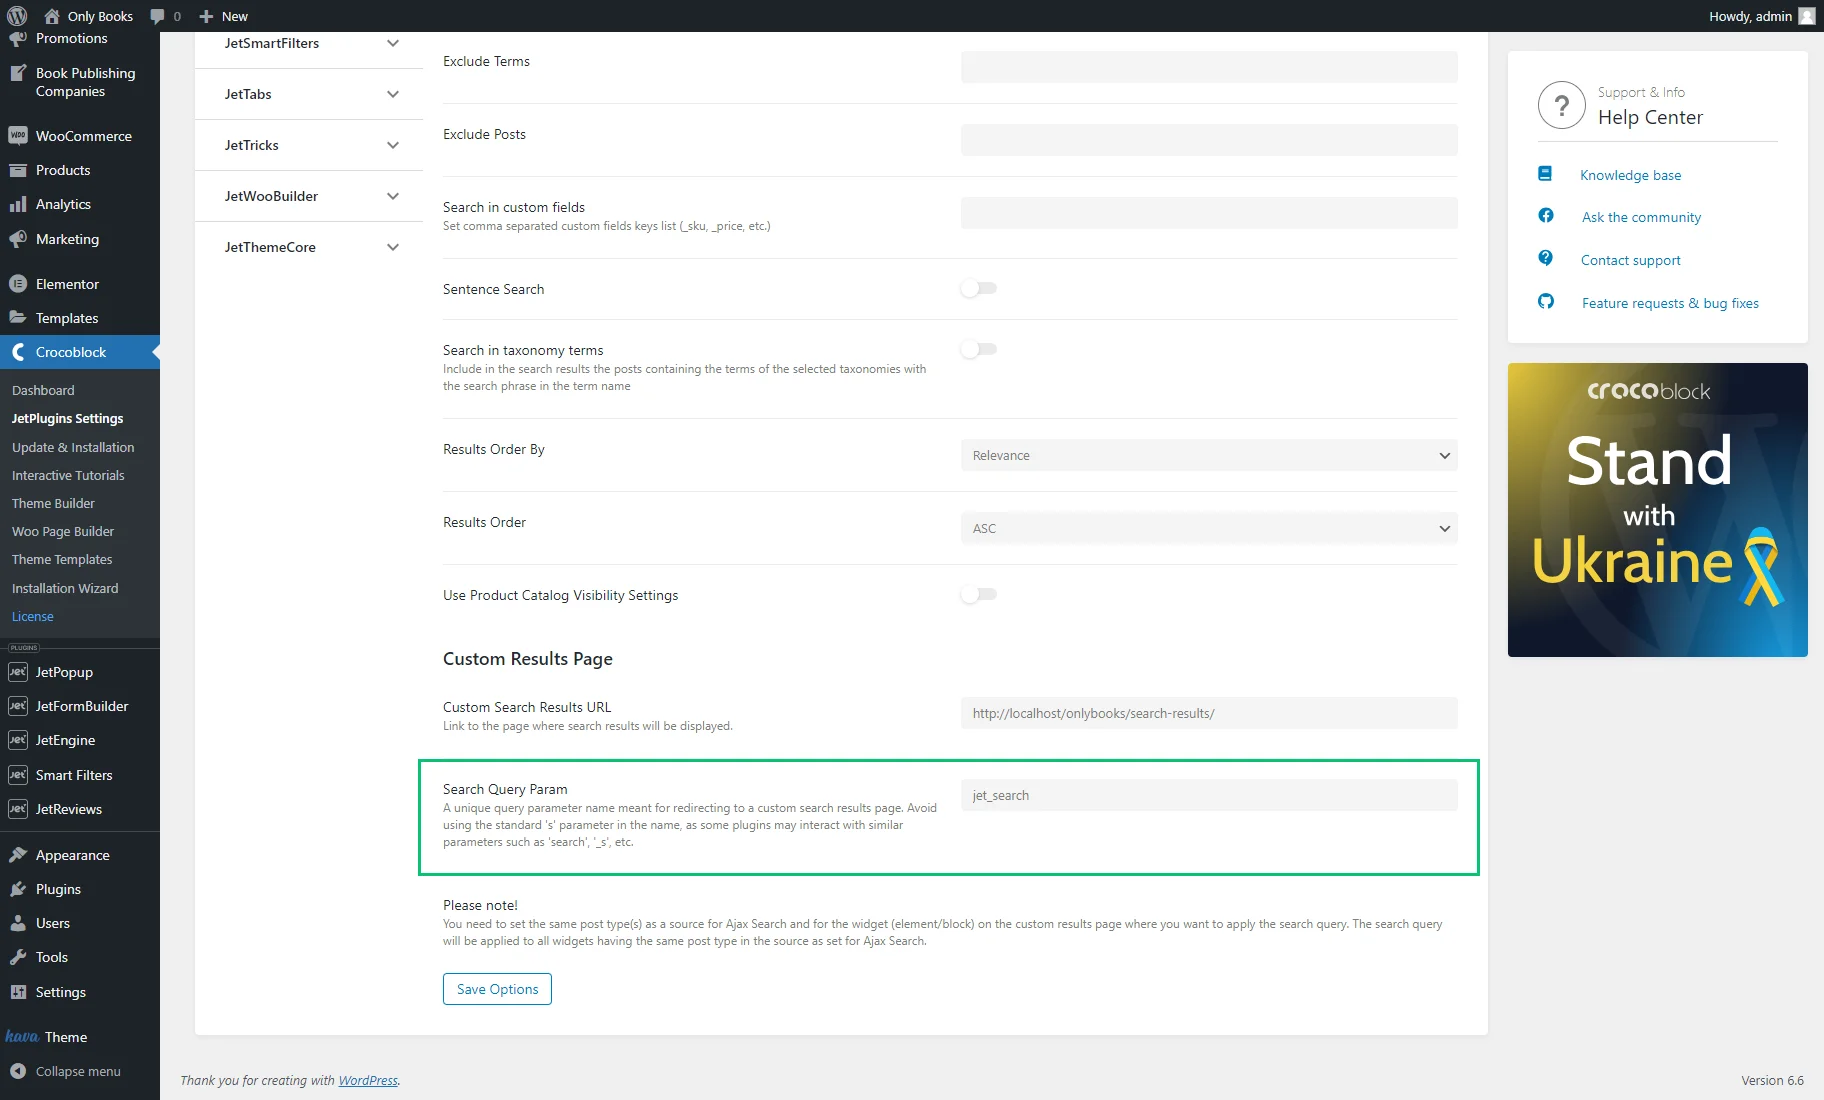
First, we navigate to the WordPress Dashboard > Crocoblock > JetPlugins Settings > JetSearch > Ajax Search Settings tab, scroll down to the Search Query Param, and copy it. In our case, it’s the default “jet_search” query parameter name.
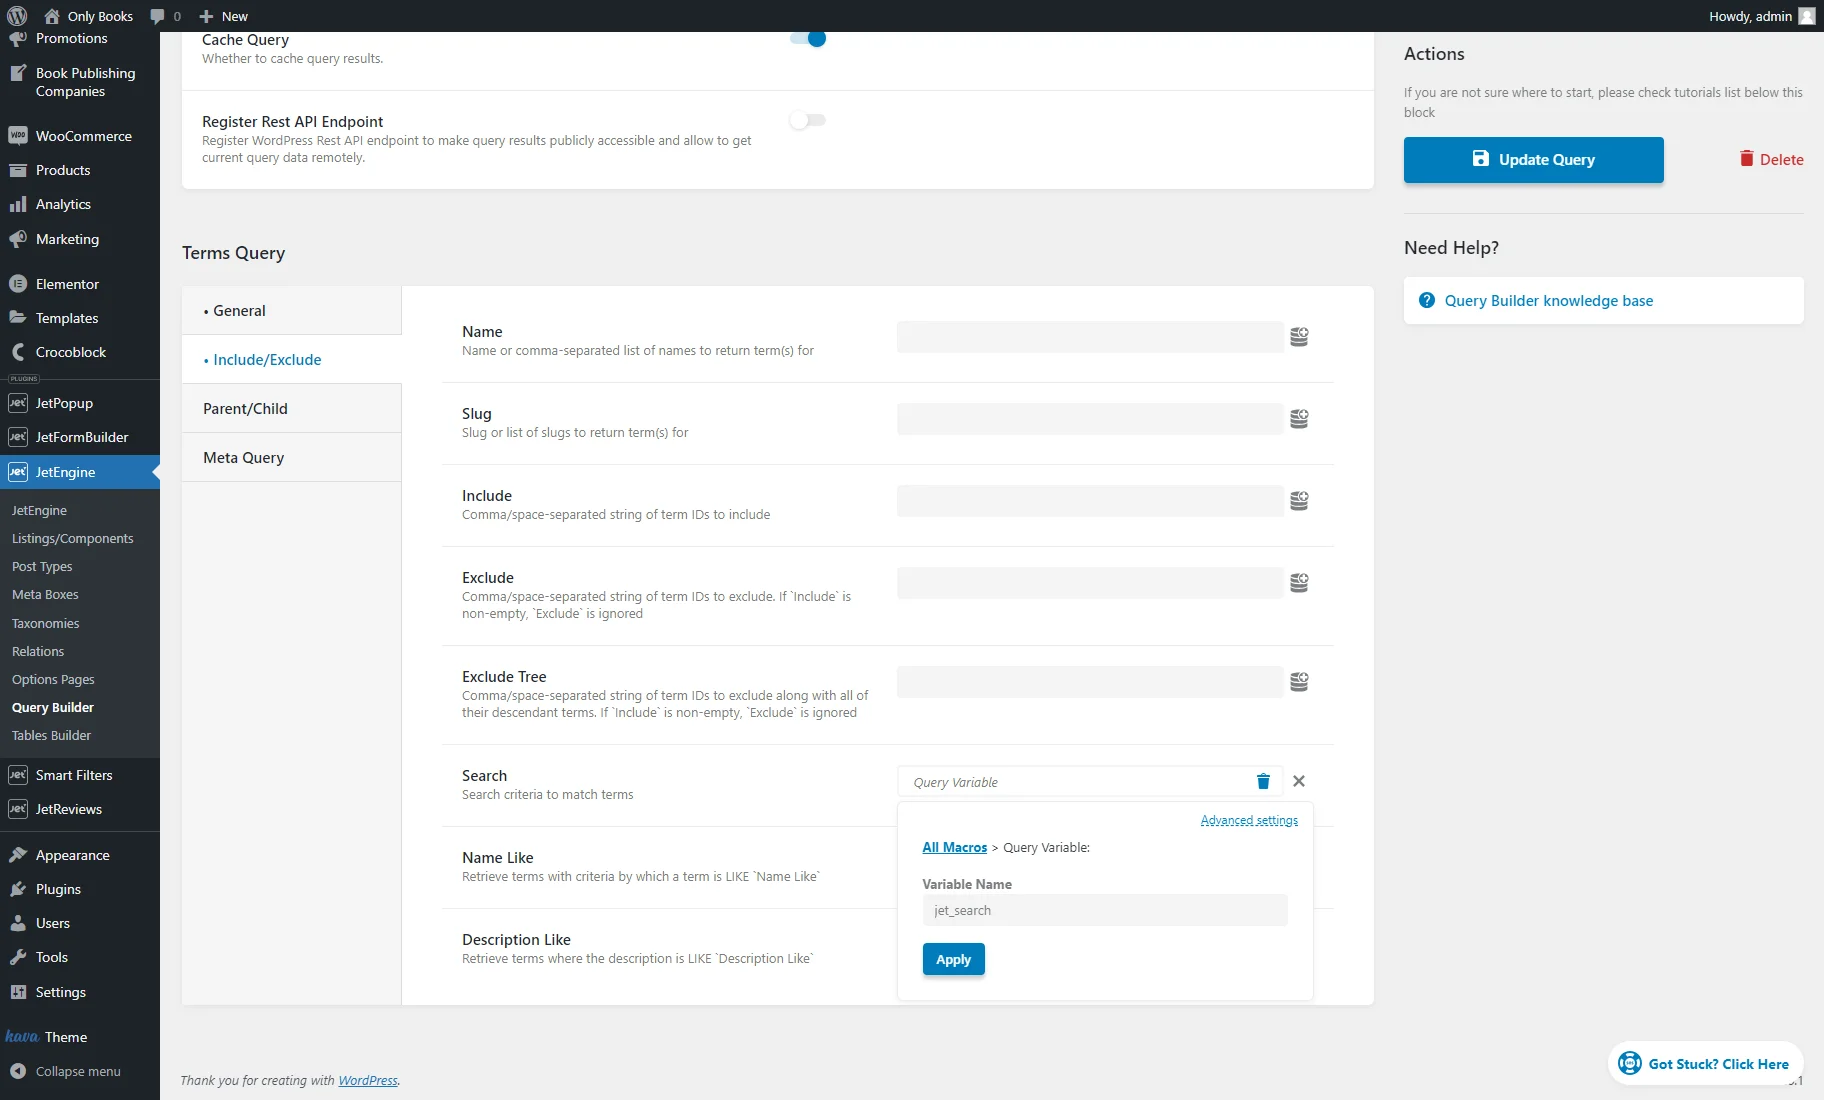
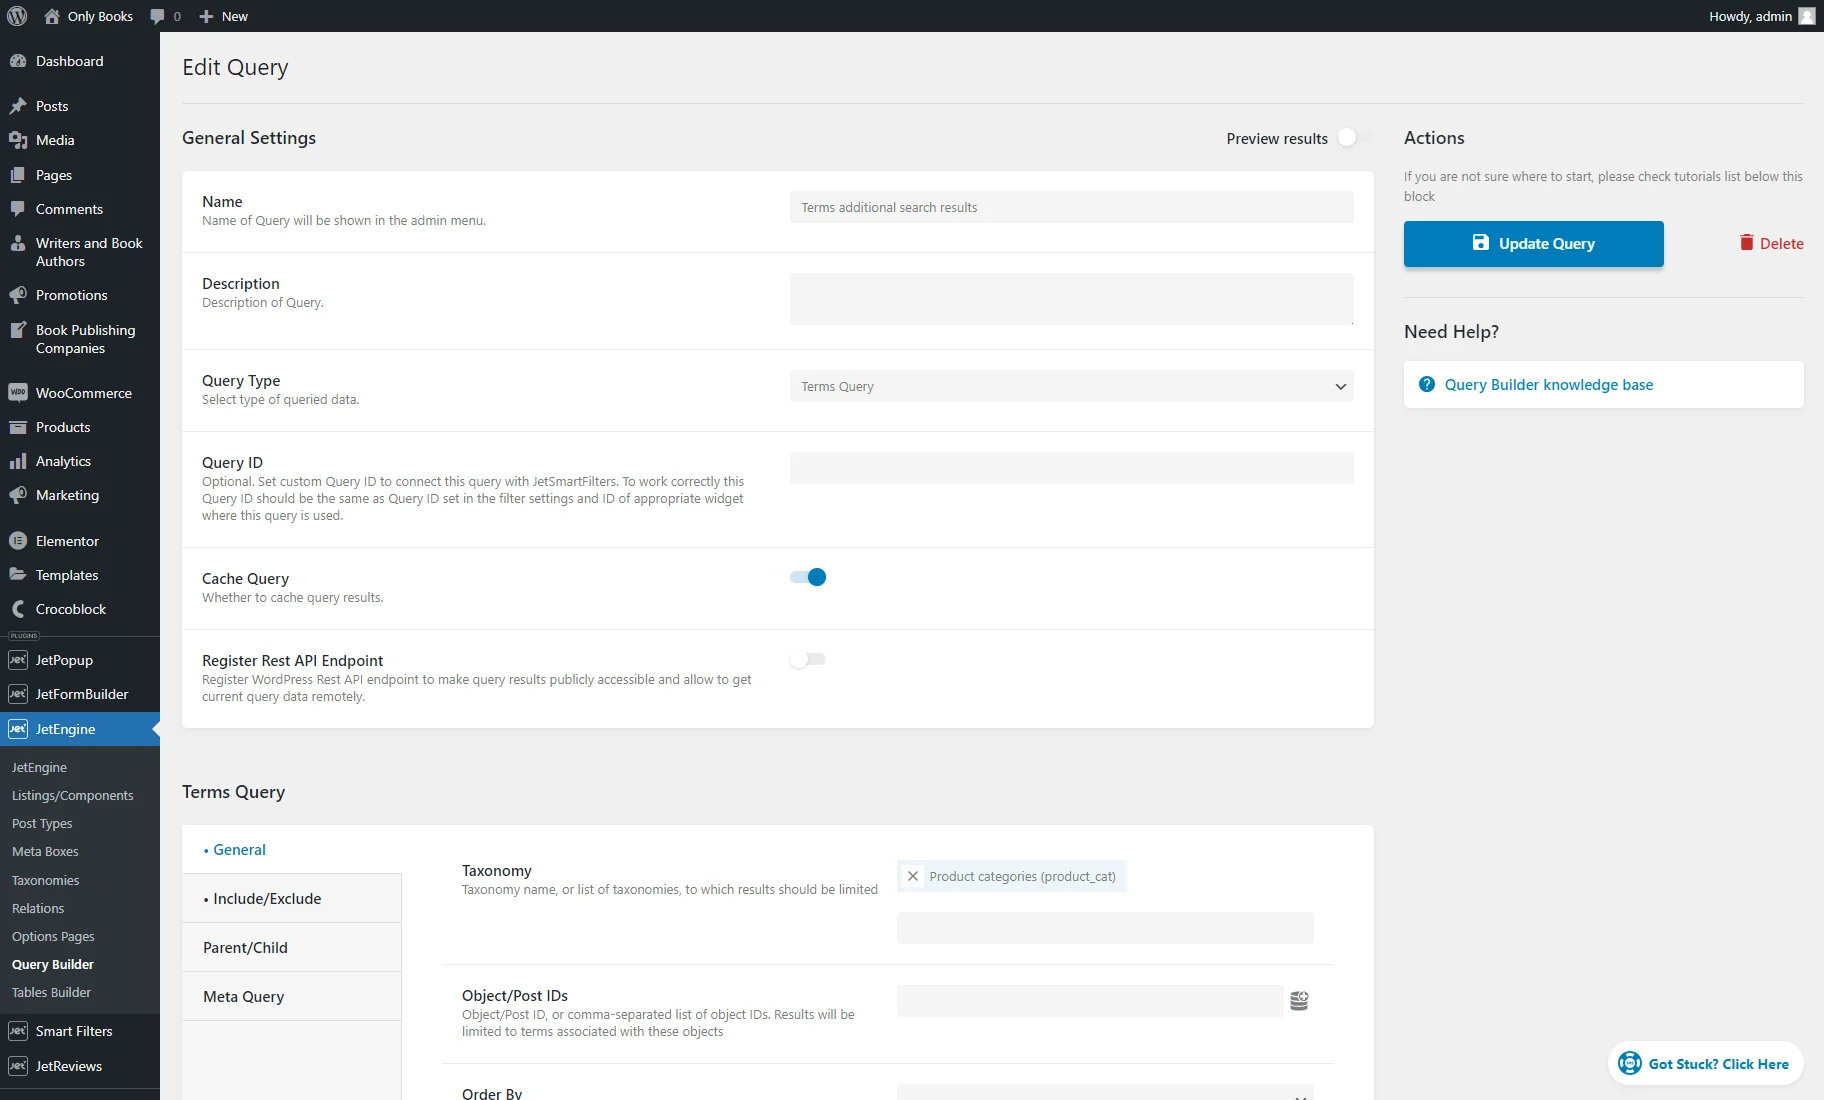
To create a custom query, we go to the WordPress Dashboard > JetEngine > Query Builder tab and hit the “Add New” button.
In the General Settings section, we enter the query Name (“Terms additional search results”) and select the “Terms Query” Query Type.
In the General tab of the Terms Query section, we pick the needed Taxonomy (“Product categories”).

In the Include/Exclude tab, we click the “coin stack” button near the Search field and choose the “Query Variable” macro.
In the pop-up, we set the copied “jet_search” text from the Search Query Param field and press the “Apply” button.
Then, we hit the “Add/Update Query” button.
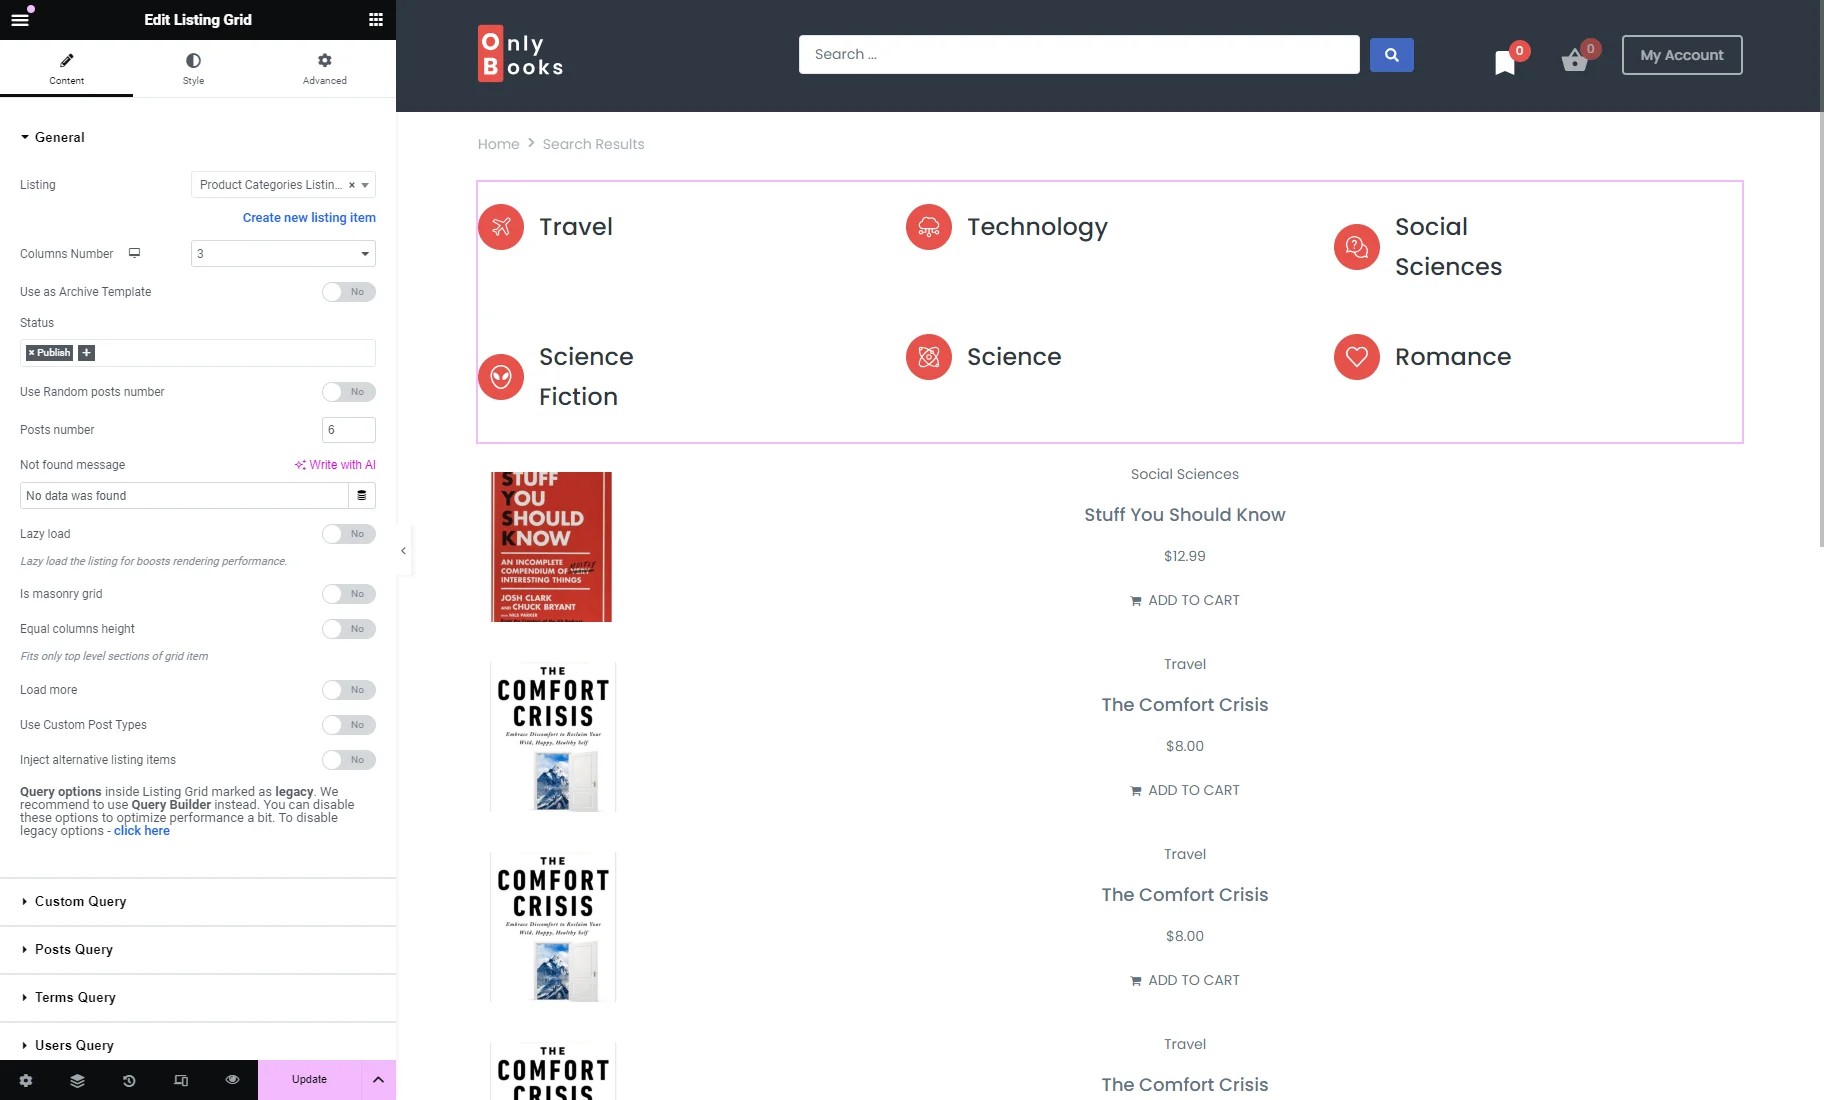
Afterward, we move to the WordPress Dashboard > Pages tab and open the Search Results page in the Elementor editor.
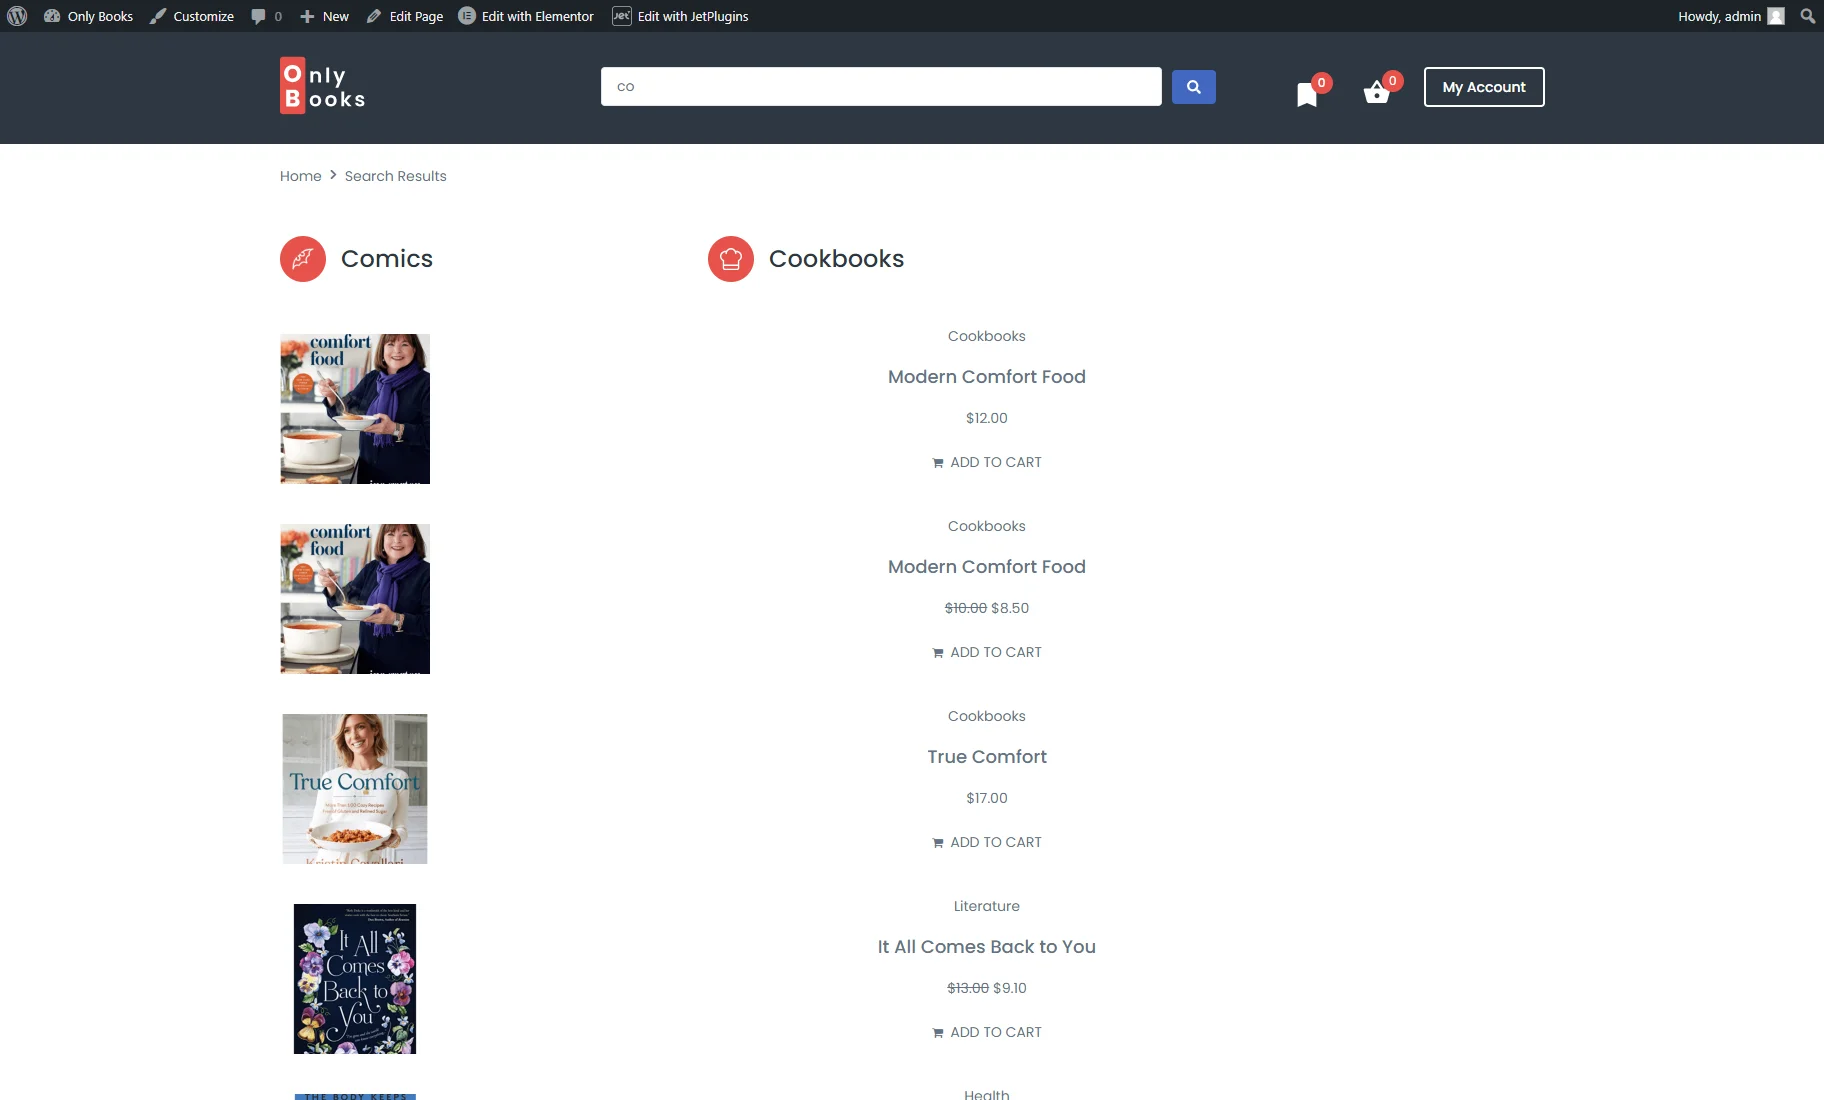
Here, we have already added the Products List widget to display searched products (the Products Grid and Listing Grid widgets can also be used).
To display the searched terms, we place the Listing Grid widget and choose the Listing created for the terms mentioned in the Using Listing Template for the Terms Search Results chapter of this tutorial.
If you haven’t crafted a listing yet, you can also check the How to Create a Listing Template for Custom Taxonomy in Elementor tutorial.
Next, we unroll the Custom Query tab, enable the Use Custom Query toggle, and select the just-built query in the Custom Query drop-down menu.
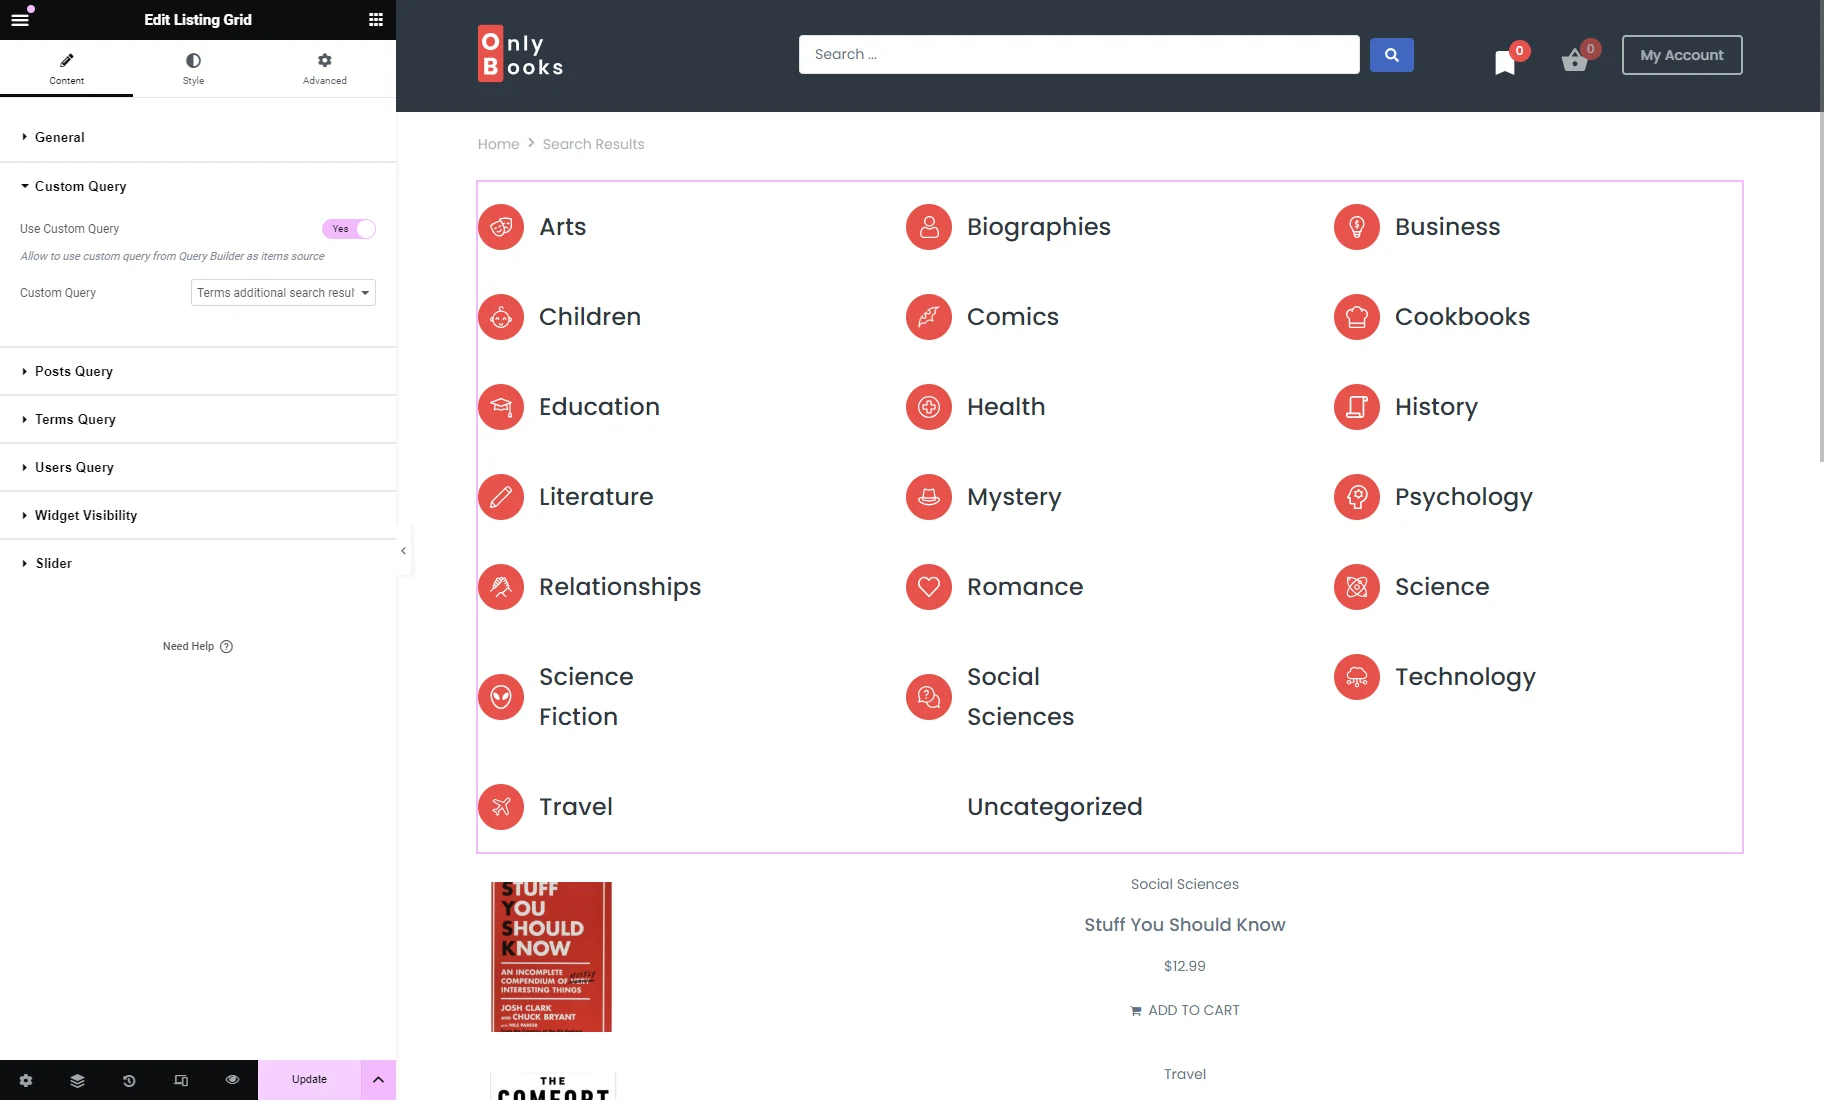
After finishing customizing the Search Results page, we hit the “Update” button.
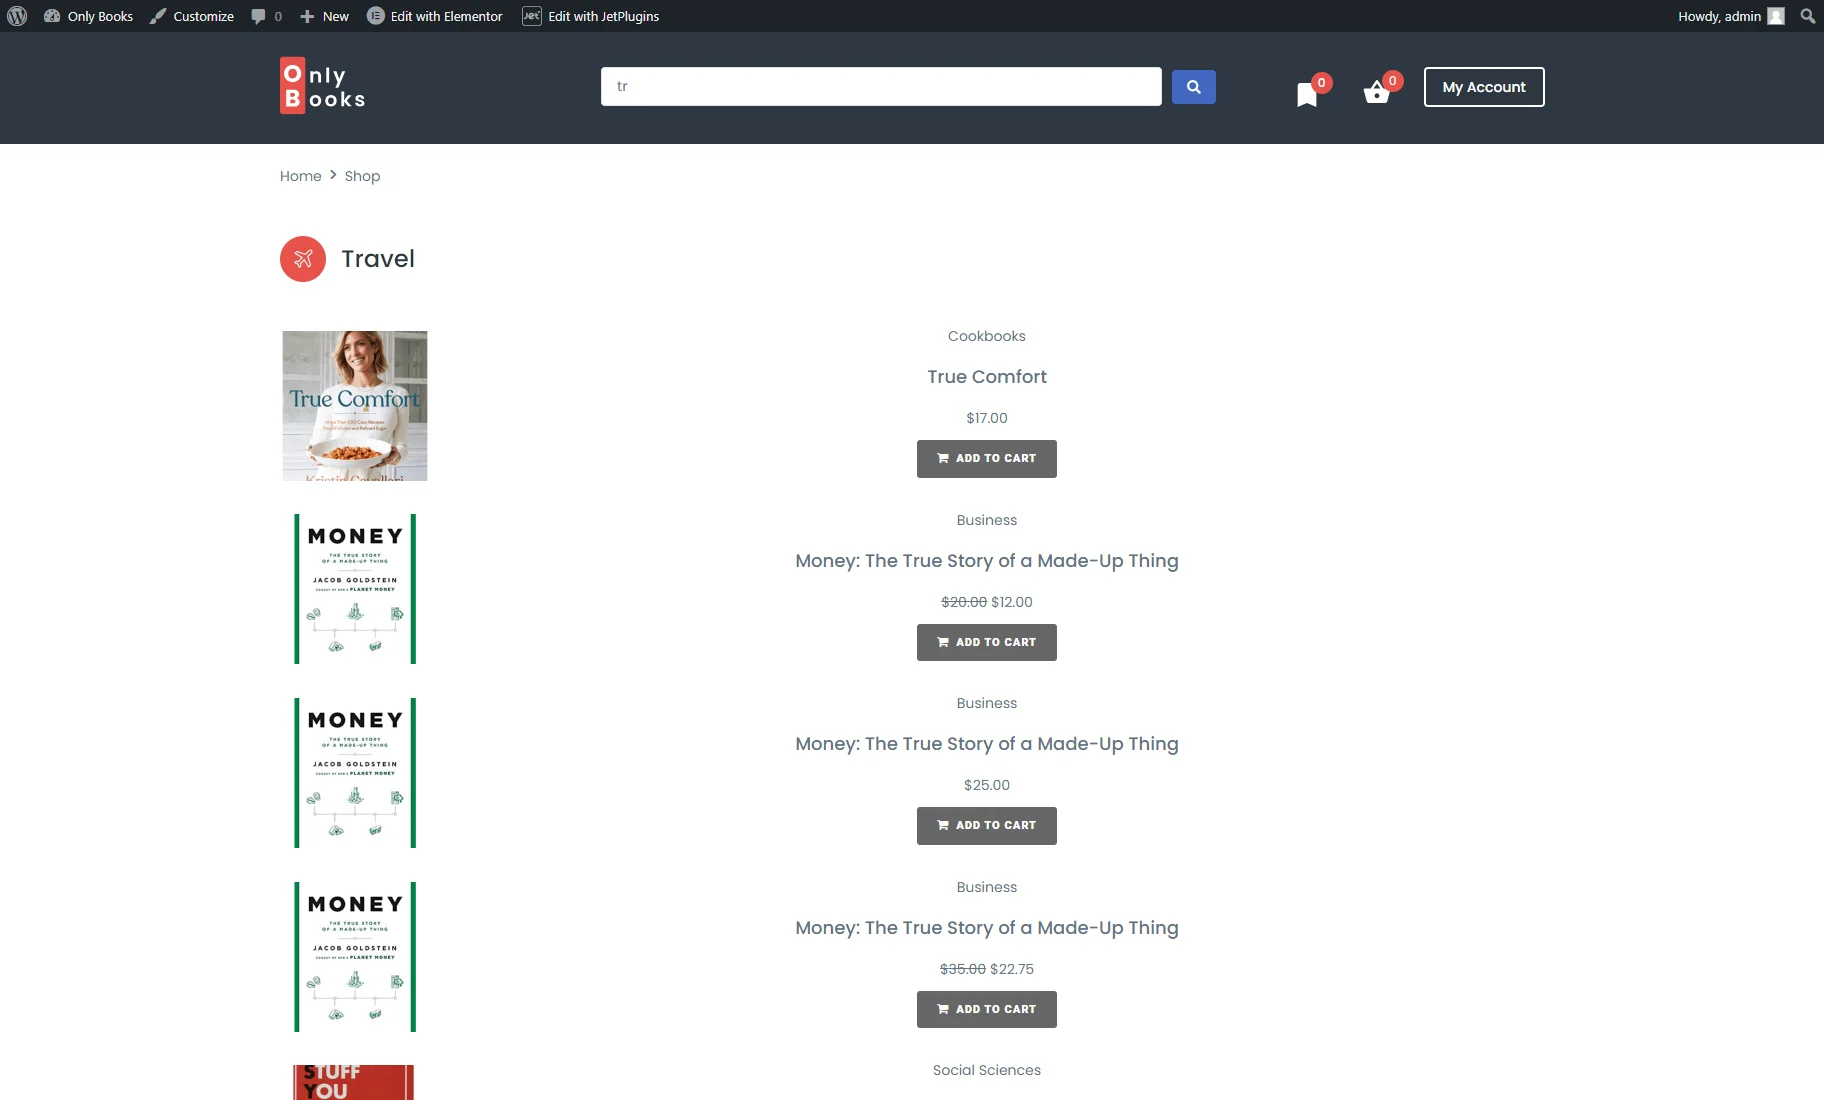
Eventually, we proceed to the Home page on the front end, enter a request into the search bar of the Ajax Search widget, and click the “Submit” button.
The Search Results page shows the searched terms and products as intended.
How to Display Terms on the Search Results Archive Template
To display the terms on the Search Results page, you need to create a custom query that can be achieved with the Query Builder feature of the JetEngine plugin.
We go to the WordPress Dashboard > JetEngine > Query Builder tab and hit the “Add New” button.
In the General Settings section, we enter the query Name (“Terms additional search results”) and select the “Terms Query” Query Type.
In the General tab of the Terms Query section, we pick the needed Taxonomy (“Product categories”).
In the Include/Exclude tab, we click the “coin stack” button near the Search field and choose the “Query Variable” macro.
In the pop-up, we enter the “s” value and press the “Apply” button.
Then, we hit the “Add/Update Query” button.

To learn how to create an Archive Search template for posts with the JetThemeCore plugin, proceed to the How to Create an Archive Template to Display the Search Results tutorial.
The How to Create a Search Page Template describes how to build a Search Page template for WooCommerce products.
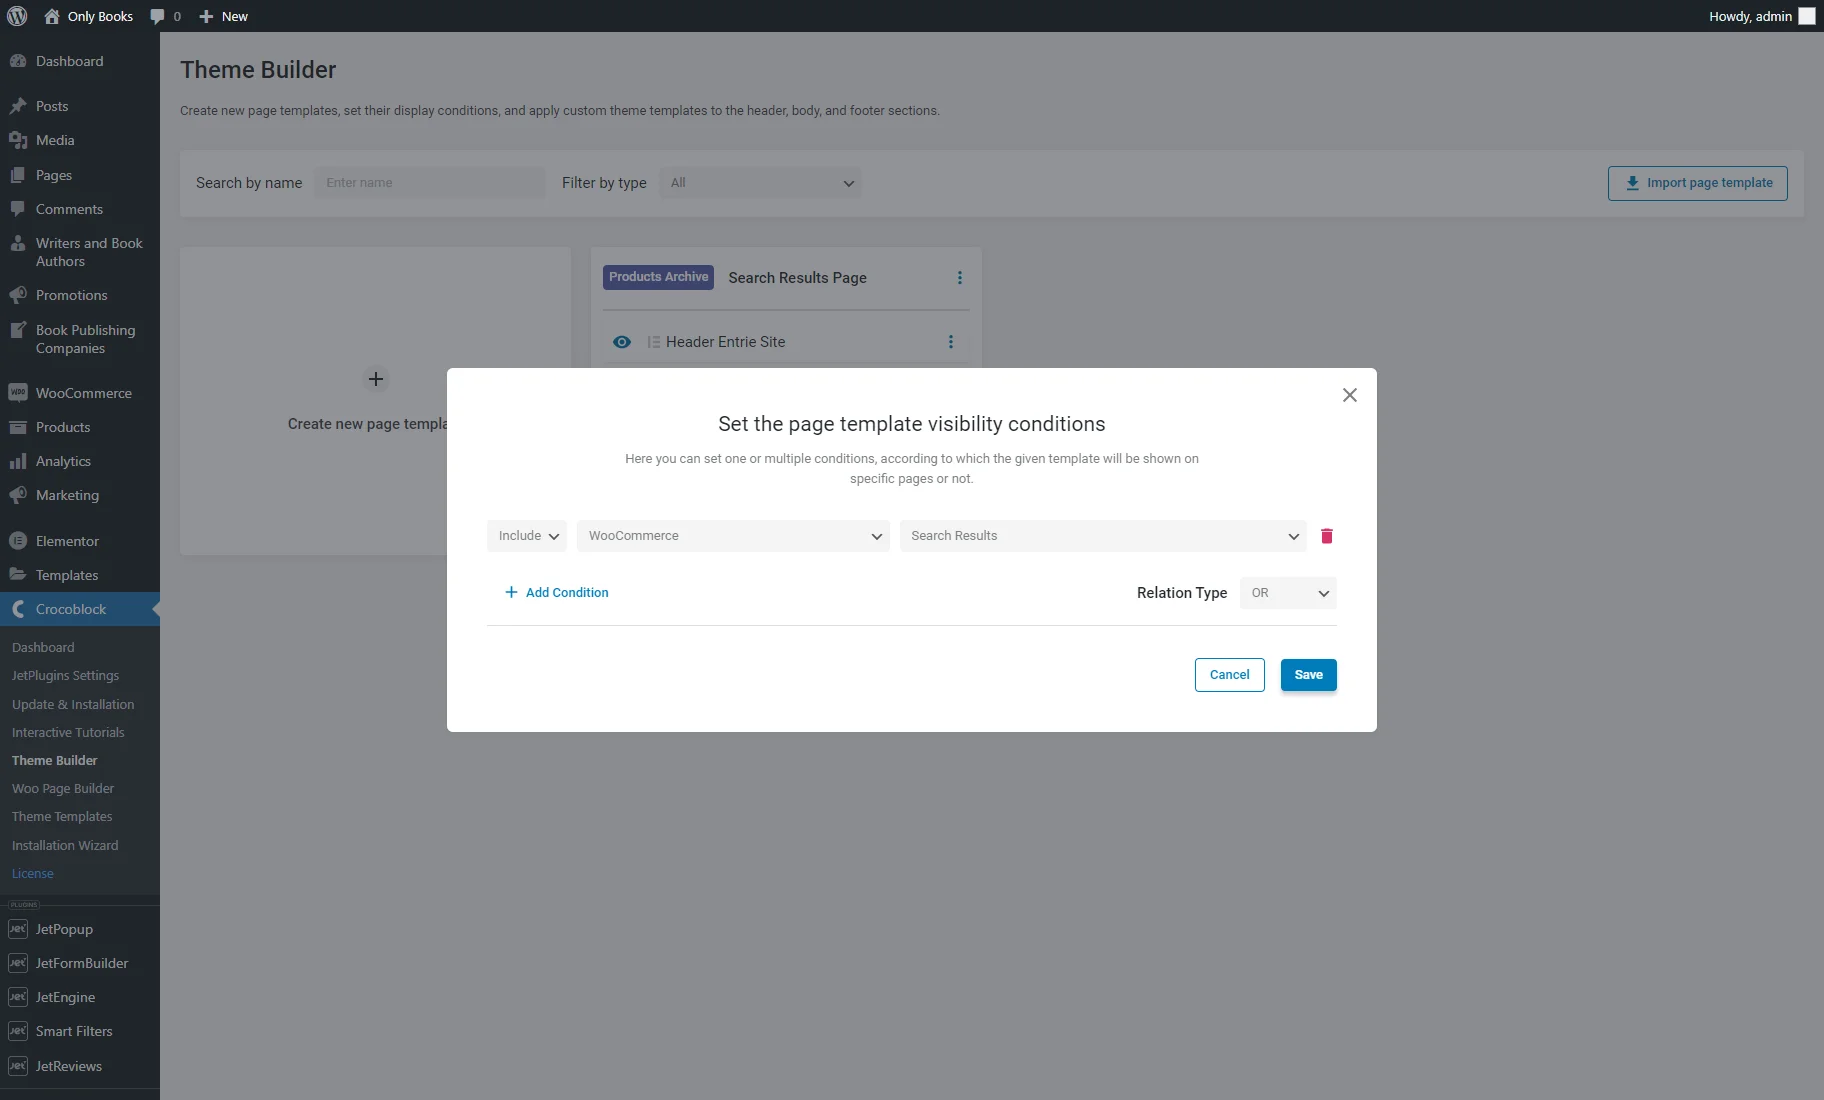
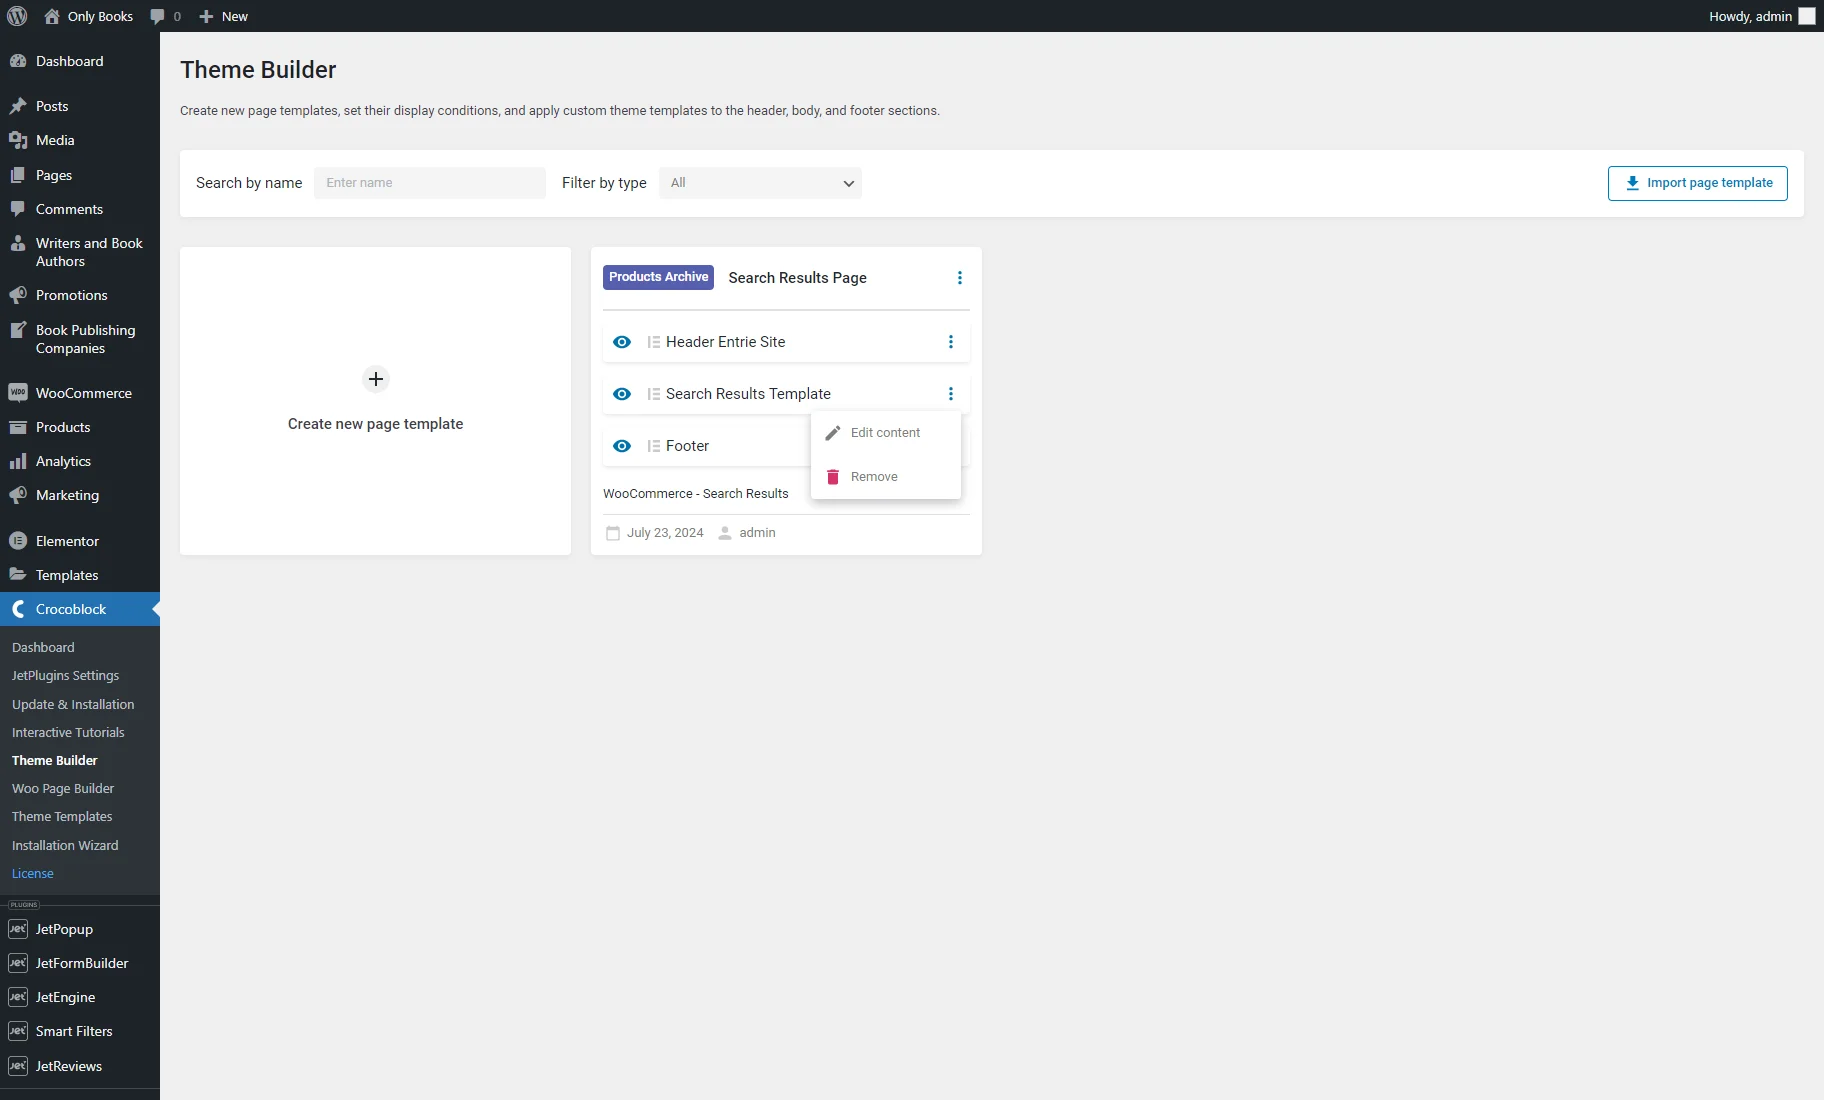
We move to the WordPress Dashboard > Crocoblock > Theme Builder tab, where we created the Search Results Page template with header, body, and footer.
We set such conditions by hitting the “three dots” and “Edit conditions” buttons near the page title: “Include,” “WooCommerce,” and “Search Results.” The conditions can be saved by clicking the “Save” button.
To alter the Search Results body template, we hit the “three dots” and “Edit content” buttons near it. This template was created with the JetThemeCore plugin in the Elementor editor.
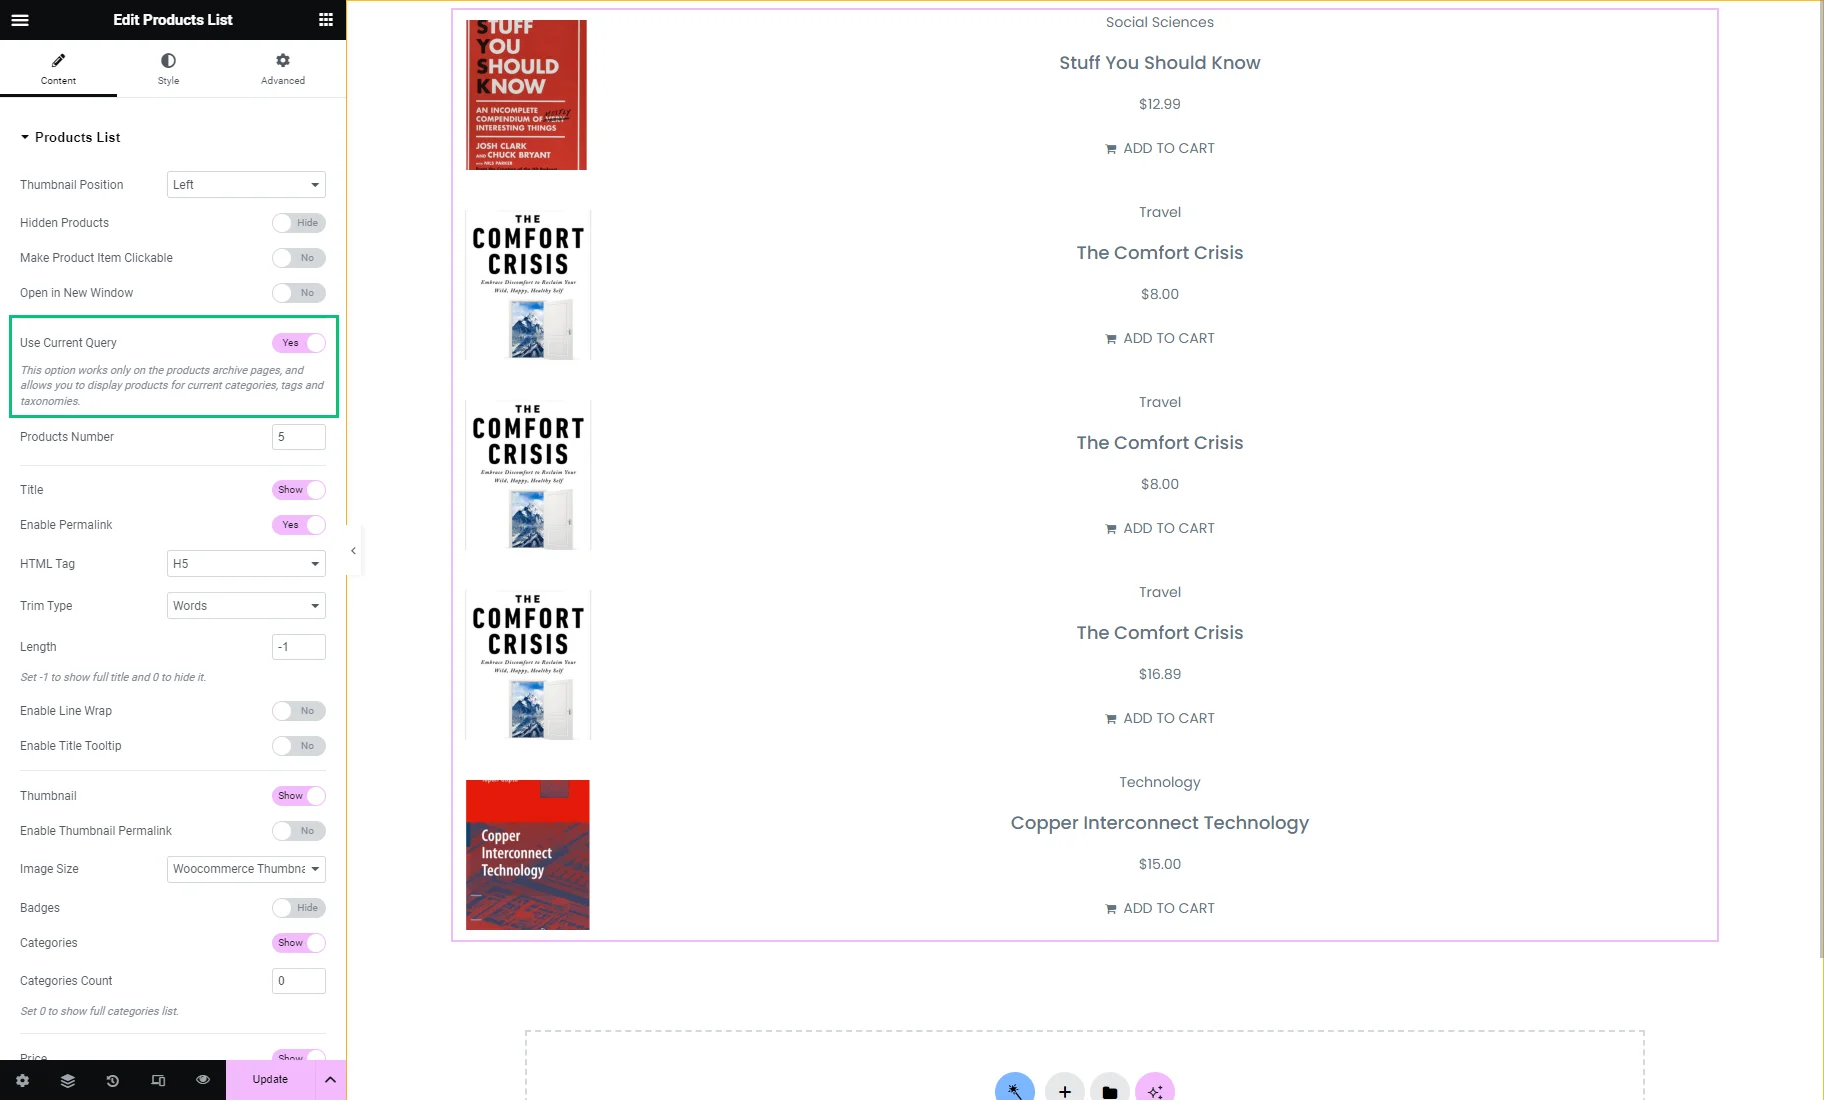
Here, we have already added the Products List widget with the Use Current Query toggle enabled to display requested products on the Search Results archive template. You can also use the Products Grid widget with the same toggle activated or with the Listing Grid widget with the Use as Archive Template toggle enabled.
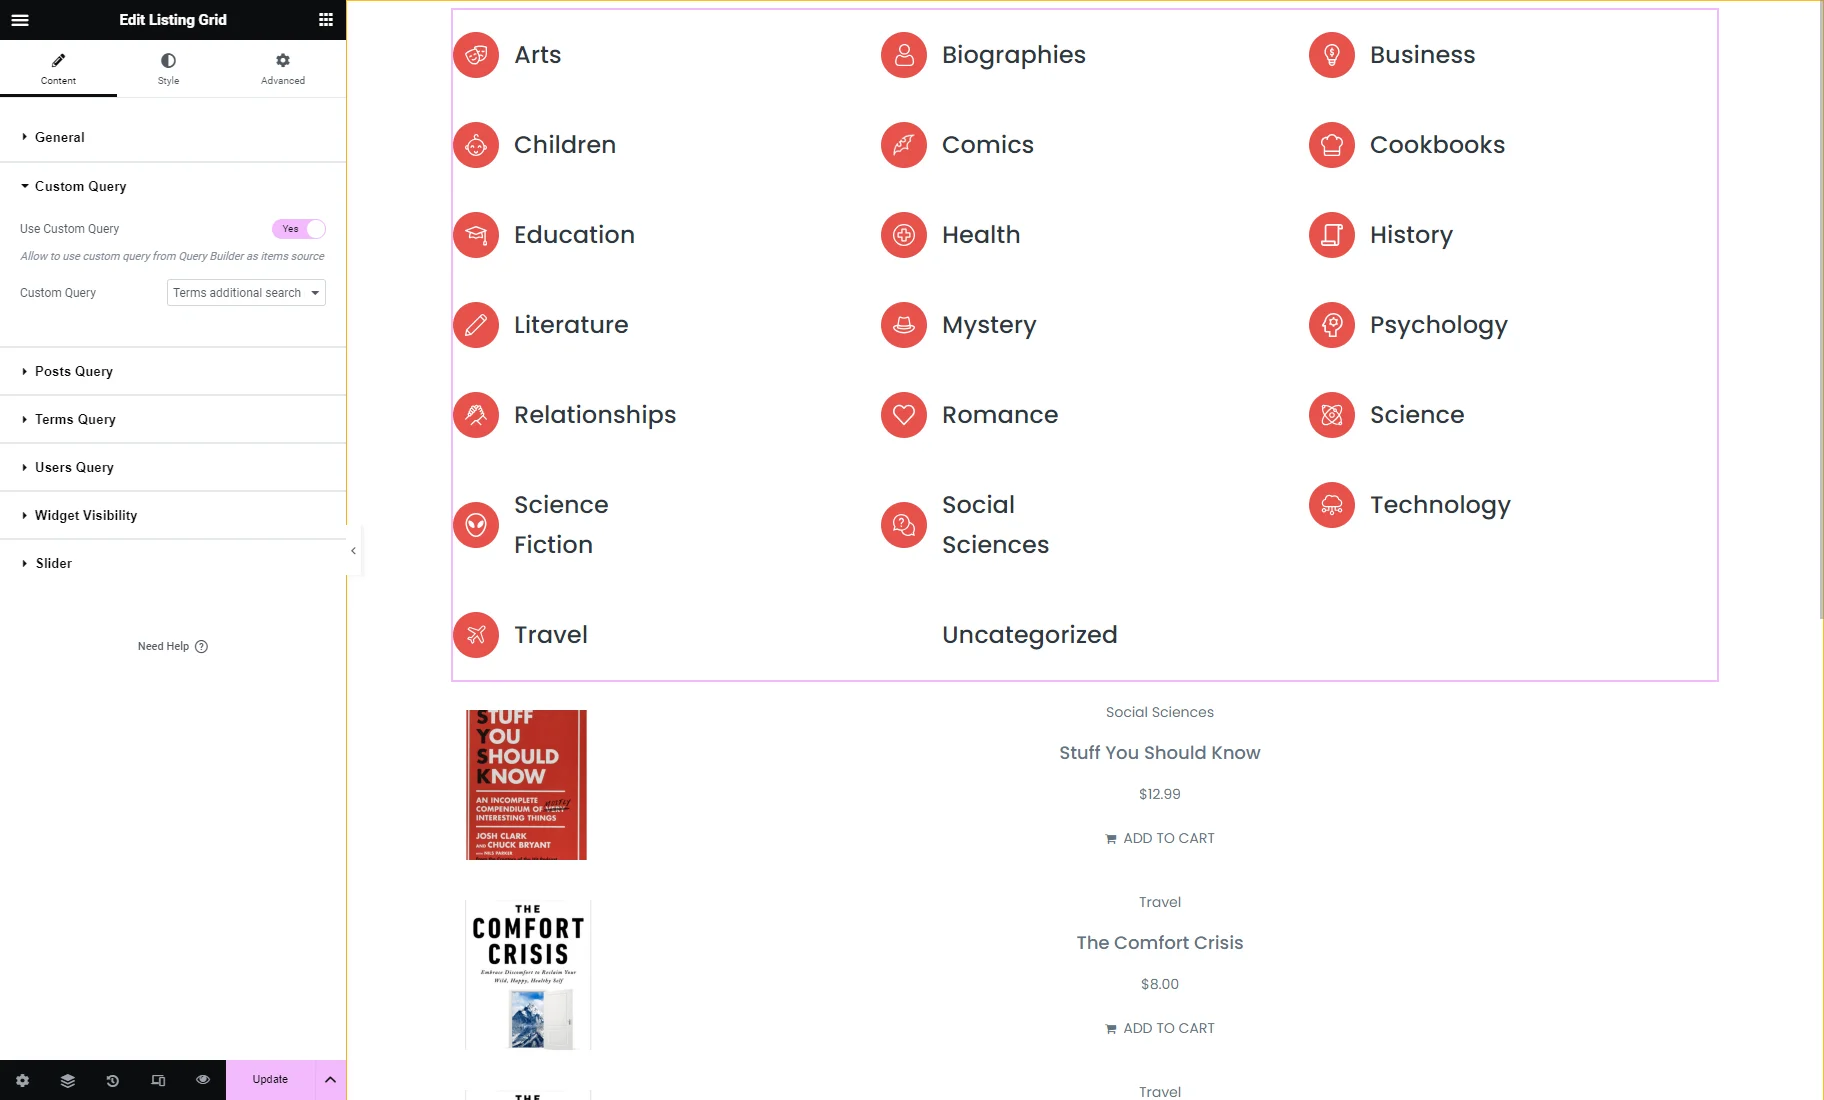
To display the searched terms, we place the Listing Grid widget and choose the Listing created for the terms mentioned in the Using Listing Template for the Terms Search Results chapter of this tutorial.
If you haven’t crafted a listing yet, you can also check the How to Create a Listing Template for Custom Taxonomy in Elementor tutorial.

Next, we unroll the Custom Query tab, enable the Use Custom Query toggle, and select just-built query in the Custom Query drop-down menu.
After finishing customizing the Search Results page, we hit the “Update” button.
Eventually, we proceed to the Home page on the front end, enter a request into the search bar of the Ajax Search widget, and click the “Submit” button.
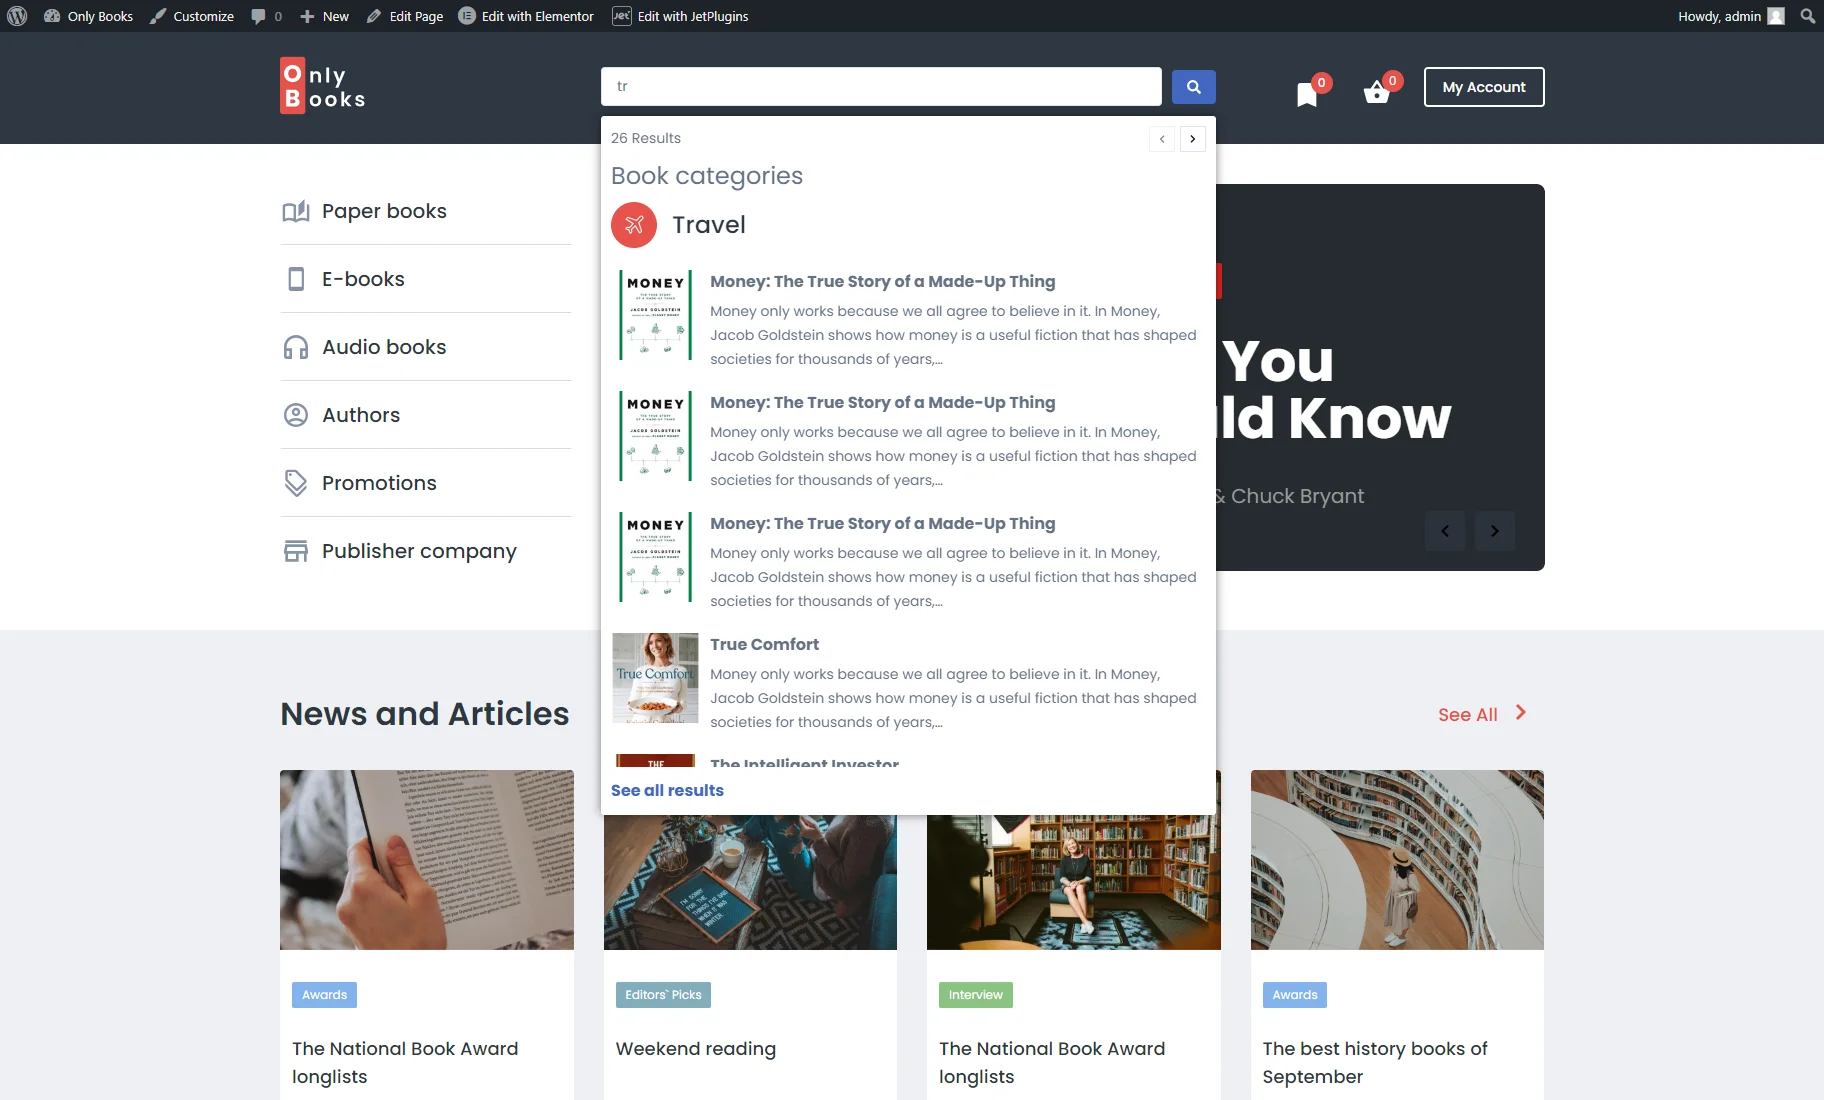
The Search Results Page template shows the searched terms and products as intended.
That’s all. Now you know how to display terms in the search results area along the posts using the JetSearch plugin on the example of the WooCommerce products categories on the WordPress e-commerce site.