How to Display Search Results by Separate Post Types
Learn how to use the JetSearch plugin for WordPress for AJAX searching in different post types presented as different tabs on the same page and display the search results simultaneously, as well as to hide empty tabs if there is no data available.
Before you start, check the tutorial requirements:
- Elementor (Free version) or Block Editor (Gutenberg)
- JetEngine plugin installed and activated with some posts and Custom Post Types (CPTs) created;
- JetSearch plugin installed and activated
- JetTabs plugin installed and activated with the Tabs widget enabled;
- Hide empty items add-on for the JetTabs plugin;
- a page for displaying search results created
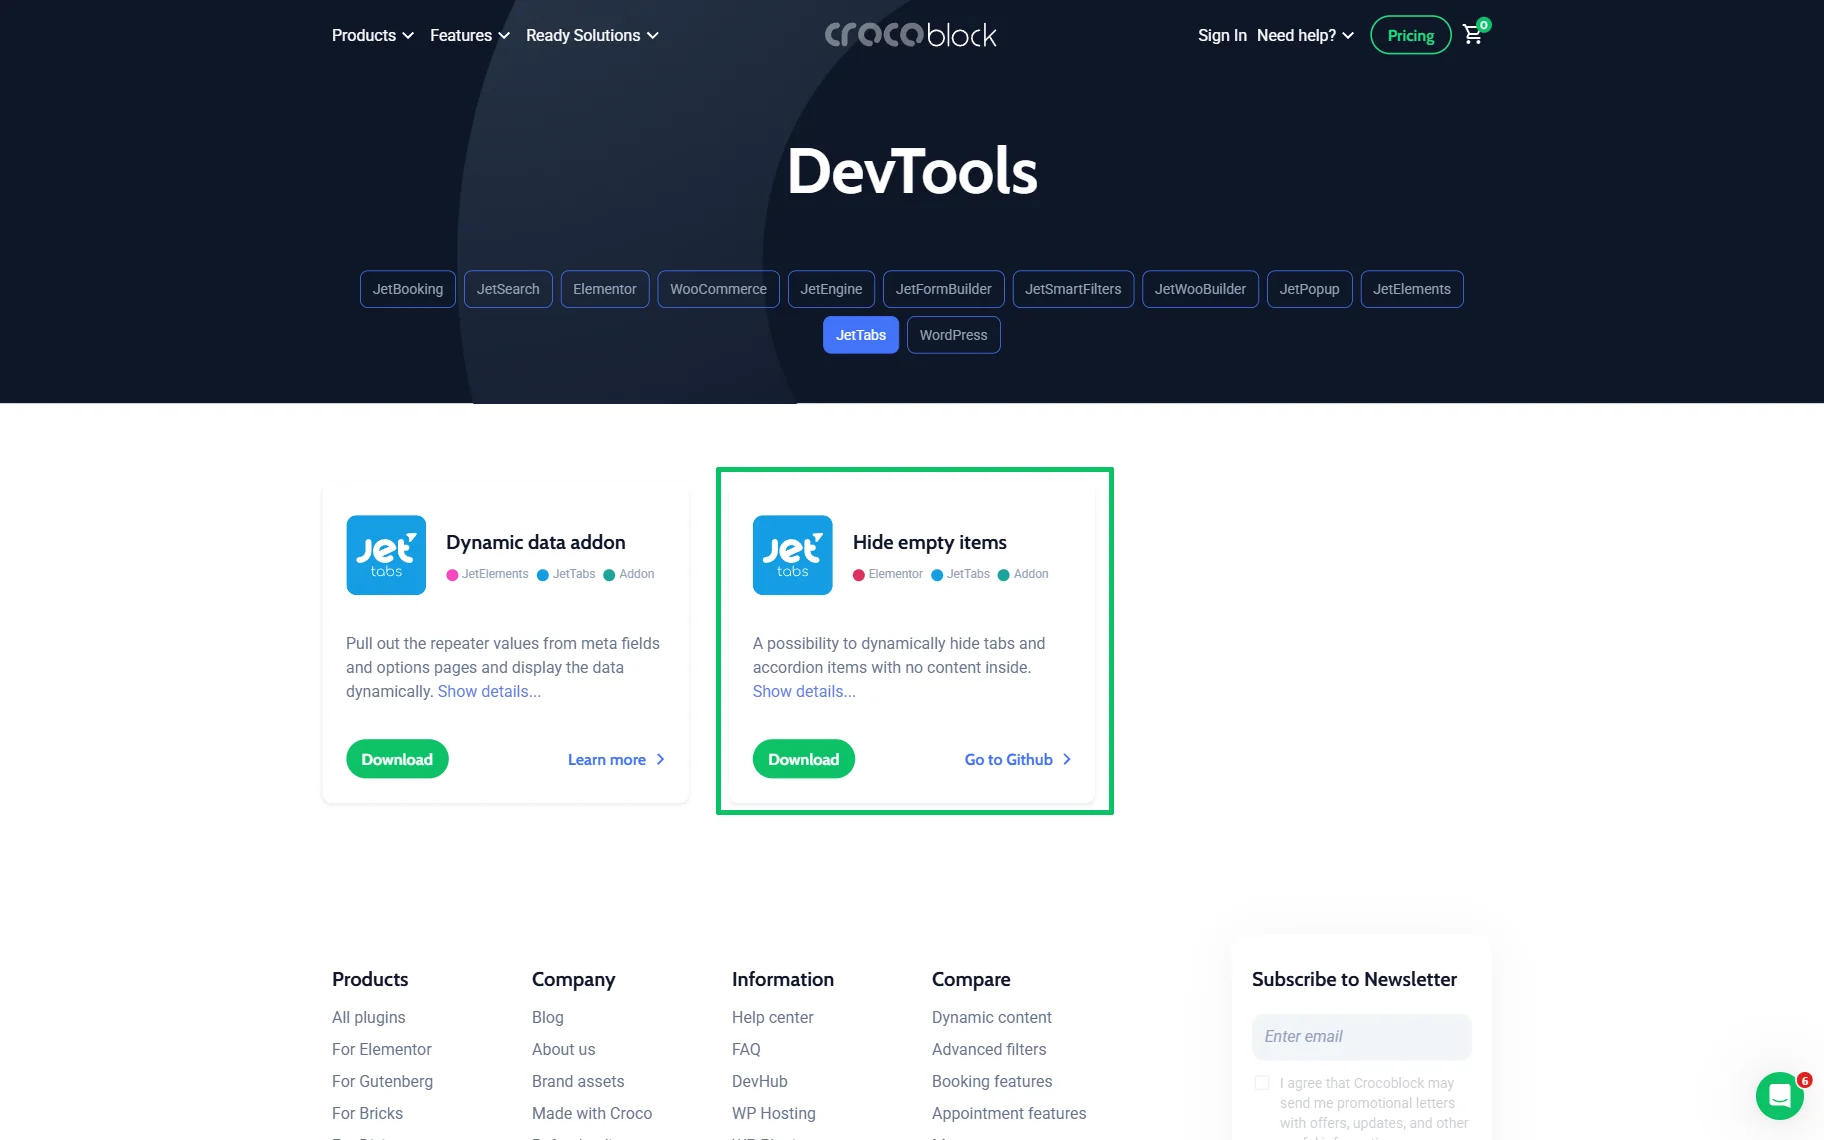
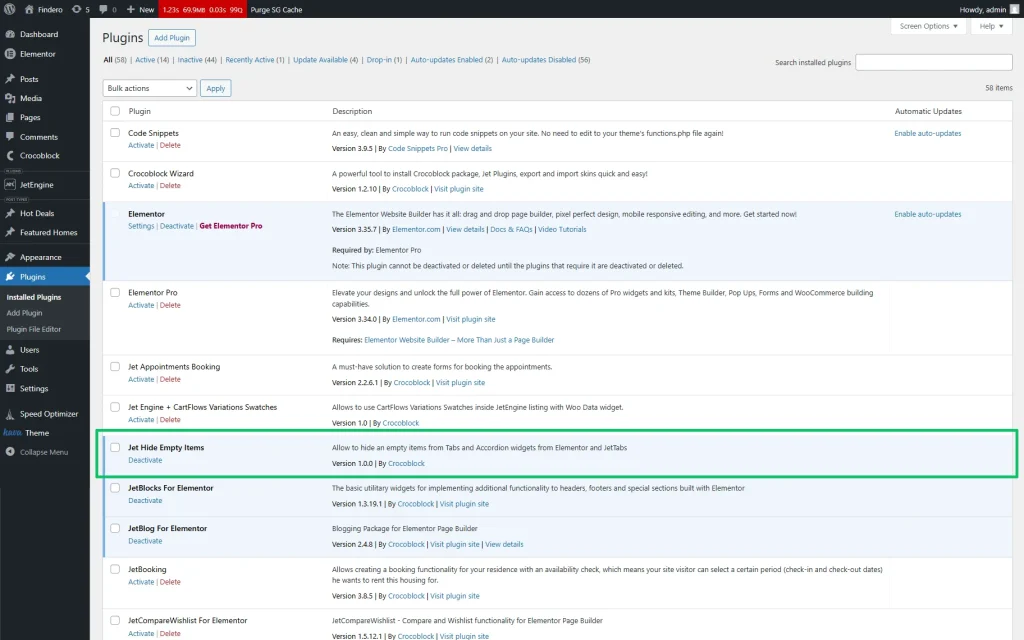
Install a Plugin to Hide Empty Items
First, move to the Crocoblock’s Free DevTools Kit page, press the “JetTabs” button, find the Hide empty items add-on, and download it.
Then, install and activate this plugin as any other WordPress plugin. For example, you can do it manually or via the WordPress Dashboard.
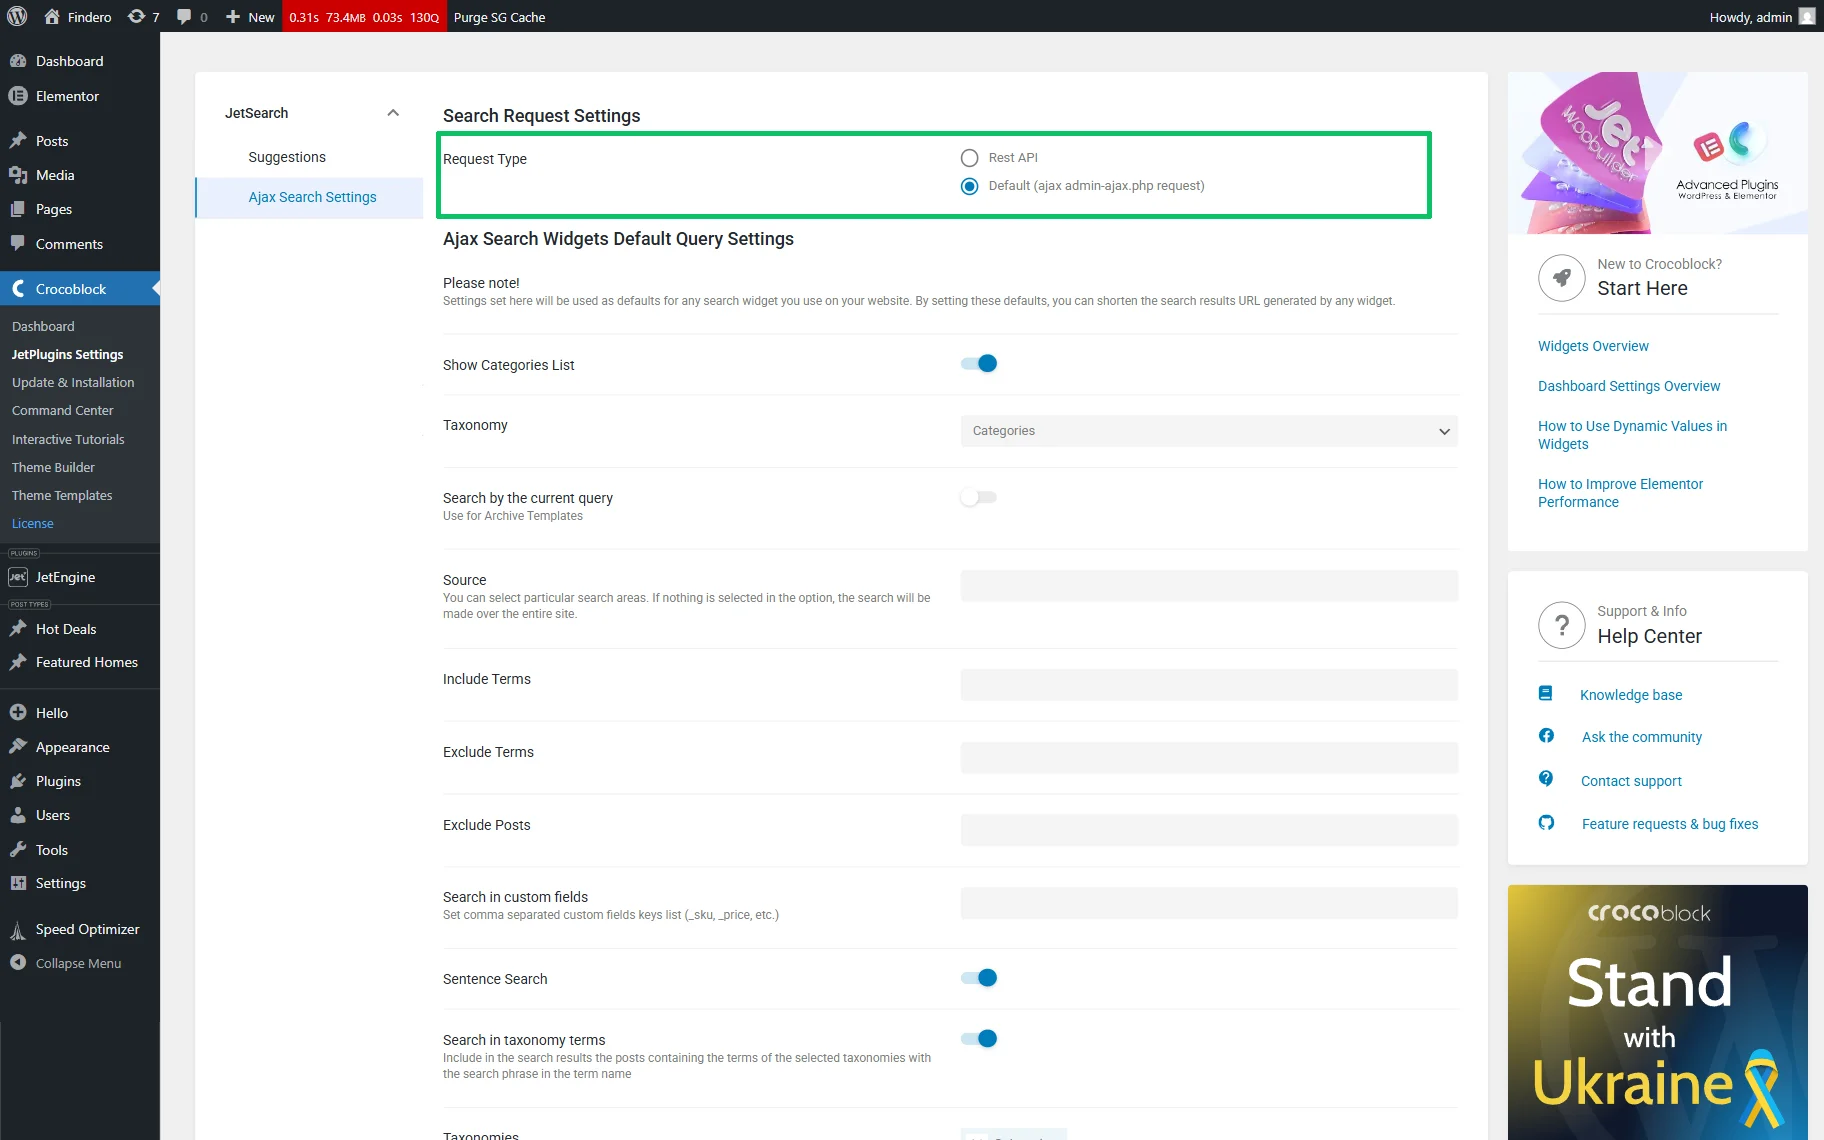
Configure the JetSearch Settings
First, move to the WordPress Dashboard > Crocoblock > JetPlugins Settings > JetSearch tab. Here, select the “Default (ajax admin ajax.php request)” Request Type.
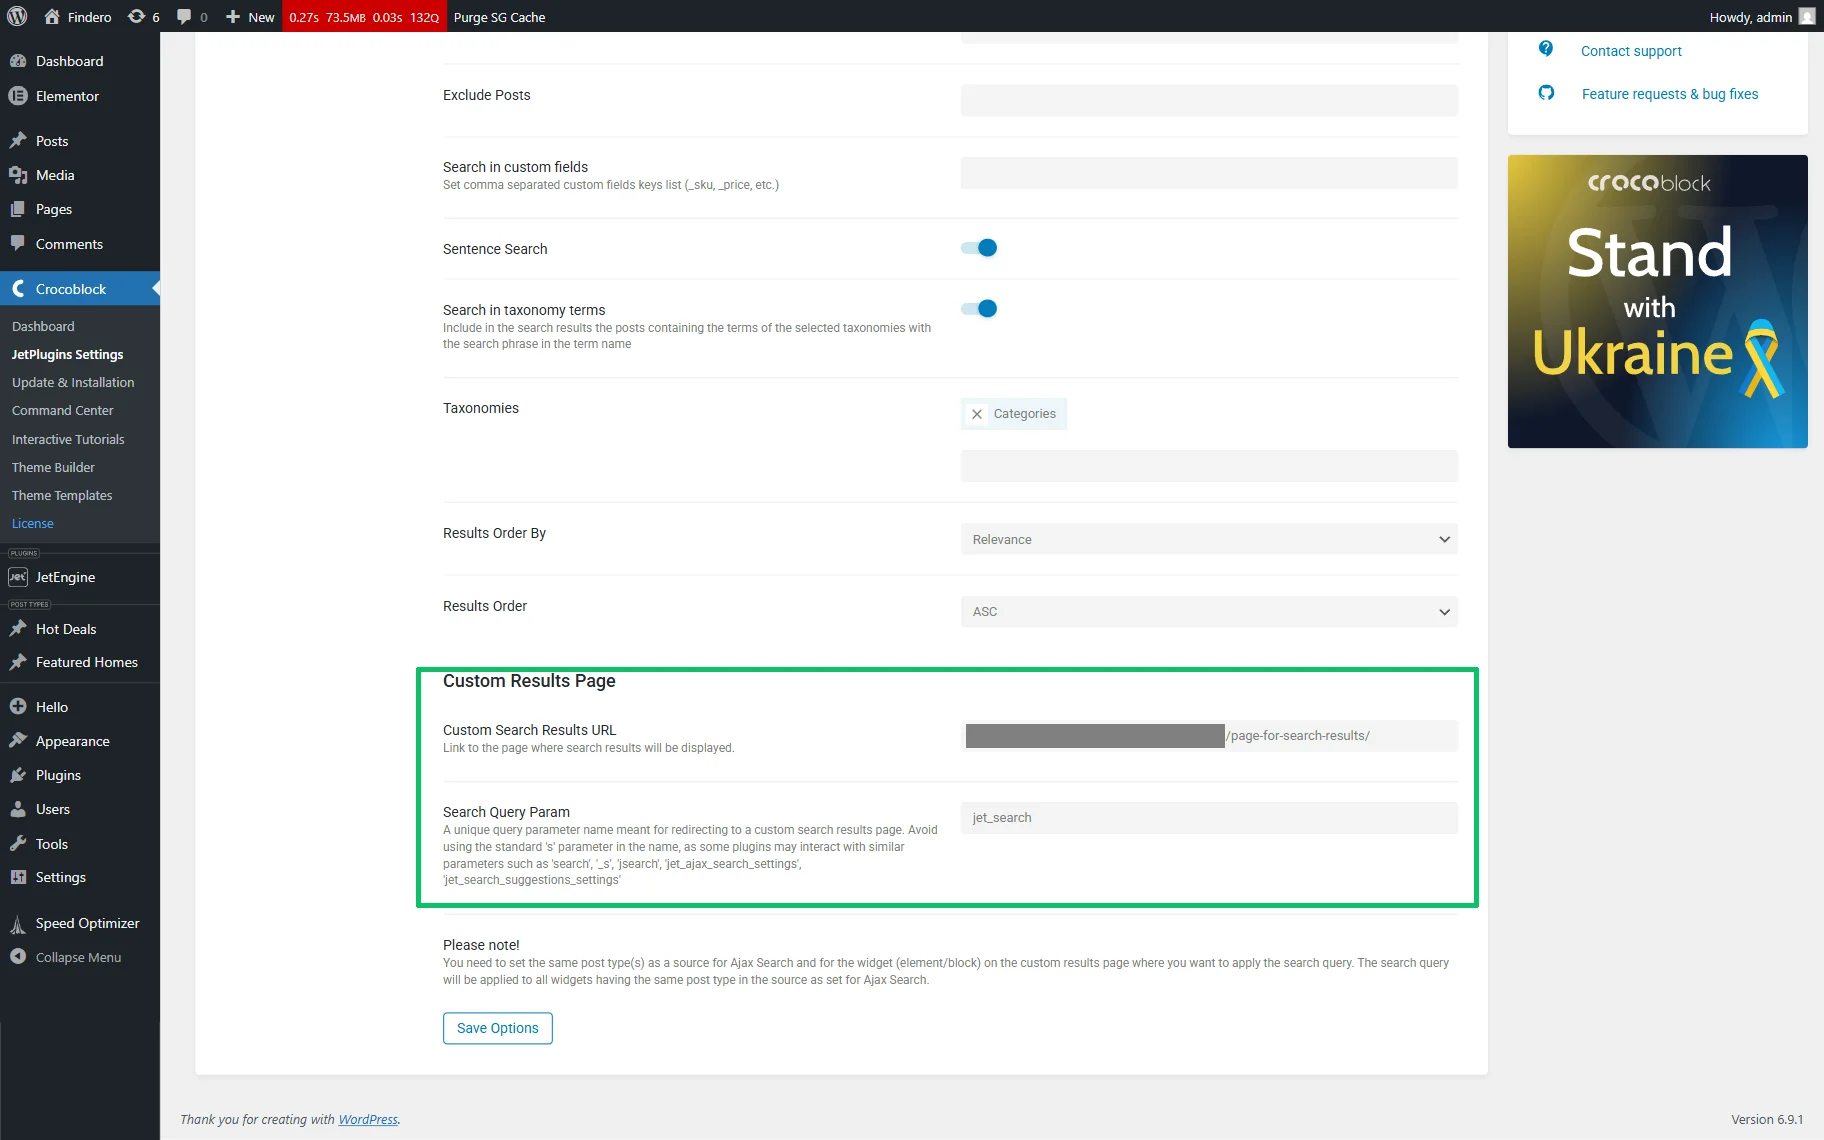
Then scroll down the settings page and add a link to a page that displays the search results. Finally, click the “Save” button at the bottom.
Create Queries to Each Post Type
To display all post types (each in its own tab), we create separate queries for each: in this case, for regular WordPress posts, the “Featured Homes” and the“Hot Deals” CPTs.
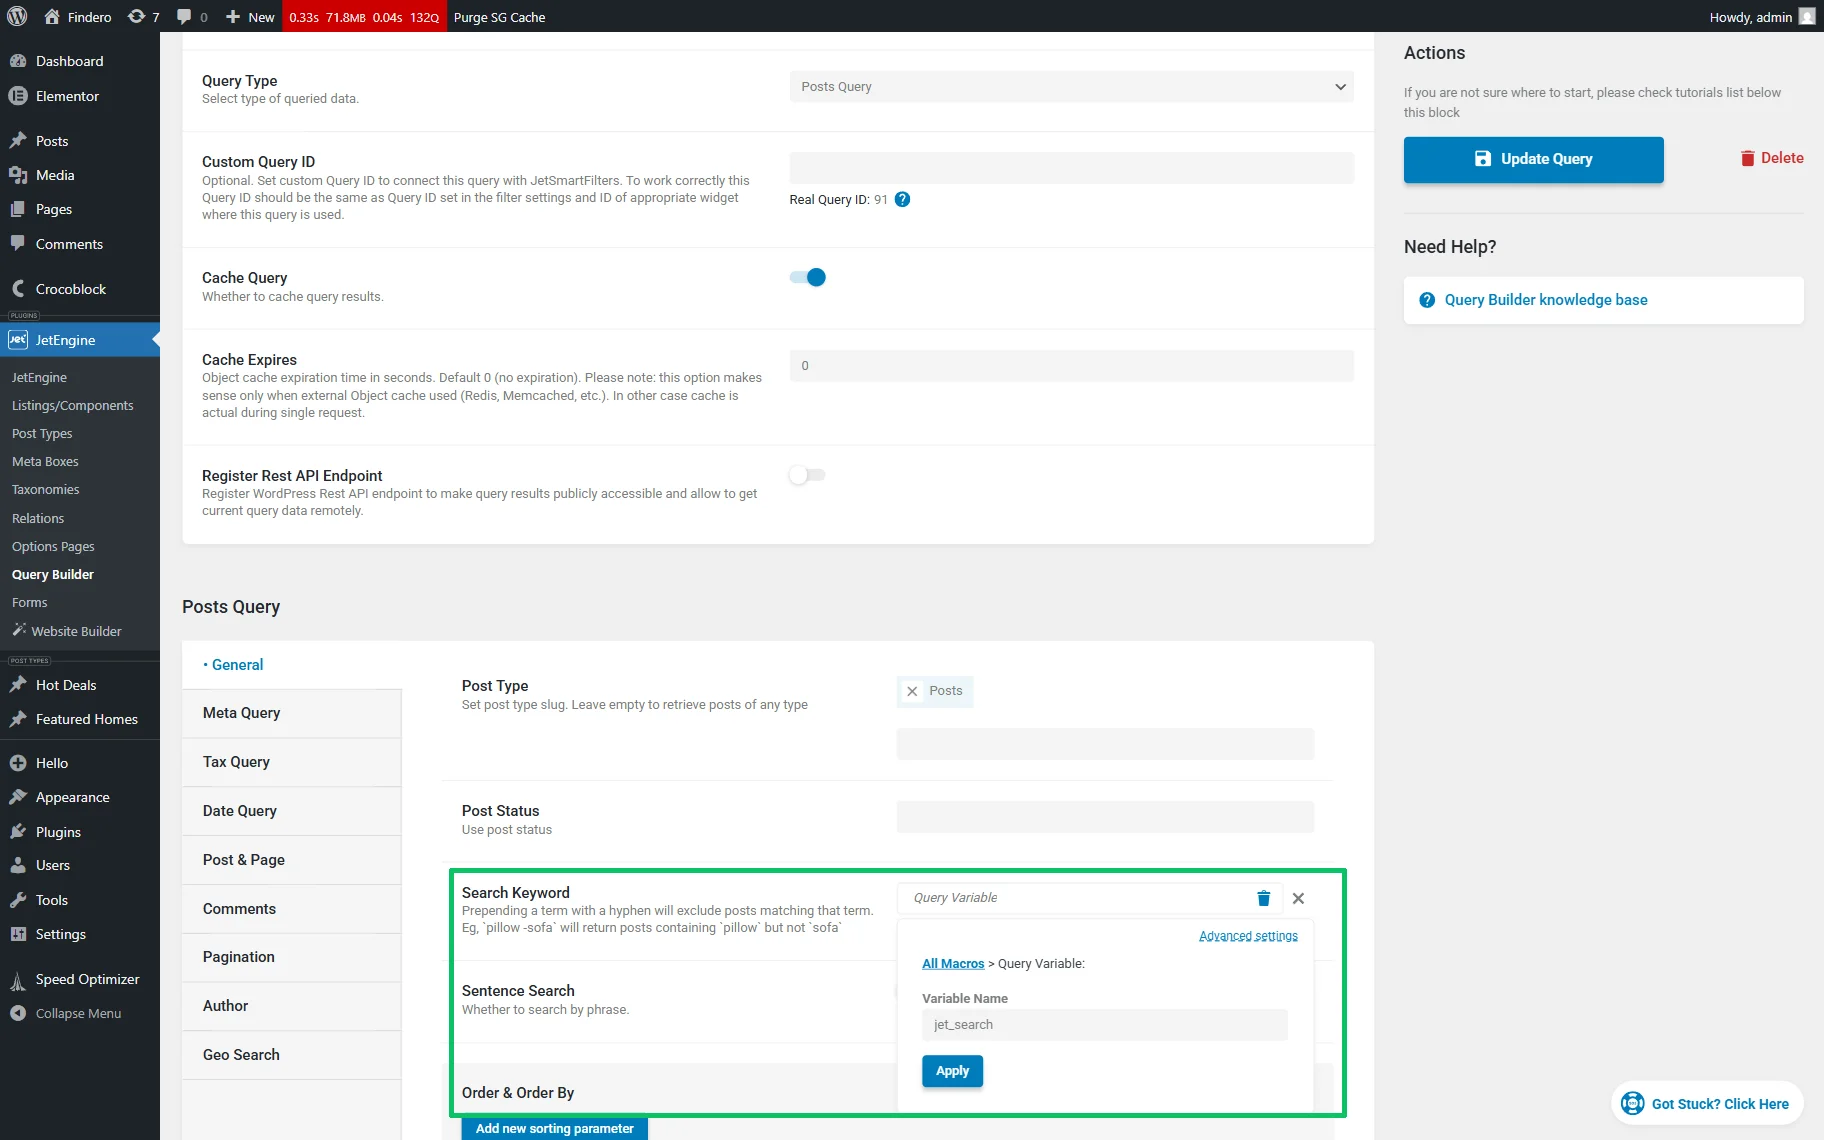
Move to the WordPress Dashboard > JetEngine > Query Builder tab. First, press the “Add New” button at the top of the Queries List tab and create a Post Type Query: fill in the query’s Name, set the “Posts Query” Query Type.
Then move to the Posts Query > General tab, press the “Dynamic Tag” icon near the Search Keyword drop-down, and select the “Query Variable” option. After that, insert the Variable Name (the “jet_search”, in this case) in the appeared window and press the “Apply” button. Save the changes by pressing the “Add/Update Query” button at the top of the page.
Similarly, create Post Type Queries for the CPT to display the search results. Here, we build another two queries for the “Featured Homes” CPT and “Hot Deals” CPT.
Create Listing Items
Navigate to the WordPress Dashboard > JetEngine > Listings/Components directory. Here, create new listings by clicking the “Add New” button. Then, add the needed widgets and publish the listing.
Build listing items individually for the posts and CPTs to be displayed in search results.
In this case, we build the listing for the regular WordPress posts, the “Featured Homes” CPT, and the “Hot Deals” CPT.
Read the How to Create a Listing Template for Post Types in Elementor tutorial to learn how to use the Listing template functionality from the JetEngine WordPress plugin to create listing templates for dynamic content.
Create Templates
In this case, we first create a template for the “Featured Homes” CPT.
Create or open a page for each listing item and insert the Listing Grid widget into it. Then display the required listing item using it.
The How to Create A Listing Grid in JetEngine video provides you with more details and explanations on configuring the widget’s settings.
In the next step, move to the Custom Query section, unroll it, and enable the Use Custom Query toggle. Then, select the previously created query in the newly appeared Custom Query drop-down list. Once you have completed it, save this page as a template. To do so, click the arrow near the “Publish” button and select the “Save as Template” button.
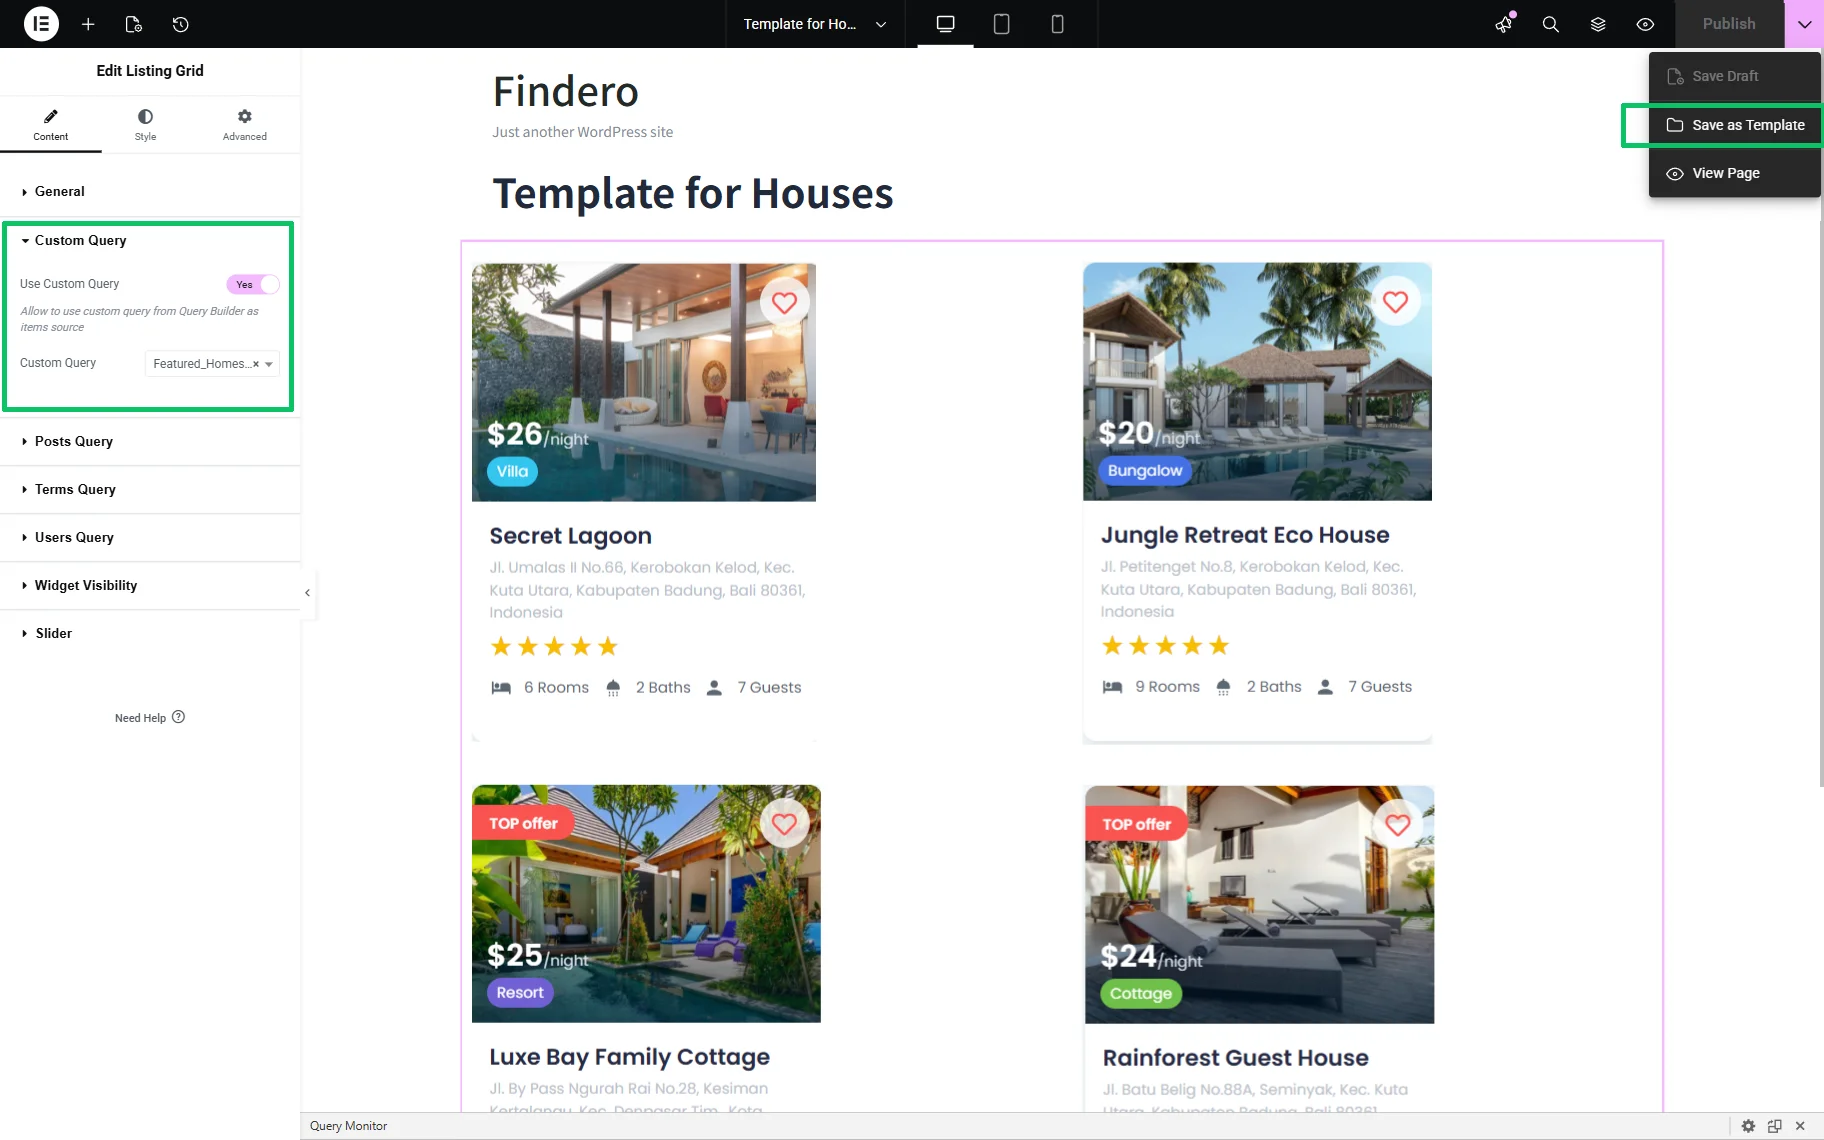
Next, in the Save this Page to your library window, fill in the name of the template (Tab_template_houses, in this case) in the text field and tick the “Site Template” checkbox. After that, press the “Save” button.
In the same way, create templates for displaying other posts and/or CPT posts. Here, we created templates for the regular WordPress posts and the “Hot Deals” CPT.
Build the Search Pages
In this case, you need to create two pages: one for entering search queries and another for displaying the results. After submitting a search request on the first page, users are redirected to the second page, where the results are shown.
Build the search page
Open another page in the Elementor editor. Add the AJAX Search widget and configure the Search Form settings.
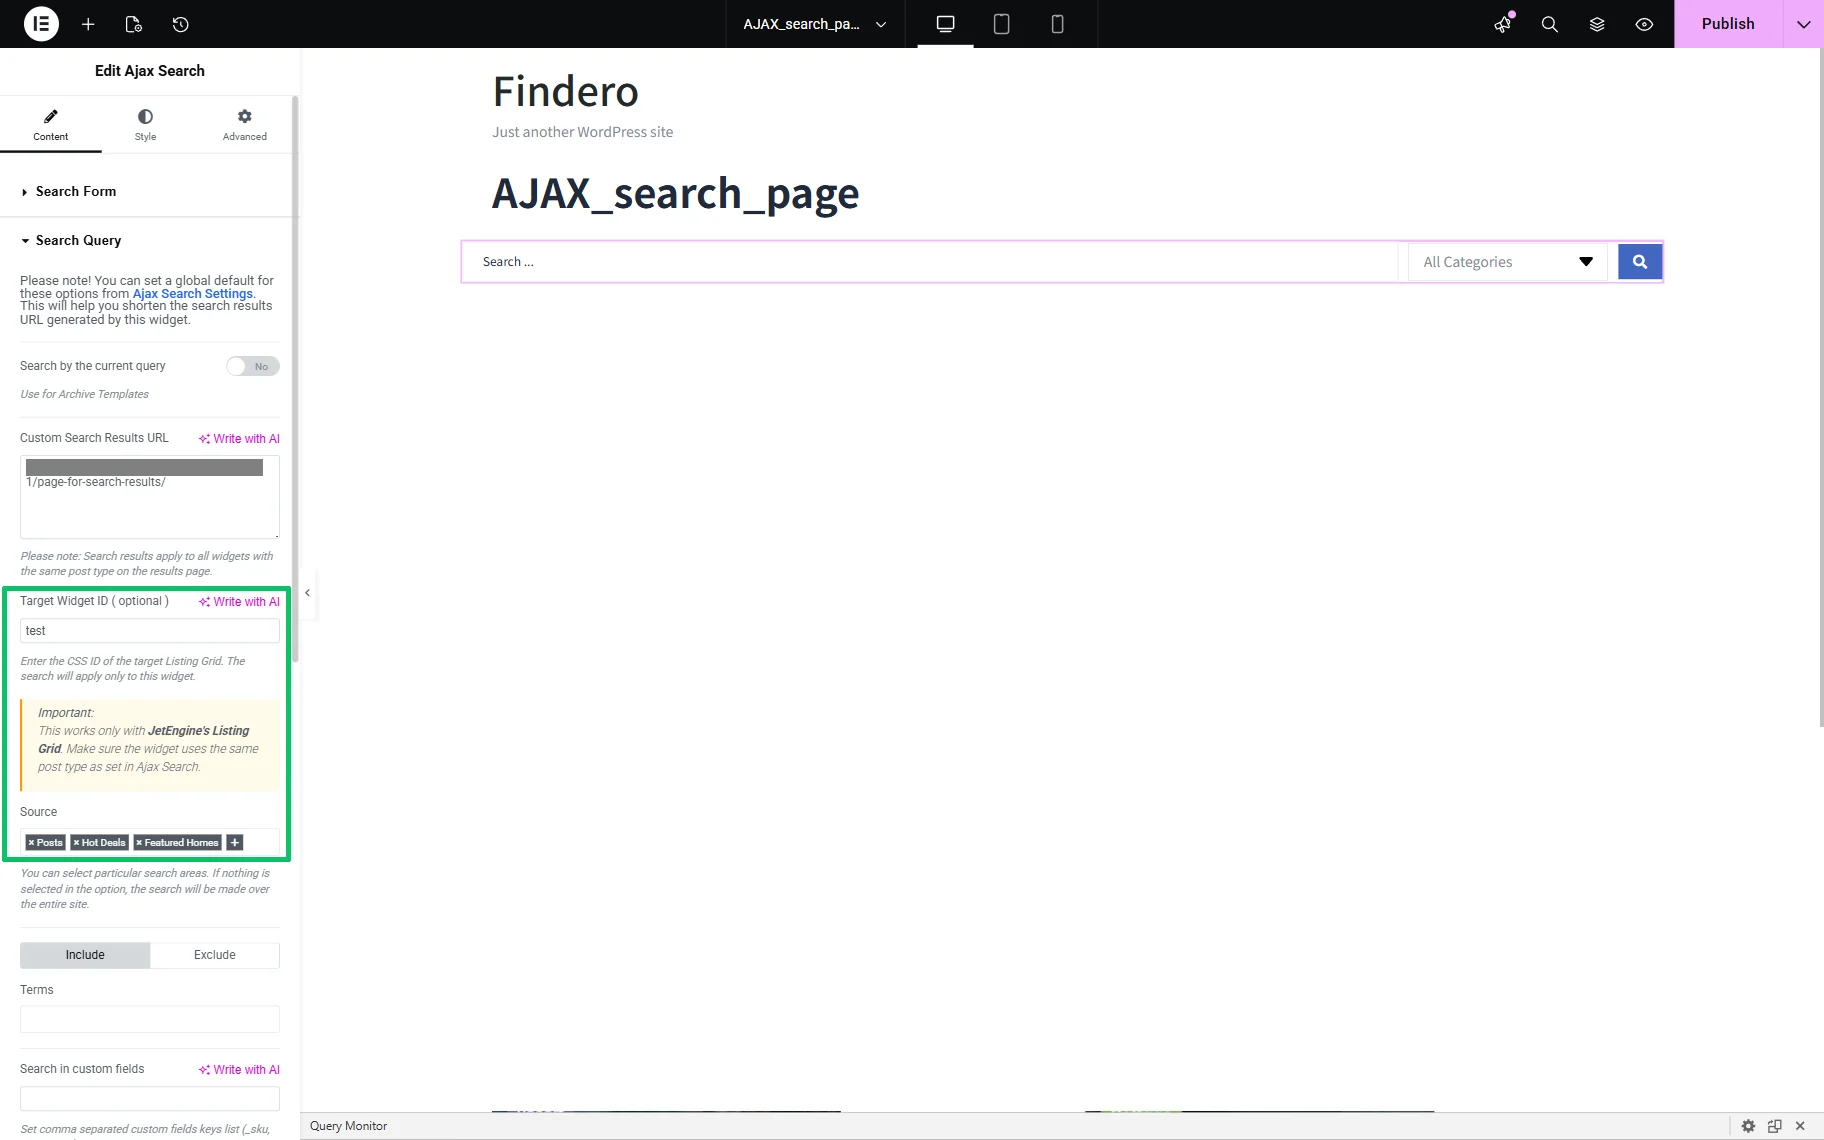
Then, unroll the Search Query tab. Enter the link to the search results page in the Custom Search Results URL field.
Since the widget displays the same search results across all tabs (e.g., WordPress posts, “Featured Homes” CPT, and “Hot Deals” CPT), insert an unexisted widget ID in the Target Widget ID field (for example, “test”).
The next step is to select the posts to be displayed in the Source drop-down list (in this case, regular WordPress posts, the “Featured Homes” CPT, and the “Hot Deals” CPT).
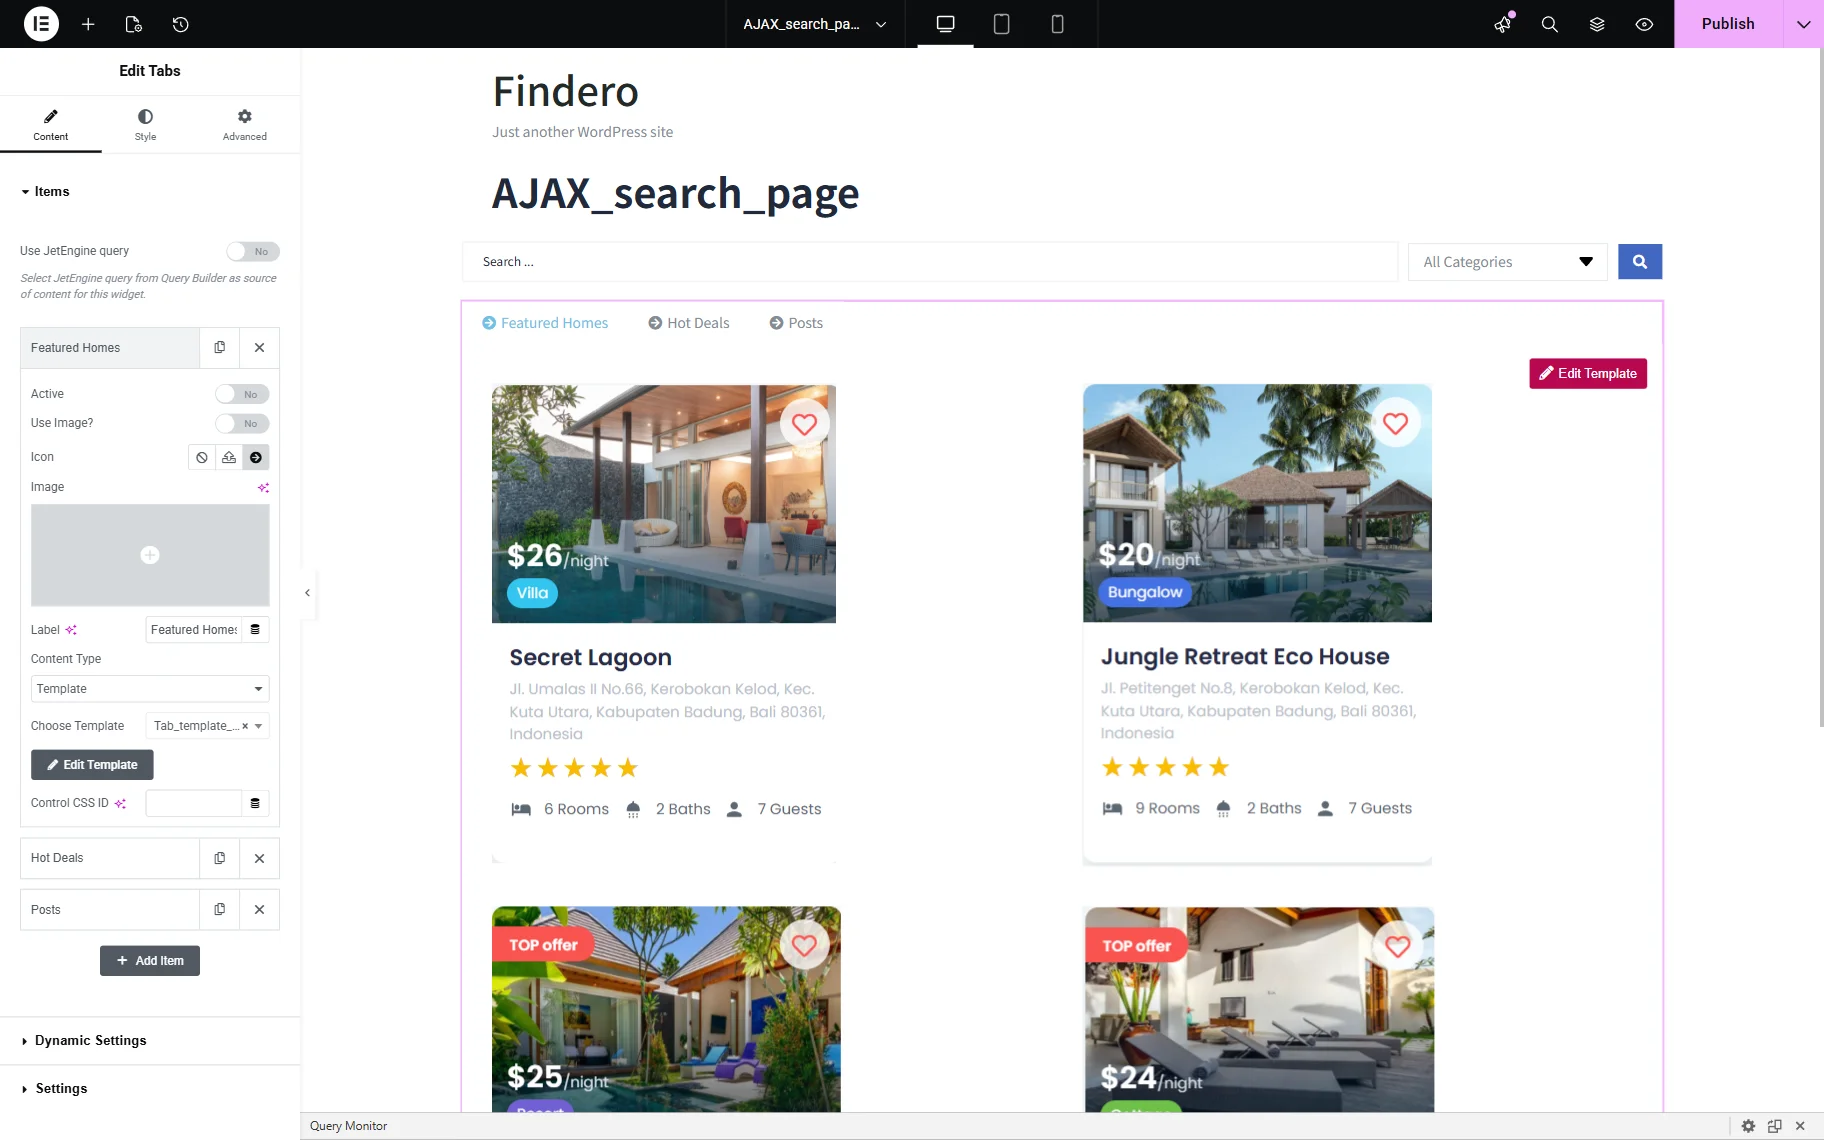
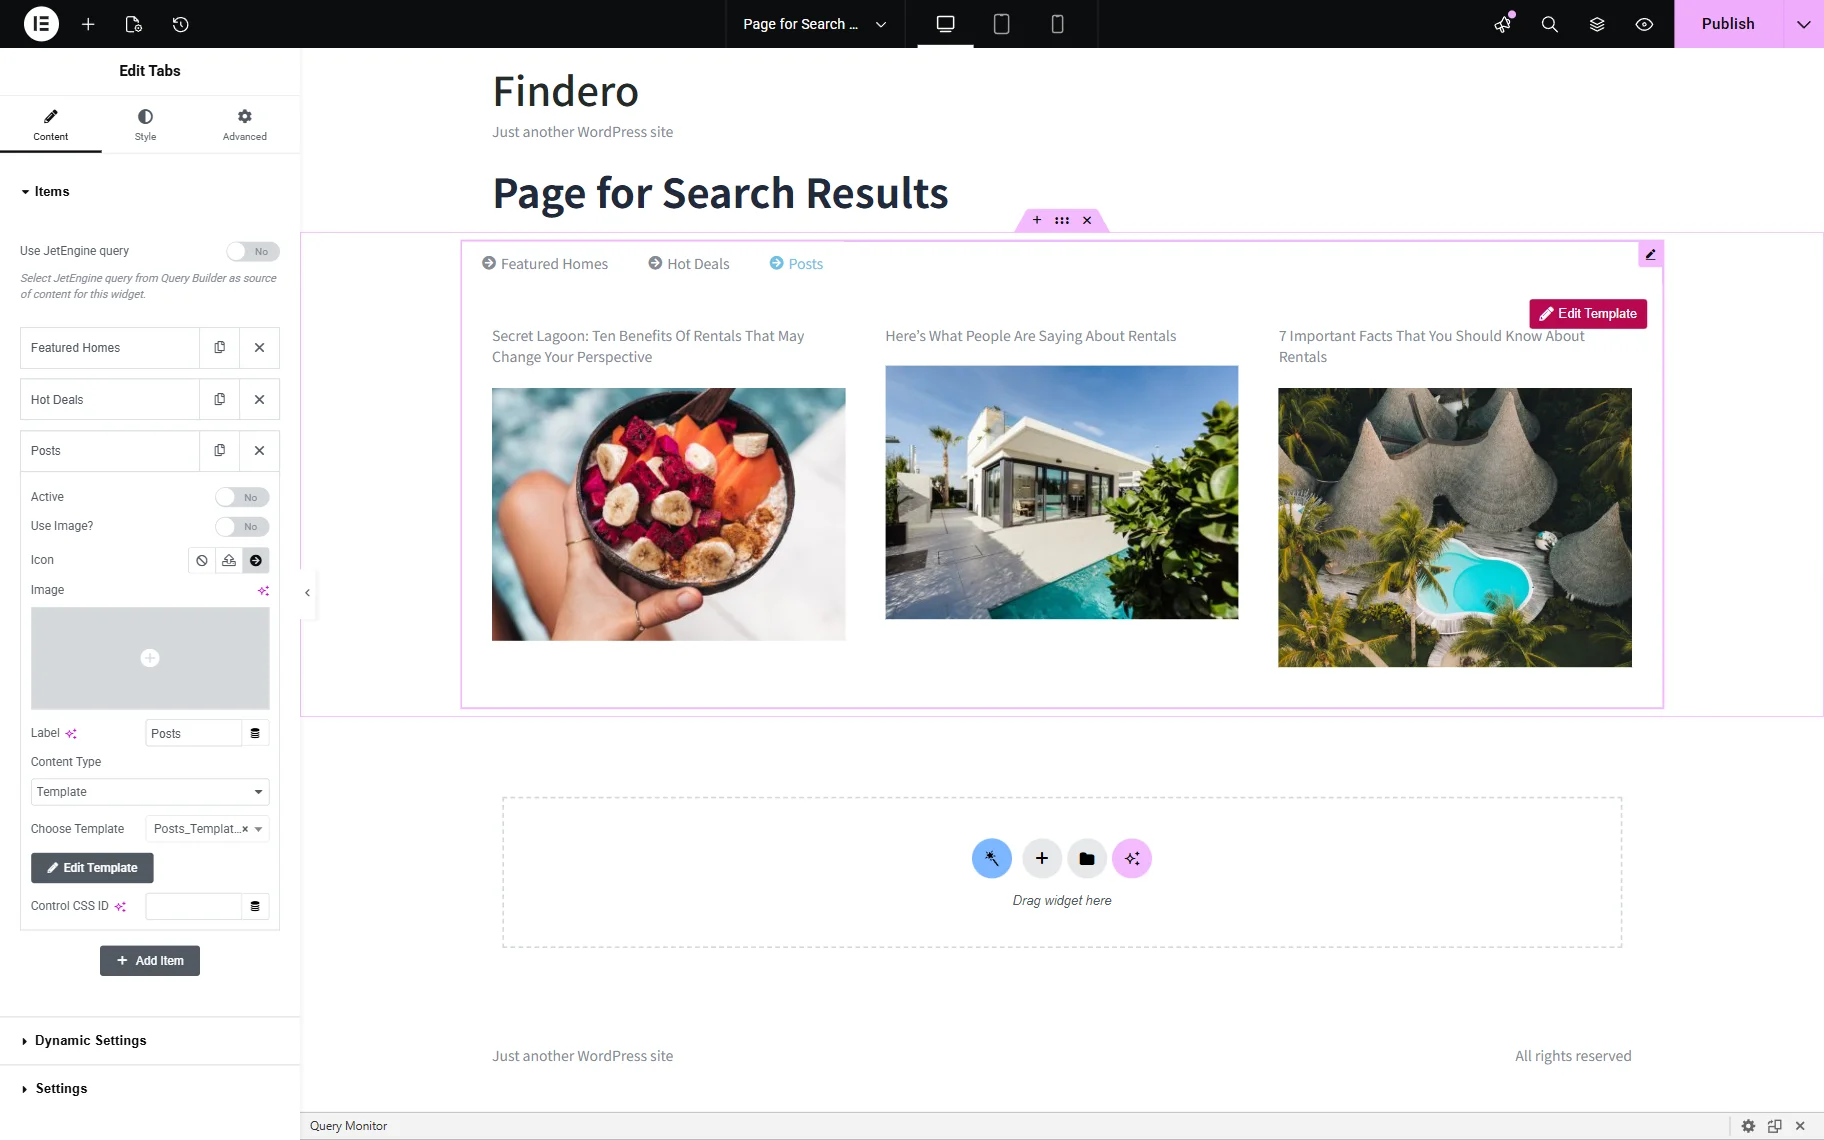
Once done, add the Tabs widget from the JetTabs plugin. In the Items tab, click the “Add Item” button, set the tab Label, choose “Template” as the Content Type, and select the previously created Elementor template from the Choose Template drop-down.
In particular, we create three tabs and assign labels to them based on the post type names: “Features Homes,” “Hot Deals,” and “Posts.” Then, we assign the previously built corresponding templates to each tab.
Finally, we save the page.
Build the page for displaying results
This page contains the Tabs widget with the same settings as the corresponding widget on the previous page.
Test the Flow
Move to the front end of the page with the AJAX Search widget added (here, to the “AJAX_search_page”) and enter the required value in the search field of the widget.
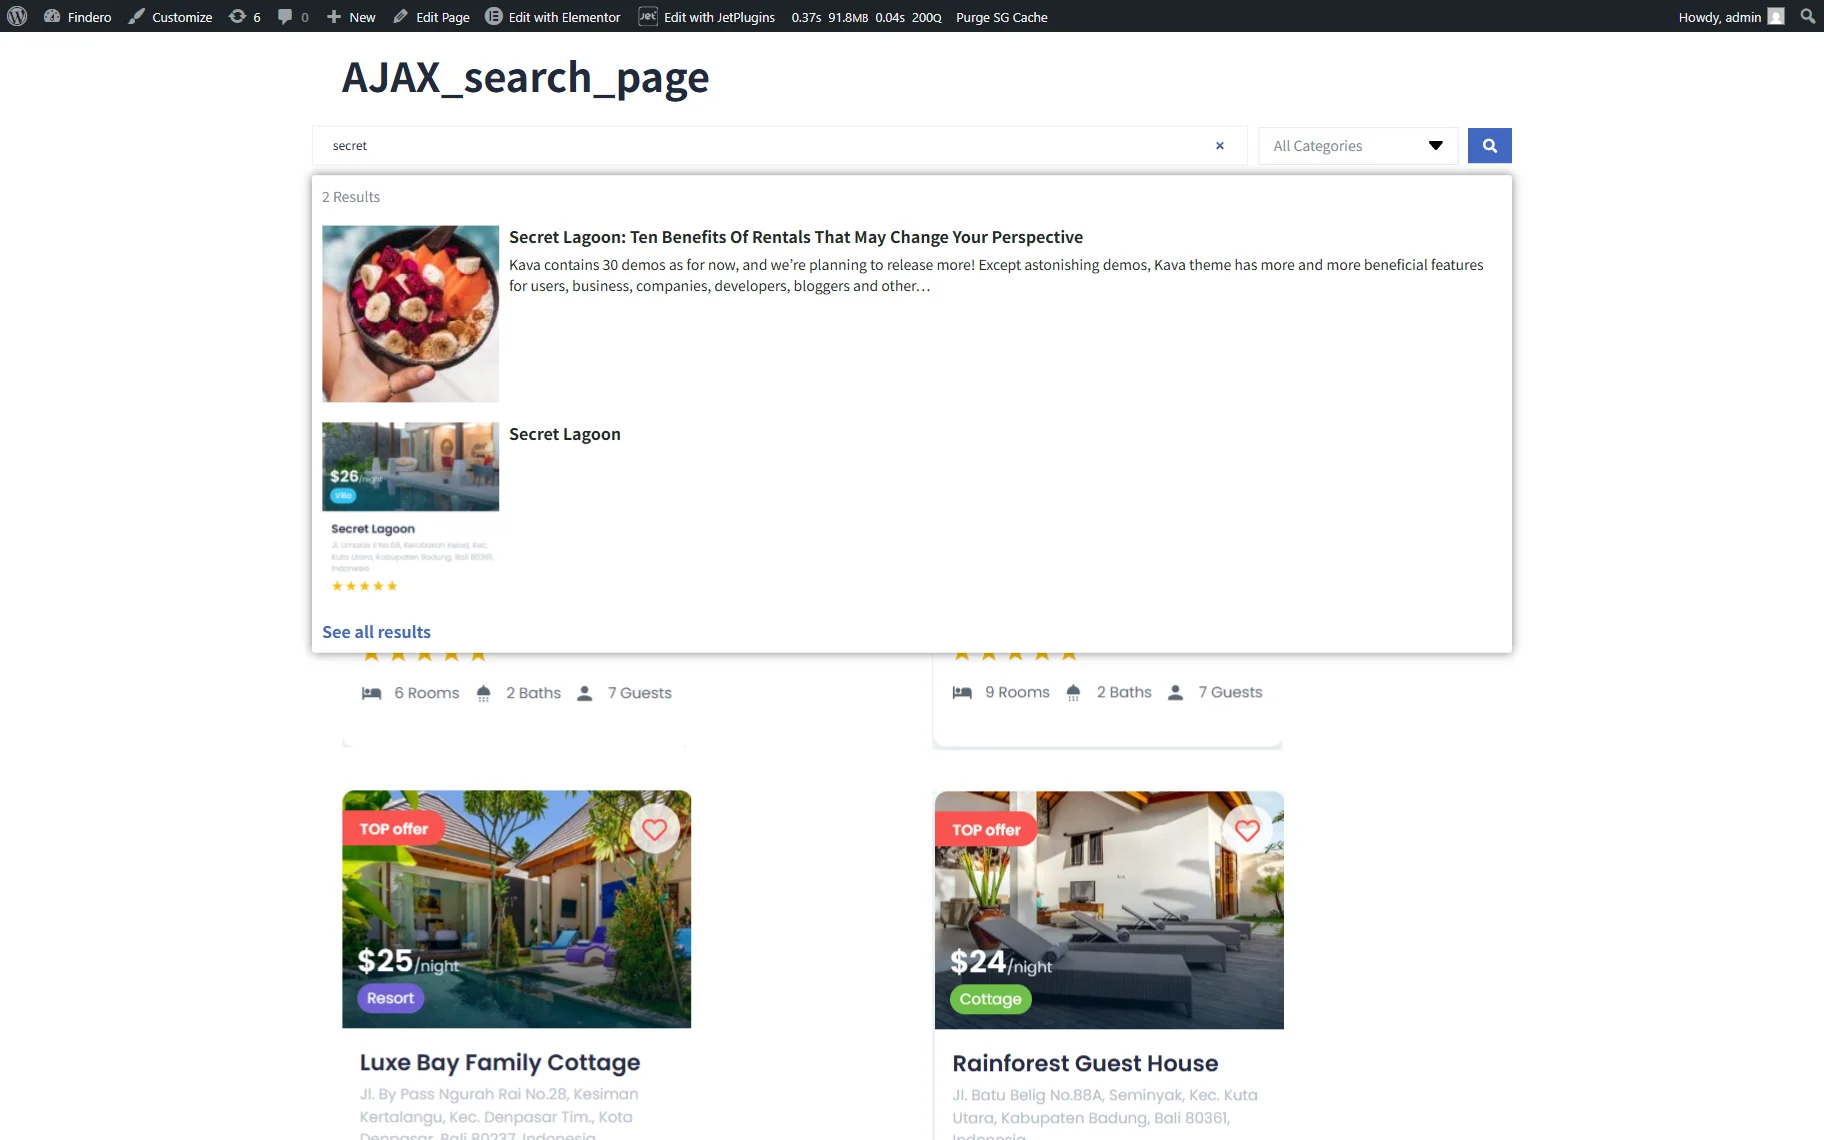
Alt text: entering a search key into the search field
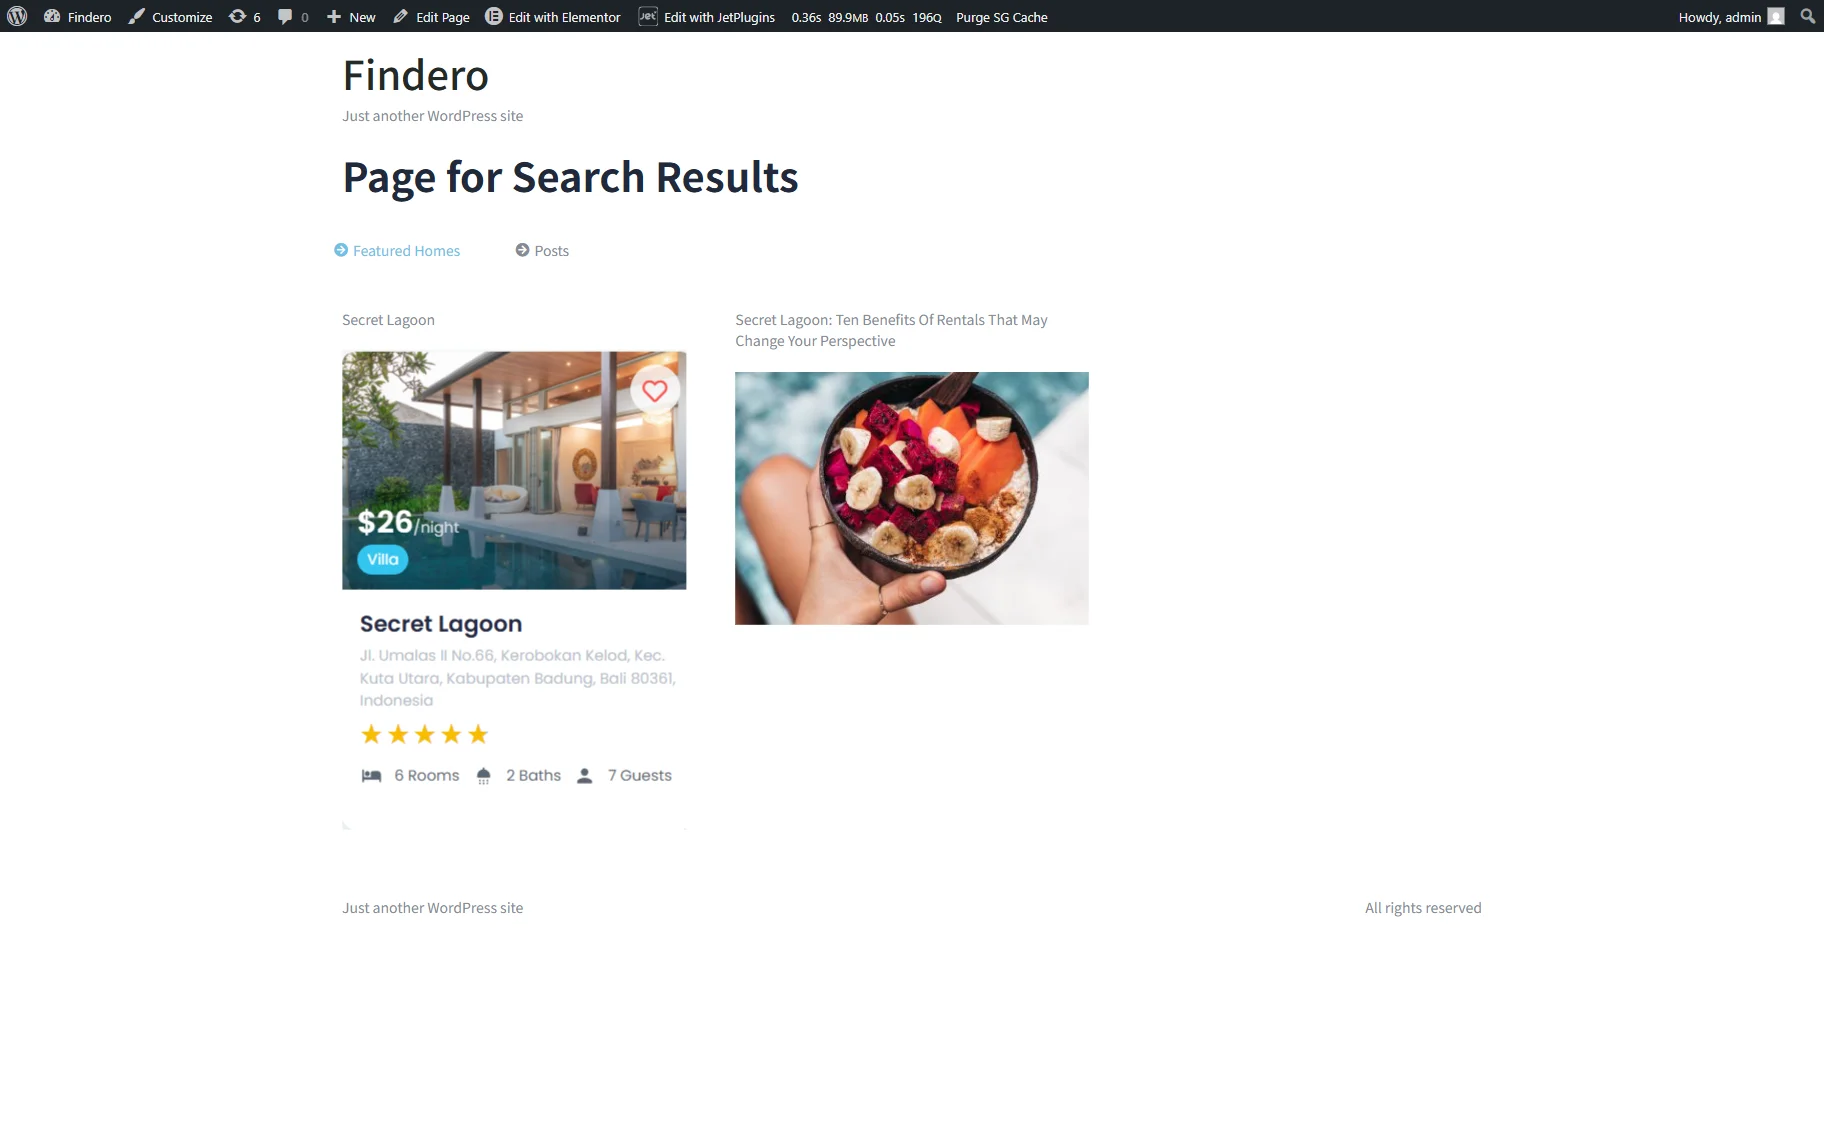
After pressing the “Enter” key, you will be redirected to the results page (the “Page for Search Results”), which displays the WordPress posts and CPT posts related to the specified value. Also, since the only “Featured Houses” CPT and WordPress posts contain posts with the needed search key, the “Hot Dealts” CPT tab will be hidden.
That’s it. Now you know how to use the JetSearch plugin for WordPress to perform AJAX searching in different post types presented as different tabs on the same page and display the search results simultaneously, as well as to hide empty tabs if there is no data available.