How to Set Query Builder Switcher Data Source in Select and Radio Filters
Find out how to set Query Builder Data Source in Select and Radio filters from JetSmartFilters.
Before you start, check the tutorial requirements:
- Elementor (Free version) or Block editor (Gutenberg)
- JetSmartFilters plugin installed and activated
The “Query Builder Switcher” is one of the Data Sources available for the JetSmartFilters’ “Select” and “Radio” Filter Types if the JetEngine plugin is installed on the WordPress website.
This source allows switching between the Query Builder options on the front end. One “Query Builder Switcher” source-based filter and one Listing Grid can display different queries, avoiding the need for several Listing Grid widgets.
Create Filter
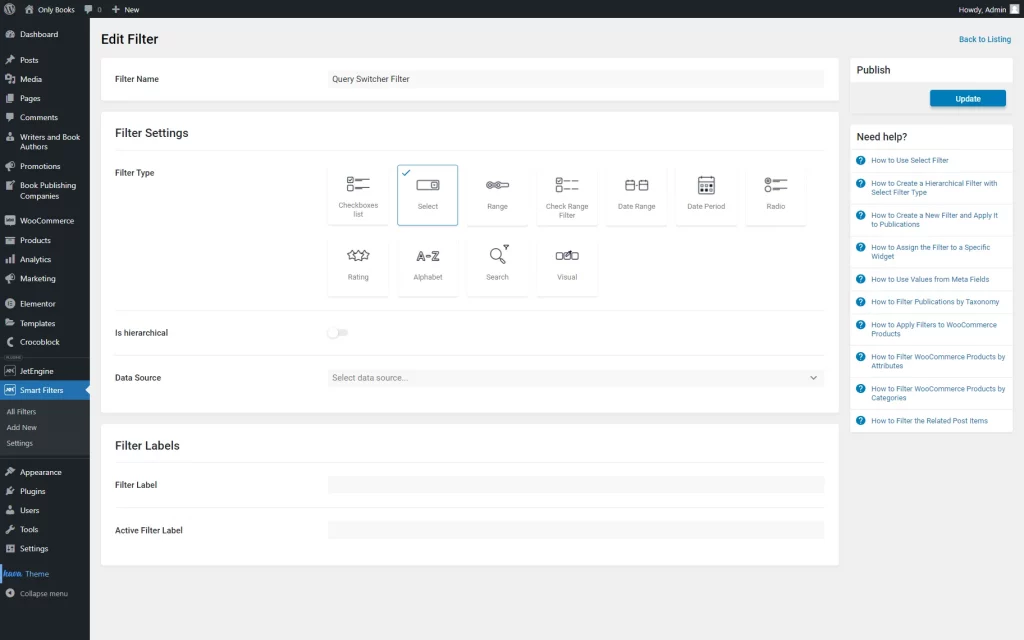
Go to WordPress Dashboard > Smart Filters > Add New to create a new filter.
Complete the Filter Name and head to the Filter Settings section.
Pick either “Radio” or “Select” Filter Type.
Now, we choose the “Select” option.
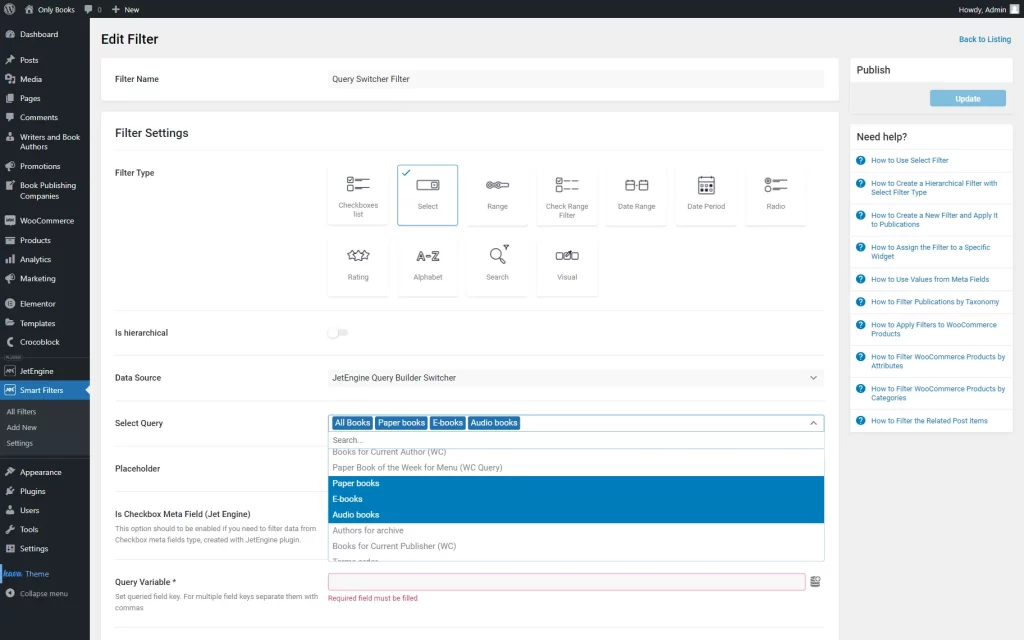
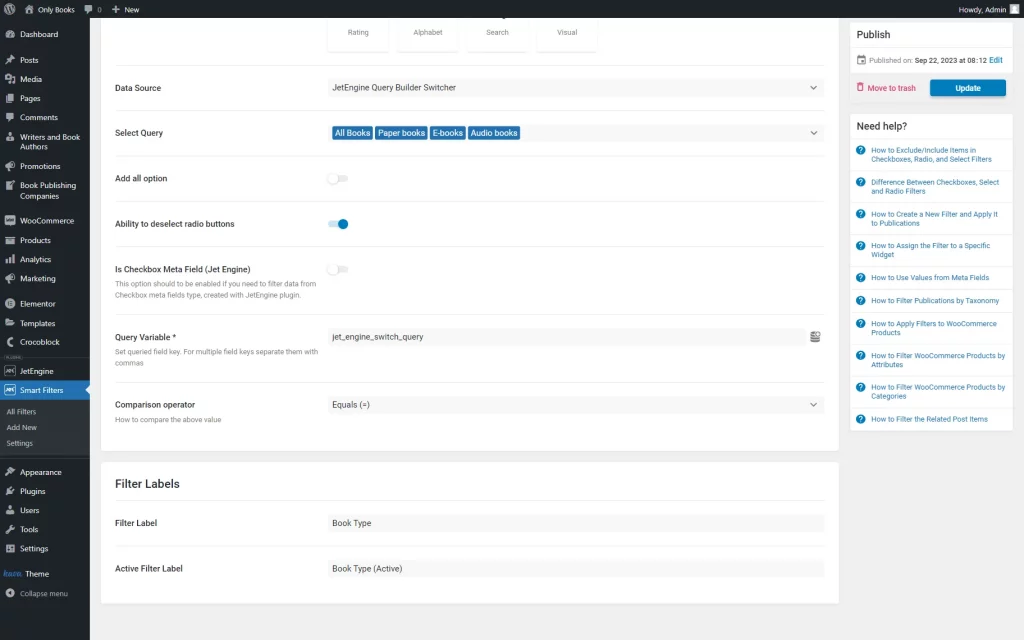
Choose the “JetEngine Query Builder Switcher” Data Source and pick the needed query options in the Select Query field.
For instance, we use “All Books,” “Paper books,” “E-books,” and “Audio books” queries.
Change the Placeholder if needed and leave the Is Checkbox Meta Field (Jet Engine) toggle unactivated.
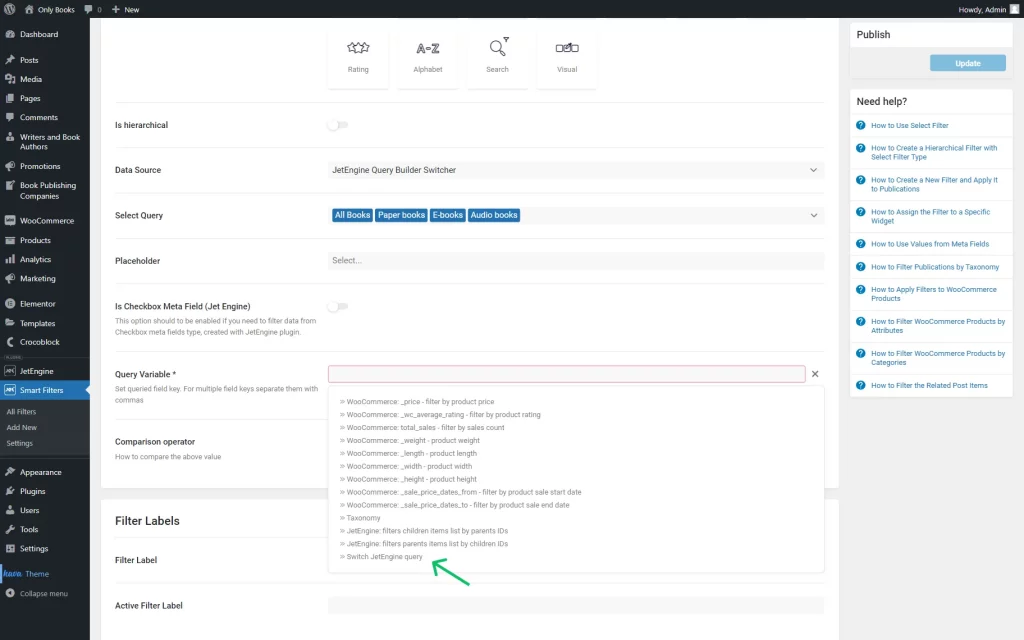
Proceed to the Query Variable field. Press the “Dynamic Tags” button to see the presented ready-to-go options. Сhoose the “Switch JetEngine query” option.
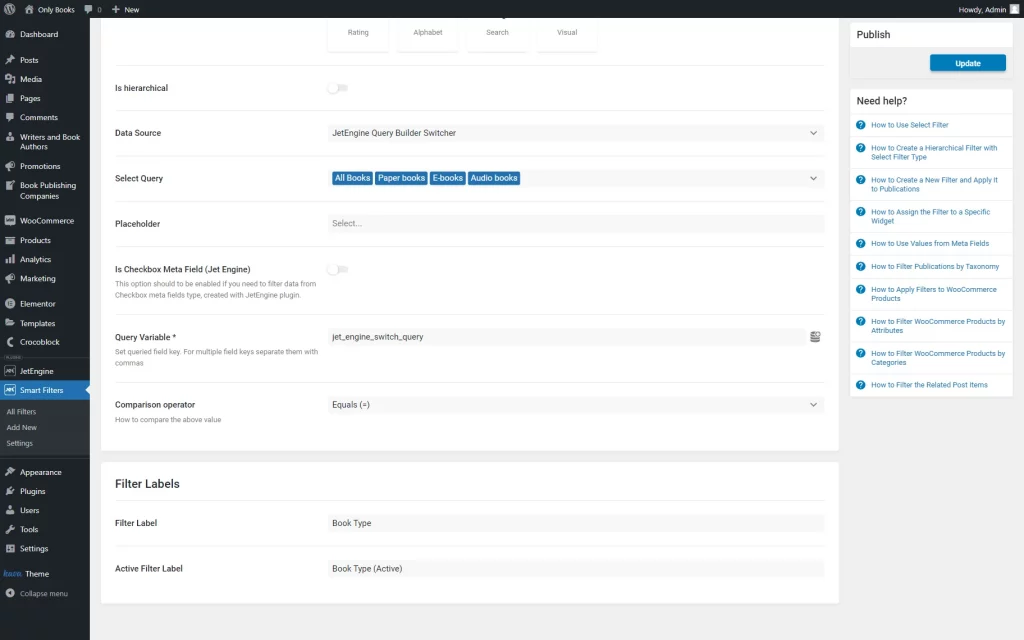
Leave the “Equals (=)” option in the Comparison operator field and head to the Filter Labels section.
Fill in the Filter Label and Active Filter Label fields to finish the setup.
Click the “Update” button to save the result.
There are two more toggles in the “Radio” Filter Type settings: Add all option and Ability to deselect radio buttons. They are optional.
Adjust Content
Navigate to the WordPress Dashboard > Pages directory and press the “Add New” button or open the page you have built beforehand.
The page can be edited in Elementor, Block Editor, or Bricks Builder.
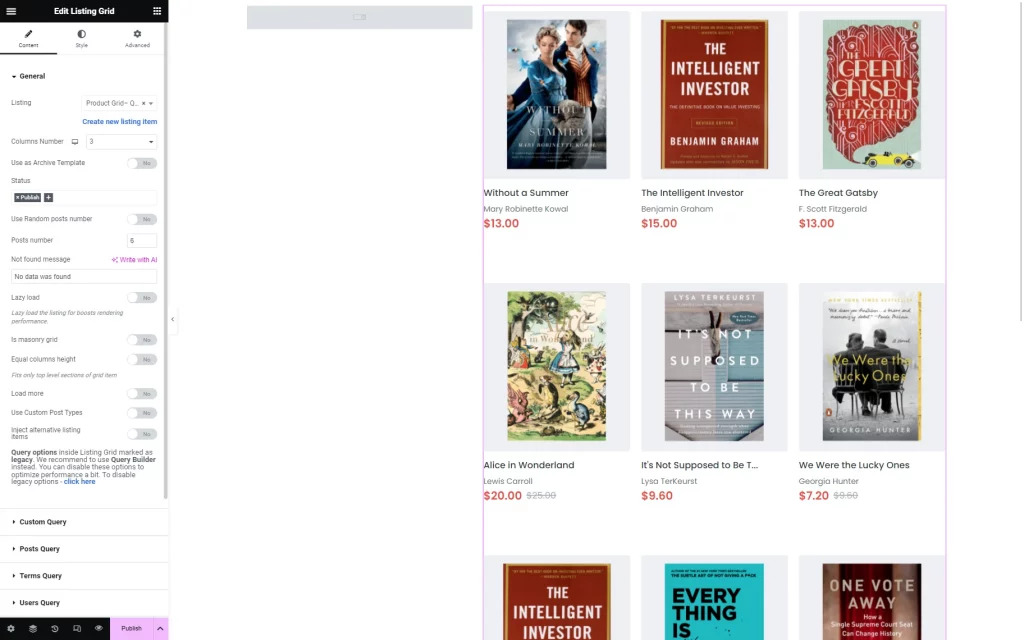
Place the filter widget (Select Filter or Radio Filter) and the Listing Grid widget on the page. Select the needed Listing for the Listing Grid widget.
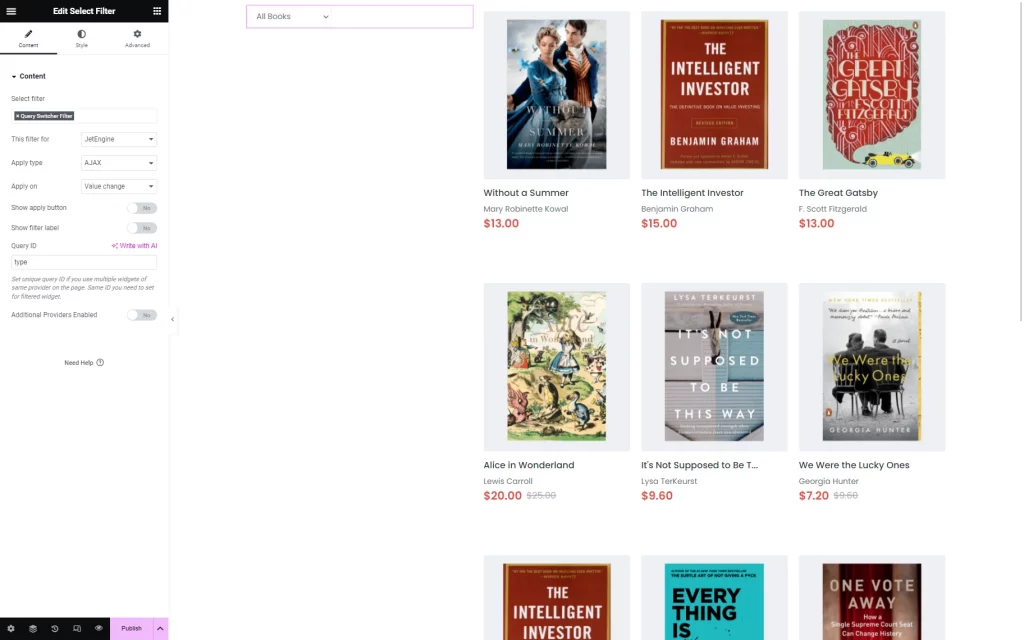
In the filter settings, complete the Select Filter field with the newly created filter’s name.
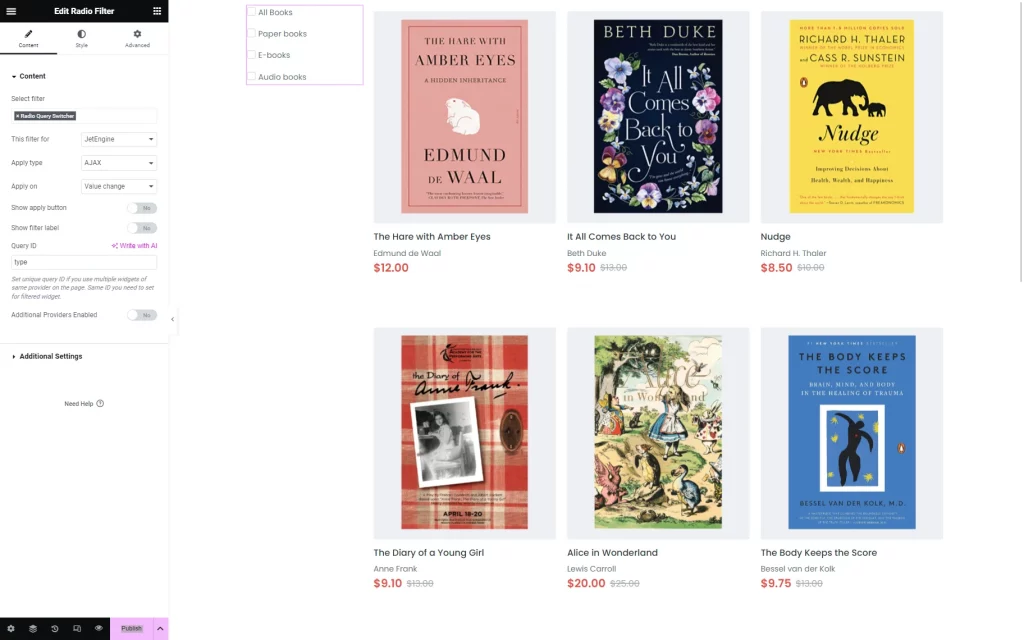
Pick the “JetEngine” option as a filter provider in the This filter for field.
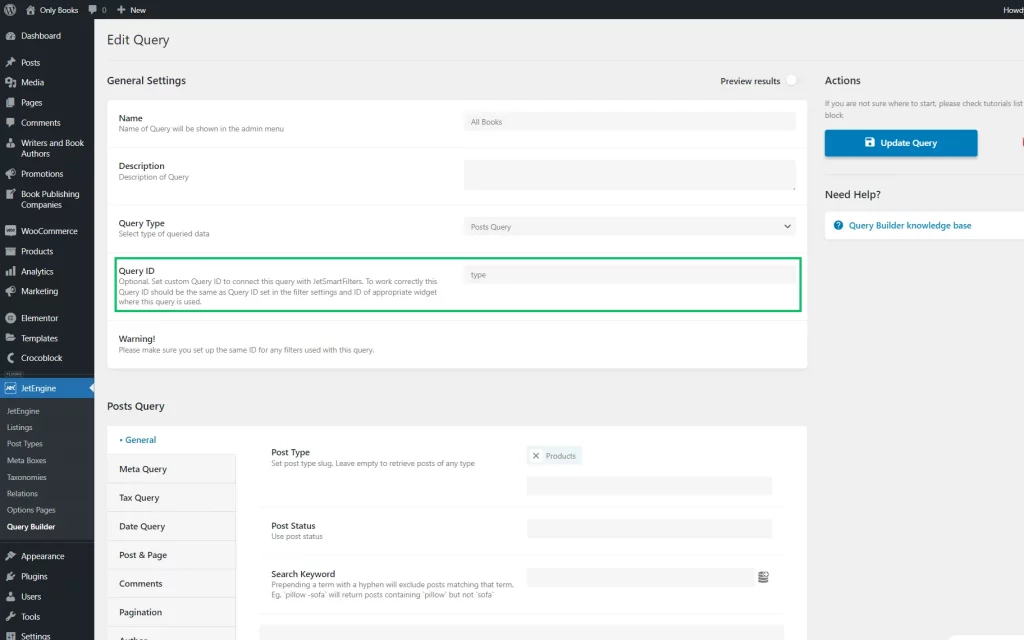
Complete the Query ID with a value set in the query in advance.
If you haven’t set Query ID, you can do it in the General Settings section of the WordPress Dashboard > JetEngine > Query Builder directory.
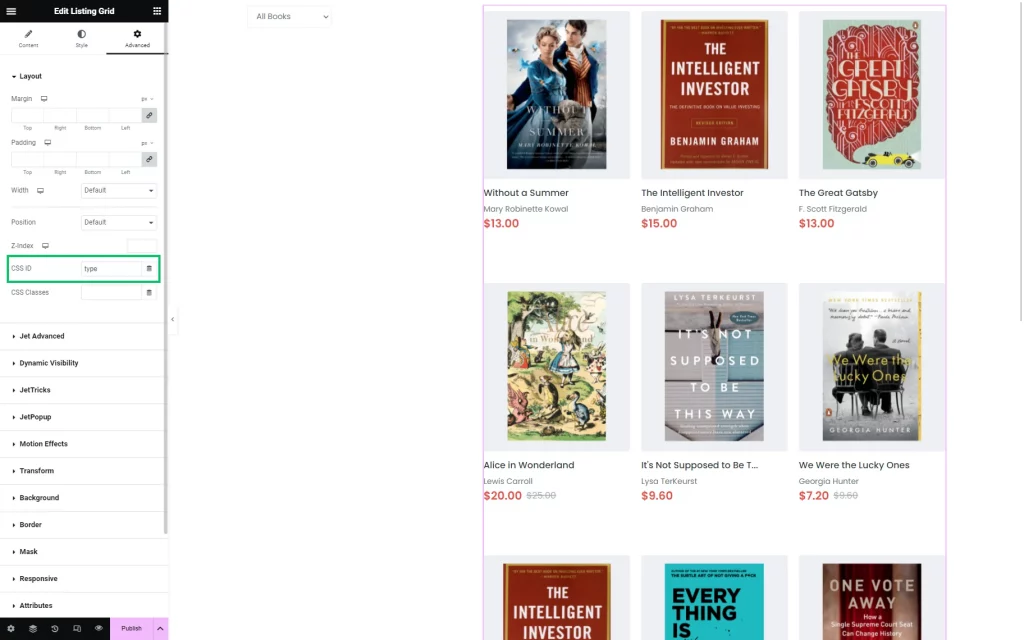
The same ID should be attached to the Listing Grid widget. Head to the Edit Listing Grid > Advanced > Layout section and paste the needed value in the CSS ID field.
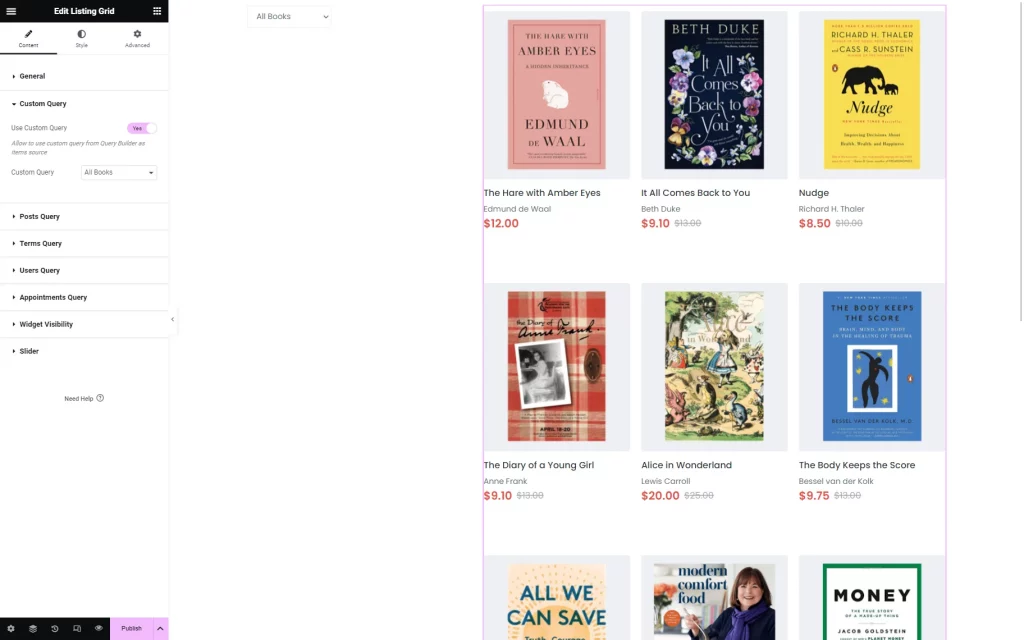
Go to the Content tab and open the Custom Query section. Here, activate the Custom Query toggle and choose the item used by default in the filter. In our case, it is “All Books.”
Optionally, complete the rest of the settings and hit the “Publish/Update” button.
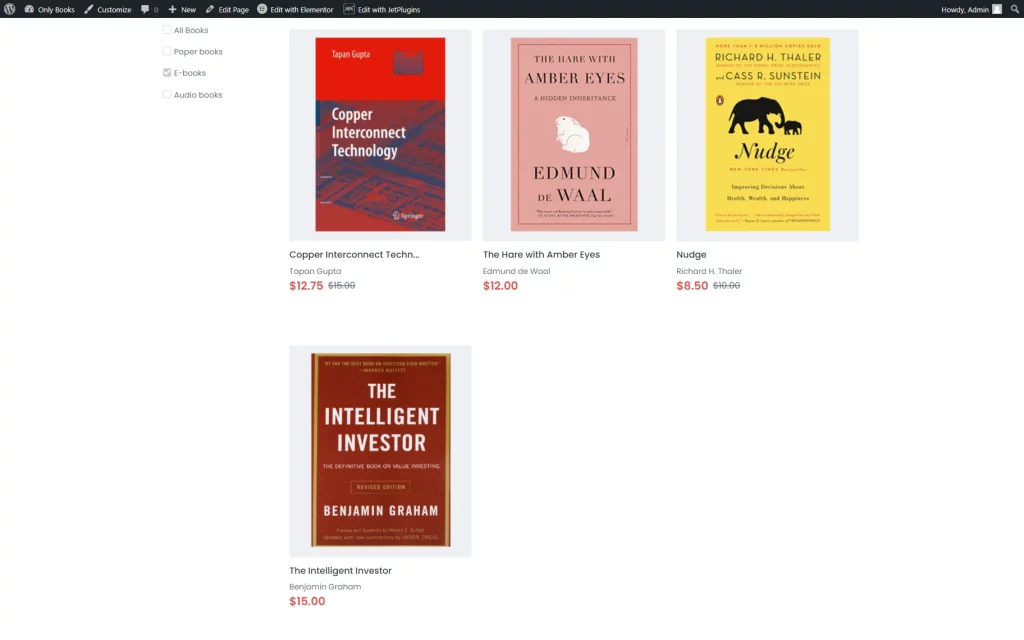
Check Result
That’s all about the “Query Builder Switcher” Data Source available as a part of the JetSmartFilters and JetEngine plugin functionality.
