How to Use Filters with the Listing Grid Widget
This tutorial explains how to use JetSmartFilters widgets with the Listing Grid widget of the JetEngine plugin.
Before you start, check the tutorial requirements:
- Elementor (Free version), Block editor (Gutenberg), or Bricks
- JetEngine plugin installed and activated
- JetSmartFilters plugin installed and activated
JetSmartFilters’ filters can be connected to the JetEngine Listing Grid widget/block/element to filter posts, products, users, Custom Post Types, or Custom Content Types dynamically.
This tutorial covers:
- creating and attaching filters to the Listing Grid widget/block/element;
- configuring AJAX filtering;
- choosing the correct provider;
- avoiding common pagination and filtering issues.
How Filtering Works with Listing Grid
Listing Grid is a JetEngine plugin widget/block/element intended to display dynamic data from Meta Fields of Custom Post Types (CPT), Custom Content Types (CCT), default WordPress pages and posts, terms, taxonomy, or WordPress User data. If additional plugins are installed and activated, this widget/block/element can be used to display WooCommerce products, JetAppointment service, and provider data, and more in the form of a grid.
So when the JetEngine Listing Grid returns the results of the query, JetSmartFilters modifies the query results according to the selected parameters. The list can be filtered by categories, meta fields, or query results, etc. It is also important to select the proper provider and the Apply Type settings for smooth filtering.
Create a Filter in JetSmartFilters
Proceed to WordPress Dashboard > Smart Filters and click the “Add New” button.
In the newly opened window, fill in the following fields:
- Filter Name — enter the desired name for the filter to be able to search by it;
- Filter Label — enter the regular label that will be shown next to the filter itself. It helps users understand what the filter is for before they interact with it;
- Active Filter Label — enter the label that will be shown after the filter becomes active, usually inside the Active Filters or Active Tags widgets/blocks/elements;
- Filter Type — select the desired type of filter. Among the options are: “Checkboxes list,” “Select,” “Search,” etc. The following settings will become available for adjusting according to the selected type;
In this case, we select “Checkbox list” Filter Type. For the Data Source, we use the “Taxonomies” option. For the Taxonomy, select the required one; we use the “Category.” You can also set the Order rules, whether you need to show the empty terms, or include/exclude some terms, etc.
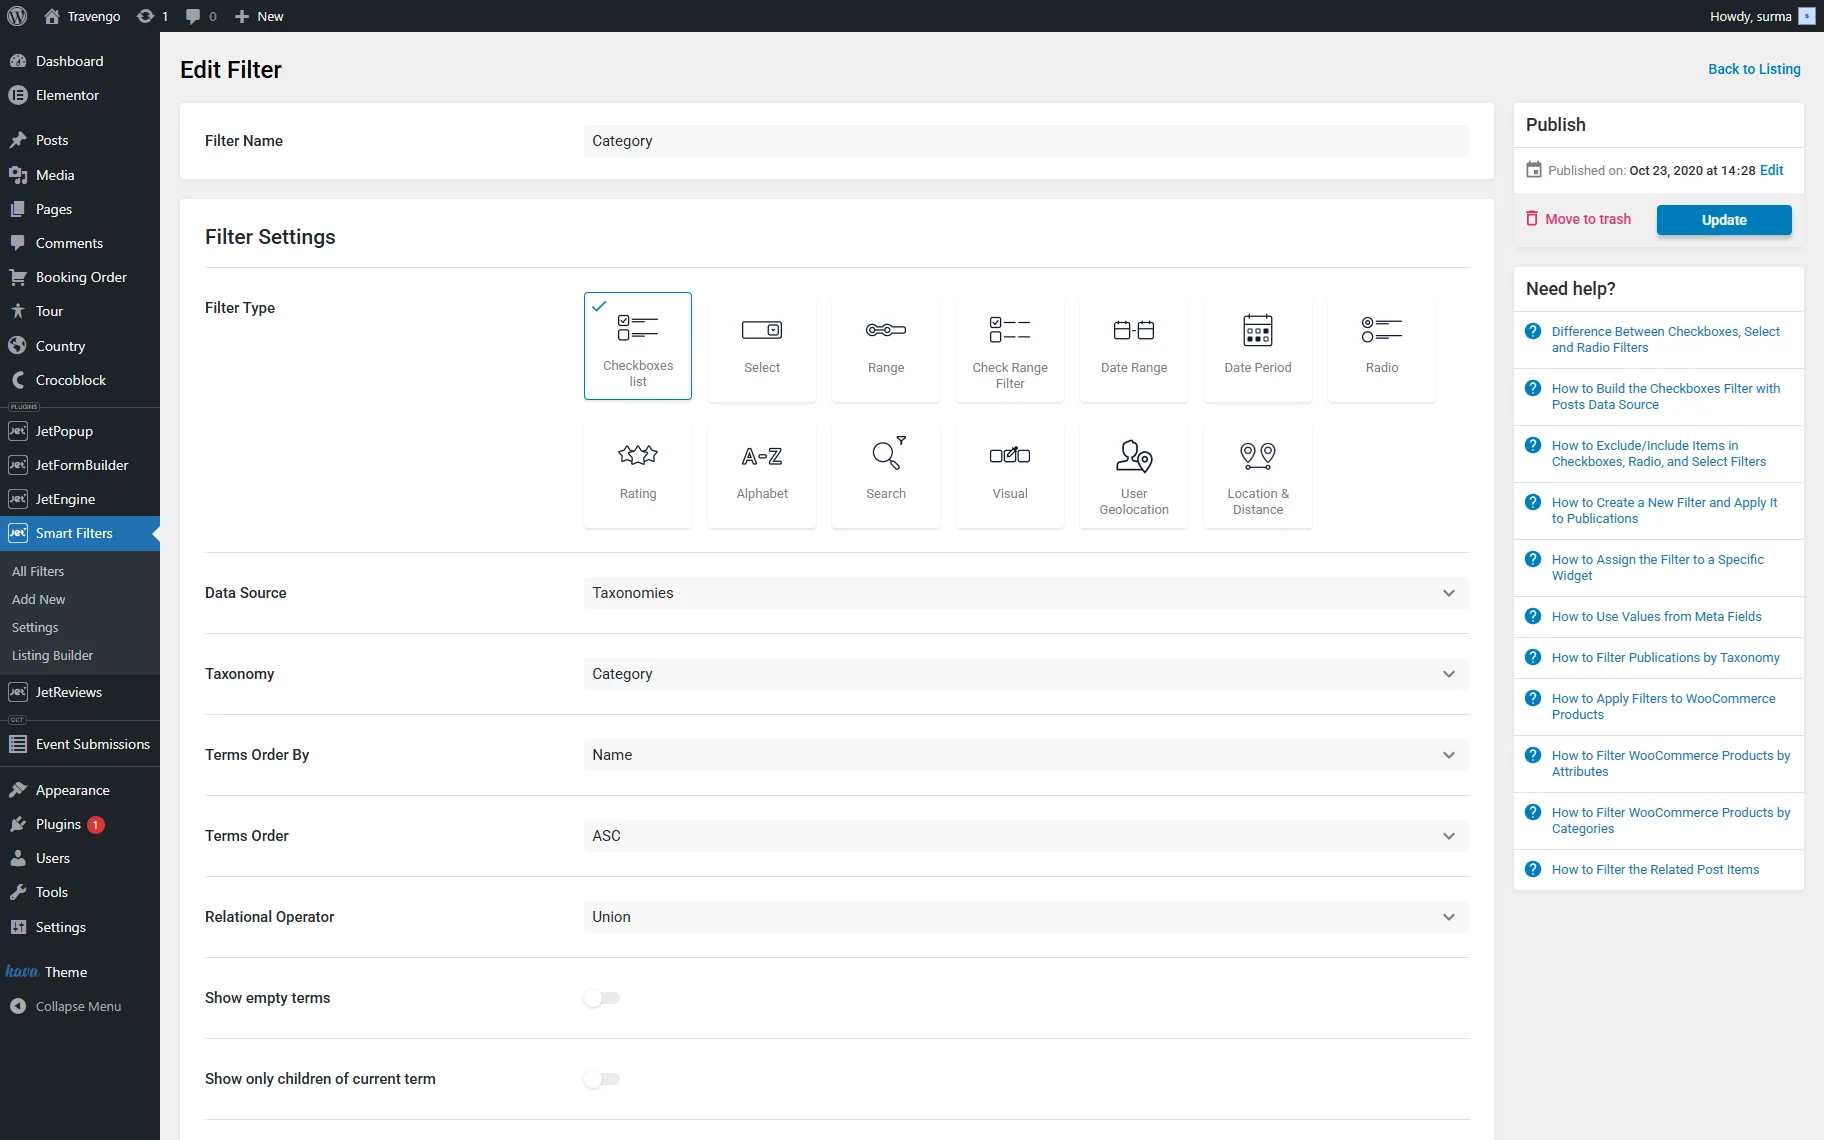
To save the filter, the “Update” button should be pressed.
Add the Listing Grid
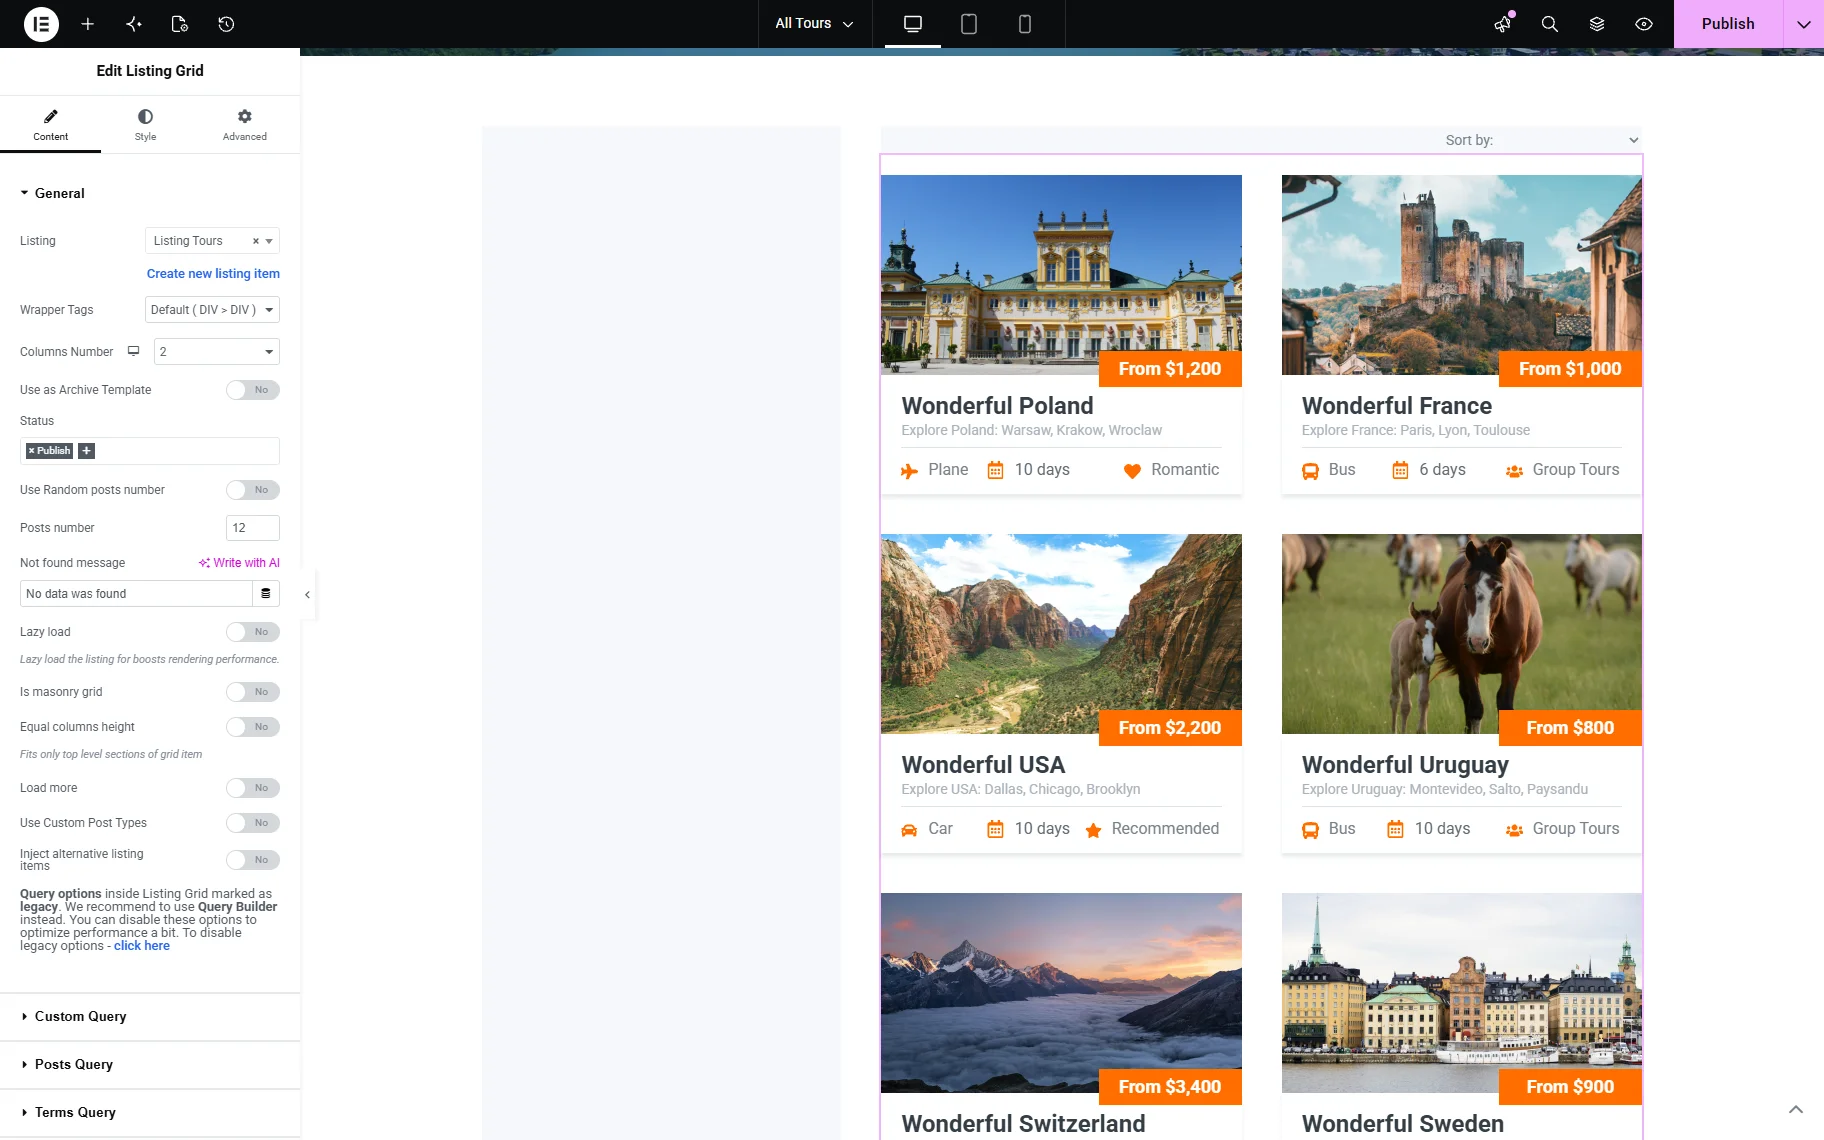
Open the editing page where the filter is expected to be applied — we use Elementor editor in this case. Insert the Listing Grid widget and select the Listing Item you created earlier.
Follow the How to Create a Listing Template for Post Types in Elementor tutorial if you are not sure about the settings.
Connect the Filter to the Listing Grid
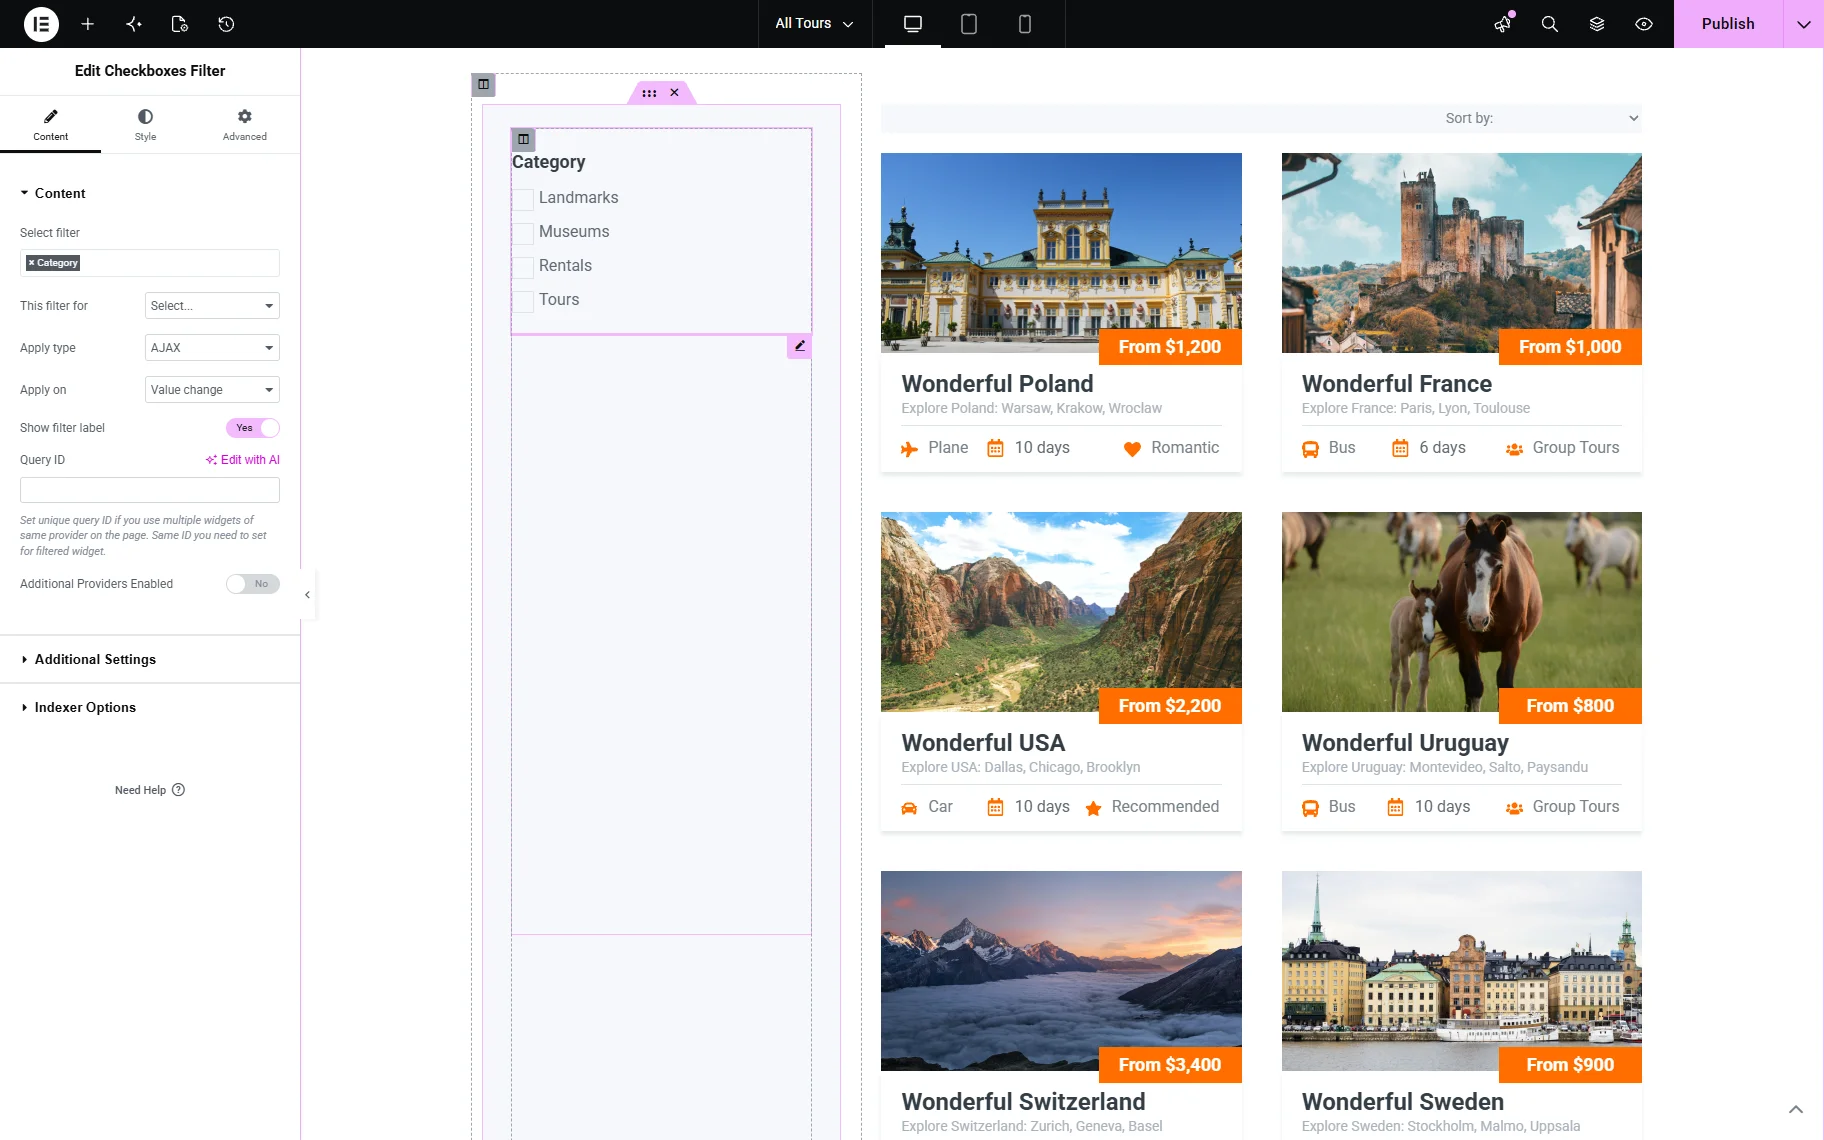
Now, add the filter widget to the page. As far as we have created a “Checkboxes list” filter, we search for and add the Checkboxes Filter widget. Select the filter you created, “Category” in our case.
Choose the correct provider for your filter
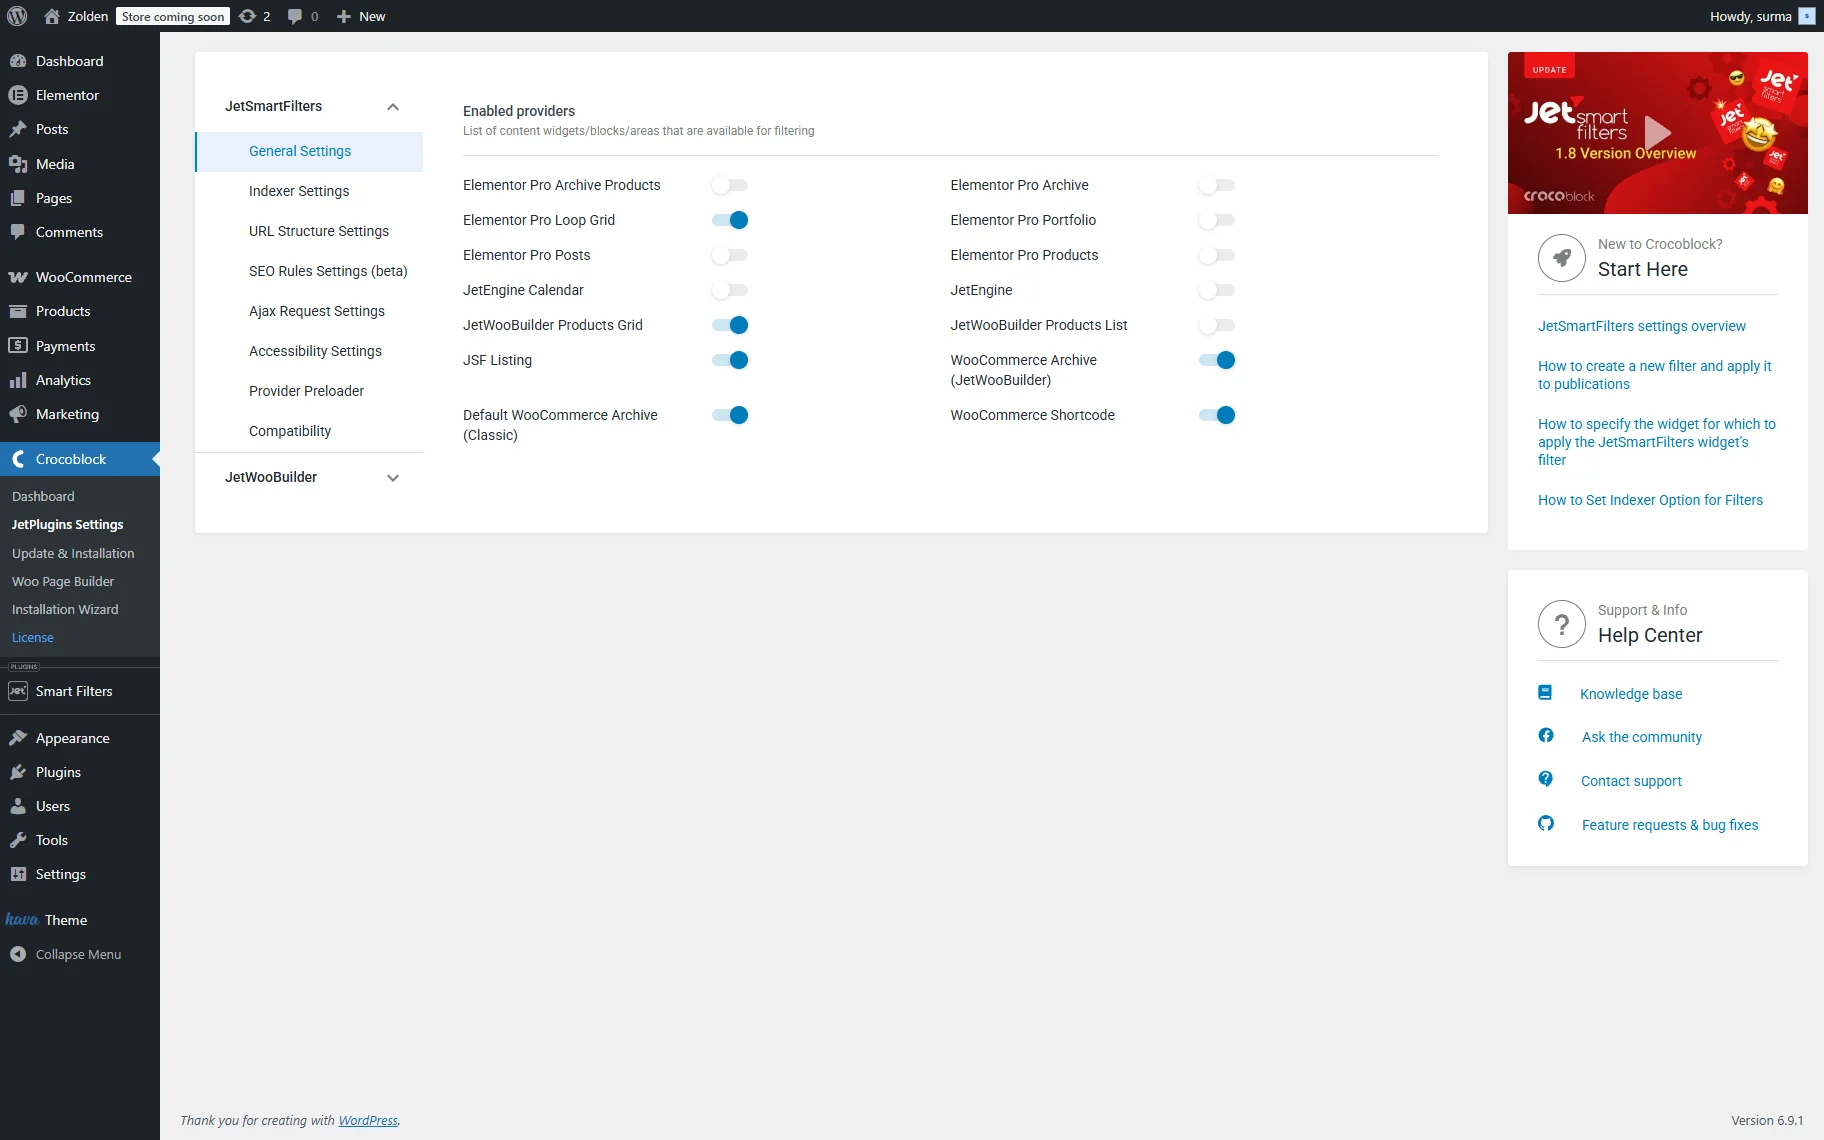
The next vital setting is the provider selection in the This filter for field. As far as we are using the Listing Grid as a provider, the “JetEngine” option should be selected.
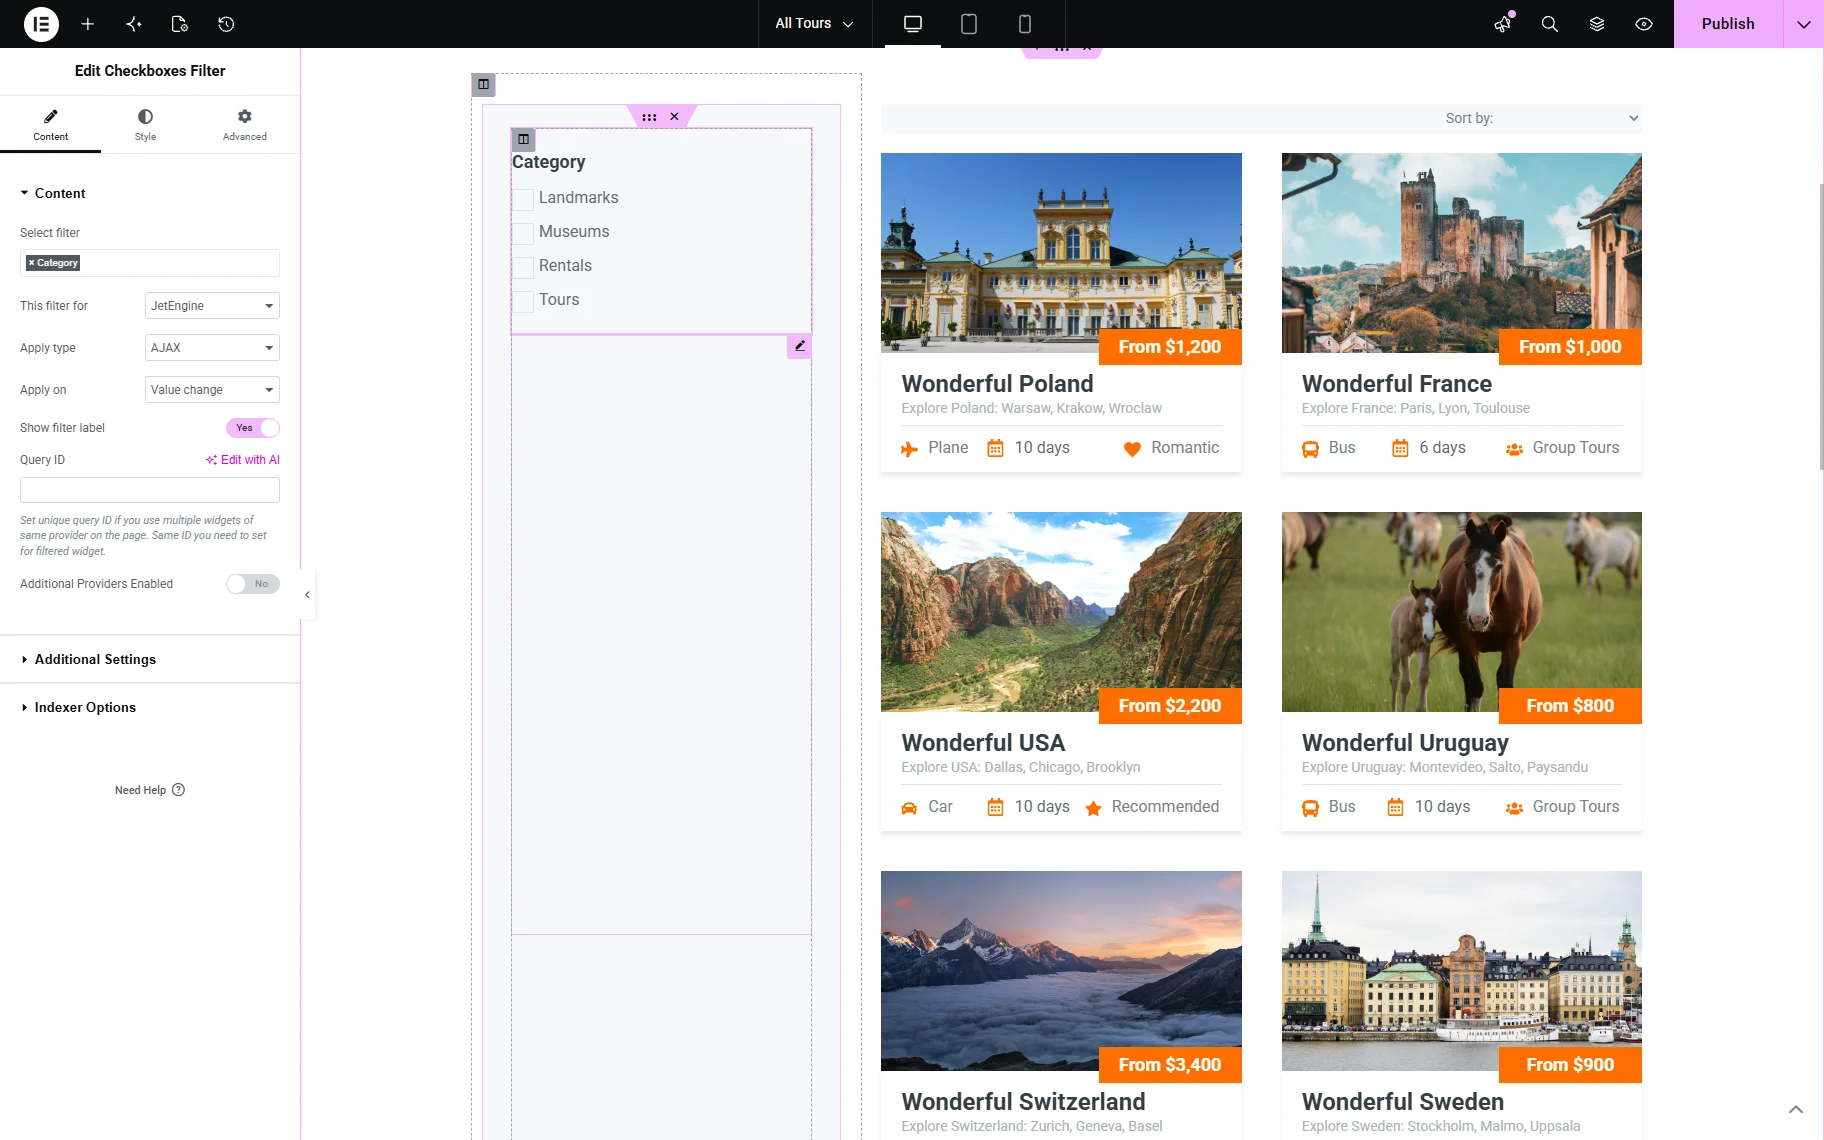
Remember to enable the needed provider in WordPress Dashboard > Smart Filters > Settings > General Settings. The provider will not be available in the This filter for dropdown until it is enabled in these settings.
To learn more about correct provider selection according to the filtered widget/block/element, refer to our How to Connect Filters with Providers Using Custom IDs guide. It is important to select the corresponding provider, otherwise, the filter will not be applied.
AJAX vs. Page Reload filtering
The next important setting is the Apply Type. There are three options offered:
- AJAX;
- Mixed;
- Page Reload.
The option you choose will affect the way the filter is applied. Here is a short comparison table for you to understand the difference between the Apply Types.
| Apply Type | When to Use | URL Behavior |
| AJAX | Standard filtering without page reload | URL does not change |
| Mixed | When shareable filtered URLs are needed | URL updates, but the page does not reload |
| Page Reload | Static archive filtering and SEO-oriented pages | Full page reload |
To learn more about which Apply Type should be used in what case, check our AJAX, Mixed, and Page Reload Filter Apply Types Overview guide.
If you see a full page reload instead of a smooth AJAX update when filtering, first check the Apply Type setting in JetSmartFilters and the AJAX settings of the grid widget/block/element.
Back Button and filter state
The browser’s “Back” button behavior also depends on the Apply Type selected for the filters on the page.
- AJAX Apply Type does not change the URL once the filter is applied — that’s why if you click the “Back” button to remove the applied filters, you will be redirected to the previous page.
- Mixed Apply Type stores filter values in the URL— this helps preserve filtered results when users navigate back from a single post/page. That is also useful for directories, stores, and archive pages.
- Page Reload Apply Type stores the filter values in the URL, as well as reloading the page completely when the filter is applied. It works well together with the “Back” button: it will redirect you to the previous filter results or prefiltered grid.
Pagination, Load More, and Infinite Scroll notes
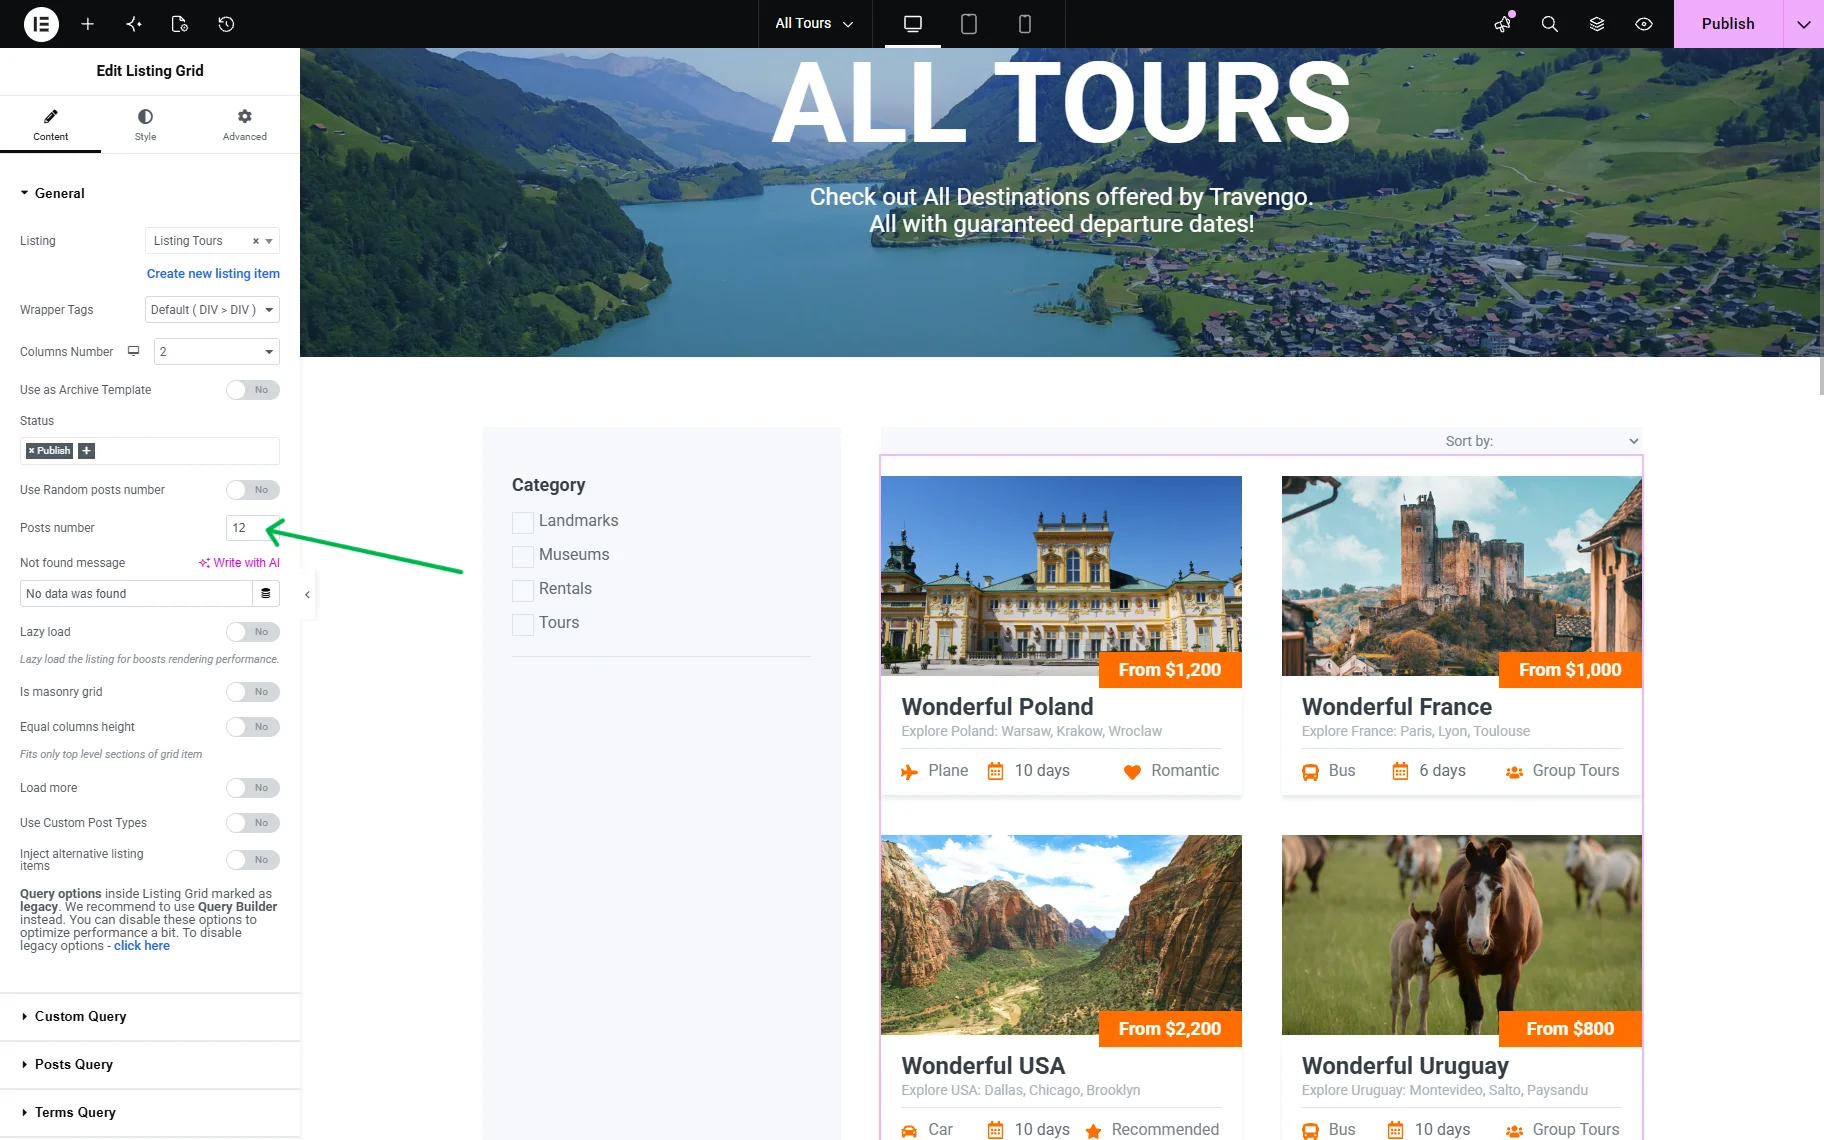
Another important setting that can affect the filters’ behavior is the Posts number setting in the Listing Grid widget/block/element or a custom query if applied.
Among the possible issues you may encounter are:
- posts duplication;
- incomplete filtering results;
- wrong number of posts.
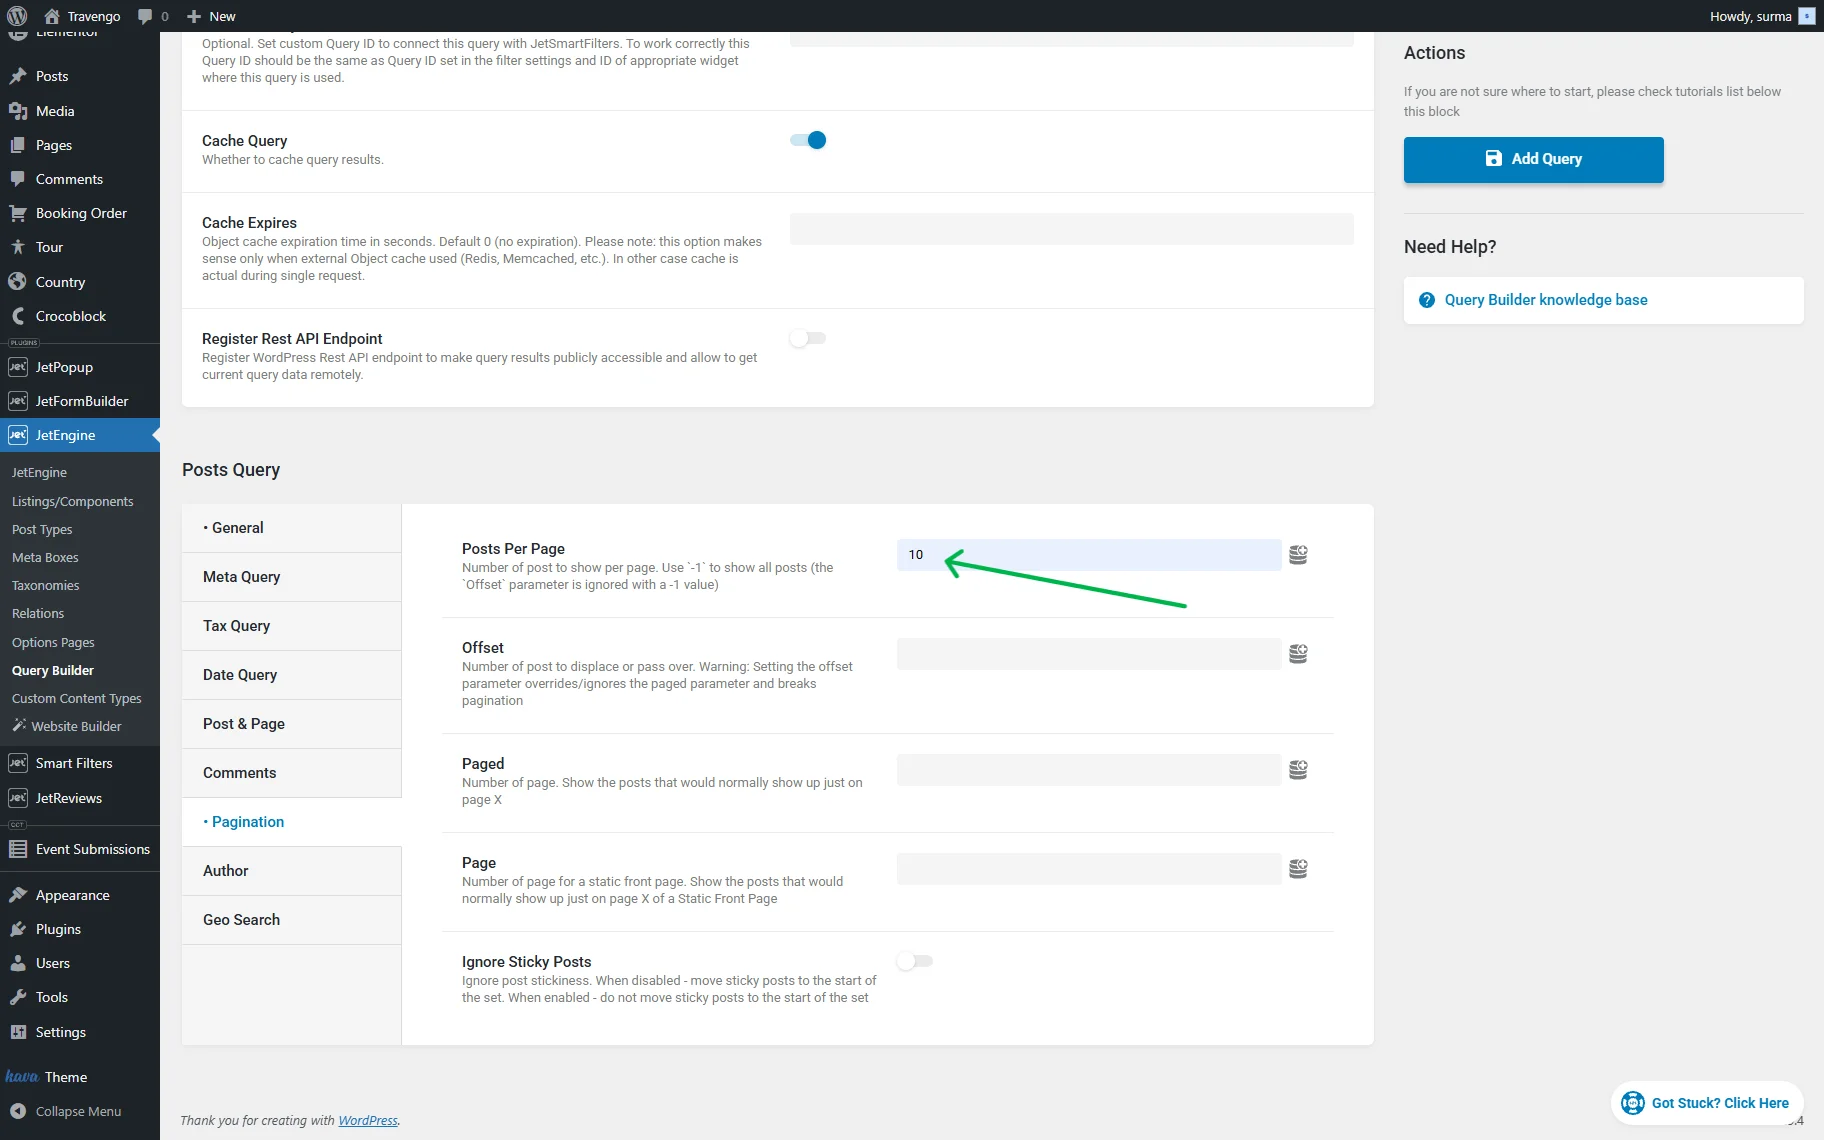
So ensure that the Posts number field defines at least as many posts as there are available in the filtered results. Additionally, you can try to set the correct number of posts in the custom query, following the Posts Query > Pagination > Posts Per Page field directory.
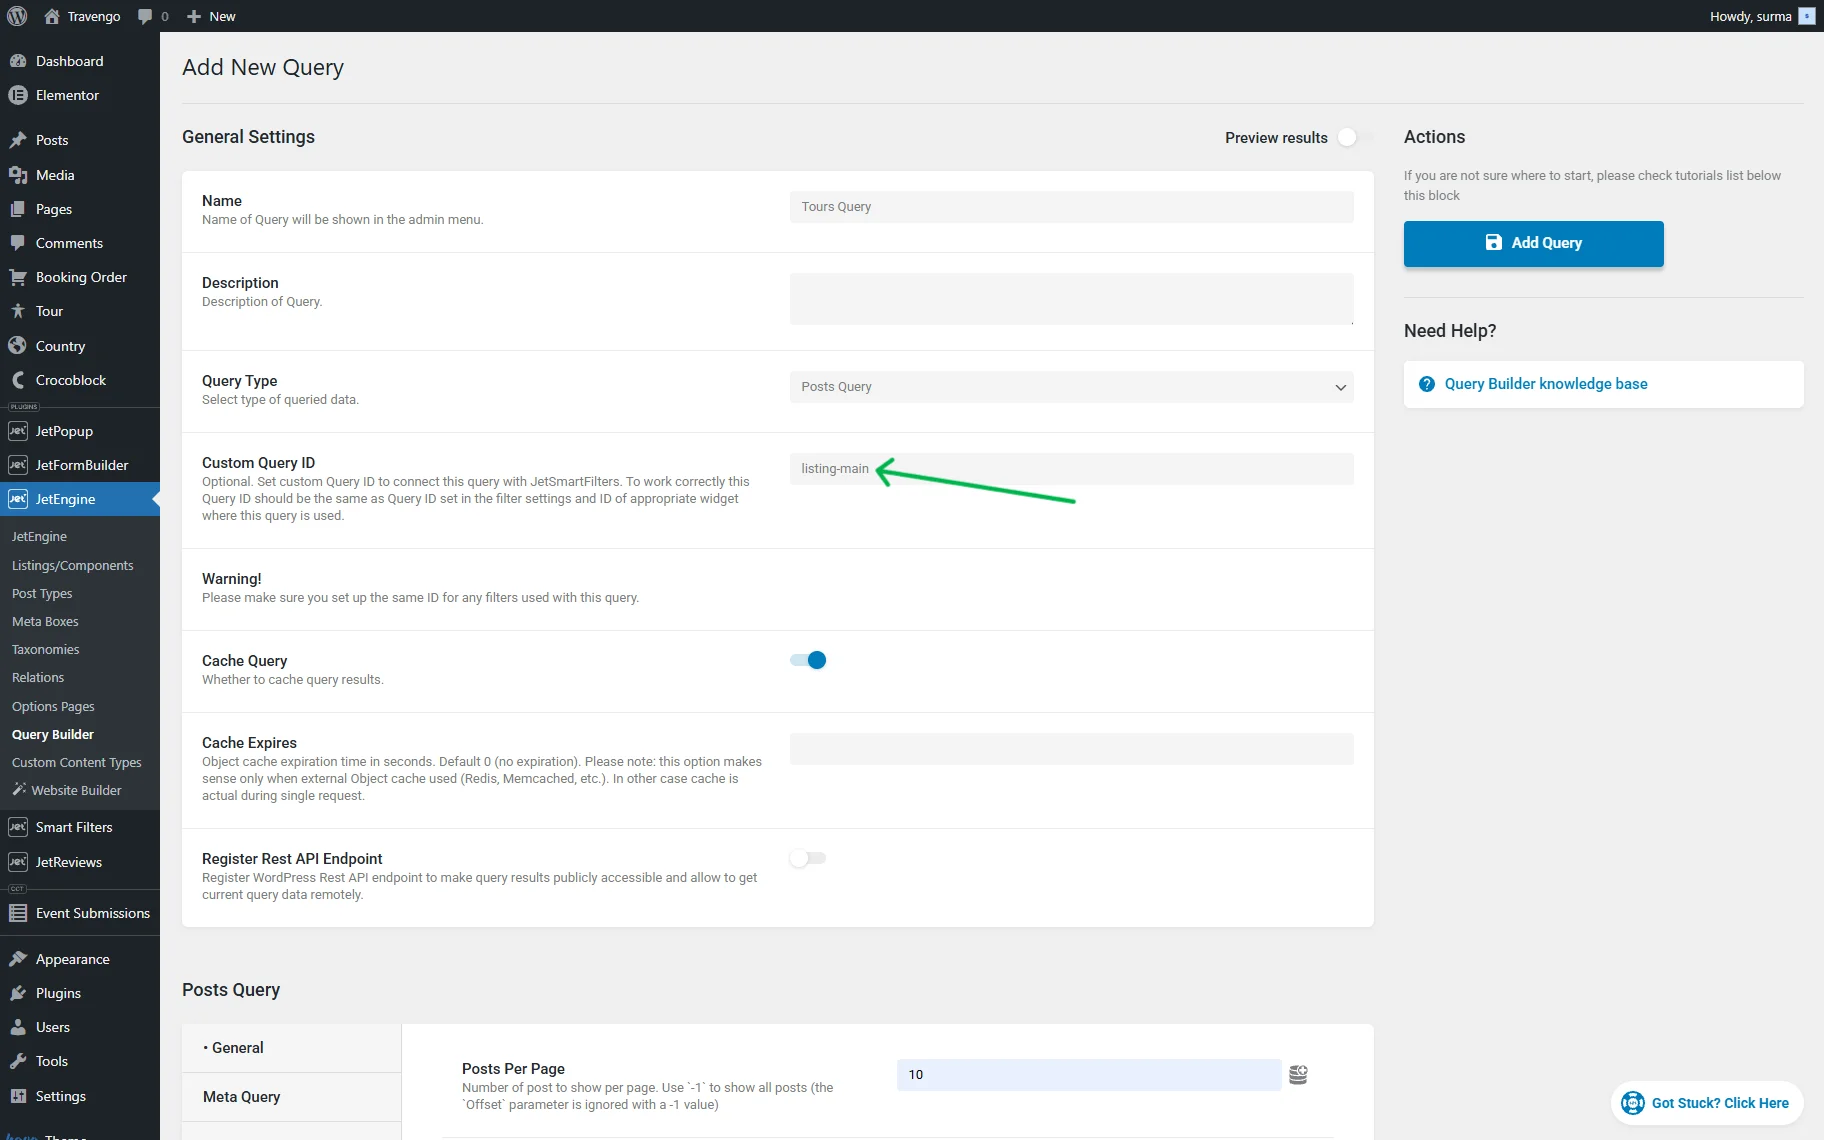
When Query ID is needed
By default, JetSmartFilters’ filters work without a Query ID. However, often the Query ID is required when using Query Builder or multiple grids/filters on one page. Refer to the How to Connect Filters with Providers Using Custom IDs guide to learn how to attach the Query ID to different providers.
The Query ID might be required when:
- there are multiple grids/filters on one page, and you need to connect filters to dedicated providers;
- there are several custom queries used on the page that prevent filters from working correctly.
For simple Listing Grid setups, the Query ID may not be necessary.
To set up the Query ID correctly, in the Query ID field of the filter widget, add the unique ID.

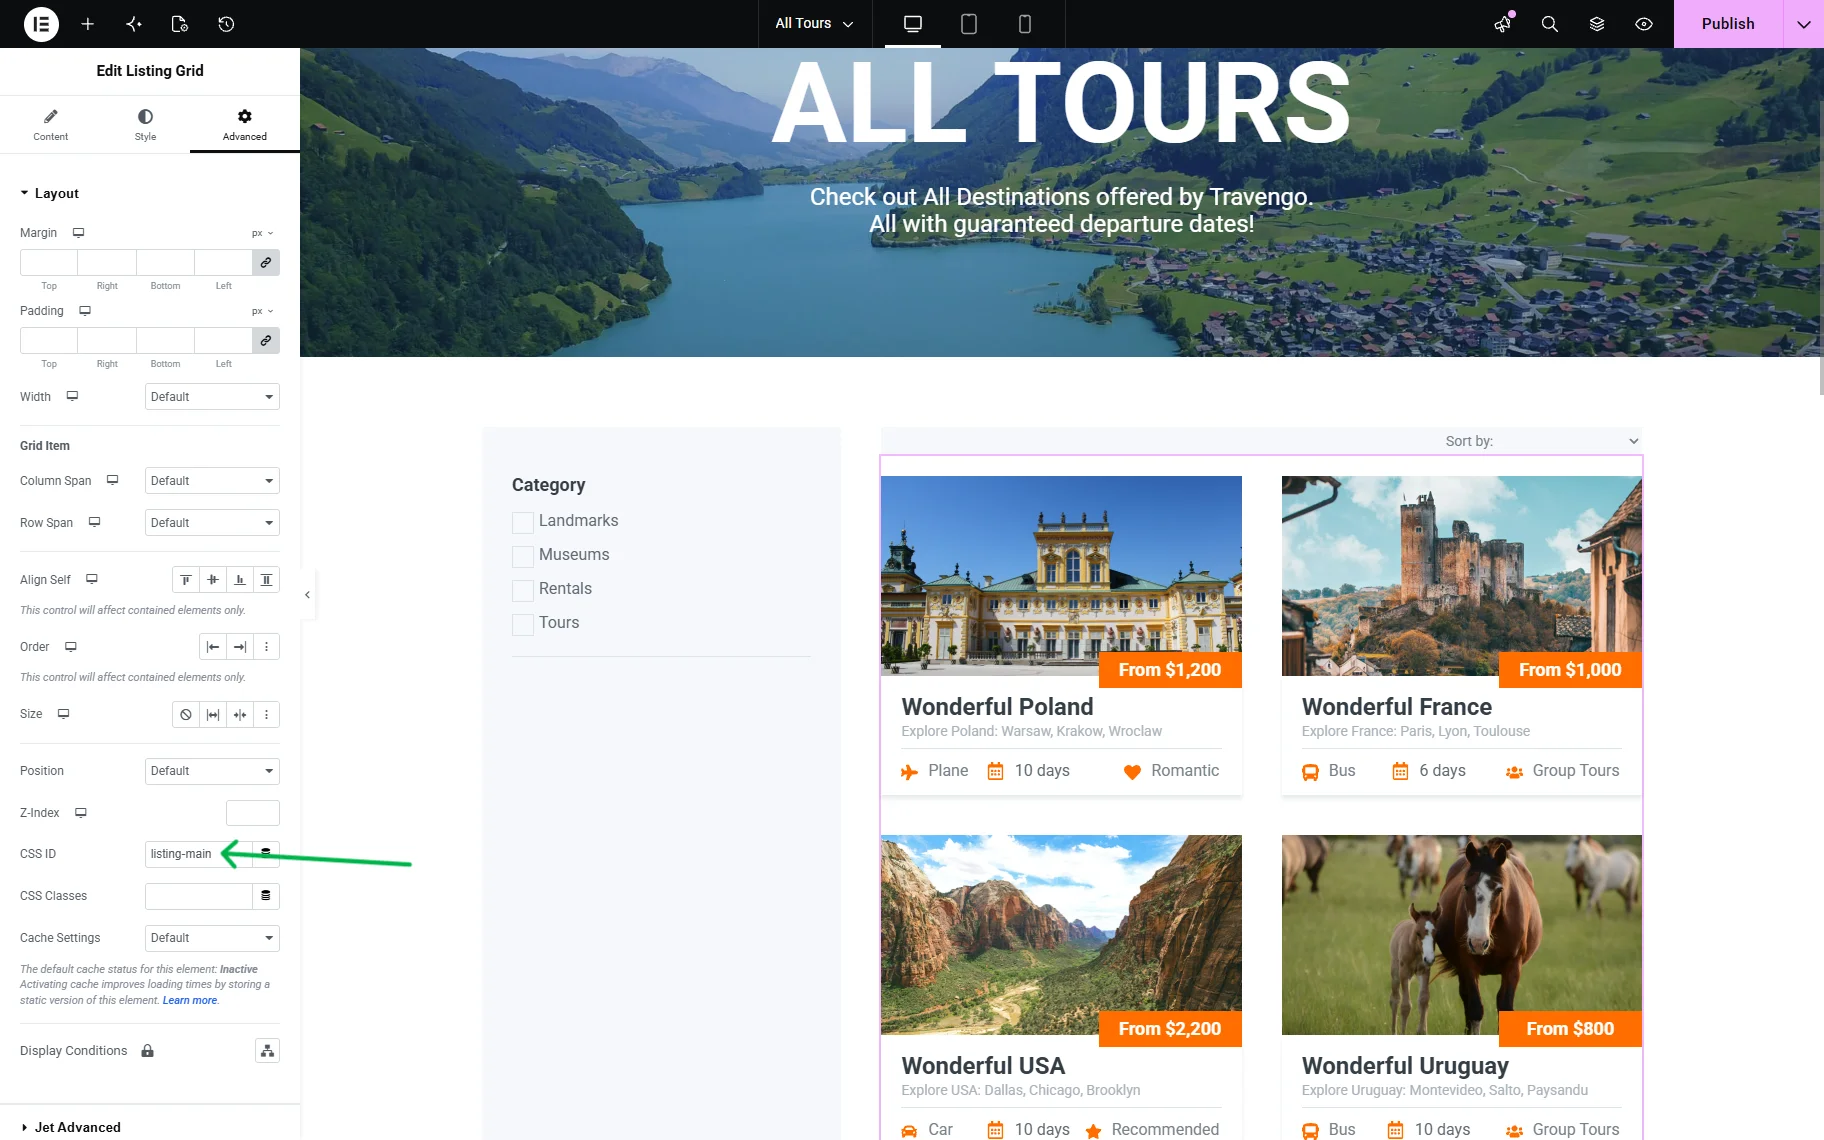
Proceed to the Advanced tab of the Listing Grid widget. Enter the same Query ID you used for the filter in the CSS ID field.
In case you have a custom query applied to the Listing Grid, apply the same Query ID to it in the dedicated field.
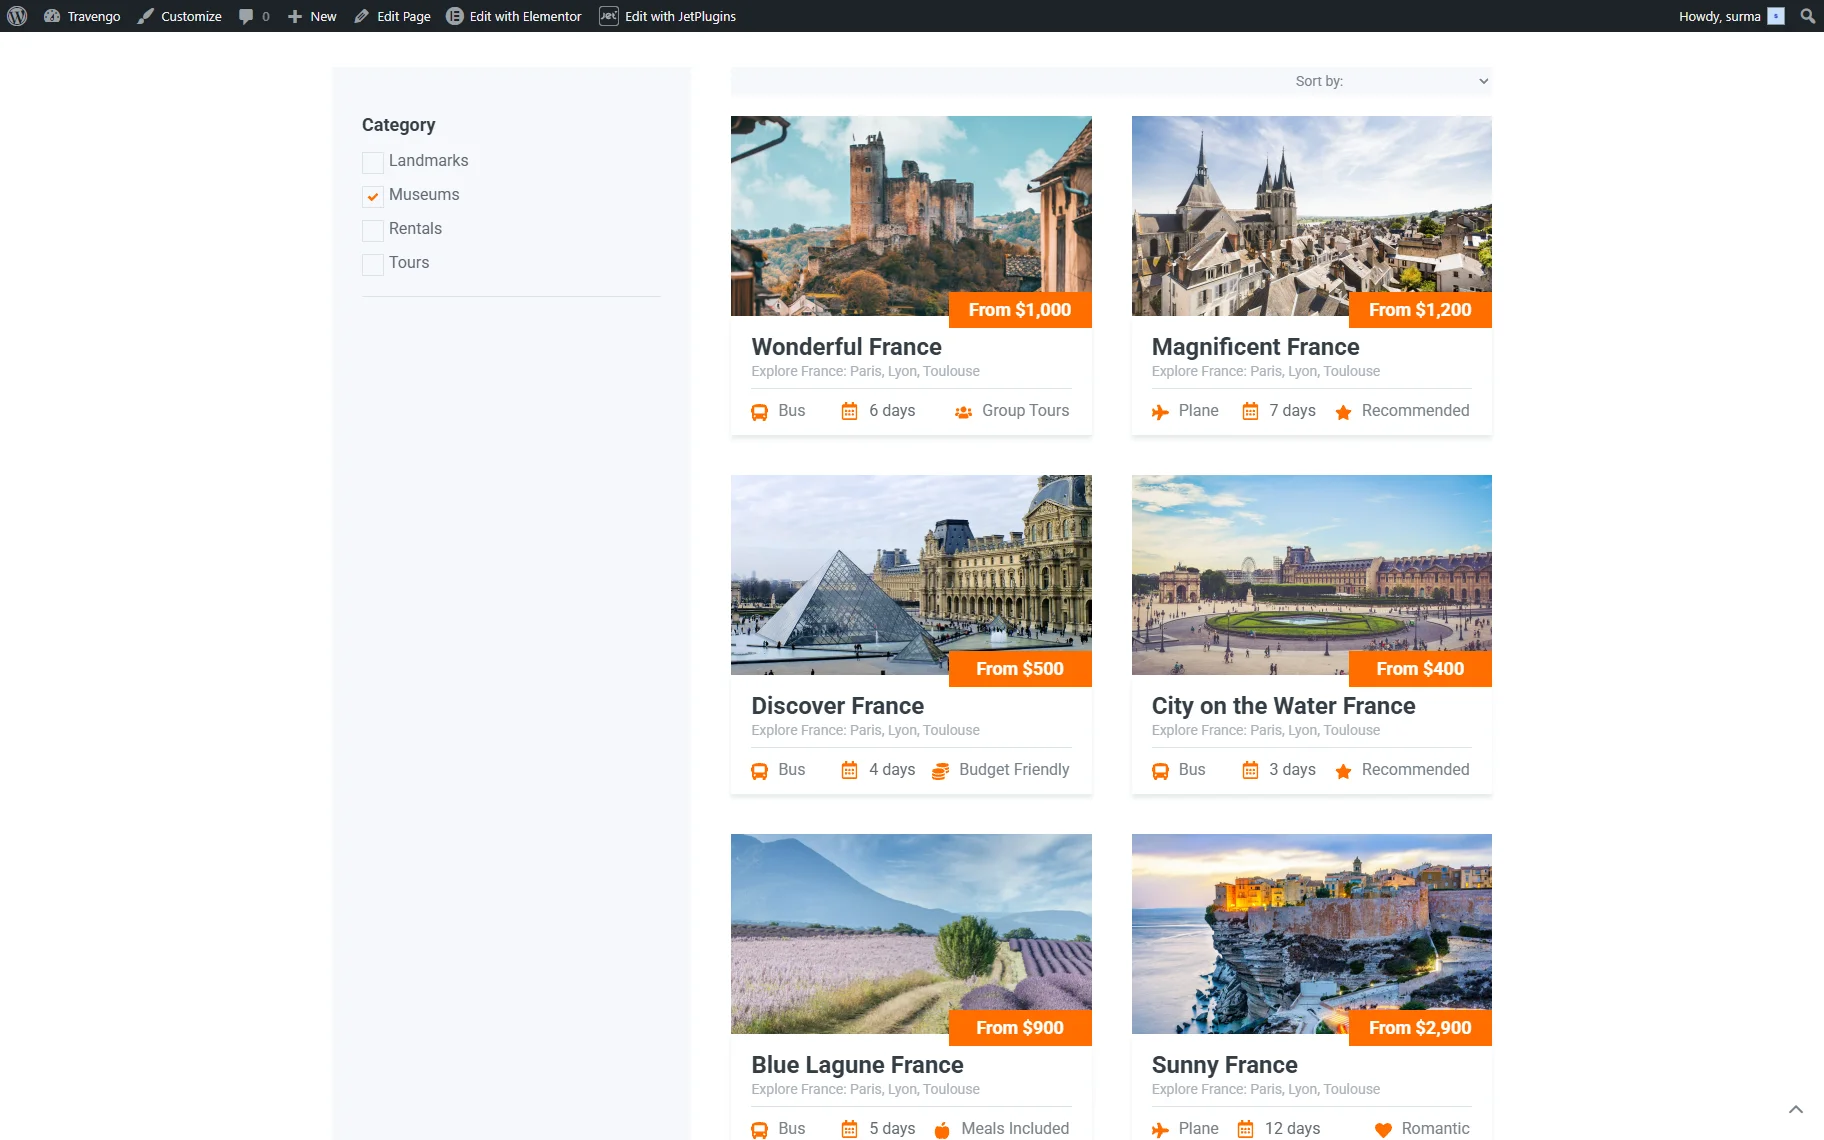
Check the Result
Ensure you clicked the “Publish” button on the page where the filter is applied and update the custom query if you used one.
On the frontend, the filter is successfully applied to the Listing Grid.
FAQ
Usually, this happens because the wrong provider is selected in the This filter for field. When filtering the Listing Grid widget/block/element, the provider should be set to “JetEngine.” Additionally, ensure that the provider is enabled in WordPress Dashboard > Smart Filters > Settings > General Settings and that the filter and Listing Grid are connected correctly.
The Apply Type defines how the filtered results are updated on the page:
– AJAX updates results instantly without reloading the page;
– Mixed updates results without reload and stores filter values in the URL;
– Page Reload refreshes the entire page after applying filters.
AJAX is commonly used for smooth filtering experiences, while Mixed and Page Reload are helpful when you need shareable filtered URLs or SEO-friendly archive pages.
The behavior depends on the selected Apply Type.
With the AJAX Apply Type, the URL does not change after filtering, so the browser “Back” button returns users to the previous page instead of the previous filter state.
The “Mixed” and “Page Reload” Apply Types save filter values in the URL, allowing users to return to previous filtered results using the browser navigation.
For simple setups, a Query ID is usually unnecessary. However, it becomes important when:
– there are multiple Listing Grids or filters on the same page;
– you use Query Builder queries;
– several providers or custom queries are connected on one page.
In these cases, the same Query ID should be added to the filter widget/block/element, Listing Grid widget/block/element, and custom query settings.
This usually happens because the Posts number setting in the Listing Grid or the Posts Per Page value in the custom query is smaller than the total number of matching posts. When the available number of loaded posts is limited, filtering may produce incomplete results, duplicated posts, or incorrect pagination behavior.
That’s it. Now you know how JetSmartFilters’ filters work with the JetEngine Listing Grid widget/block/element on your WordPress site.