How to Create a Product Quick View Popup with Click on Widget Trigger Event
From this tutorial, you will learn how to create a quick product view using JetWooBuilder and JetPopup plugins.
Receiving the details about an item from a popup window is much more convenient for the customer than switching to a separate page. That’s why “Quick View” buttons are so popular on online store websites. To create a popup with the details about the product you will additionally need a JetPopup plugin, so make sure you installed it.
Create a Popup
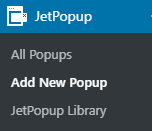
First of all, open your WordPress Dashboard and go to the JetPopup > Add New Popup submenu.
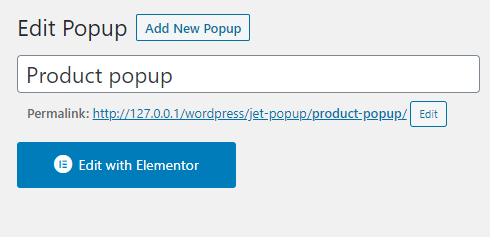
Give your popup a name, and click the “Publish” button. Afterward, hit the “Edit with Elementor” button.
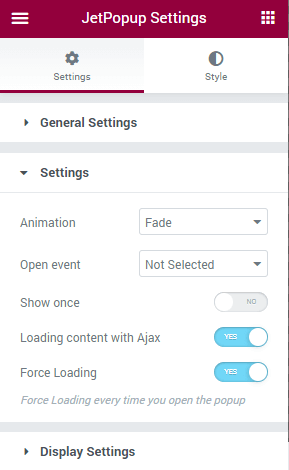
Pay attention that we leave this popup empty, although, we still have to enable the Loading content with Ajax and Force Loading toggles in the JetPopup Settings, which you can find if you click the gear icon at the very bottom-left corner of the Elementor panel.
Click the “Update” button and go back to the WP Dashboard.
Create a Single page template
Proceed to the JetPlugins > Jet Woo Template menu tab and click the “Add New Template” button at the top to create a new template.
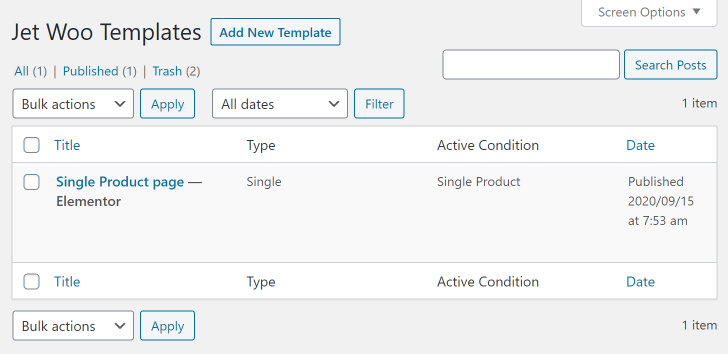
In This template is for: dropdown select the “Single” option. Then, give your template a name in the Template Name text field and click the “Create Template” button.
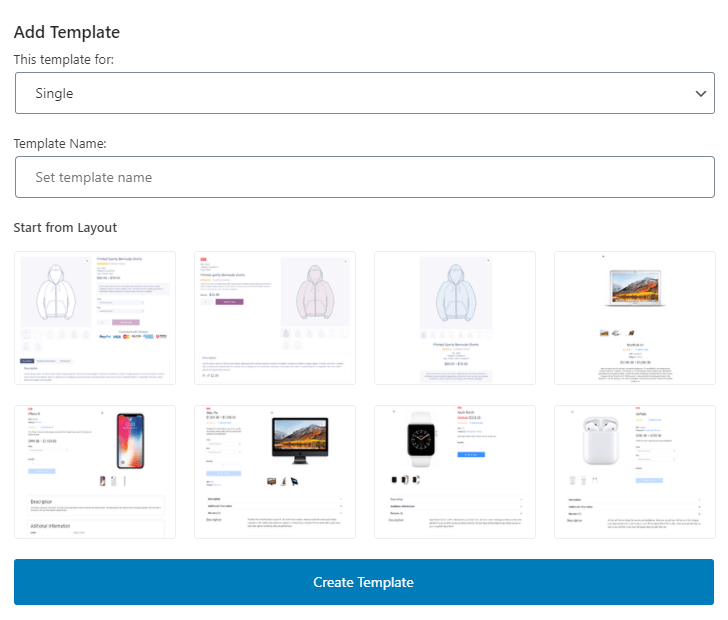
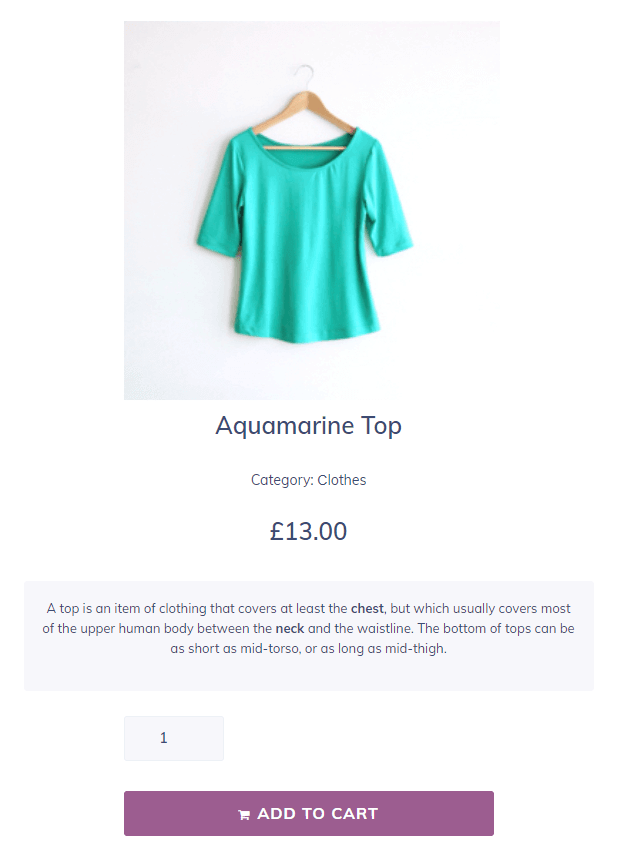
We have to fill this template the way we want our future quick view to look like. It can be an image of the product displayed with the help of the Single Image widget, the name of the product displayed with the help of Single Title widget, some metadata such as SKU, categories; the price, the description, the add to cart button, etc.
Click the green “Publish” button to save the changes.
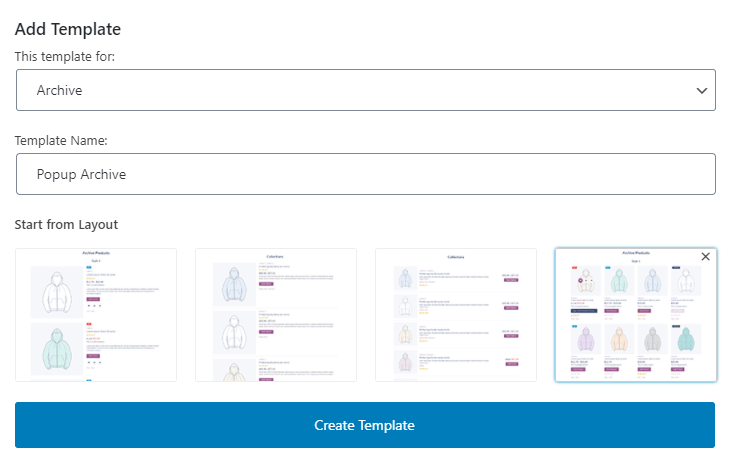
Create Archive template
Exit to Dashboard. Open JetPlugins > JetWooTemplates and click the “Add New Template“. Choose the “Archive” type of template. Select the pre-made layout.
Drag and drop the Button widget to the working area. Open the Advanced Settings tab and unfold the JetPopup accordion block. Here you have to turn the Jet Woo Builder Quick View toggle on.
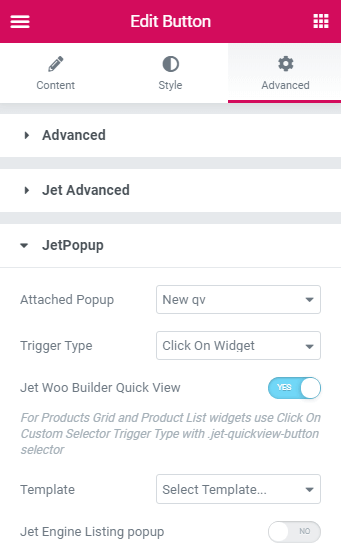
In the Attached Popup dropdown, choose the empty popup template you have created beforehand. Please make sure to select the “Click on Widget” option in the Trigger Type menu feature.
Move down to the Template dropdown, where you have to select the template of a Single page you have created earlier. When this is done, click the “Publish” button.
Add Products Loop to the Shop page template
Open JetPlugins > Jet Woo Templates and create a Shop page template. If you have any problems with that – check out our Shop creation tutorial. Be aware, that it has to contain a Products Loop widget, so if you haven’t done that before, add it now. Assign the created template to the websites page in the WooCommerce > Settings menu window.
In the same window move further to the Product Archive section and tick the Custom Product Archive option so that you are able to assign a custom archive page. Finally, select the created archive template in the Product Archive Template dropdown and click the “Save” button at the bottom of the page to save all the changes.
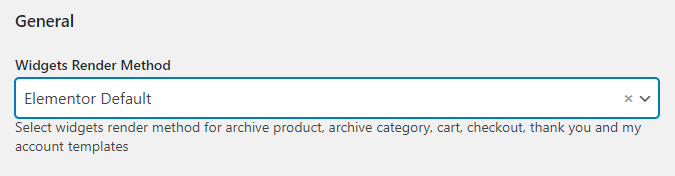
Now you should proceed to the General block and choose the Elementor Default template.
Add Products Grid to the Shop page template
There’s also an opportunity to add Quick View to the Products Grid widget.
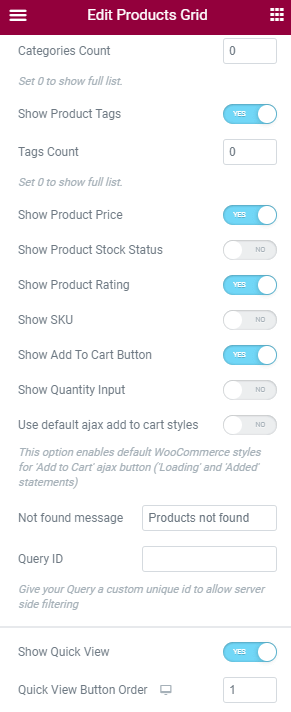
Firstly, you need to add the Products Grid to your Shop page. In the General settings block enable the Show Quick View option.
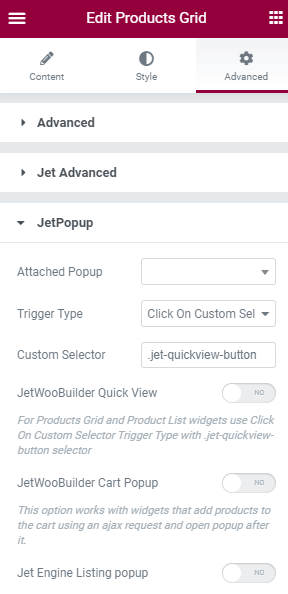
Then, go to the Advanced settings > JetPopup and select your empty popup. The next step is to choose Click on Custom Selector Trigger Type and add the following custom selector – .jet-quickview-button
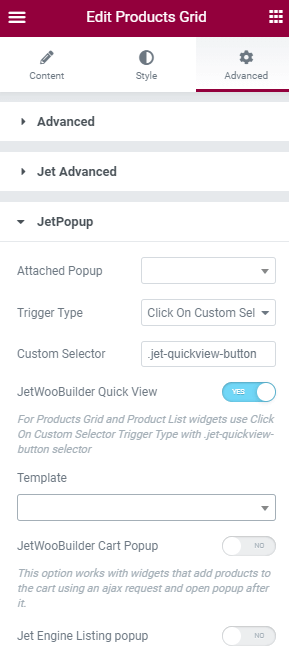
Don’t forget to enable the JetWooBuilder Quick View option and select the needed template below.
Now go to your shop page and see what it looks like!