Sending Form Submissions to a Related User Email
This guide explains how to send an email to the related user’s email address. You will learn how to set up a custom query and a form that sends the form data to the related user's email address field using the JetEngine and JetFormBuilder WordPress plugins.
Before you start, check the tutorial requirements:
- Elementor (Free version)
- JetFormBuilder plugin installed and activated
In this case, we use the Relation between posts and users. When the post is updated, we need to send the updated information to the user related to this post.
Adjust an SQL Query
Proceed to WordPress Dashboard > JetEngine > Query Builder and click the “Add New” button.
Enter the Name for a query and select the “SQL/AI Query” Query Type.
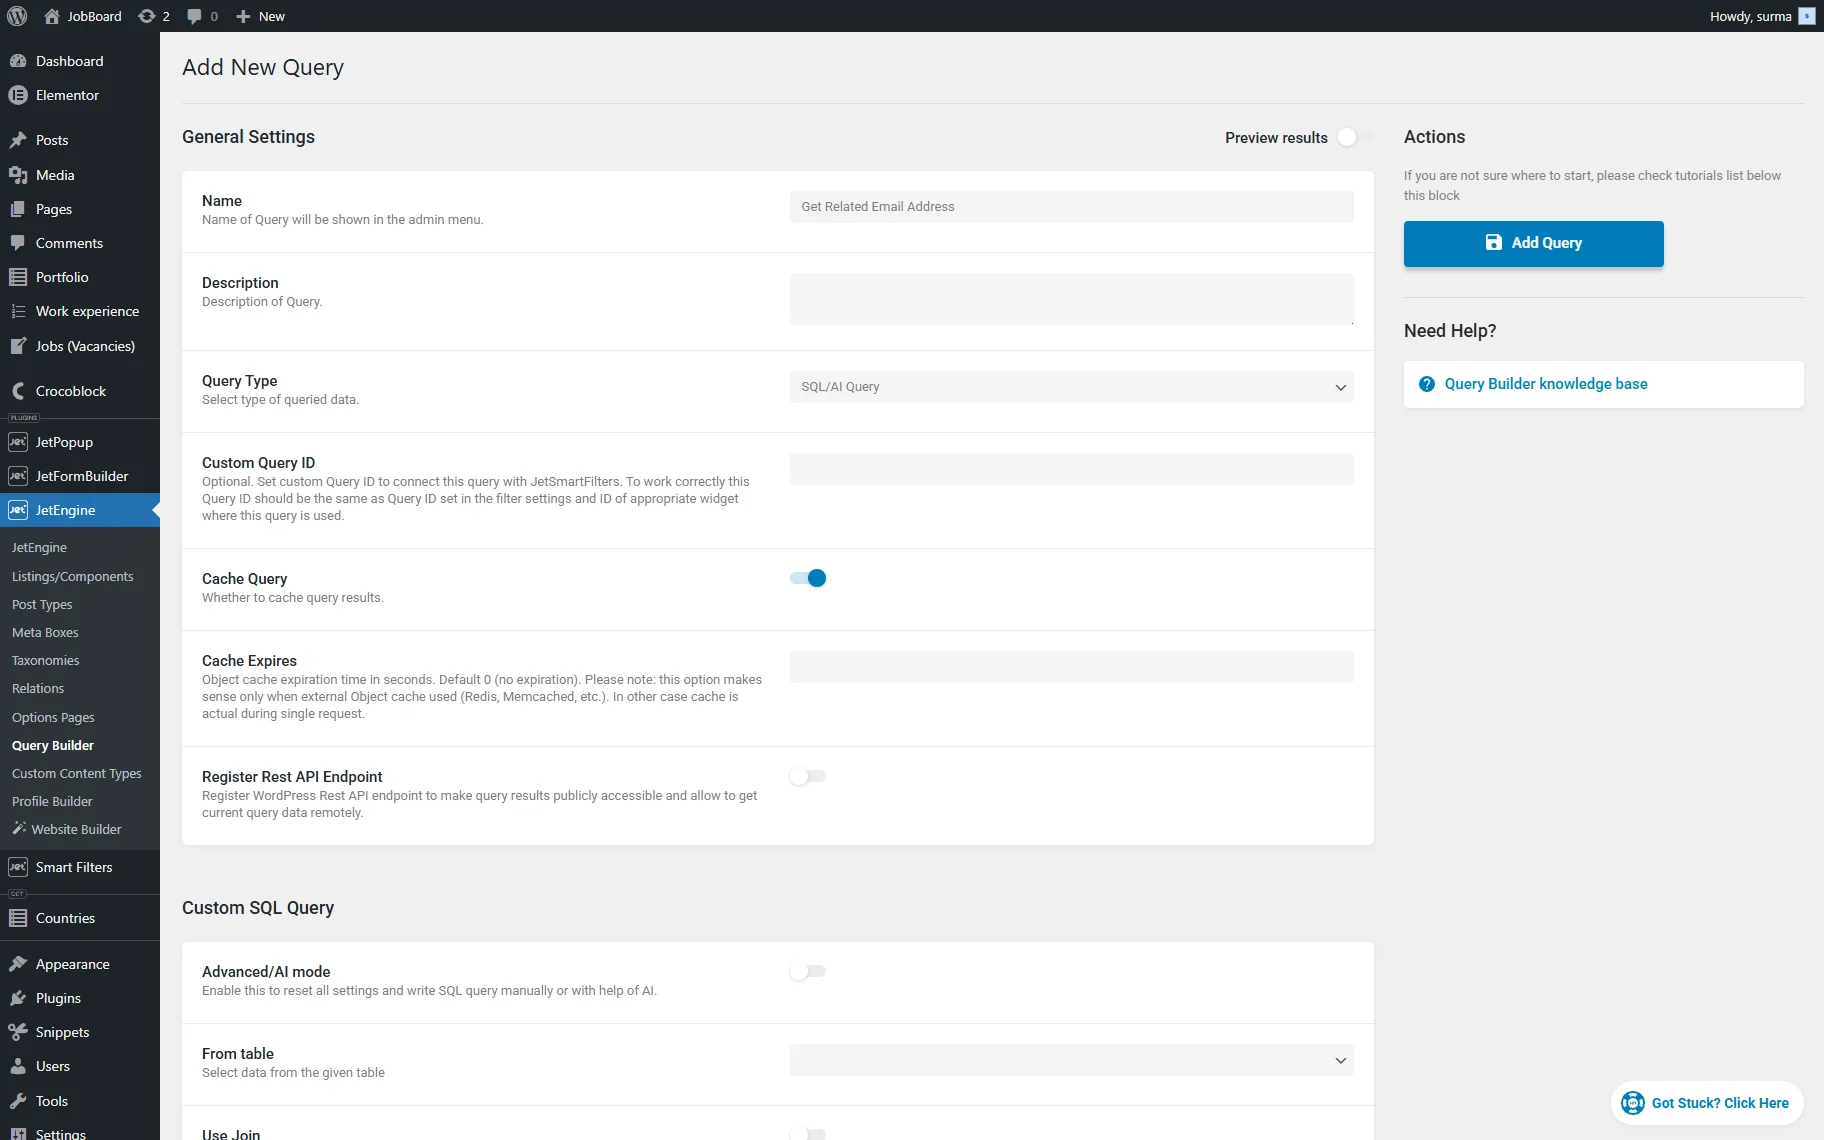
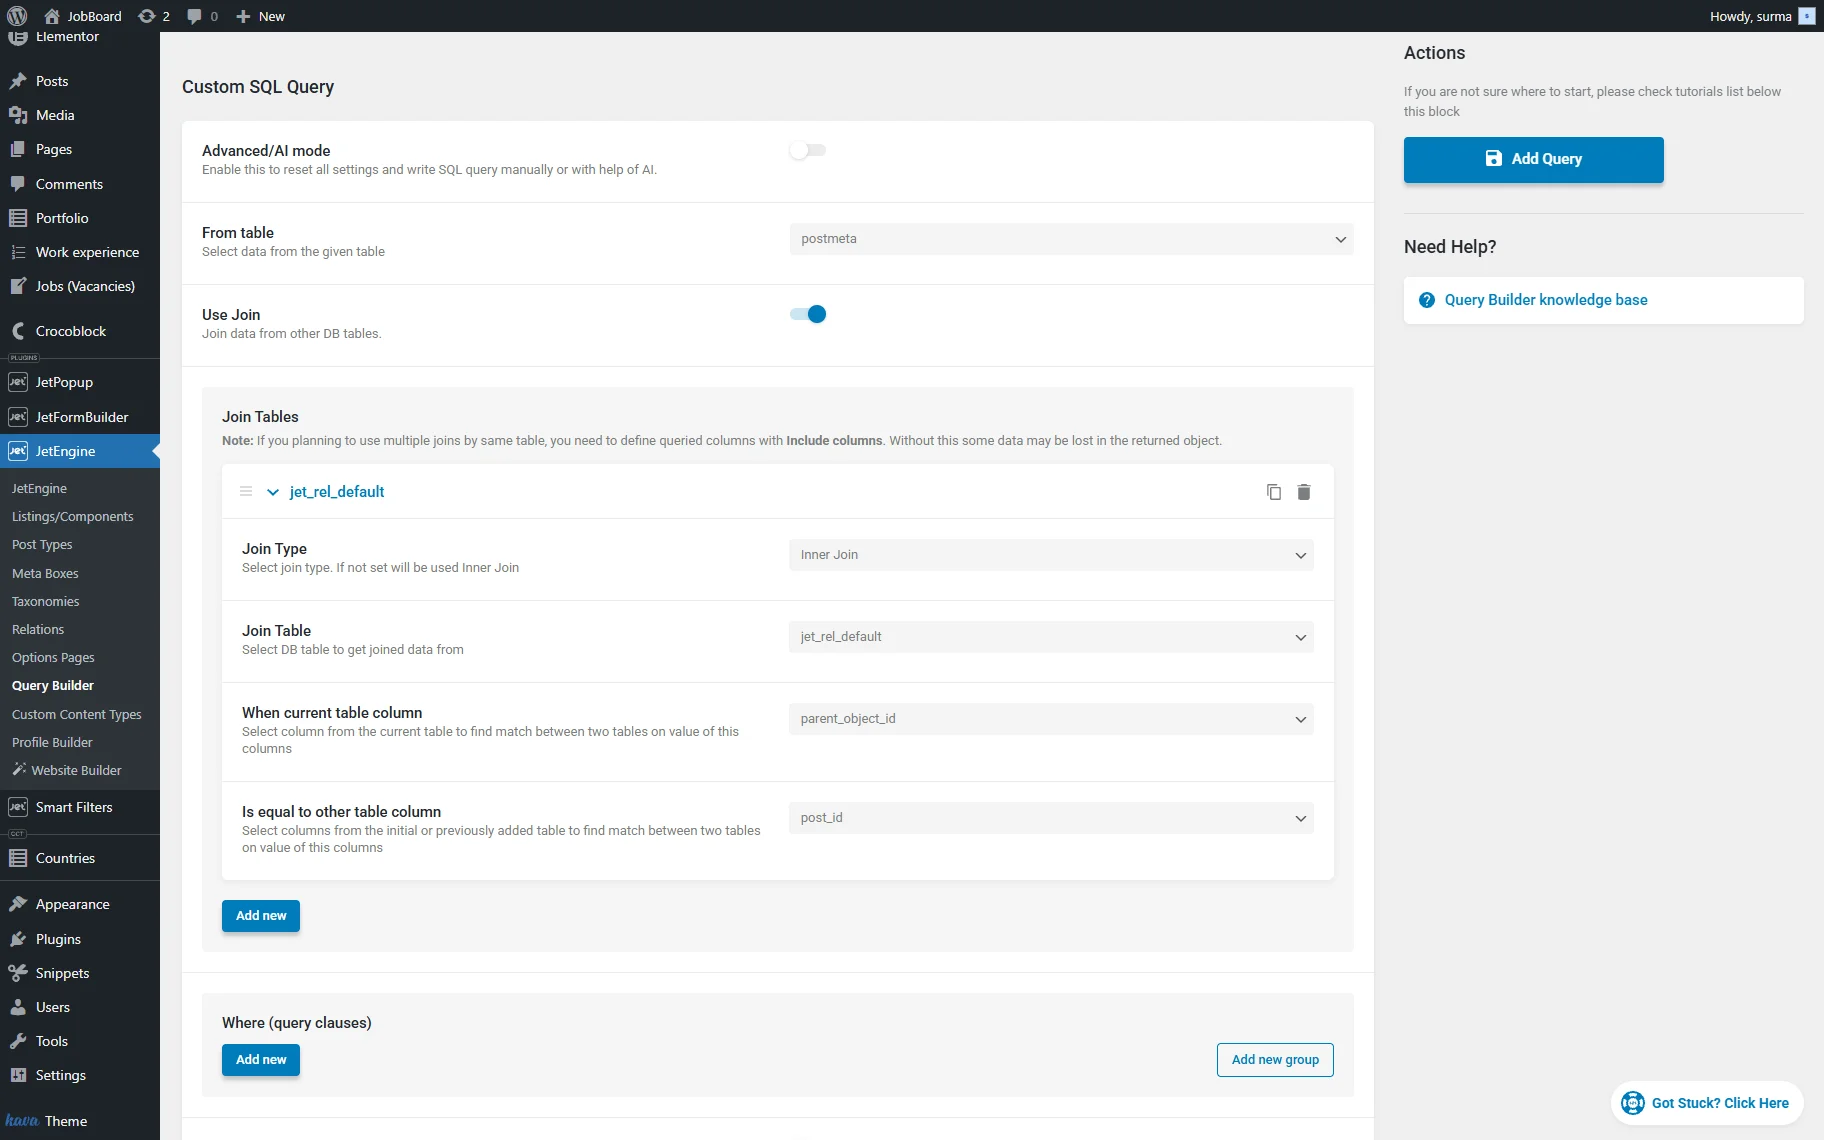
In the From table dropdown, select the “postmeta” option.
Enable the Use Join toggle. In the Join Tables, click the “Add new” button. For the Join Type, select the “Inner Join” option. Choose the “jet_rel_default” option for the Join Table. In the When current table column field, select the “parent_object_id” option. For the Is equal to other table column dropdown, select the “post_id” option.
In the Where (query clauses) section, click the “Add new” button.
Select the “jet_rel_default.child_object_id” option for the Column field, and the “Equal (=)” operator for the Compare input. For the Value field, click the “Dynamic Tag” icon and select the “Current user ID” option.
Click the “Add new” button again. Now, select the “postmeta.meta_key” for the Column field. Choose the “Equal (=)” operator for the Compare dropdown. In the Value input, enter the email address meta field from which to pull the data.
In the Where Relation dropdown, select the “And” option.
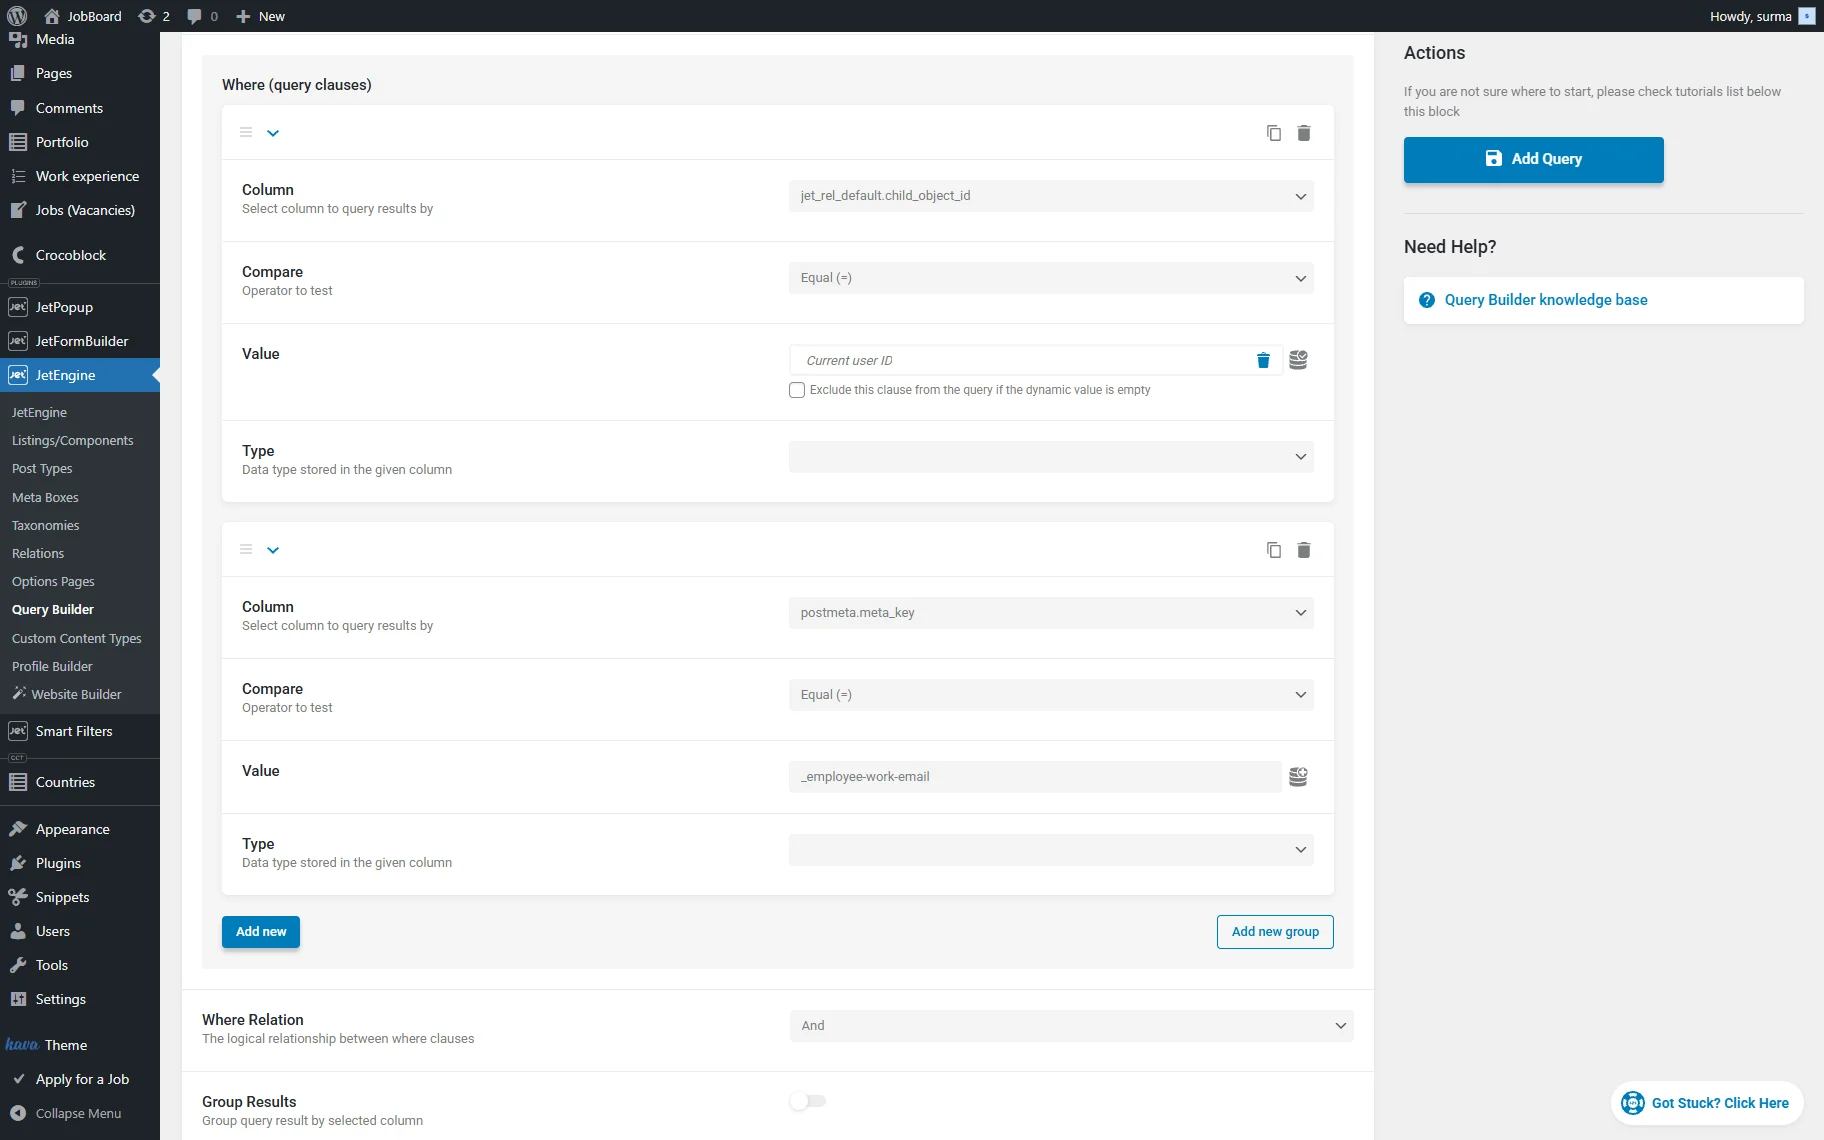
Click the “Add Query” button once you are ready. This SQL query retrieves the related data and returns the meta field containing the email we need.
Generate a Macro
Proceed to WordPress Dashboard > JetEngine > JetEngine > Macros Generator. For the Macros field, select the “Query Results” option. In the newly appeared Query field, select the query you created earlier. For the Return dropdown, select the “List of selected fields from item object” option. In the Comma-separated fields list field, enter the “meta_value” value.
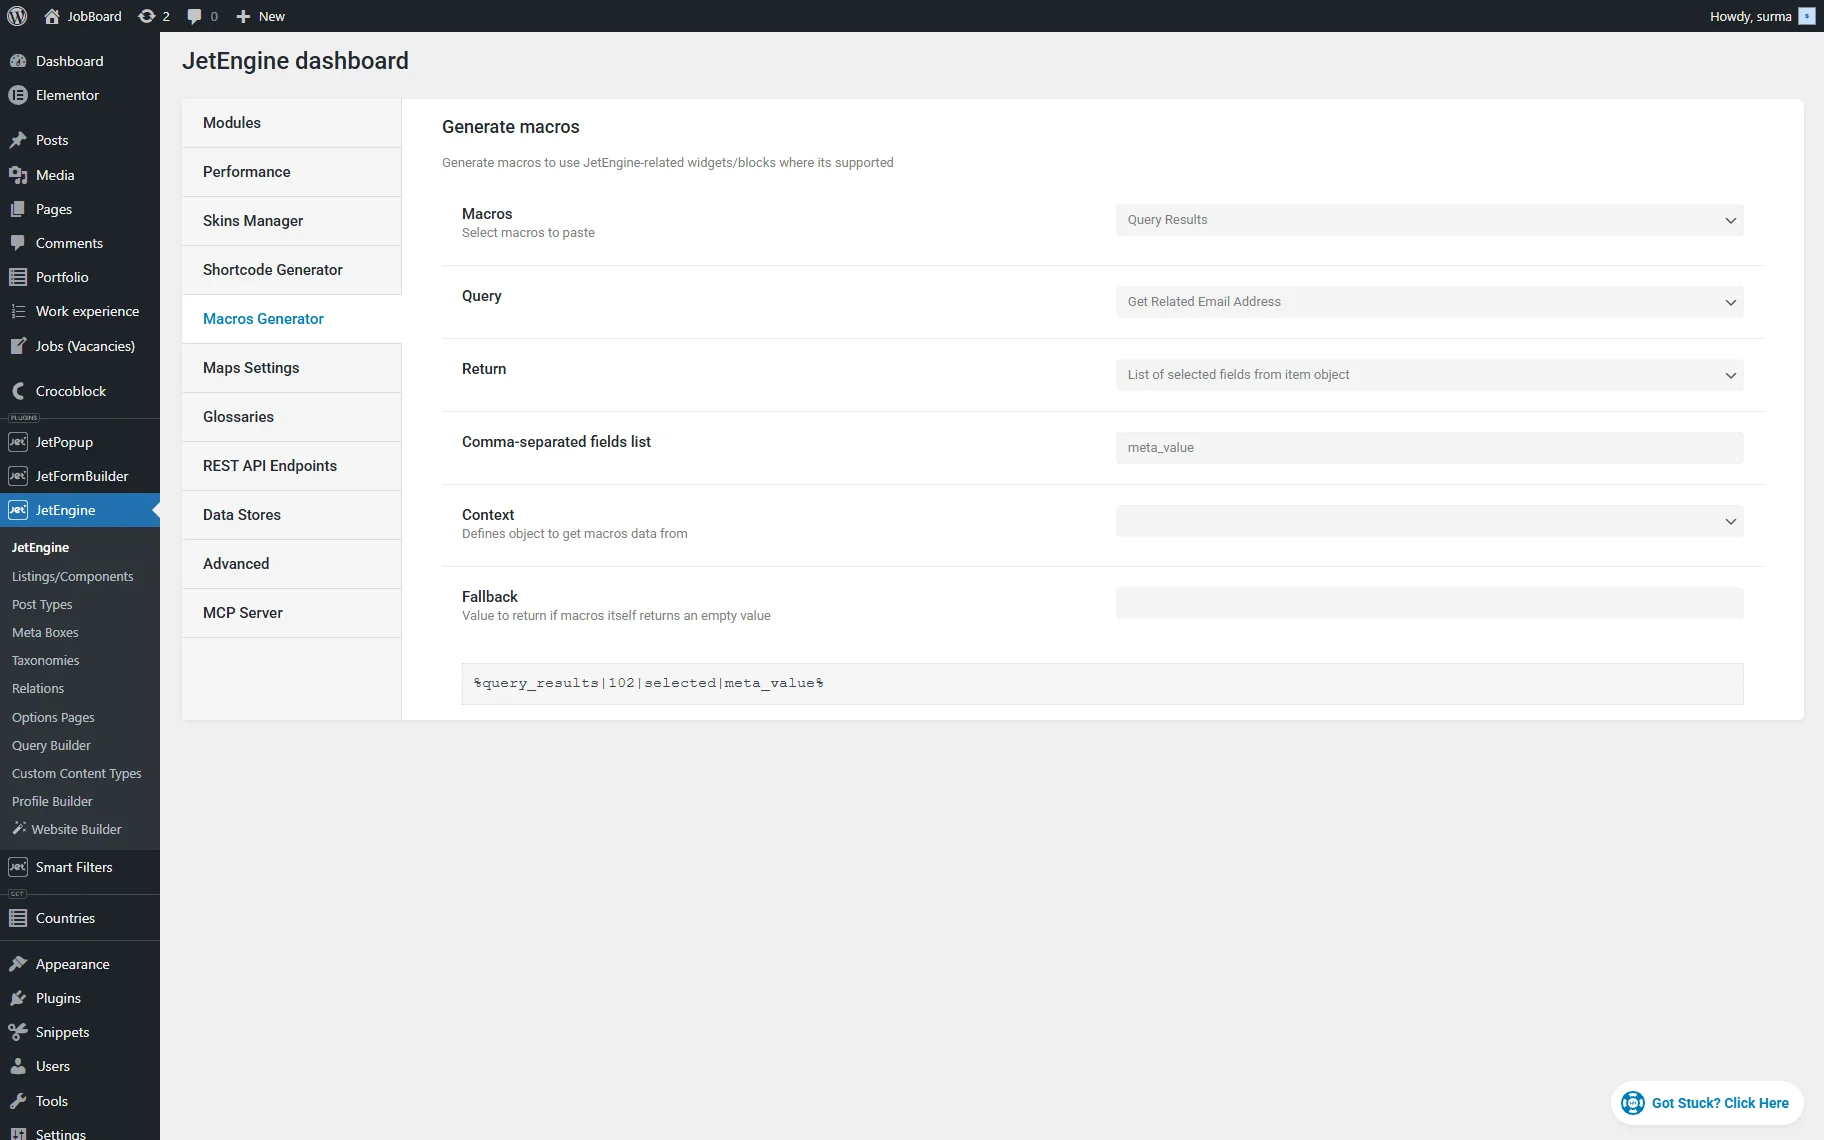
Copy the macro you get, and keep it for now.
Add the Code
Add the following code to the functions.php file of the child theme, or into the Code Snippets plugin, or any other plugin for code snippets.
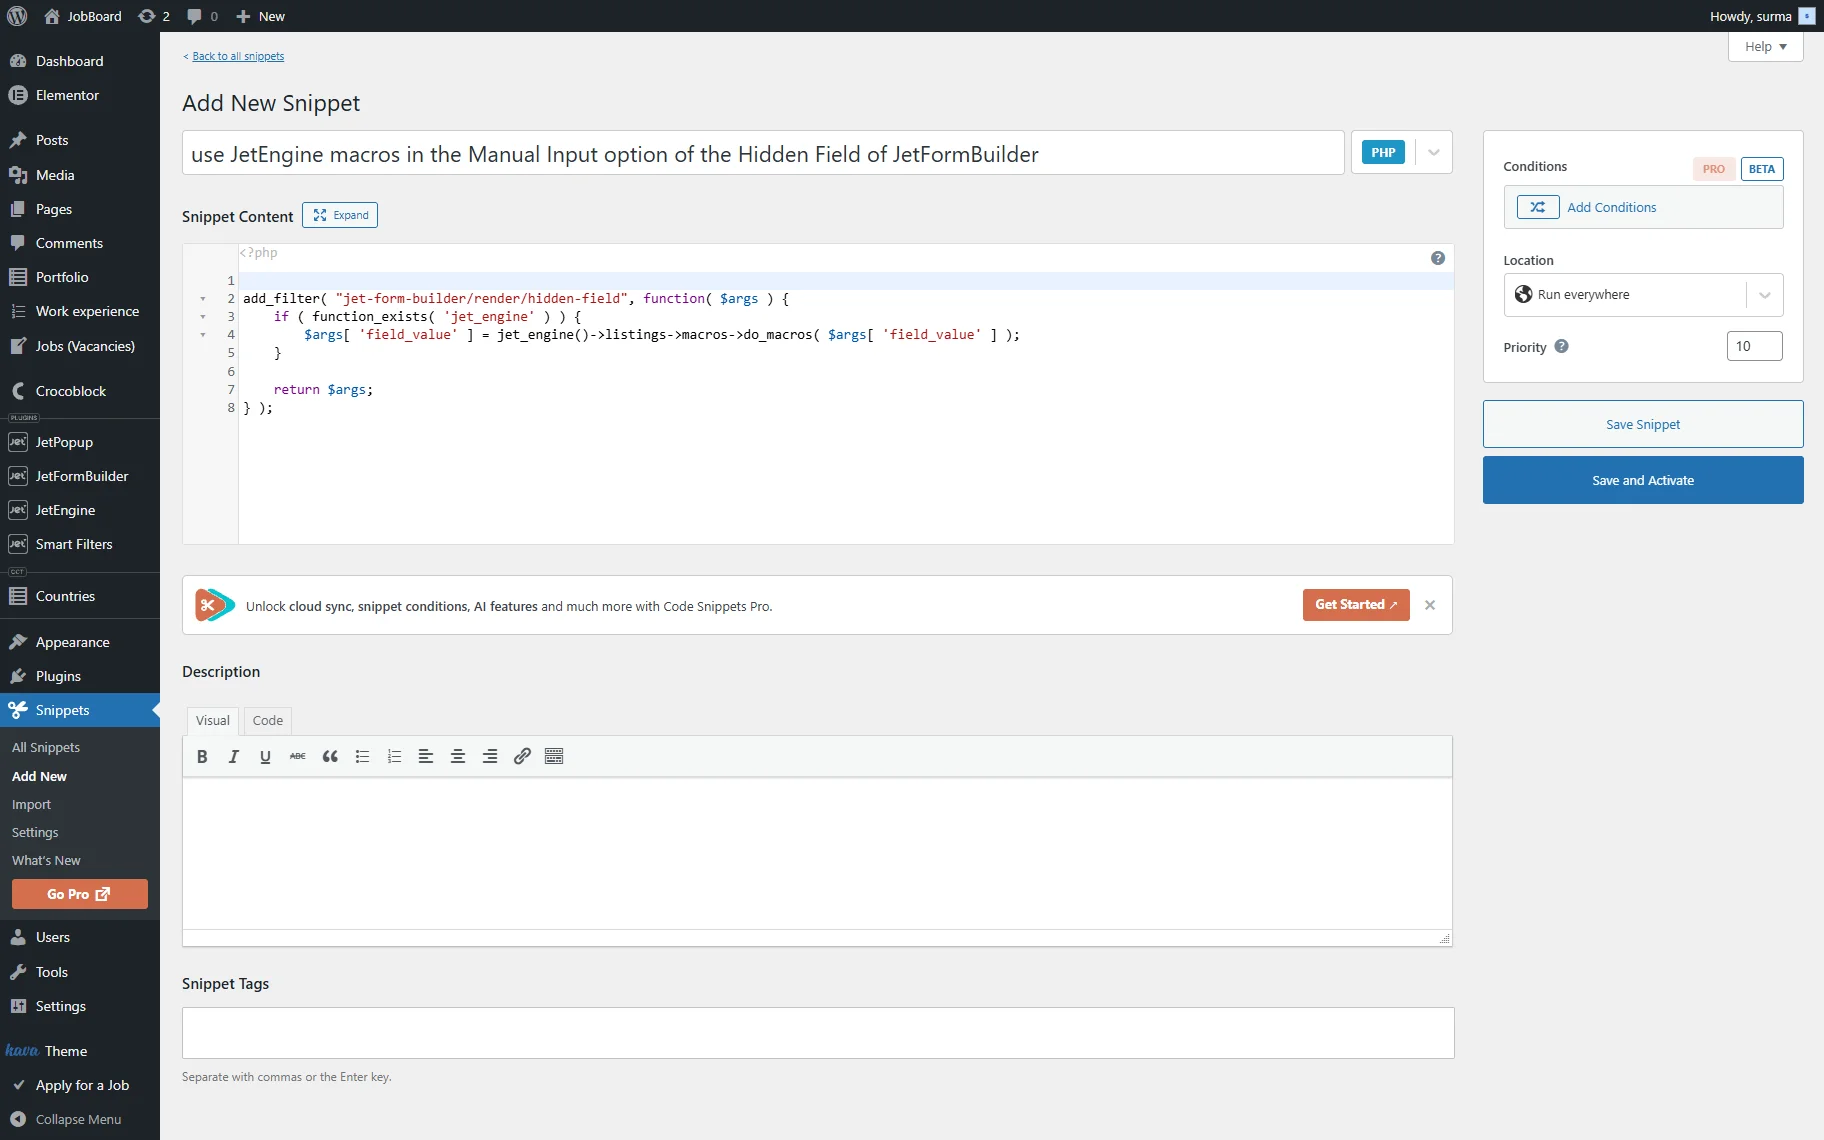
In this case, we use the Code Snippets plugin. Click the “Save and Activate” button.
Form Set-Up
Proceed to the form you need to edit. In this case, we use a post-update form to send the updated information to the related user.
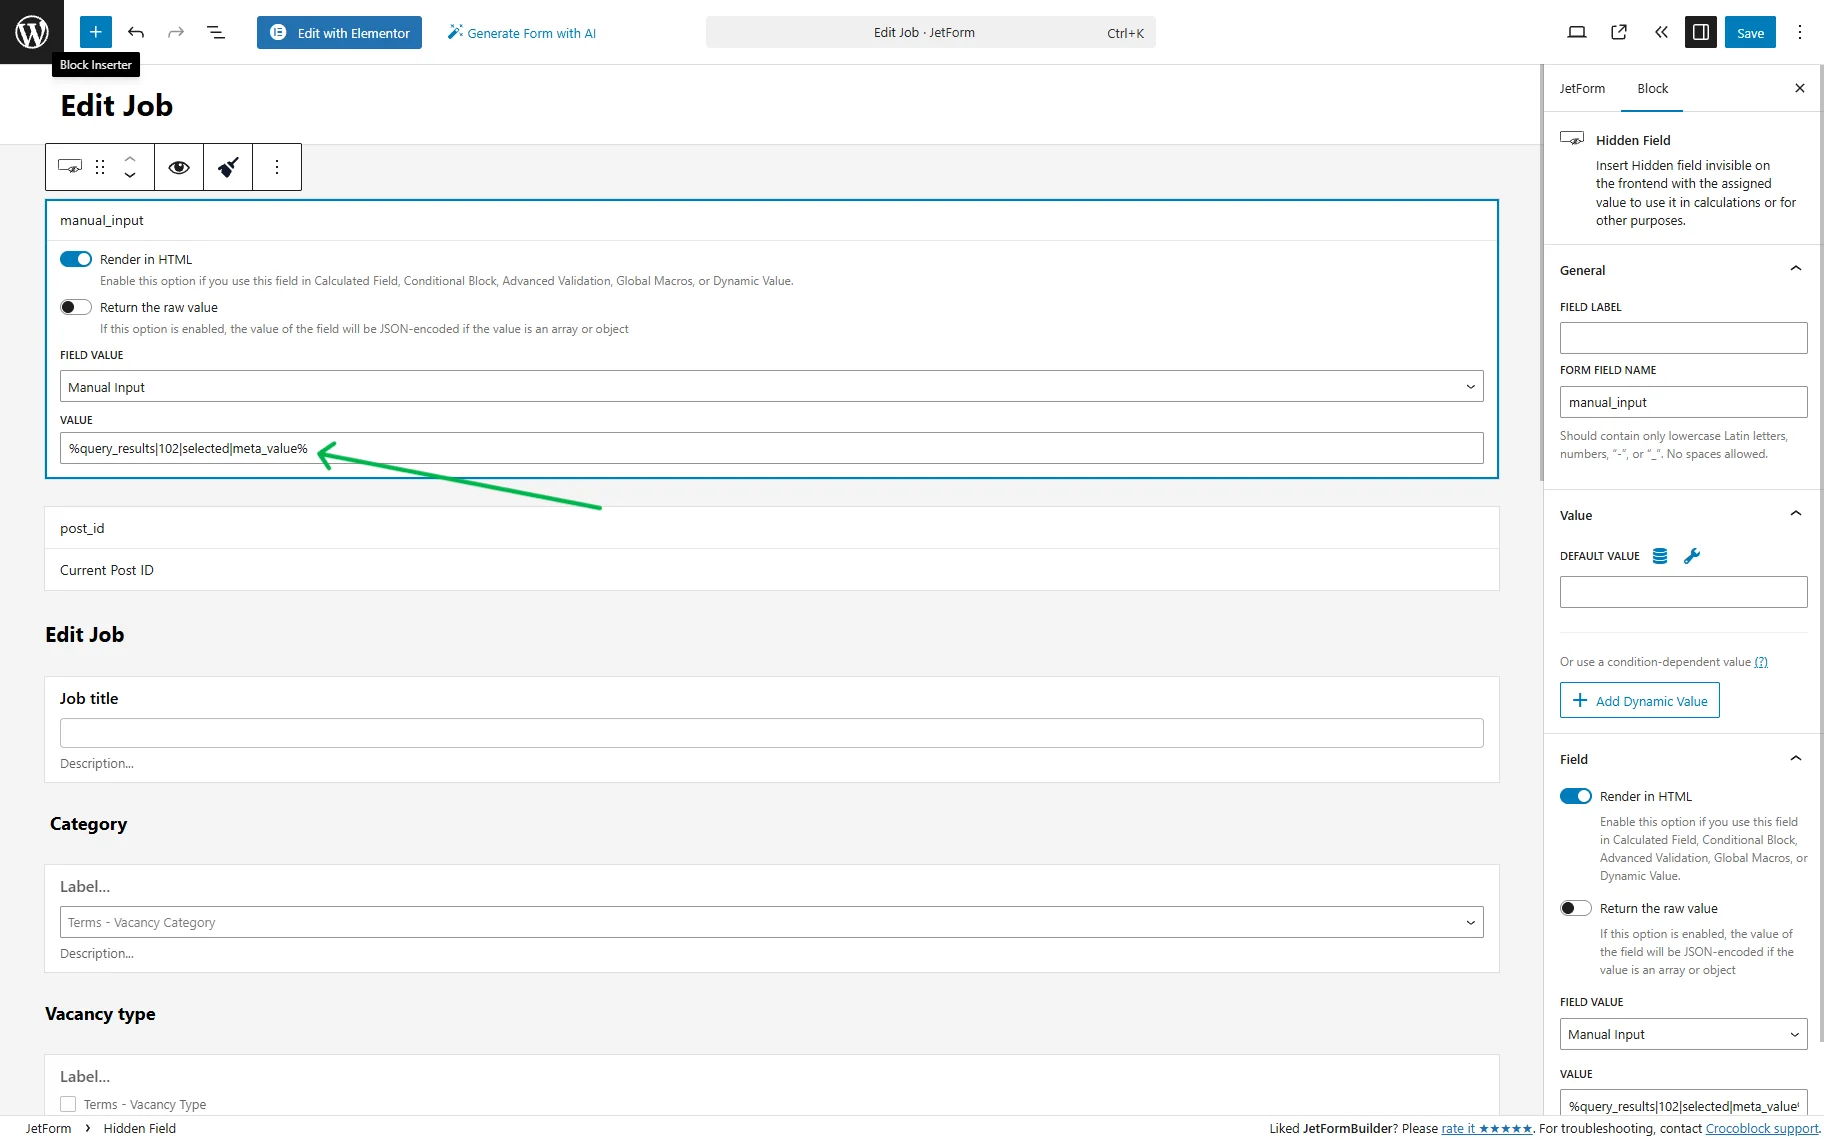
Alongside the fields for the post update, add a Hidden Field with the “Manual Input” FIELD VALUE. In its VALUE field, add the macro you created earlier.
In the Post Submit Actions section, click the “+ New Action” button and select the “Send Email.” In the editing action pop-up, select the “Email from submitted form field” option for the MAIL TO field. In the FROM FIELD dropdown, select the Hidden Field with macro.
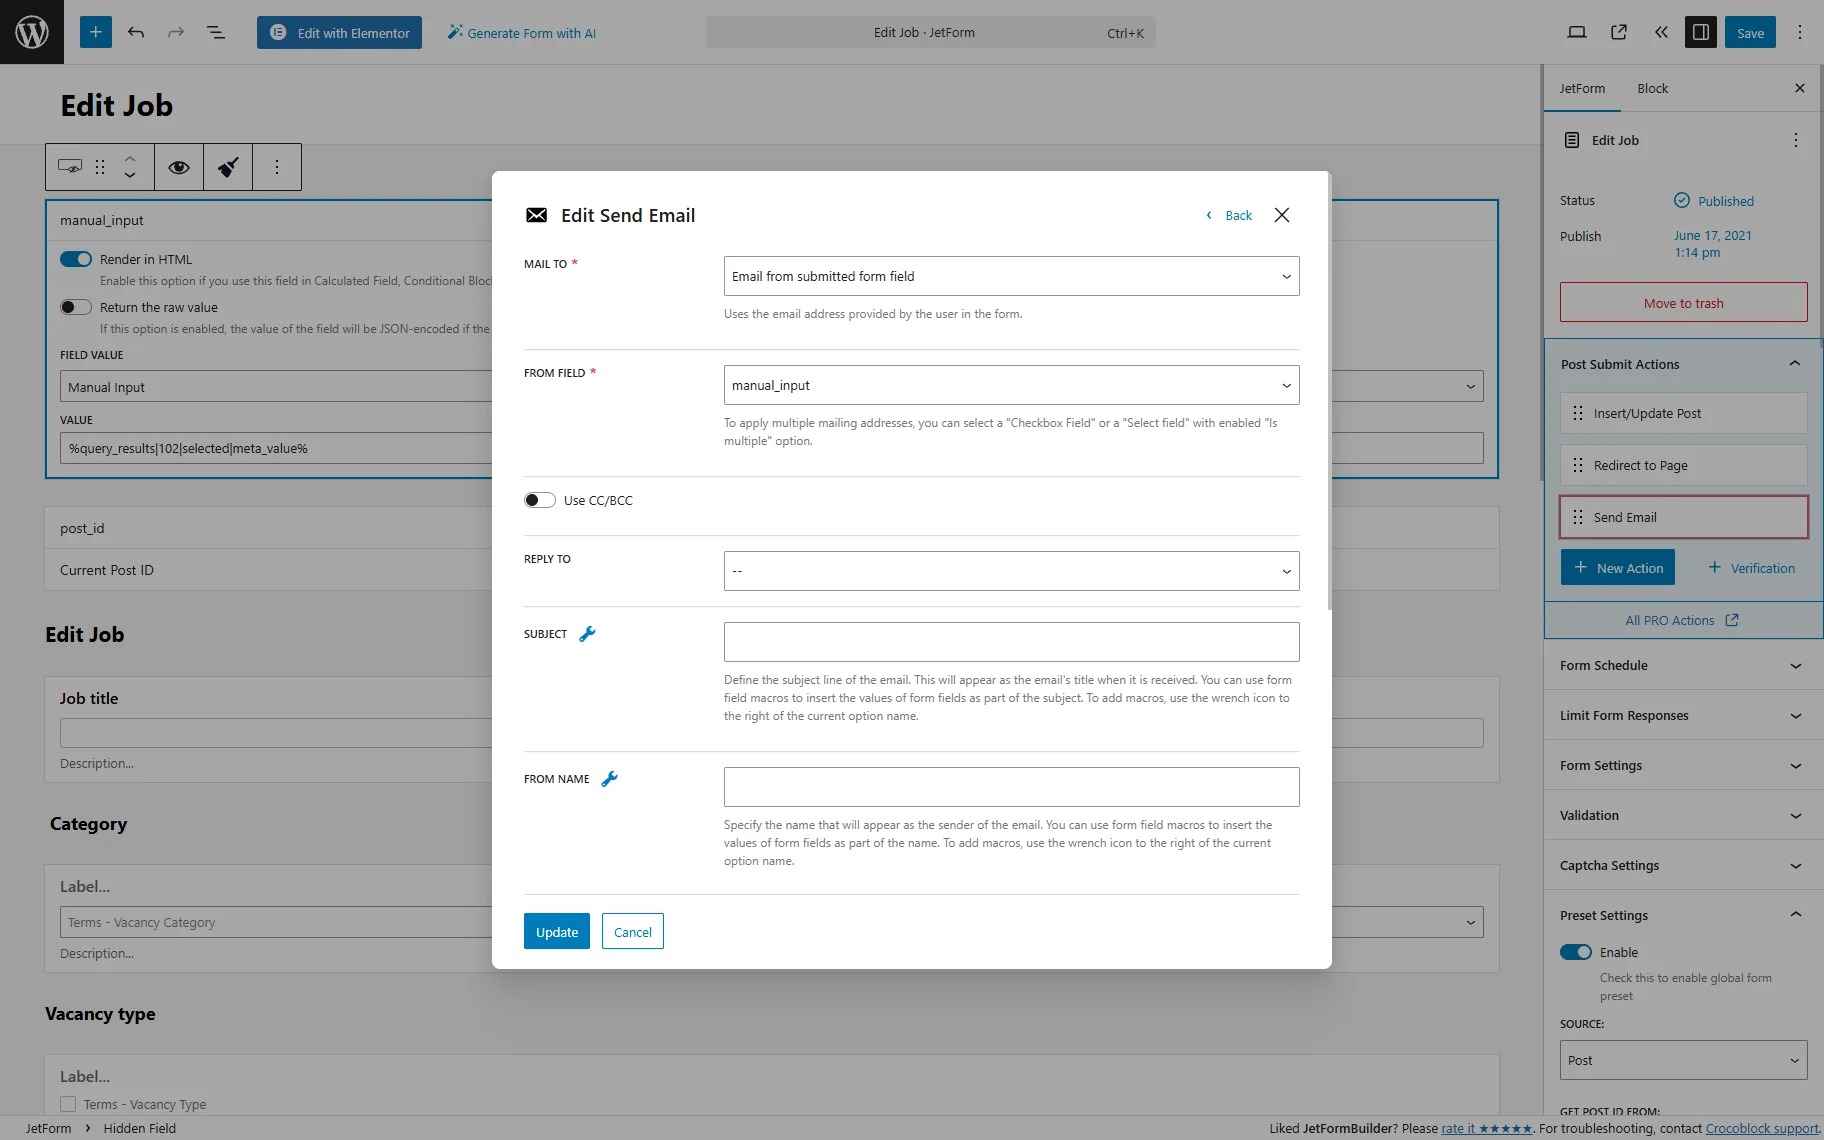
Then, set the email content and click the “Update” button. Save the form.
Check the Result
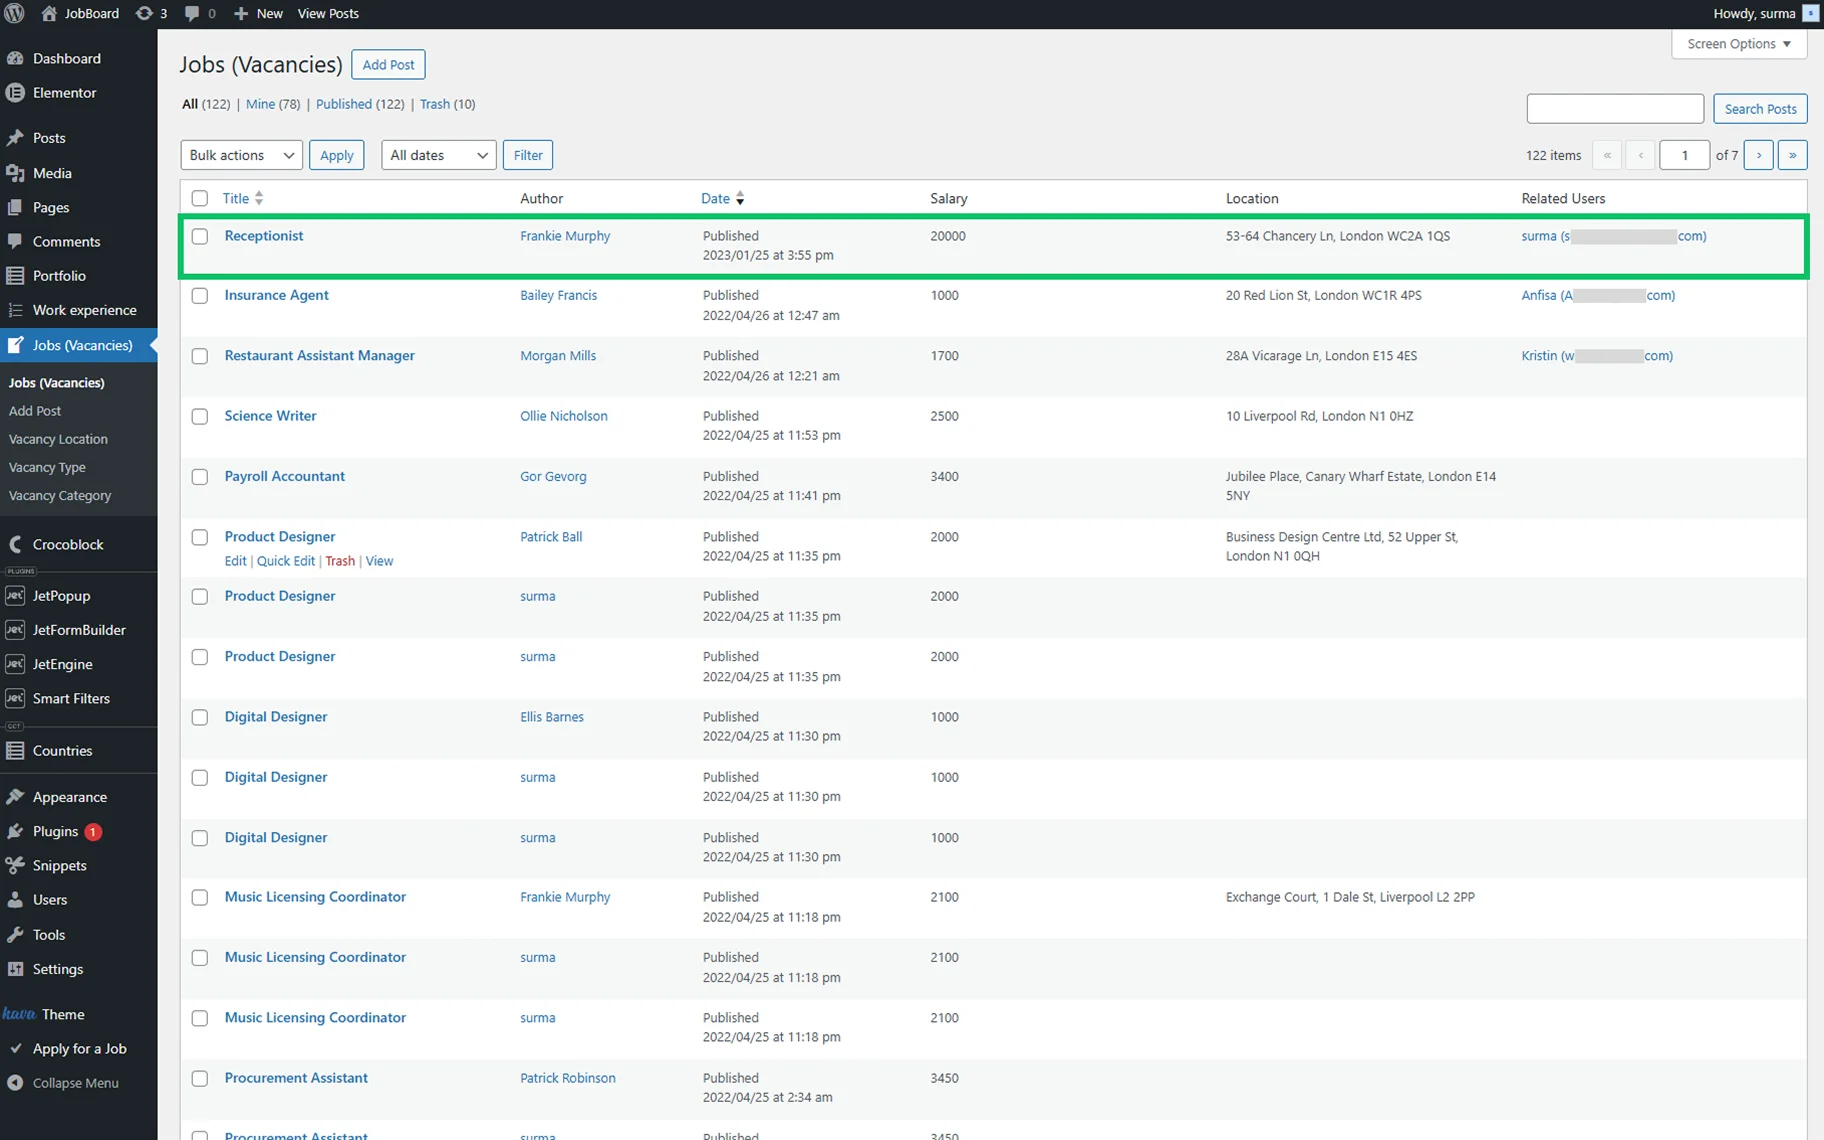
Ensure that the form is added to the single post page of the related post.
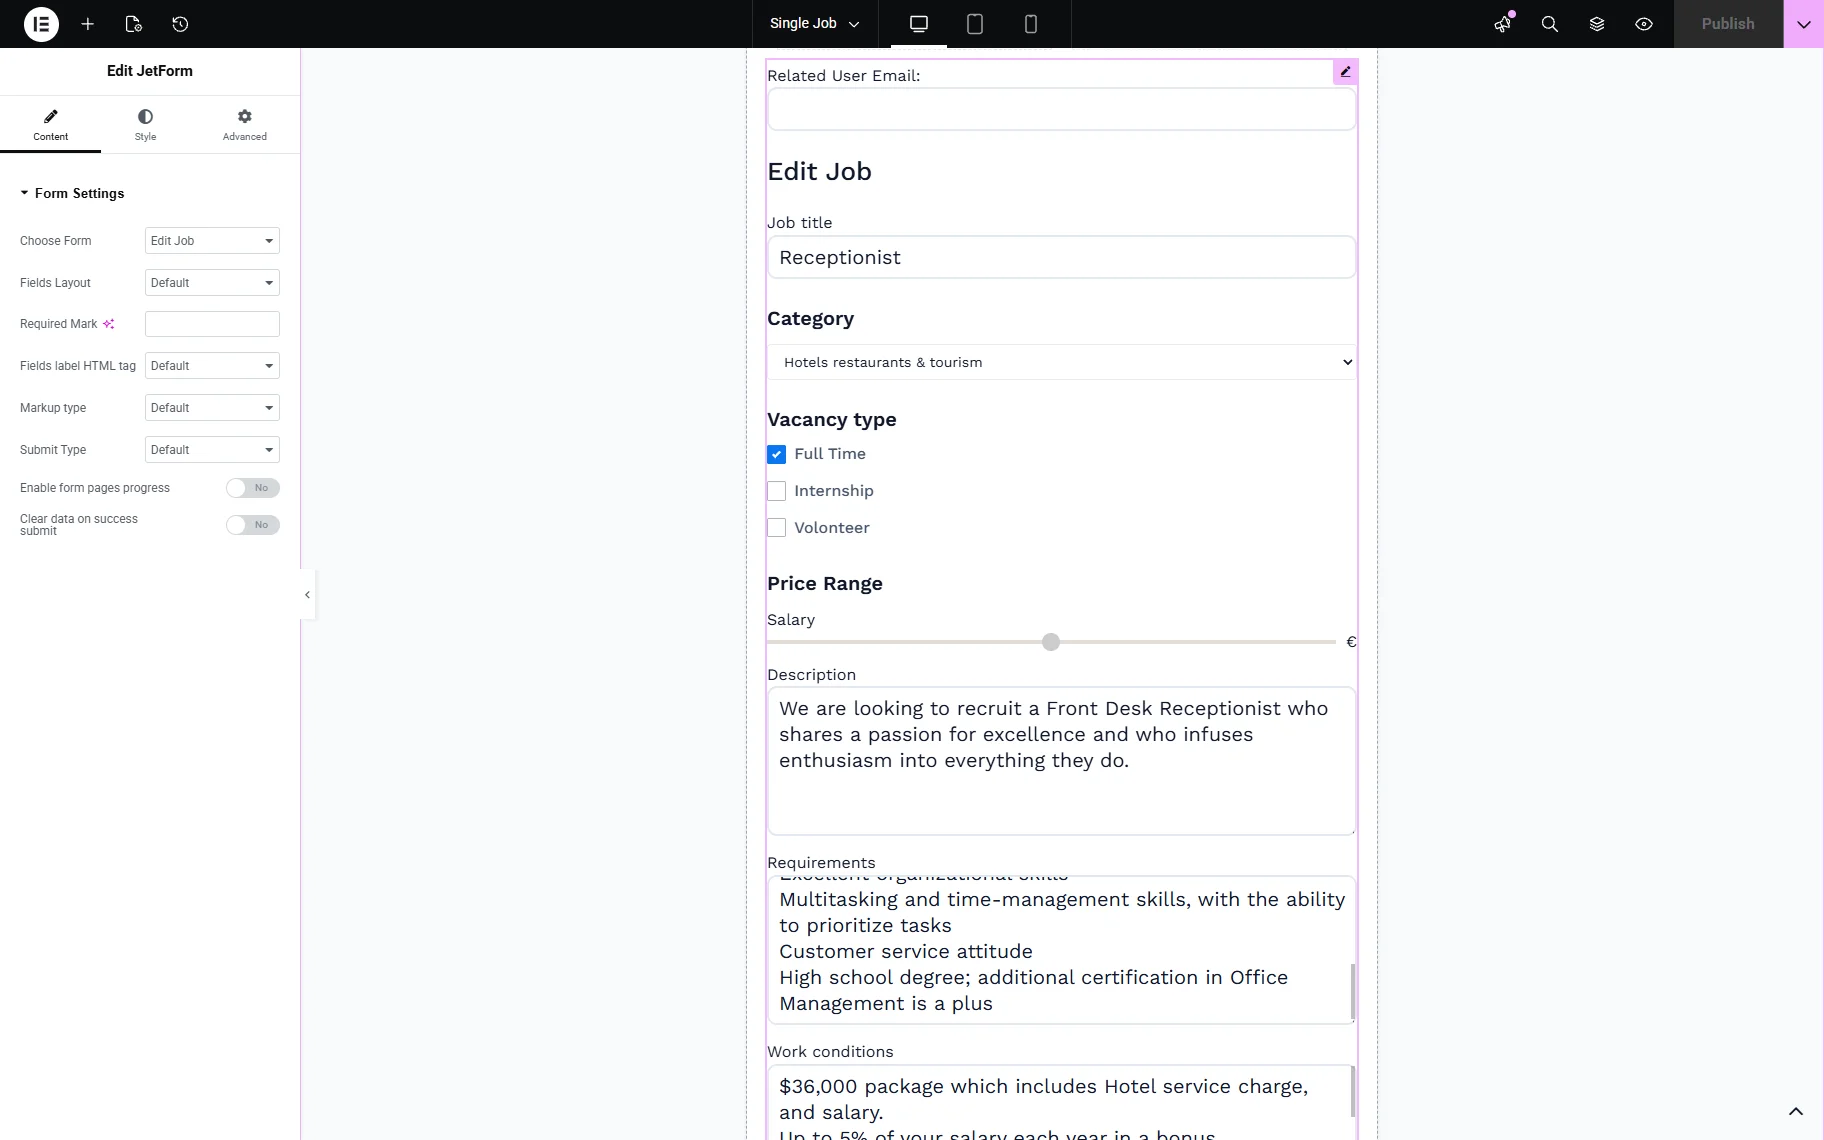
The post we are checking has the user connected.
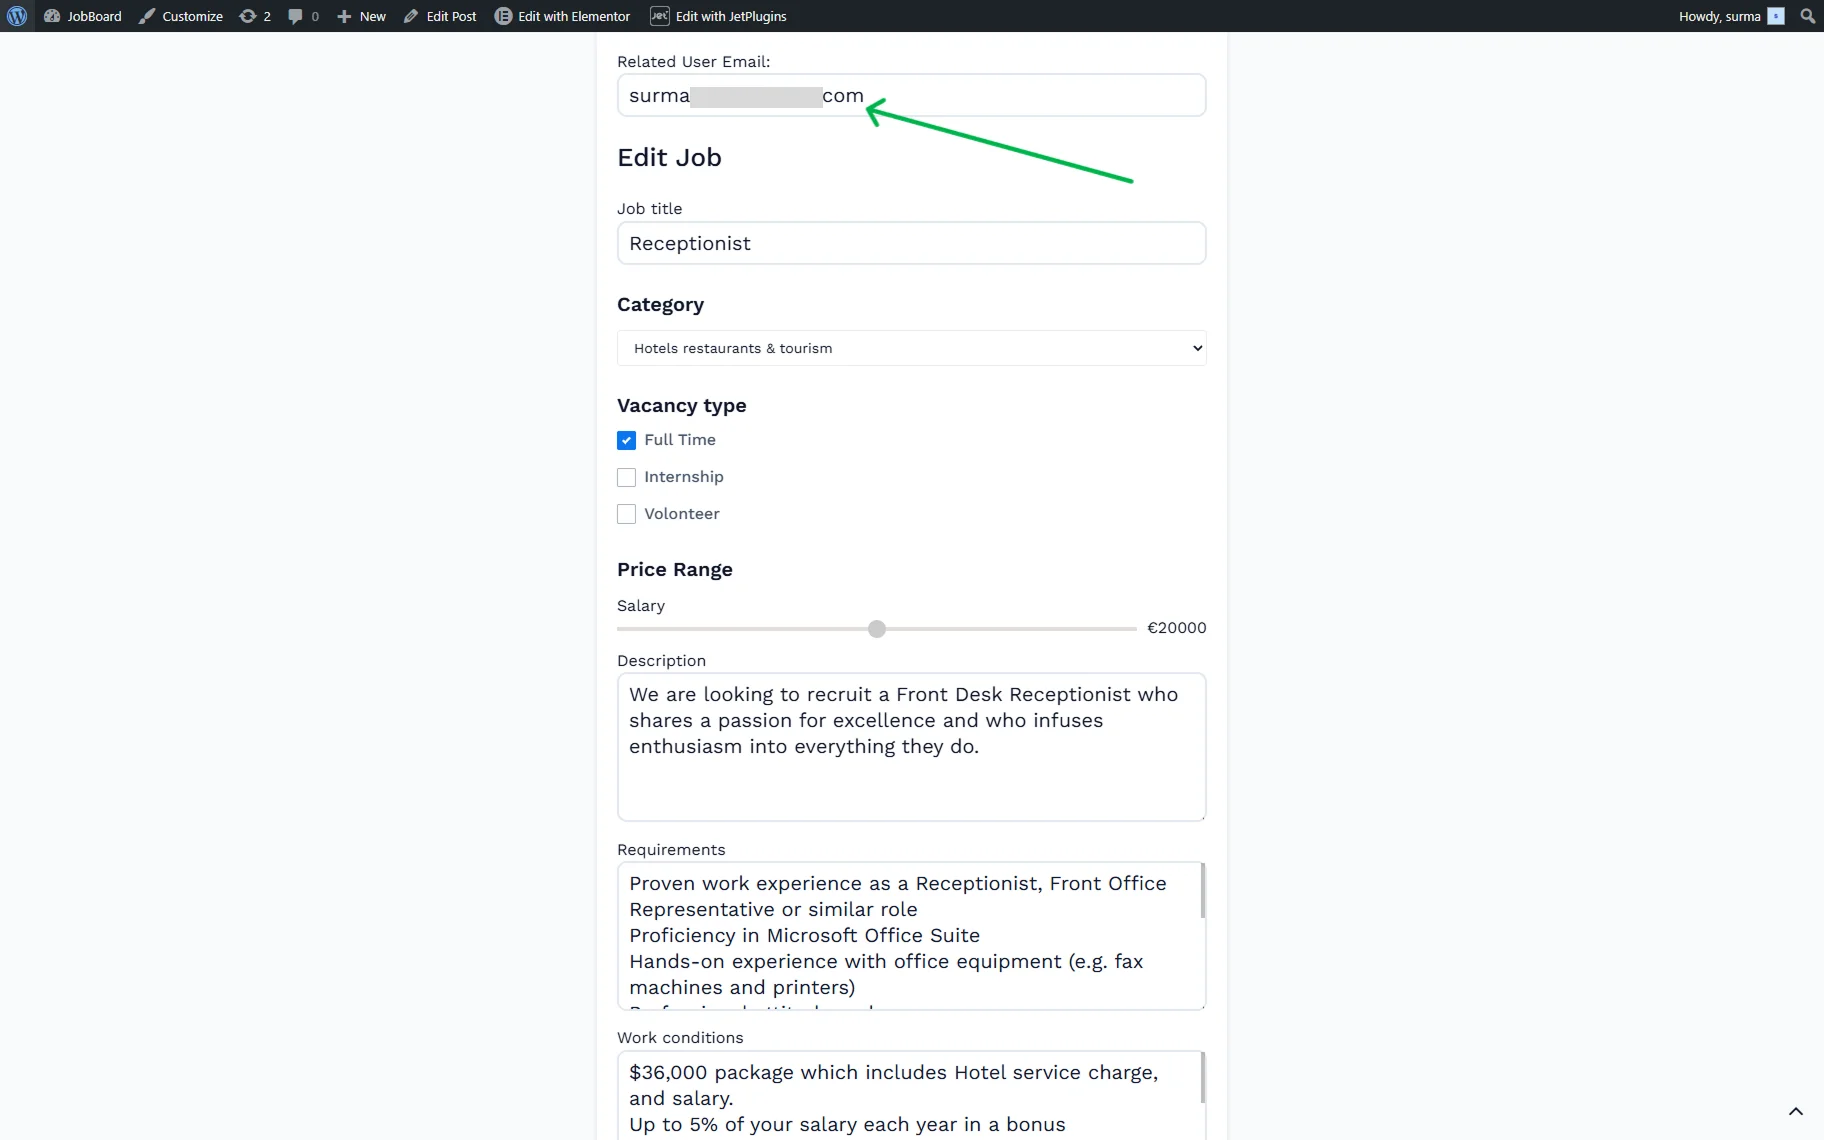
We also added a Text Field to the form to show that the required email is connected. When we proceed to the front end, we can see that the related user’s email is connected.
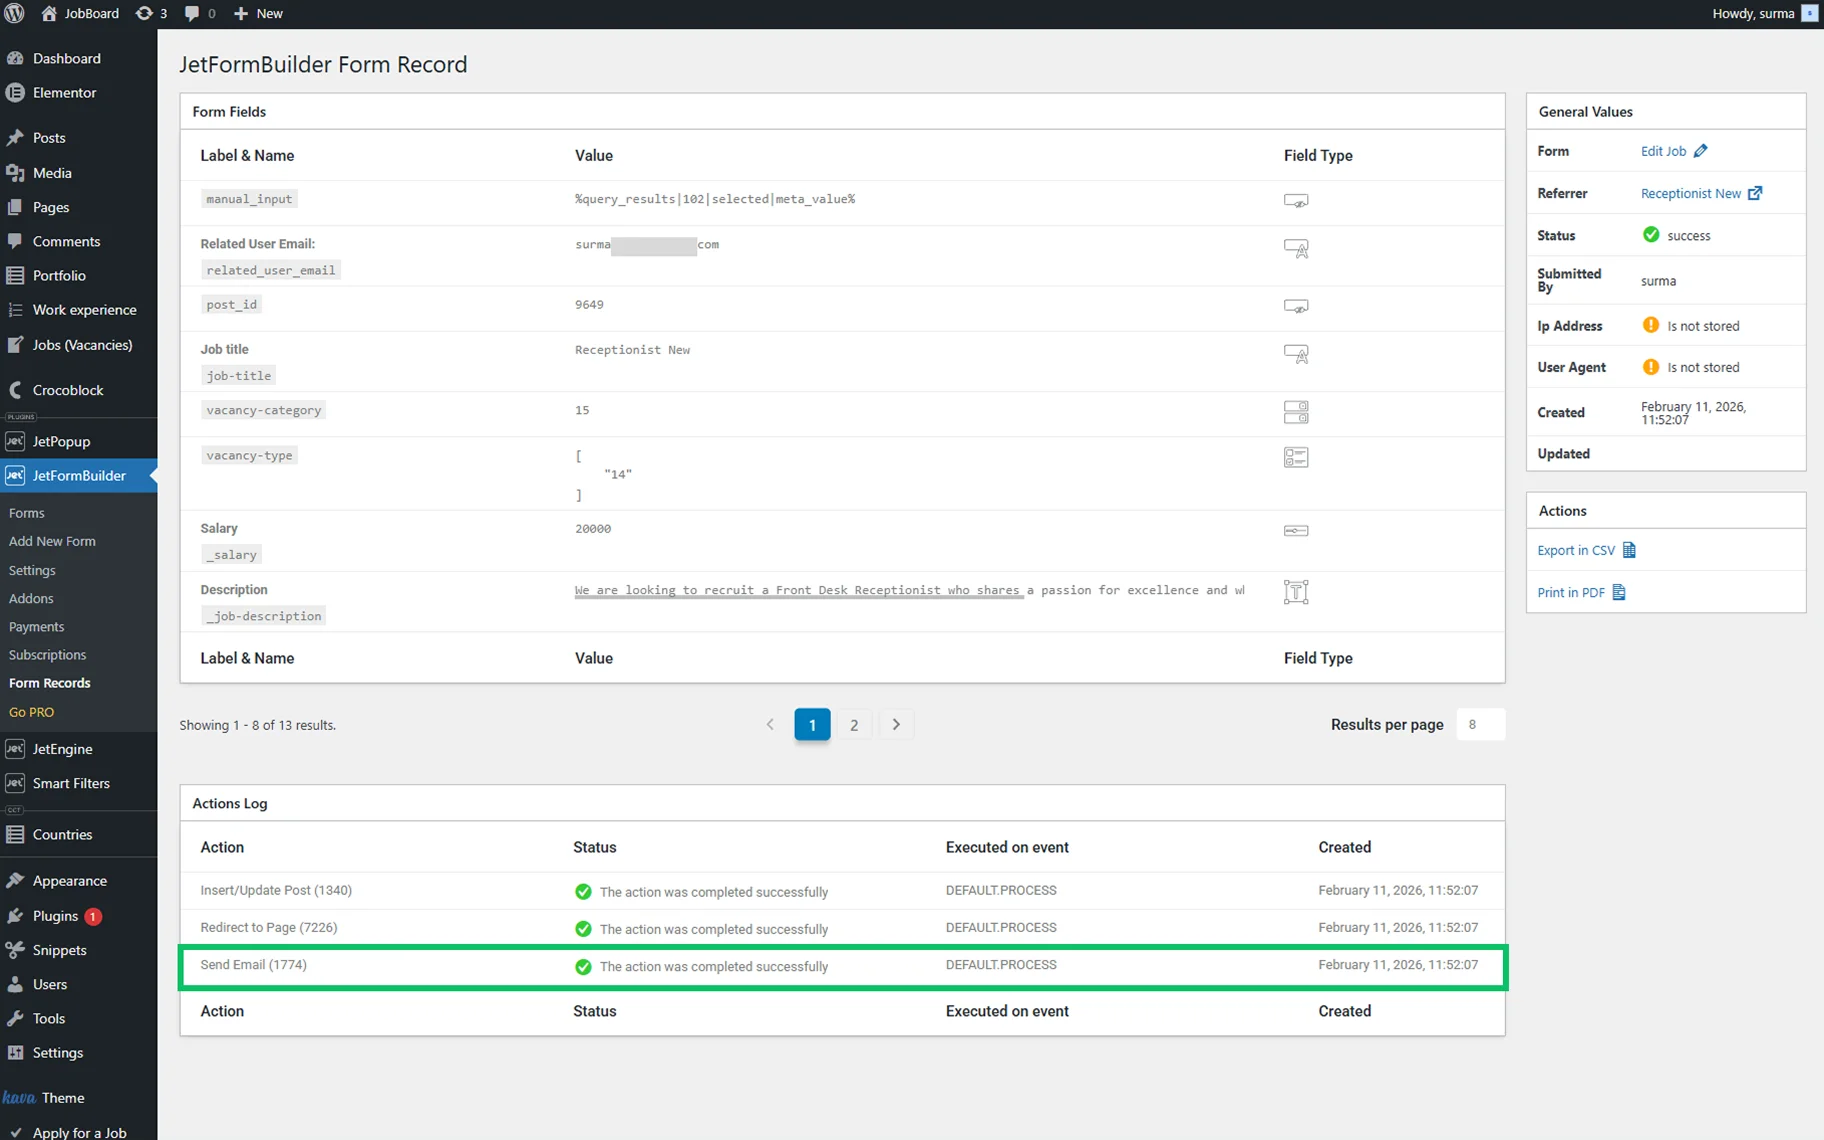
Once we submit the form, it is successfully sent to the related user’s email address.
That’s it. Now you know how to send an email to the related user’s email address using JetEngine and JetFormBuilder WordPress plugins.