What are WordPress blocks, and how can you use them? Are there ways to further enhance the Gutenberg blocks editor with more features? And what if you don’t like Gutenberg and want to return to the Classic WordPress editor? I will answer all these questions right here, so stick around.
Table of Contents
- What Are WordPress Content Blocks?
- How to Use Blocks in WordPress
- WordPress Block Editor Tips and Tricks
- What If You Don’t Like Using WordPress Gutenberg Blocks?
- FAQ
- WordPress Blocks: A Step in the Right Direction
What Are WordPress Content Blocks?
Since version 5.0 of WordPress launched in December 2018, WordPress has had a new way to edit posts and pages, called the Gutenberg editor. Previously, you edited WordPress posts and pages in a text-based Classic editor. But now, with Gutenberg, you can create and edit posts and pages by adding blocks and positioning them on the page.
Gutenberg Blocks
Gutenberg WordPress blocks are the blocks of content that you use to build a page or post in the Gutenberg editor. For example, these blocks can be paragraph text, headings, images, videos, quotes, tables, buttons, and many other types of website content. The WordPress website has a complete list of blocks.
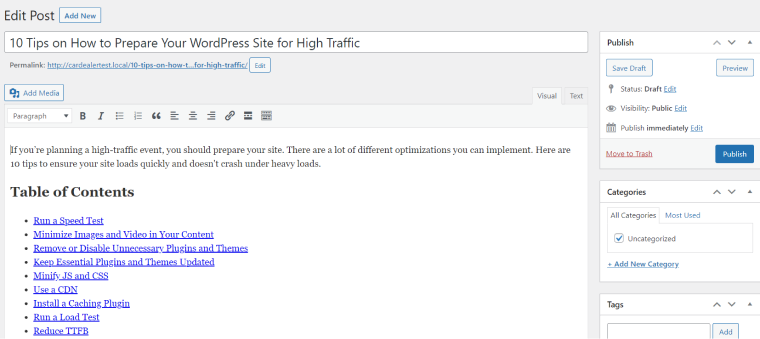
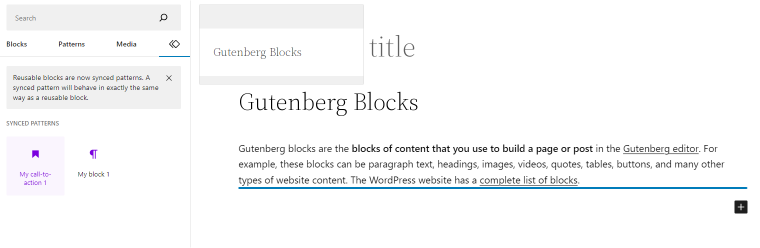
Here is an example of a blog post being edited with the WordPress Gutenberg blocks editor:

Here is the same blog post being edited with the Classic editor:
Gutenberg block types and their functionalities
All blocks are grouped into six sets based on their functionalities in the list of Gutenberg blocks. Let’s review what types of Gutenberg blocks are by default in the WordPress native editor and which blocks are the most useful:
- Text blocks are the fundamental blocks necessary for creating most web pages. The top three blocks in this category are Paragraph, Heading, and List, helping you to shape your written content.
- Media blocks insert non-textual content in your post, such as images, video, and audio files. A Gallery block allows displaying multiple images in a gallery grid, and a File block adds a link to a downloadable file.
- Design blocks insert invisible elements on the page, helping organize all content to suit your needs. Column and Row blocks arrange elements horizontally, while Stack, Separator, and Spacer control the vertical position of blocks. Interestingly, the Buttons block is also in this set.
- Widgets blocks allow integrating widgets into the WordPress Gutenberg editor by inserting ready-made, customizable templates for page lists, calendars, and comments feeds. The Custom HTML and Shortcode blocks are also here for additional custom elements.
- Theme blocks enable users to customize their website’s layout, design, and functionality. They enhance navigation between different pages (Navigation, Next, and Previous Post blocks), create a consistent layout across the site (Site Logo, Title, Comments), and more.
- Embed blocks are for embedding external content from platforms like YouTube, Twitter, Reddit, and Instagram. With these tools, you only have to insert a URL to display a video or an image instead of dealing with the code.
Expanding the Gutenberg Editor with plugins
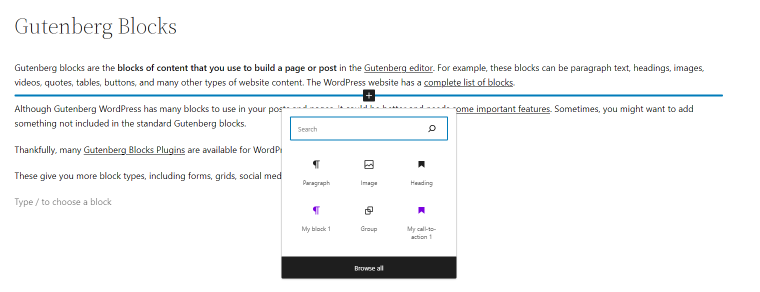
Although Gutenberg WordPress has many blocks to use in your posts and pages, it could be better and needs some important features. Sometimes, you might want to add something not included in the standard Gutenberg blocks.
Thankfully, many Gutenberg Blocks Plugins are available for WordPress – both free and paid.
These give you more block types, including forms, grids, social media blocks, image galleries, etc.
NOTE
When discussing the WordPress Gutenberg editor’s cons and pros, it was often pointed out that it may not be compatible with many plugins and themes. However, the situation is constantly changing as Gutenberg compatibility is becoming an essential feature of every WordPress tool. For example, almost all JetPlugins are now compatible with the block builder.
How to Use Blocks in WordPress
So, you now have a general understanding of what Gutenberg WordPress blocks are. Let’s get into how to use them to create and edit your WordPress posts and pages.
Adding a WordPress block
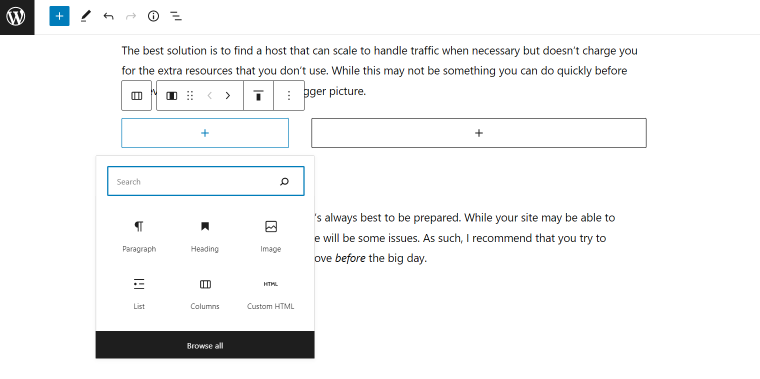
In a new or existing post or page, click the plus sign in the top-left corner of the editor:

Alternatively, you can hover your mouse over a place in between blocks within the content. This activates a plus icon, which you can click. If you insert a block using this method, it will appear in that location.
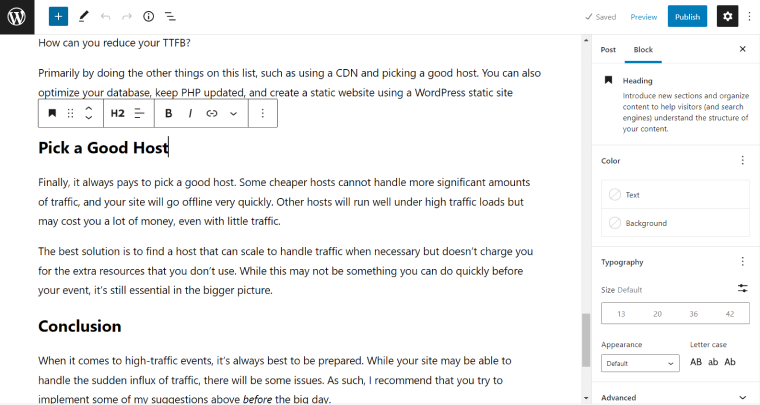
Customizing a WordPress block
If you want to customize a block, click on it. You will notice that this brings up a floating toolbar above the block. You can change the block type, alignment, text format, etc.

You may also notice the area to the right with more advanced block settings. Here, you have detailed control over the appearance and function of the block.
Selecting blocks using the List View
Most of the time, you won’t have a problem finding the block you want to edit and then clicking it. However, if you are editing a very large page of content, there may be so many blocks that it can take time to find the specific block you want to edit.
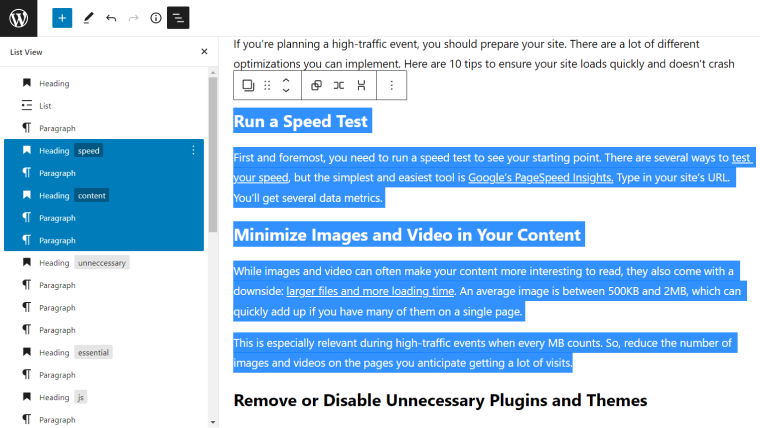
This is where the List View comes in useful. To open the List View, click the list icon in the top-left of the editor.
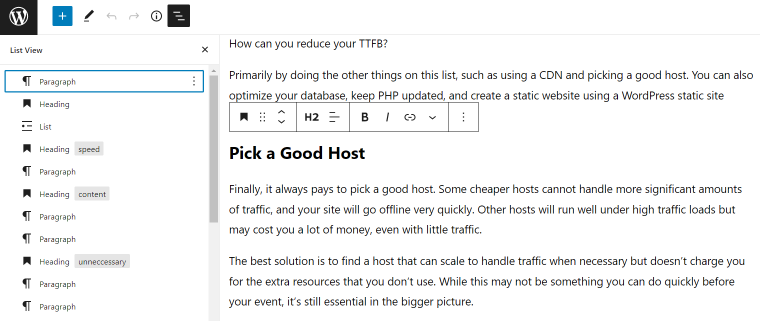
This brings up a window to the left that displays a list of all the blocks in your post or page. In the List View, you can quickly select a specific block.
Rearranging WordPress blocks
Another helpful thing you can do in the List View is to move blocks around by clicking and dragging them up and down the list.
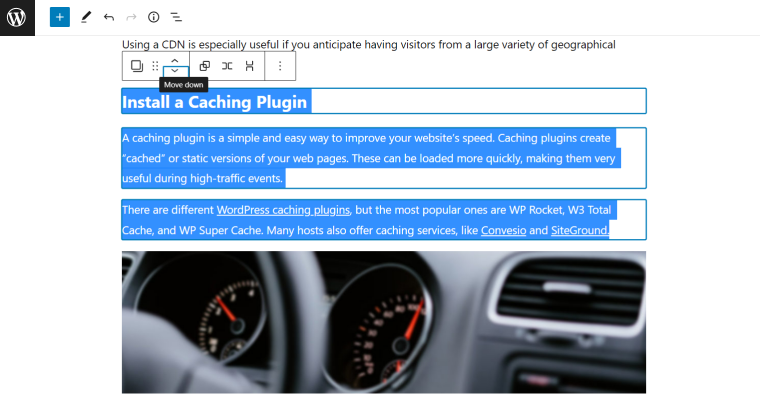
There are also two ways to rearrange blocks without using the List View. One way is to click the up or down arrow in the floating toolbar when you click on a block.
The other way to rearrange blocks is to click the six dots on the floating toolbar and drag it into a new position within the content.
Moving multiple blocks
There might be times when you need to move multiple blocks to a different position within the post or page. Moving one block at a time would be too time-consuming in such situations. Thankfully, there are several ways you can easily move several blocks at the same time.
One way is to click and drag your mouse and select all the blocks you want to move, just as you would when choosing several paragraphs in a document.
At that point, you have two options. First, you can click the six dots in the floating toolbar and drag the blocks into position.
The other option is to use the up or down arrows in the floating toolbar to move the multiple blocks up or down within the post or page.
However, you can also move multiple blocks within the List View. Click the list icon to open the List View, hold down the Shift key, and select all the blocks you want to move. Then you can drag them into a different location within the list.
Putting WordPress blocks side-by-side in columns
Until now, it might have seemed like you could only have a block in each vertical position within your post or page. Well, actually, you can have blocks side-by-side.
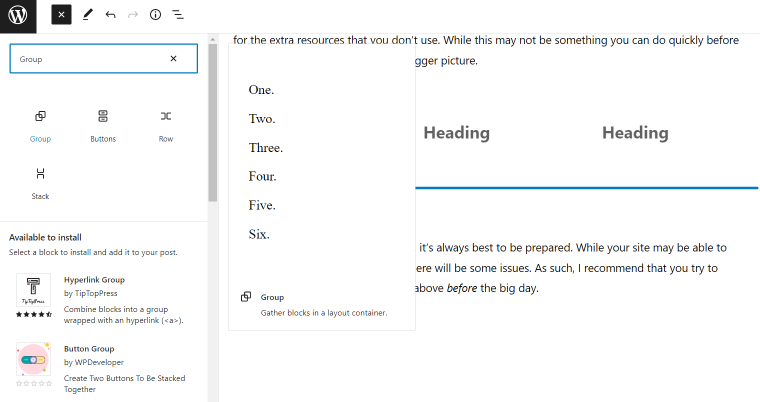
To do this, you need to use the Columns block. When you go to add the Columns block, you will have a choice of layouts, as shown in this screenshot:
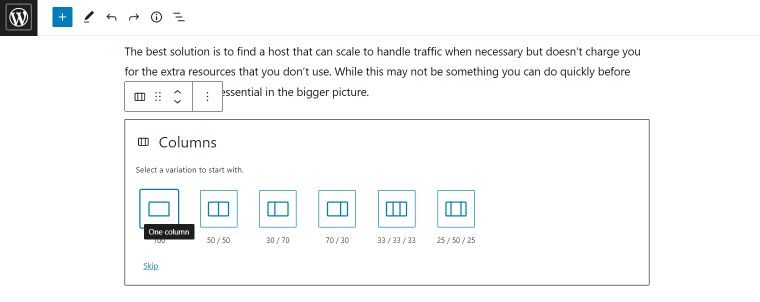
Once you have chosen a column layout, you will notice that each column has a plus icon. Clicking those plus icons will allow you to insert blocks into the desired columns. You can even add column blocks within columns, giving you more elaborate column layouts.
If you change your mind about the column layout later, don’t worry. You can easily change the layout afterward. The easiest way to do this is to use the List View to select the columns block. You will then be able to adjust the settings in the section on the right.
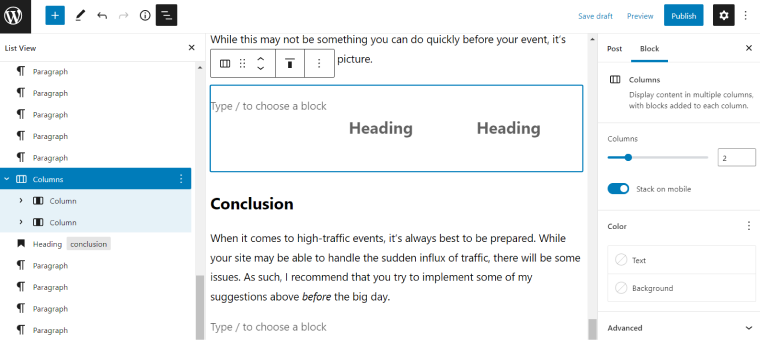
If you need to adjust the size of individual columns, select a column within the List View, then set the percentage or number of pixels.
Grouping WordPress blocks together
Did you know that you can group blocks? This can be very useful if you want to apply certain attributes to a set of blocks, for example, a background color.
To create a group, you first need to add the Group block. To do this, bring up the block inserter by clicking the plus icon and selecting the Group block.
Then, you can click the plus icon within the Group block to add new blocks.
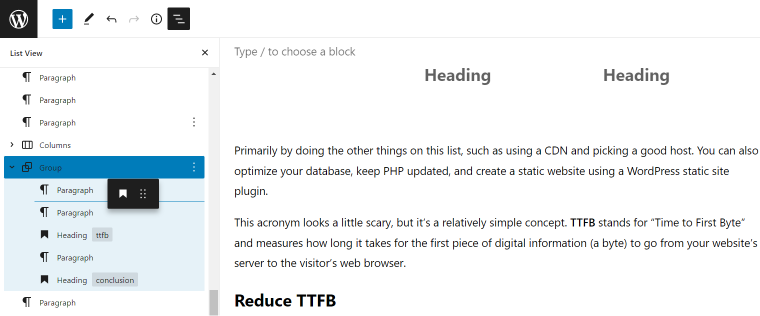
Alternatively, you can drag existing blocks into the Group block by selecting a block, clicking the six dots on the floating toolbar, and dragging the block into the Group block.
Once your Group block has blocks within it, you may need help selecting the Group block to make changes to it. If so, you will probably find it easier to choose the Group block from within the List View.
Copy and paste WordPress blocks
Sometimes you want to copy existing content to reuse it on the same page. If that is paragraph text, you can copy and paste it just as you would in a standard Word document — “Ctrl/Cmd + C” to copy, followed by “Ctrl/Cmd + V” to paste. This also seems to work with images.
But for other block types, you will need to do it this way instead:
- Select the block.
- Click the three dots on the floating toolbar that appears.
- Select Duplicate.
You can then move that duplicate block to wherever you want it to be and edit it if you wish.
WordPress Block Editor Tips and Tricks
Learning the basics of WordPress editing opens up doors for creating posts and pages. As you get more practice with the blocks, you’ll learn different techniques to streamline your workflow. Here are a few tips to set you up with a kickstart.
Keyboard shortcuts
If you’re a keyboard-dependable person using Gutenberg block editor, you’re in luck because there are many keyboard shortcuts to speed up your workflow:
- Save changes: Ctrl + S
- Undo a change: Ctrl + Z
- Duplicate a selected block: Ctrl + Shift + D
- Insert a new block before a selected block: Ctrl + Alt + T
- Insert a new block after a selected block: Ctrl + Alt + Y
- Move a selected block up: Ctrl + Shift + Alt + T
- Move a selected block down: Ctrl + Shift + Alt + Y
- Open document overview panel: Shift + Alt+ O
You can also type / and type the initial letters of a block to insert it instead of reaching for a mouse and clicking the “+” button.
The complete list of keyboard shortcuts for Windows and Mac can be found in the WordPress documentation.
Reusable Blocks
Save time by creating reusable blocks for frequently used content elements. The scenarios to use reusable blocks are innumerous: adding feedback forms, links to your blog, call-to-action blocks, affiliate banners, etc.
To create such instruments, click the three-dot button opening options for the corresponding block and choose the “Create pattern/reusable block” option. Name it. You can find your pre-created block by typing its name in the search field or opening the Synced Patterns tab.
Code Editor
For advanced users, the code editor within blocks allows seeing all content in HTML format. This provides precise control over block behavior and styling. To access it, click the three-dots button at the top right and proceed to the Code editor option. To return to the previous interface, click Visual editor.

Adding content from Google Docs
You can seamlessly transfer your content from Google Docs to the Gutenberg block editor. Instead of copypasting each paragraph one by one, you can do that with the entire Google Doc. The WordPress block editor will recognize the format of your content and automatically convert each element into relevant block types like links, headings, paragraphs, lists, and more.
Locking blocks
Lock specific blocks you want to keep unchanged, preventing accidental edits or unintentional modifications. To do this, select the block, click the three dots, and find the Lock option. Here, you can choose to prevent the removal or disable movement of the block.
What If You Don’t Like Using WordPress Gutenberg Blocks?
For many people, the Gutenberg blocks editor is a more intuitive way of building content. Even if Gutenberg still has some room for improvement, it is a big step in the right direction for many.
However, some people still prefer the old WordPress editor, with its simple text-based interface. If that’s true for you, what can you do?
Thankfully, there is a way to still use the Classic editor within WordPress by installing a plugin. Here are two that are worth trying.
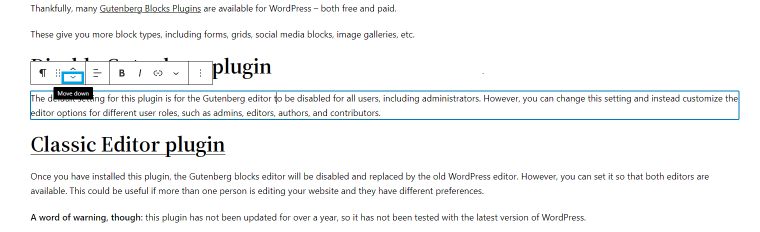
Disable Gutenberg plugin
The default setting for this plugin is for the Gutenberg editor to be disabled for all users, including administrators. However, you can change this setting and instead customize the editor options for different user roles, such as admins, editors, authors, and contributors.
Classic Editor plugin
Once you have installed this plugin, the Gutenberg blocks editor will be disabled and replaced by the old WordPress editor. However, you can set it so that both editors are available. This could be useful if more than one person is editing your website and they have different preferences.
FAQ
WordPress blocks are individual content that you can insert into your post or page and then move into a specific position within the content. Examples include headings, paragraph text, images, and videos.
You can easily rearrange your Gutenberg WordPress blocks by clicking the six dots on the floating toolbar, dragging the block into a different position, or clicking the up or down arrows on the floating toolbar. You can also move them within the List View.
When you click on a block in WordPress, you will notice a floating toolbar appears above it. You will also notice some more advanced settings in the panel to the right of the content.
Yes, all installations of WordPress since version 5.0 come with the Gutenberg blocks editor as standard.
The easiest way to create a custom block is to use one of these Gutenberg block plugins.
That’s a matter of personal preference and depends on what you are trying to do on your website. Try the Gutenberg editor first, but if you need more features, you can also try Elementor, as it has a free version.
By default, the Gutenberg block editor provides six block types: text, media, design, widget, theme, and embed blocks.
WordPress Blocks: A Step in the Right Direction
Now you know everything you need to know about WordPress blocks and how to use them. WordPress has come a long way since it was first released in 2003, and the Gutenberg blocks editor is a big step in the right direction.
Of course, if you find that the standard blocks offered by WordPress don’t offer quite what you are looking for, there are various plugins available to enhance WordPress with more features.
