It’s cool if users can create notifications on your website, isn’t it? It’s important not only to be able to set some reminders but also to hide them when they are checked as “Read.” You can do it using JetEngine and JetFormBuilder plugins. If you prefer Elementor for building a website, you will also need the JetElements plugin to display the notification dropdown. However, it will work with other builders, such as Block Editor or Bricks, as well.
Table of Contents
- Tools to Be Used
- Creating Custom Content Type and a Form
- Creating Custom Query and Data Store
- Fetching Notifications on the Front End
- Making Notifications Reload Without Page Refreshing
- FAQ
- Takeaway
Tools to Be Used
To create user notification functionality on your website, you don’t have to have coding skills, and here is the stack I will use:
- JetEngine Custom Content Types (CCT);
- JetEngine Query Builder;
- JetEngine Data Store;
- JetEngine Dynamic Visibility;
- JetFormBuilder;
- JetElements.
First, I will create a CCT and then a query to fetch the CCT items. Then, I will set up a Data Store to store the read notifications. The JetFormBuilder form will be used to create notifications, and JetElements will help display them. Finally, I will need to make them reload without refreshing the page.
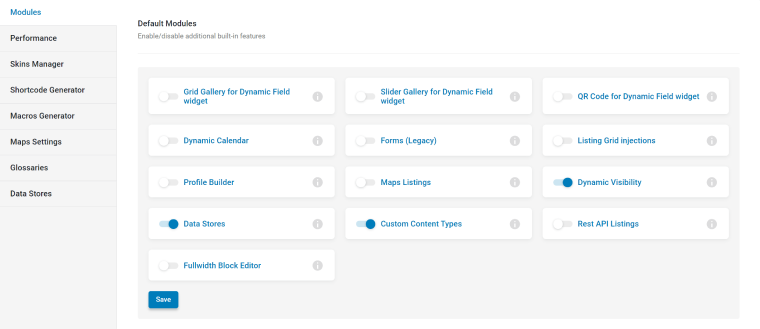
Go to JetEngine > JetEngine, and make sure that the Custom Content Types, Data Store, and Dynamic Visibility modules are activated. Also, install JetFormBuilder and JetElements if you are working with Elementor.
Creating Custom Content Type and a Form
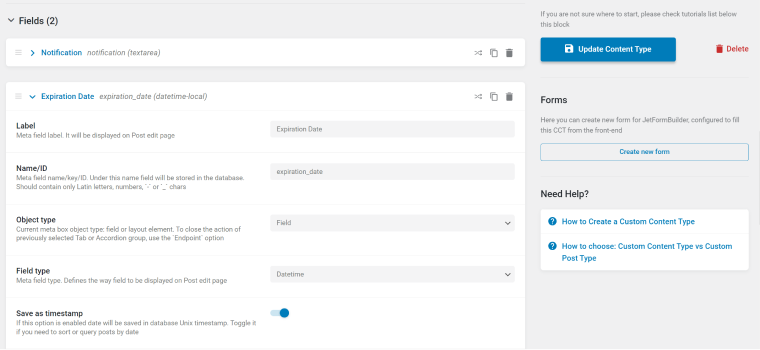
After activating the modules, you will see that the Custom Content Types menu item appeared in the JetEngine’s section. Click on it, and press “Add New.” Let’s call it “Notifications,” and it should have two fields:
- Notification (Textarea field type);
- Expiration Date (Datetime field type).
It’s crucial to activate the “Save as Timestamp” toggle so it can be queried later.
Save the content type, and on the right side, you will see the “Create new form” button, which will automatically generate the form to populate this CCT. Click on it, and you will find yourself on the page with a new JetFormBuilder form. The good thing is that it already has the “Insert/Update Custom Content Type Item” action added with all the fields mapped there to be connected with the corresponding CCT. This form will do what the name suggests: add a new notification that will be saved as a CCT item.
Creating Custom Query and Data Store
Now, I need to query only those notifications that are not expired. Let’s head over to the JetEngine > Query Builder and create a new query. In the Query Type section, select “Custom Content Type Query,” and it’s better to deactivate the cache toggle not to deal with the cache.
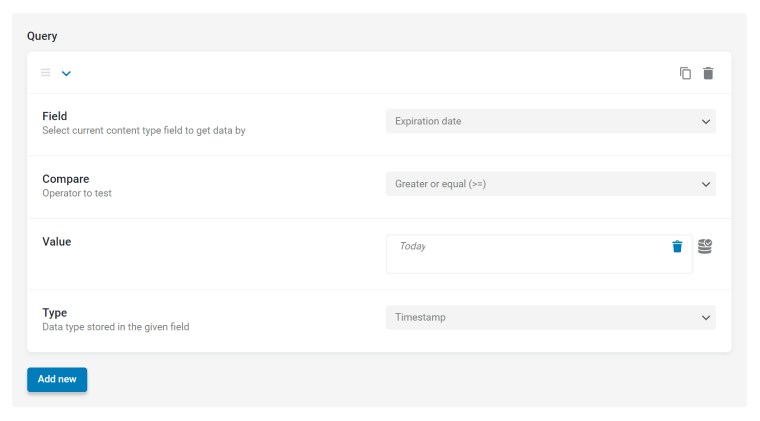
Select the Notification CCT and then the “Expiration Date” Field, then choose the “Greater or equal (>=)” operator, and in the Value section, we will need a macro to pull up the “Today” value. Click on a database icon and select it from the list.
Finally, in the Type section, select the “Timestamp.”
Save the query; it will fetch only notifications with an expiration date that is earlier or equal to today.
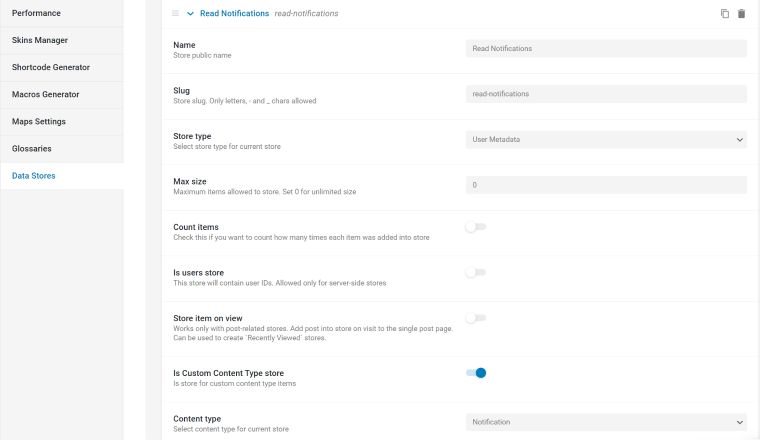
Now, we want users to be able to mark their notifications as read, and for this, we will need a data store. Let’s switch to the JetEngine > JetEngine, and in the Data Stores section, click “New Store.” I will name it “Read Notifications” and select “User Metadata” store type, as we will have it for registered users, and the read notifications will be associated with their profile. After that, activate the Is Custom Content Type store toggle and select the “Notifications” CCT from the dropdown.
Save the Data Store. Now, it’s important to go to the Notification CCT and click “Update” to update the database table. This warning is displayed in the Data Store settings, so don’t ignore it.
Fetching Notifications on the Front End
Before fetching notifications on the front end, let’s create a few so we will know what to fetch. Go to your Notification item in the Dashboard (or use the form you’ve created for it) and add some test notifications.
Now, it’s time to fetch these notifications on the front end based on the query. Go to JetEngine > Listings/Components and create a new listing with a Query Builder source, as well as the query you’ve made for the notifications.
I want to show three items in the listing template:
- a time when the notification has been created;
- the notification;
- a “Read” button to make it disappear.
Use your favorite editor, and add the Dynamic Field widget/block. For the first two elements, we will use the “Post/Term/User Object Data” source, and in the Object Field dropdowns, find your CCT and the Created Data field.
If you want it not to show the date and time but how long ago it was created, go down to the Filter field output section, select the “Human-readable time difference,” and in the Customize field output section, add the “ago” word after the “%s” variable.
Now, let’s fetch the notification itself – add one more Dynamic Field widget, but this time, in the Object Field dropdown, select the Notification field.
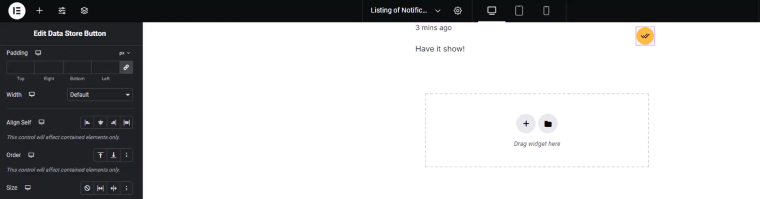
Finally, we need the button to hide notifications when they are read. Add the Data Store Button widget/block, and in the settings, select the data store name we’ve created for notifications. Head to the “Action after item added to store” and select the “Hide item” value. Style your button and the whole listing item, and it will be ready to be displayed in the dropdown.
I want my notification to be shown using the Dropbar widget by JetElements. The good thing is that you can use text or templates as content there. I prefer a template. I will create an Elementor container template and add the Listing Grid widget to it. This widget is for displaying listing templates, so I will select the listing I’ve just created and do all the styling.
Go back to the Dropbar widget and use this template to create a dropbar. Add more styling if needed.
Showing the notification count
It would be nice to show a notification count so the user knows how many new notifications are there. To do this, I will go back to the Listing template, add a Title, choose a dynamic tag, and select the Query Results Count option from the list. In the Advanced tab, I will add the phrase “notifications unread,” so it makes more sense.
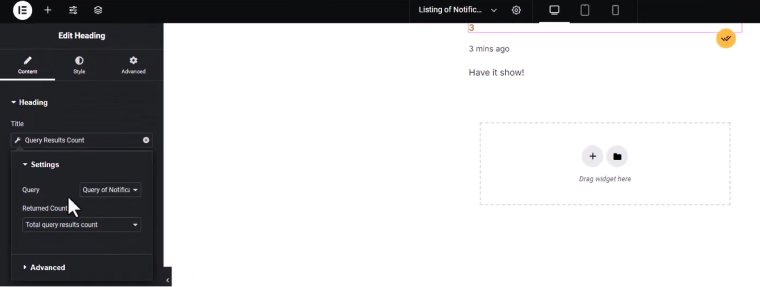
Now, the number of new notifications will be shown, but the problem is that it will be shown before each notification. So, this is where I need to use Dynamic Visibility (it can be found in the Advanced tab). For the widget with the query result, I select the condition to display “Is N item” from the list and, in the number field, type “1.” This means that it will be shown only for the first instance.
Making Notifications Reload Without Page Refreshing
The final step here is to make the notifications reload smoothly after marking them as read without page refreshing. To implement this, I will go back to the query that I created earlier for notifications CCT and add one more tweak. The idea of it is not to show the query result once it is sent to the Data Store.
To do this, I will add one more query parameter; in the Field section, select Query ID – which, in simple terms, means the query itself. In the Compare section, select “Not in the list,” and in the Value section, click on the database icon, find Get Store, and select the “Read notifications” Data Store item.
So, as a result, only those elements that have a timestamp that is later or equal to today will be queried and not stored marked as read, which is equal to being stored in the Data Store.
Reloading the listing
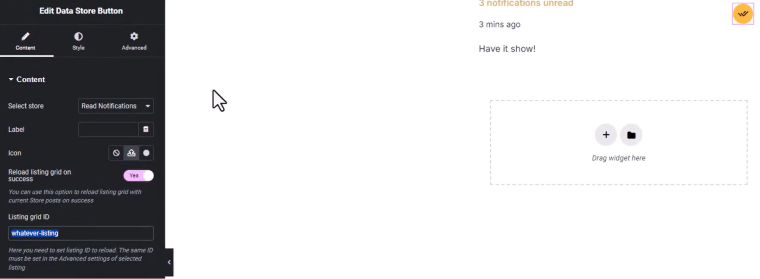
I’m happy with the query, but one thing should be edited in the Listing. Let’s get back to the Data Store Button widget, activate the Reload listing grid on success toggle, and now we need to specify the Listing Grid that should reload by setting any unique ID in the field below:
Update it, and go to the template that is used in the Dropbar, and in the Advanced tab of the Listing Grid, paste the same ID so it will reload on the Data Store Button click.
Go back to the front end and enjoy the magic. Also, don’t forget to insert the form to create new notifications. To style it properly, I recommend using the JetForm widget.
FAQ
Yes, you can do it using Crocoblock plugins.
No, you can do it without any coding knowledge.
Takeaway
I hope this article was helpful to you and showed one more example of how, with the help of Crocoblock and JetEngine in particular, you can create elements that seem very complex at first glance. You don’t need any coding skills for that, and Query Builder is a strong asset when it comes to fetching data dynamically.