If you’re looking to spruce up your filter section with more than just plain checkboxes, radio boxes, or dropdowns, JetSmartFilters has a “Visual” filter type that might interest you. With this option, you can easily add color boxes or images for a more visually appealing experience.
However, its layout has quite many limitations just because of its nature. The good news is that JetEngine has an excellent tool for creating custom layouts of any complexity for elements such as Listing Templates. So why not try to combine JetEngine’s capabilities in building custom listings with JetSmartFilters’s functionality? We’ve created an add-on that does the job and are ready to present it to you in this article.
NOTE
As of now, this functionality is available only for Elementor. However, in the future, it will be added as JetEngine’s add-on that supports Block Editor and Bricks.
Crocoblock’s Listing as Filter: Basic Use Case
💡 Check the demo of this functionality on this demo page.
The plugins to be used: JetEngine and JetSmartFilters.
⛏️ The add-on for using listings as filters can be downloaded from GitHub.
This add-on is all about making the filters look great on the front end, as JetEngine’s Listing Templates offer almost unlimited design freedom, and by using them, you can create any custom filter layouts, which is especially useful for WooCommerce sites.
This is a simple example of it, and the pictures with category names above are actually filters:
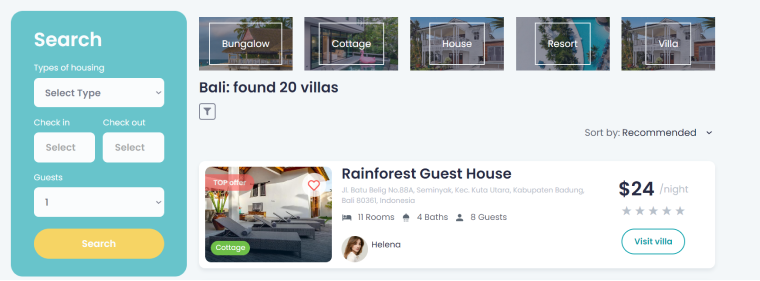
In this article, I will show you how to recreate a listing as a filter that looks like this and sort vehicles by types:
First, let’s create a custom post type called “Transport” and add vehicles there. Also, add taxonomies and category terms such as “Cars,” “Mototechnics,” etc.
Now, create two queries: one for this taxonomy and one for the Transport CPT in JetEngine > Query Builder, where you can set the order of elements and other parameters to display taxonomy terms exactly how you want them to be.
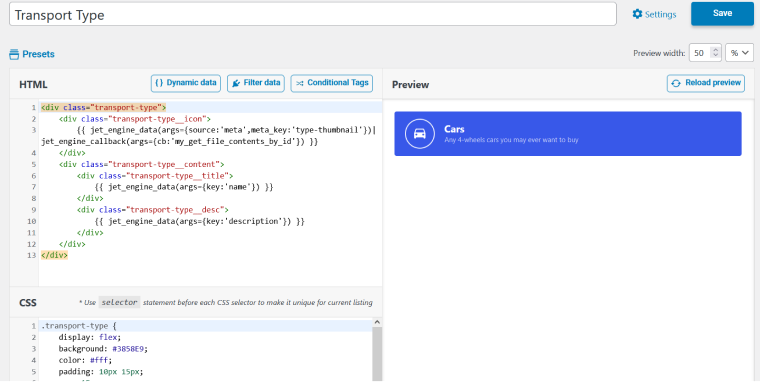
After that, create listings for each of the queries, with Query Builder as a listing source. I’ve used the Timber/Twig view for both listing templates. The interface looks like this:
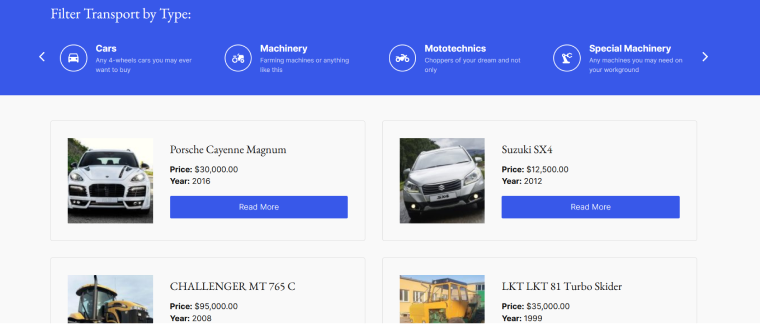
The taxonomy listing, which will act as a filter, looks like this on the front end:

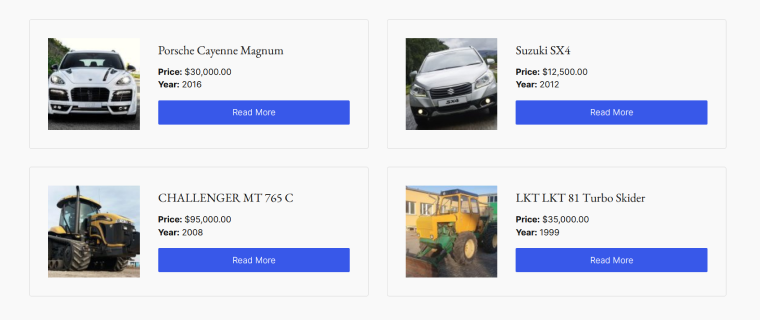
And the vehicle listing that will be filtered looks like this:
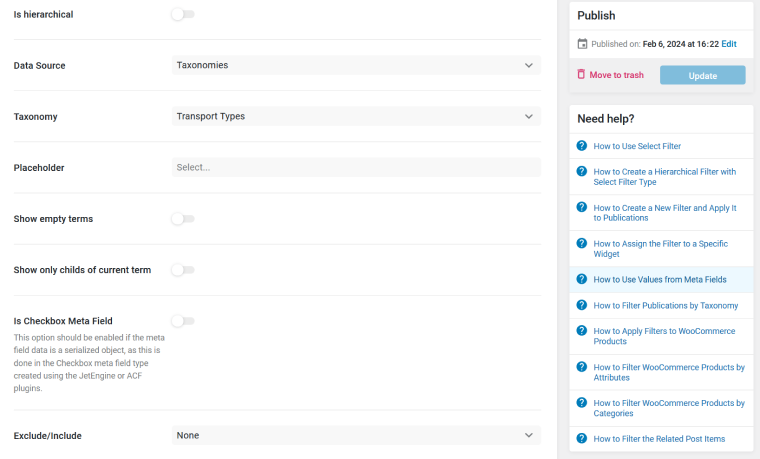
Next, I set up a filter (JetSmartFilters plugin). This step is required to implement the filtering functionality, as the plugin will process the data. The filter type which suits for Listing as a Filter can be one of the following: Select, Radio, or Checkbox since it has the same logic – a list of options, each of which represents one value.
I used a Select filter. The settings are standard for this filter type with Taxonomies as Data Source.
Now, it’s time to put it together. Make sure you’ve installed the Listing as Filter add-on.
Add both listings to the page using the Listing Grid widget.
❗ Set the unique ID to the block that will be filtered. It’s important to ensure that the filter will be applied to the correct listing.
Go to the listing that will act as a filter, open the Listing as Filter tab, enable it, select the previously created filter, and fill in the rest of the settings. In a Query ID field, insert the ID that you assigned to the previous listing to be filtered.
All done; now, the taxonomy listing acts like a filter for the vehicle listing.
💡 For a more complicated case of using listing as a filter, check this article.
FAQ
Filters for CPT are created the same way as for default post types. Go to JetSmartFilters, select the filter type, and select this post type or its meta fields as a data source.
Use either JetSmartFilters > Visual filter type or the method described in this article for more advanced layouts.
Takeaway
In this text, I’ve demonstrated how to use one listing as a filter for another one. It can be done with the help of two plugins, JetEngine and JetSmartFilters, plus the free add-on, which you can download via the link at the beginning of this article. For now, it works only with Elementor; however, you can use any other editor (Twig or Block editor) to create listing templates. Later, it will be released as a JetEngine module with support for all the builders with which the plugin works.

