Appointment Workflows Overview
This guide describes the Workflows settings tab, a part of the JetAppointment plugin's functionality on WordPress websites.
When an appointment is set up, several actions may accompany it. To set an email sending, schedule a Zoom meeting, or make other complex connections, the JetAppointment plugin can be used.
Once JetAppointment is installed and activated, the WordPress Dashboard > Appointments > Settings should be opened.
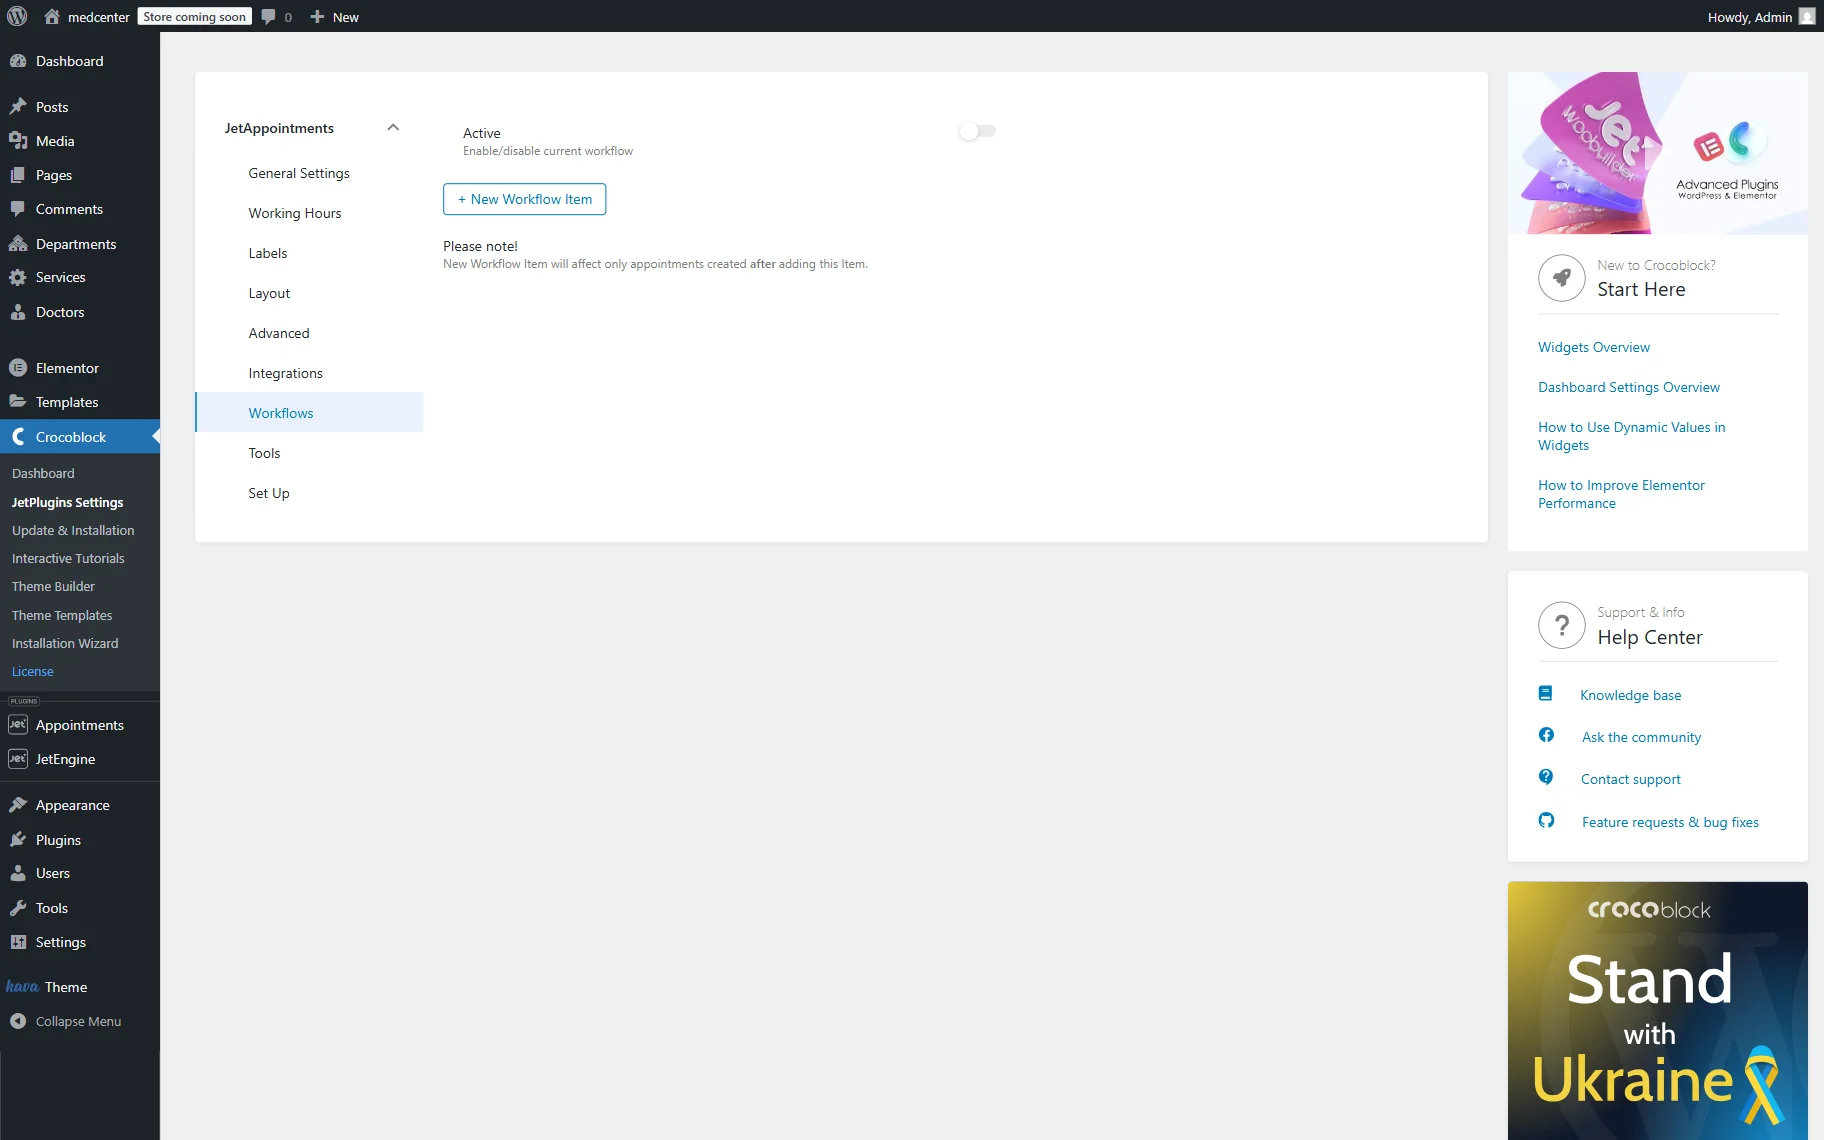
- Active — a switcher that should be enabled to activate the set workflow;
- New Workflow Item — a button that should be set to adjust the appointment workflow.
Generally, a workflow is a set of actions performed in response to specific triggers.
For instance, let’s check the first workflow as an example. Immediately after the appointment is created, an email can be sent to the service provider, allowing users to confirm the appointment by clicking on the specific link.
The second workflow is executed after the users approval (“Appointment Status Changed” Event); the user receives a notification about the scheduled Zoom call, along with a link to the conference. Additionally, the user receives a reminder the day before the call.
That’s how multiple workflows for appointments can be set.
To set it up, the “New Workflow Item” button should be clicked so the Event and Start fields appear.
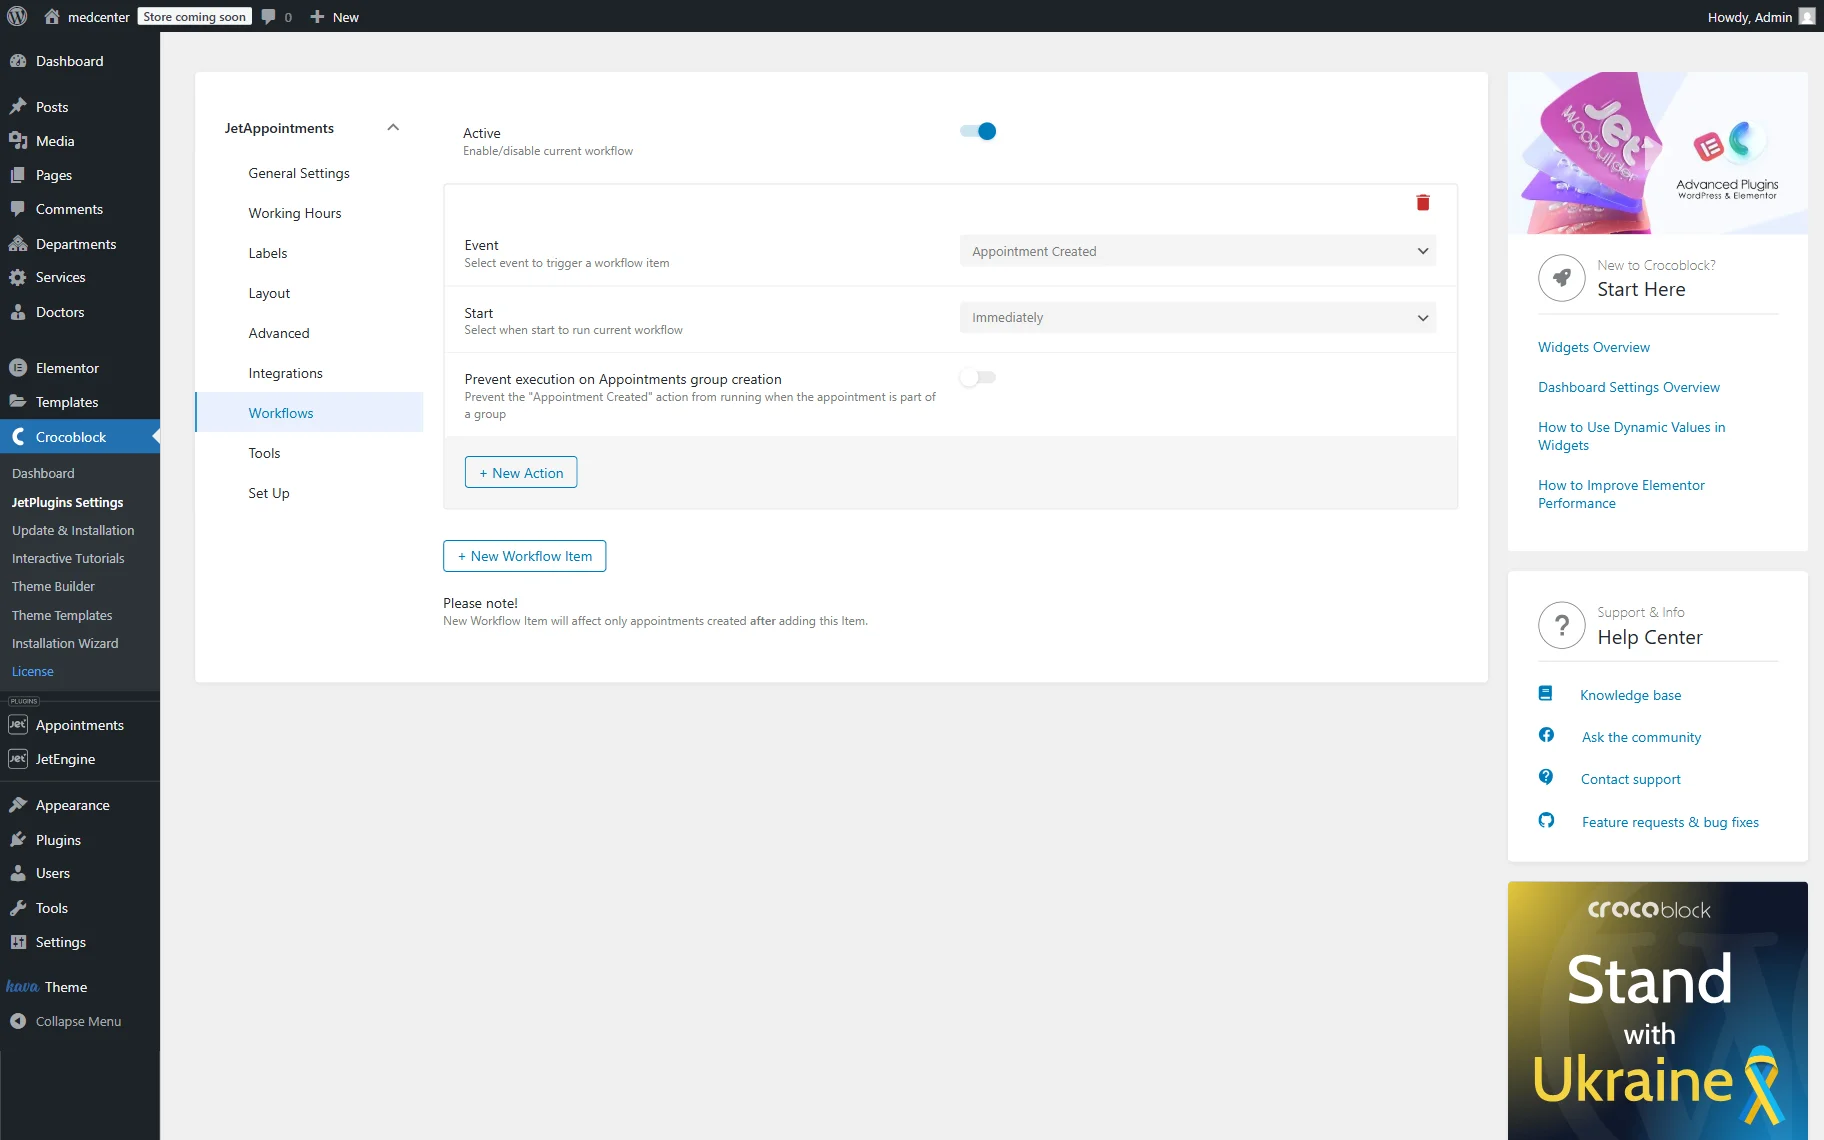
Let’s look at the Event options. They are associated with the life cycle of the appointment:
- Appointment Created — an option that should be set to trigger the workflow once the appointment has been created;
- Appointments Group Created (Multi Booking) — an option that should be set to apply the workflow once a group of appointments has been created during a multi-booking process;
- Appointment Status Changed — an option that allows to select the status on which the action will be triggered.
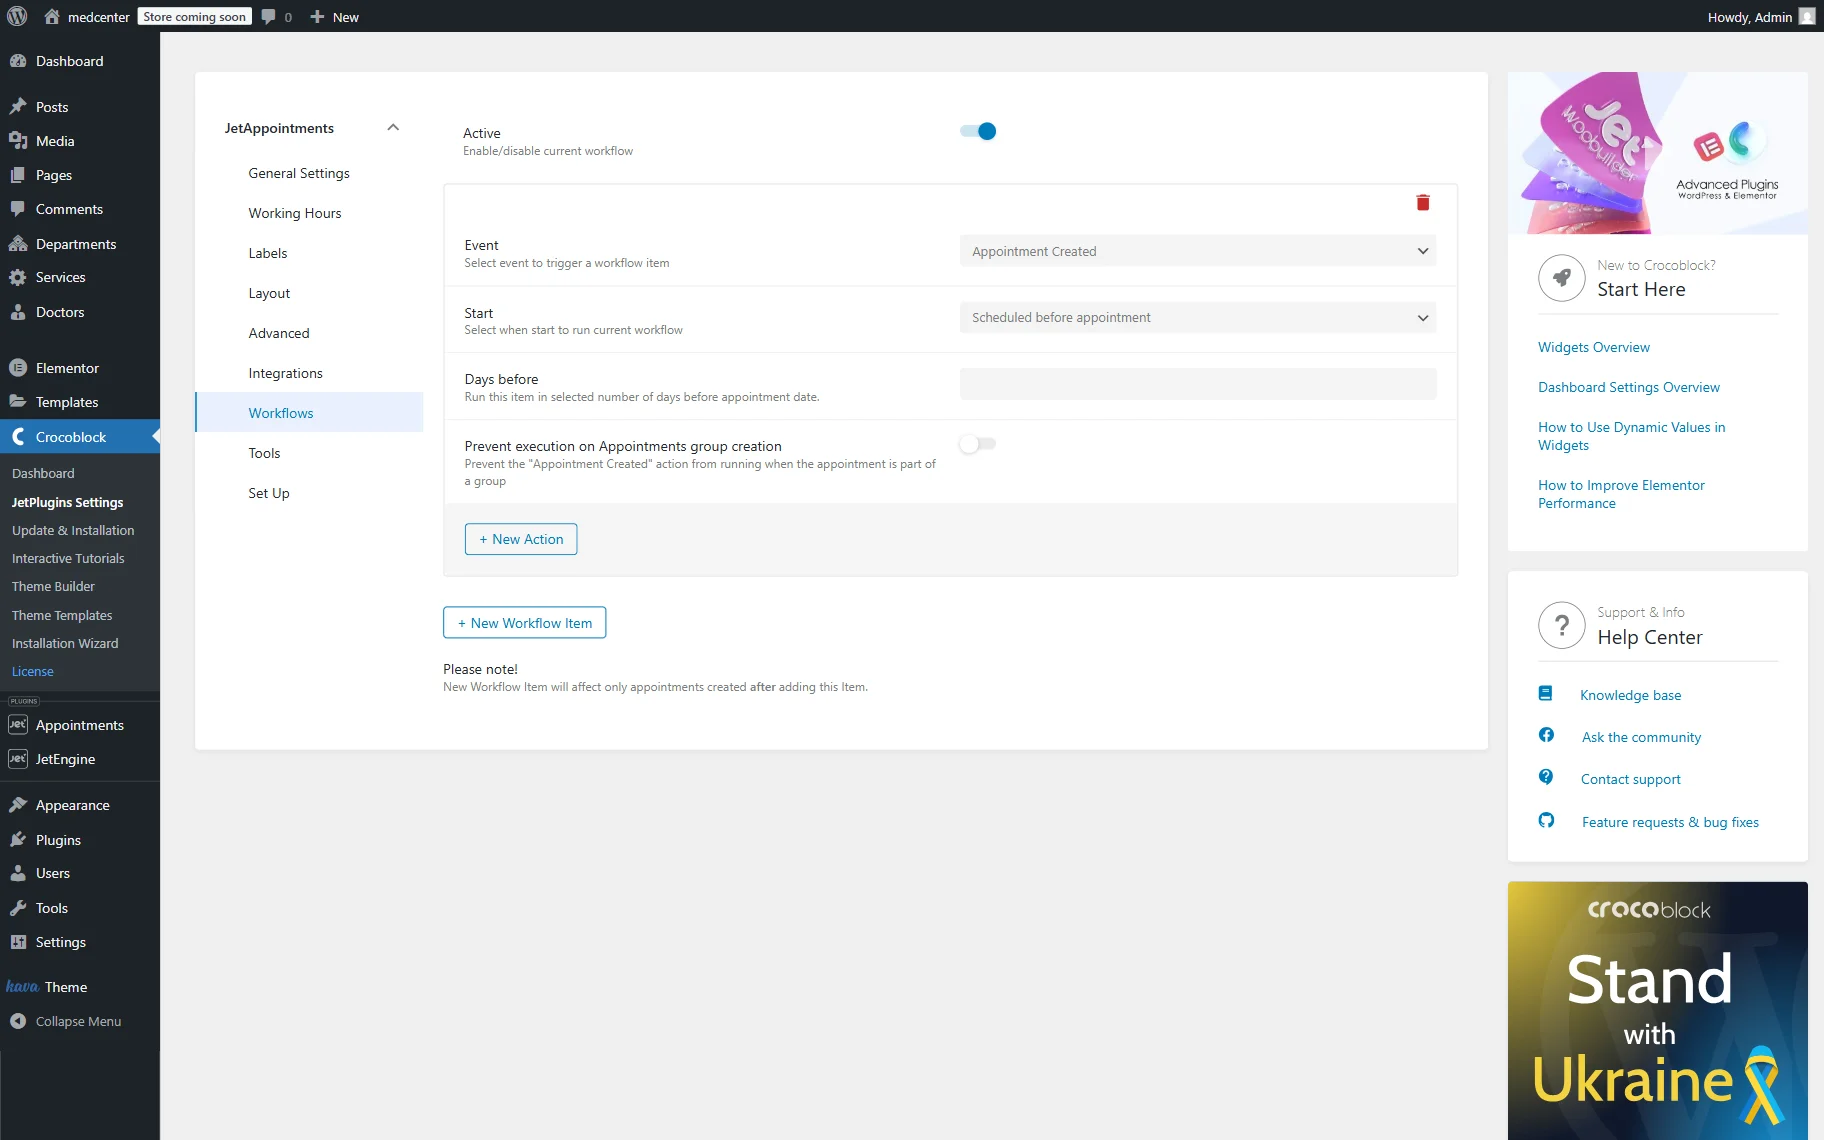
The Start field offers the following options: “Immediately”, “Scheduled before appointment”, and “Scheduled after appointment.”
The Prevent execution on Appointments group creation toggle appears when the “Appointment Created” or “Appointment Status Changed” event is selected. When activated, it prevents the action from running when the appointment is a part of the group.
If multi-booking is enabled and a group of appointments is booked with this option, the workflow will not be executed for the group. However, with a single appointment with this option enabled, the workflow will still be executed.
The New Status field appears when the “Appointment Status Changed” event is selected. The required status should be set to trigger the action.
If the scheduled action is selected, one can specify the Days before. Complete the field with the number so the action will be enabled in the set number of days before the appointment.
Once the workflow is added, the actions can be adjusted. To add an action, the “New Action” button should be pressed.
The Action set by default is “Send Email.”
Let’s examine the settings that are common to all actions:

- Action name — set the name for the current action to identify it visually in the actions list;
- Action — select the desired action.
Other settings appear if the “Send Email” Action is set:
- Email to — the recipient of the email;
- Email Subject — the subject of the sent email;
- Sent from email — the address displayed as “From address”;
- Sent from name — the name of the sender;
- Email message — the message the recipient is to get.
Also, the “Dynamic tag” button can be pushed next to some of the fields.
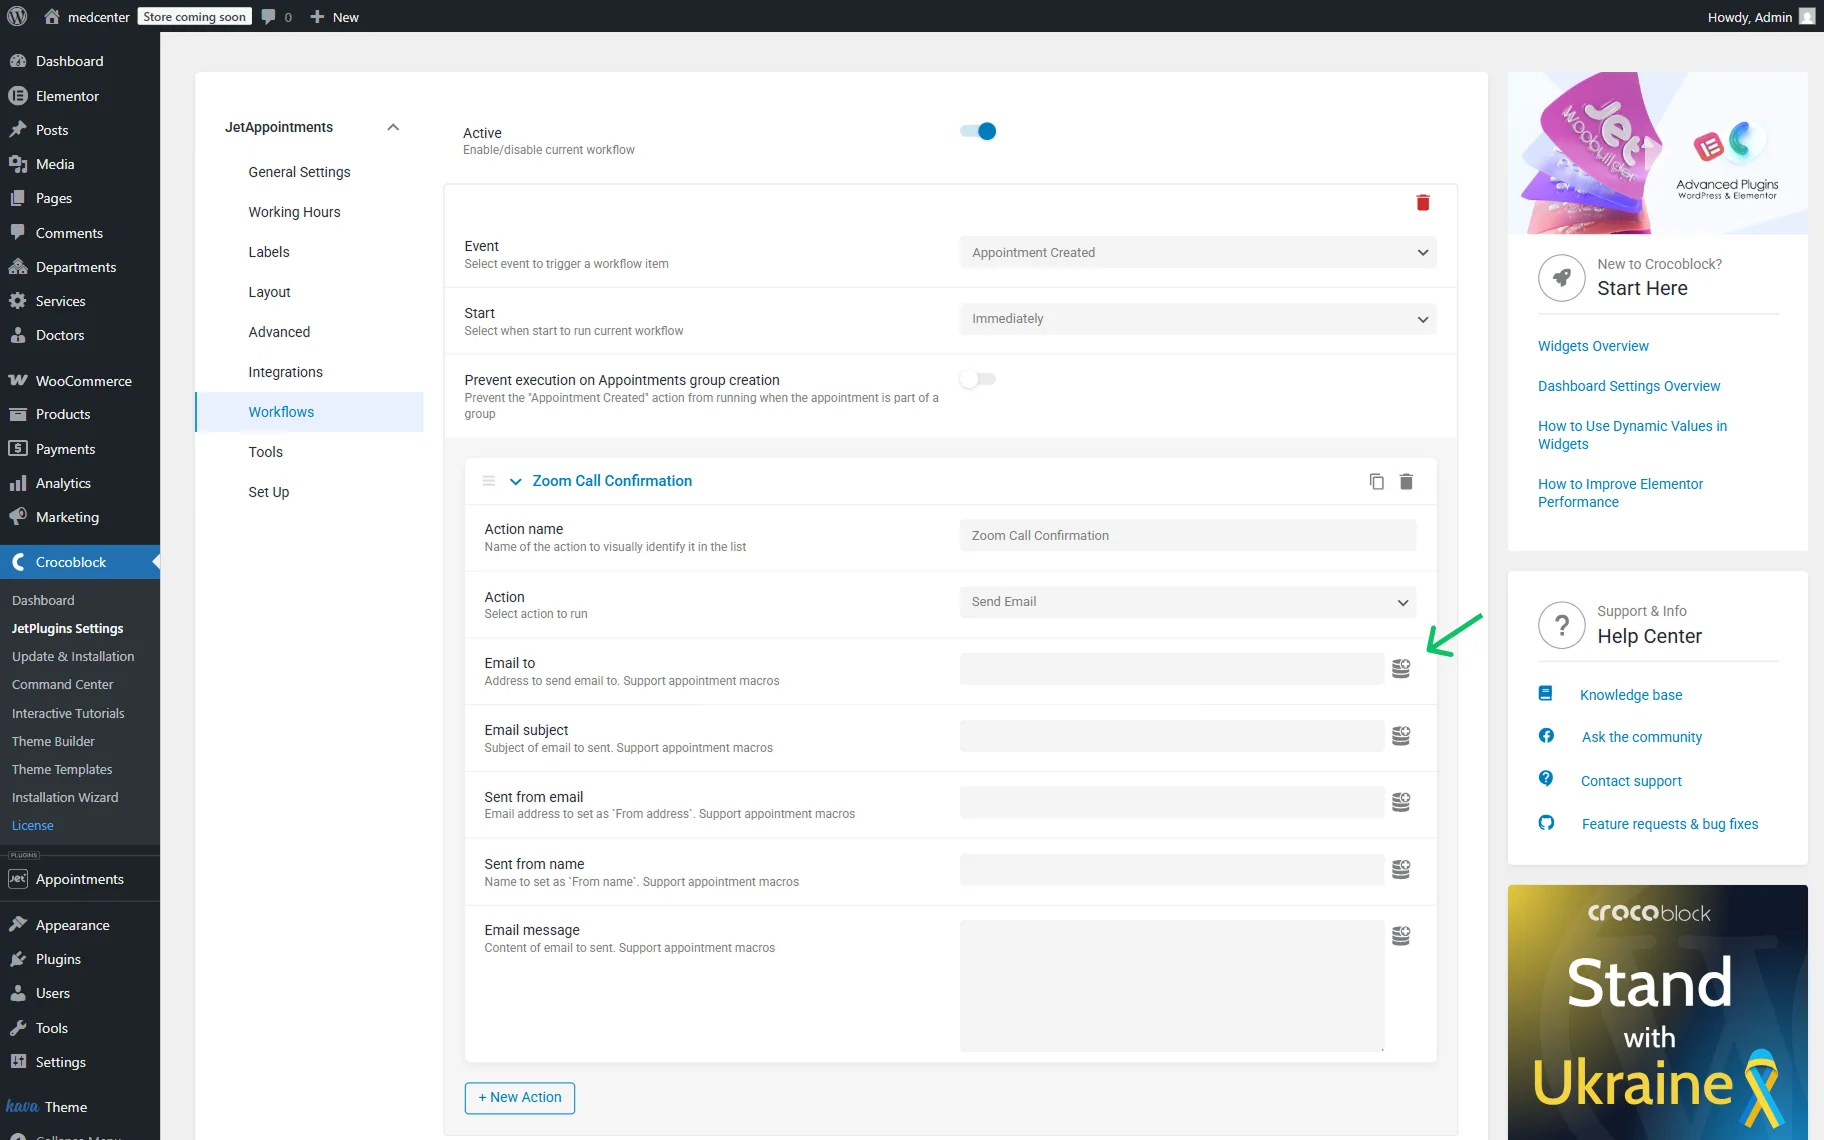
With the presented macros, one can add appointment date and time, links, related meta, IDs, price, and other data.
Some macros can be used to retrieve the needed data dynamically. Check how to do it on the Zoom integration example.

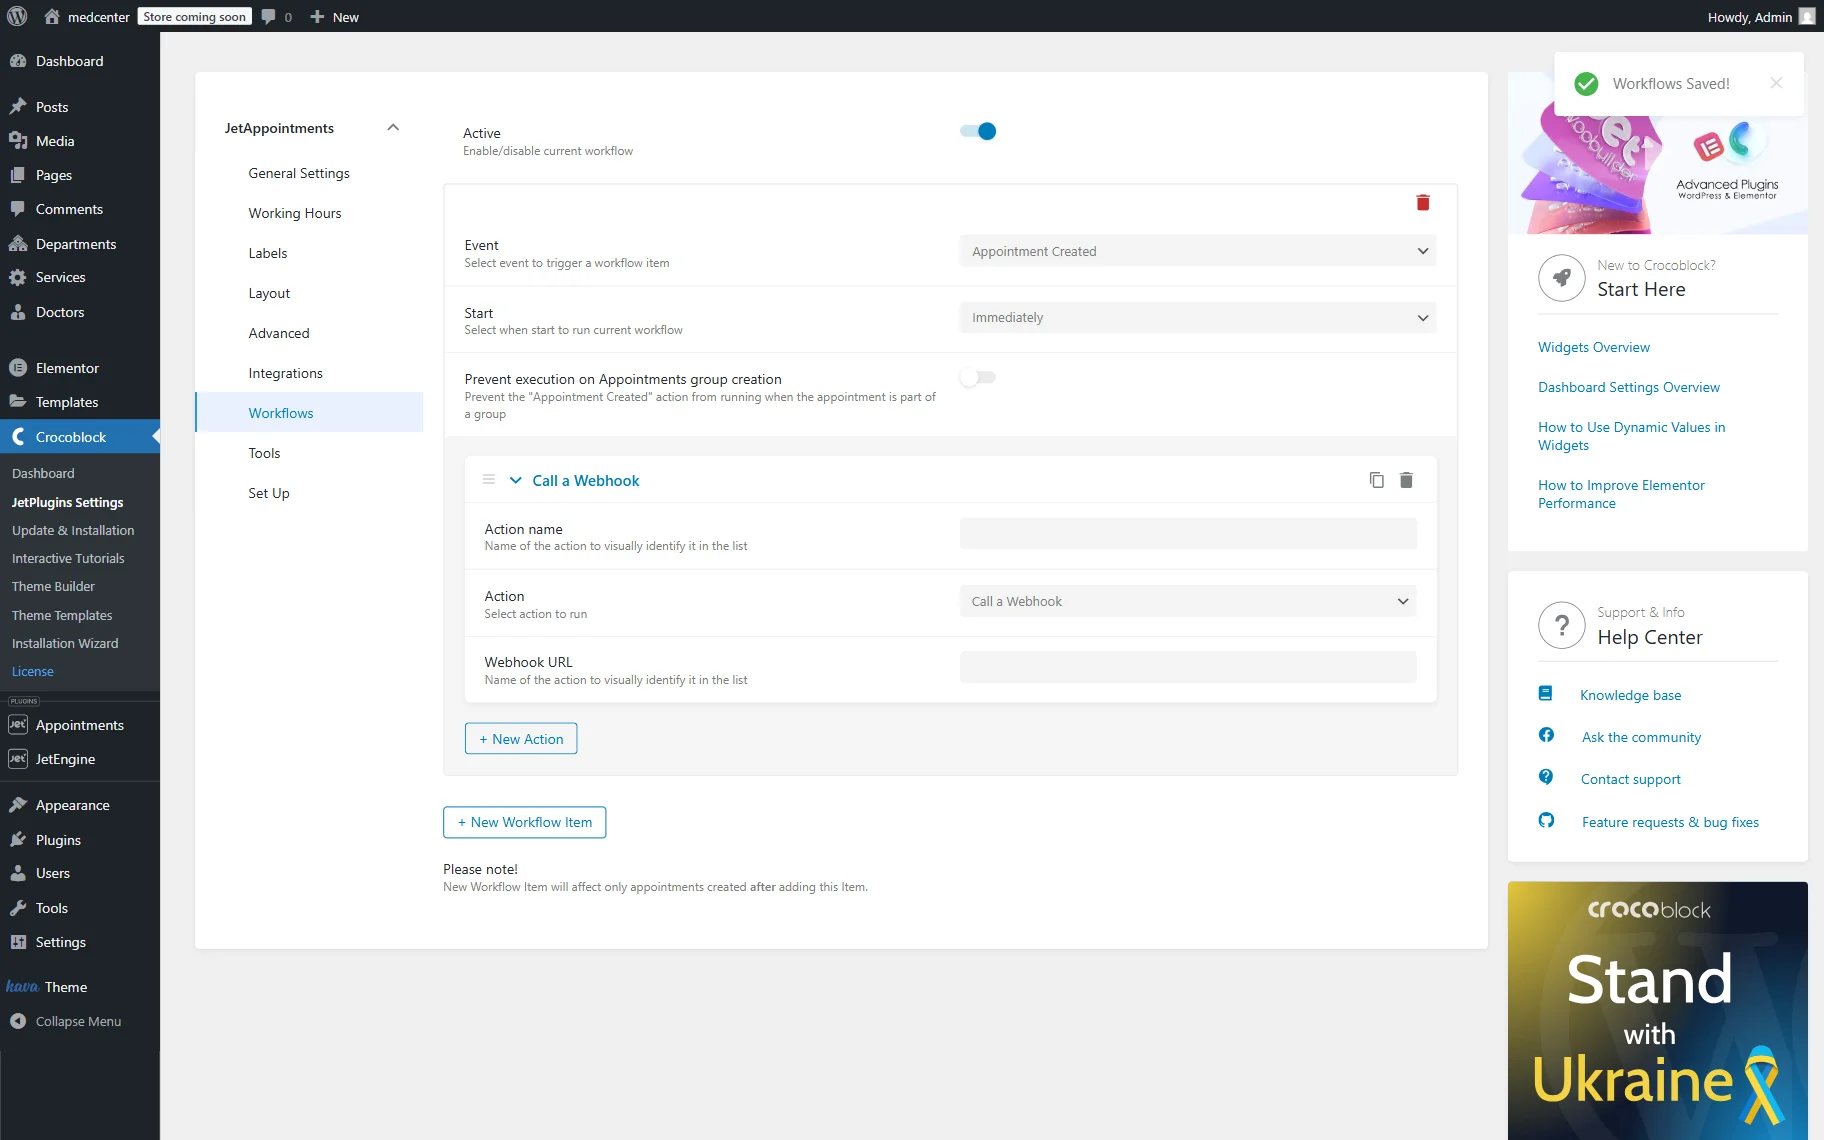
Another action to check is the “Call a Webhook” option. This action should be used to create more complicated workflows by using Make (formerly Integromat) and Zapier services.
Here, one field is presented where the Webhook URL should be pasted, the one received once the services mentioned earlier are set up.
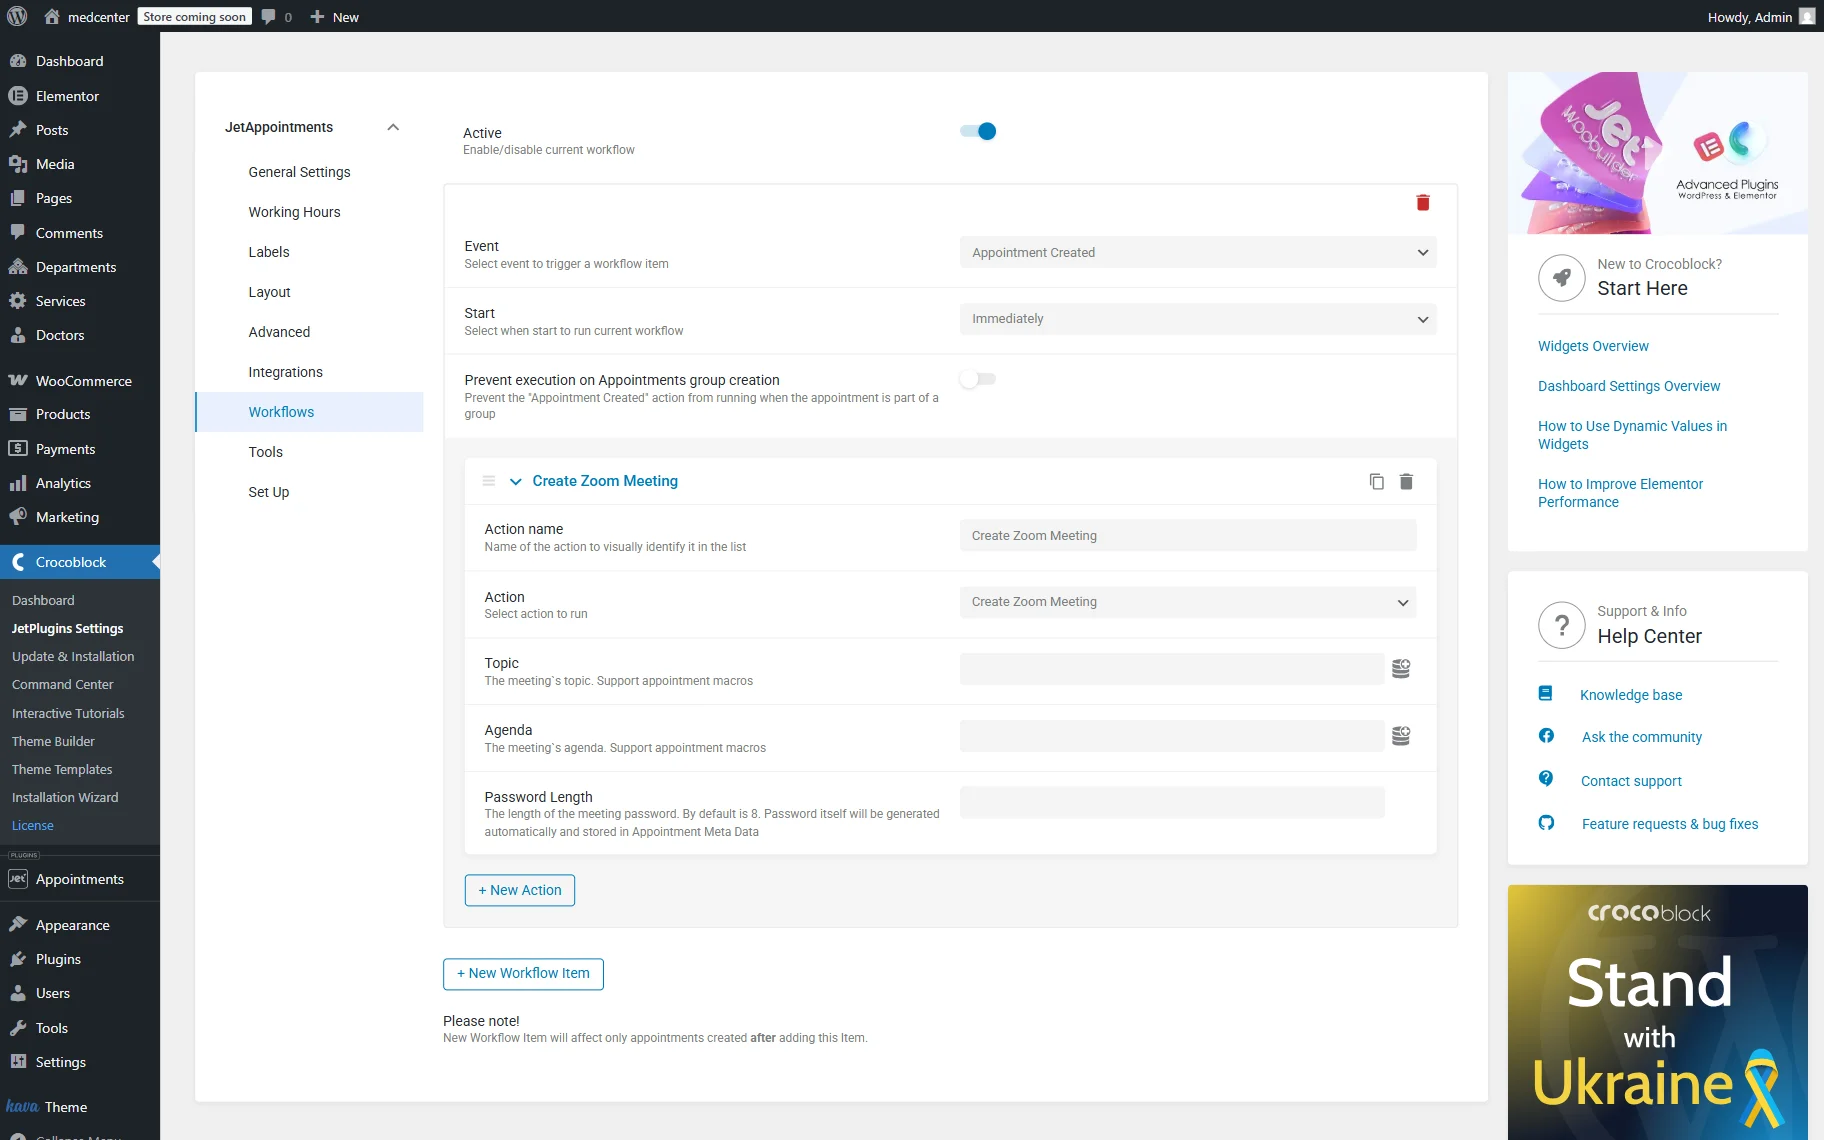
The last action is “Create Zoom Meeting.” It refers to the Zoom integration that can be set up in the Integrations tab of the plugin settings.
Additionally, the Zoom and JetAppointment integration to get Gmail notifications about upcoming appointments can be adjusted.
That’s all about customizing the appointments’ workflows on the WordPress website by using the JetAppointment plugin.