How to Operate with Dynamic Visibility via Shortcodes
This tutorial is about operating with Dynamic Visibility of widgets/blocks/elements via JetEngine’s shortcodes for WordPress.
Before you start, check the tutorial requirements:
- Elementor (Free version), Block editor (Gutenberg), or Bricks
- JetEngine plugin installed and activated
In this guide, we will look through the process of JetEngine’s shortcode generation in order to show certain widgets/blocks/elements in case a certain condition is met, namely if the price of the tour exceeds $1500 on the tour website.
Also, check the Dynamic Visibility Overview to know how to manage the visibility conditions.
Generate a Shortcode
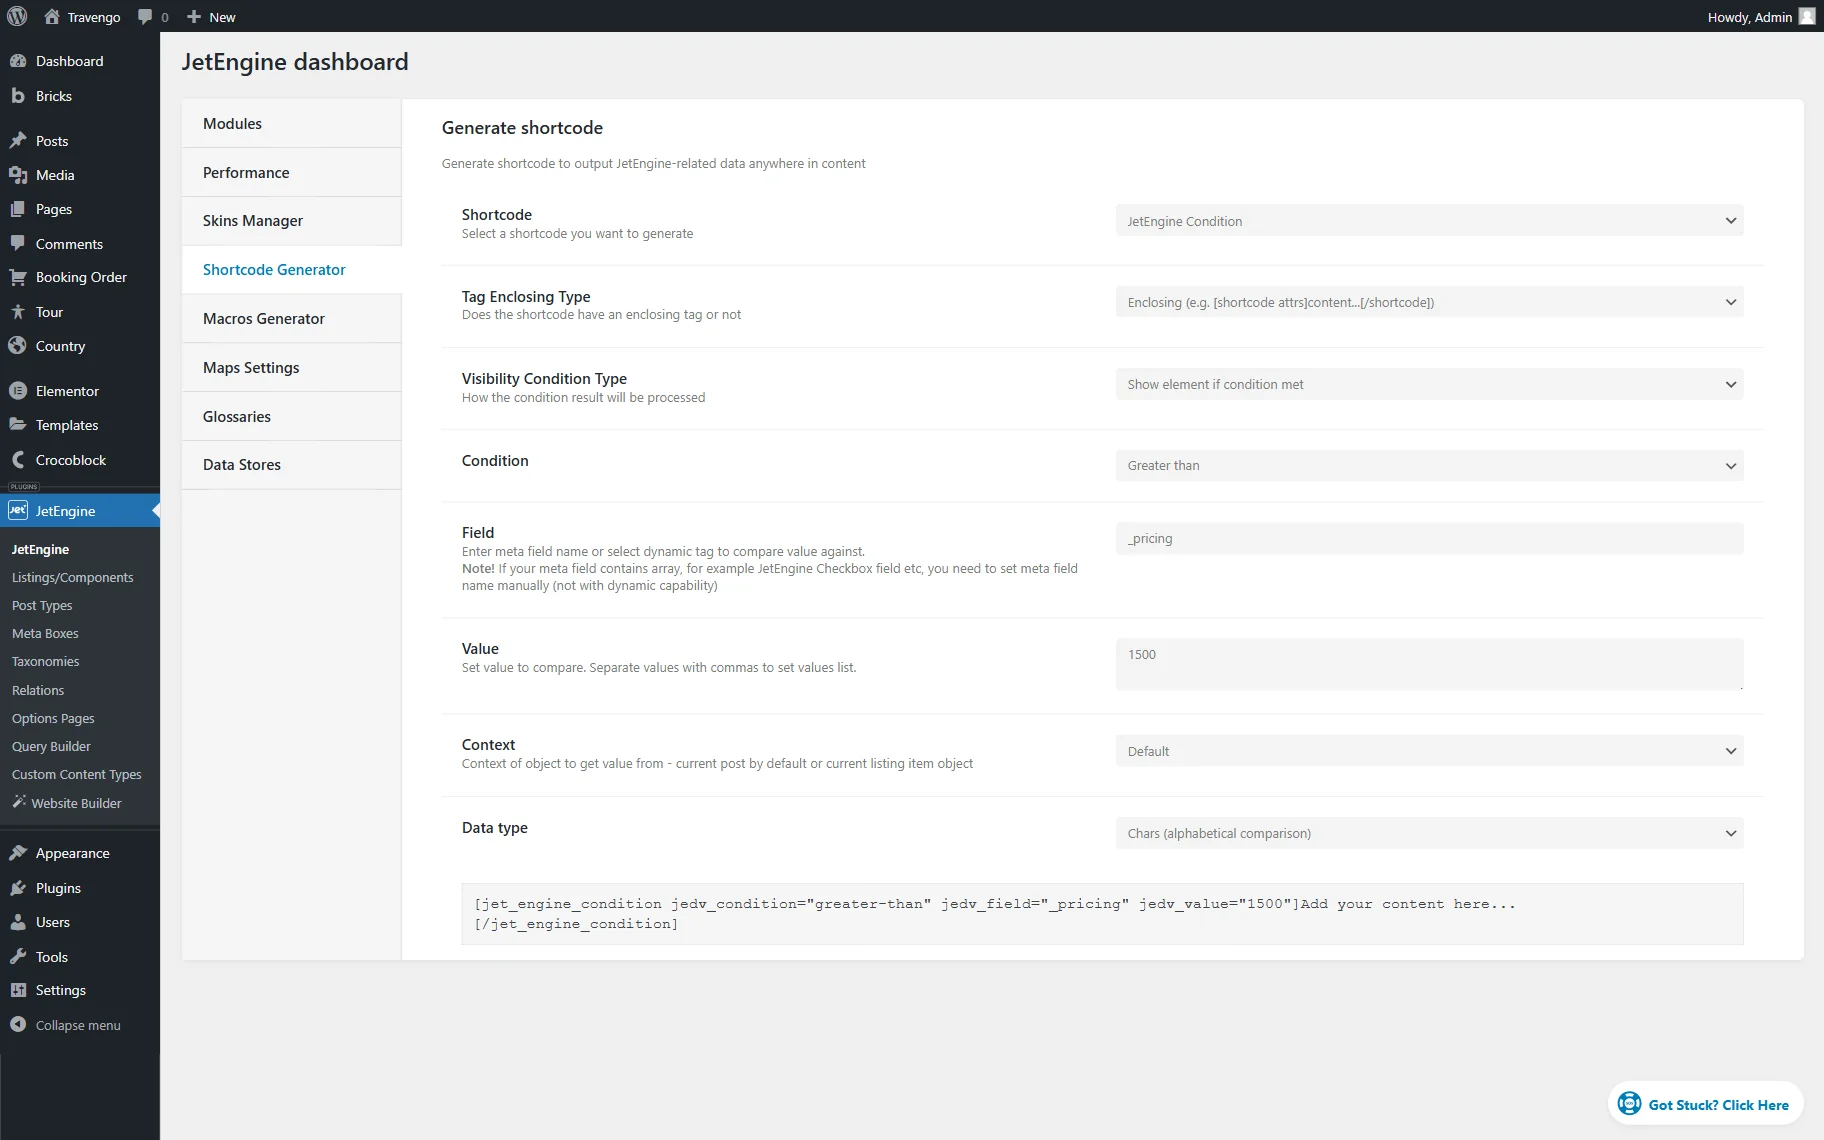
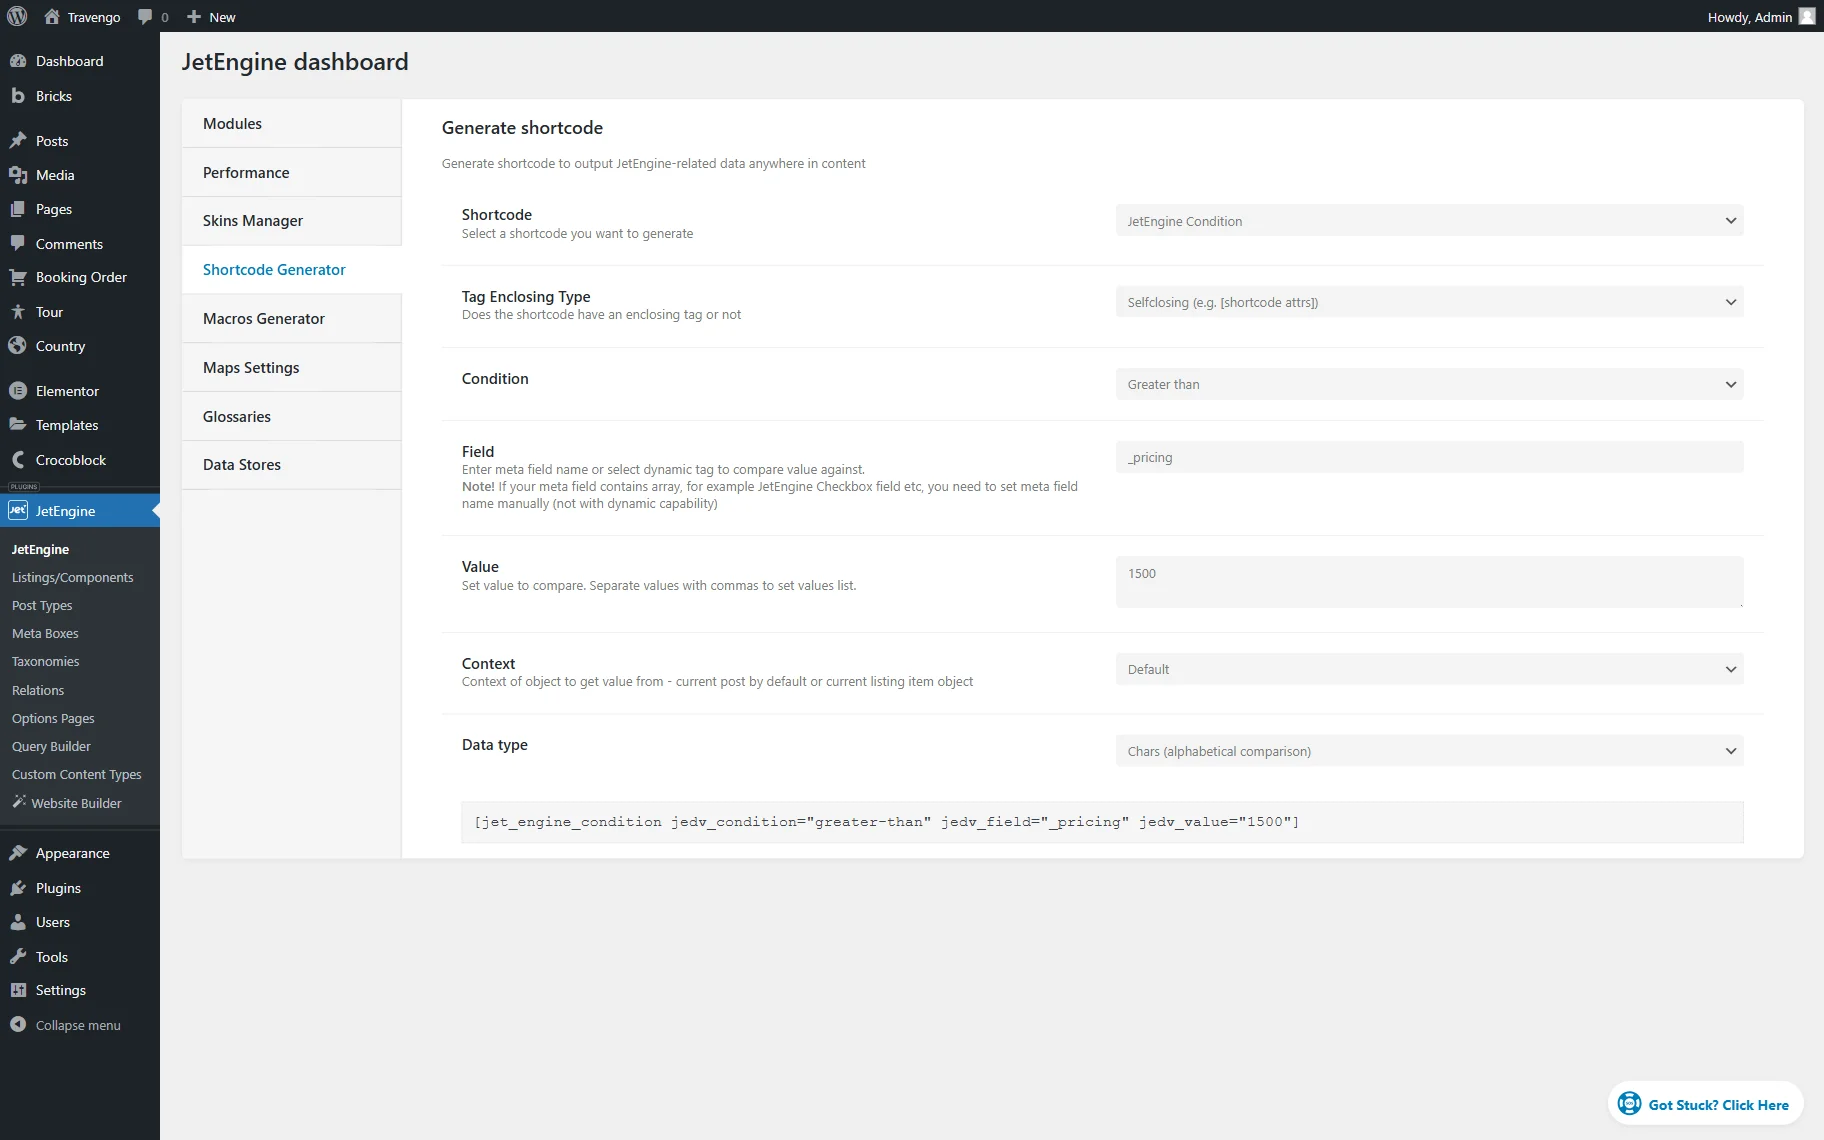
Head to WordPress Dashboard > JetEngine > JetEngine and open the Shortcode Generator tab.
Here, select the preferred option in the Shortcode field. Now, we pick the “JetEngine Condition” option.
Next, we select the “Enclosing (e.g. [shortcode attrs]…content[/shortcode])” option as the Tag Enclosing Type to be able to paste the needed text inside of the shortcode.
Then, we leave the default “Show element if condition met” Visibility Condition Type.
In the Condition field, select the needed option. In this case, we pick the “Greater than” option.
In the Field, paste the Name/ID of the meta field value that should be compared. In this case, we paste the “_pricing” value.
Then, we paste the “1500” in the Value field so the text will be visible only when the price exceeds the mentioned value.
Next, we leave the following Context and Data type fields default.
Ultimately, copy the shortcode.
Use Shortcode in Elementor
Proceed to the place where you want to use the generated shortcode. For instance, we want to use it in JetEngine’s Listing template, so we head to WordPress Dashboard > JetEngine > Listings/Components and press the “Add New Item” button.
In the Setup Listing Item pop-up, we leave the default “Posts” Listing source, choose the “Tour” option in the From post type selector (it is the Custom Post Type created beforehand), set the “Listing Tours” Listing item name, and leave the default “Elementor” Listing view.
Click the “Create Listing Item” button to open the editor.

Fill the listing with the needed widgets. In our case, we have added different dynamic widgets, namely Dynamic Link, Dynamic Image, and Dynamic Fields.
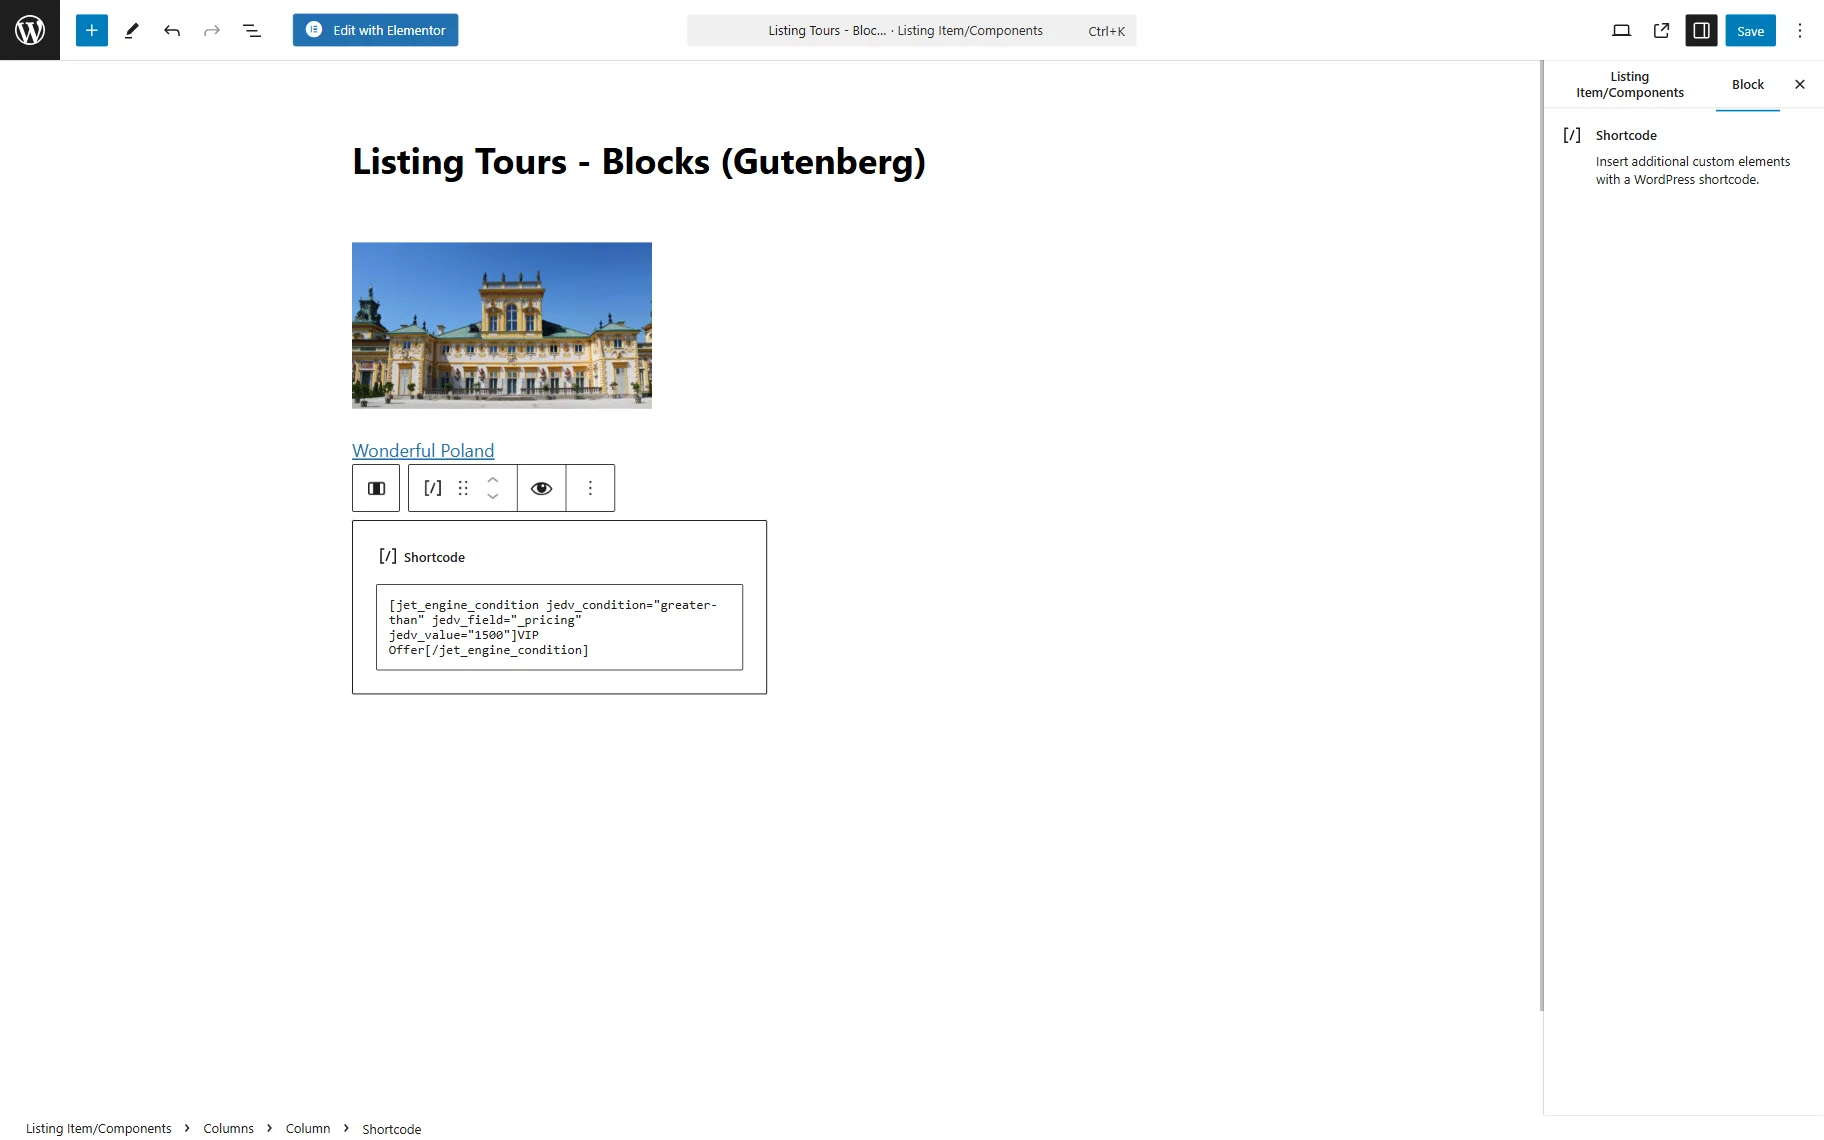
Next, add a Shortcode widget to the page.
In the Enter shortcode field, paste the copied shortcode and change the “Add your content here…” text inside it into the text you need.
For instance, we have the following shortcode:
[jet_engine_condition jedv_condition="greater-than" jedv_field="_pricing" jedv_value="1500"]VIP Offer[/jet_engine_condition]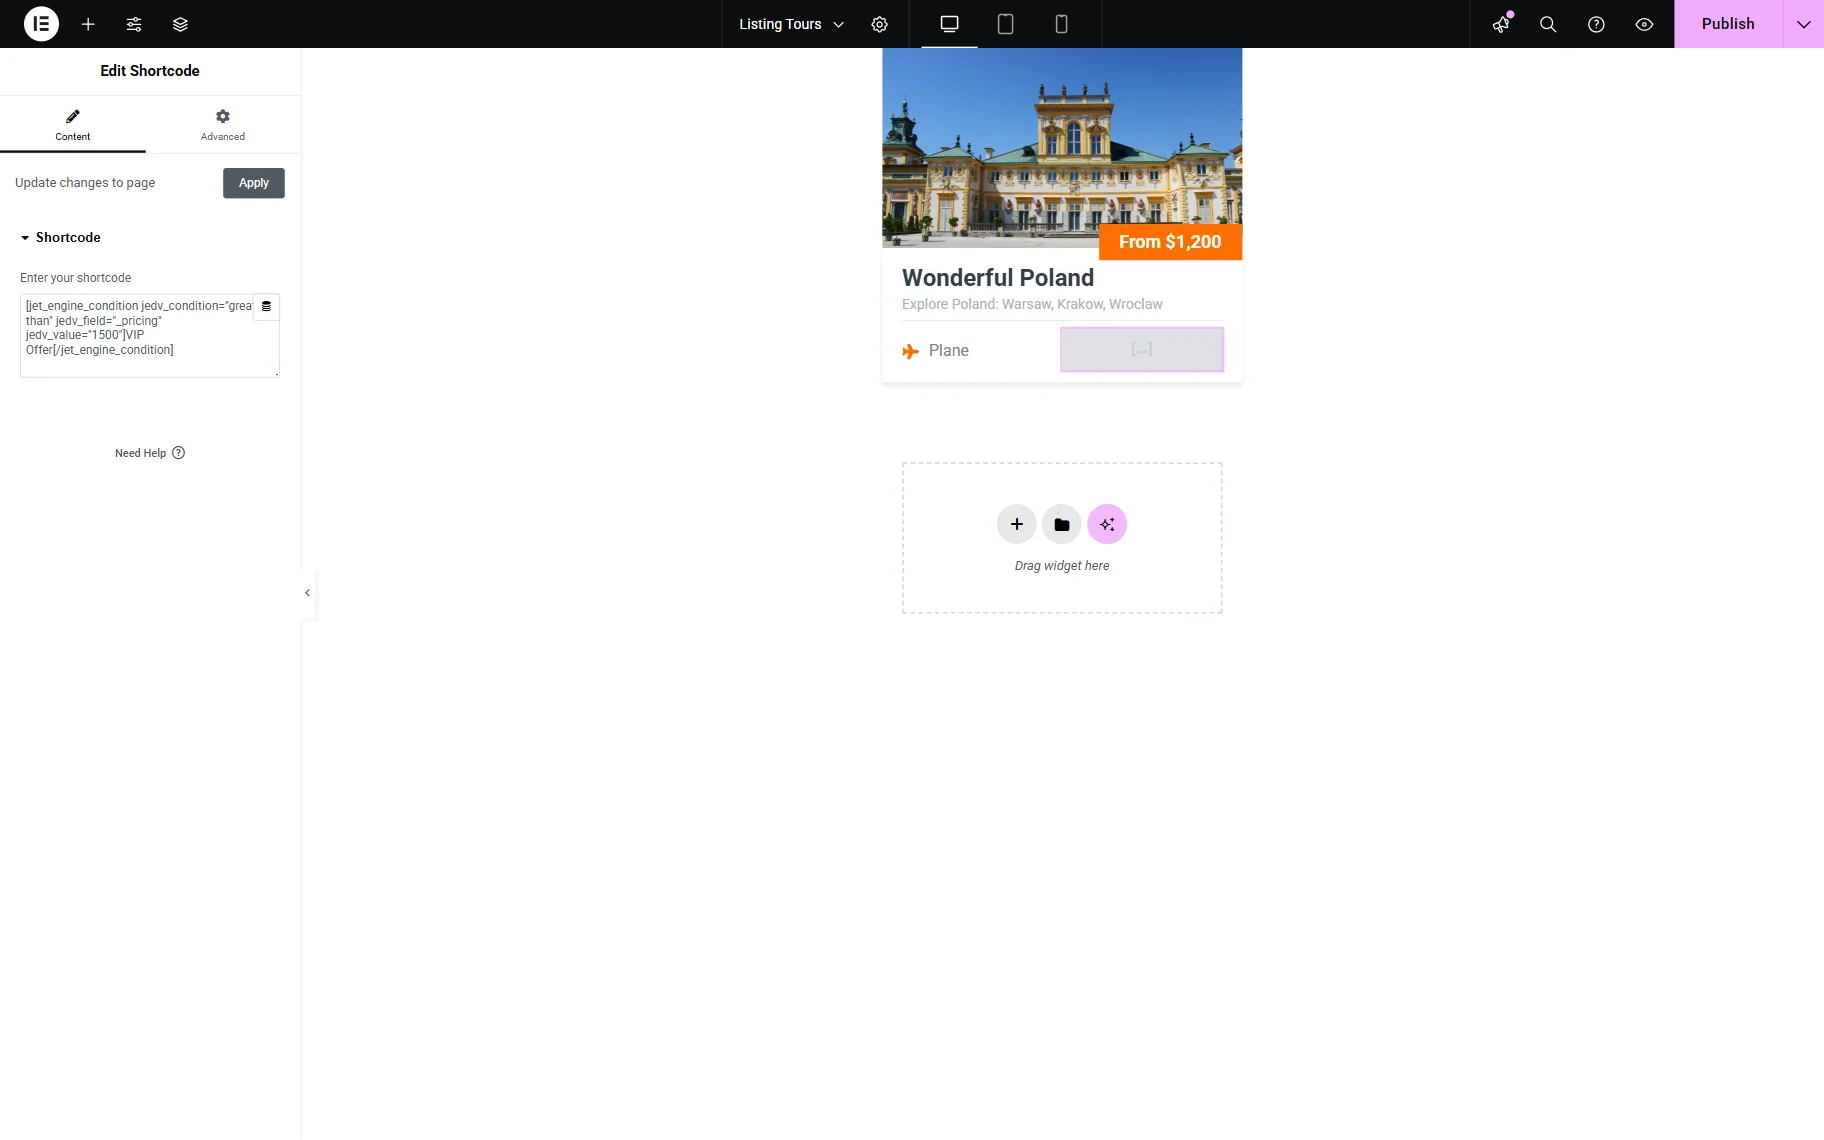
Save the listing item by pressing the “Publish” button.
Proceed to the page where you want to use the created Listing template. For instance, we go to WordPress Dashboard > Pages and open the “Home” page in the editor.
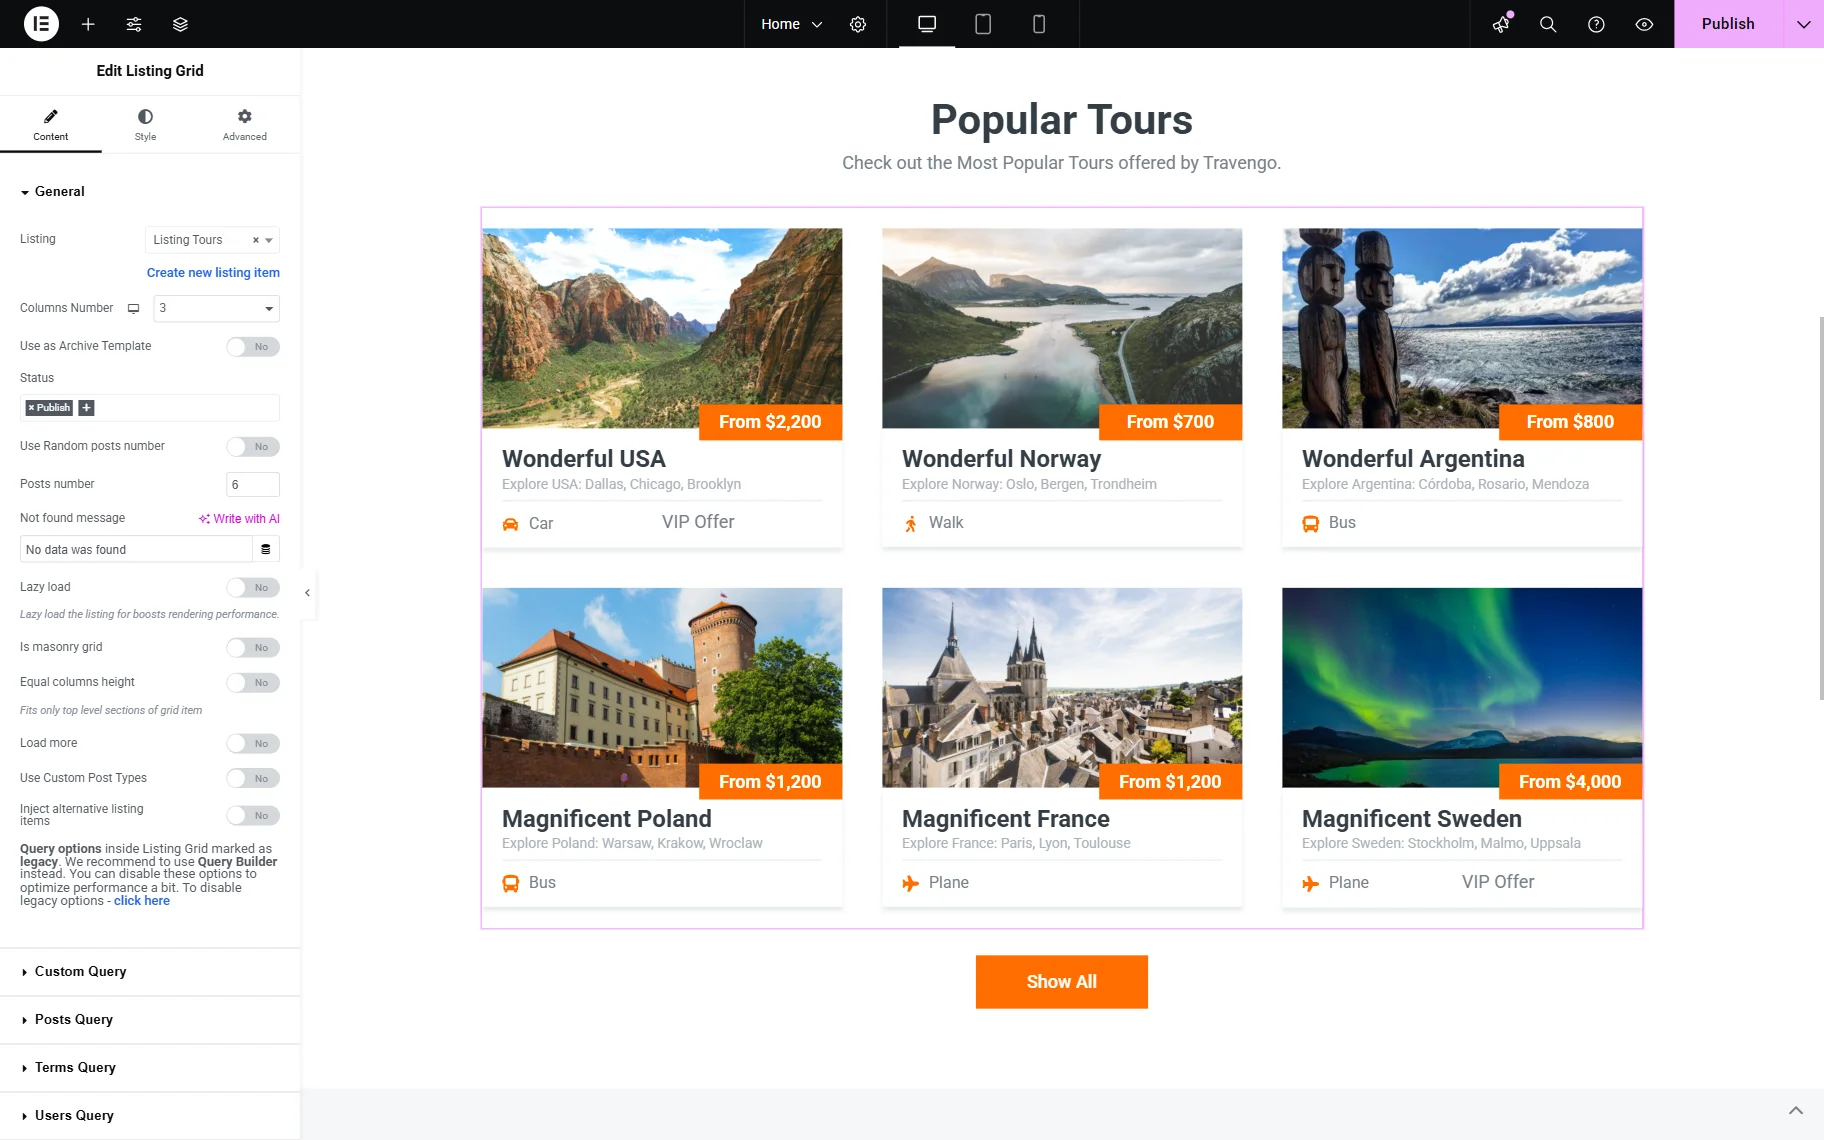
Here, find and put the Listing Grid widget on the page.
Select the needed Listing and adjust other settings if needed.
Make other changes to the page and press the “Publish” button whenever ready.
Use Shortcode in Gutenberg (Block Editor)
The customization process in Gutenberg (Block Editor) is similar to the one in Elementor.
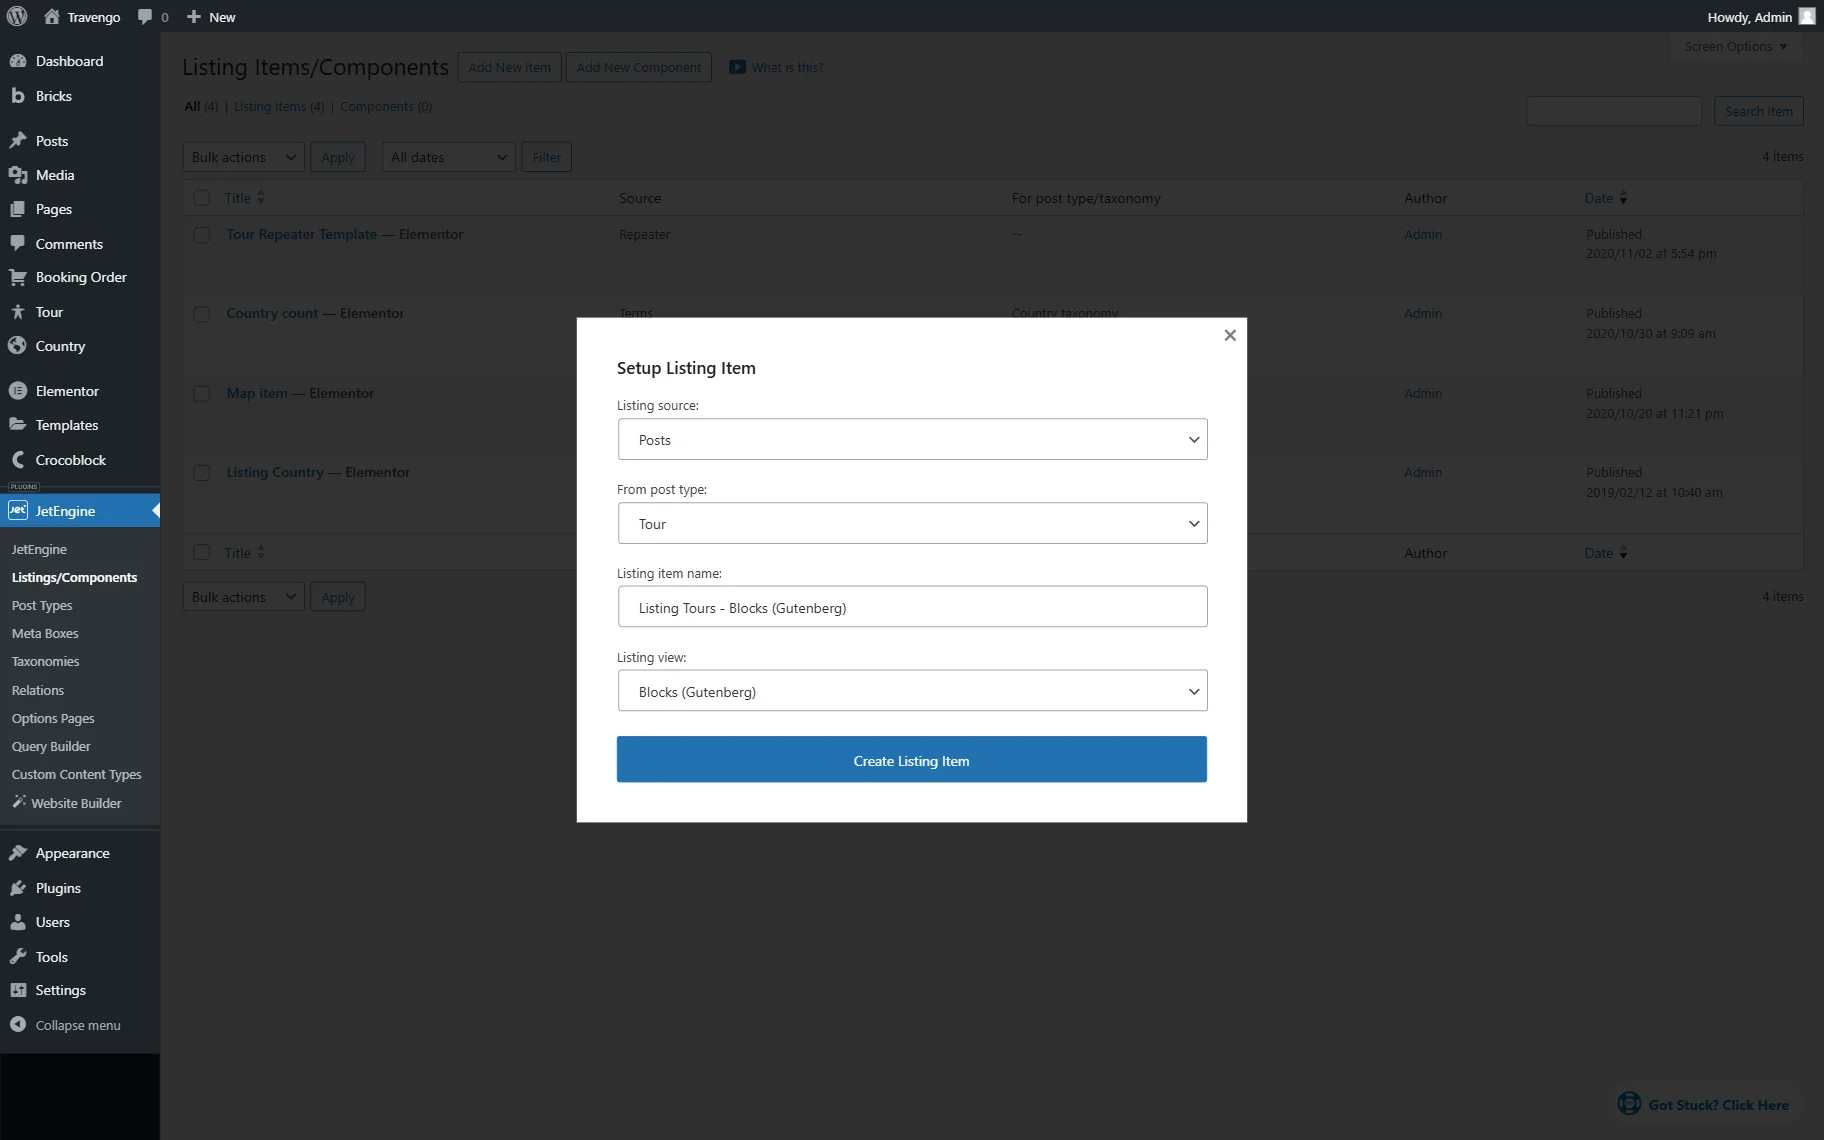
For instance, let’s assume we want to create the Listing item, but this time, it is in Gutenberg. So, in the WordPress Dashboard > JetEngine > Listing/Components directory, we press the “Add New Item” button.
In the Setup Listing Item pop-up, we leave the default “Posts” Listing source, choose the “Tour” option in the From post type selector, set the “Listing Tours – Blocks (Gutenberg)” Listing item name, and pick the “Blocks (Gutenberg)” Listing view.
Press the “Create Listing Item” button to proceed to the editor.
In the editor, add content to your listing. For instance, we add dynamic blocks, namely Dynamic Link, Dynamic Image, and Dynamic Fields.
Next, we add the Shortcode block to the page.
In the Enter shortcode field, paste the copied shortcode. For instance, we paste the same shortcode as in Elementor previously.
Now, you can add the Listing Grid to the needed page, like in the chapter about Elementor.
Use Shortcode in Bricks
Let’s generate one more shortcode, but this time it will be self-closing, so it can be later used in Bricks to set the dynamic visibility of the needed element.
Go to WordPress Dashboard > JetEngine > JetEngine and open the Shortcode Generator tab.
In the Shortcode field, we select the “JetEngine Condition” option. Next, we pick the “Selfclosing (e.g.) [shortcode attrs])” Tag Enclosing Type and the “Greater than” Condition.
In the Field, set the Name/ID of the meta field that should be used for comparison. Here, we place the “_pricing” value. The Value is set to “1500,” and the Context and Data type is left default.
Then, copy the generated shortcode.
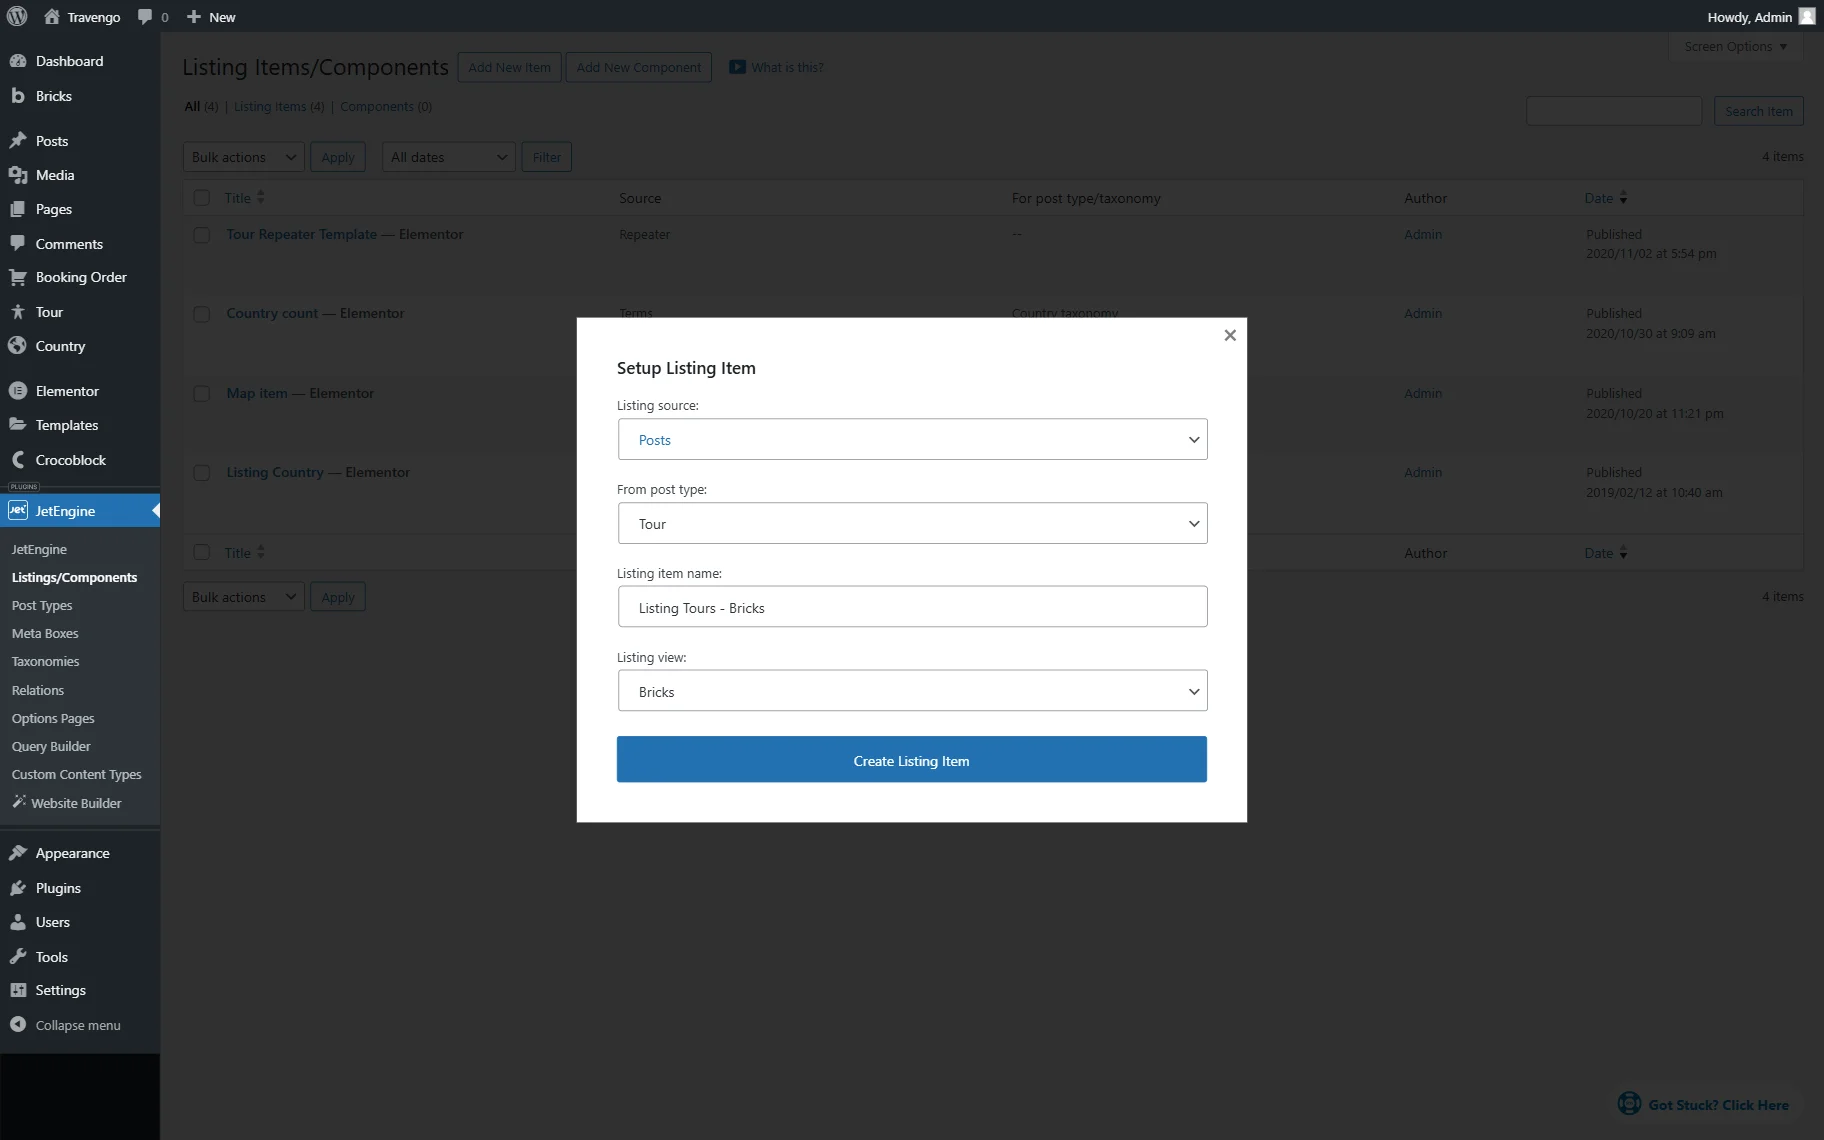
Now, we want to create the Listing item in Bricks. So, in the WordPress Dashboard > JetEngine > Listing/Components directory, we press the “Add New Item” button.
In the Setup Listing Item pop-up, we leave the default “Posts” Listing source, choose the “Tour” option in the From post type selector, set the “Listing Tours – Bricks” Listing item name, and select the “Bricks” Listing view.
Press the “Create Listing Item” button to proceed to the editor.
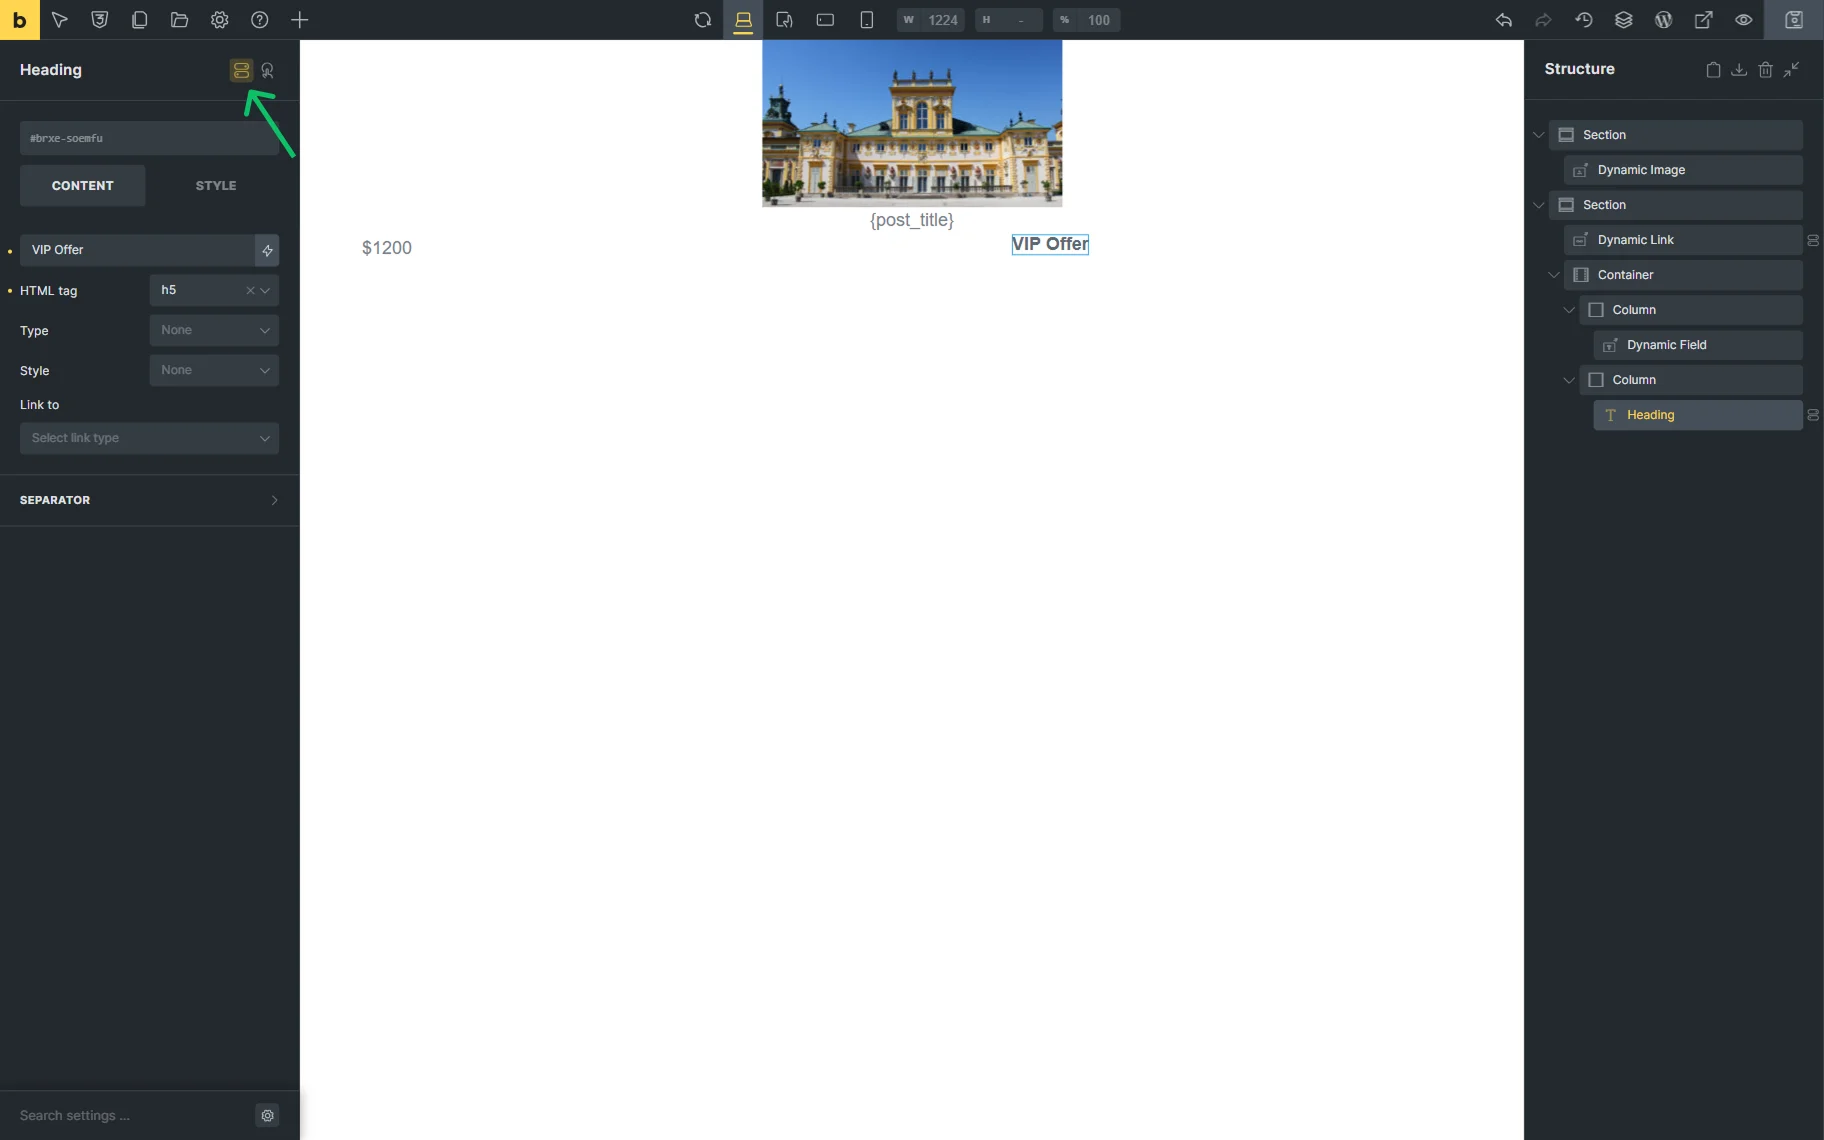
In the editor, add content to your listing. For instance, we add dynamic elements, namely Dynamic Link, Dynamic Image, and Dynamic Fields.
Next, we add a Heading with the “VIP Offer” text. When the element is selected, press the “Conditions” button.
Hit the “plus” button.
In the Select condition dropdown, find the JET ENGINE section and select the “Dynamic Visibility” option.
In the appeared Compare field, pick the “Condition is met” option.
In the Value field, paste the copied shortcode.
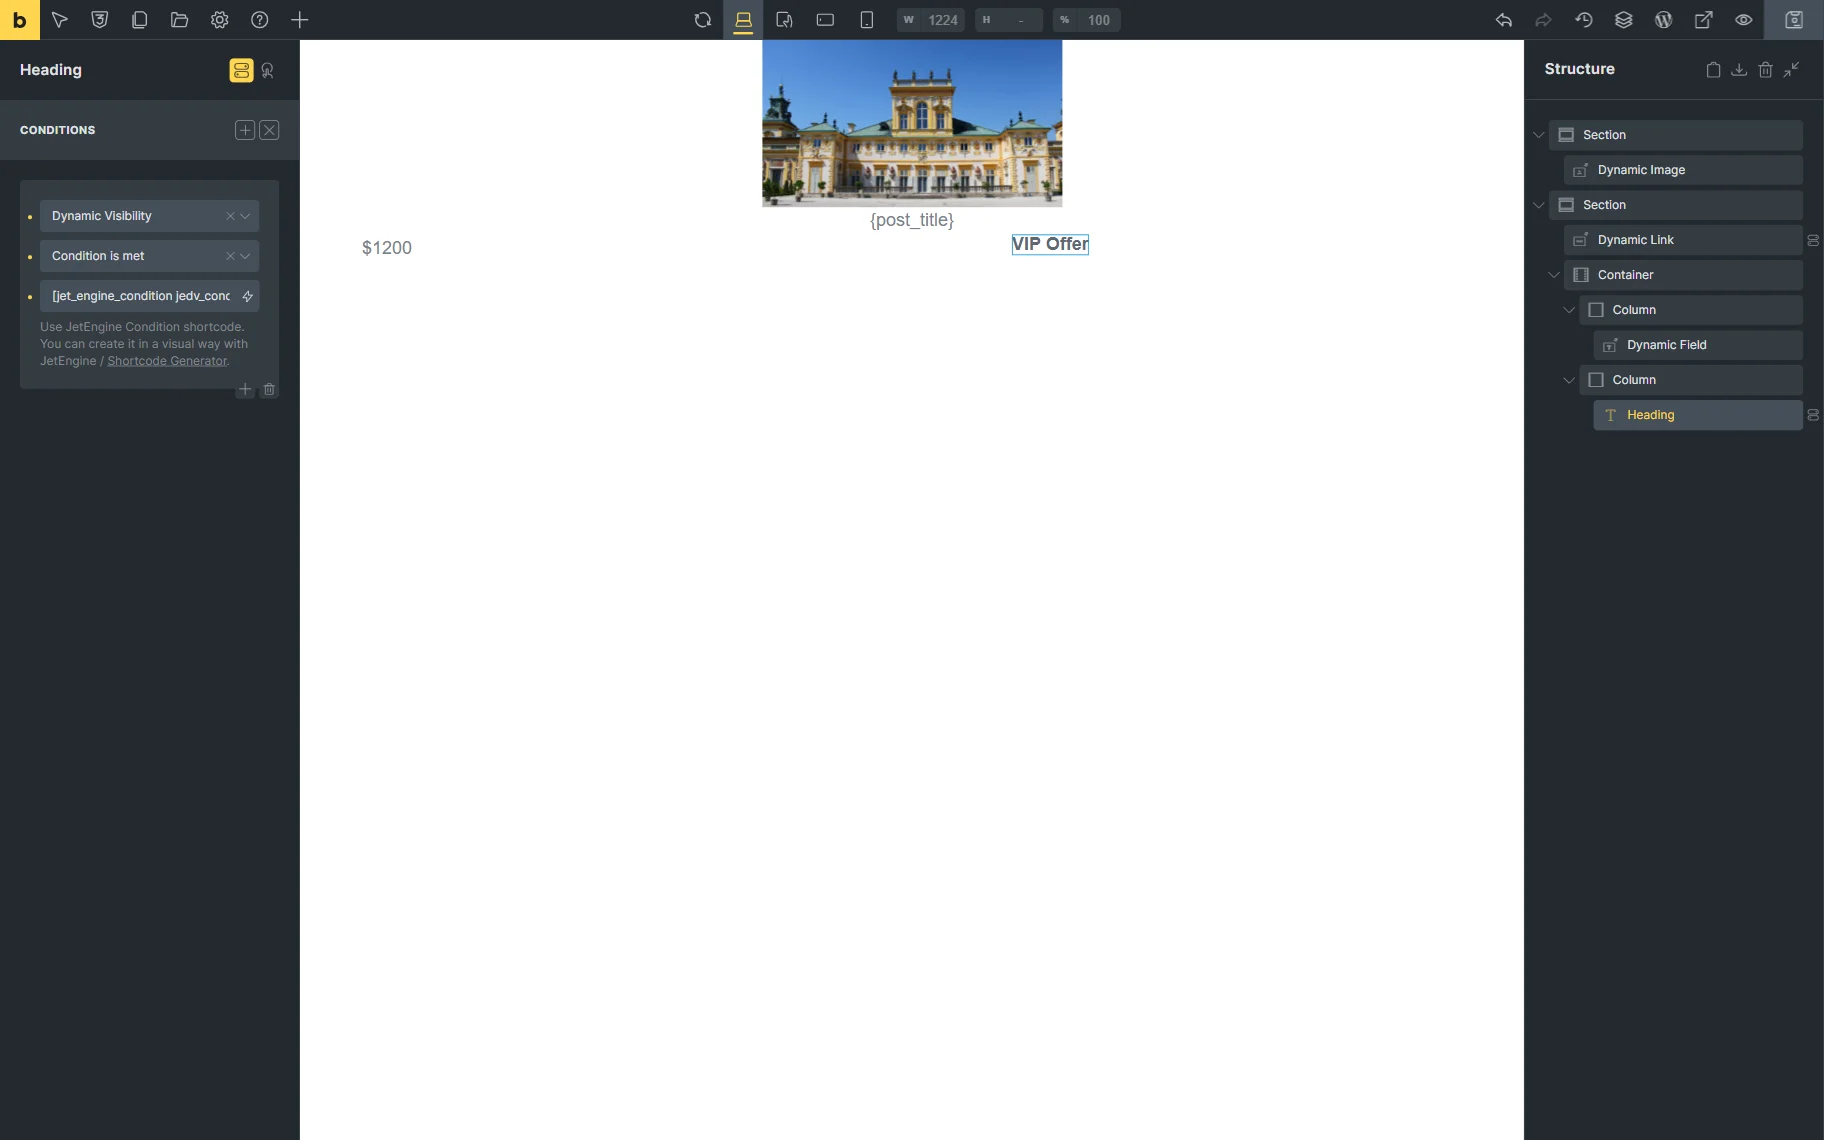
Ultimately, save the page.
Now, you can add the Listing Grid to the needed page, like in the chapter about Elementor.
Check the Result
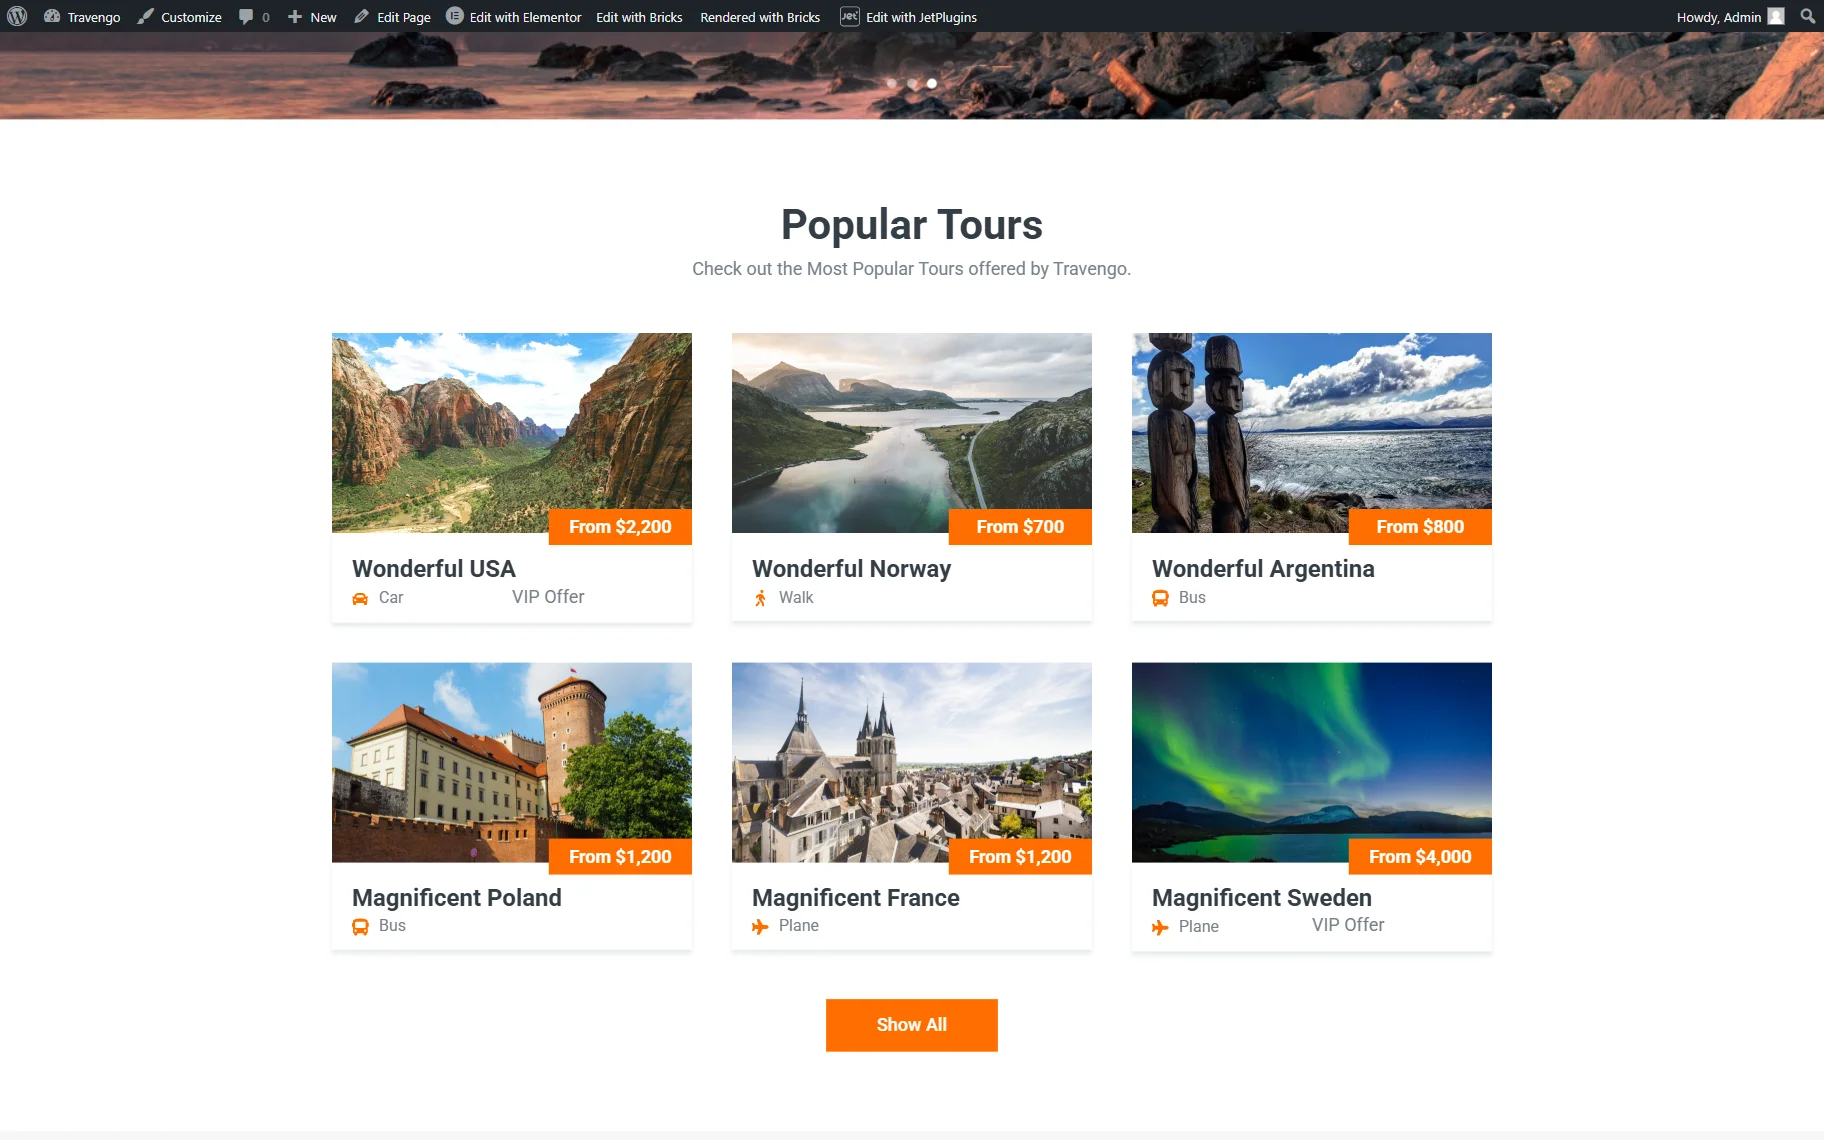
Open the just-edited page on the front end.
As you can observe, the added text is now visible next to the items when the condition is met, namely, when the price is higher than $1500.
That’s all; now you know how to operate with Dynamic Visibility via JetEngine shortcodes on your WordPress website.