How to Link Booking Instances with Map Listings
Find out how to set up pop-ups on the map when users hover over items in CPT listings.
Before you start, check the tutorial requirements:
- Elementor (Free version)
- JetEngine plugin installed and activated
- JetBooking plugin installed and activated
Learn how to link JetBooking Instance Custom Post Type listings with a dynamic map in WordPress. This guide explains how to set up pop-ups that open on the map when users hover over items in the listing, creating a more interactive and user-friendly booking experience.
Create a Listing Template
First of all, we need to create a Listing Template for the Custom Post Type (“Properties” in this case). You can refer to our How to Create a Listing Template for Post Types in Elementor guide if you are not sure about the setup.
We use the Dynamic Widgets to display the information about the CPT items.
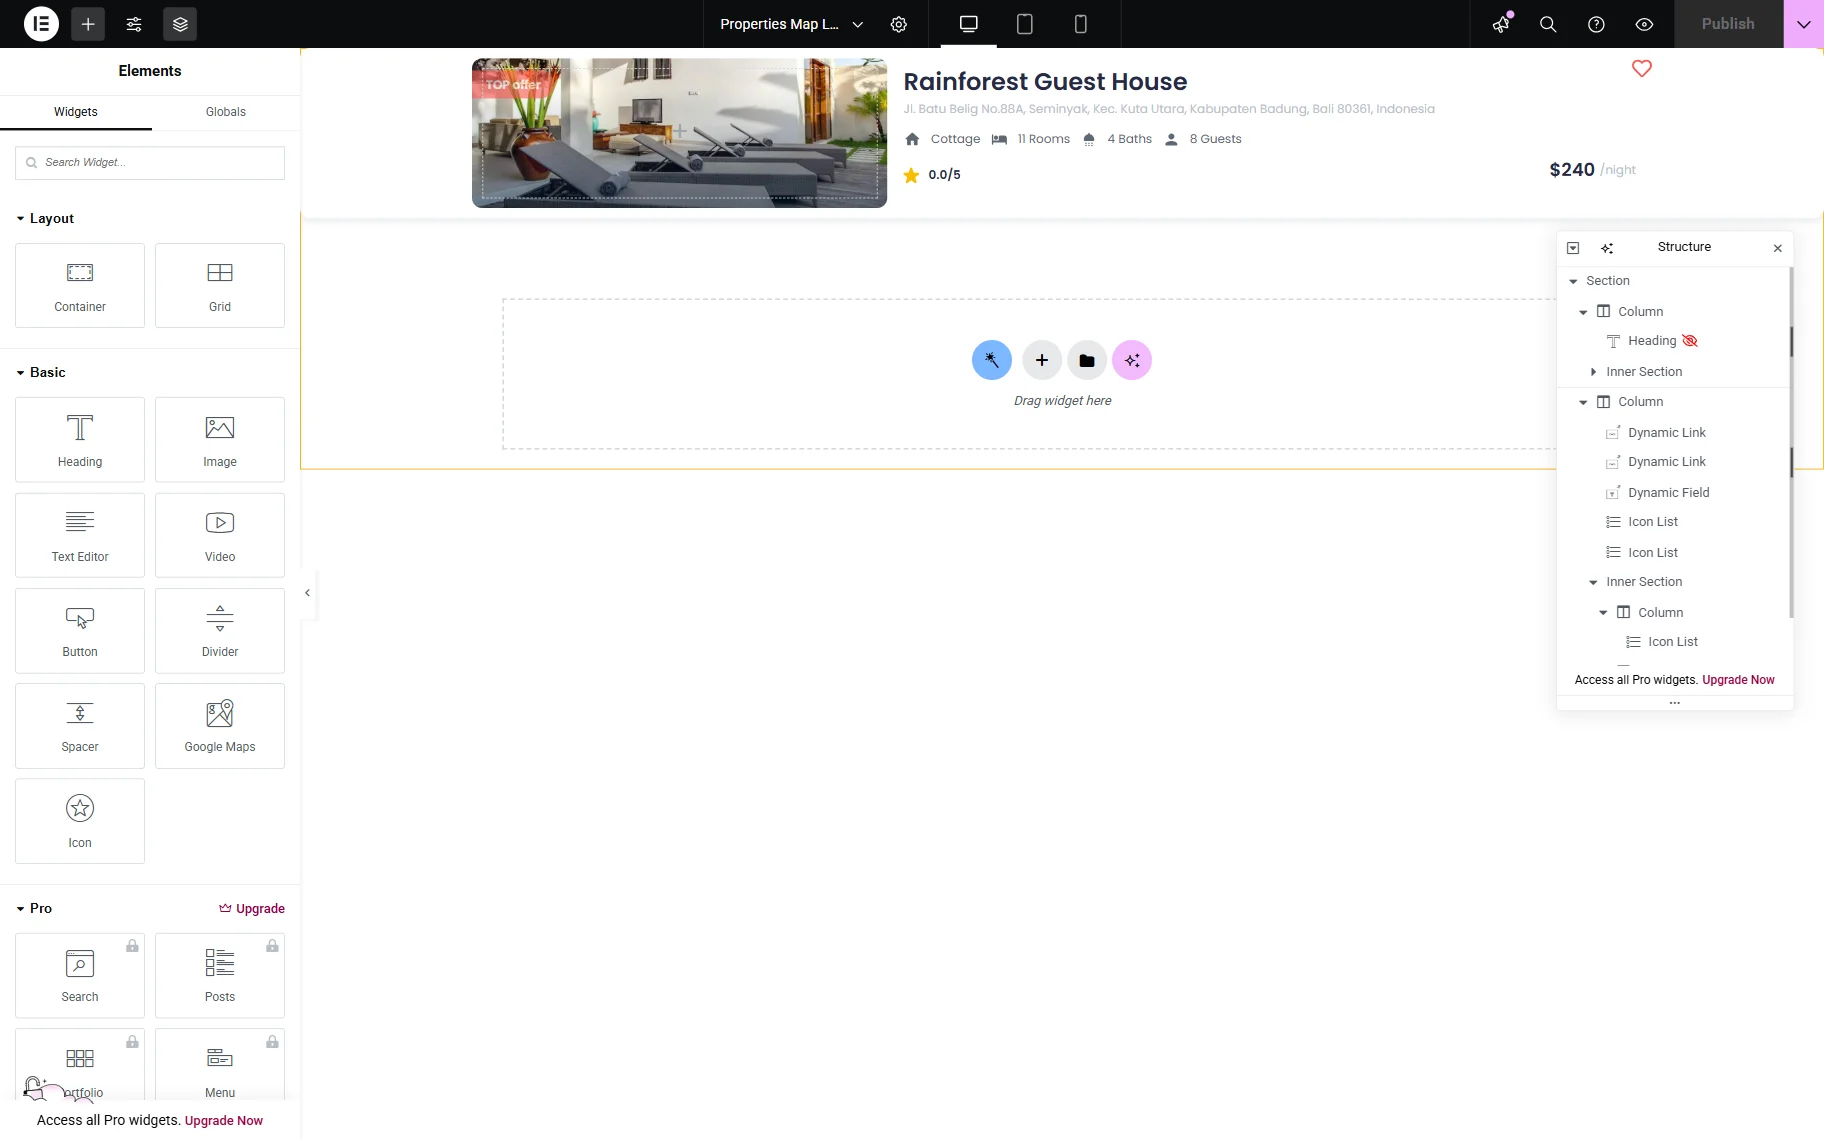
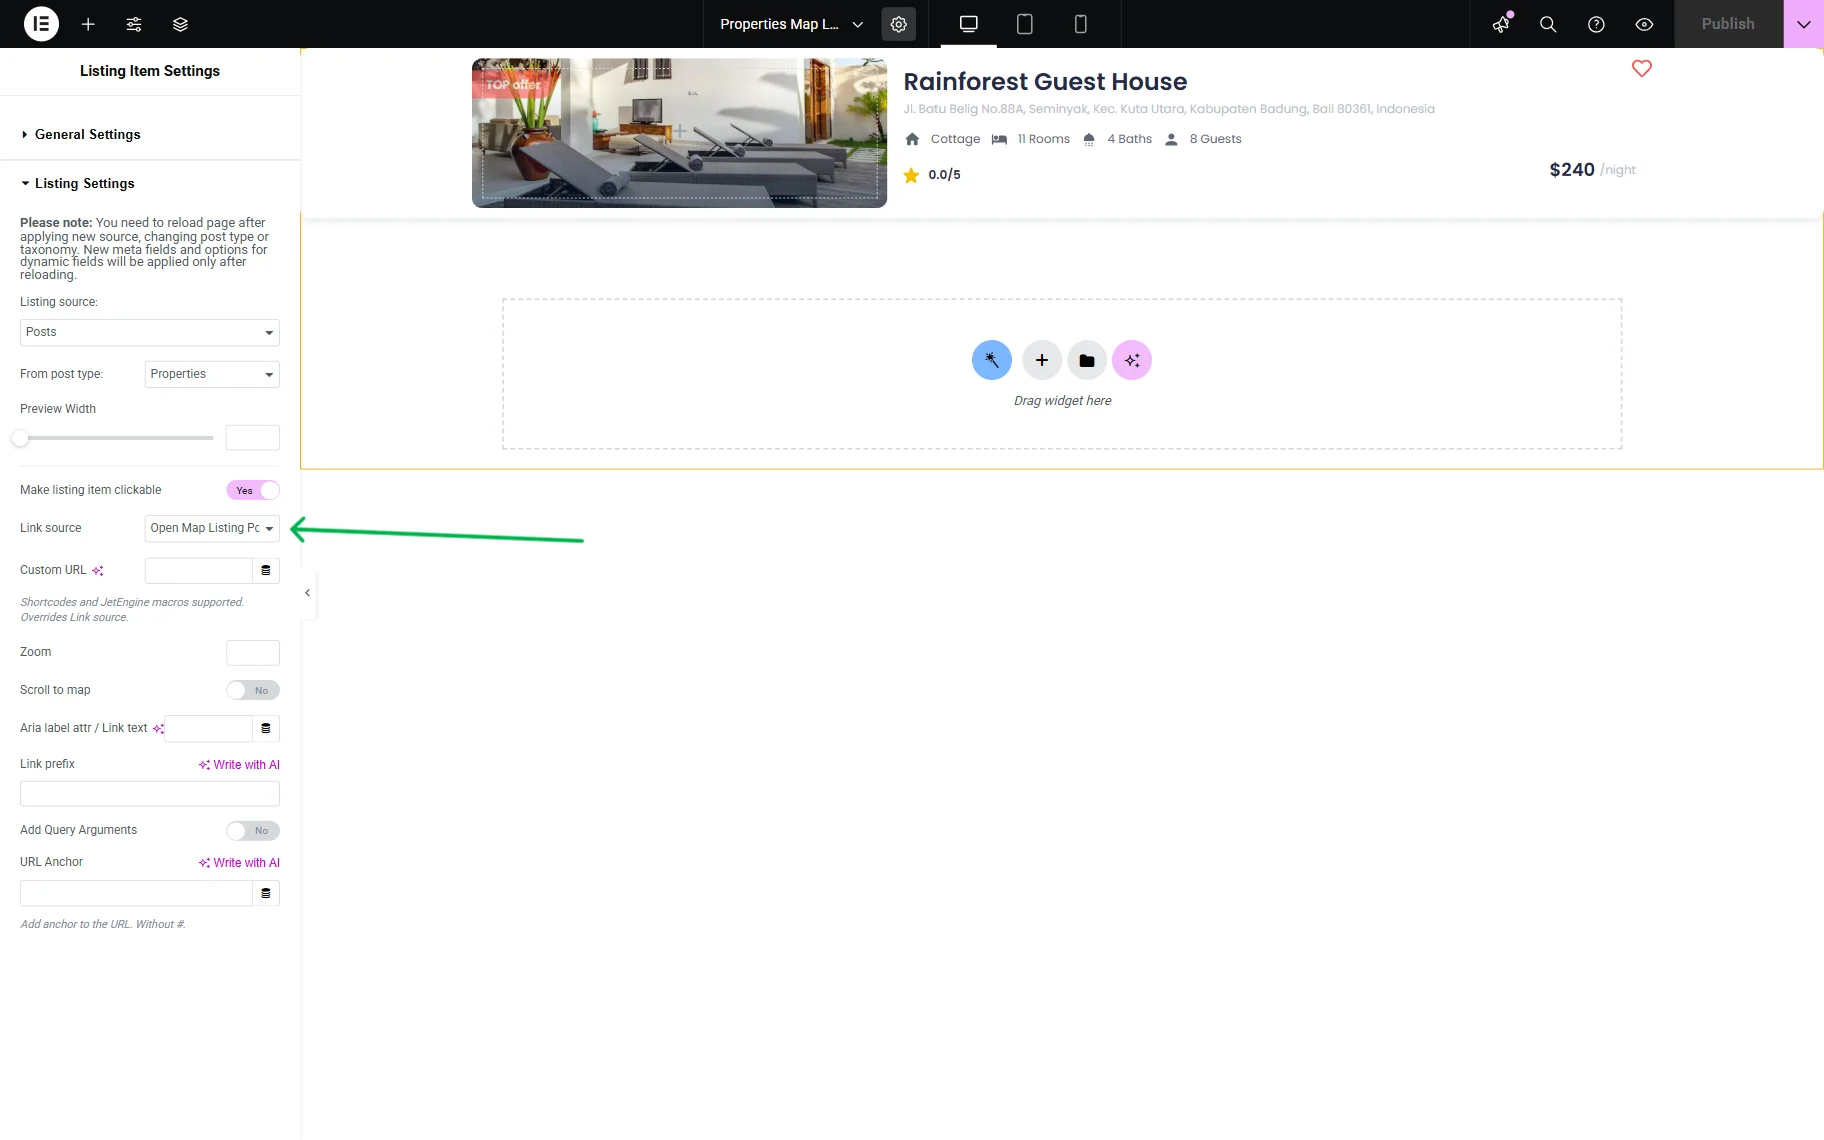
Once you are ready with the content settings, click the “gear” icon in the top section to open the Listing Item Settings tab. Then, in the Listing Setting section, enable the Make listing item clickable toggle. Select the “Open Map Listing Popup on Hover” option in the Link source field.
Click the “Publish” button.
Adjust a Map Listing
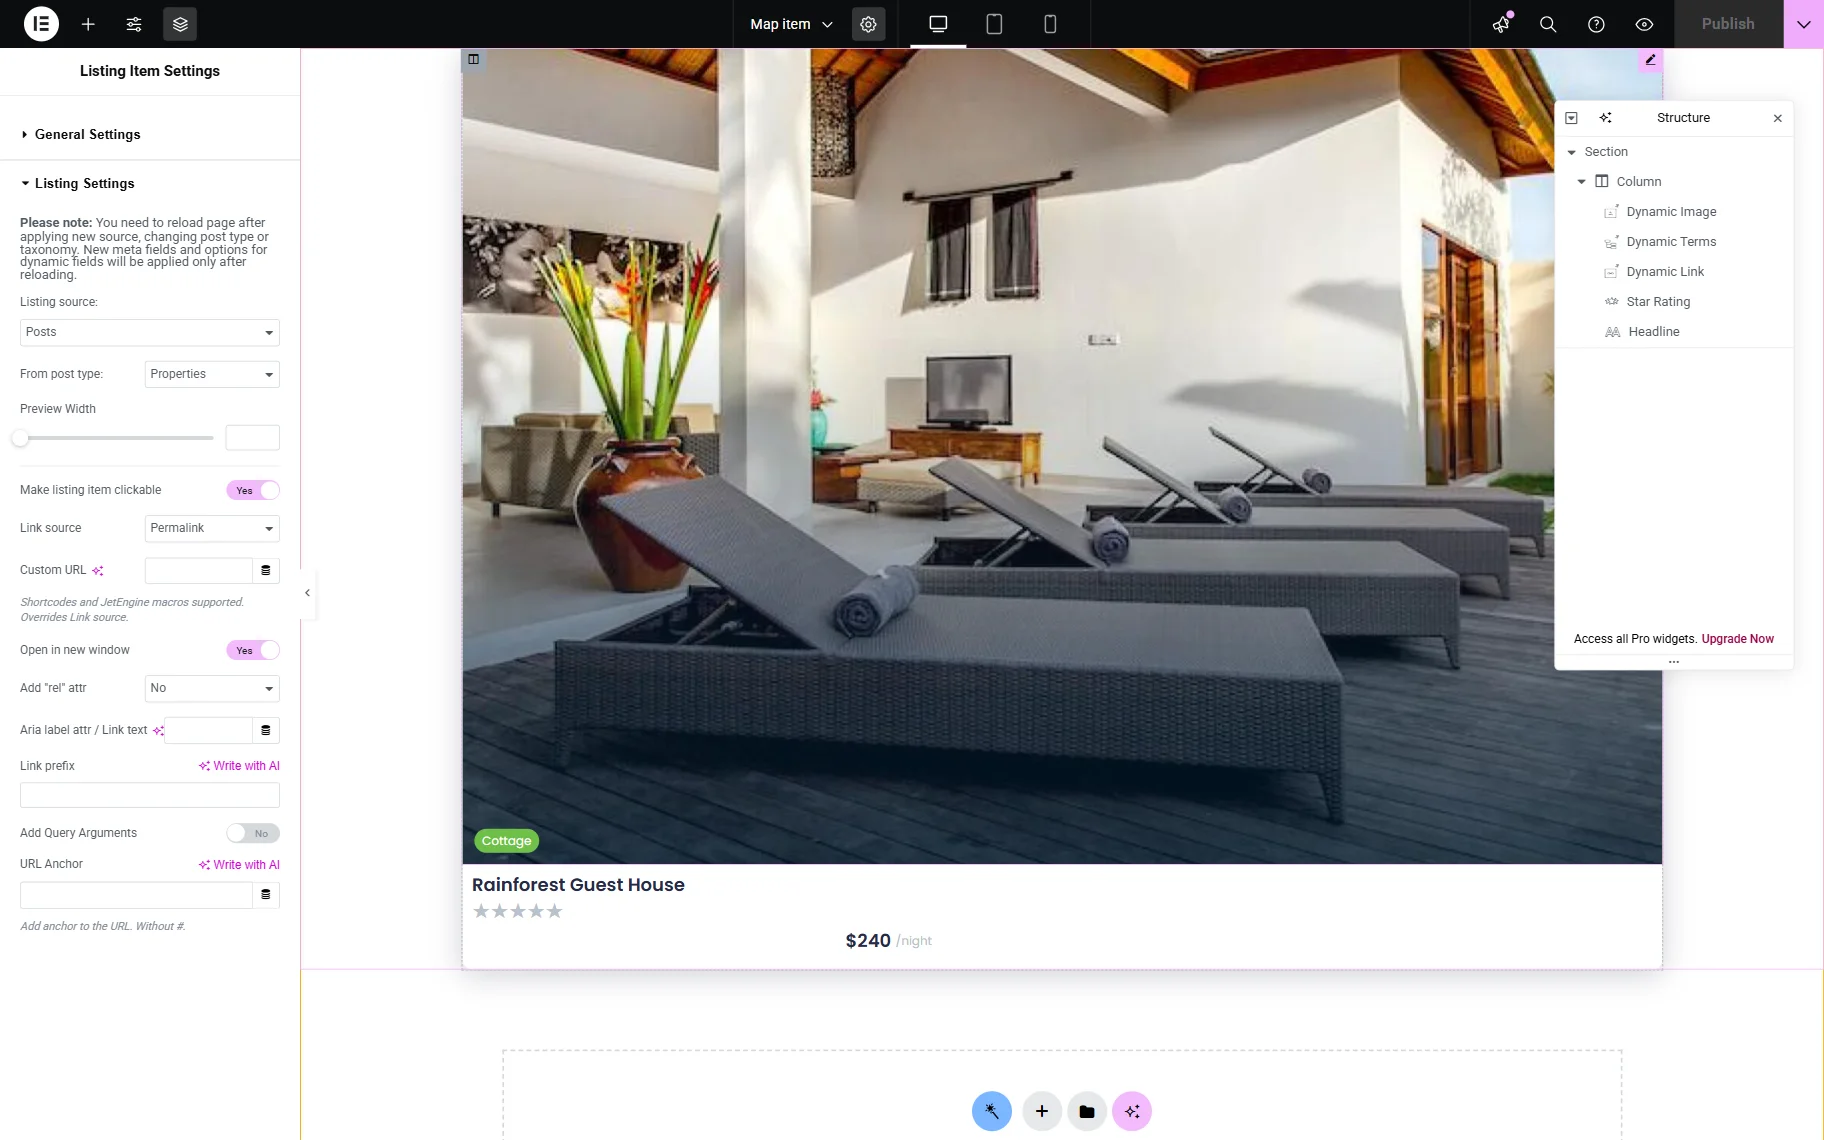
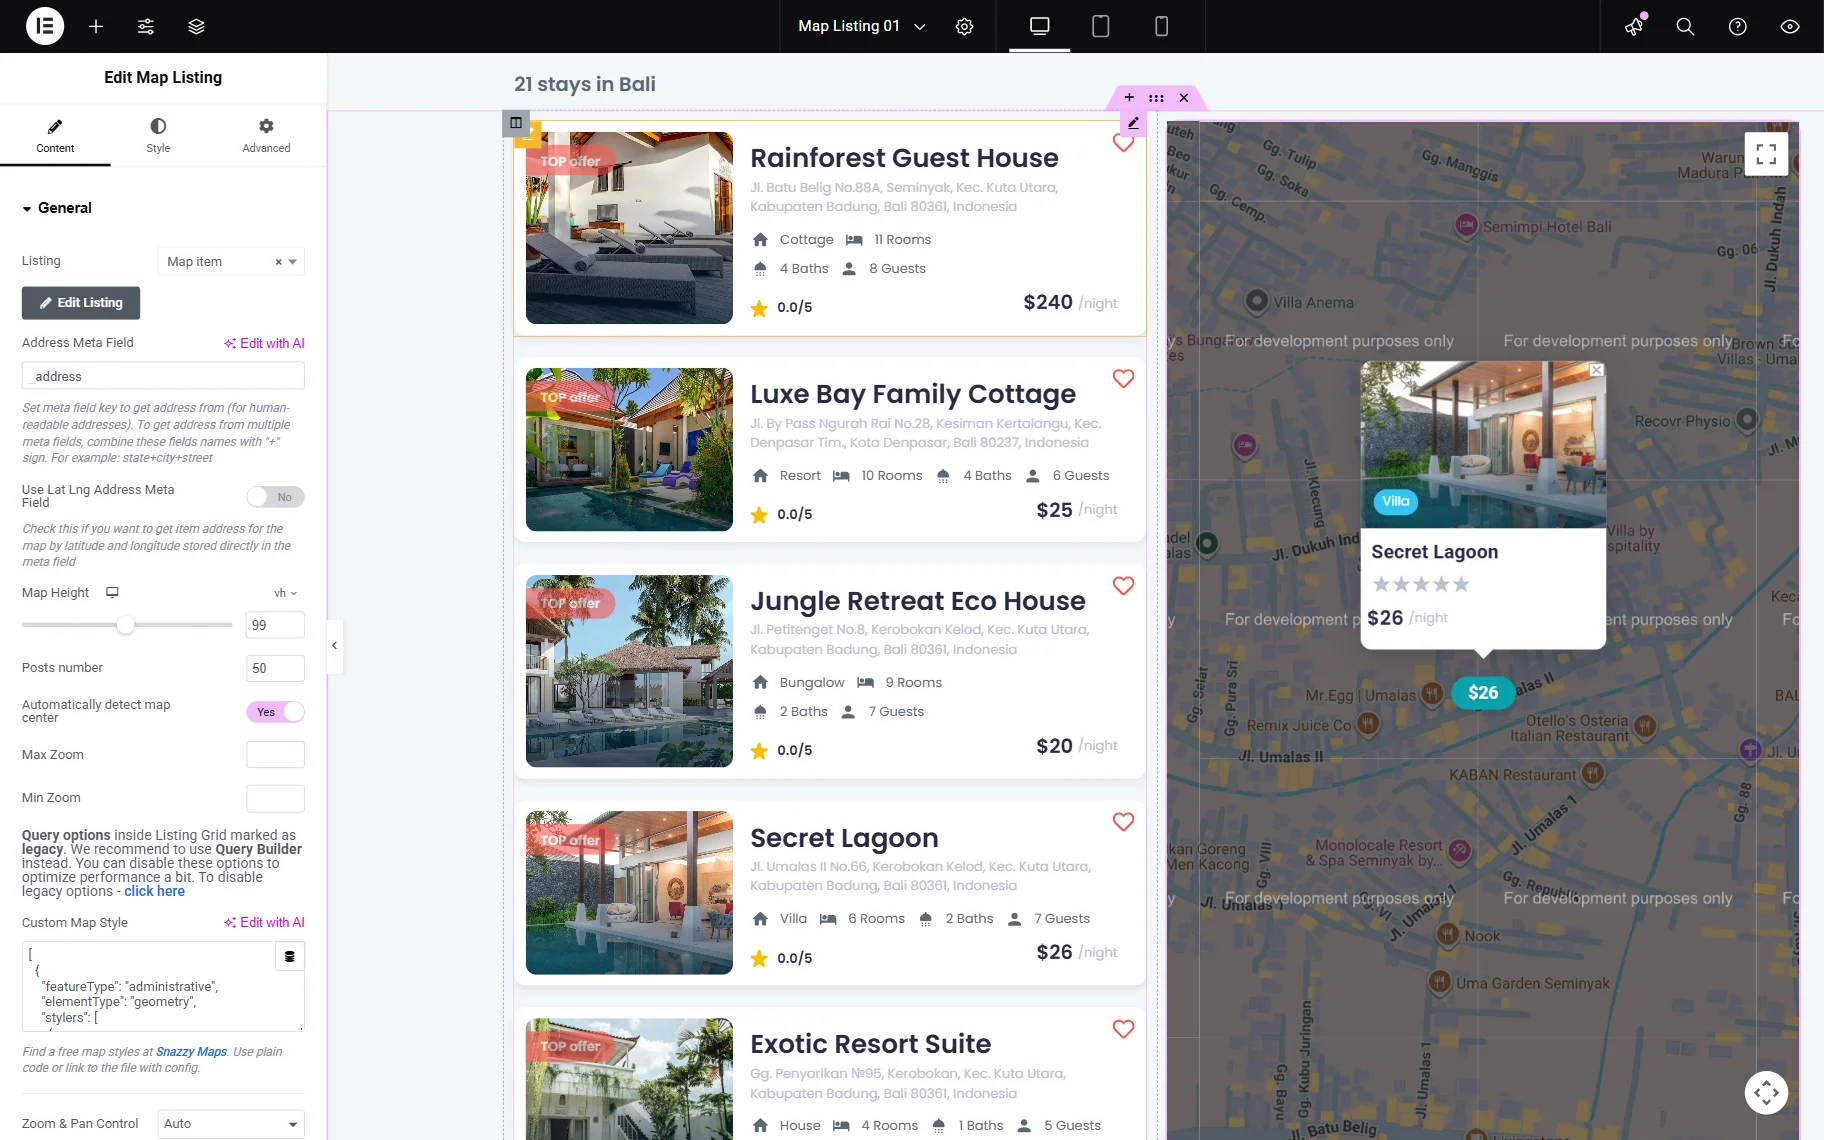
The next step is setting up the Map Listing for the same CPT.
With the Dynamic Widgets, we create a template for the pop-up that appears when we hover over a pin on the map.
Click the “Publish” button once you are ready.
Add Listings to the Page
Proceed to the page where the listings need to be displayed.
First, we add the Listing Grid widget and select the template you created earlier in the Listing field.
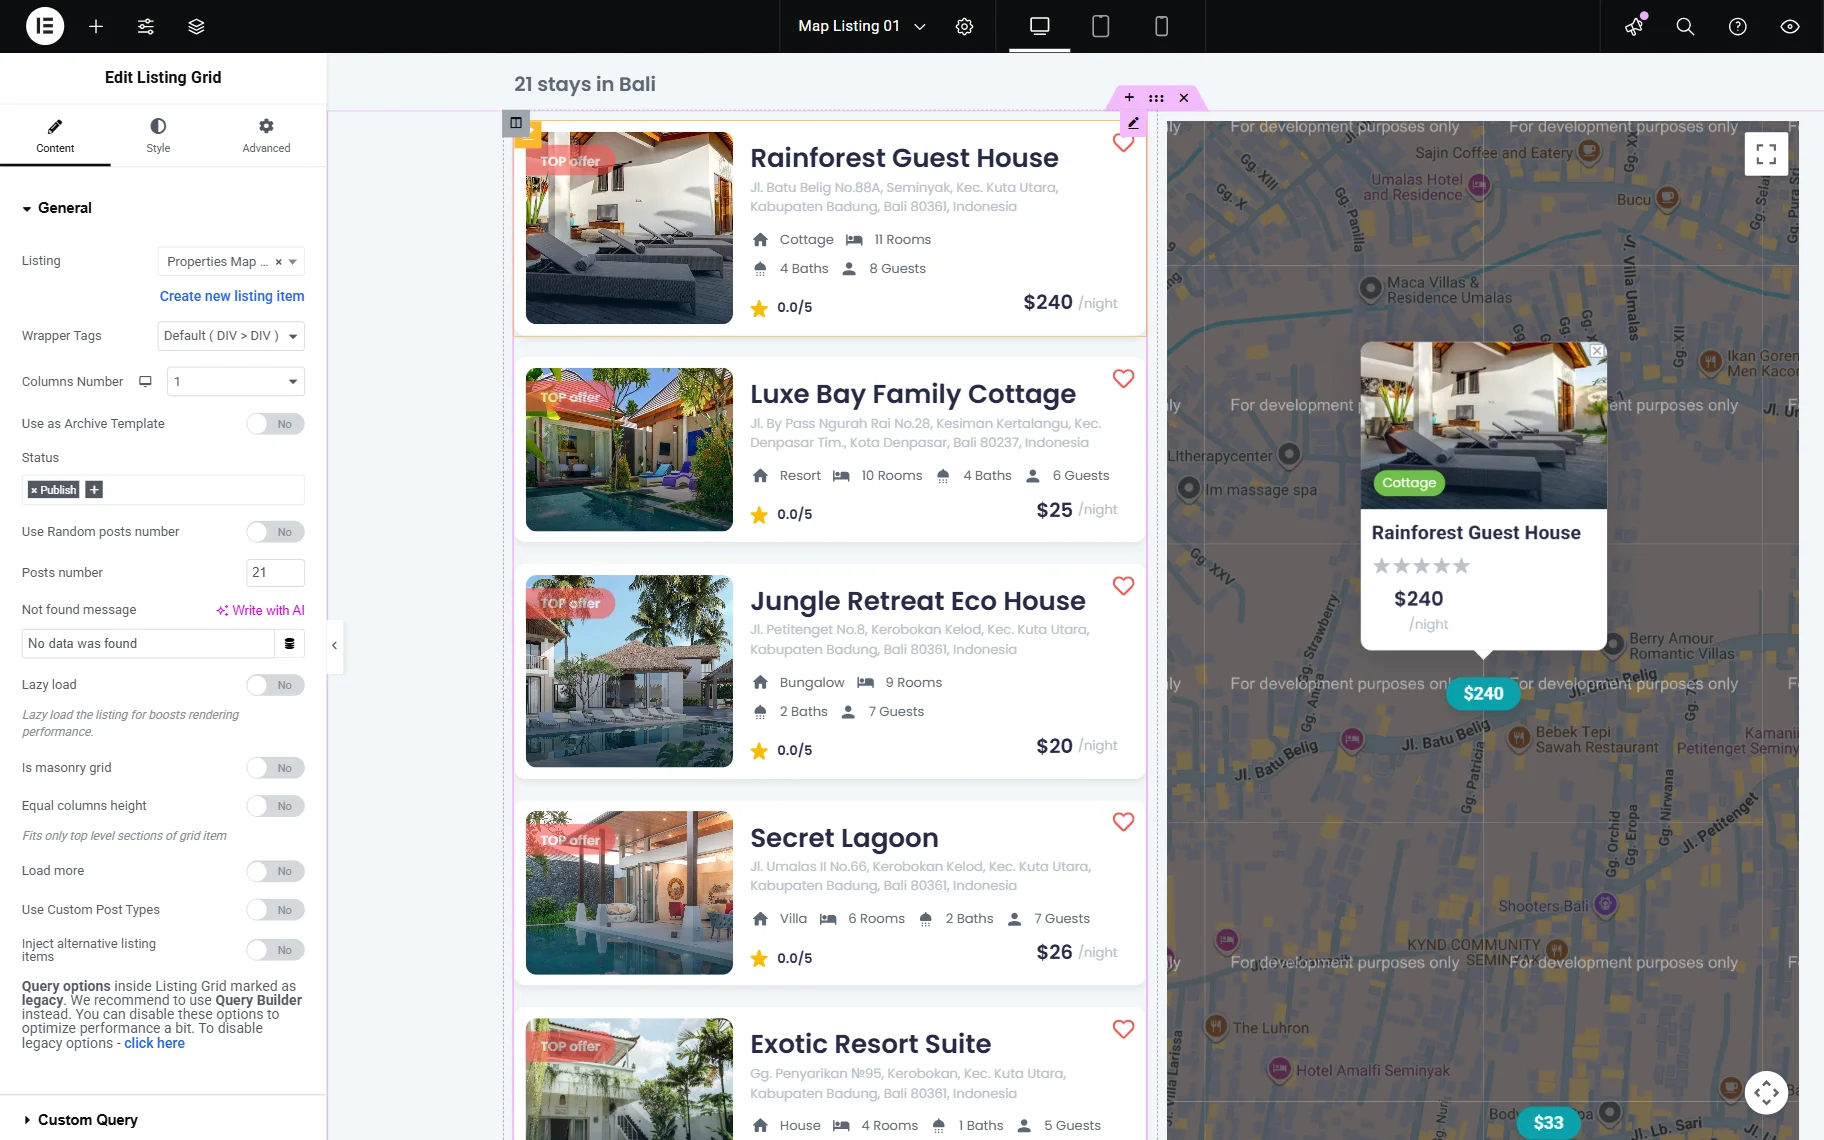
In the second column, we add the Map Listing widget. Choose the listing template from the Listing input.
Once you are ready with the setup, click the “Publish” button.
Check the Result
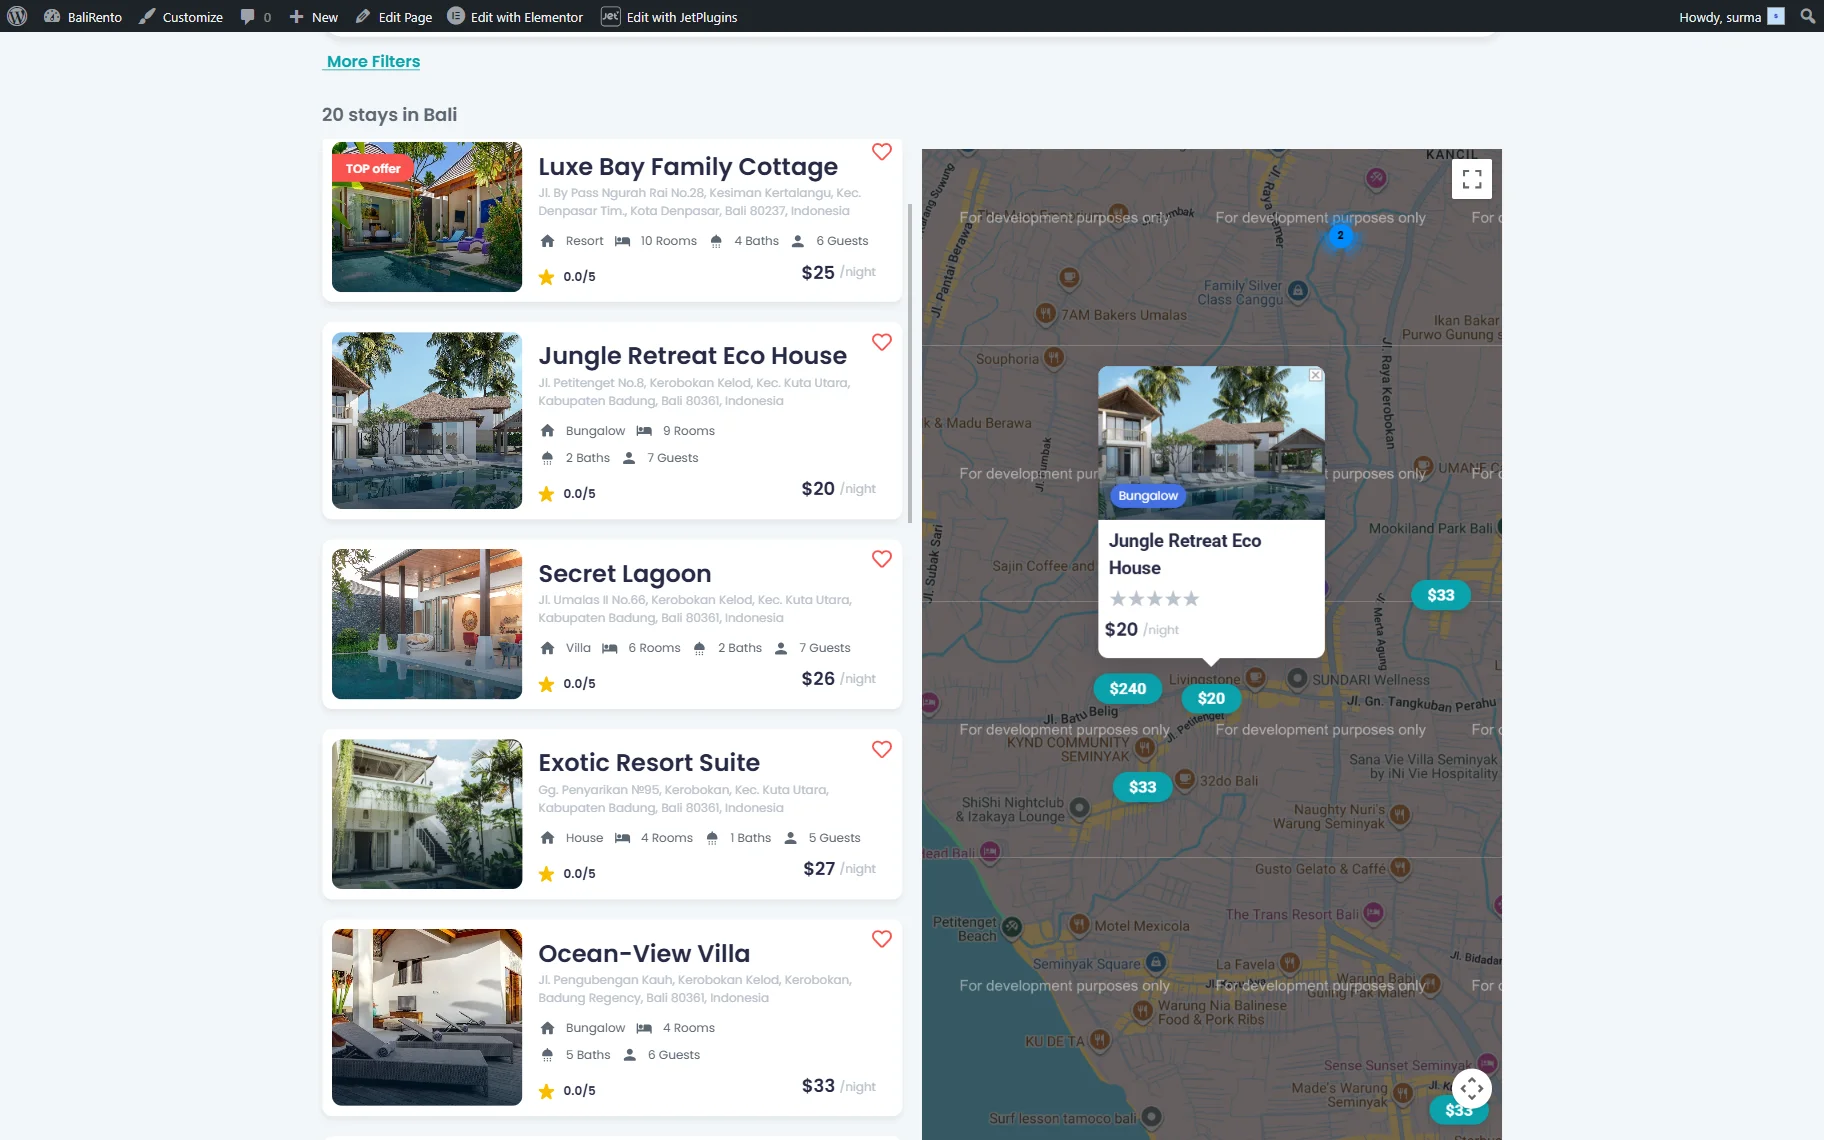
Proceed to the front end of the page with the listings. When we hover over the listing item in the list, the same item automatically opens on the map.
That’s it. Now, you know how to set up pop-ups that open on the map when users hover over items in the JetBooking Instance CPT listings with a dynamic map in WordPress.