How to Translate the JetSmartFilters Filter Based on the JetEngine Glossary
Check how to translate the JetSmartFilters filter with the JetEngine’s “Glossary” source using the WPML plugin on your WordPress website.
This tutorial explains how to prepare the glossary, link it to meta fields, and make your filter work across all translated site versions.
Create a Glossary
Proceed to WordPress Dashboard > JetEngine > JetEngine and open the Glossaries tab.
Press the “New Glossary” button.
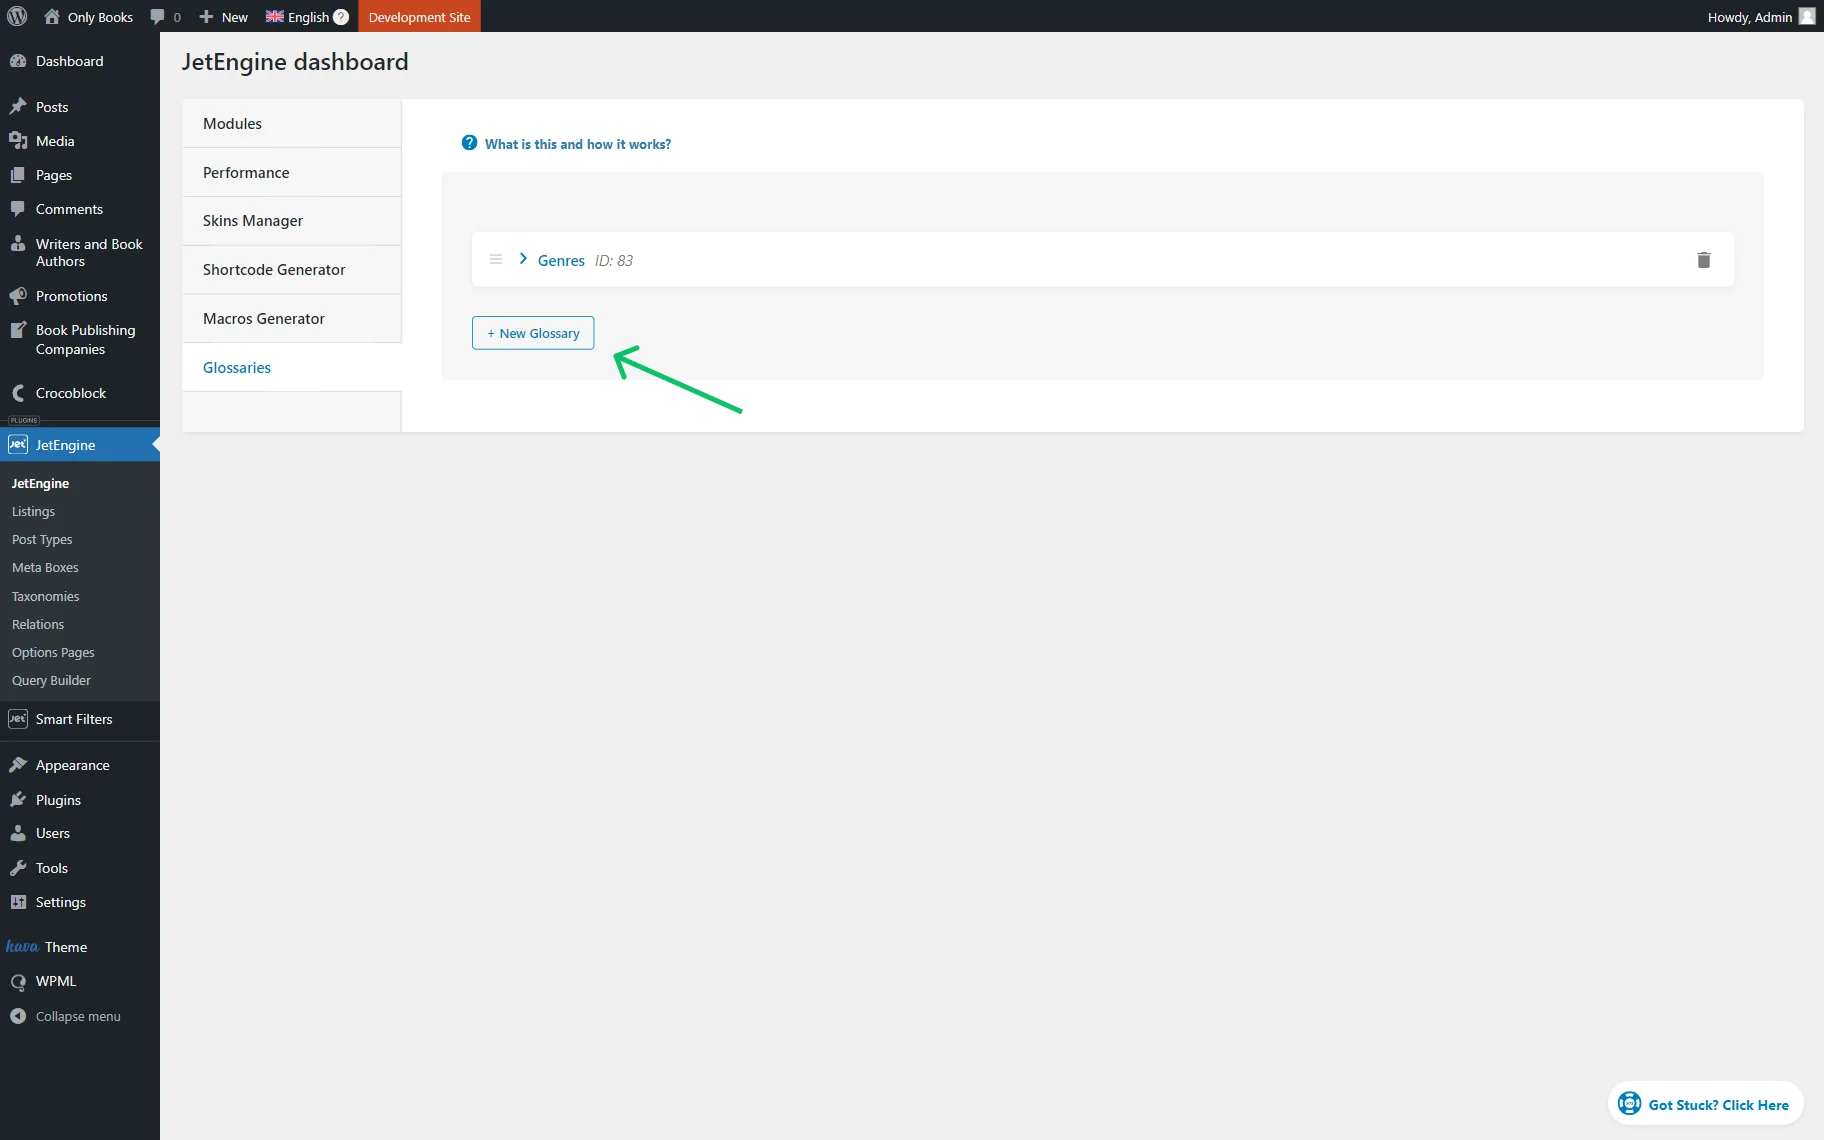
Define the glossary’s Name and set its Data Source. It can be either “Set items manually” or “Get items from uploaded file.”
If you want to add a new item, press the “New field” button.
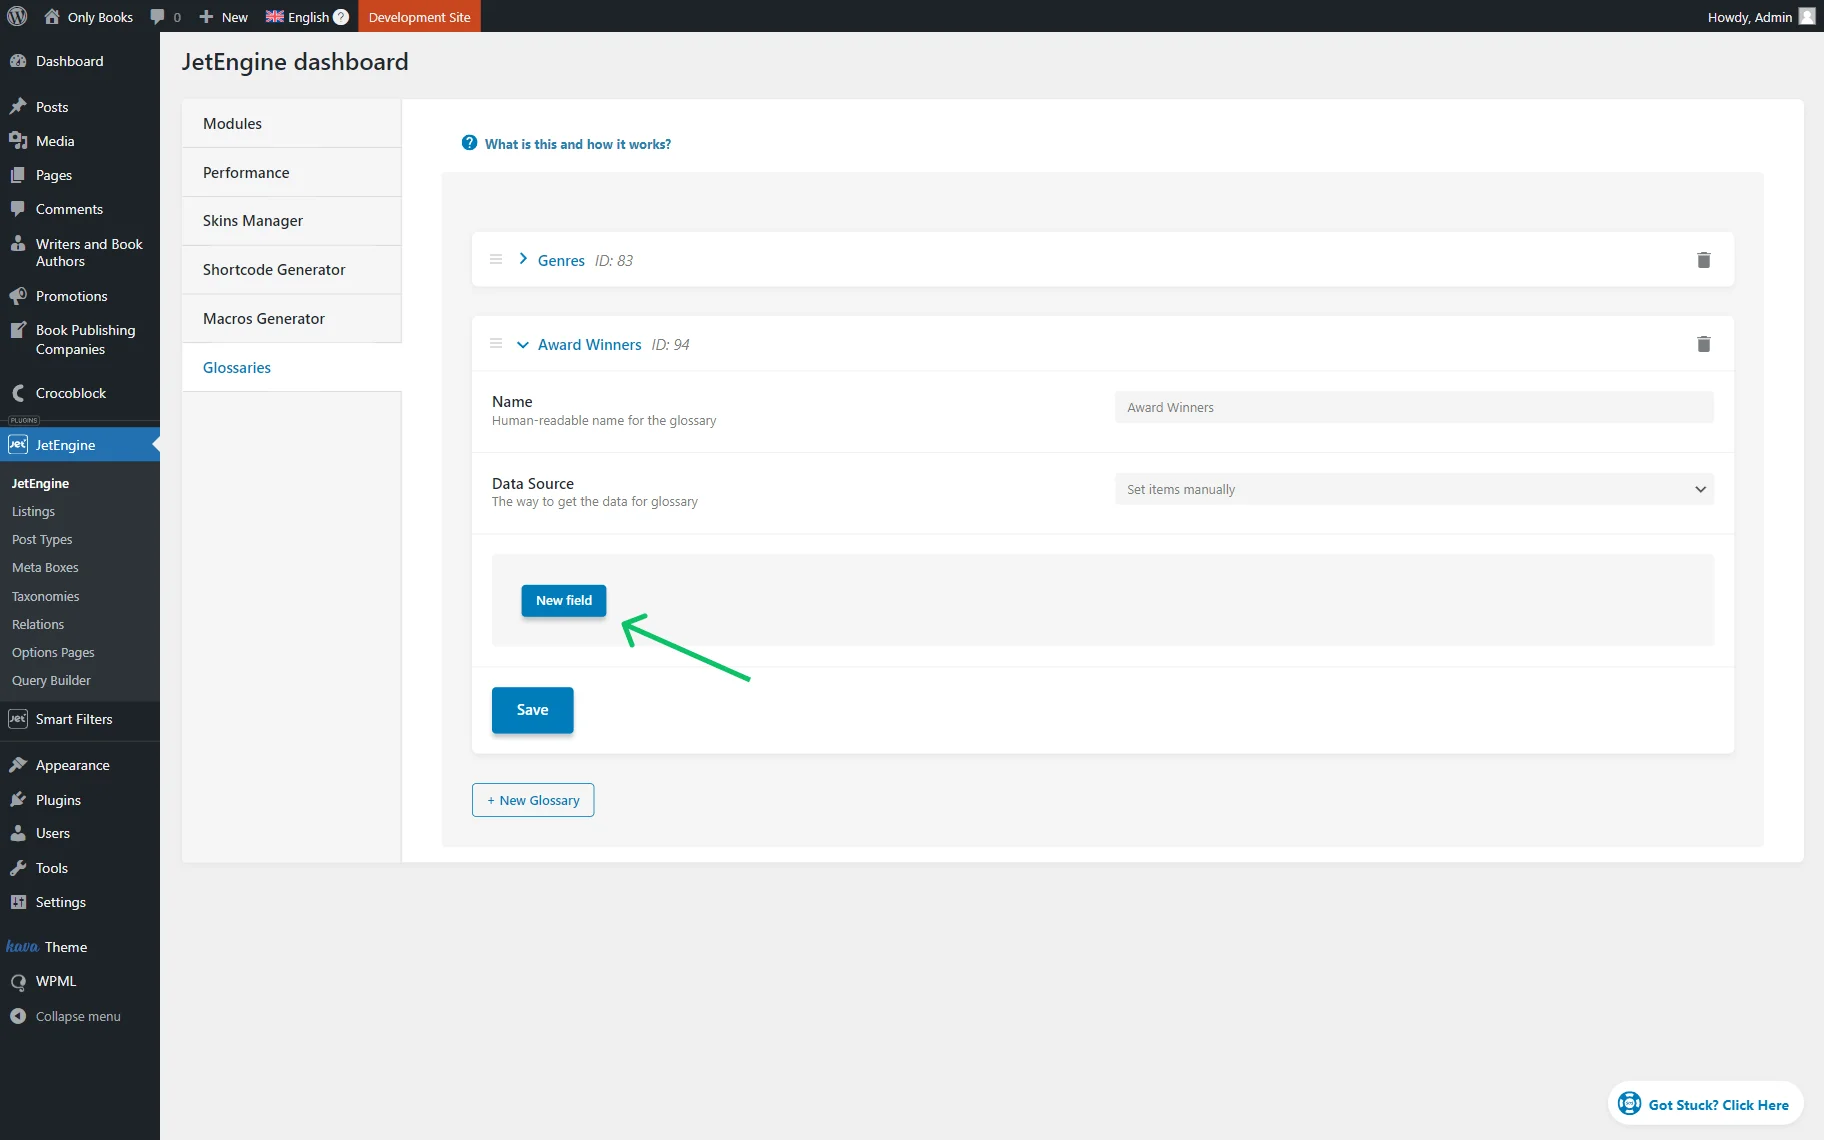
Every item you add has the following customization settings:
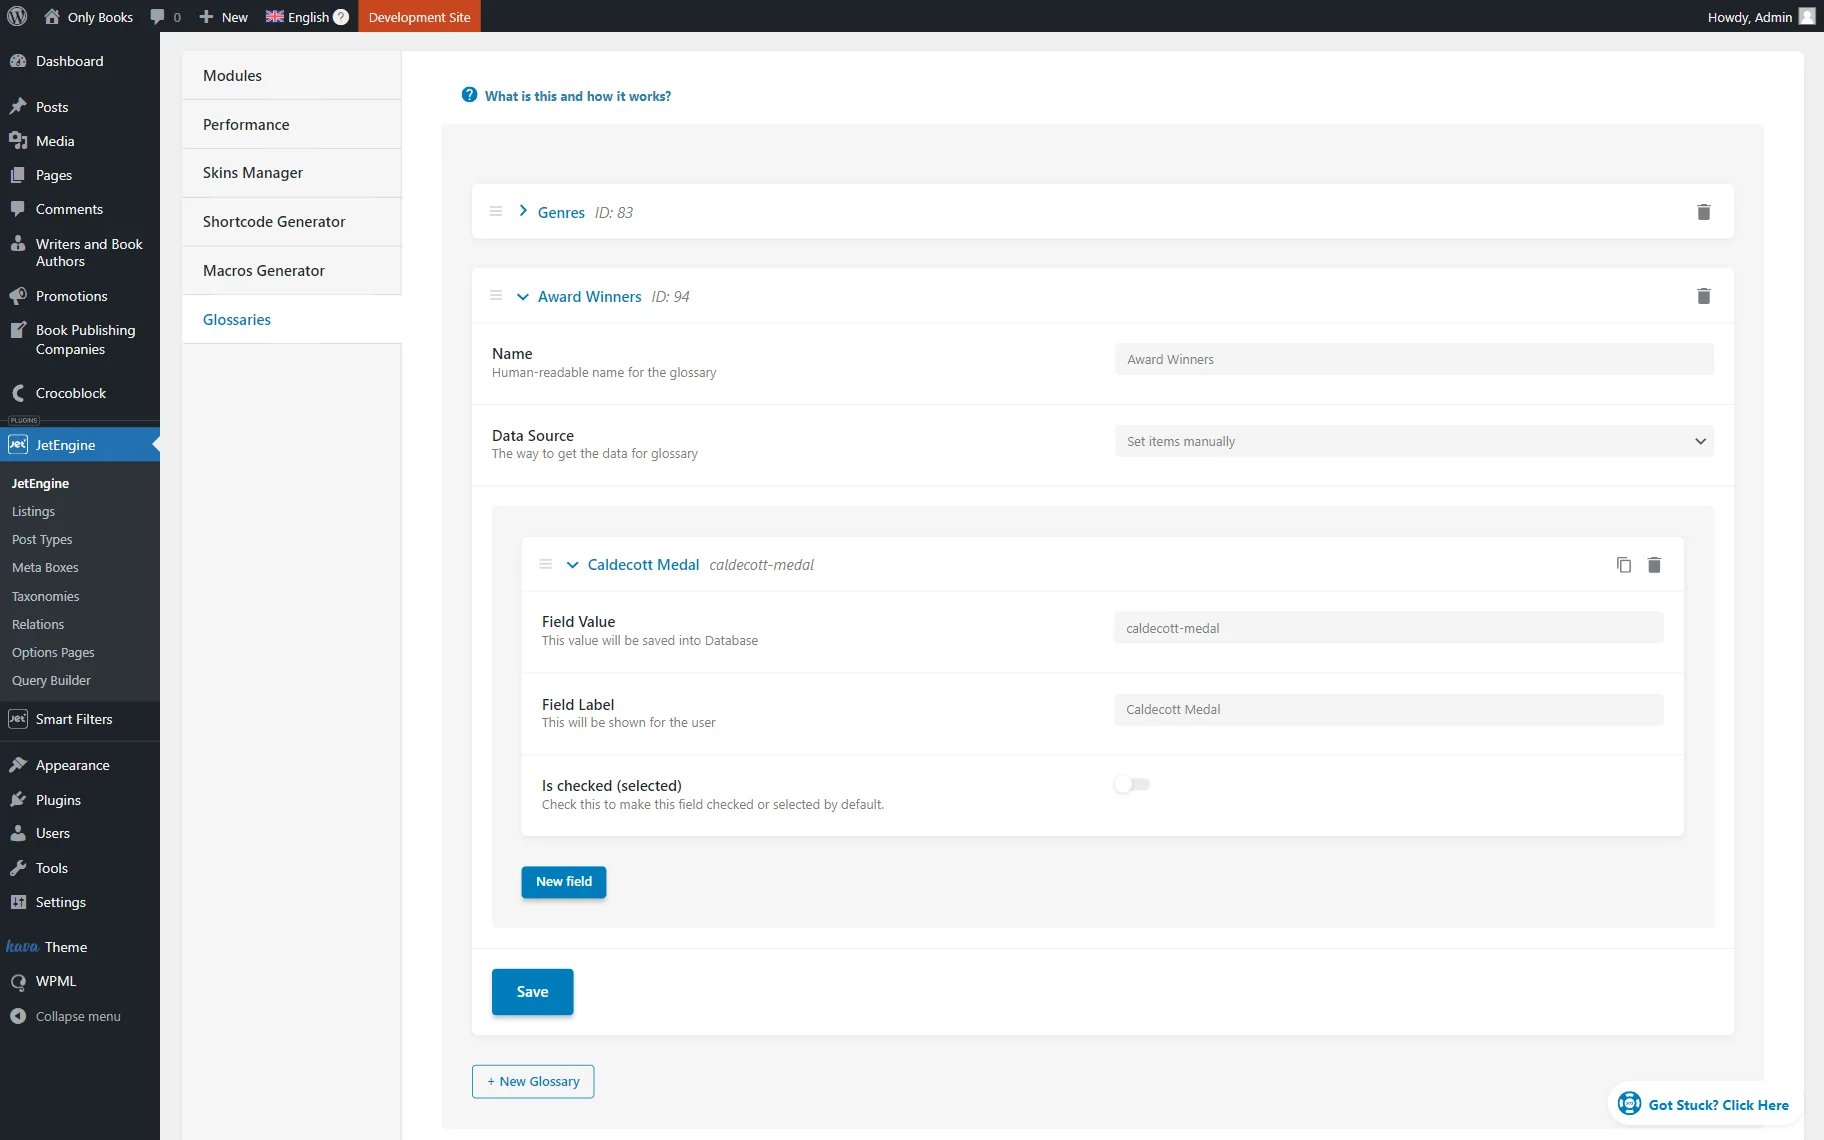
- Field Value — a unique value of the item that should contain only Latin lowercase letters with no spaces and can contain numbers, “-”, and “_” symbols;
- Field Label — a name of the item displayed as its label;
- Is checked (selected) — a toggle that should be activated if you want the item to be selected by default.
Once the glossary customization is over, press the “Save” button.
Add a Meta Field
Now, go to WordPress Dashboard > JetEngine > Post Types directory for Custom Post Types, or WordPress Dashboard > JetEngine > Meta Boxes to adjust a meta box for other sources.
For instance, we go to WordPress Dashboard > JetEngine > Post Types and open the existing post type editing page.
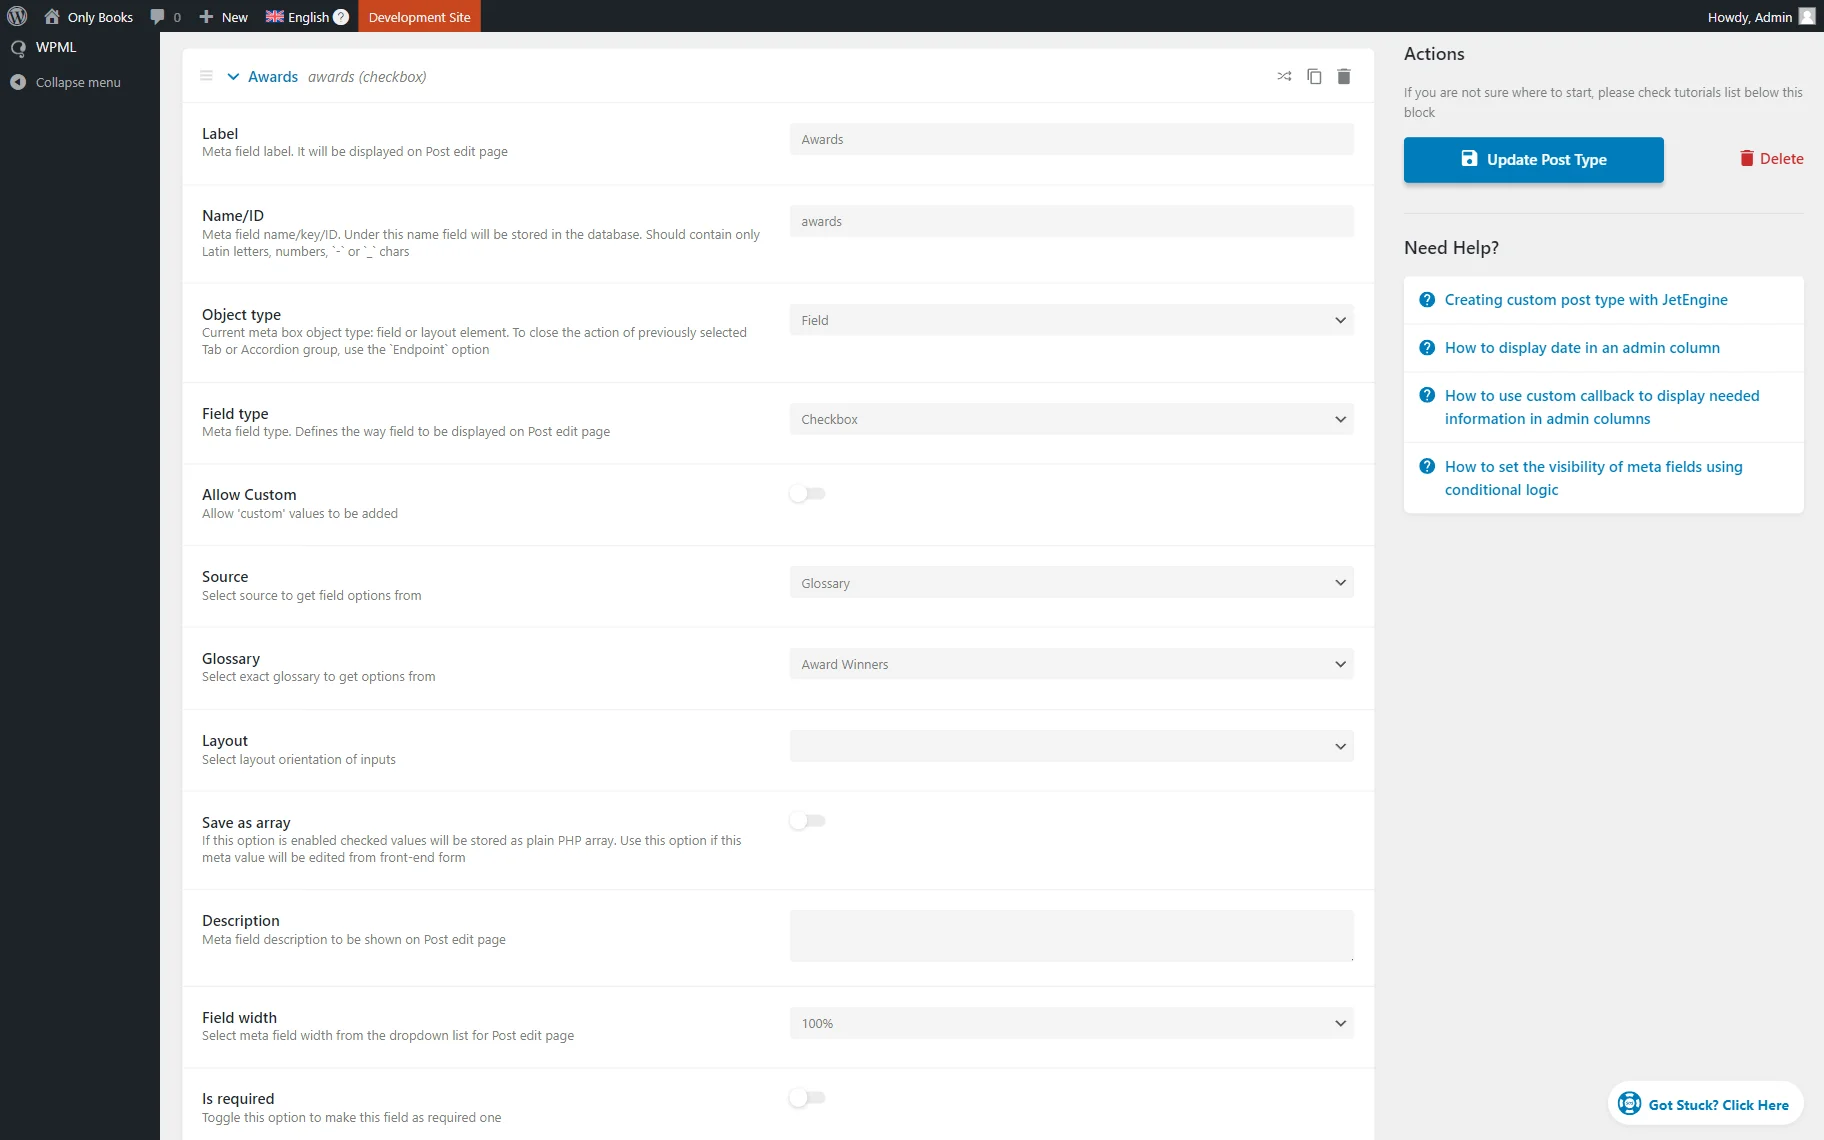
In the Meta fields section, click the “New Meta Field” button to create a new meta field.
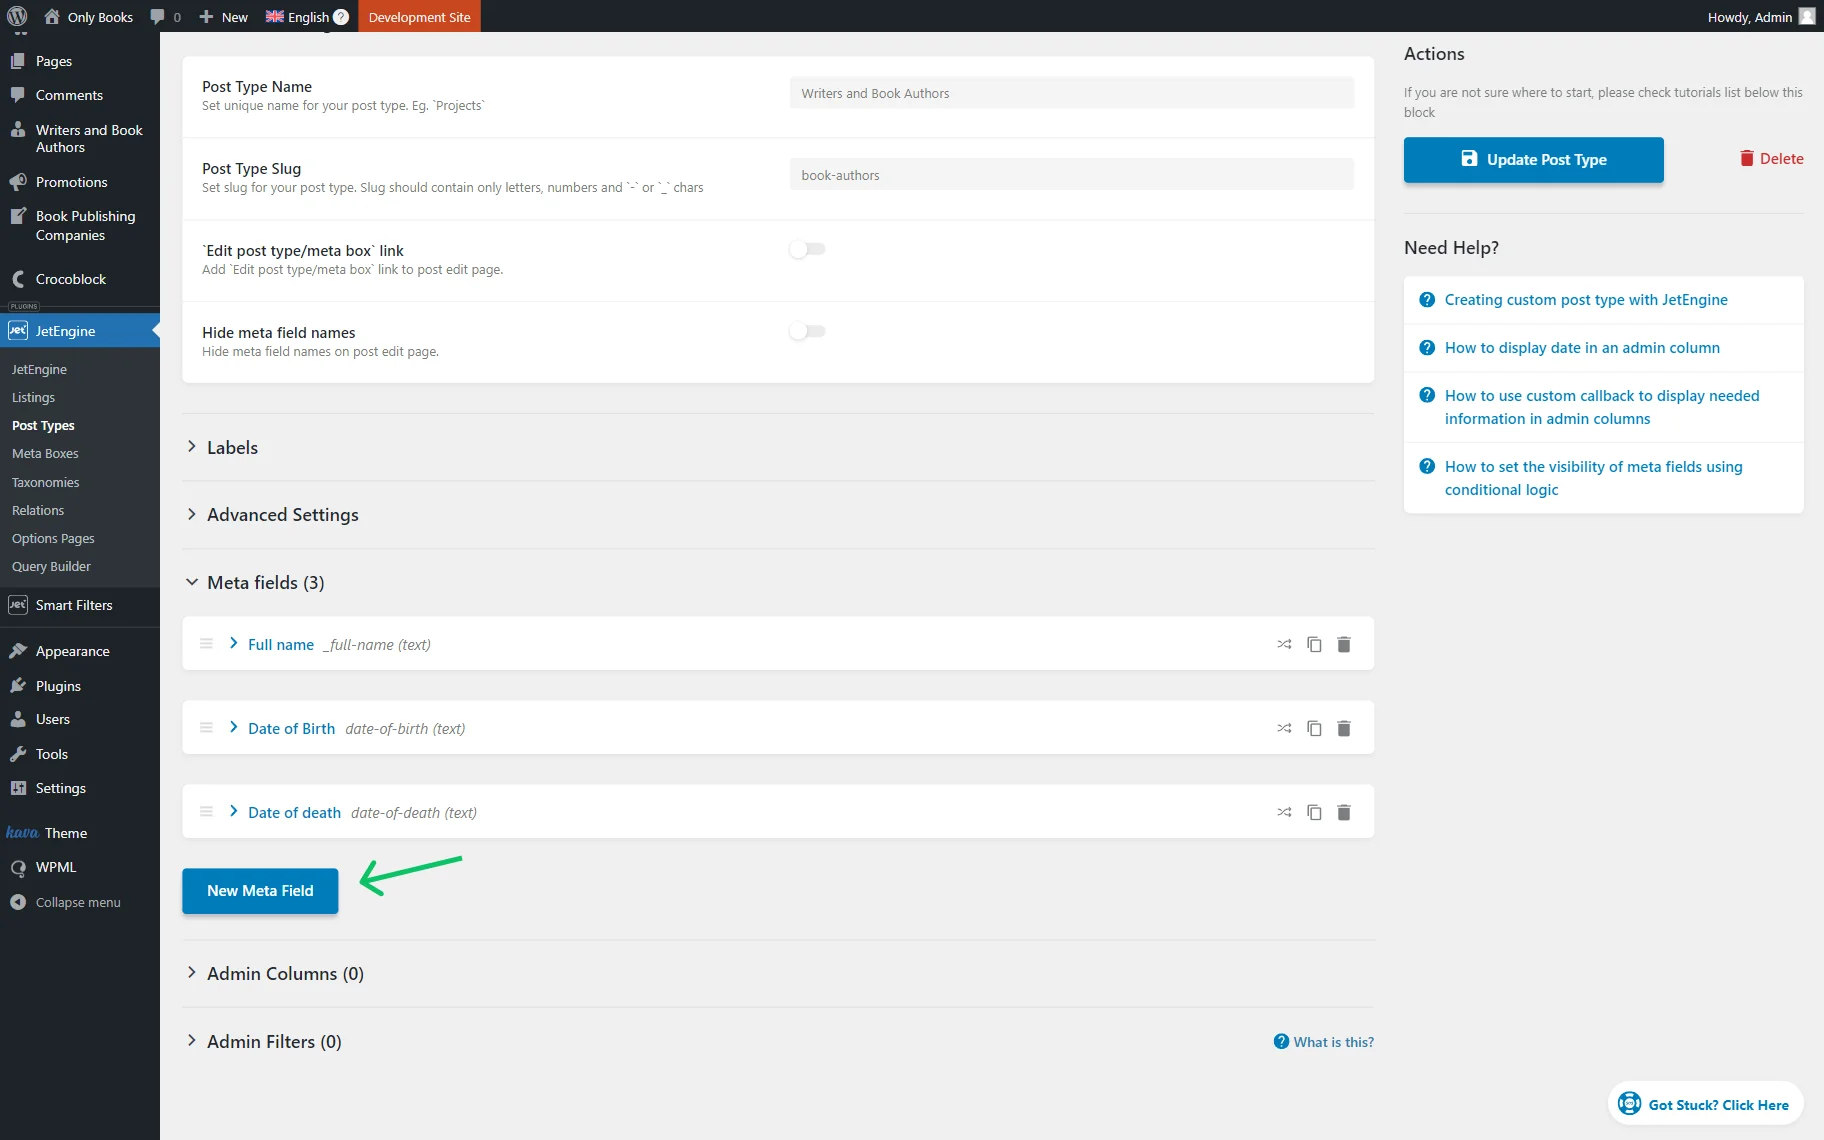
Complete the Label and change the Name/ID of the field if needed.
Then, set its Field type to “Checkbox” and select “Glossary” as its Source. Also, pick a Glossary you have just created.
That’s all with the metadata editing, so we hit the “Update Post Type” button.
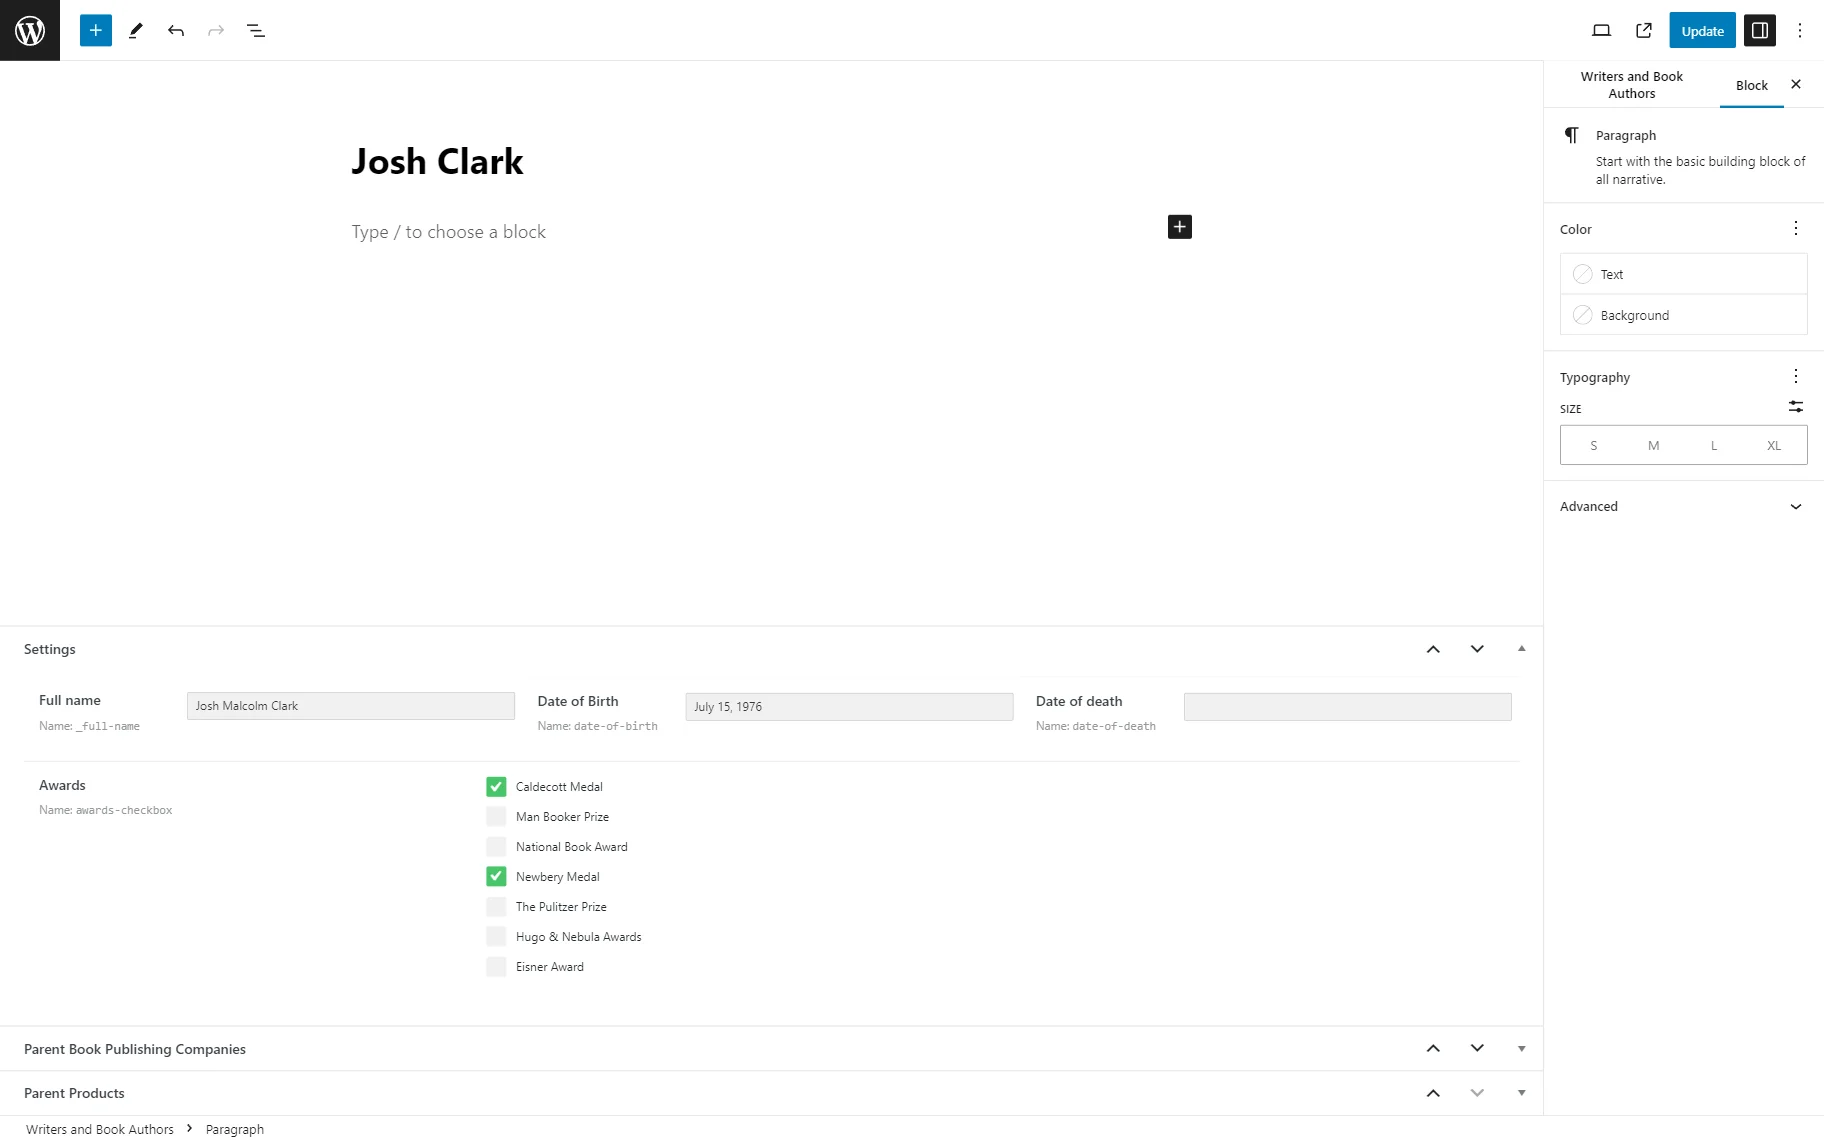
Head to the posts of the edited CPT and complete the just-added “Checkbox” meta field in all of the posts.
Don’t forget to save the changes.
Enable the CPT and Custom Field Translation
The next step is to ensure you have activated the translation for the current source and custom field. To do so, navigate to WordPress Dashboard > WPML > Settings.
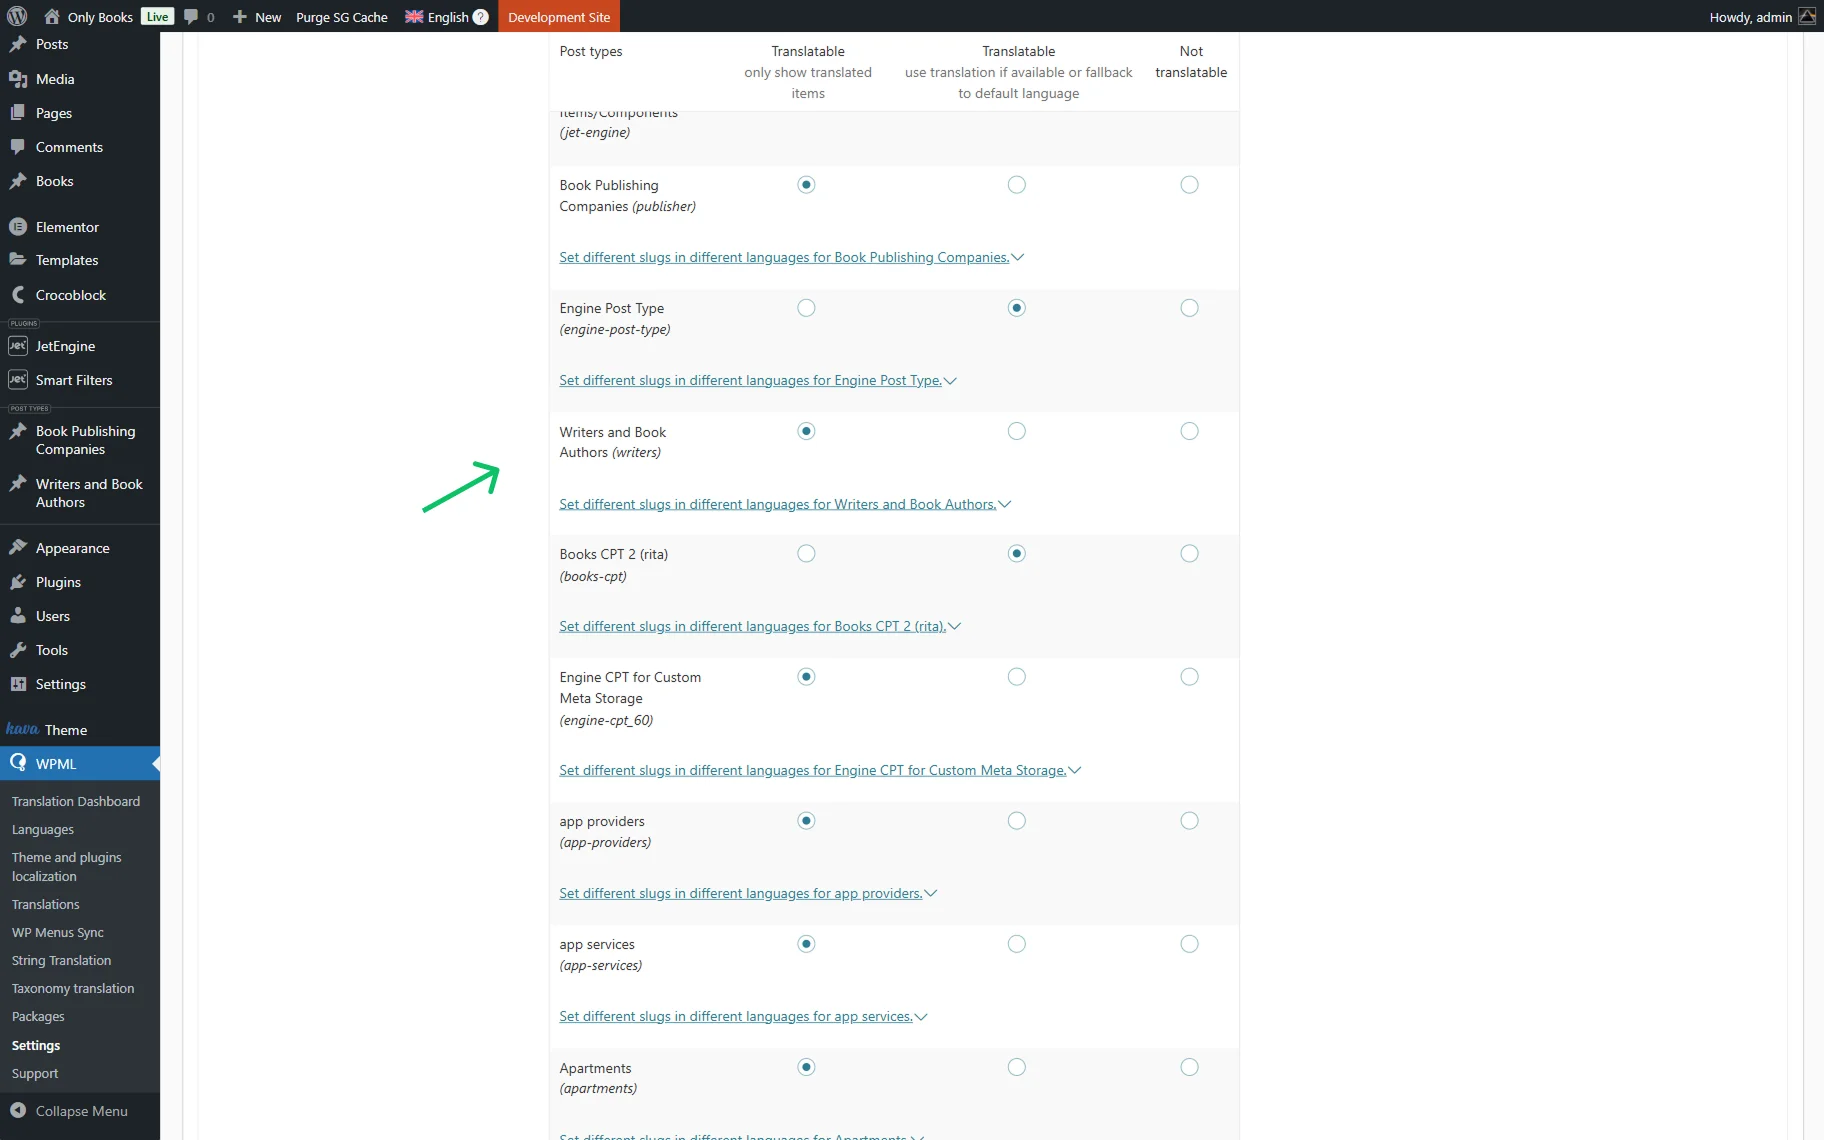
First, we scroll down to the Post Types Translation section, as we work with CPT and need to ensure it can be translated. We find the needed post type, set it to “Translatable,” and press the “Save” button.
Repeat the same step with the source to which the “Checkbox” meta field is applied.
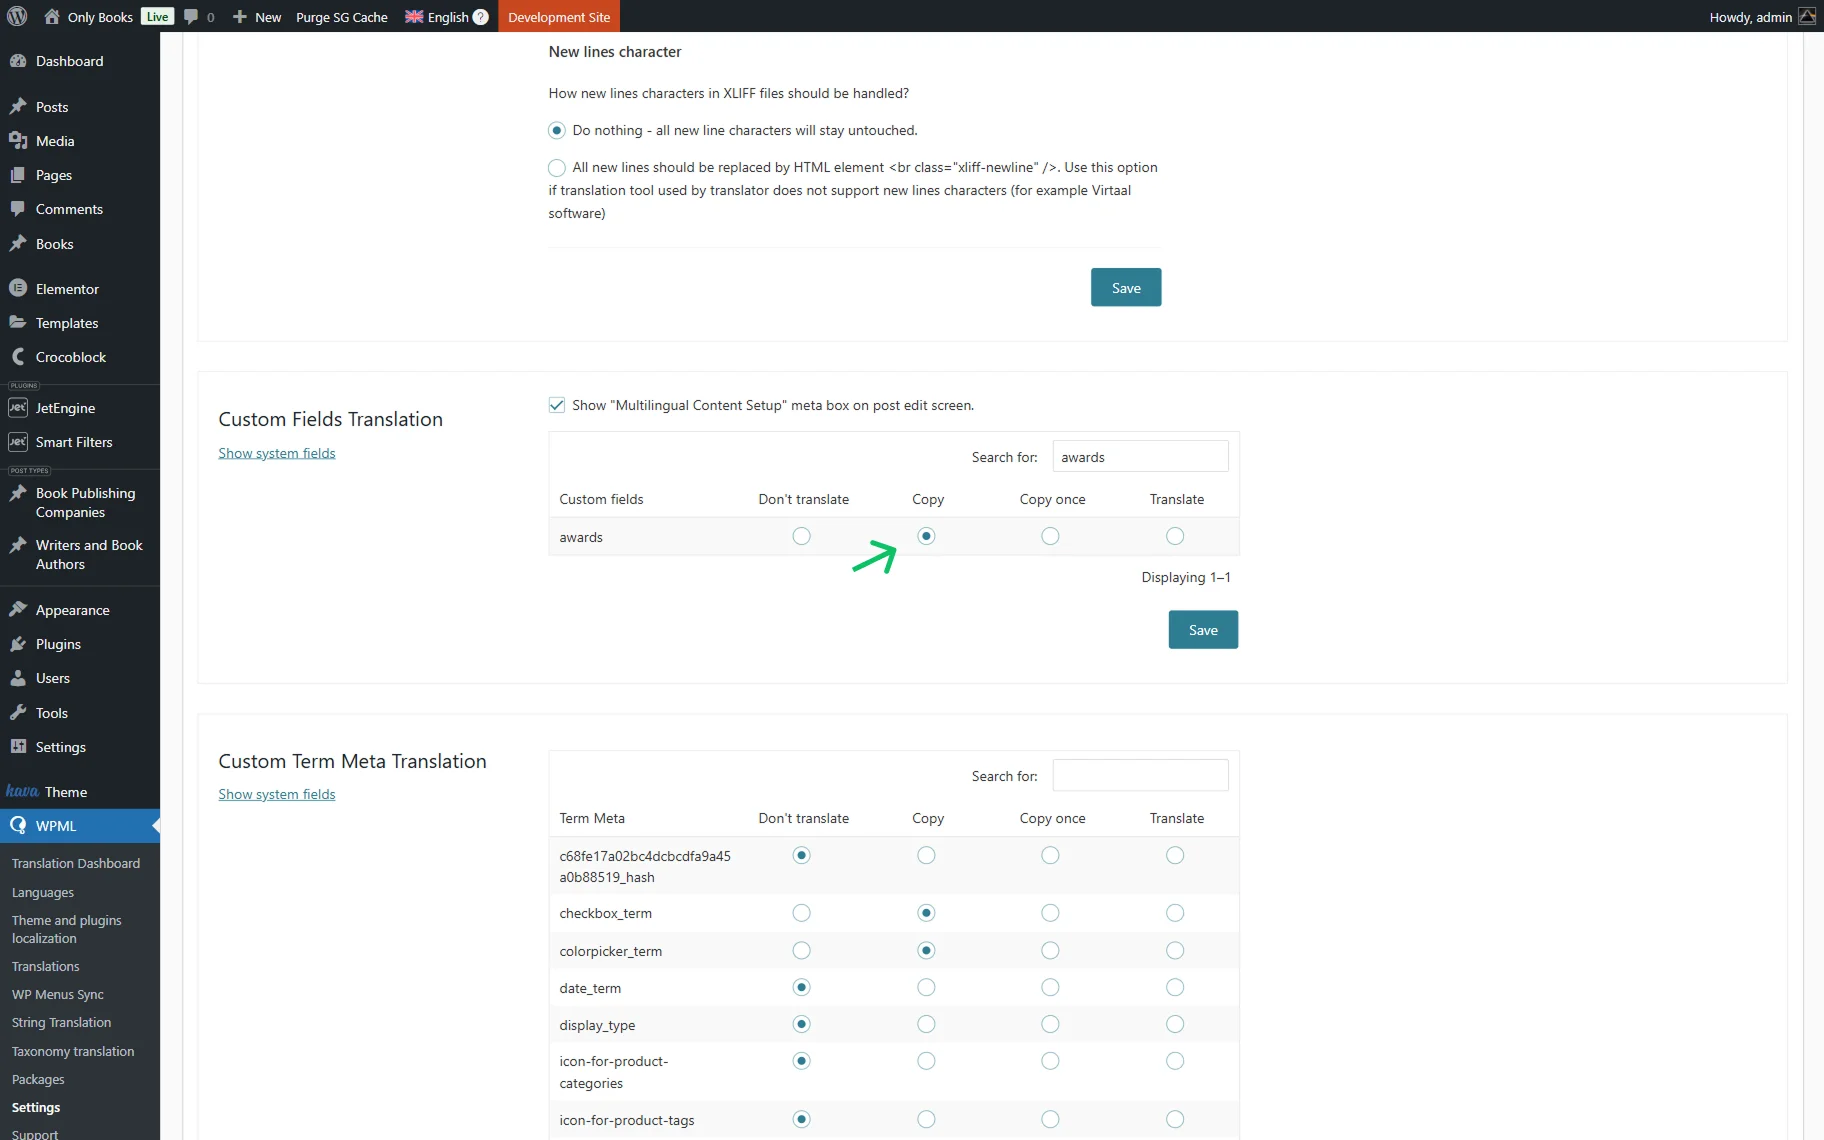
Then, move to the Custom Fields section. Find the “Checkbox” field you have created (you can do this with the Search for: search bar), set its status to “Copy,” and click the “Save” button.
Translate the Meta Field
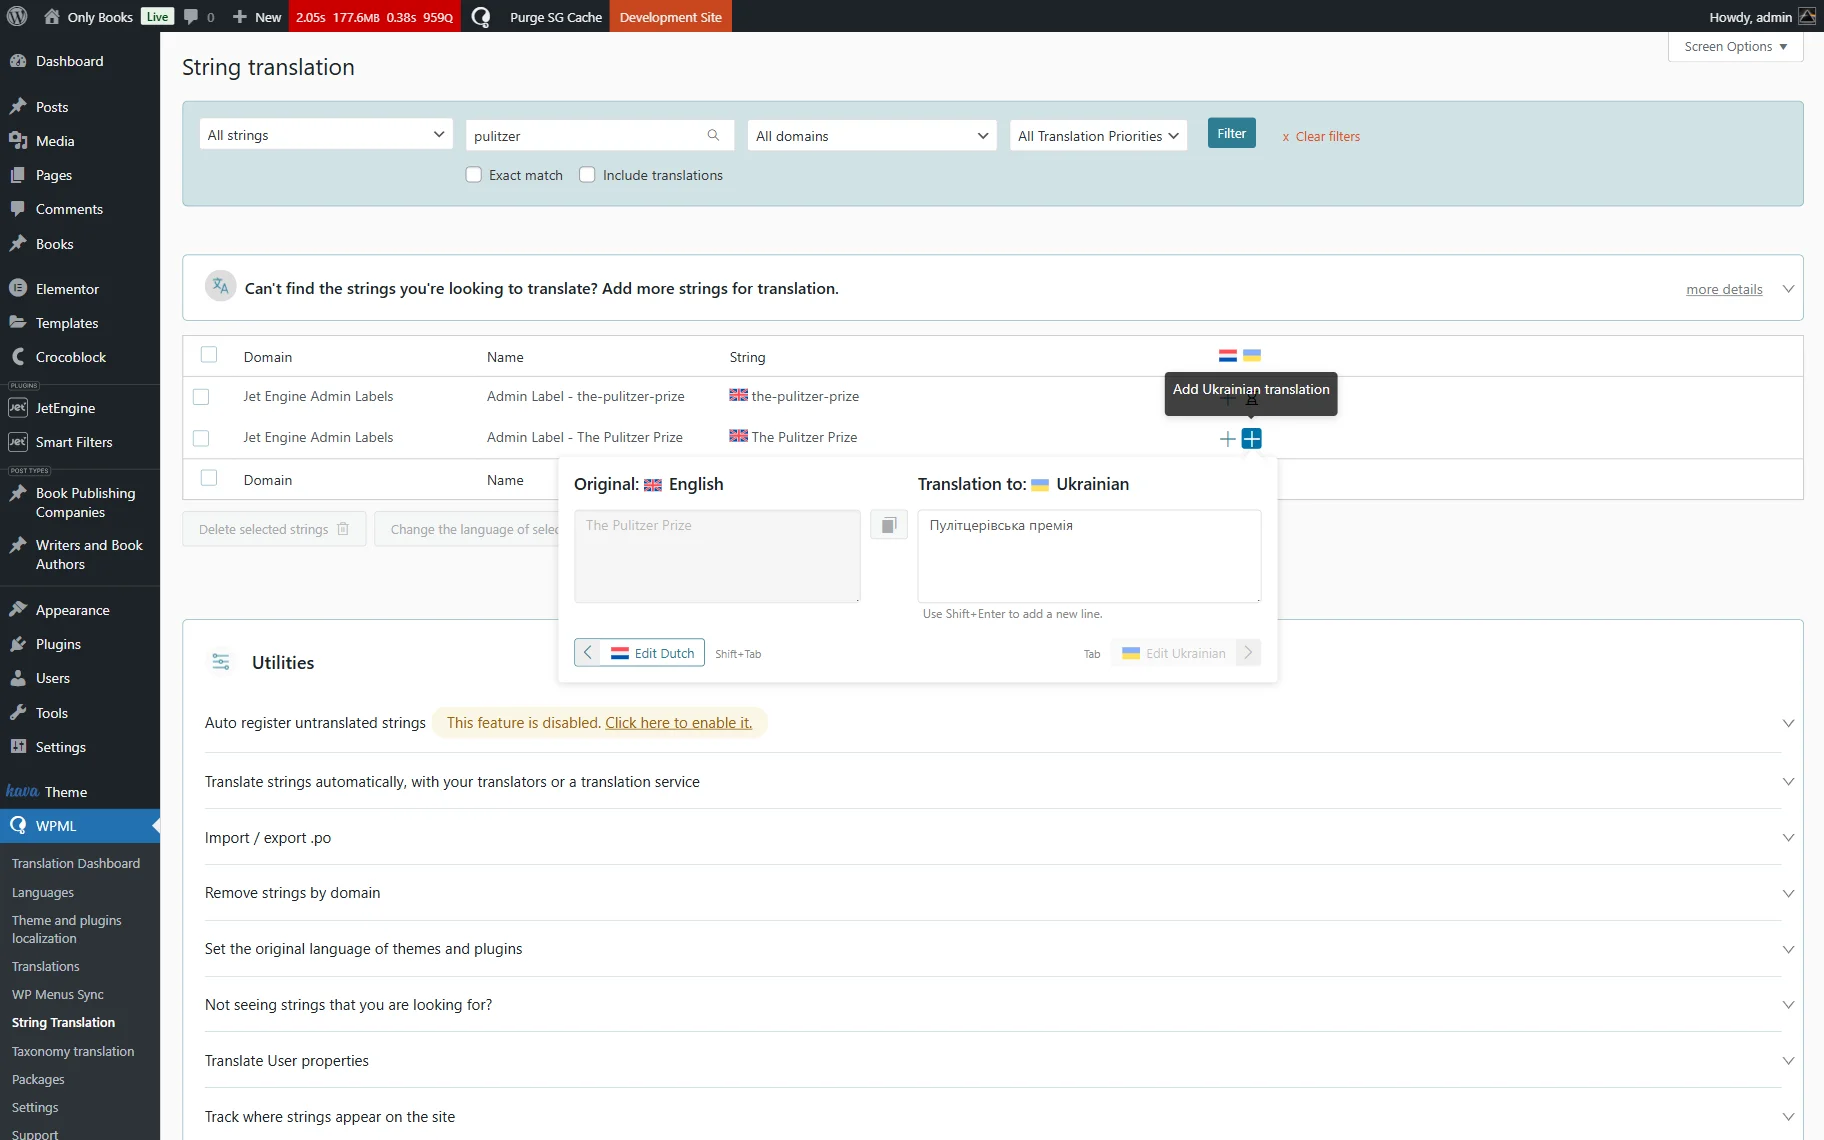
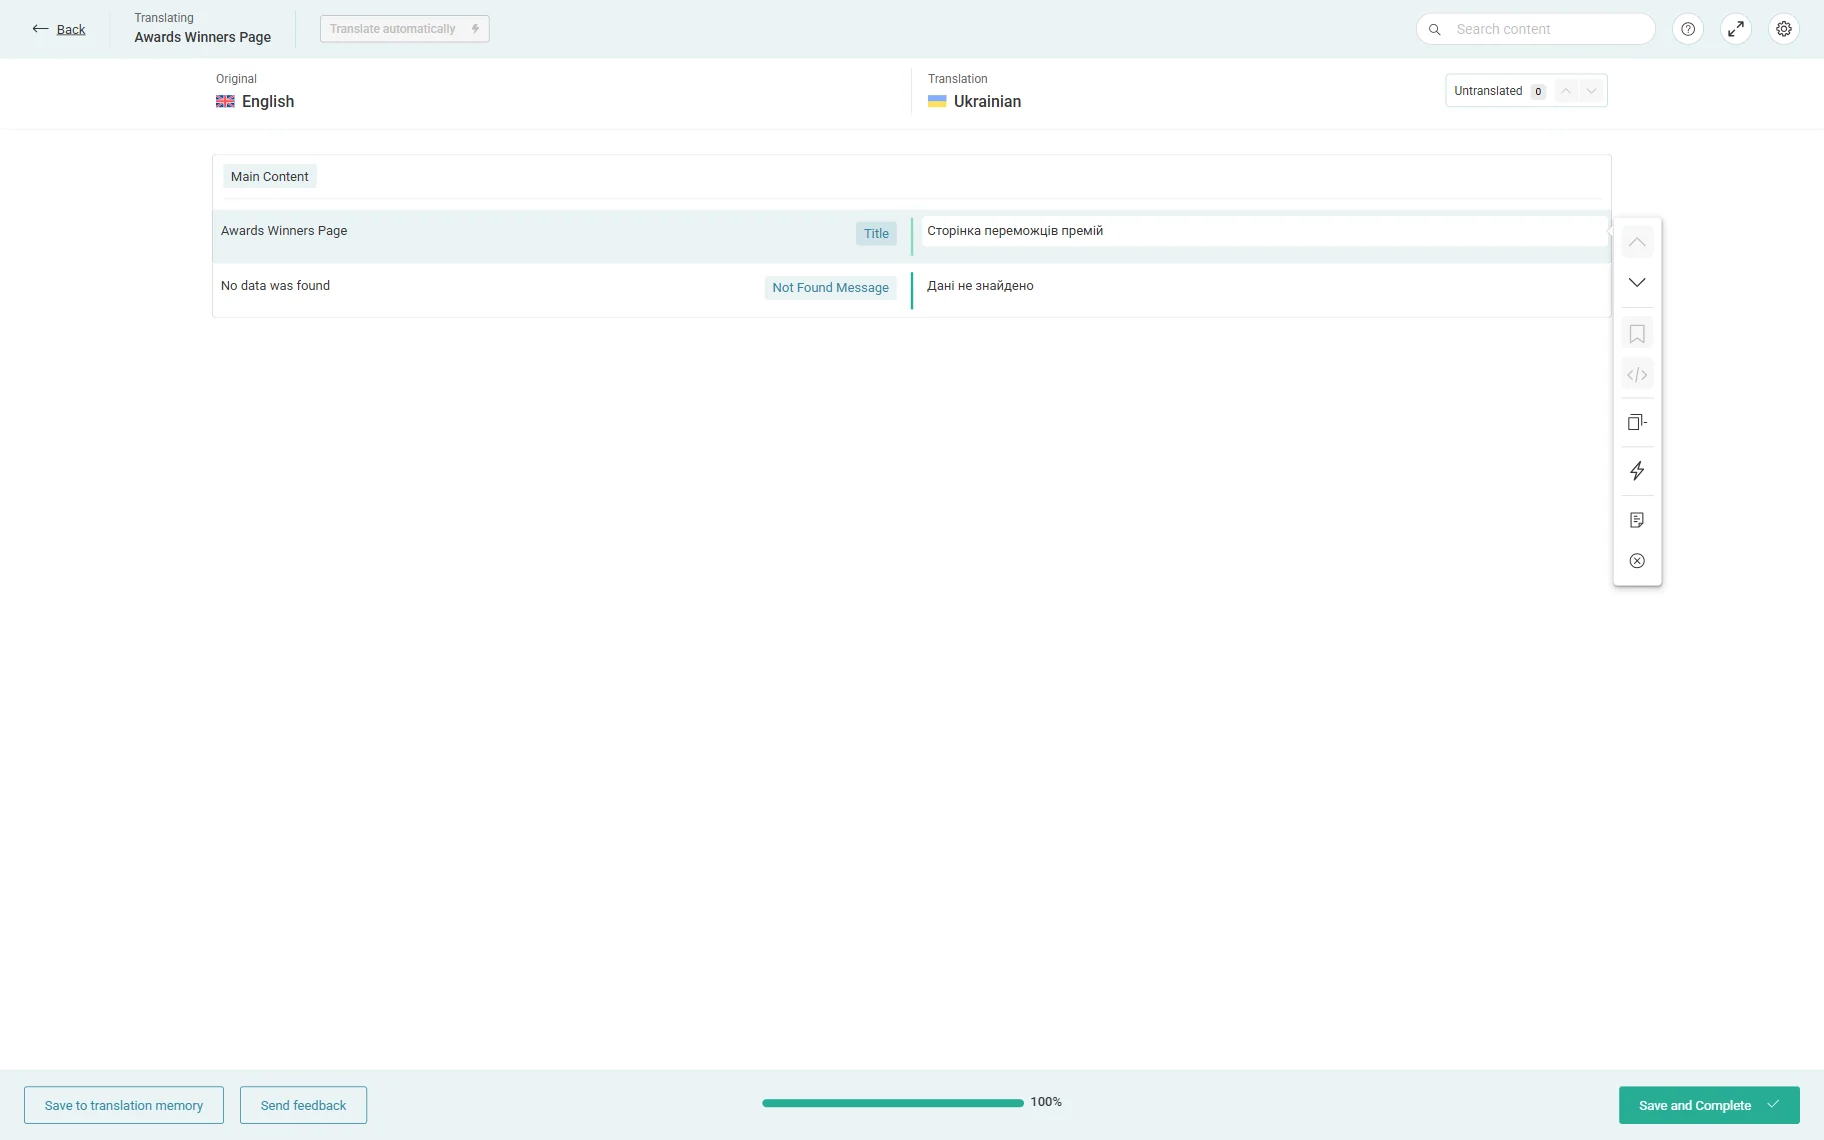
Go to WordPress Dashboard > WPML > String Translation.
Here, find the Labels for the glossary fields, and click the “+” button next to each to add a translation.
Complete the translation of all the needed items.
Build a Filter
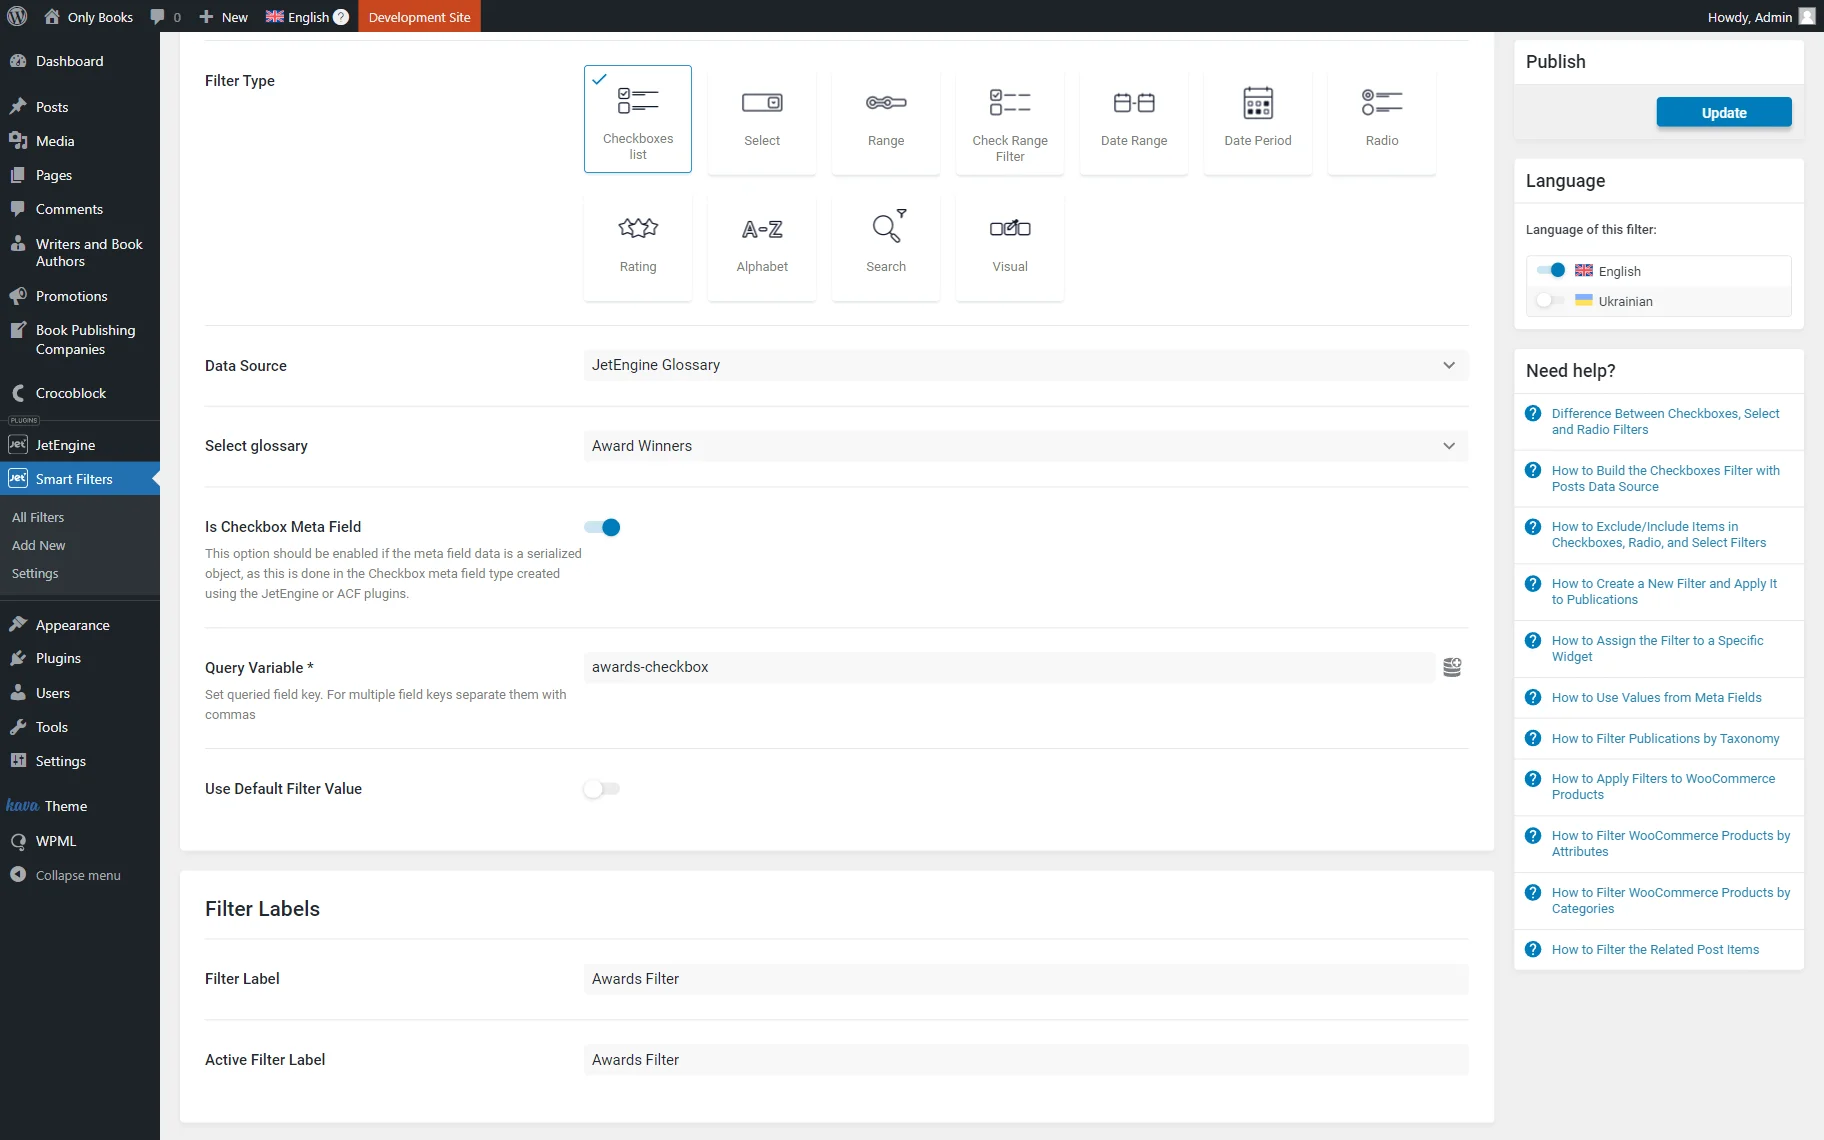
Head to WordPress Dashboard > Smart Filters > Add New to build a new filter.
Set the Filter Name and select the “Checkboxes list” option as the Filter Type.
Then, select its Data Source to be “JetEngine Glossary” and pick the needed glossary in the corresponding Select glossary field.
Activate the Is Checkbox Meta Field (Jet Engine) toggle as we work with the JetEngine “Checkbox” field.
In the Query Variable field, put the Name/ID of the built “Checkbox” meta field.

Complete the Filter Labels section and press the “Update” button to save the filter.
Add Content to the Page
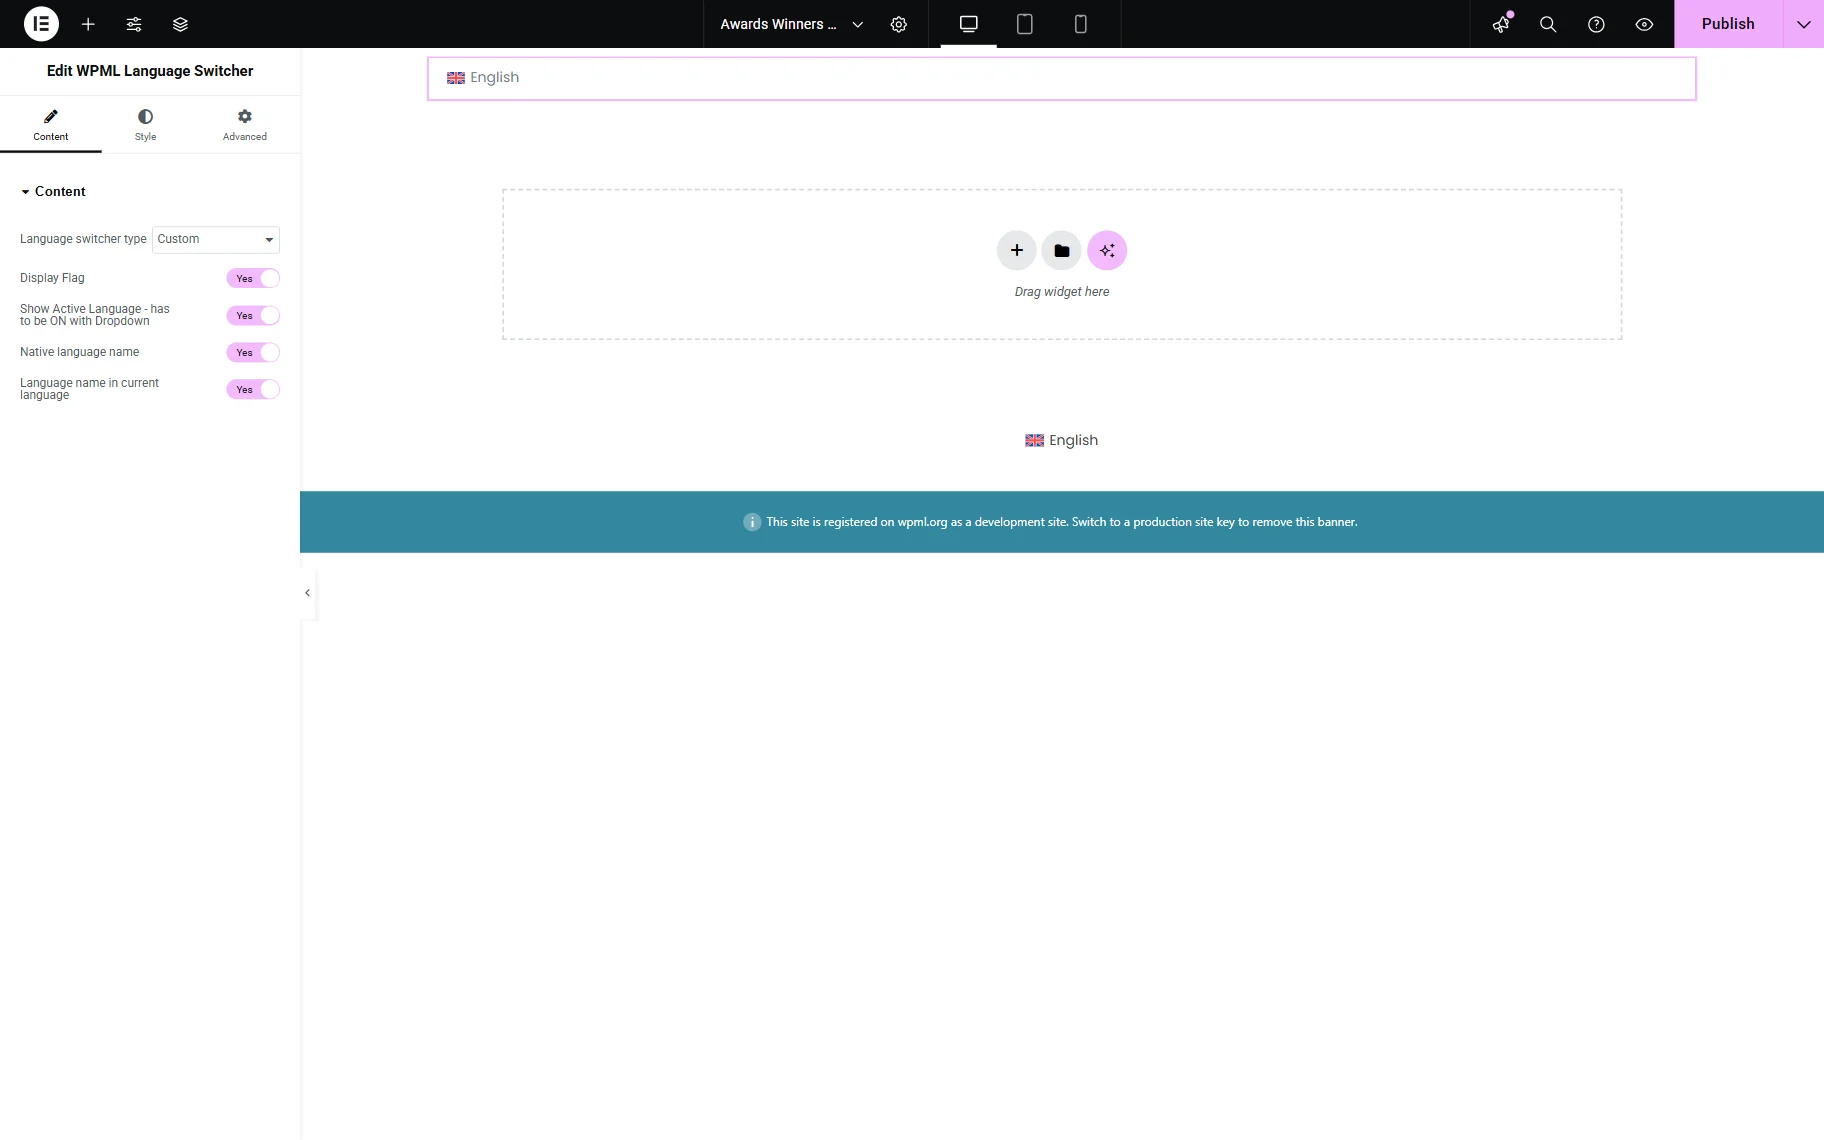
Head to the preferred editor to add the content; it can be Block Editor, Elementor, or Bricks. For instance, we work in Elementor.
On the page, add the Language Switcher widget so you can switch between languages later.
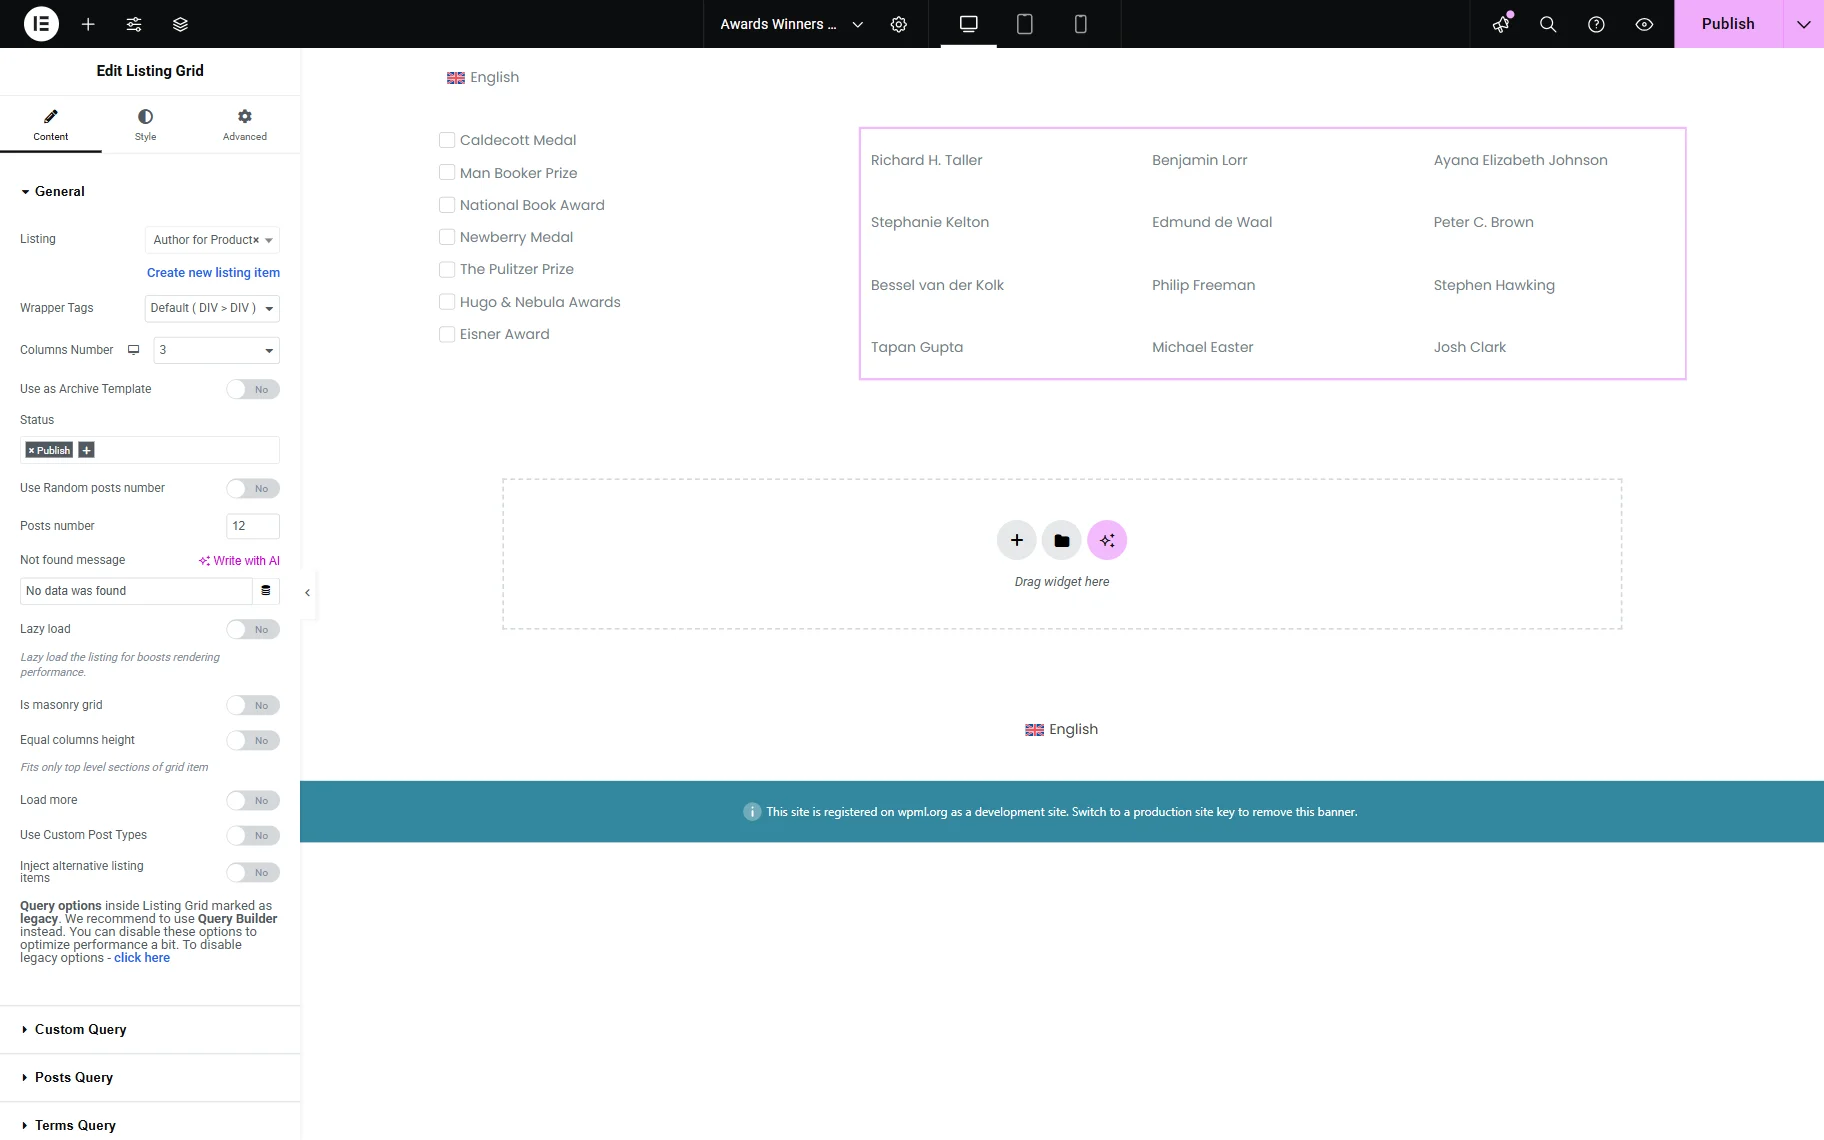
Add the Checkboxes Filter widget to the editing page. Select the needed filter and define its provider in the This filter for field.

Add the provider to the page. For instance, we add the Listing Grid widget. We built the Listing template beforehand, with just one Dynamic Field presenting the book’s author name.
Adjust the page further if needed, and once ready, press the “Publish” button.
Translate the Page
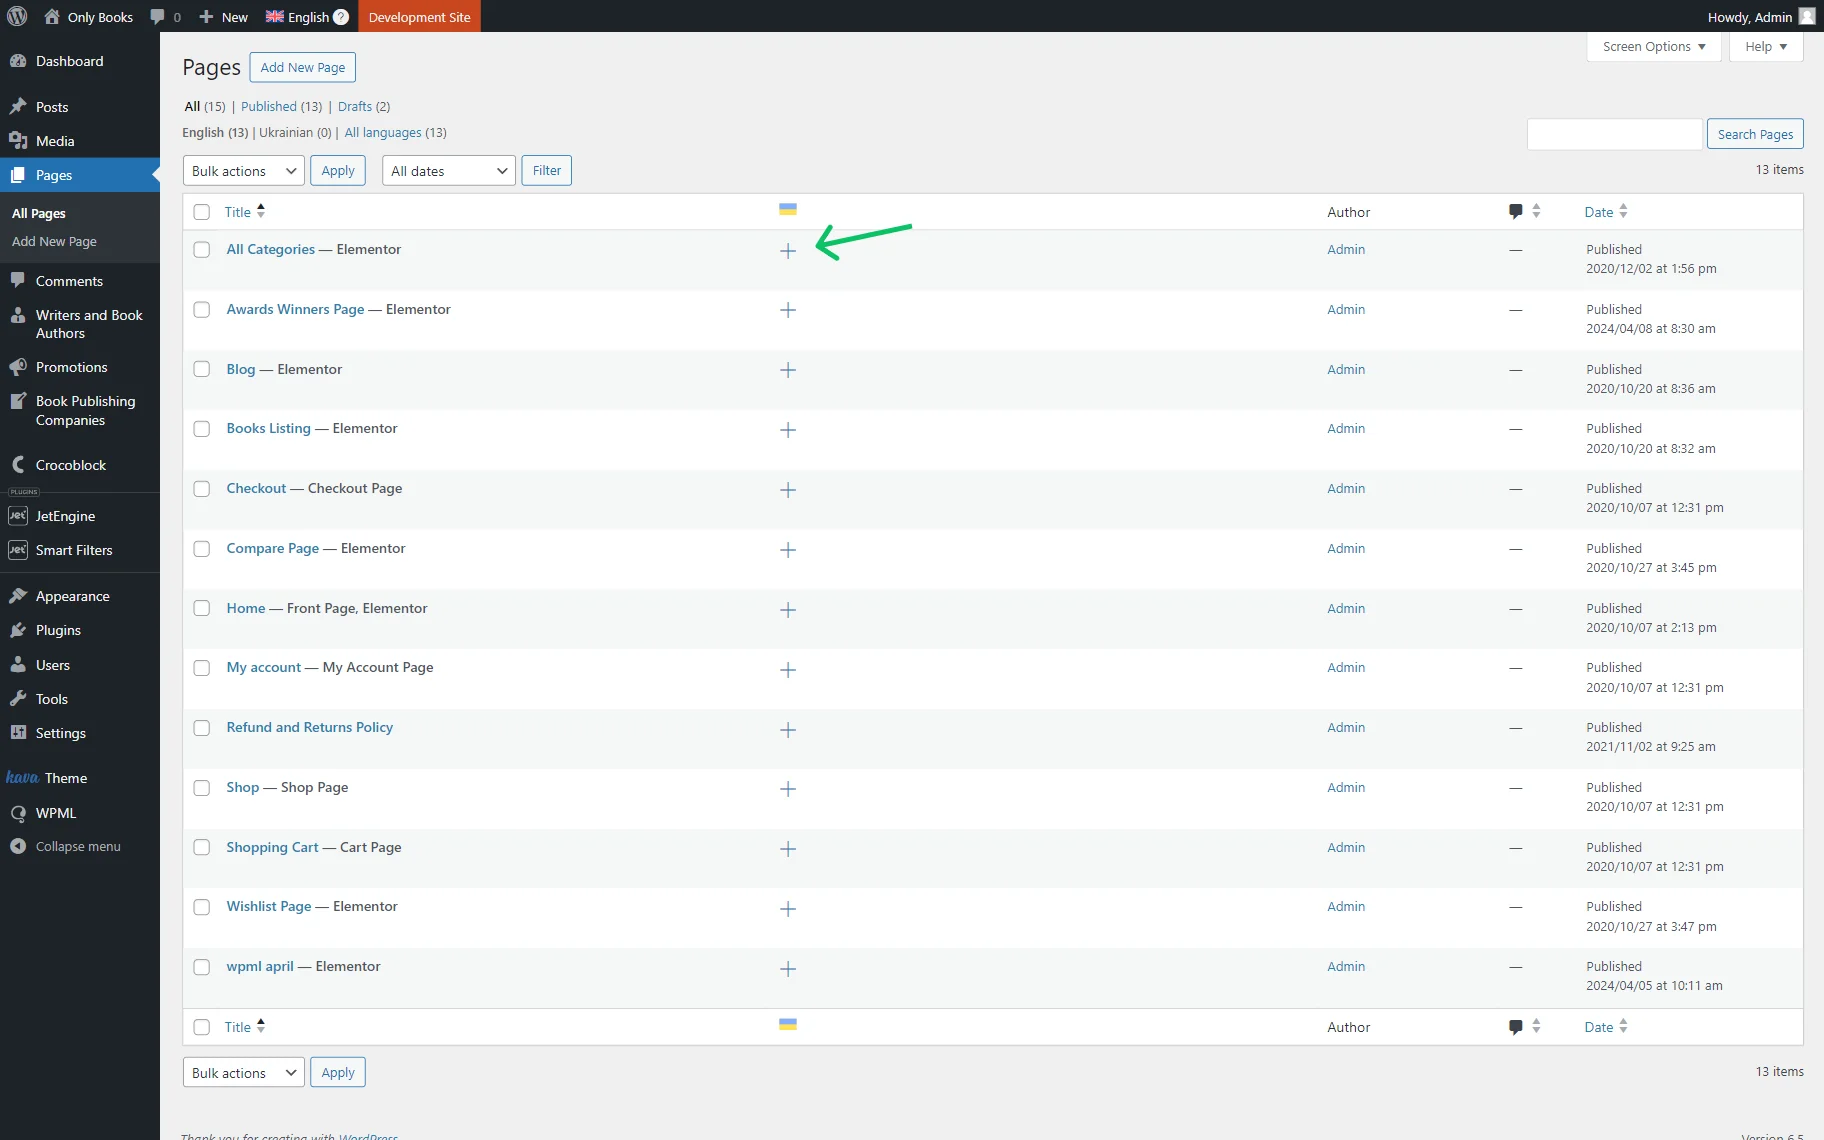
Return to the list of pages and translate the item by clicking the “+” button.
Complete the translation for all of the CPT items.
Check the Result
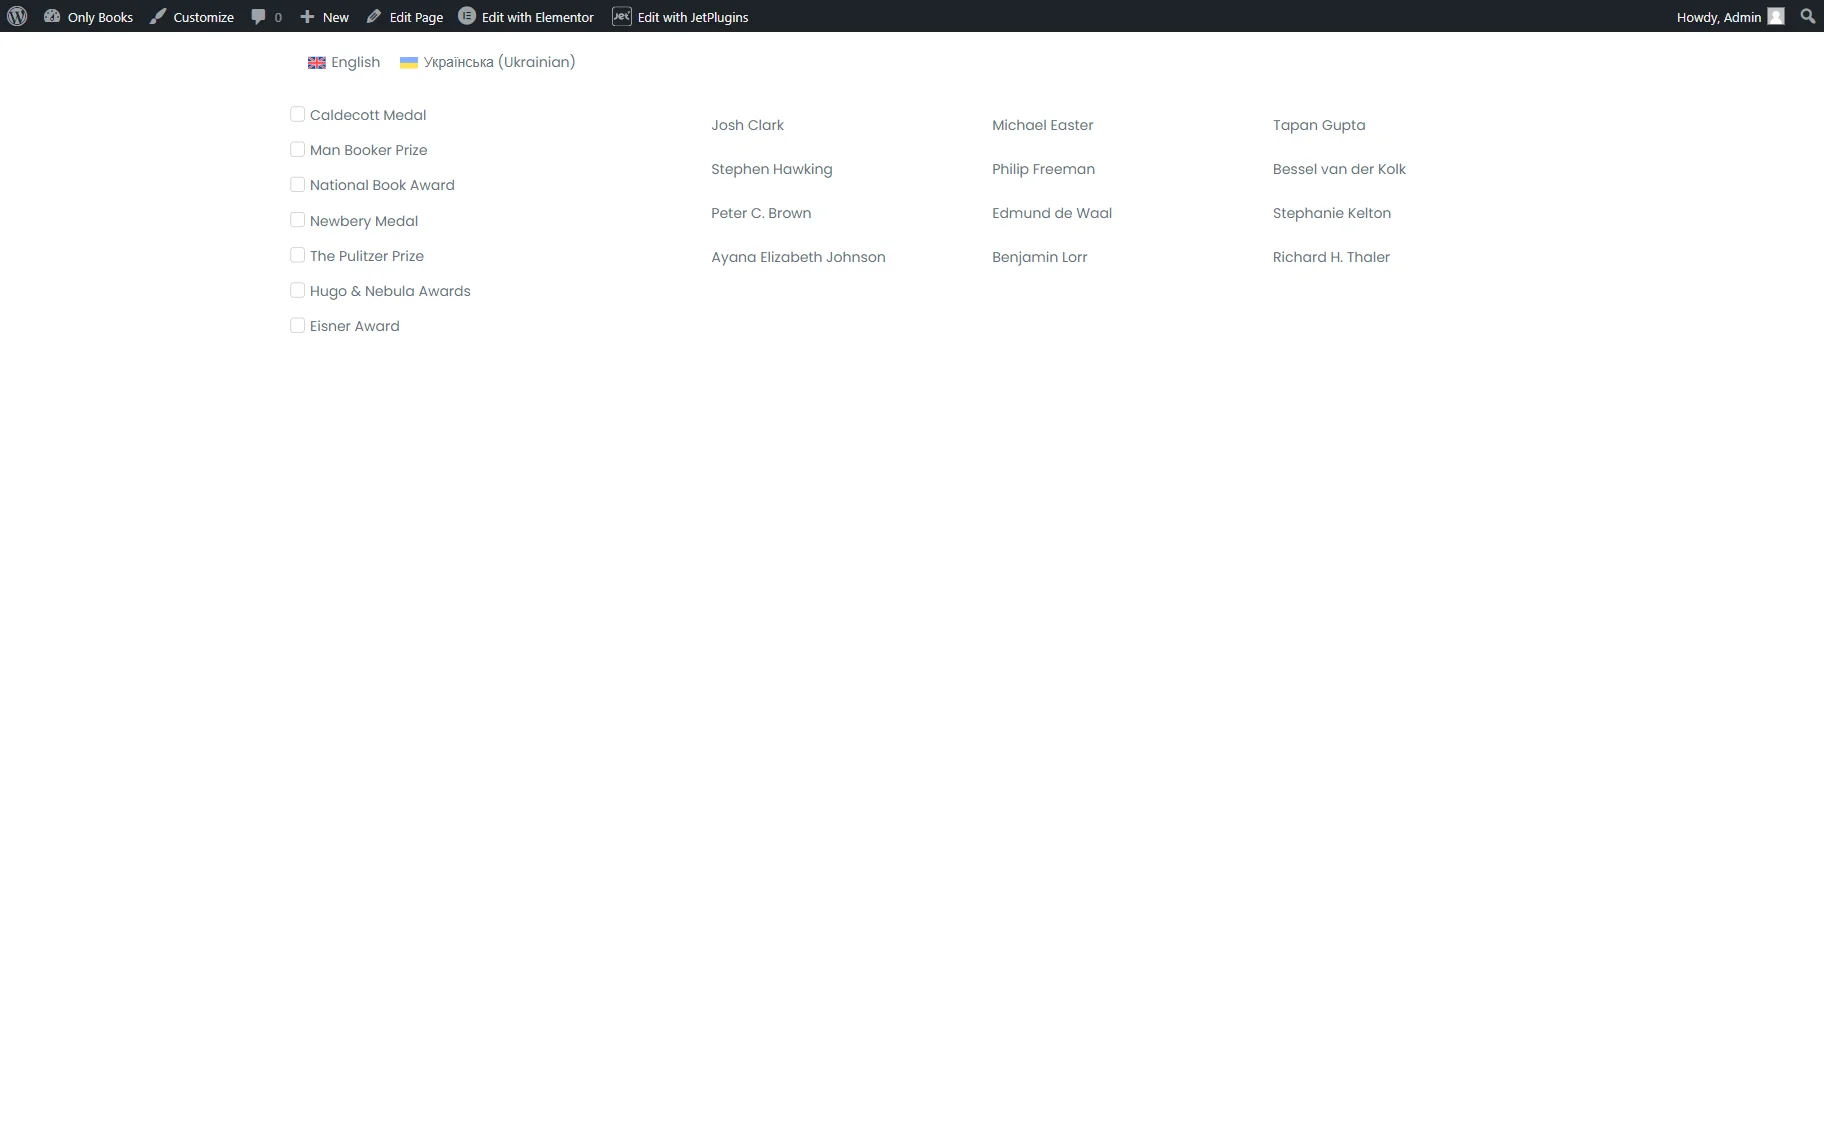
Proceed to the front end to check the result. At first, we see the original version of the page.
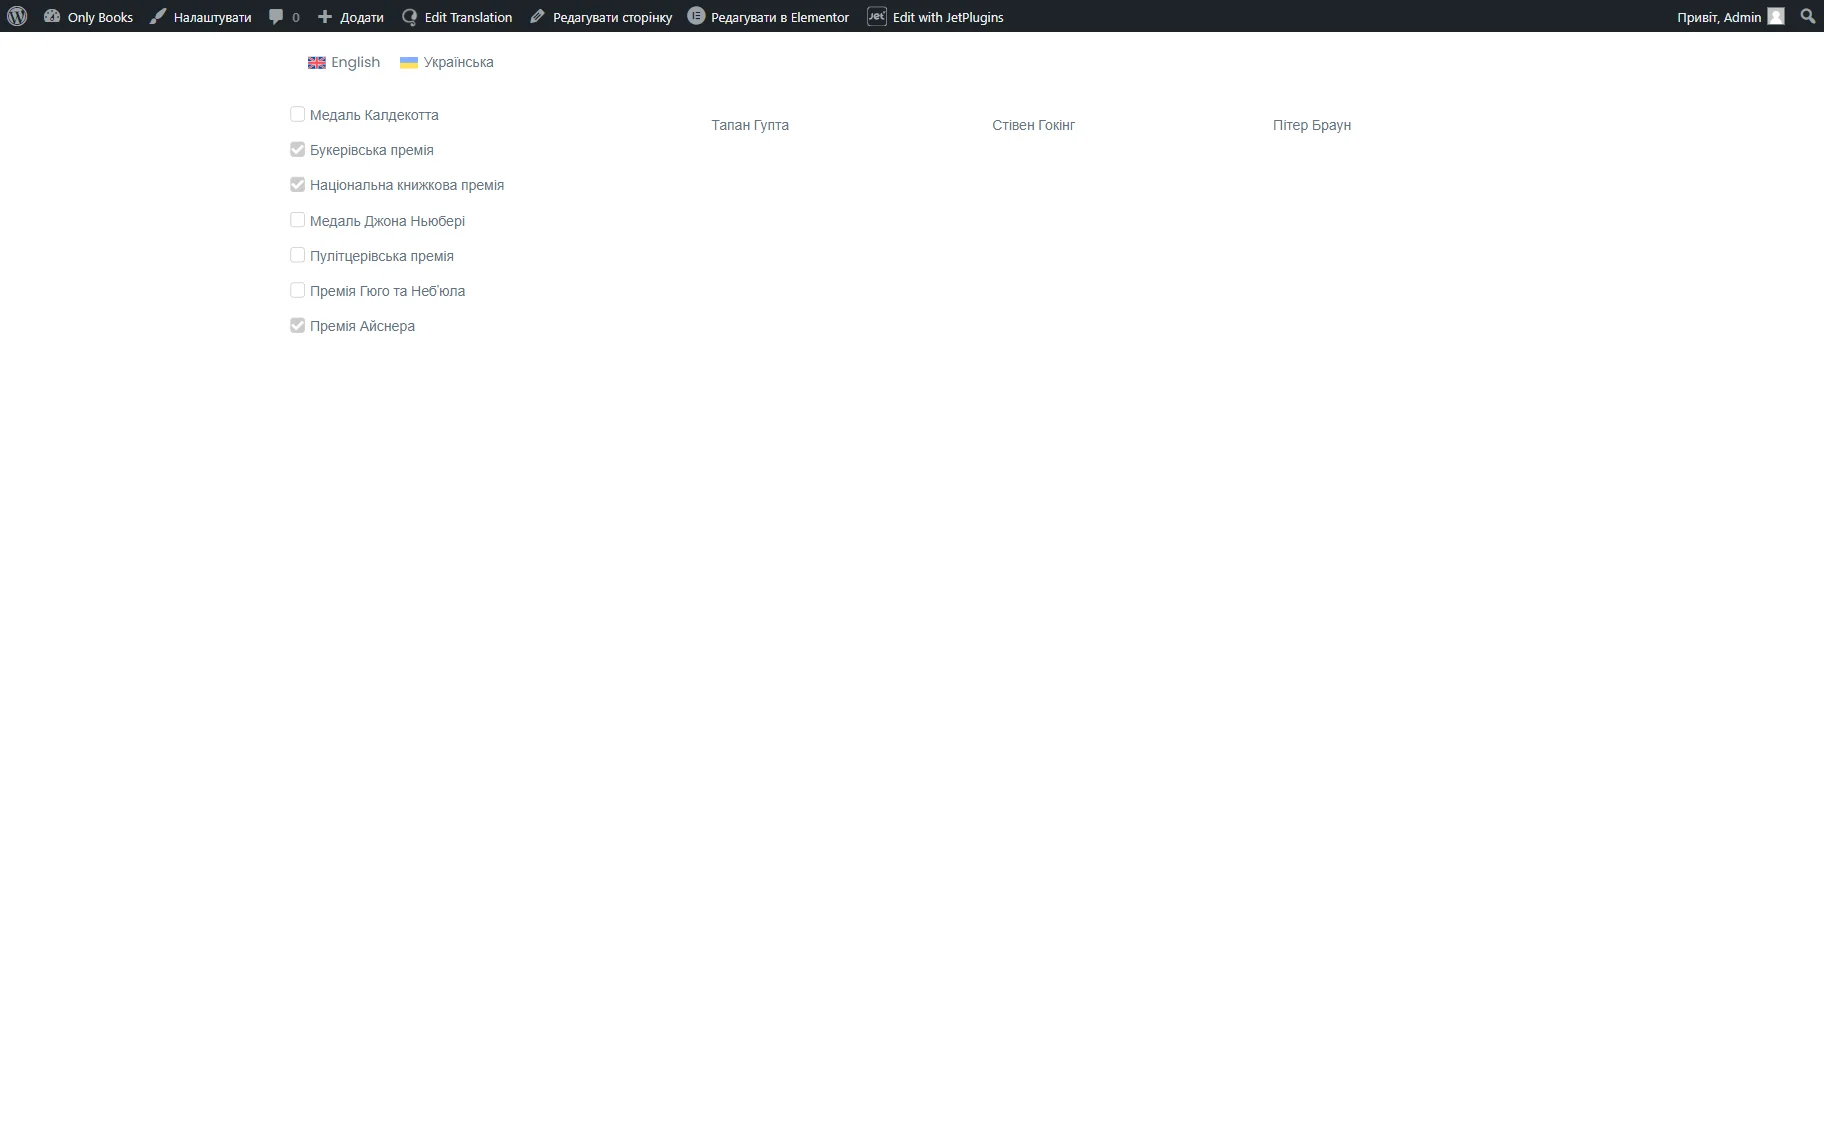
Once we click on the Ukrainian flag, we switch to the Ukrainian version of the page.
As you can observe, the content has now been translated.
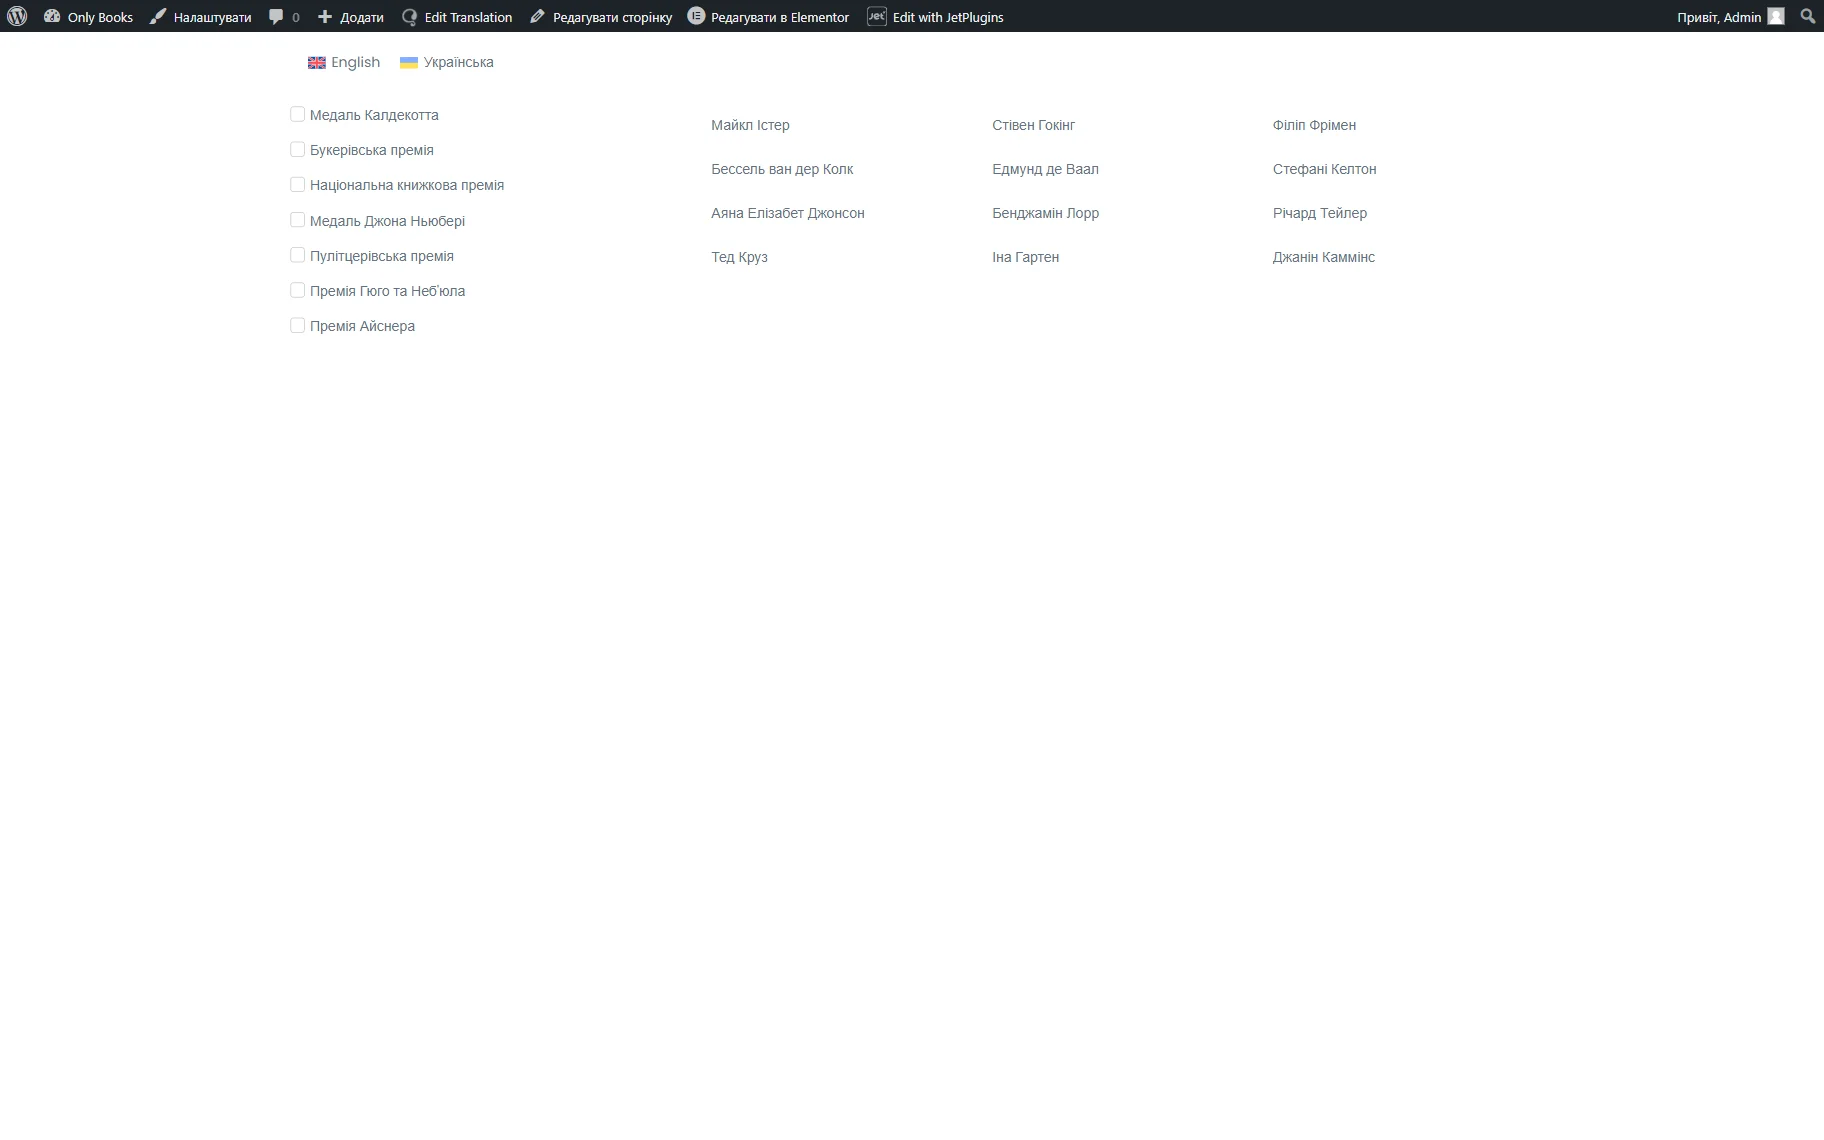
Let’s check how the WPML filter works by selecting the options in the Checkbox Filter.
The Listing Grid is now filtered by the Checkbox Filter options.
Also, check our How to Make a JetEngine-Built Website Multilingual tutorial to learn more about JetEngine and WPML integration.
That’s all about translating the JetSmartFilters filter based on the glossary built with JetEngine for WordPress websites.