How to Update JetPlugins from the WordPress Dashboard
Find out how to keep all Jet plugins in sync with their newer versions by updating them via Dashboard.
From this tutorial, you are going to find out how to update JetPlugins in order to keep your Dashboard up-to-date and use the latest improved versions of Jet plugins.
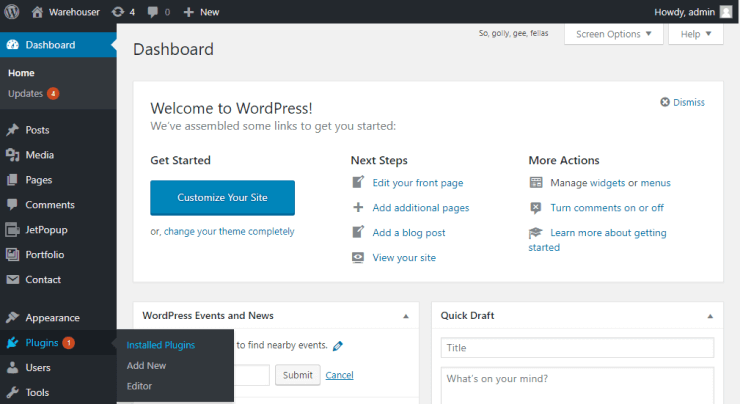
Navigate to your WordPress Dashboard. There is a menu with numerous options on the left. If there are any newer versions available for plugins, you will see the red notification in the Plugins block.
Hover over this block to reveal the sub-menu options. Click the Installed Plugins button in order to proceed to the list of plugins you have installed previously.

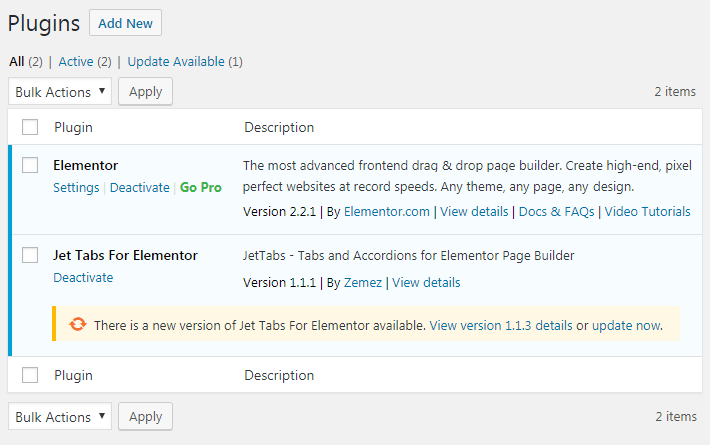
Here, you will see an orange notice, informing you that there is a new version of a particular plugin available. You are given an opportunity to read the details of what has been changed or added recently and how it differs from a previous version.
Click the Update Now option to start updating your plugin.

It usually takes approximately 10 seconds to update a plugin. In the end, you will see the green Updated! notice.

Now your plugin is up to date! It is important to know what functionality was added to the updates. Check the available updates list on the Changelog page every week.