How to Apply Meta Boxes to Users
In this tutorial, learn how to apply JetEngine meta boxes to users on your WordPress website.
Before you start, check the tutorial requirements:
- Elementor (Free version) or Block editor (Gutenberg)
- JetEngine plugin installed and activated
If you are using WordPress, you know that its user profile management system lets users customize their accounts without difficulty. Despite that, you may want to add additional custom fields to fill out the profile. That is why JetEngine Meta Boxes can be handy.
Meta Box allows you to add additional information to Posts, Taxonomies, or Users. It organizes all the created meta fields in one place and helps to manage them accordingly.
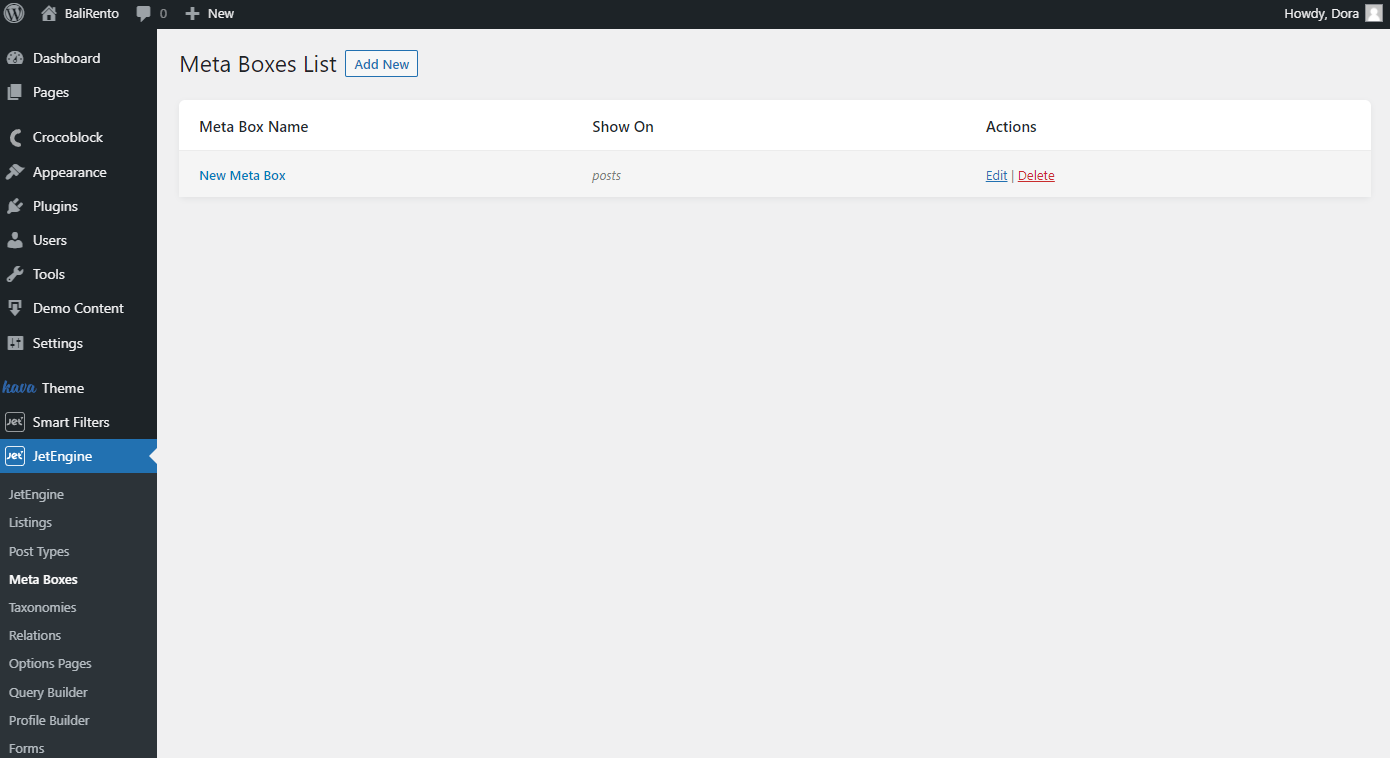
Create a New Meta Box
The first step is to add a new meta box. Go to JetEngine > Meta Boxes, and click on “Add New.”
General settings
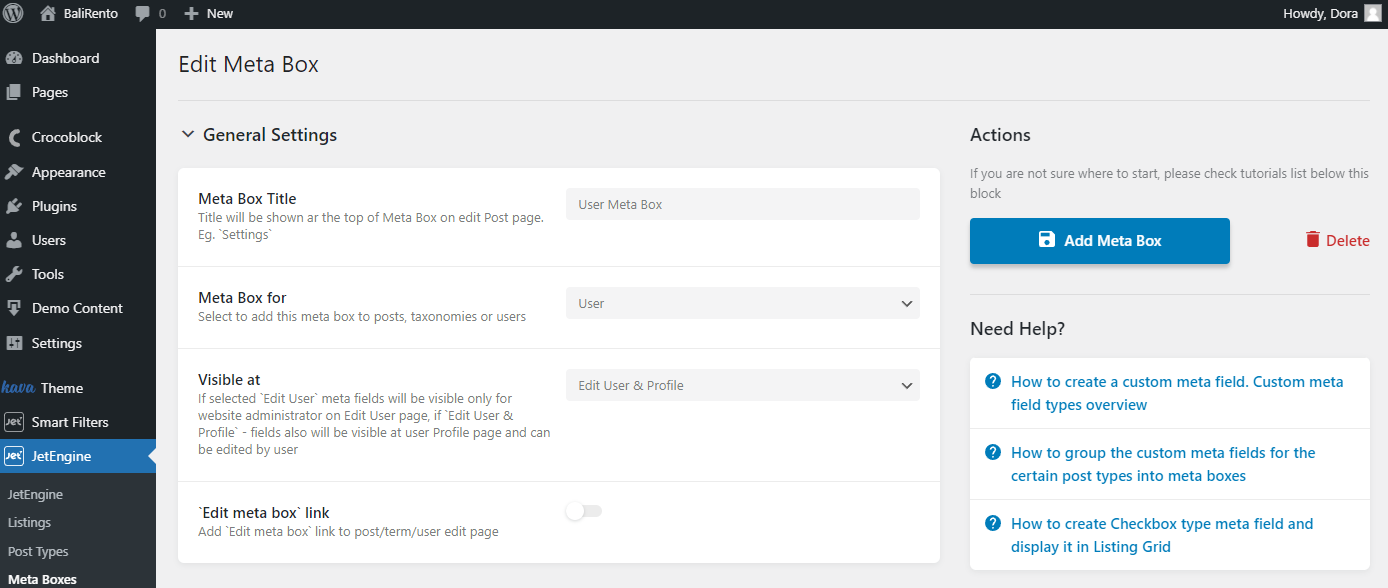
- Meta Box Title — fill in this field with the desired meta box name;
- Meta Box for — pick the option to which the meta box will be applied. In this case, it is “User”;
- ‘Edit meta box’ link — toggle it on to display a gear icon during the user profile editing. It redirects you to the Meta Box Editor when clicked.
Visibility conditions
There are two options in the Visible at selector:
- Edit User. It adds meta fields to the Edit User page. Since only administrators can edit users, such fields became visible only to people with such a role;
- Edit User & Profile. This option adds meta fields to the Edit User page and the Profile Page, which users can edit.
Meta boxes for Users have two conditions: Included for User Roles and Exclude for User Roles. More about the Visibility Conditions you can read here.
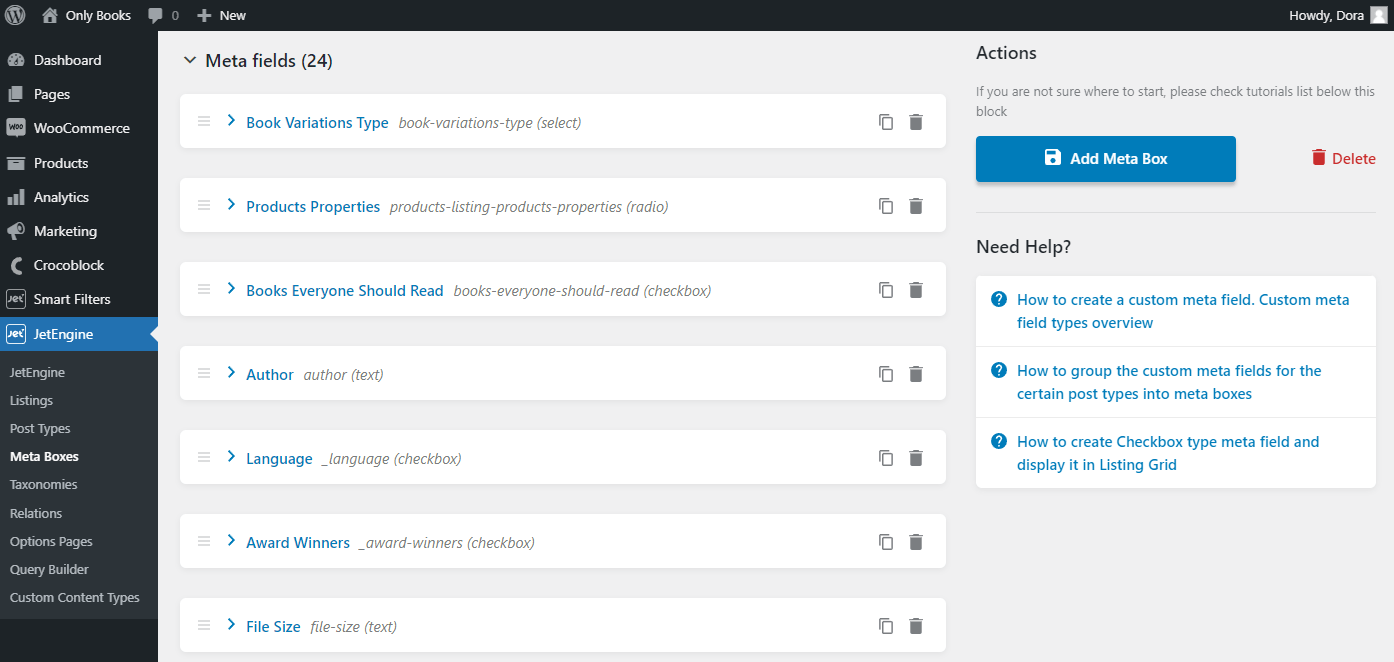
Meta fields
Proceed to the Meta Fields tab and add as many user profile fields as needed.
These custom meta fields will be added to the default WordPress ones.
After building the meta fields, save the meta box by pushing the “Add Meta Box” button. To check where meta fields are displayed, head to Users > Profile. You can see the custom meta fields under the WordPress user profile fields.
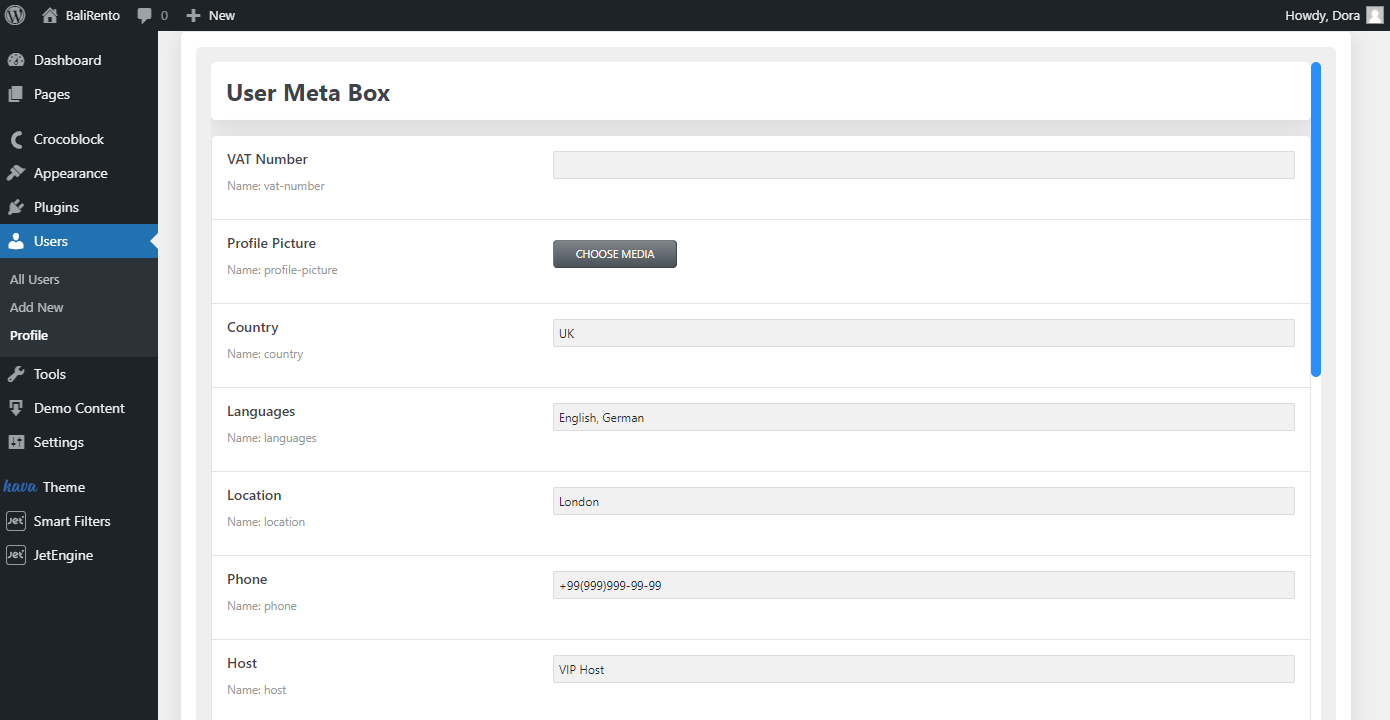
As we have chosen the “Edit User & Profile” option in the Visible At drop-down while editing the meta box, the user can fill in this information without outside help.
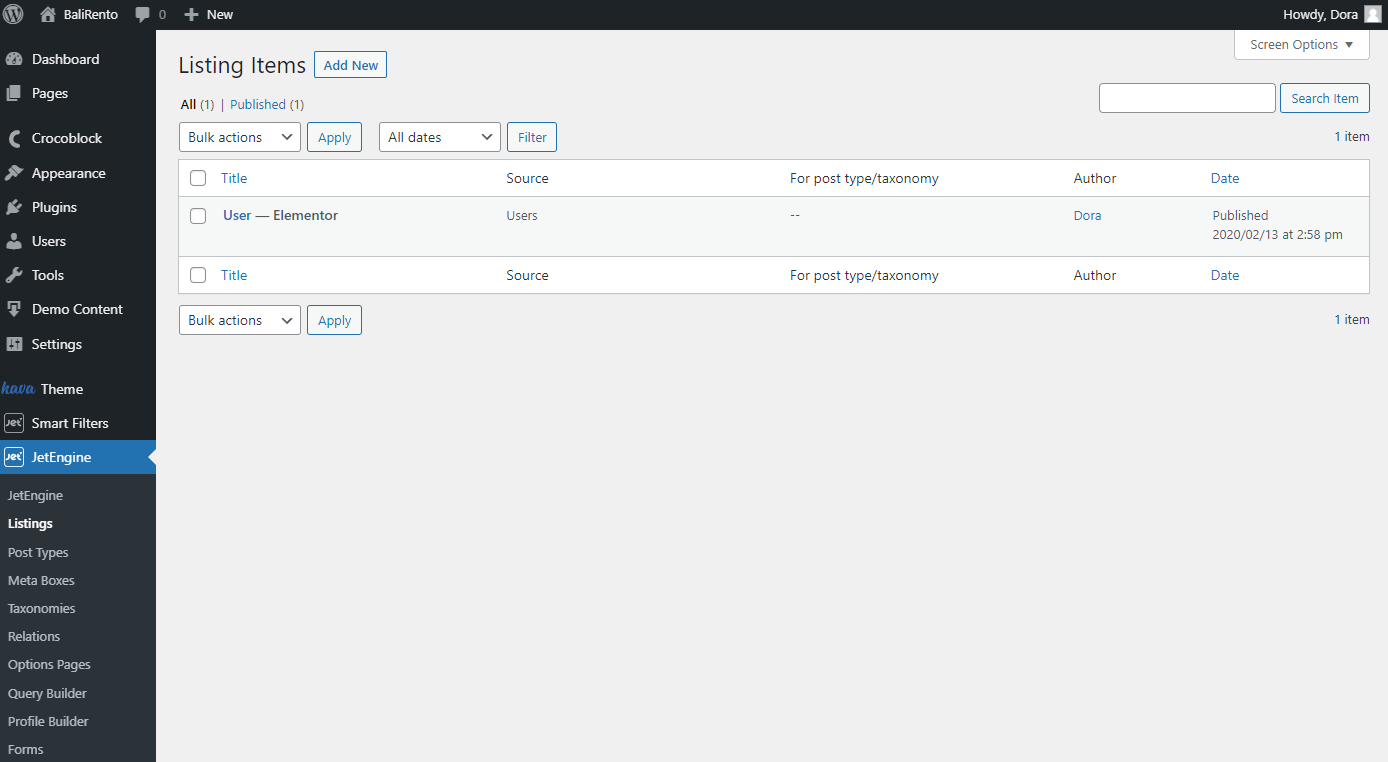
Display User Data Added with Meta Box
After creating a meta box, you can display all meta field data on the front end. There are three ways to display user metadata: User Listing Item, Single User, or a usual page. Let’s check the first option: go to JetEngine > Listings and find or create a User Listing.
Display the meta box data using widgets that can pull out the dynamic information.
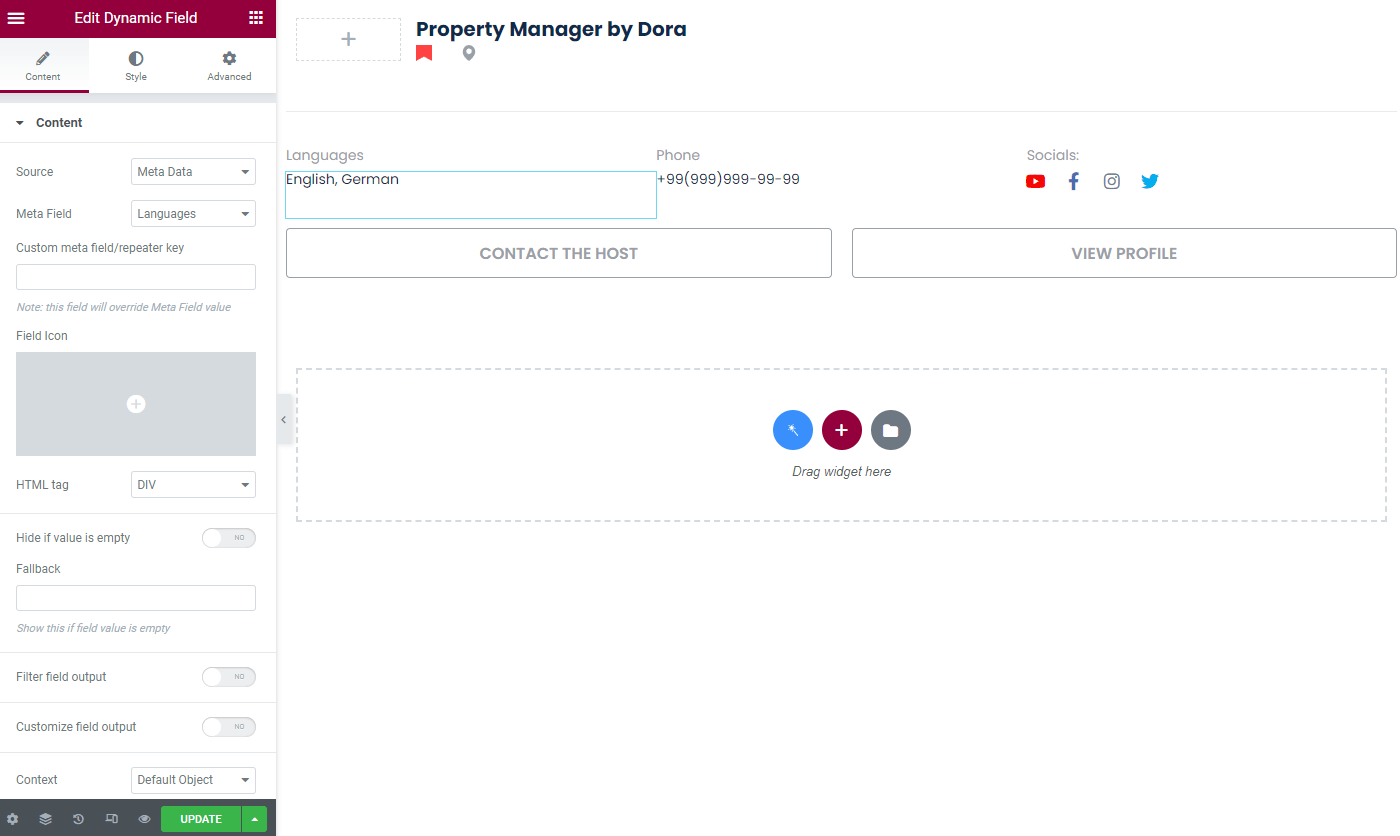
As we edit the User Listing, let’s place a Dynamic Field widget from the JetEngine plugin. The essential thing in our case is to set the “Meta Data” option as the Source and choose the desired Meta Field. The following customizations are at your discretion.
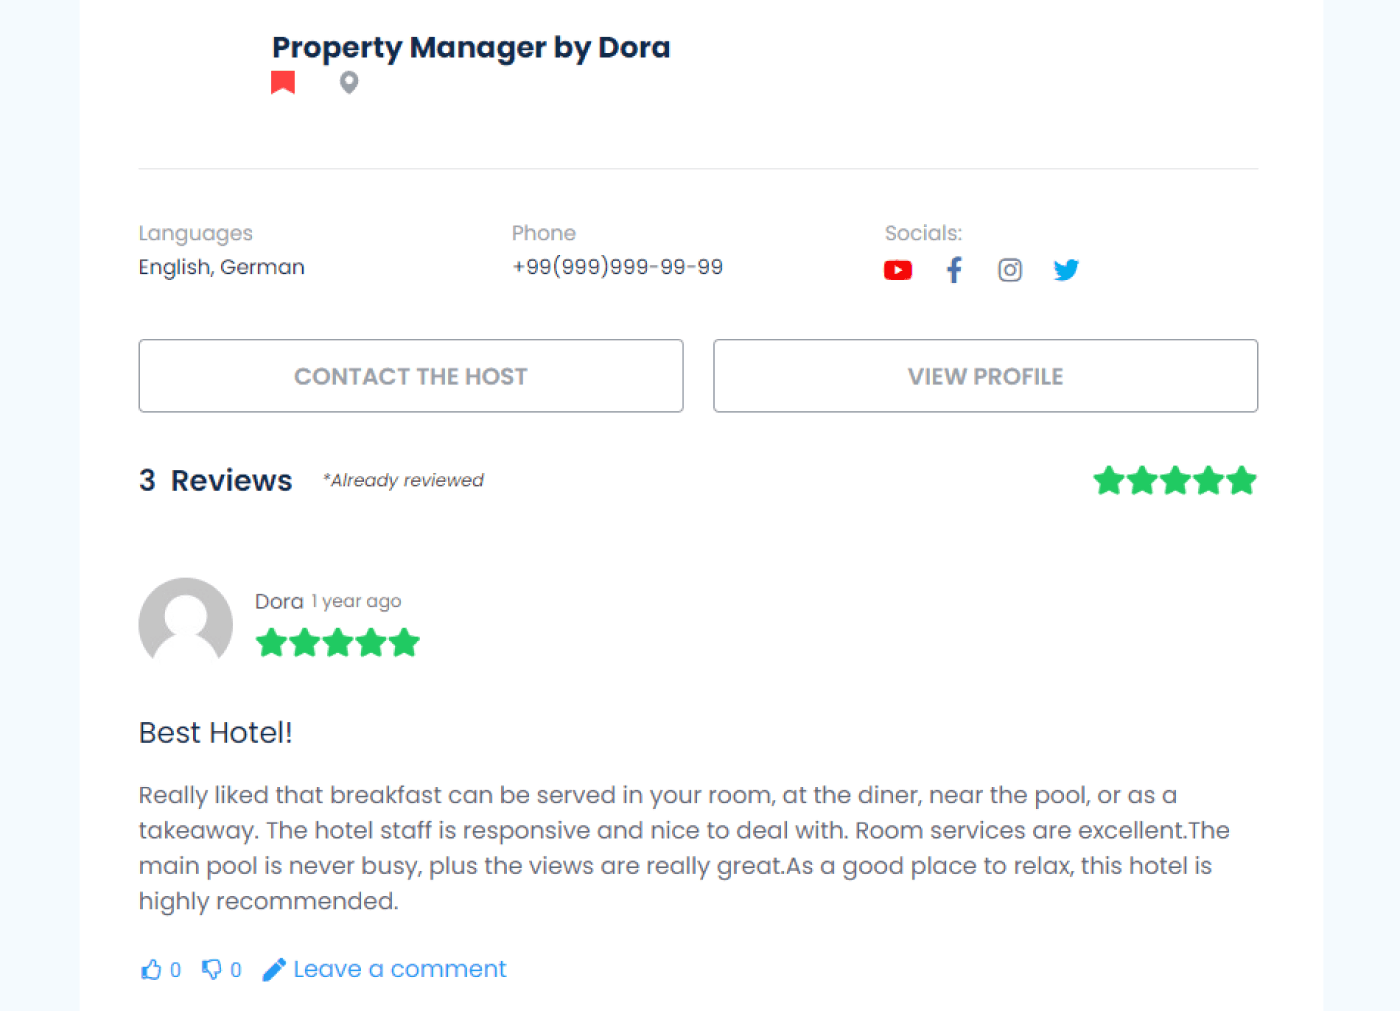
Once you are done editing the User Listing, click the “Update” button and check how the metadata works in real time.
Note that if you are trying to pull out the metadata on the usual page, you can do it with the help of the Dynamic Tag in the Elementor Text Editor widget.
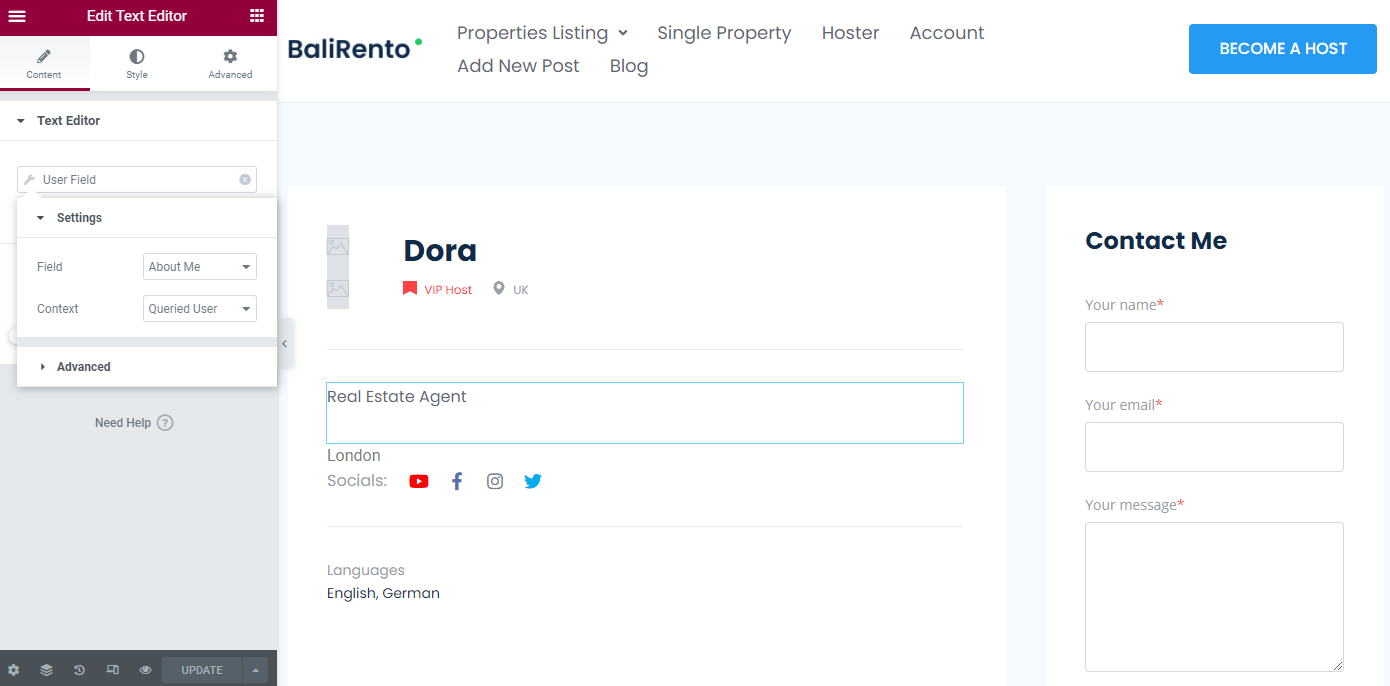
Select the Field you want to display and the Context. Don’t forget to update the page after editing.
Additional Use Cases of Metadata
Create a query
You can set a query for users. For instance, it can be a selection by location. Add location to all the needed users. You can choose any other fields for these purposes.
After you have updated the changed users, proceed to JetEngine > Query Builder. Add a new query by clicking on the similarly named button.
Give the query a name and set its type to “Users Query.” Head to the following Users Query customizations. Edit all the desired settings or skip them, as the Meta Query is the preferred option in this instance.
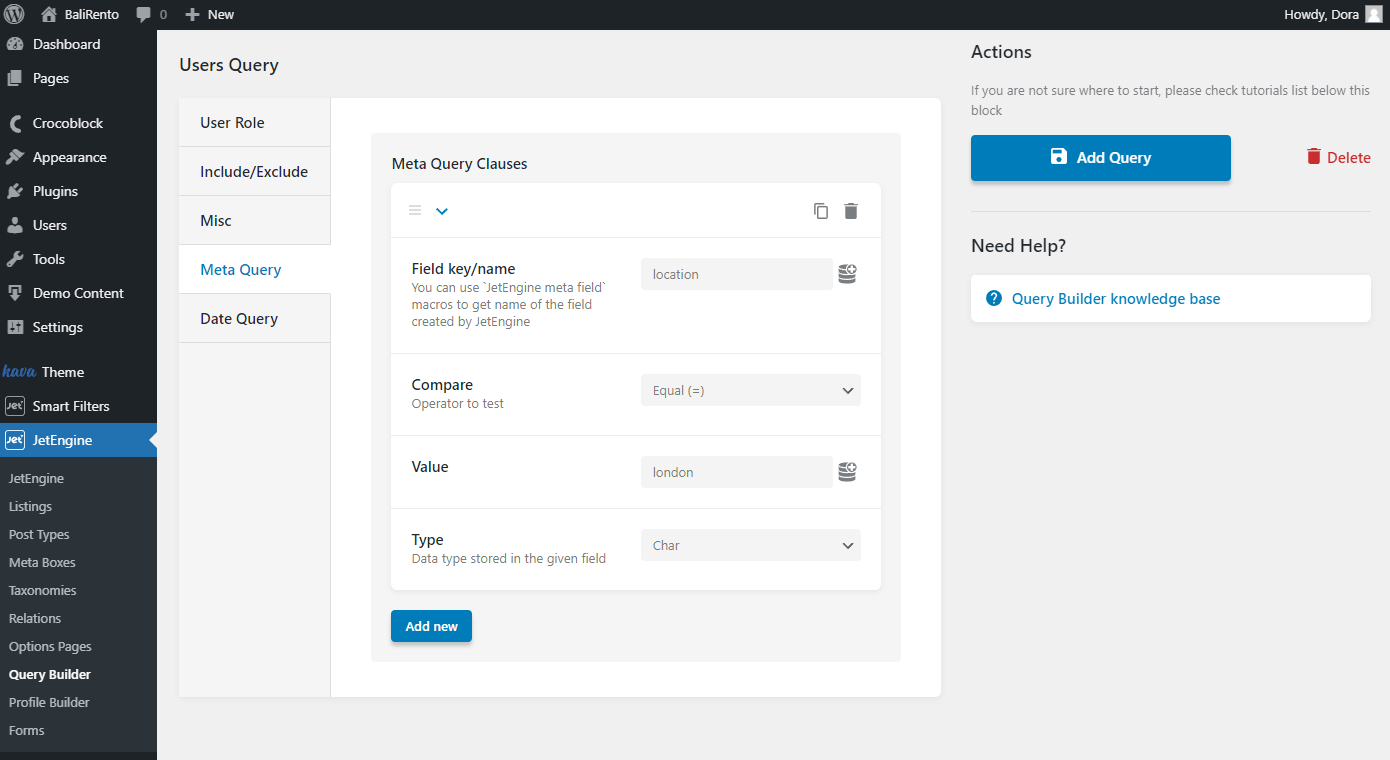
- Field key/name — use the meta field name you want to set a query for;
- Compare — choose an action that will be carried out;
- Value — set the field you want to query;
- Type of information — determine what data will be stored in the field.
When you type in all the needed fields, push the “Add Query” button to save the results and navigate to the page for which you want to attach the query.
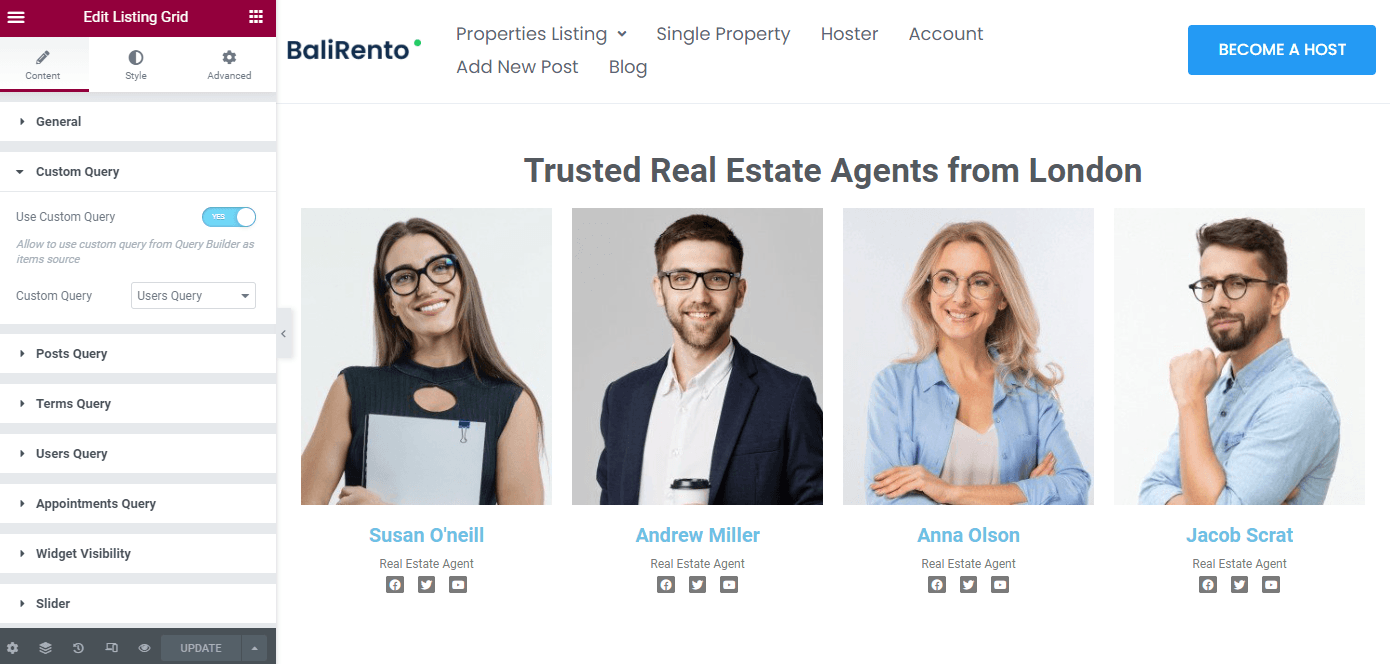
For instance, you can enable the query to work with the Listing Grid widget. Select a Listing that contains user information.
Toggle Use Custom Query, then select the newly created query to display users by location.

All the users who have set their location as London are now displayed on the page.
Use metadata in the JetSmartFilters widgets
Furthermore, note that you can filter users by metadata. For this purpose, you may use the JetSmartFilters plugin and its widgets. Check how to use filters with the help of meta fields by reading the tutorial.
Now everything is fully customized. As a result, you know how to adapt Meta Boxes to user profiles, filter, and query the necessary user information.