How to Create a Flexible Purchasing Plan with JetAppointment
This tutorial explains how to create a flexible appointment slot purchase system with JetAppointment and JetFormBuilder, including payments, discounts, and user balance tracking on your WordPress site.
Before you start, check the tutorial requirements:
- Elementor (Free version), Block editor (Gutenberg), or Bricks
- JetAppointment plugin installed and activated
- JetFormBuilder plugin installed and activated
We will describe how to build two connected forms: one for buying slots with payment integration and another for booking appointments that deduct slots from the user’s balance.
In our example, providers are teachers and services are lessons. Users can buy several lessons (appointment slots) in advance and then use them to book appointments later.
The workflow is totally compatible with the Multibooking JetAppointment feature.
For this case, we will create forms for the Single Provider page, so be aware that some settings will be specific to this setup.
Create a User Meta Field
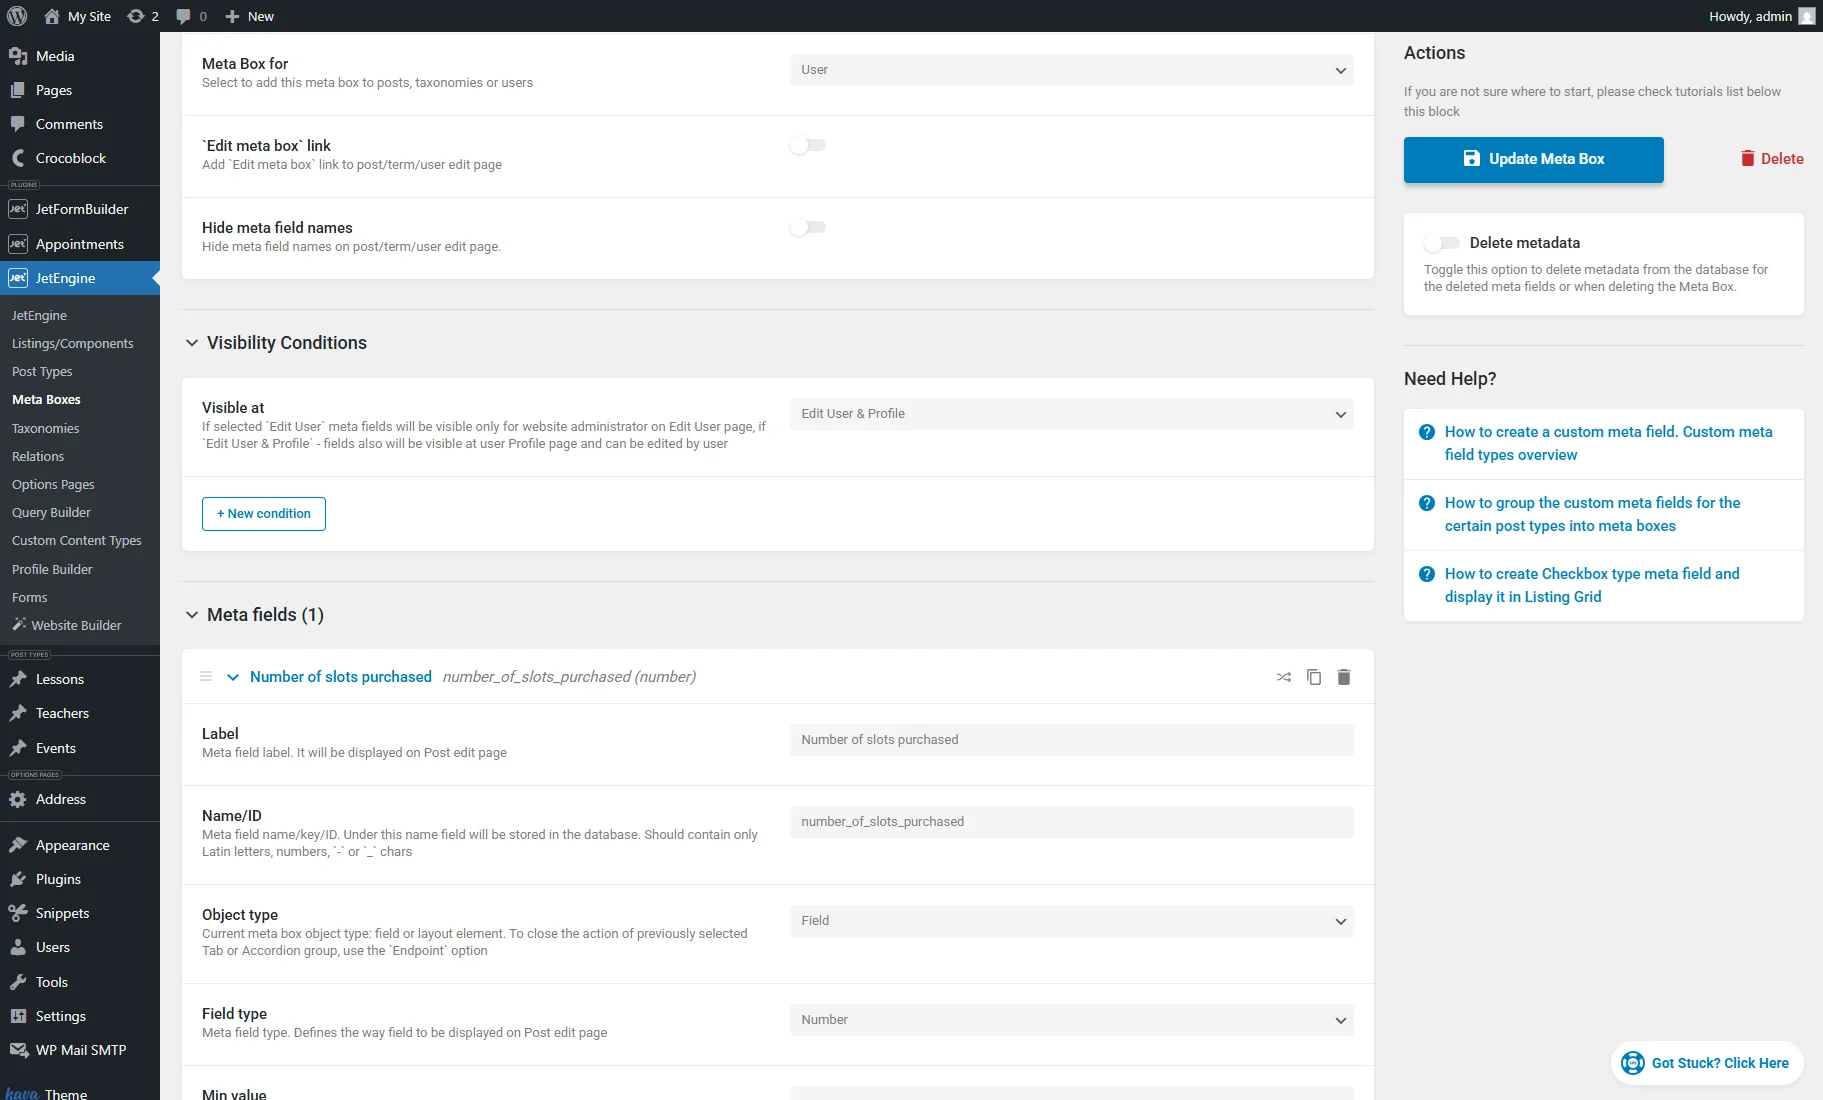
Head to WordPress Dashboard > JetEngine > Meta Boxes > Add New.
Enter the Meta Box Title and select “User” in the Meta Box for dropdown.
Set other settings and Visibility Conditions if needed, scroll down to the Meta fields section, and hit the “New Meta Field” button.
Enter the Label (e.g., “Number of slots purchased”), the Name/ID will be generated dynamically, and select the “Number” Field type.
Then, press the “Add/Update Meta Box” button.
More details can be found in the How to Apply Meta Boxes to Users tutorial.
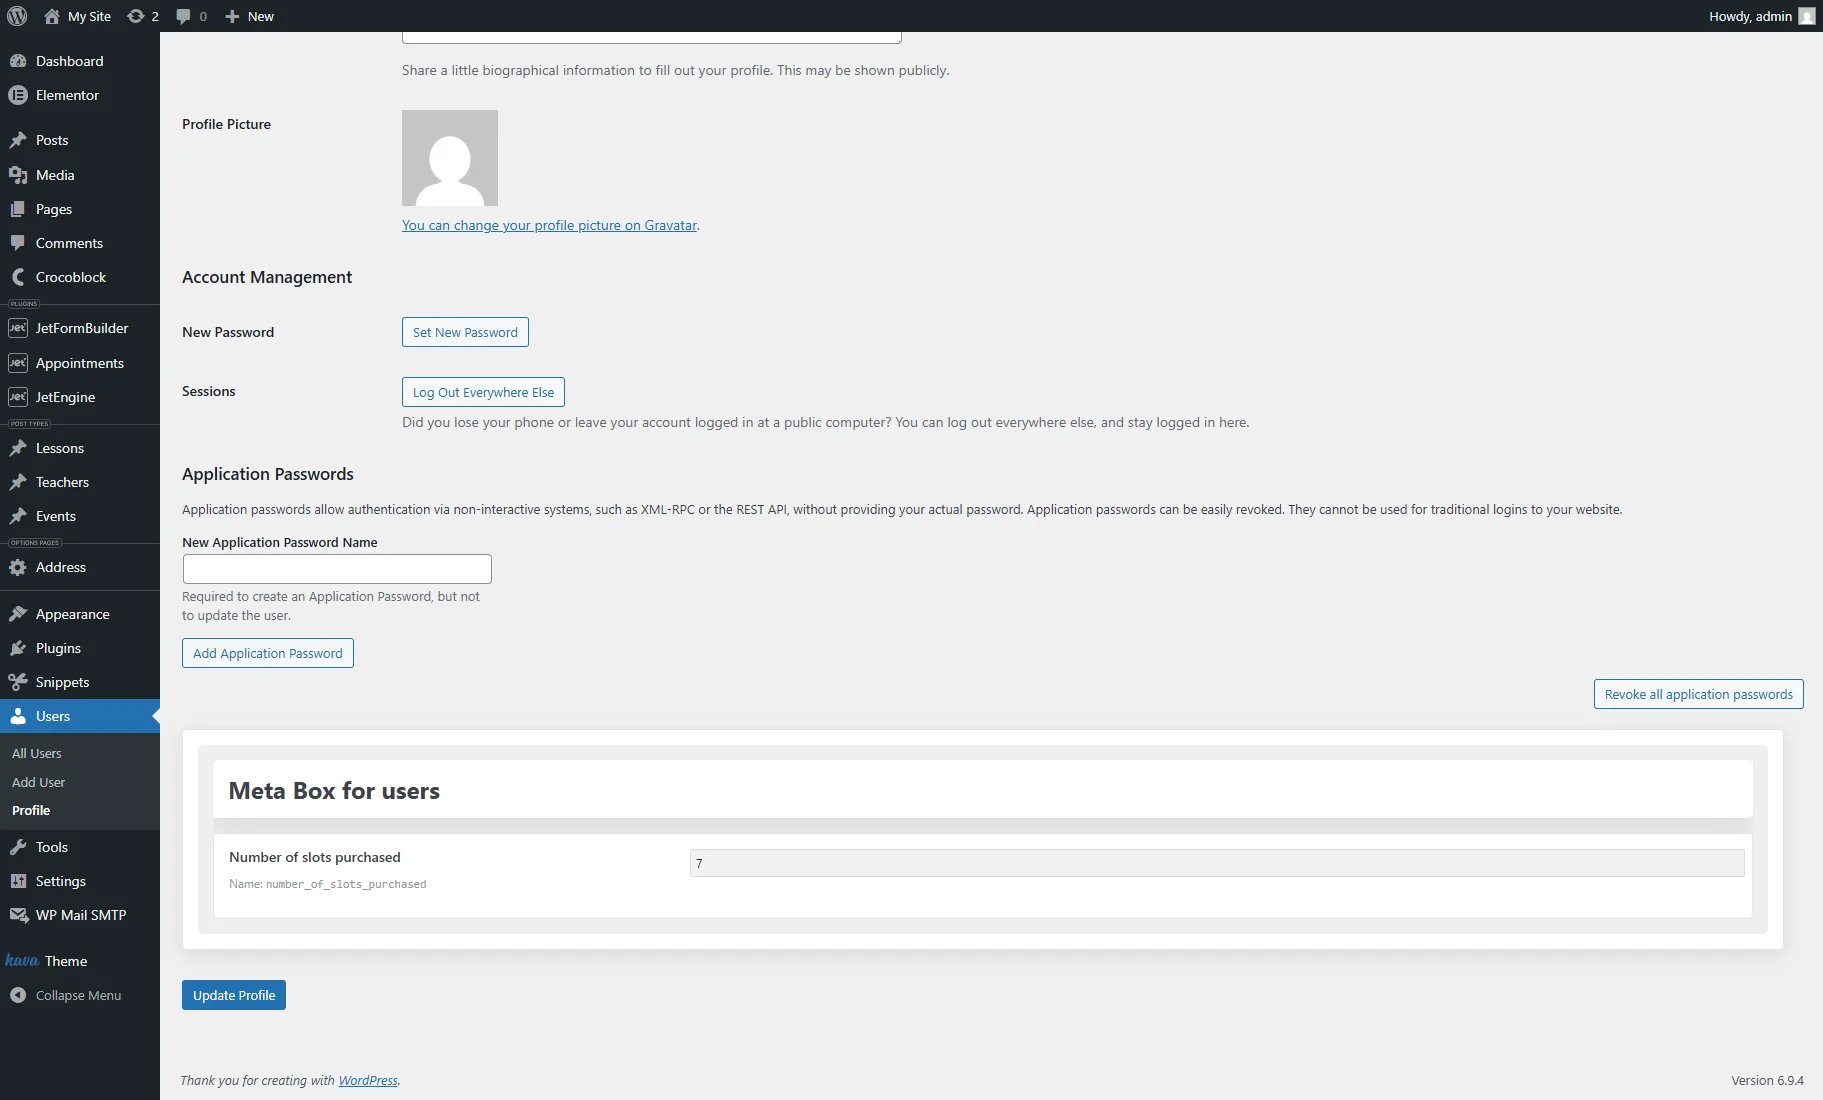
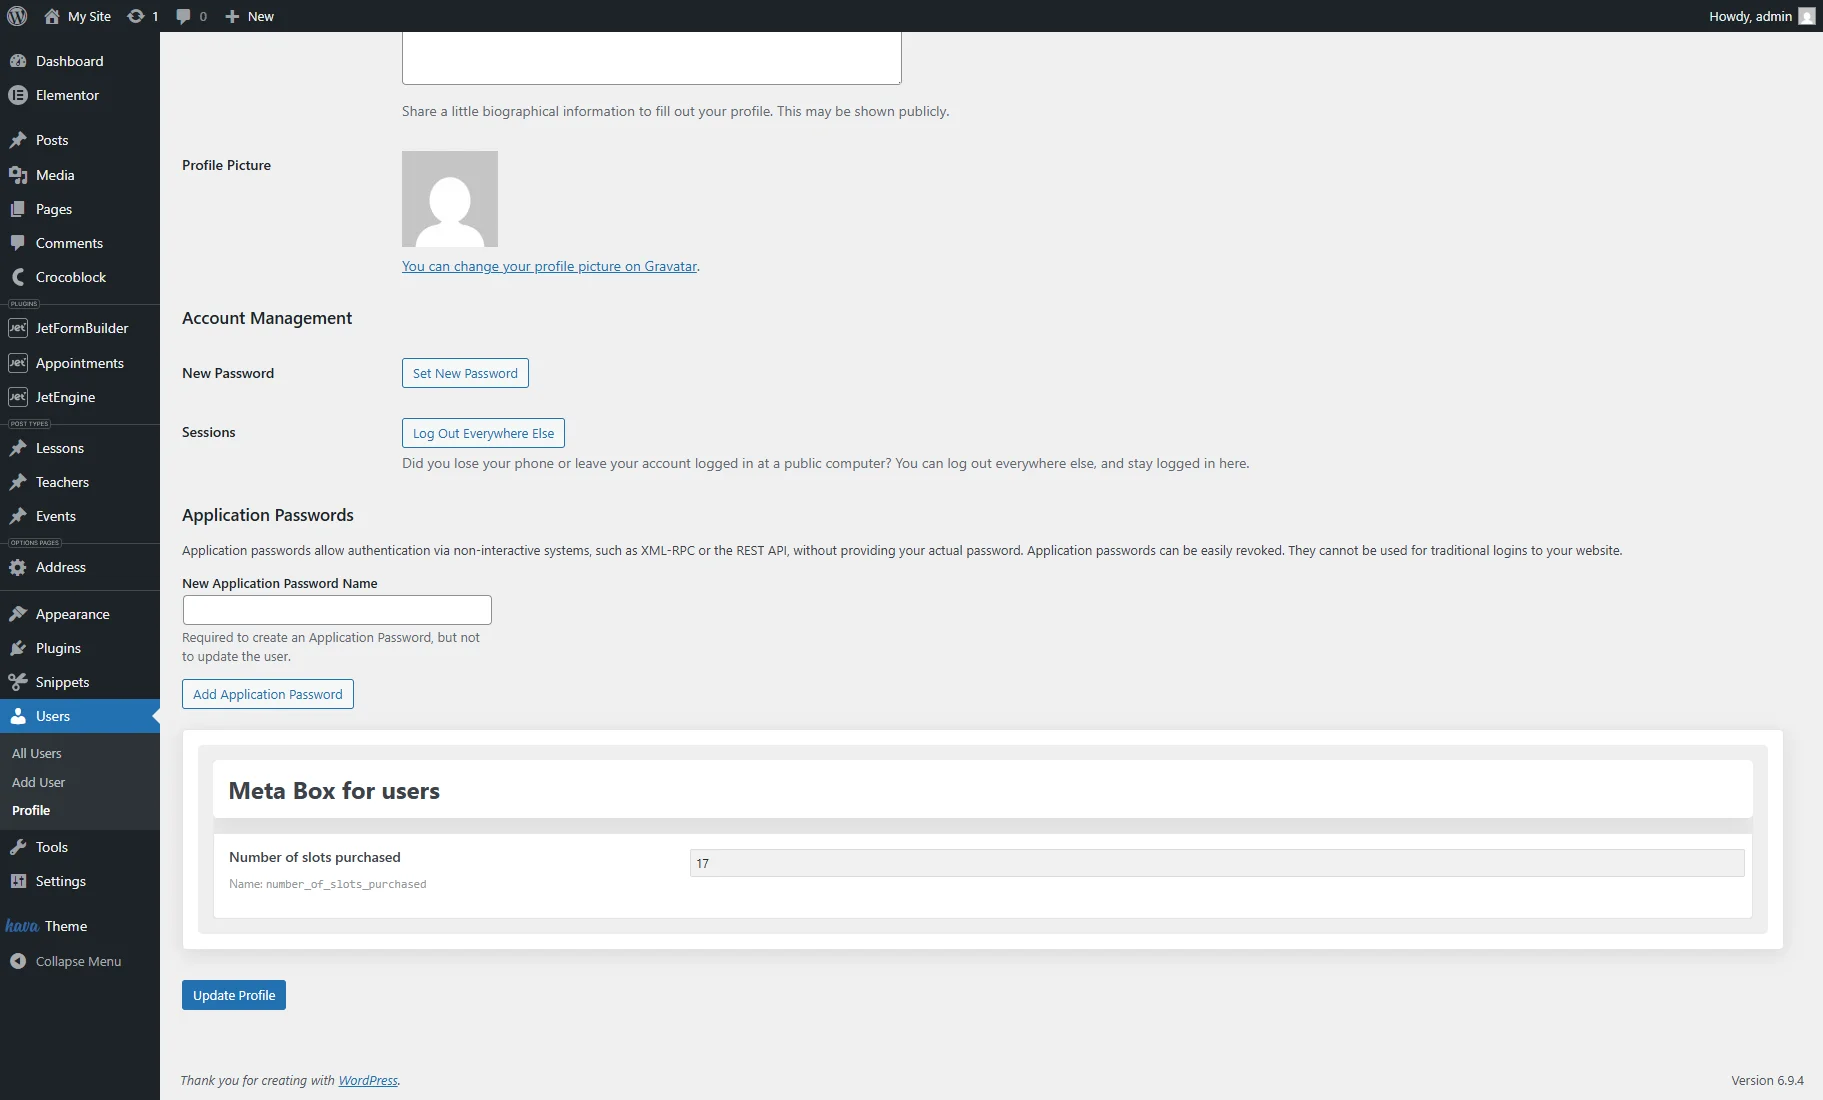
To check where the meta field is displayed, head to WordPress Dashboard > Users > Profile. It will be shown under the WordPress user profile fields.
You can change the field value manually for testing purposes (e.g., to verify how it is displayed in the form).
Create the Purchase Form
First, we will create a form that allows users to buy lesson slots and store the amount in a user’s “Number” meta field.
Be aware that this form is intended for logged-in users only. You can combine it with a registration form, but additional form fields and actions will be required.
Also, check the How to Create a Registration Form With Email Verification and How to Set Registration and Login in One Form Using Render States tutorials setup details.
Form fields
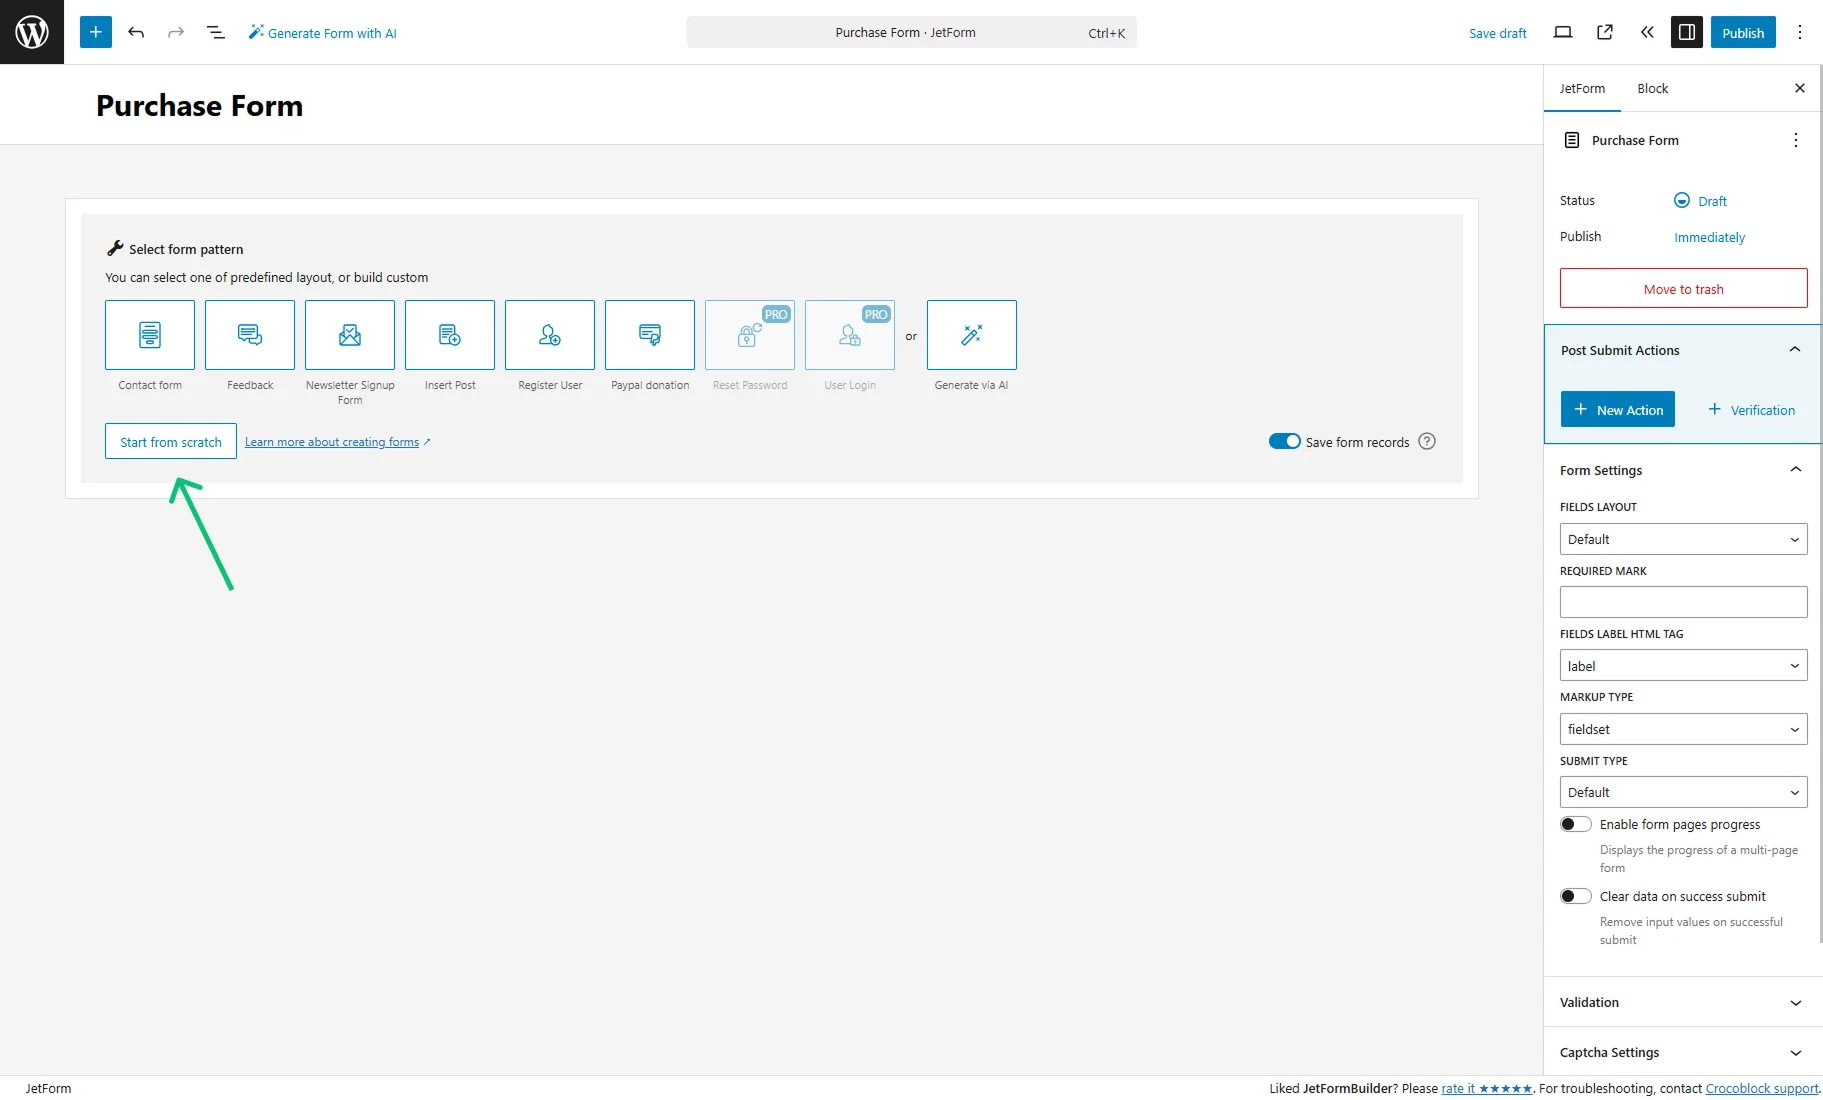
Go to WordPress Dashboard > JetFormBuilder > Add New Form. Type the form title and press the “Start from scratch” button in the Welcome block.
For the “Purchase Form,” such fields should be created:
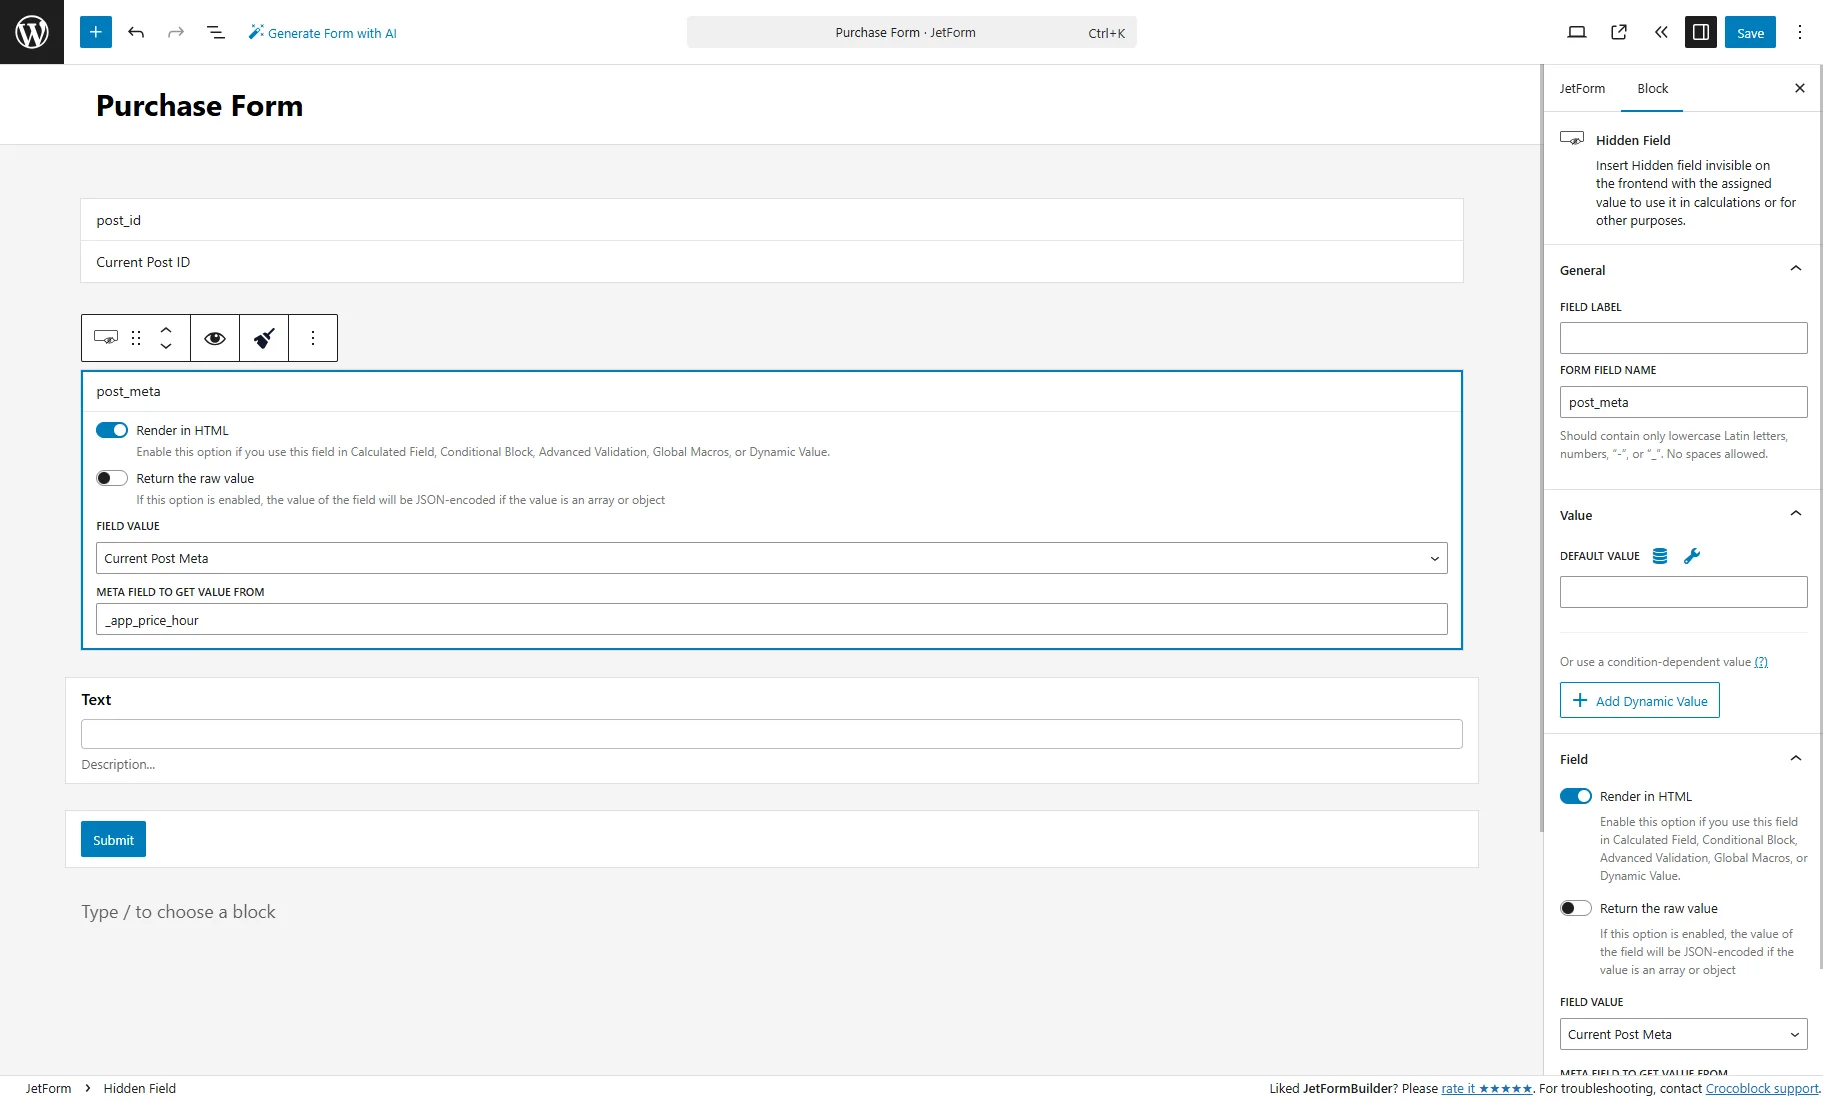
1. Keep the first Hidden Field with the “Current Post ID” FIELD VALUE that links the form to the current provider/teacher.
2. Then, duplicate this field, select the “Current Post Meta” FIELD VALUE, and enter “_app_price_hour” into the META FIELD TO GET VALUE FROM, which pulls the price dynamically from the post.
The FORM FIELD NAME in the right Block section can be changed to “post_meta”.
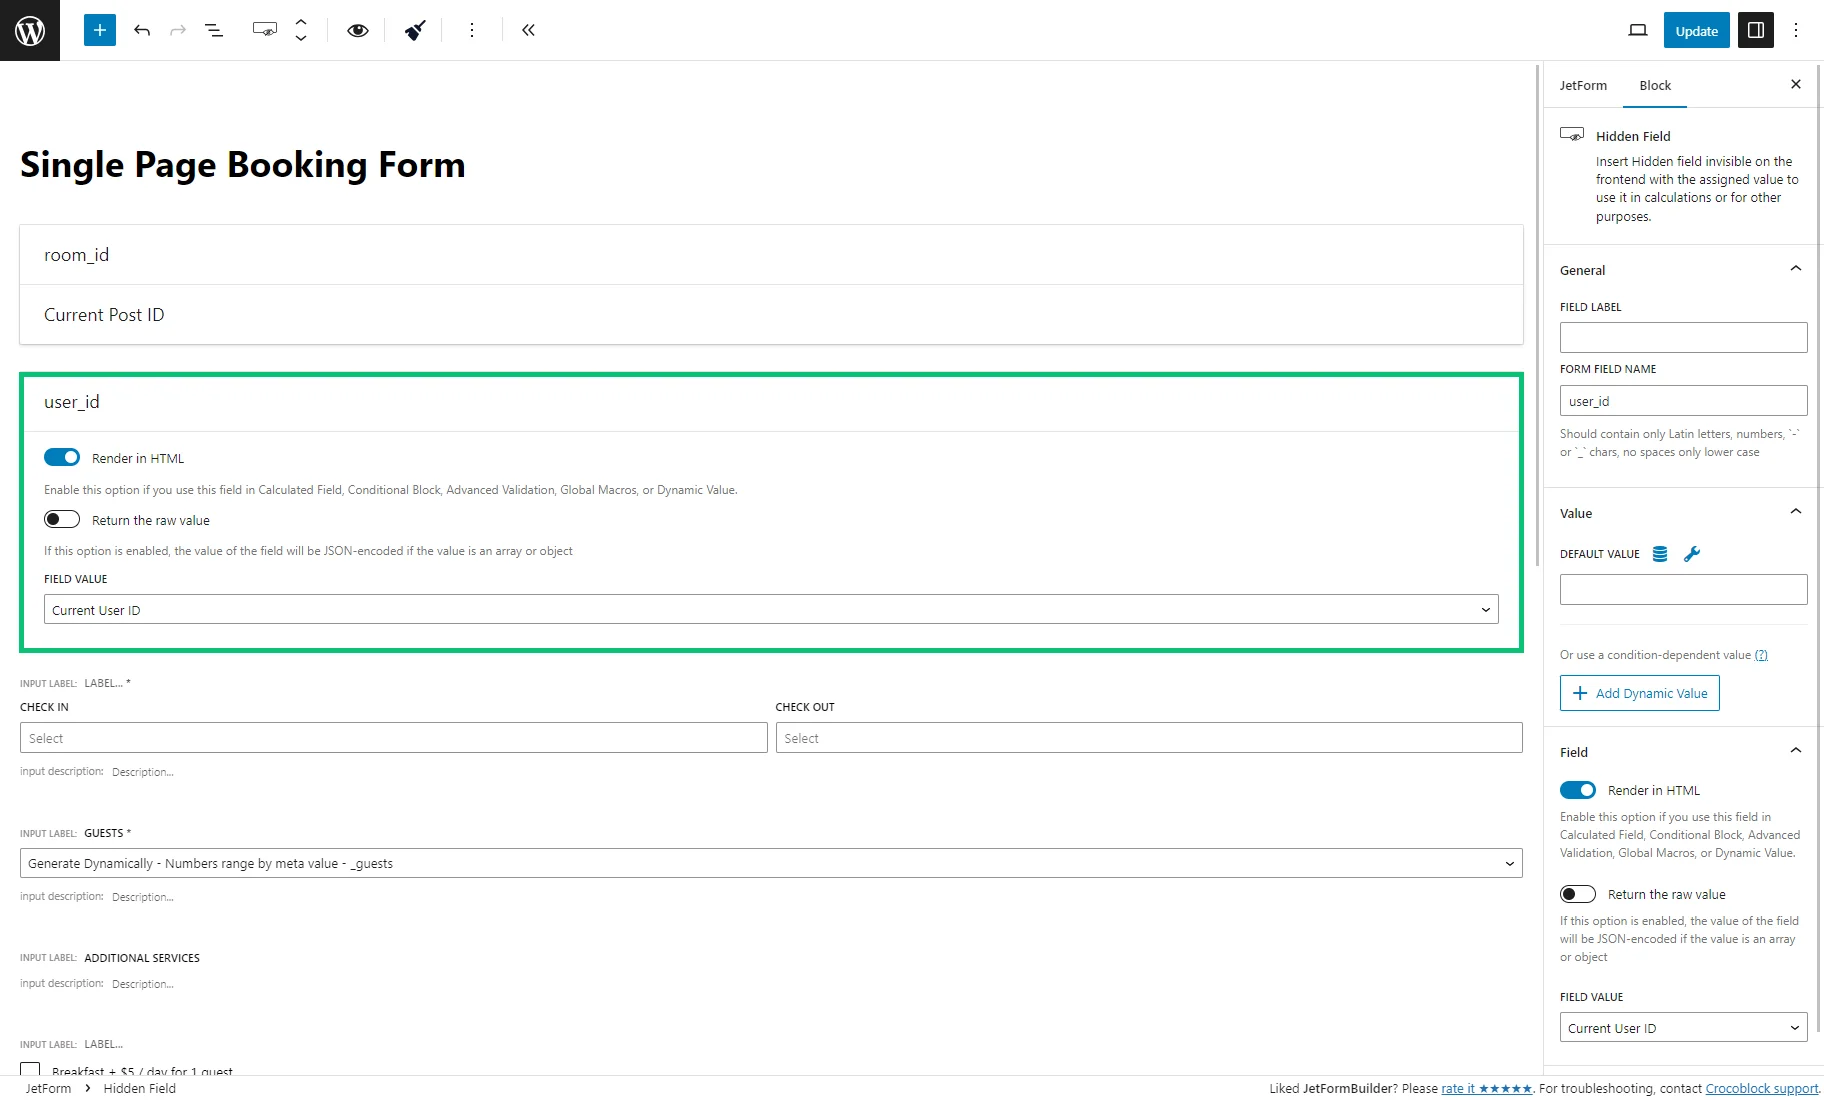
3. Add another Hidden Field and select the “Current User ID” FIELD VALUE, which indicates what user should be updated.
The FORM FIELD NAME in the right Block section should be changed to “user_id”.
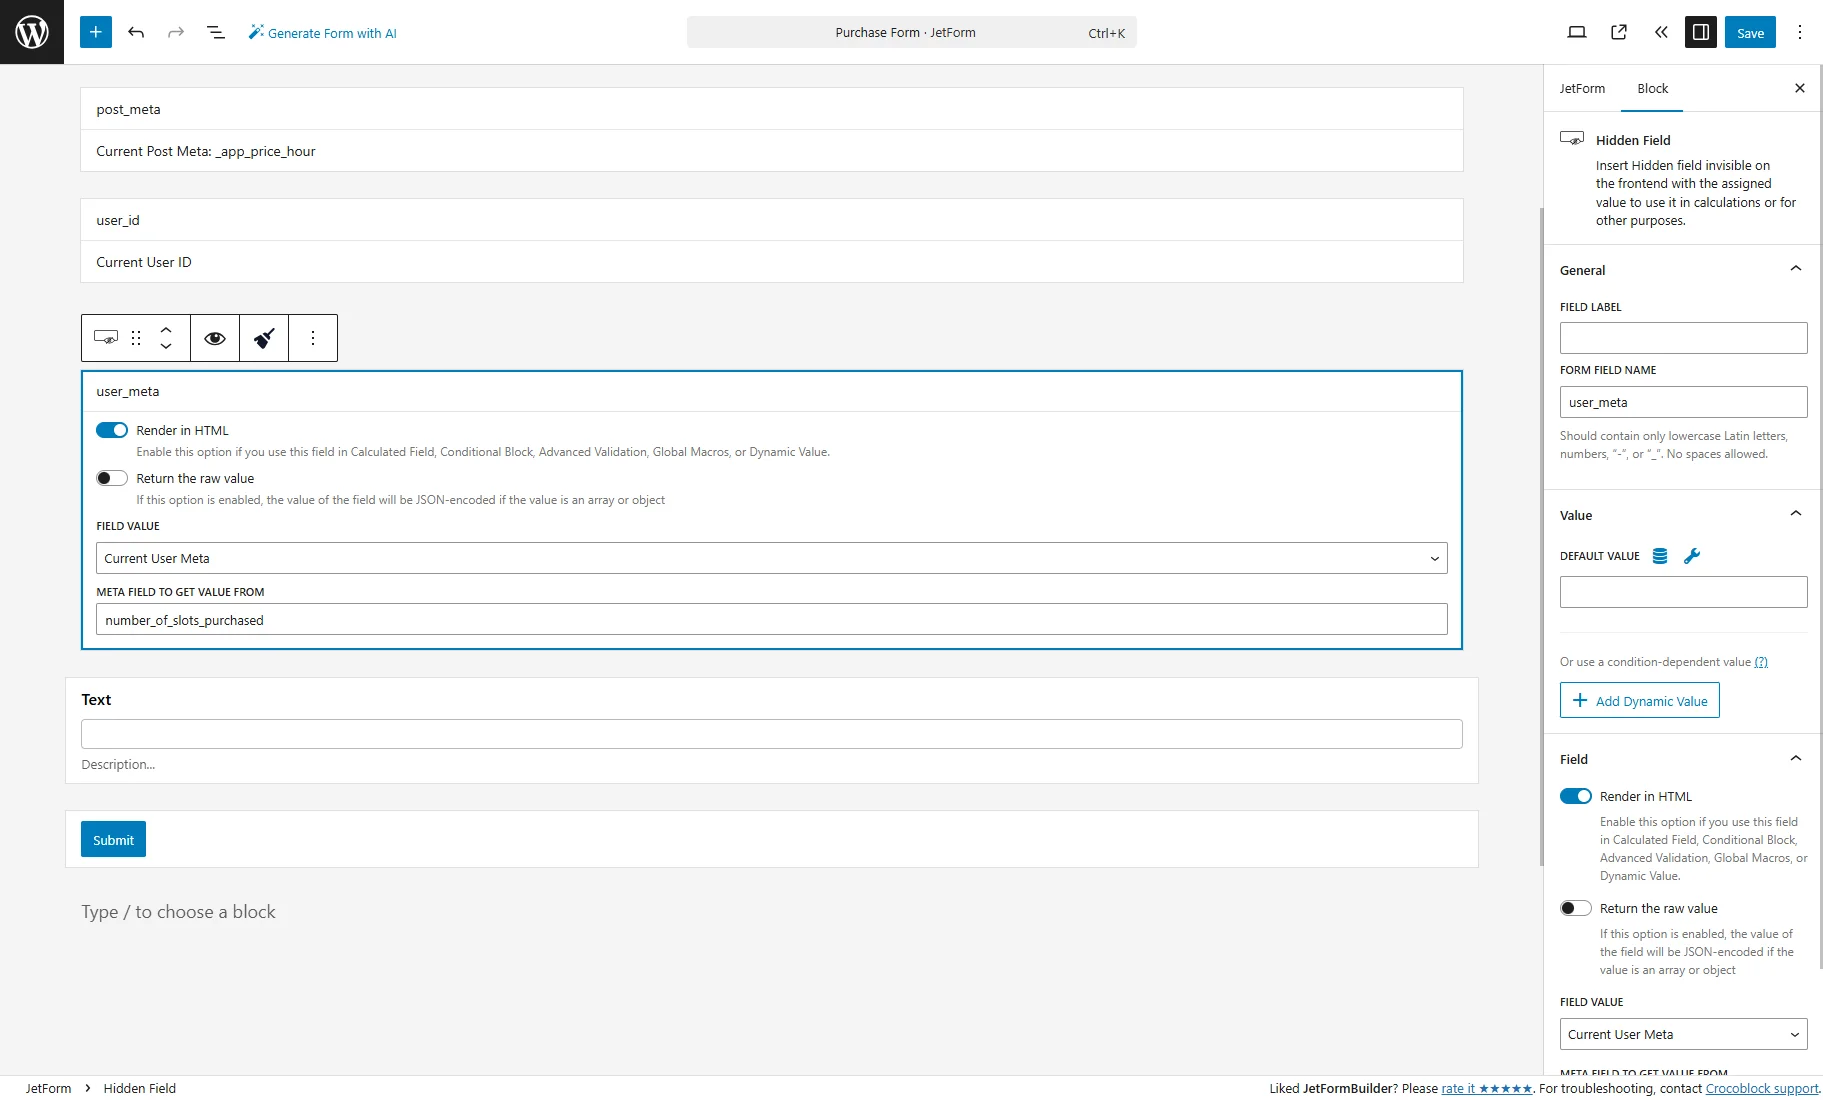
4. Duplicate this field, pick the “Current User Meta” FIELD VALUE, and enter the Name/ID of the “Number” field from the user Meta Box into the META FIELD TO GET VALUE FROM, which pulls the current user slot balance.
The FORM FIELD NAME in the right Block section should be changed to “user_meta”.
5. The Text Field can be deleted or customized according to your needs. For example, you can adjust it to the “Email” field by renaming it and choosing the “Email” FIELD TYPE in the Block > Field section on the right side.
Then, you need to add form fields for the number slots. You can combine the Number/Radio with Calculated Fields to achieve this.
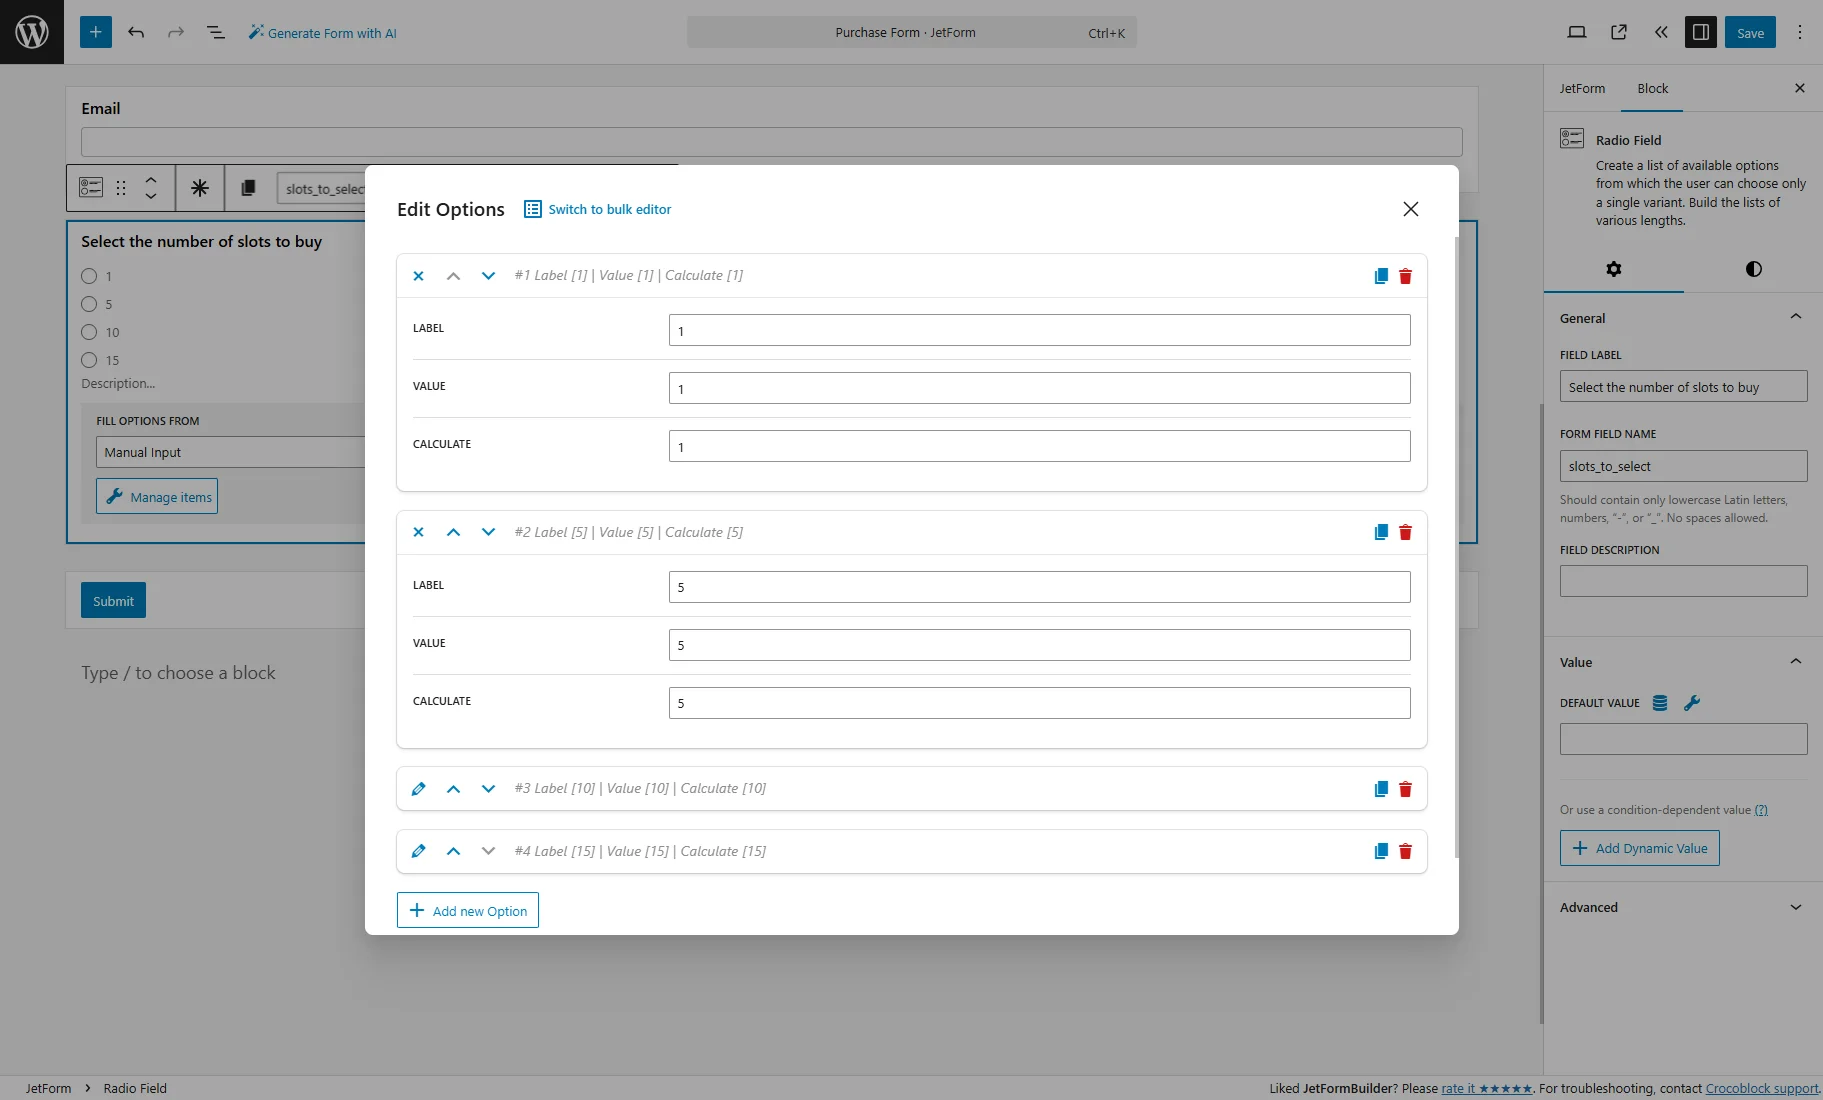
6. For instance, we add the Radio Field with the “slots_to_select” FORM FIELD NAME, keep the “Manual Input” option in the FILL OPTIONS FROM dropdown, and press the “Manage items” button.
In the Edit Options pop-up, we add “1,” “5,” “10,” and “15” example options and press the “Update” button.
After that, we should add two Calculated Fields.
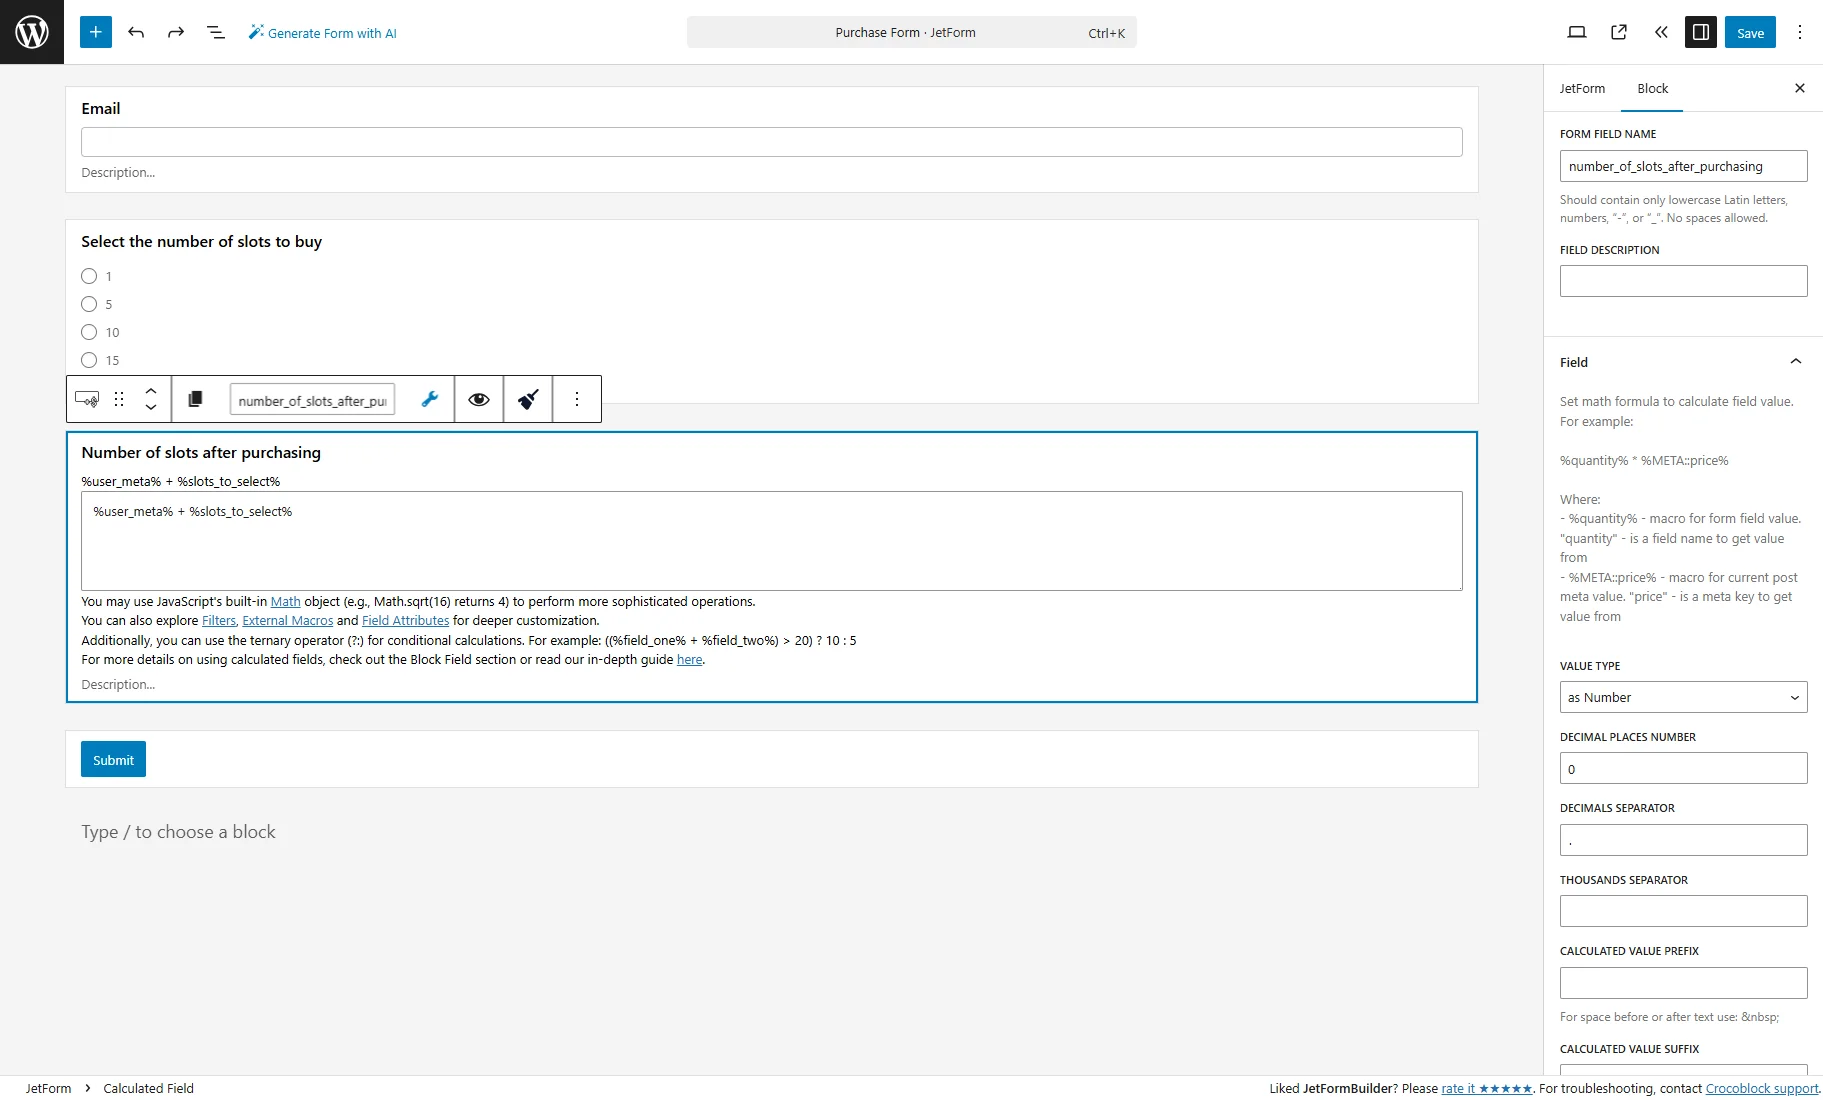
7. The first one is to display the number of slots after purchasing. Here we enter such a formula:
%user_meta% + %slots_to_select%
That adds purchased slots to the existing balance. The ‘user_meta’ is the name of the fourth Hidden Field that pulls the value from the user “Number” field, and the ‘slots_to_select’ is the name of the Radio Field.
In the Block > Field section on the right, change the DECIMAL PLACES NUMBER to “0.”
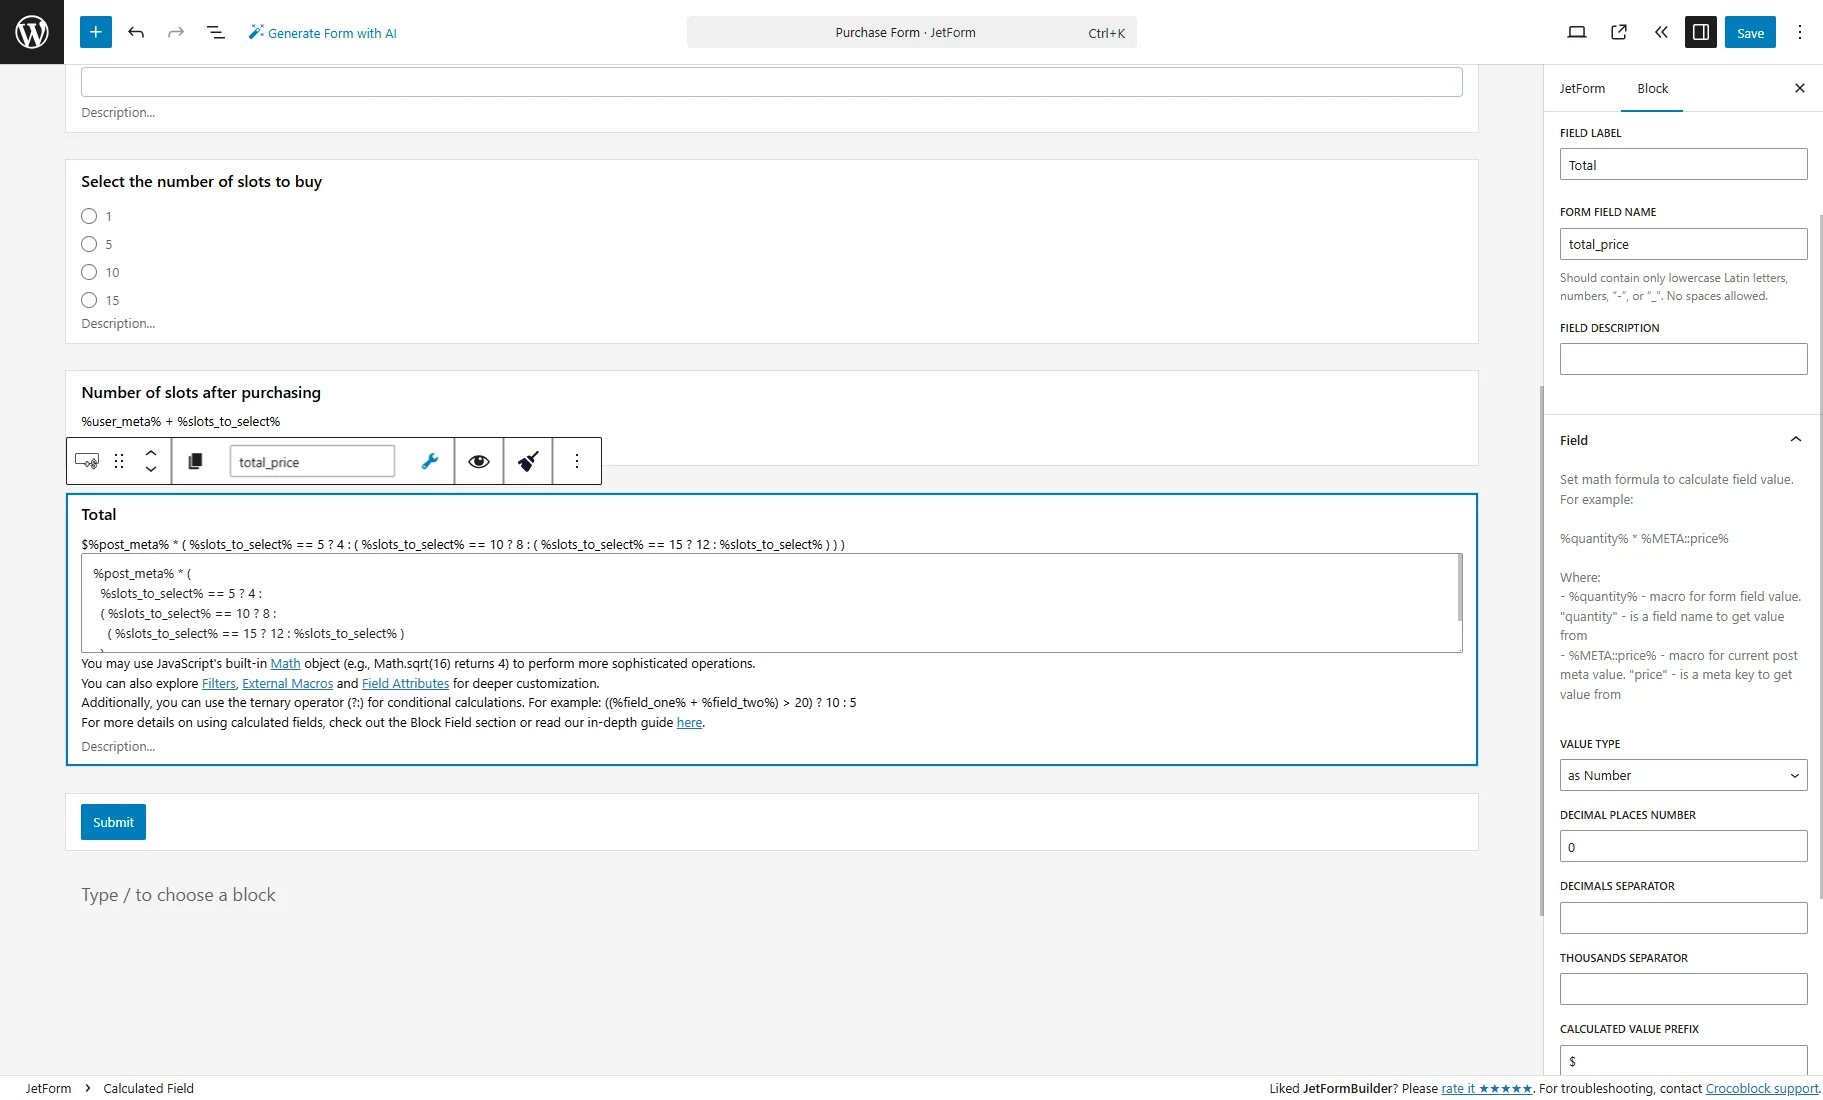
8. The second Calculated Field is to calculate the total price. We add such a formula:
%post_meta% * (
  %slots_to_select% == 5 ? 4 :
  ( %slots_to_select% == 10 ? 8 :
    ( %slots_to_select% == 15 ? 12 : %slots_to_select% )
  )
)
where the ‘post meta’ is the name of the second Hidden Field with the appointment price, and ‘slots_to_select’ is the name of the Radio Field.
This formula applies discounts:
- If “5” is selected, pay as for “4”;
- If “10” is selected, pay as for “8”;
- If “15” is selected, pay as for “12”;
For example, a lesson costs $20. If a user selects to buy five lessons, they will pay $80 instead of $100.
In the Block > Field section on the right, also change the DECIMAL PLACES NUMBER to “0.”
Payment setup
After adjusting the form fields, proceed to JetForm > Gateway Settings in the right section and select the required gateway method from the radio:
- PayPal Checkout — you can set the PayPal payment method for free, as described in the How to Store PayPal Payments from WordPress Form? tutorial or check the How to Set Recurring PayPal Payments in WordPress Form tutorial to learn how to set subscriptions with the PayPal Recurring Payments add-on for JetFormBuilder;
- Stripe Checkout — check the Stripe Payment Form with JetFormBuilder PRO Addon tutorial for more information;
- Manual — this option allows users to select their preferred payment on the front end. For more details, refer to the How to Use Both Paypal and Stripe Payment Methods in a Form tutorial.
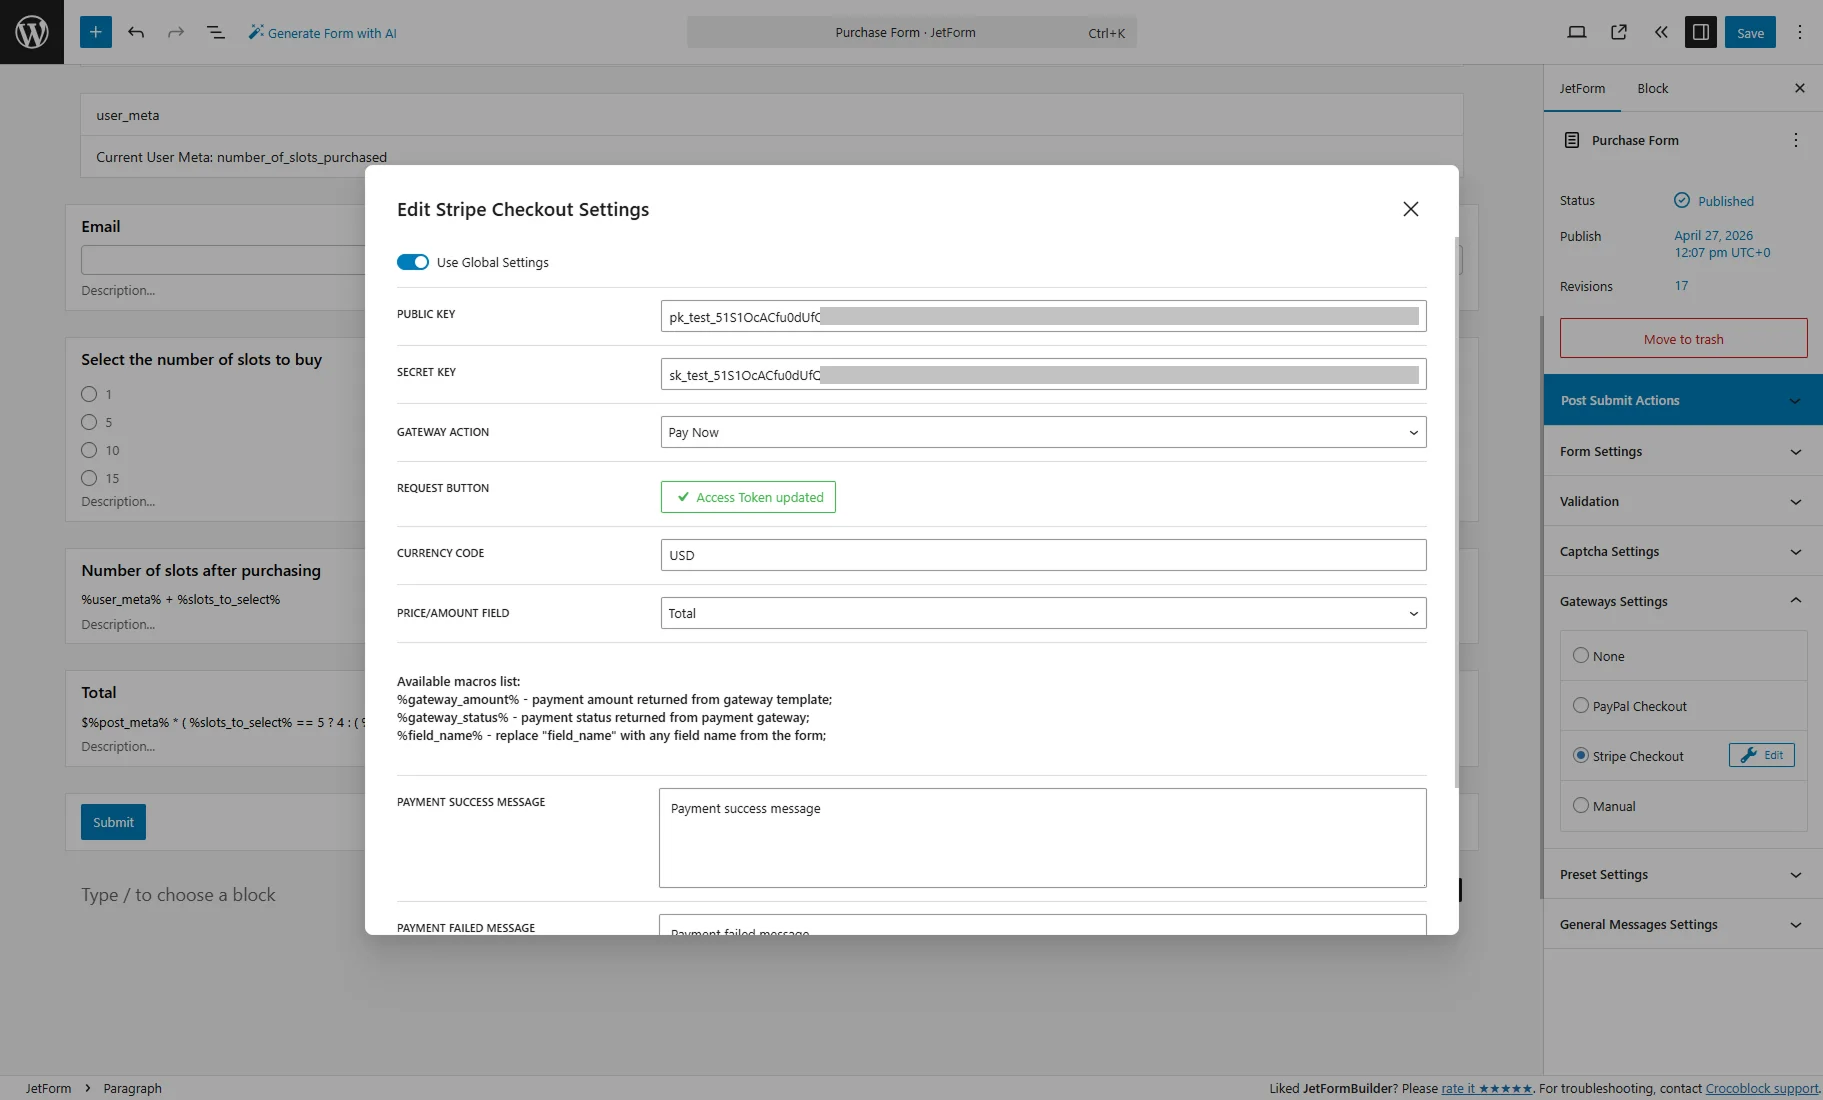
As an example, we select the “Stripe Checkout” method and press the “Edit” button for this option.

In the pop-up, we activate the Use Global Settings toggle to pull out the Public Key and Secret Key from the JetFormBuilder settings and press the “Sync Access Token” button.
Once the access token is updated, we add the CURRENCY CODE (e.g., “USD,” for more information, check the Country Currency Codes article).
In the PRICE/AMOUNT FIELD dropdown, we select the Calculated Field (“Total,” in this case).
After the checkout settings are set up, we push the “Update” button.
Post Submit Actions
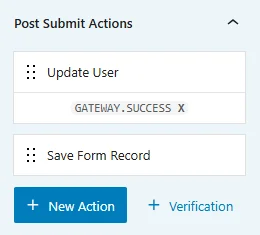
Head to JetForm > Post Submit Actions tab.
Keep the “Save Form Record” action that stores the form data, such as form entries, performed post-submit actions, and errors.
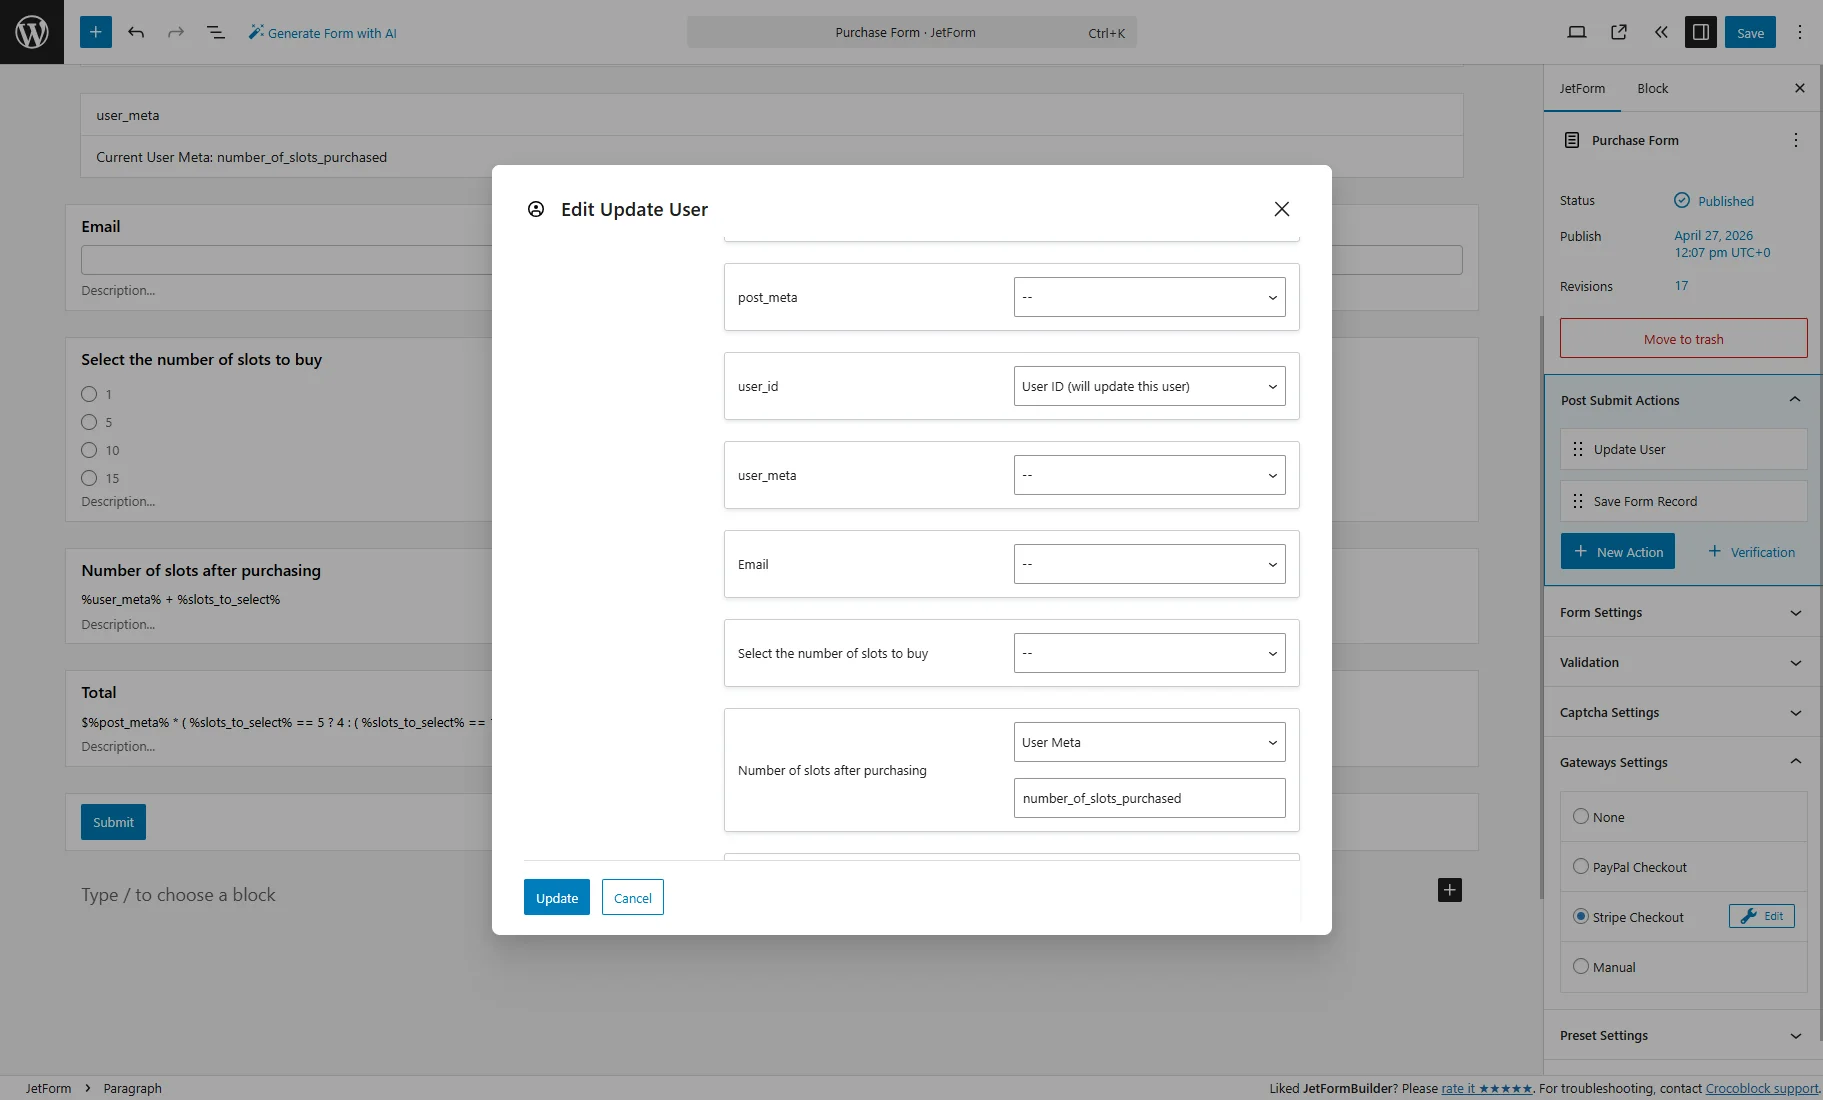
Press the “+ New Action” button, and pick the “Update User” action from the pop-up.
In the FIELDS MAP section ot the Edit Update User pop-up, map such fields:
- user_id — is the name of the third Hidden Field. Select the “User ID (will update this user)” option from the dropdown;
- Number of slots after purchasing — is the name of the first Calculated Field. Select the “User Meta” option from the dropdown and enter the Name/ID of the user “Number” meta field from the Meta Box that should be updated.
After setting the action, push the “Update” button.
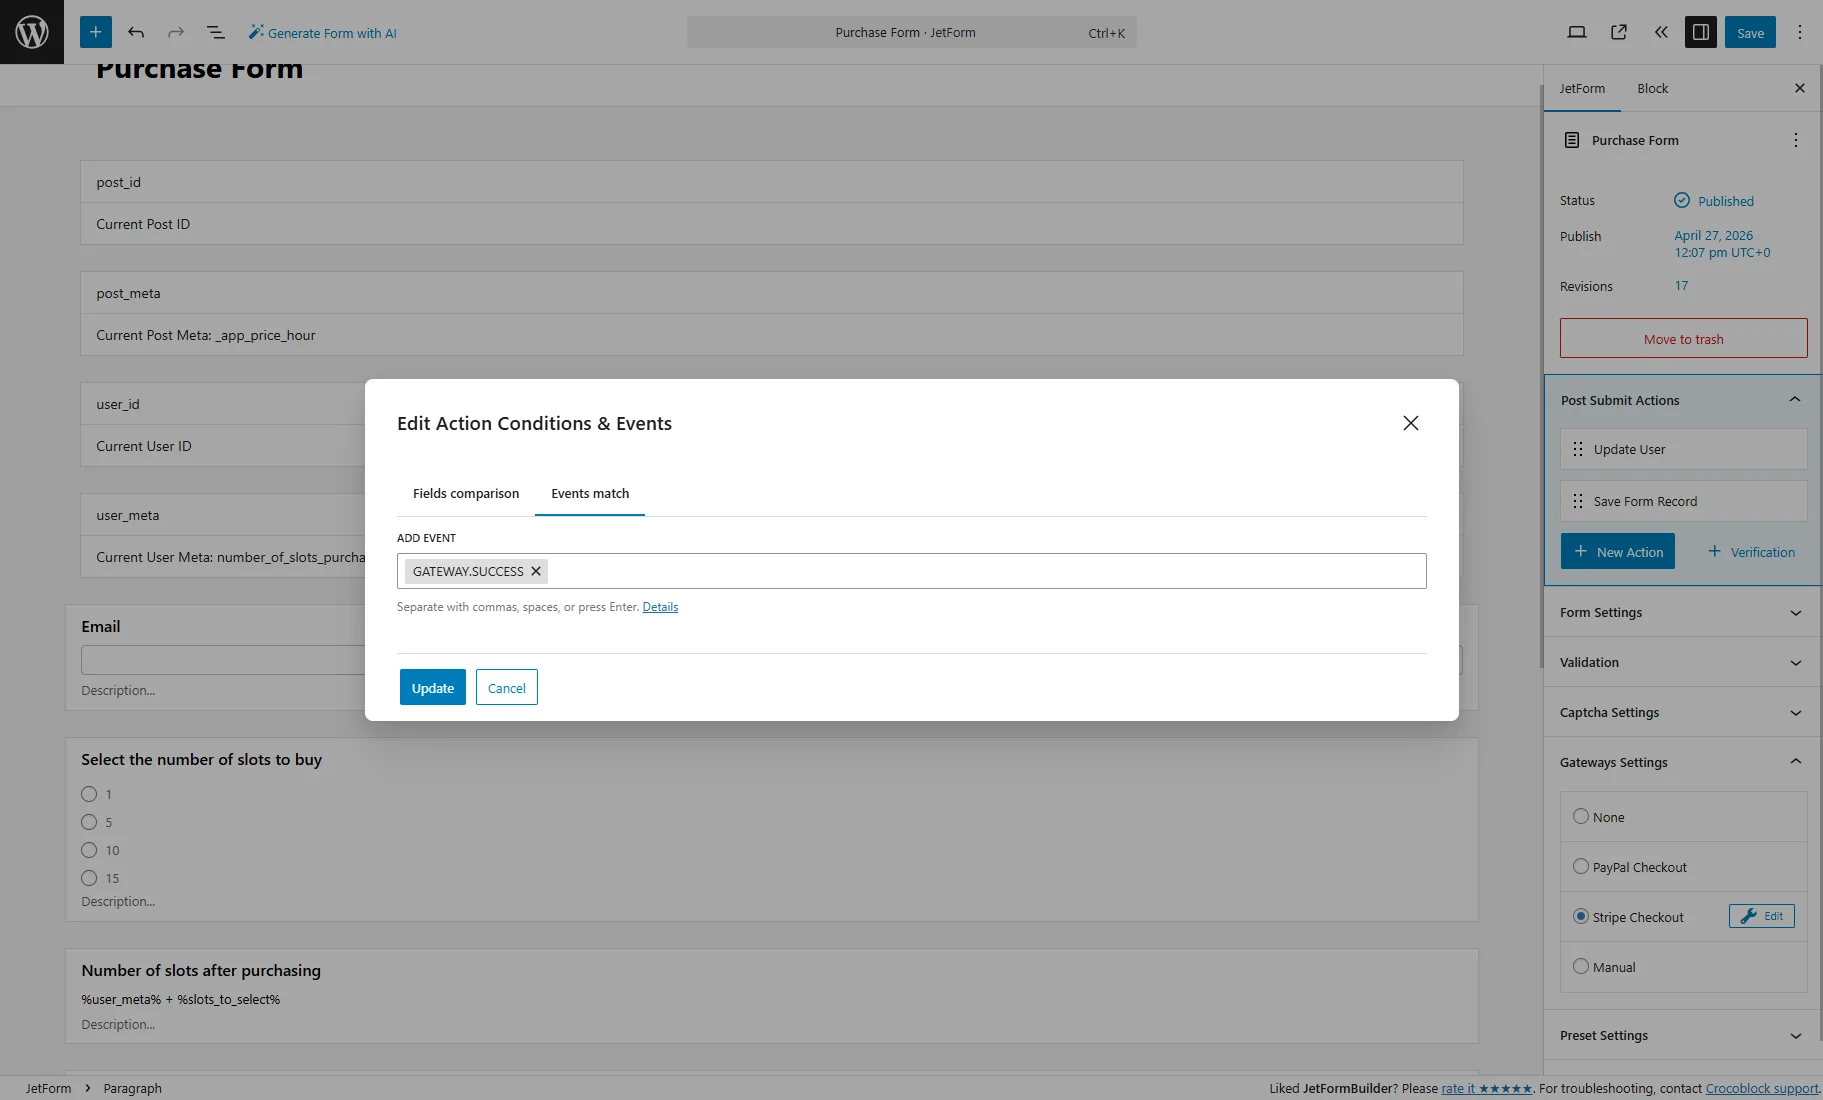
Then, hover over the “Update User” action and press the “Edit Conditions & Events” button.
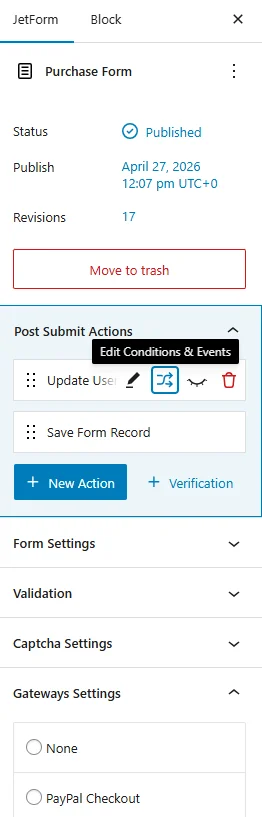
Open the Events match tab in the pop-up and select the “GATEWAY.SUCCESS” event in the ADD EVENT dropdown.
Add other post submit actions if needed (e.g., “Send Email”), press the “Update” button, and save/publish the form.
In such a way, only after successful payment, the user’s slot balance increases.
Create the Appointment Form
With the JetAppointment and JetFormBuilder plugins, you can create three standard forms: a Static Page Booking Form, a Single Service Booking Form, and a Single Provider Booking Form.
Usually, they are generated during the JetAppointment Wizard Setup. If you want to create forms from scratch, refer to the How to Set Appointment Booking Forms tutorial.
For our example, we modify the Single Provider Booking Form that will be placed on the Single Teacher page, from which users can buy slots and book lessons, but consider that you may need to modify all your booking forms.
Set up fields
First, we proceed to the WordPress Dashboard > JetFormBuilder > Forms tab and open the Single Provider Booking Form.
For now, this is a standard appointment booking form with such fields:
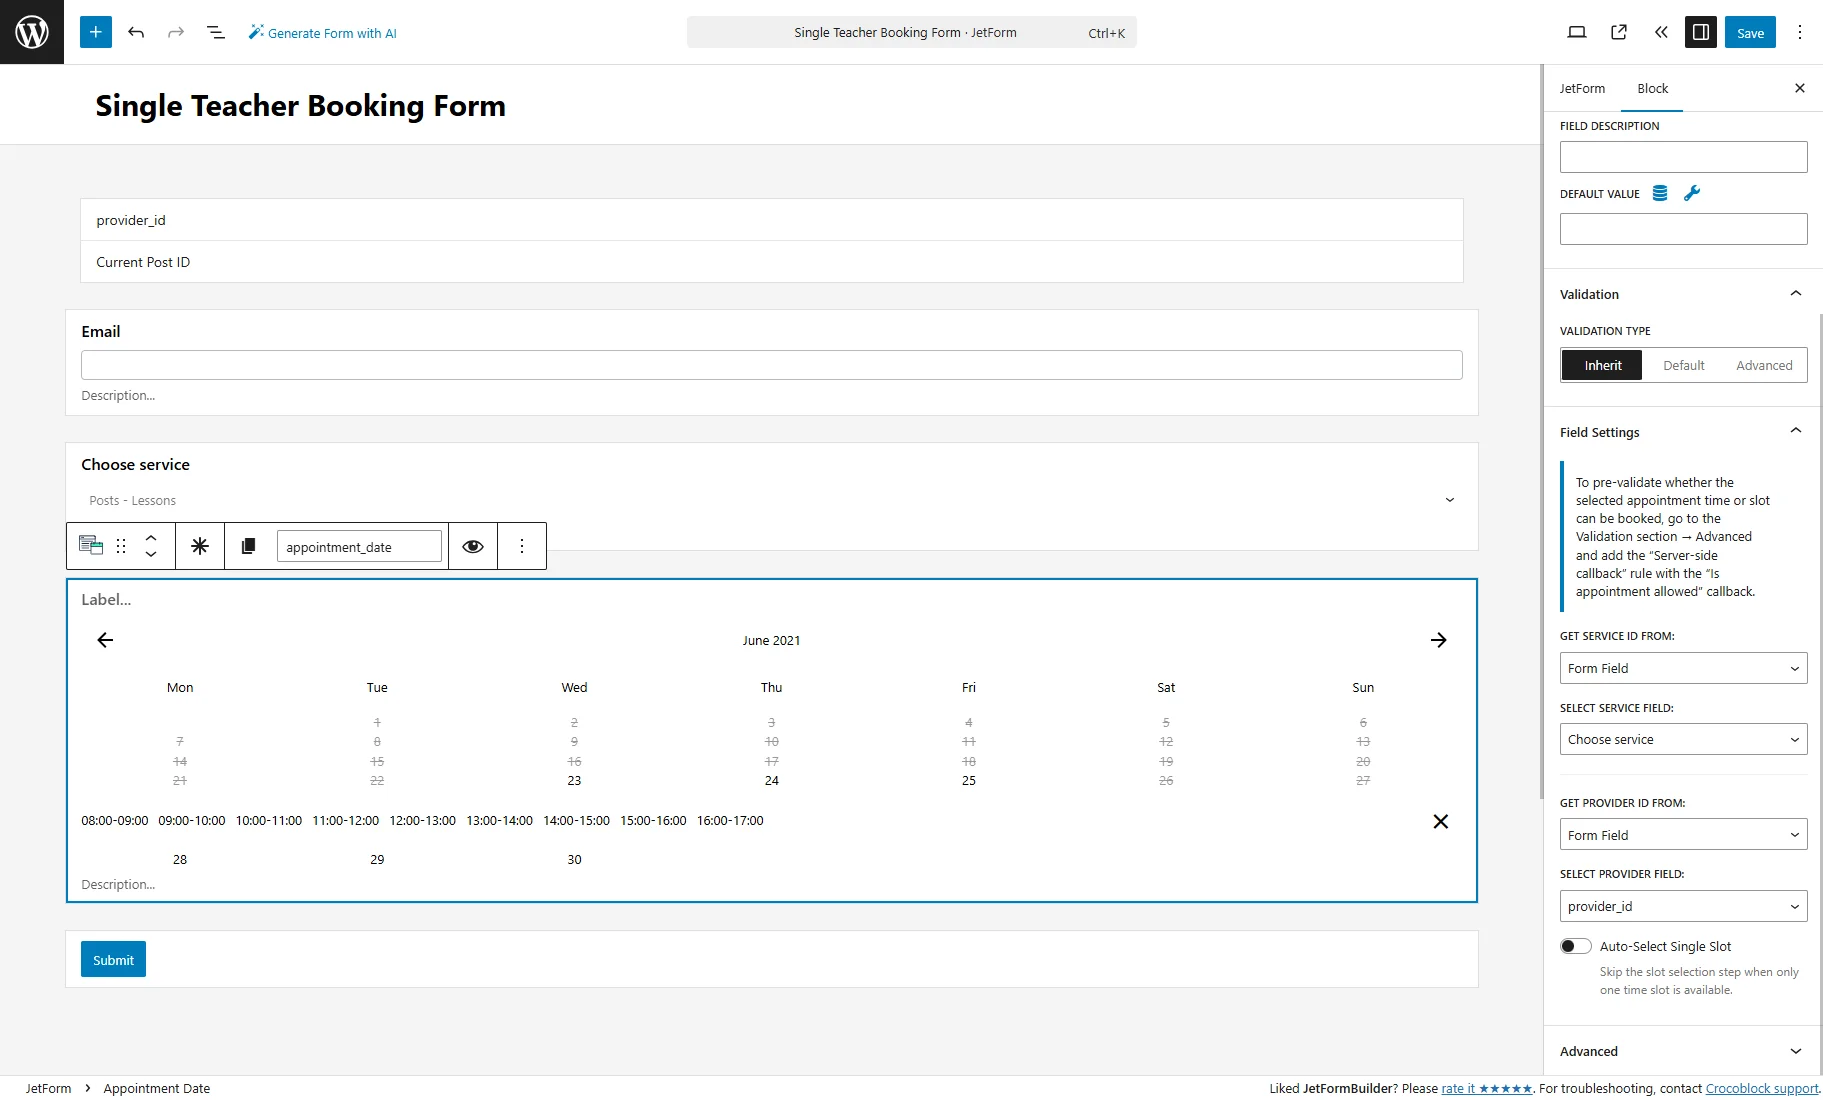
- “provider_id” Hidden Field with the “Current Post ID” FIELD VALUE;
- “Email” Text Field;
- “Choose service” Select Field;
- “appointment_date” Appointment Date field.
Then, we need to add such fields:
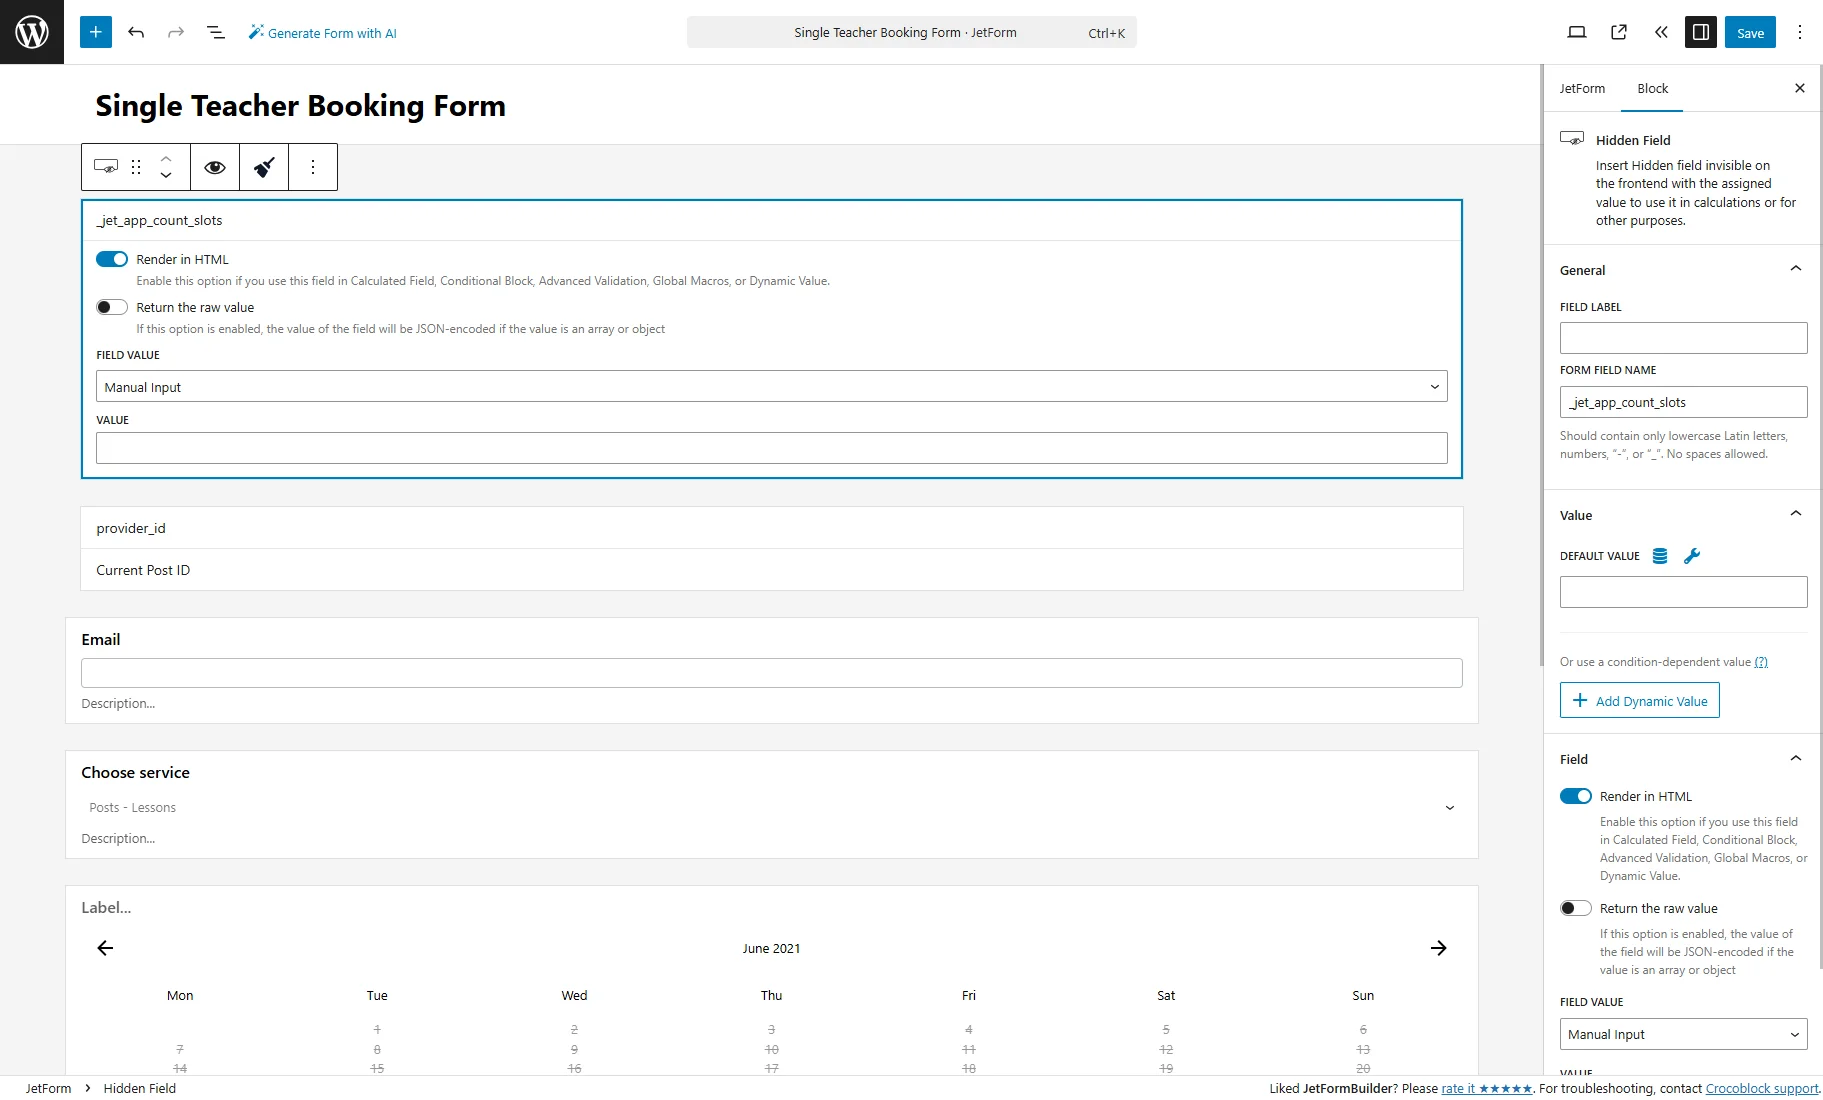
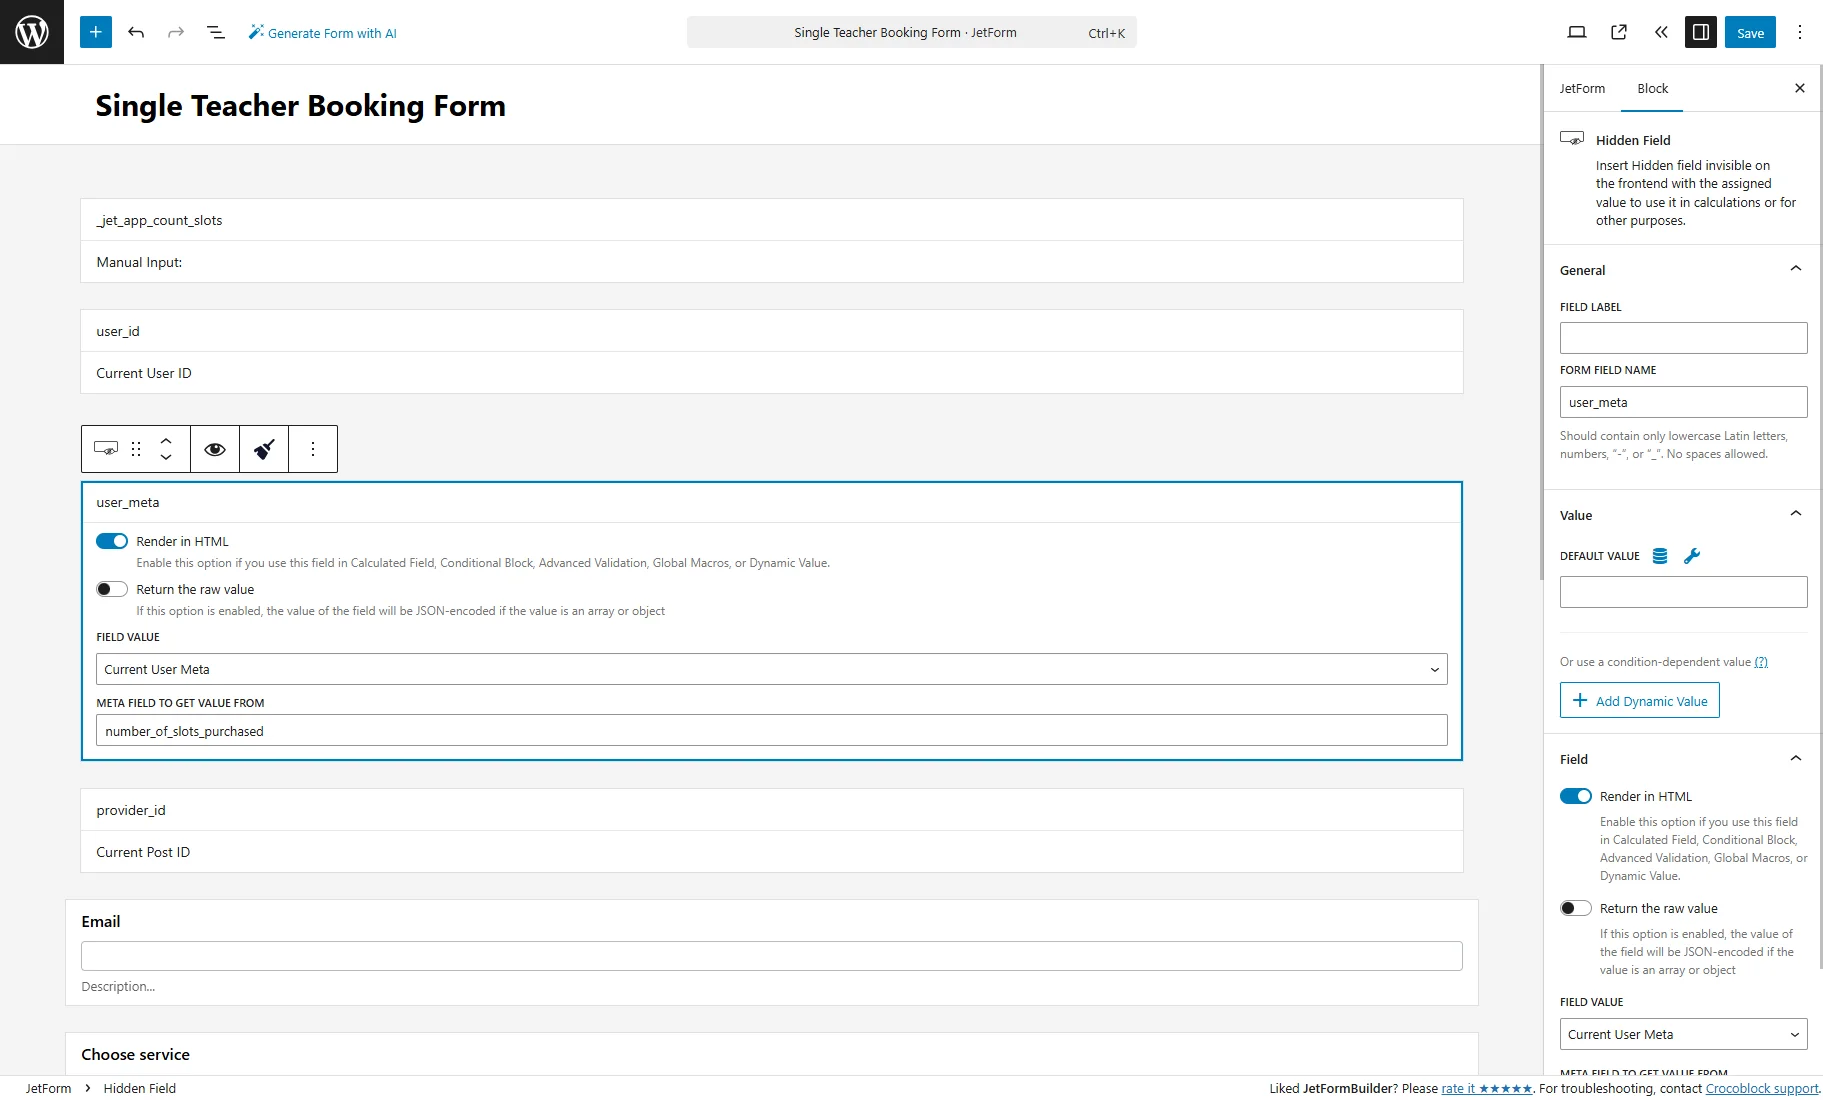
1. Place the Hidden Field, for example, at the beginning of the form.
Select the “Manual Input” FIELD VALUE and keep the VALUE field empty.
As the FORM FIELD NAME, enter “_jet_app_count_slots”.
In addition to the HTML code, we will place on the Single page after the form, it will count the number of slots the user will select to book.
2. Place the “user_id” Hidden Field with the “Current User ID” FIELD VALUE.
3. Add the “user_meta” Hidden Field with the “Current User Meta” FIELD VALUE, and enter the Name/ID of the “Number” field from the user Meta Box into the META FIELD TO GET VALUE FROM.
These two fields are similar to the user Hidden Fields added to the “Purchase Form.”
At the end of the form, before the “Submit” button, you should add two Calculated Fields.
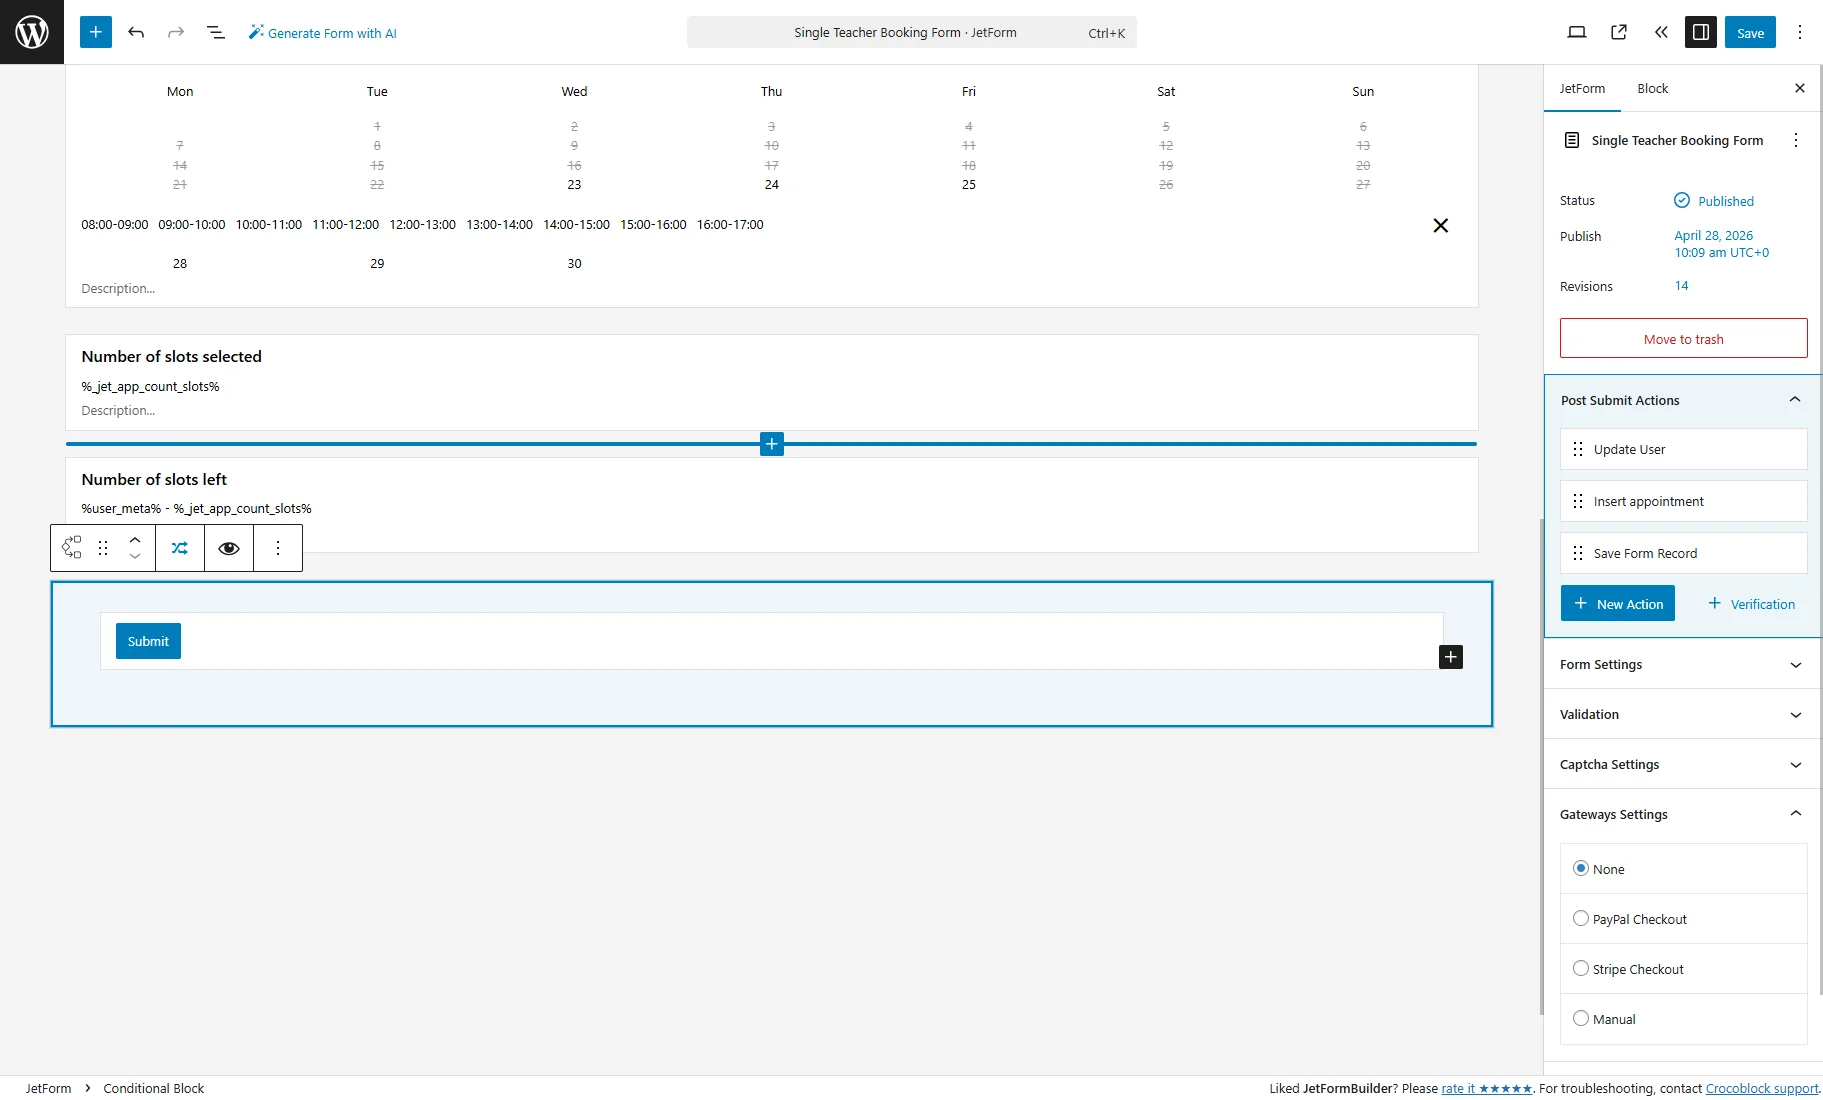
4. At first, we add an optional Calculated Field with the “Number of slots selected” LABEL and enter such a formula:
%_jet_app_count_slots%It will show the user how many slots they select.
In the Block > Field section on the right, we change the DECIMAL PLACES NUMBER to “0.”
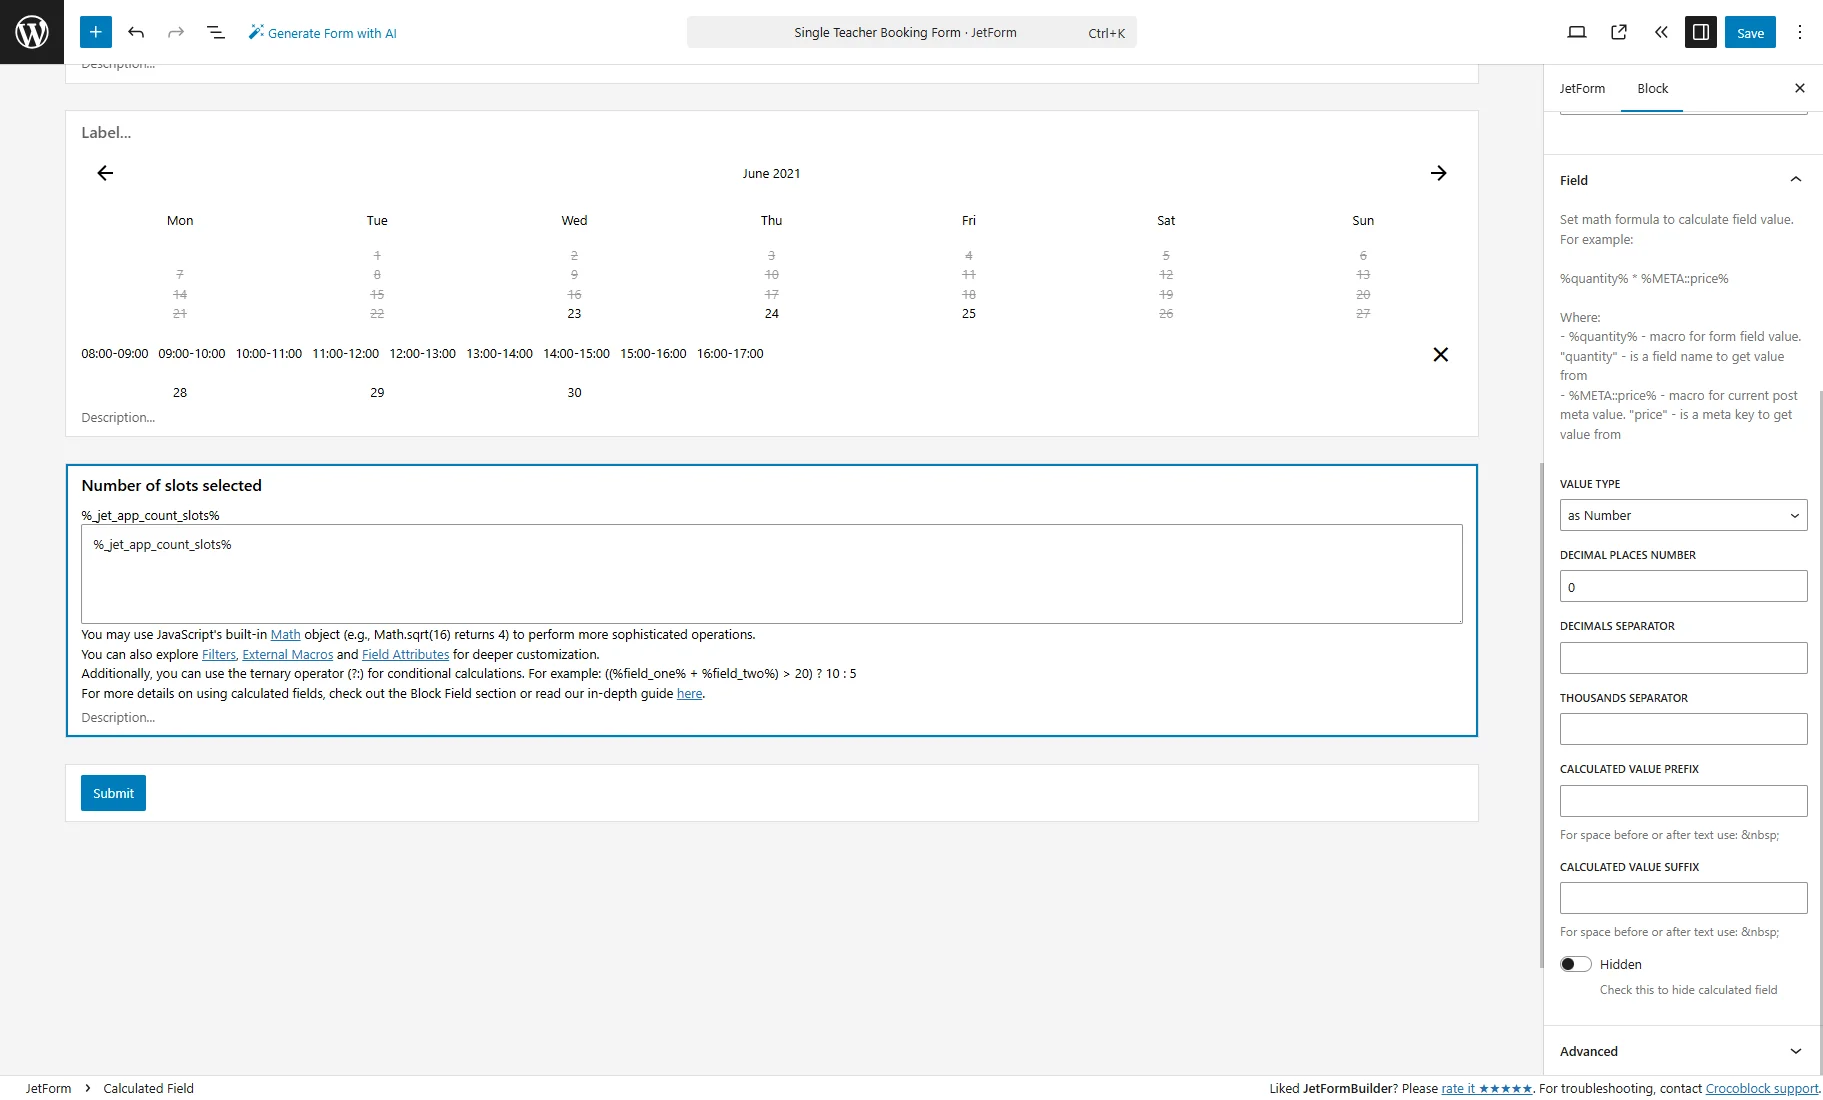
5. Add another Calculated Field to count the number of slots left after the user submits the form, and add such a formula:
%user_meta% - %_jet_app_count_slots%
where the ‘user_meta’ is the name of the Hidden Field that pulls the value from the user “Number” field (number of purchased slots by the user).
Set up Post Submit Actions
Head to JetForm > Post Submit Actions tab.
The first action can be the “Save Form Record” action.
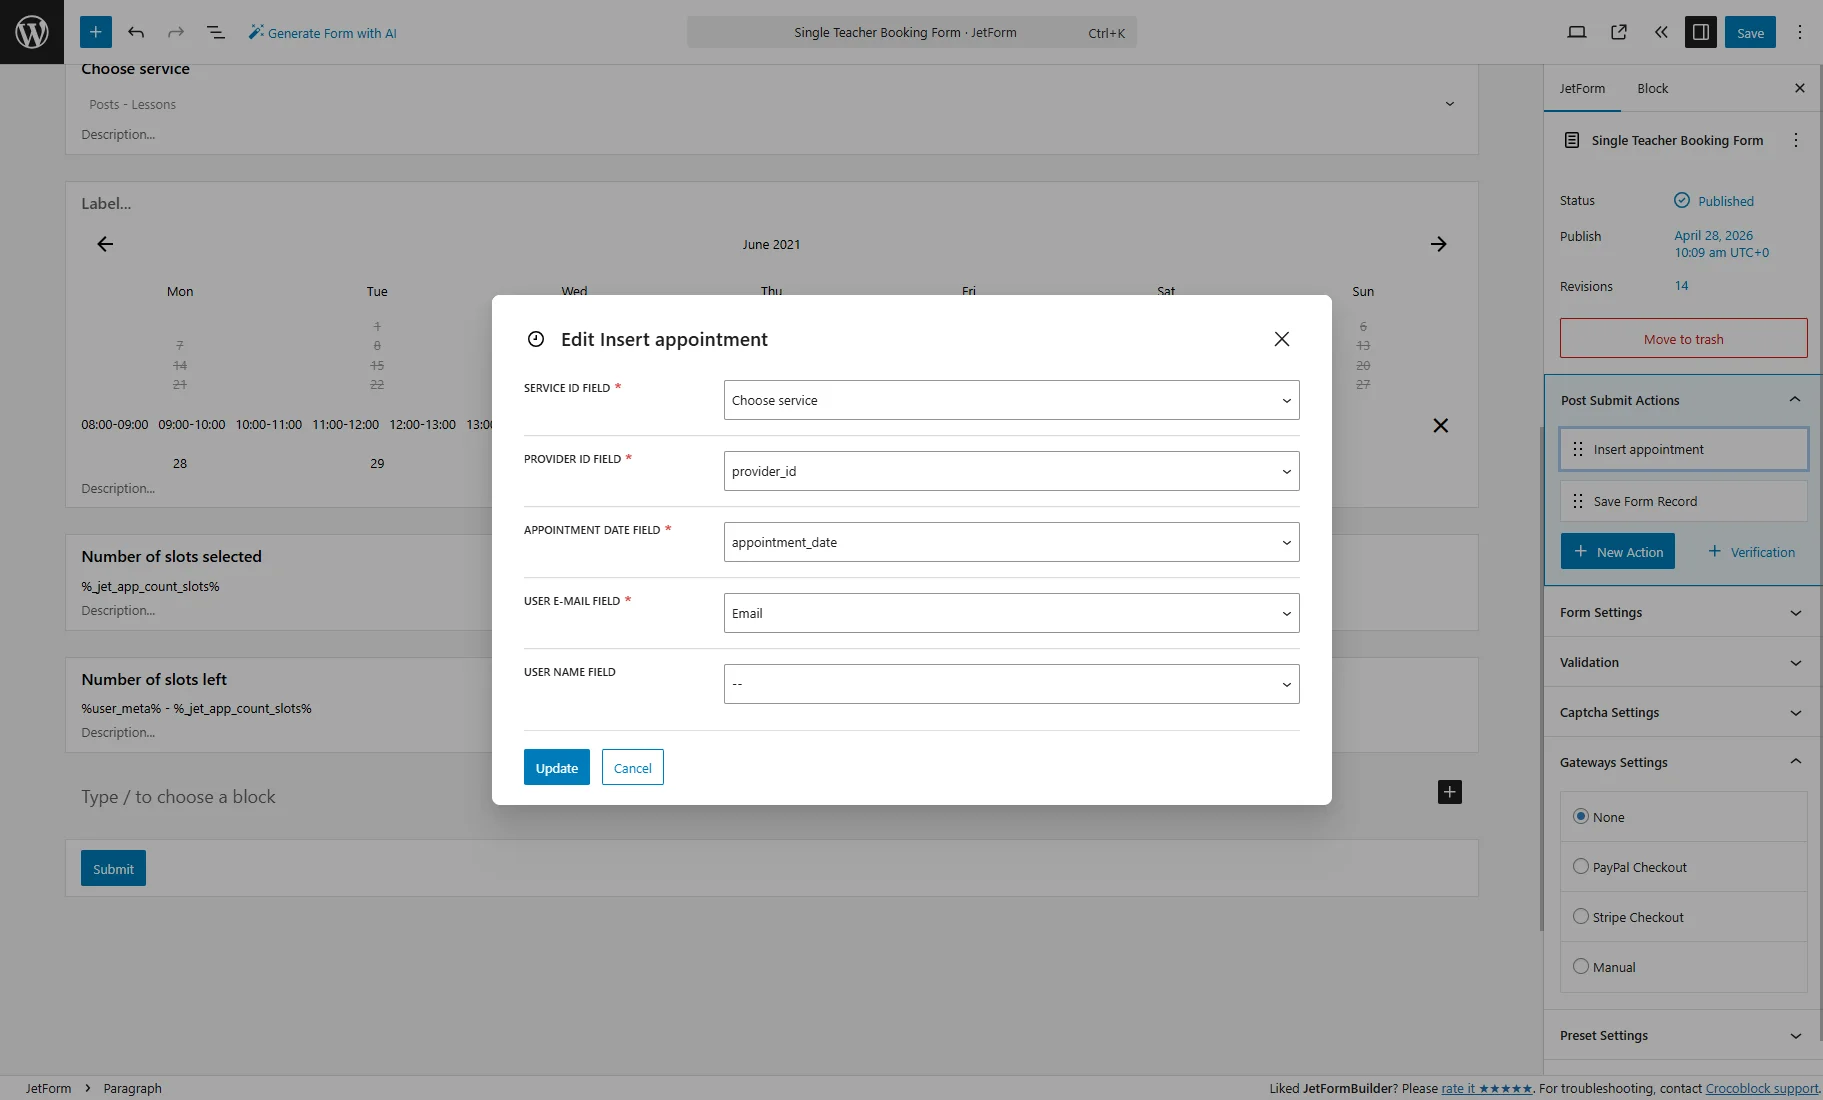
The second one should be the “Insert appointment” action with the standard settings.
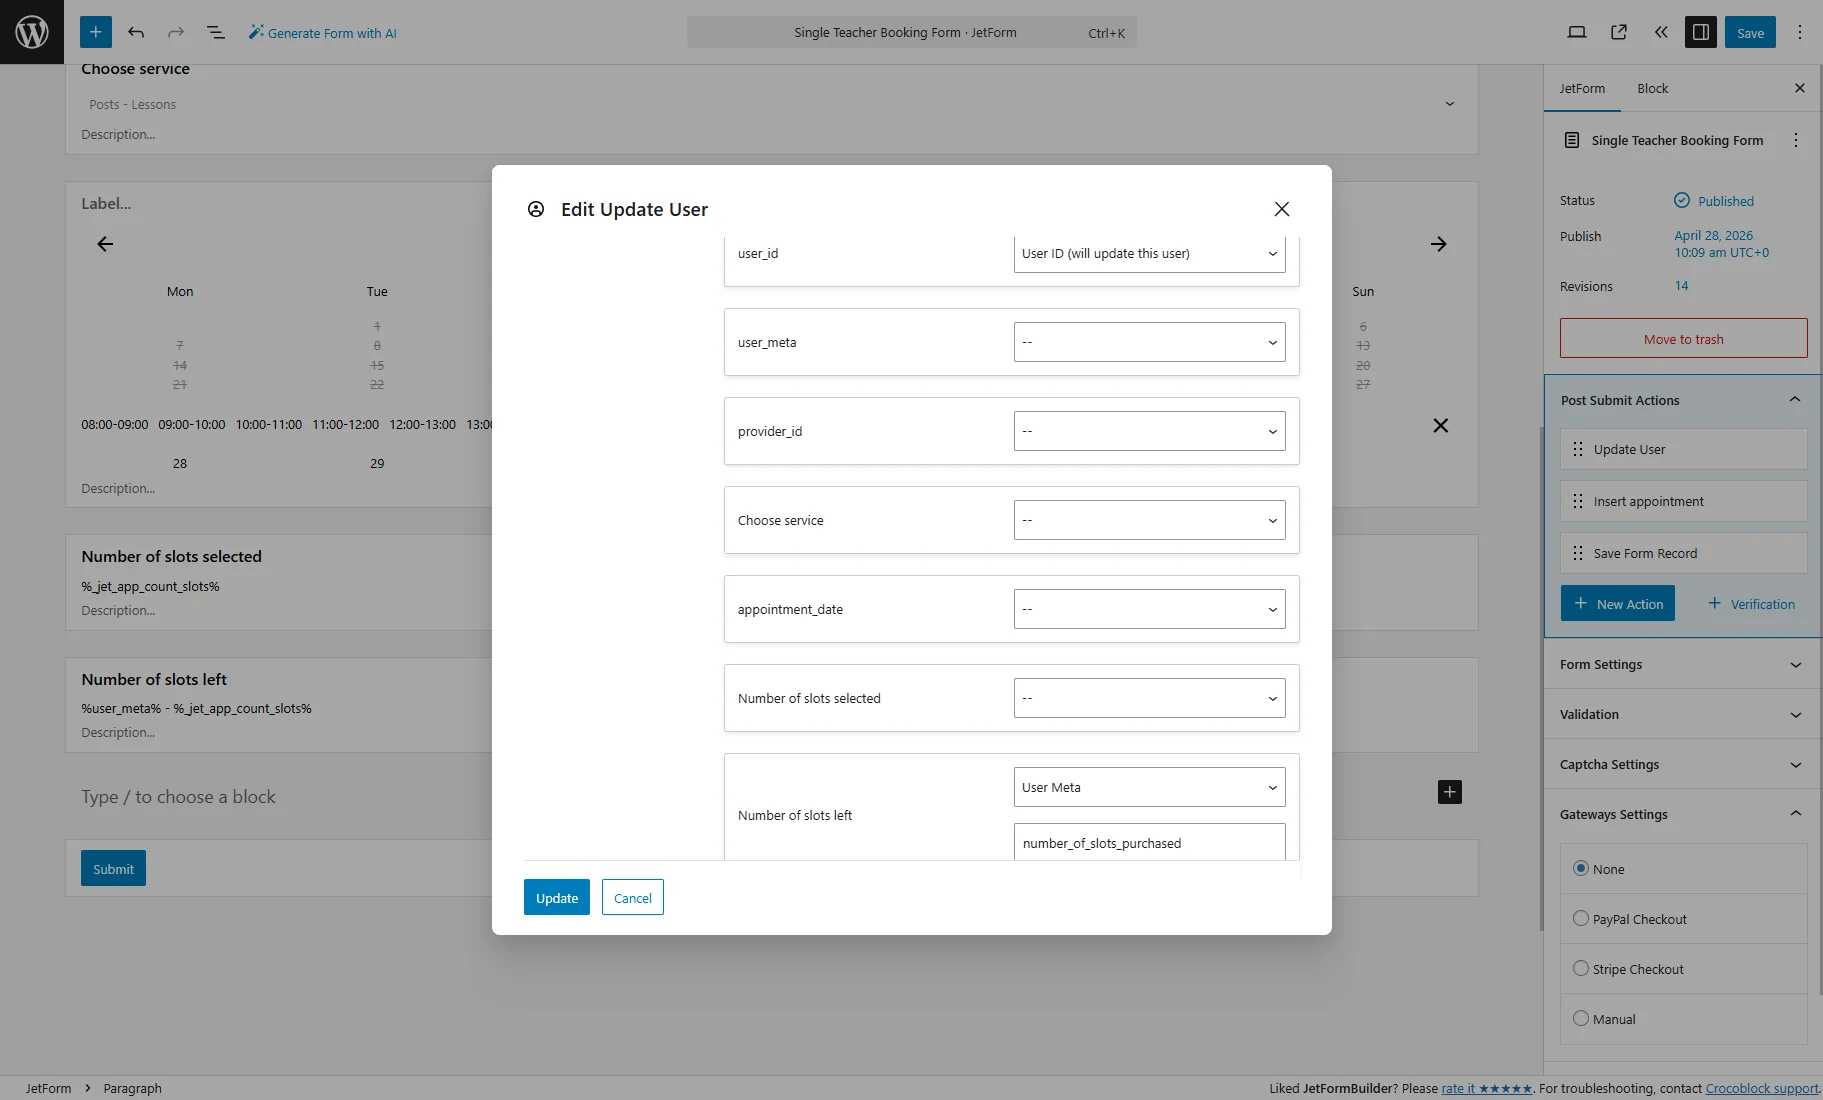
Then, press the “+ New Action” button, and pick the “Update User” action from the pop-up.
In the Edit Update User pop-up, in the FIELDS MAP section, map such fields:
- user_id — is the name of the second Hidden Field. Select the “User ID (will update this user)” option from the dropdown;
- Number of slots left — is the name of the second Calculated Field. Select the “User Meta” option from the dropdown and enter the Name/ID of the user “Number” meta field from the Meta Box that should be updated.
After setting the action, push the “Update” button.
Add Conditions to Actions
Both actions (“Update User” and “Insert Appointment”) should have conditions to prevent submission if the user hasn’t purchased enough slots.
Hover over the first action and press the “Edit Conditions & Events” button.
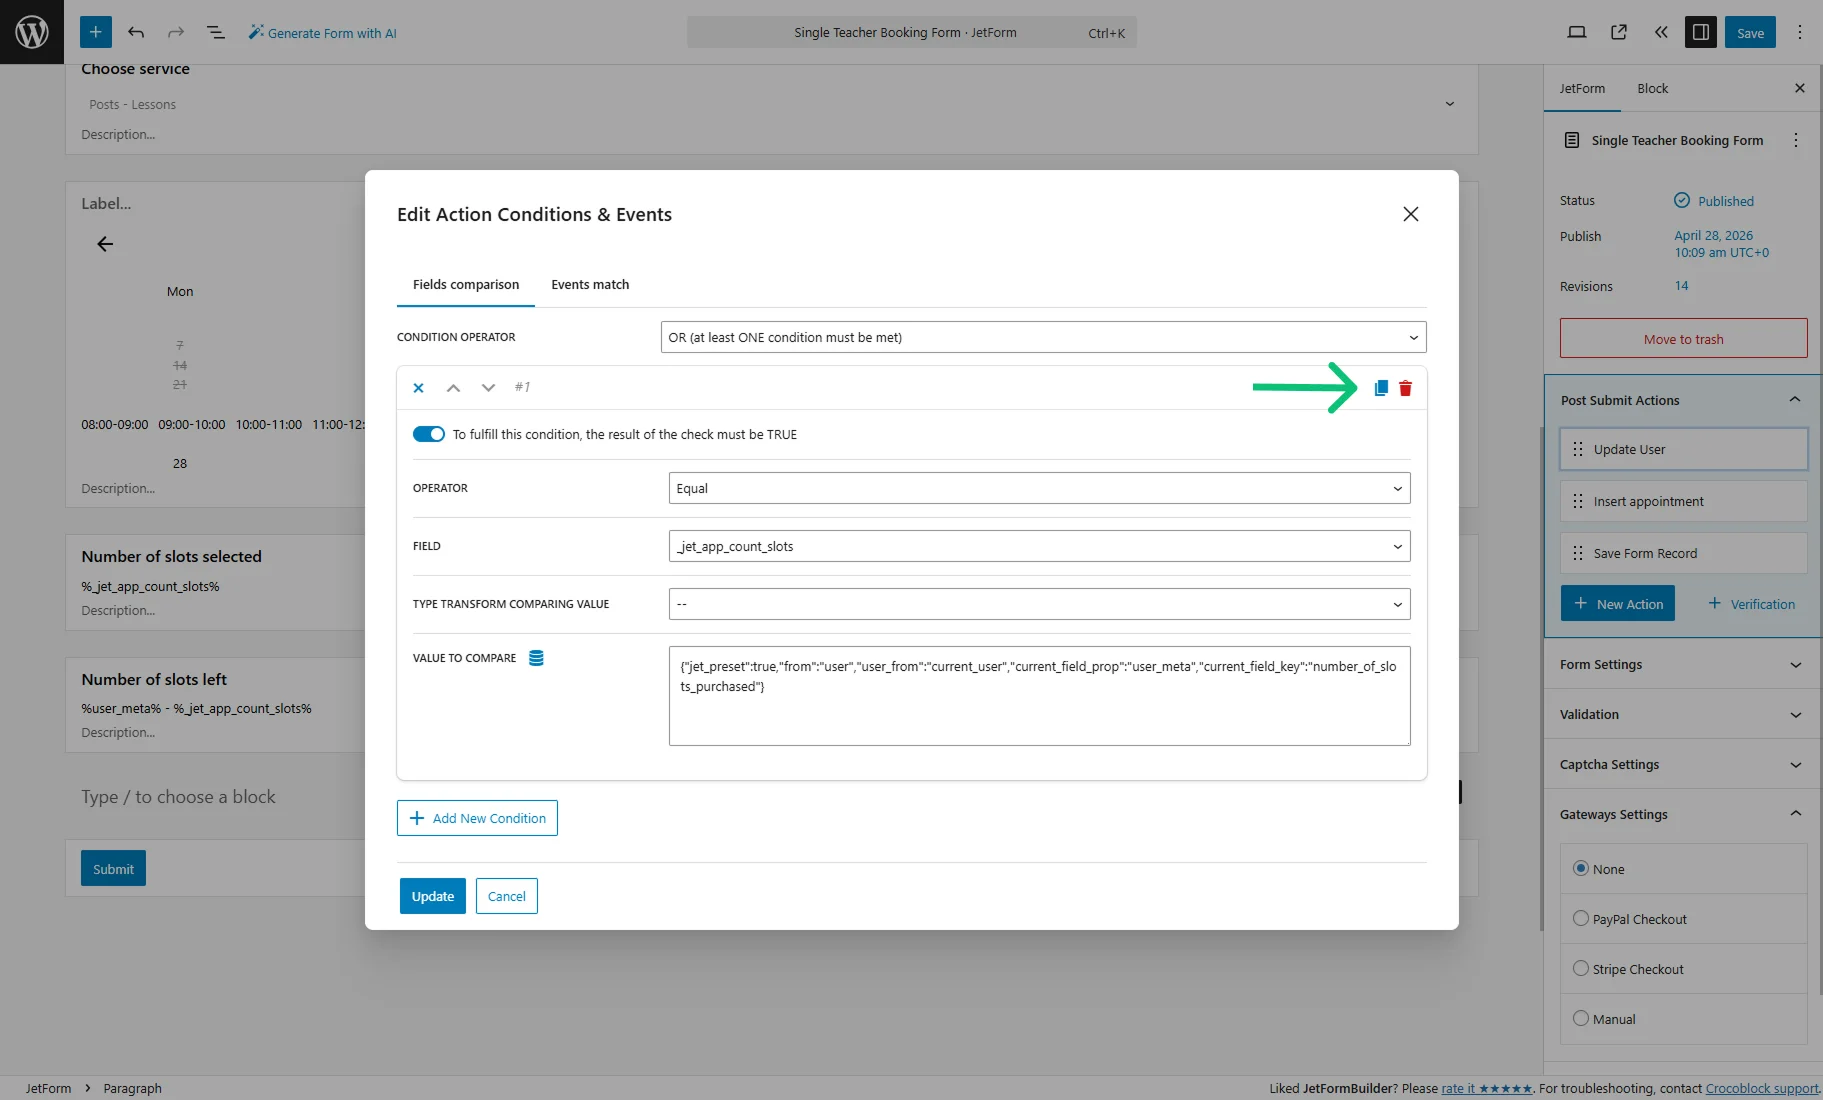
In the Fields comparison tab, pick the “OR (at least ONE condition must be met)” OPERATOR.
Then, press the “+ Add New Condition” button.
In the repeater field, select the “Equal” OPERATOR and “_jet_app_count_slots” FIELD.
For the VALUE TO COMPARE, press the “database” button. In the Edit Preset pop-up, set such options:
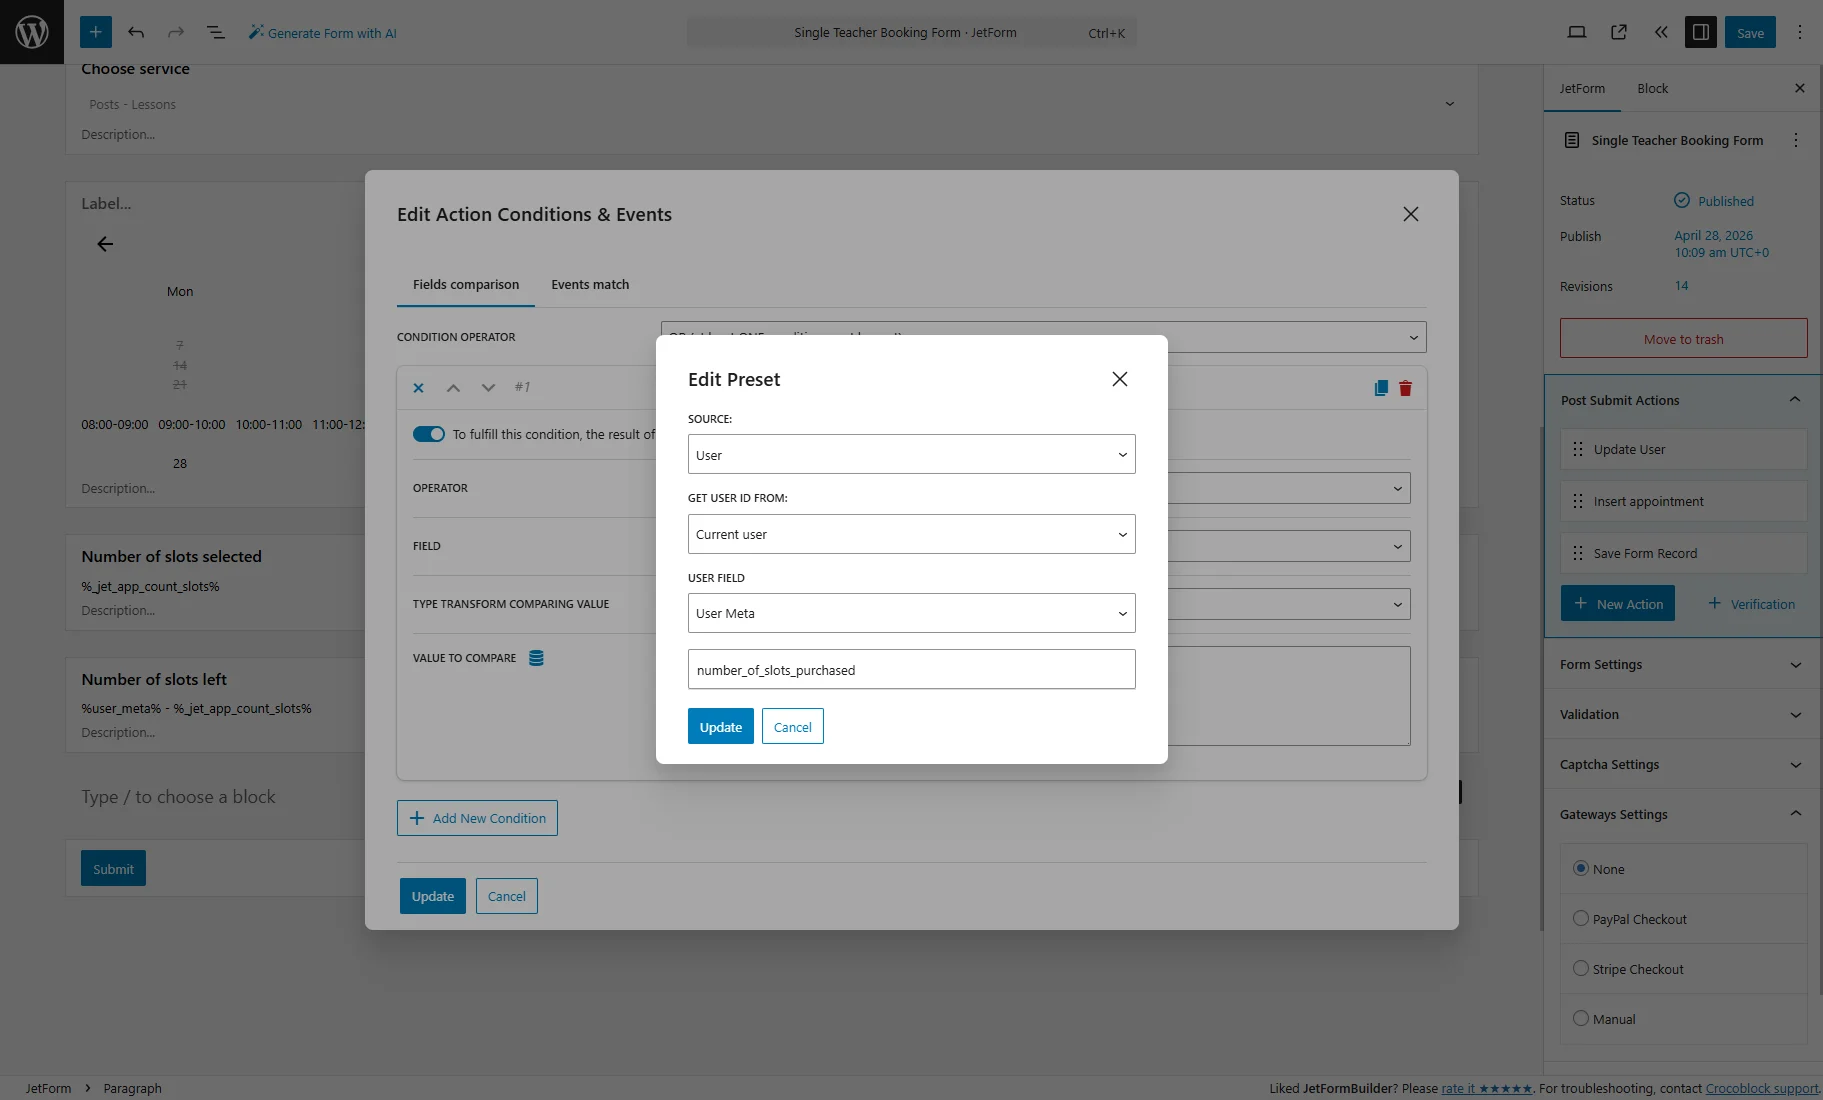
- SOURCE — select “User”;
- GET USER ID FROM — select “Current User”;
- USER FIELD — pick “User Meta”. In the next field, enter the Name/ID of the user “Number” meta field from the Meta Box.
Press the “Update” button to save the preset settings.
Next, hit the “Duplicate” icon to copy the condition.
For the new condition, you should only set the OPERATOR to “Less than.”
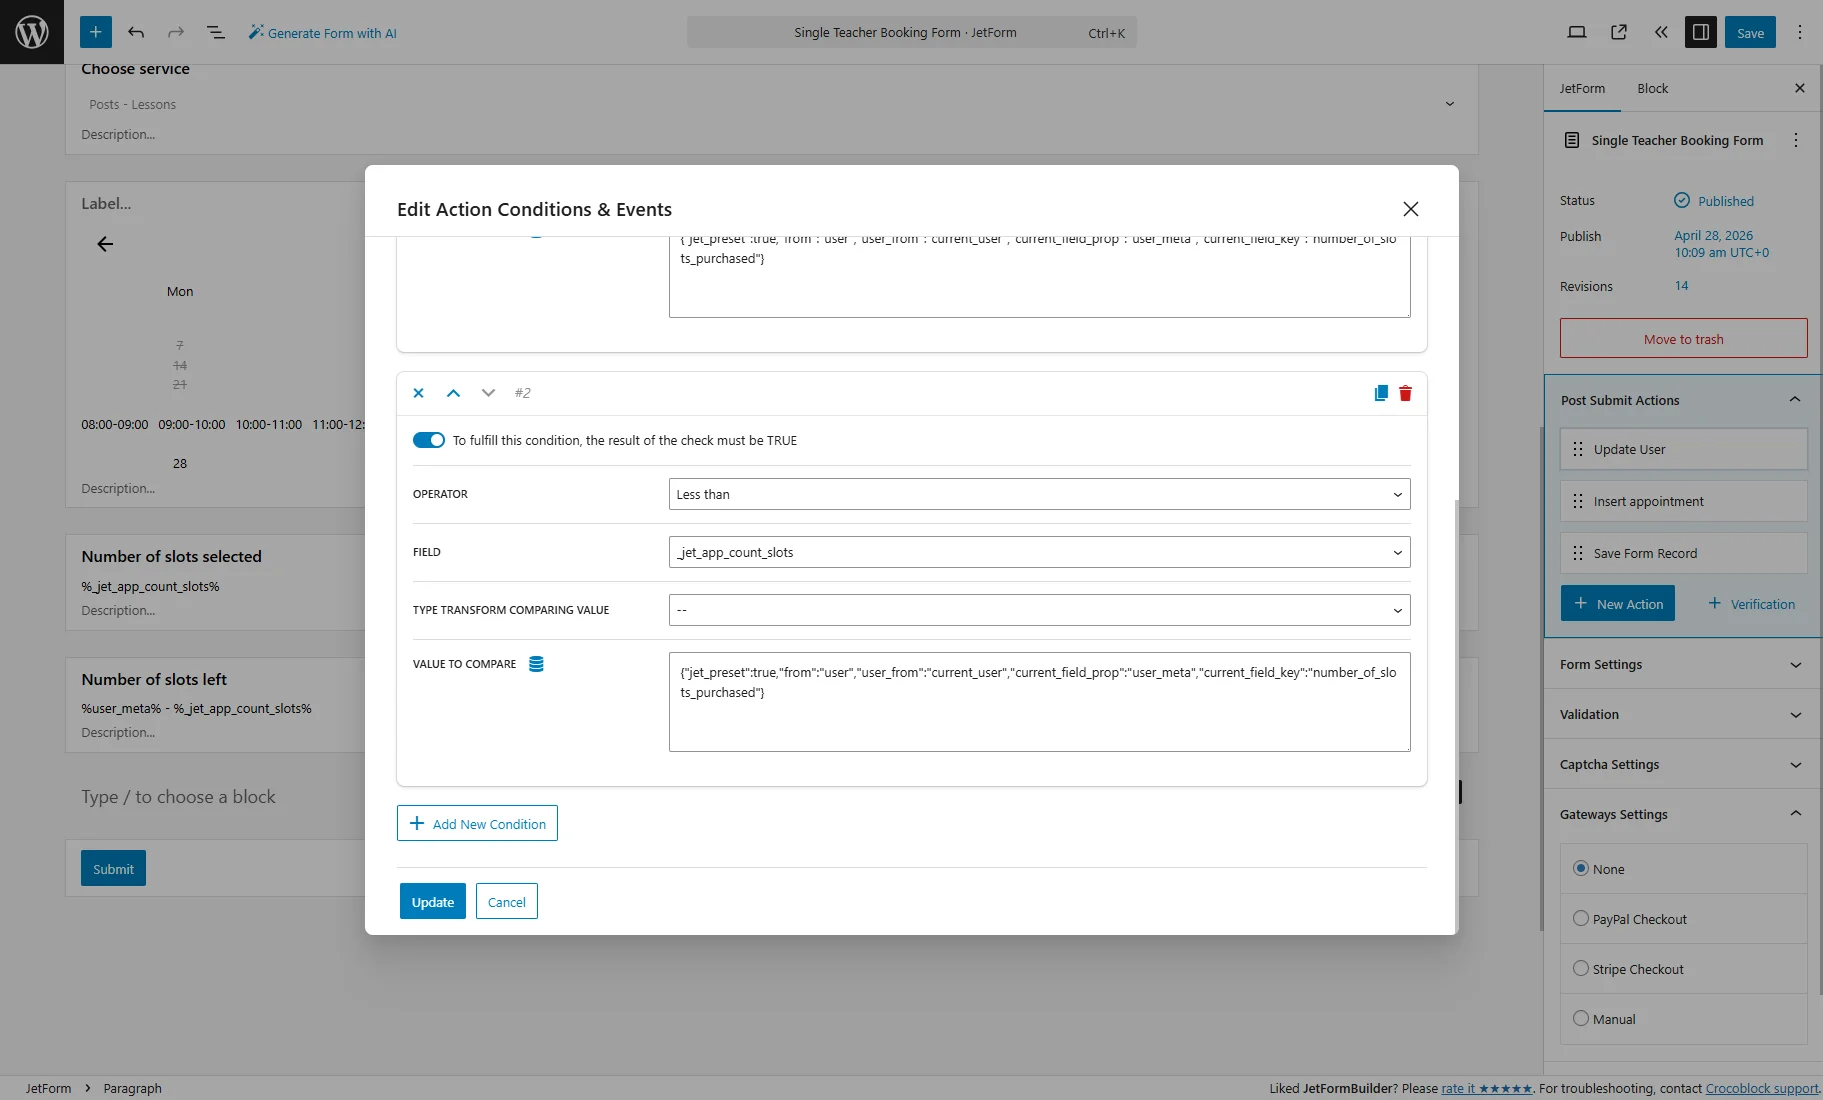
After that, press the “Update” button to save settings and close the pop-up.
Repeat all steps to apply the same conditions to the second post-submit action.
Add a Condition to Submit Button
If you wish, you can also apply a similar condition to the “Submit” button to hide it if the user doesn’t have enough slots.
Insert a Conditional Block and drag the “Submit” button inside.
Press the “crossed arrows” icon.
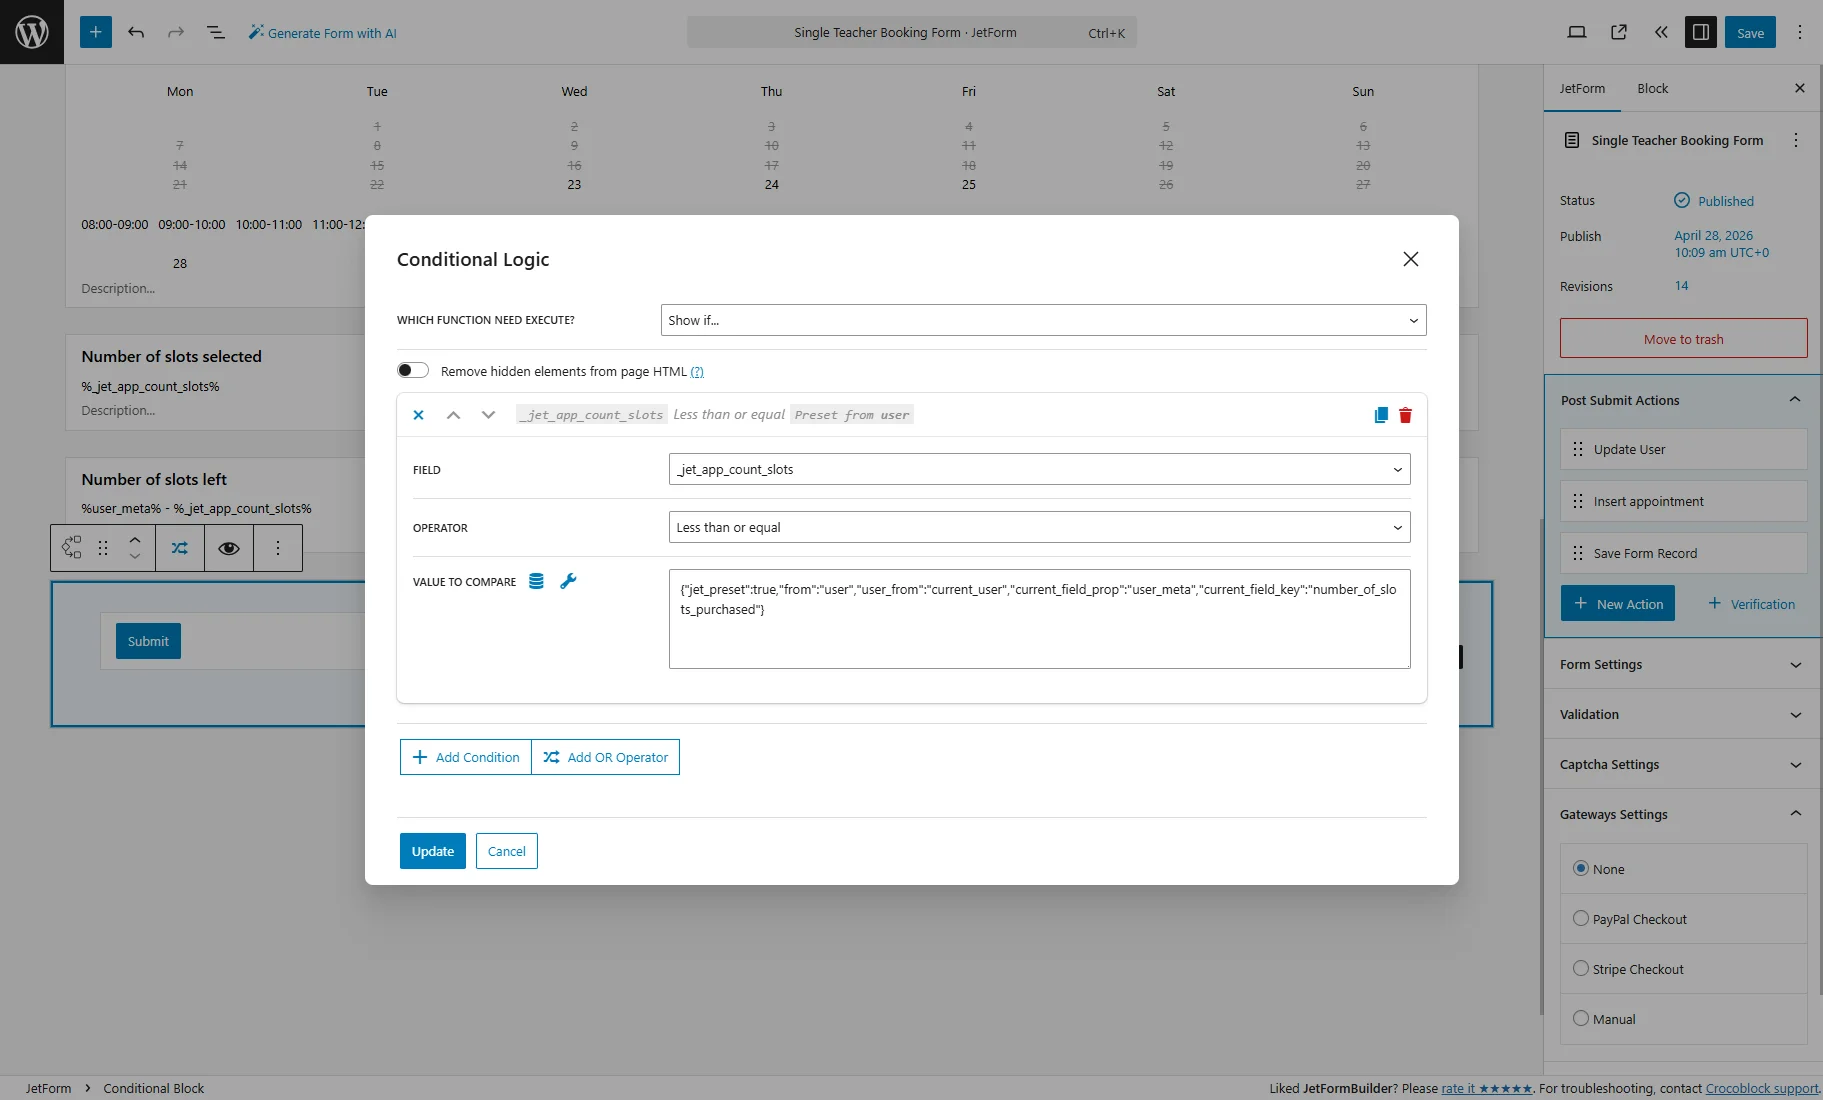
In the pop-up, select the “Show if…” option in the WHICH FUNCTION NEED EXECUTE? dropdown and hit the “+ Add Condition” button.
In the repeater field, select the “_jet_app_count_slots” FIELD and “Less than or equal” OPERATOR.
For the VALUE TO COMPARE, press the “database” button. In the Edit Preset pop-up, set such options:
- SOURCE — select “User”;
- GET USER ID FROM — select “Current User”;
- USER FIELD — pick “User Meta”. In the next field, enter the Name/ID of the user “Number” meta field from the Meta Box.
Then, press the “Update” button to save the preset settings.
That’s all for the Conditional Block. Now, you can press another “Update” button to save the settings.
Place Forms on the Page
In our case, we will place forms on the Teacher (Provider) Single Page.
You can create one with the JetThemeCore plugin as described in the How to Create Single Service/Provider Pages tutorial.
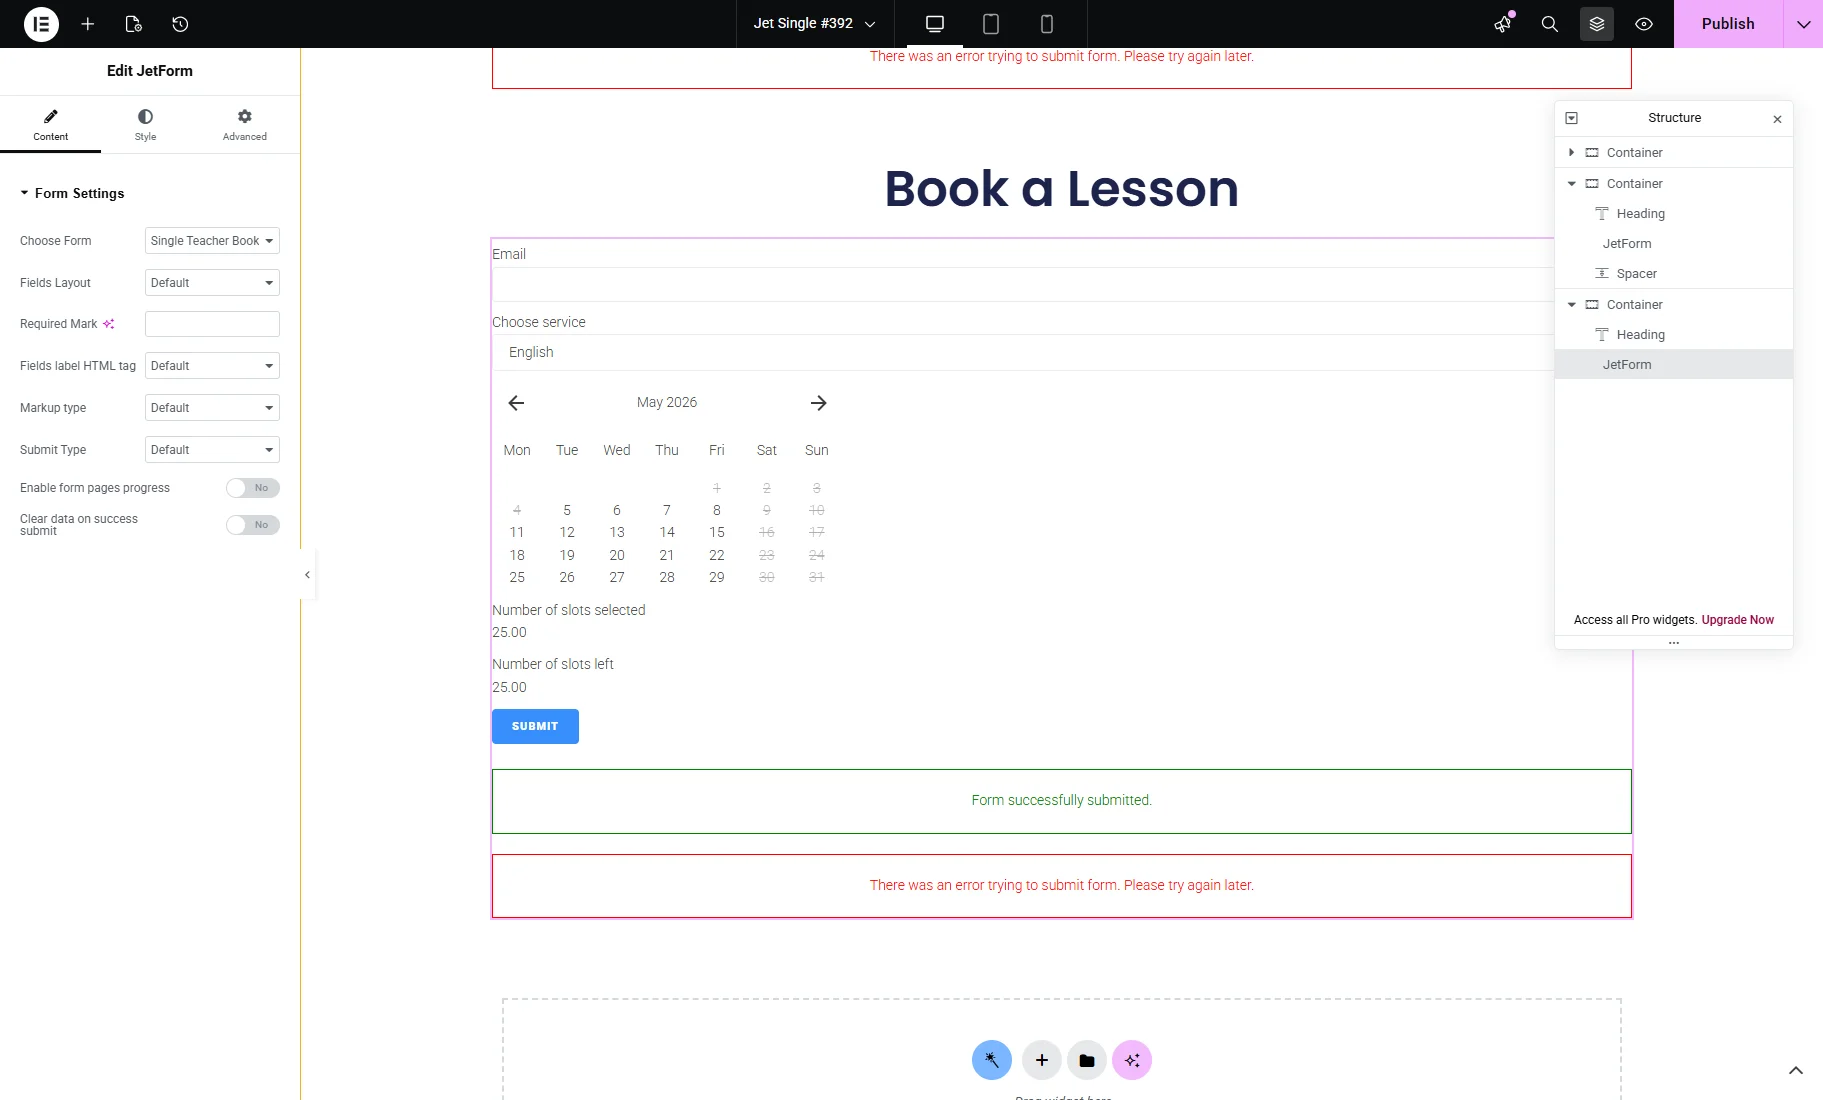
We open the Single template in the Elementor editor and find the JetForm widget in the sidebar.

Using two JetForm widgets, we placed two forms on the page by selecting them from the Choose Form dropdown.
Next, we add the HTML widget and enter the following code. Don’t forget to add <script> before the code and </script> after.
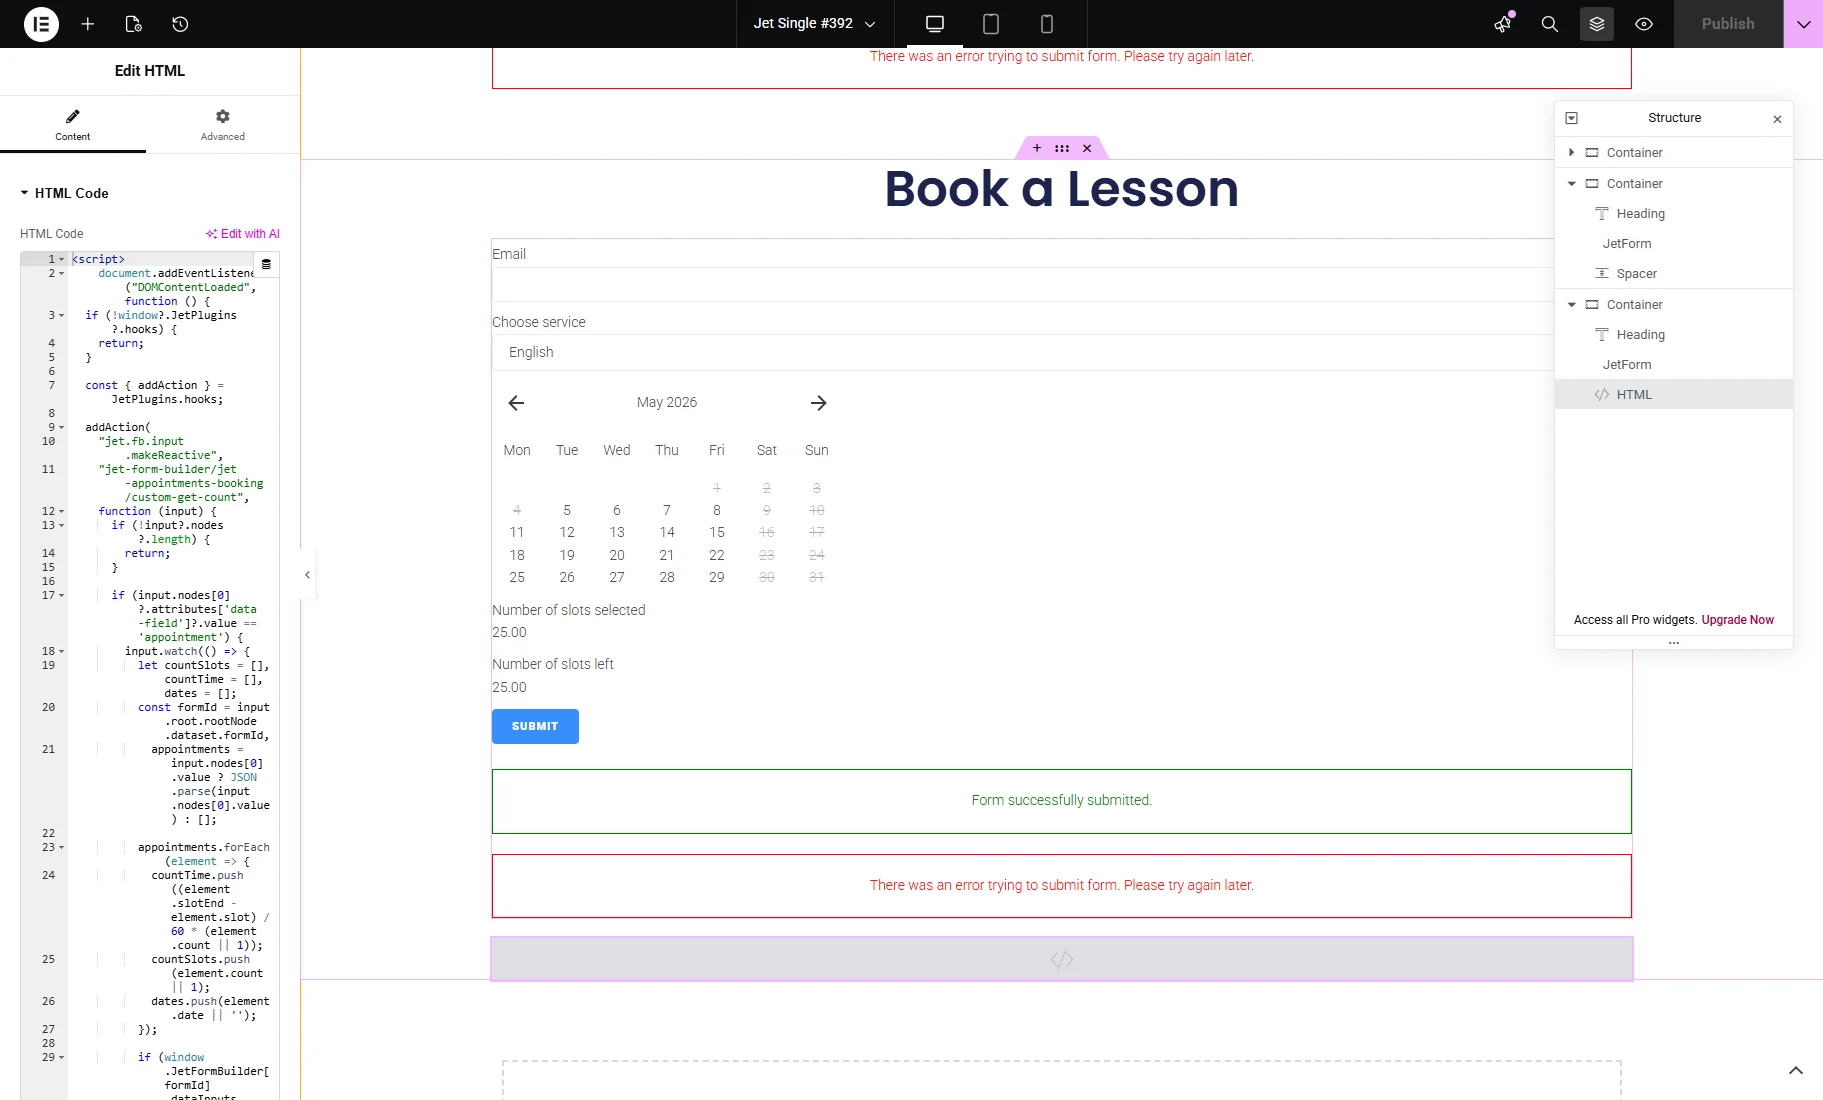
After that, you can push the “Publish” button.
Test the Flow
Open a provider/teacher post on the front end.
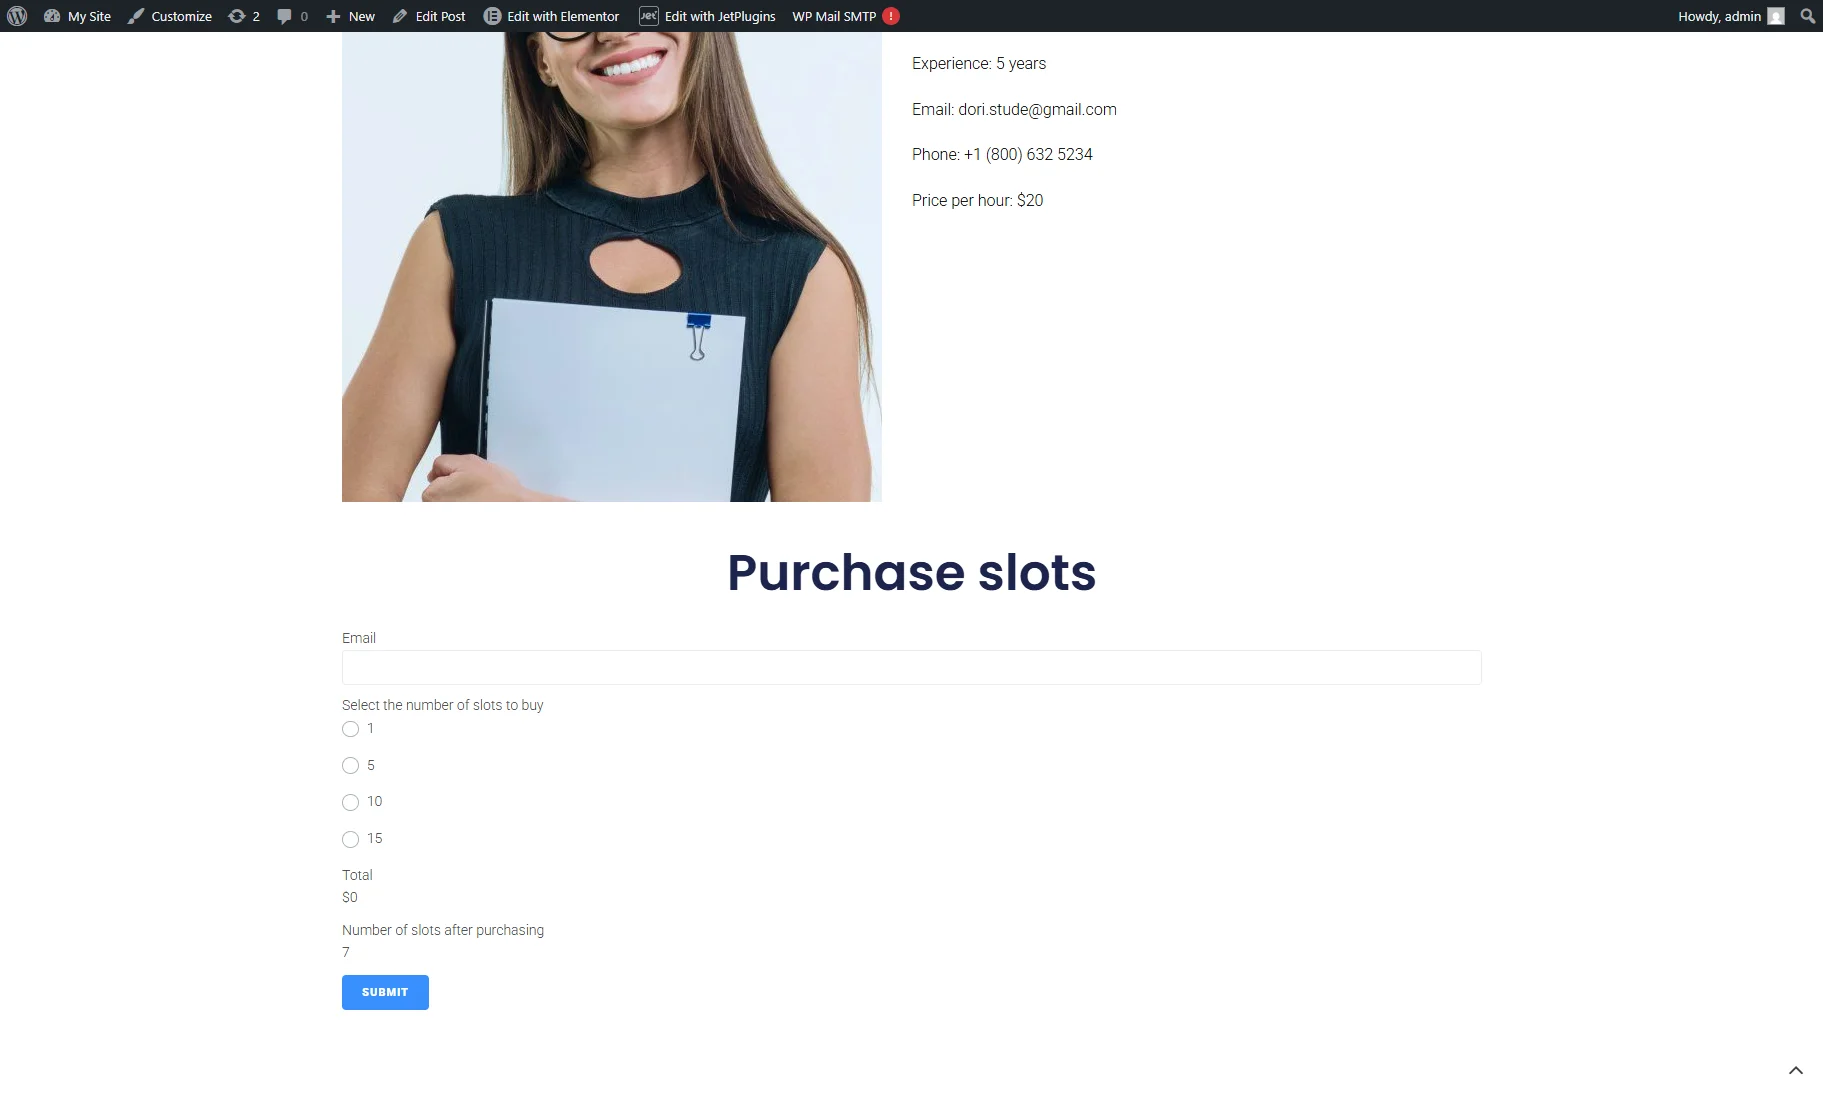
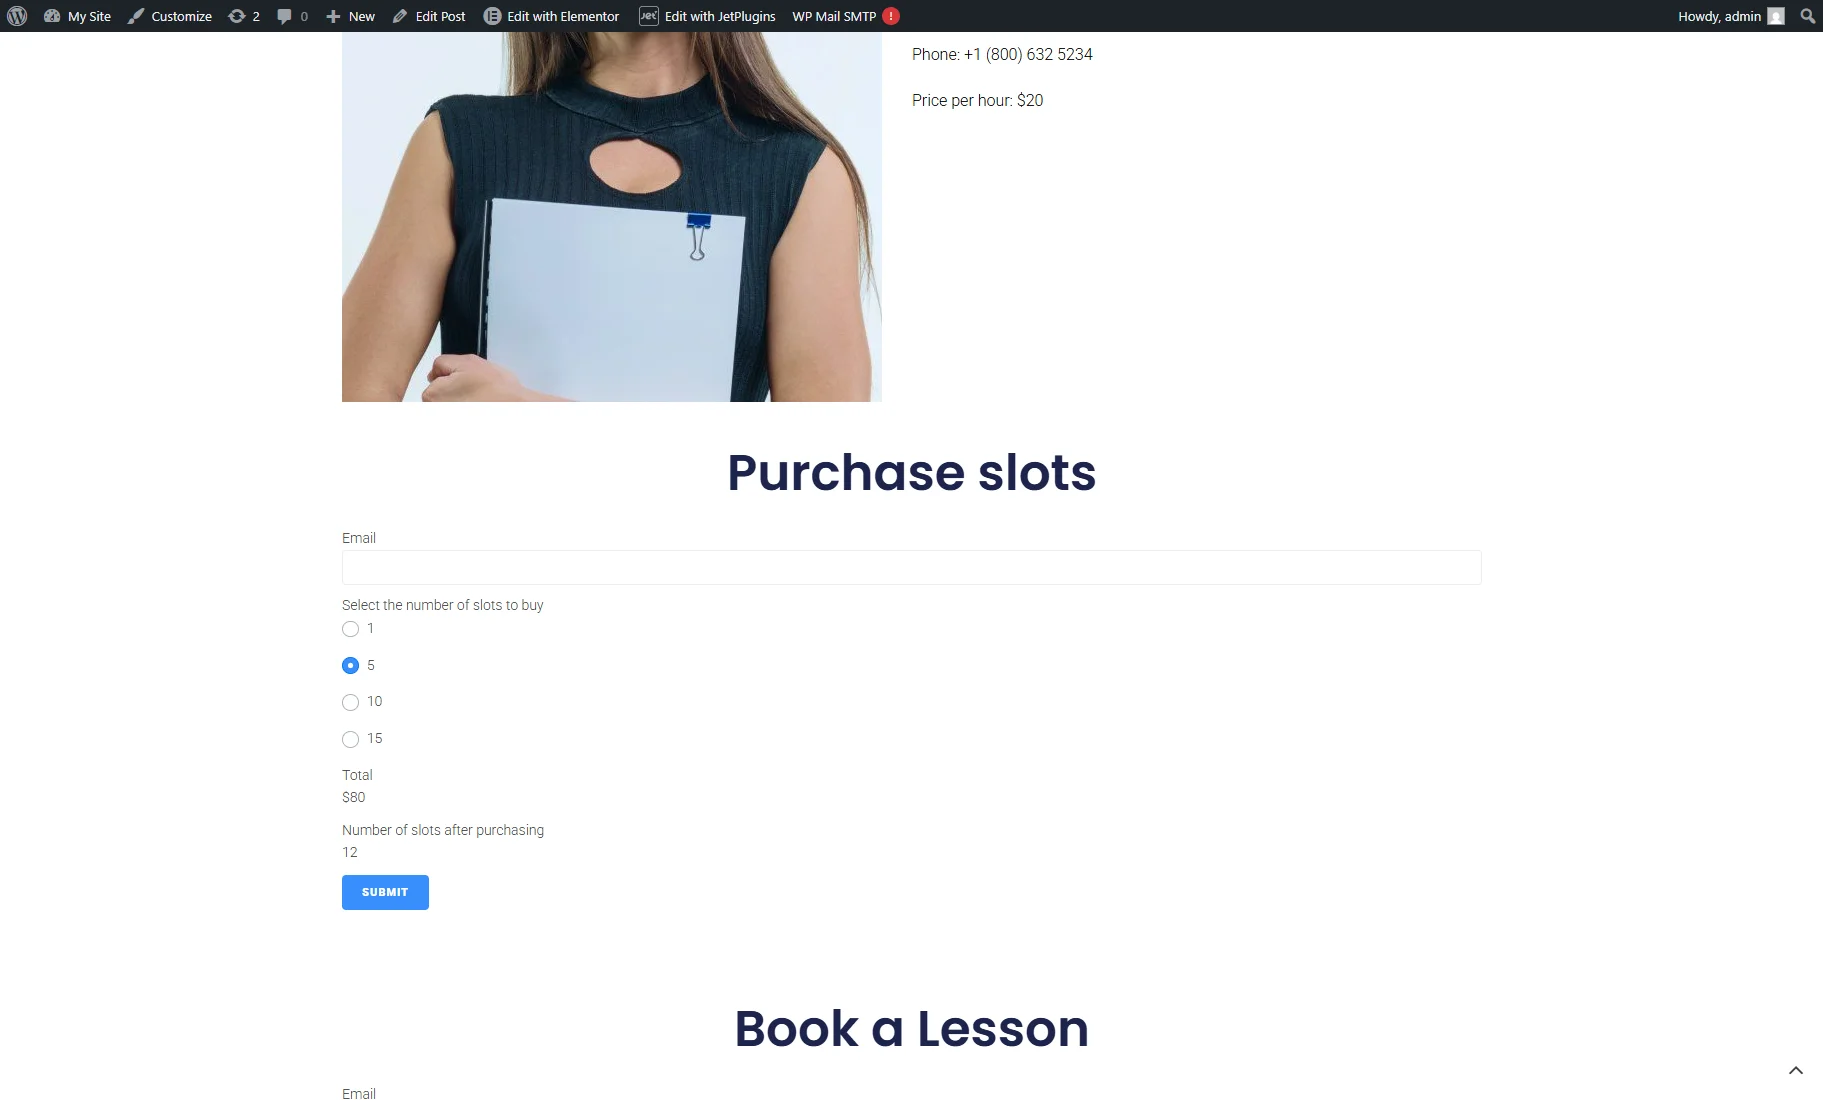
First, we test the “Purchase Form,” which already shows “7” slots. Start by checking if the Calculated Fields work correctly.
For example, if we select “5,” the “Number of slots after purchasing” field shows “5 + 7 = 12.”
The lesson price is $20, so the “Total” is $80. According to the discount formula, selecting “5” multiplies the price by 4.
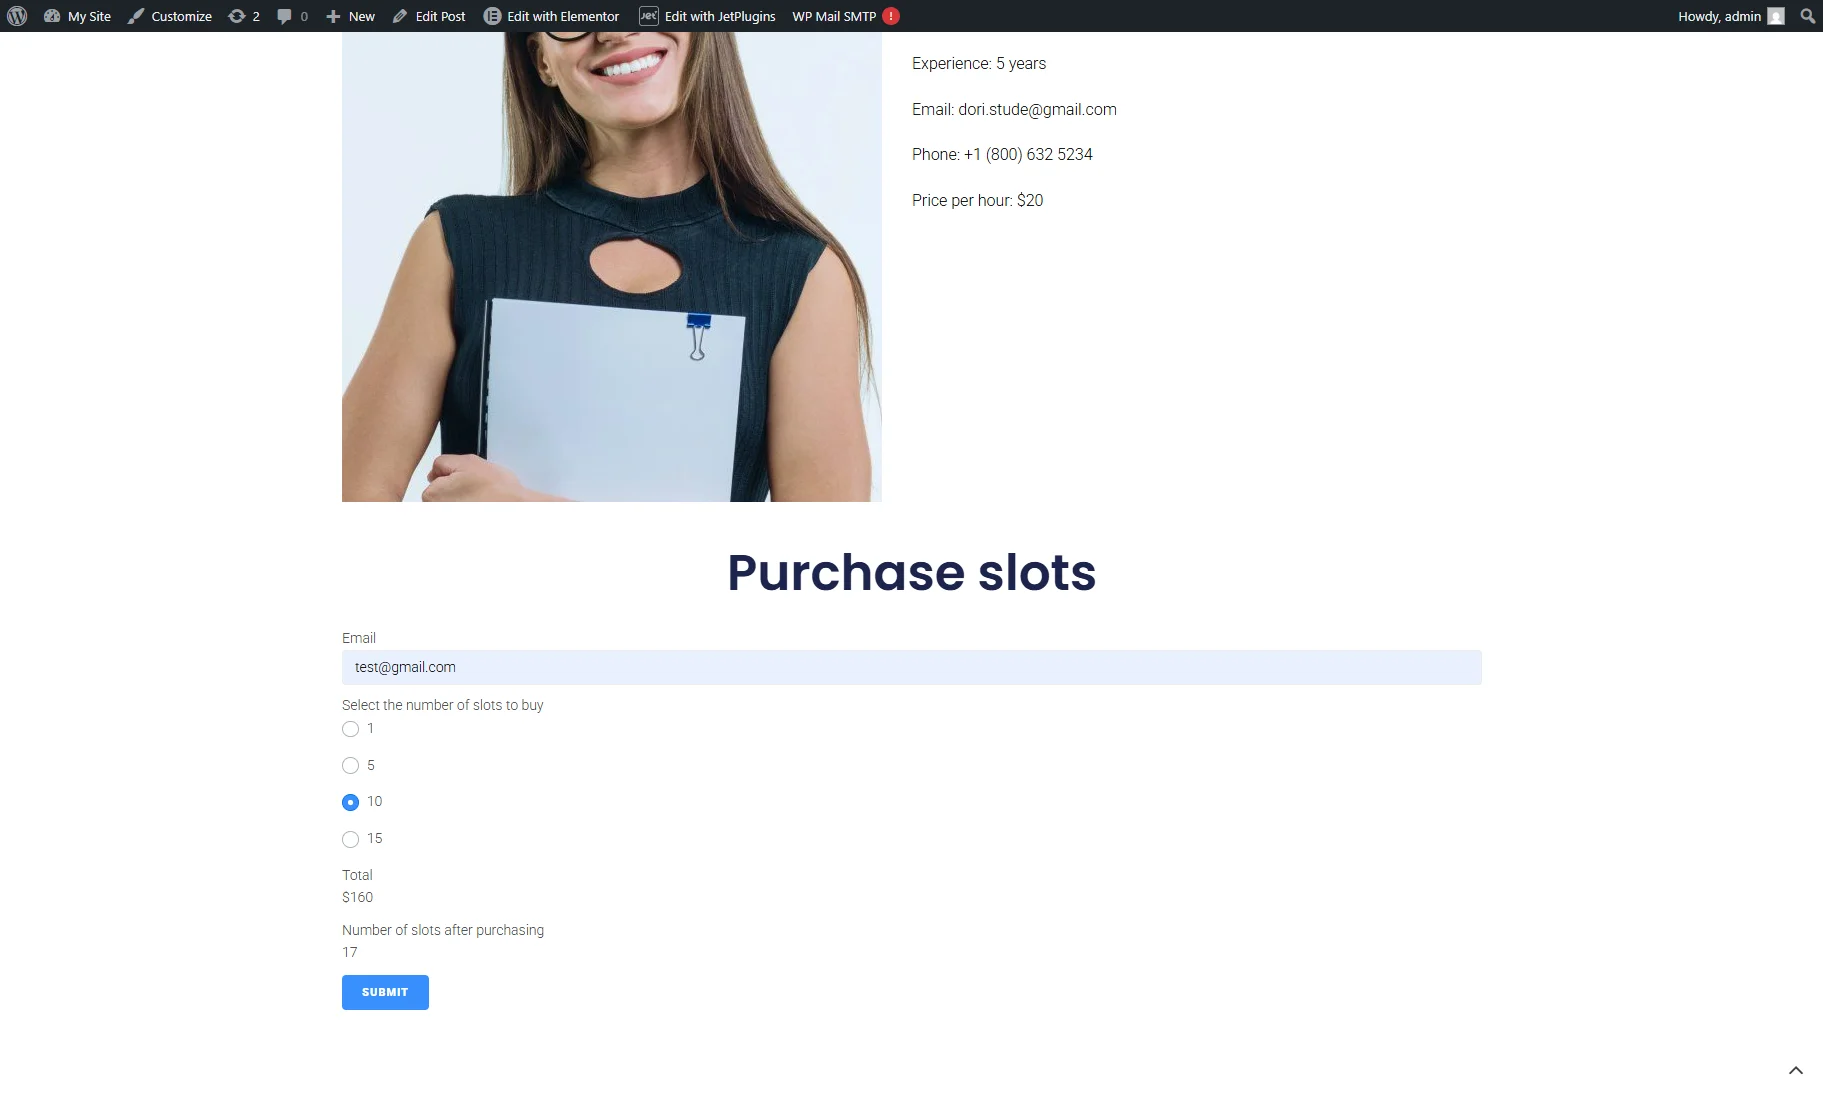
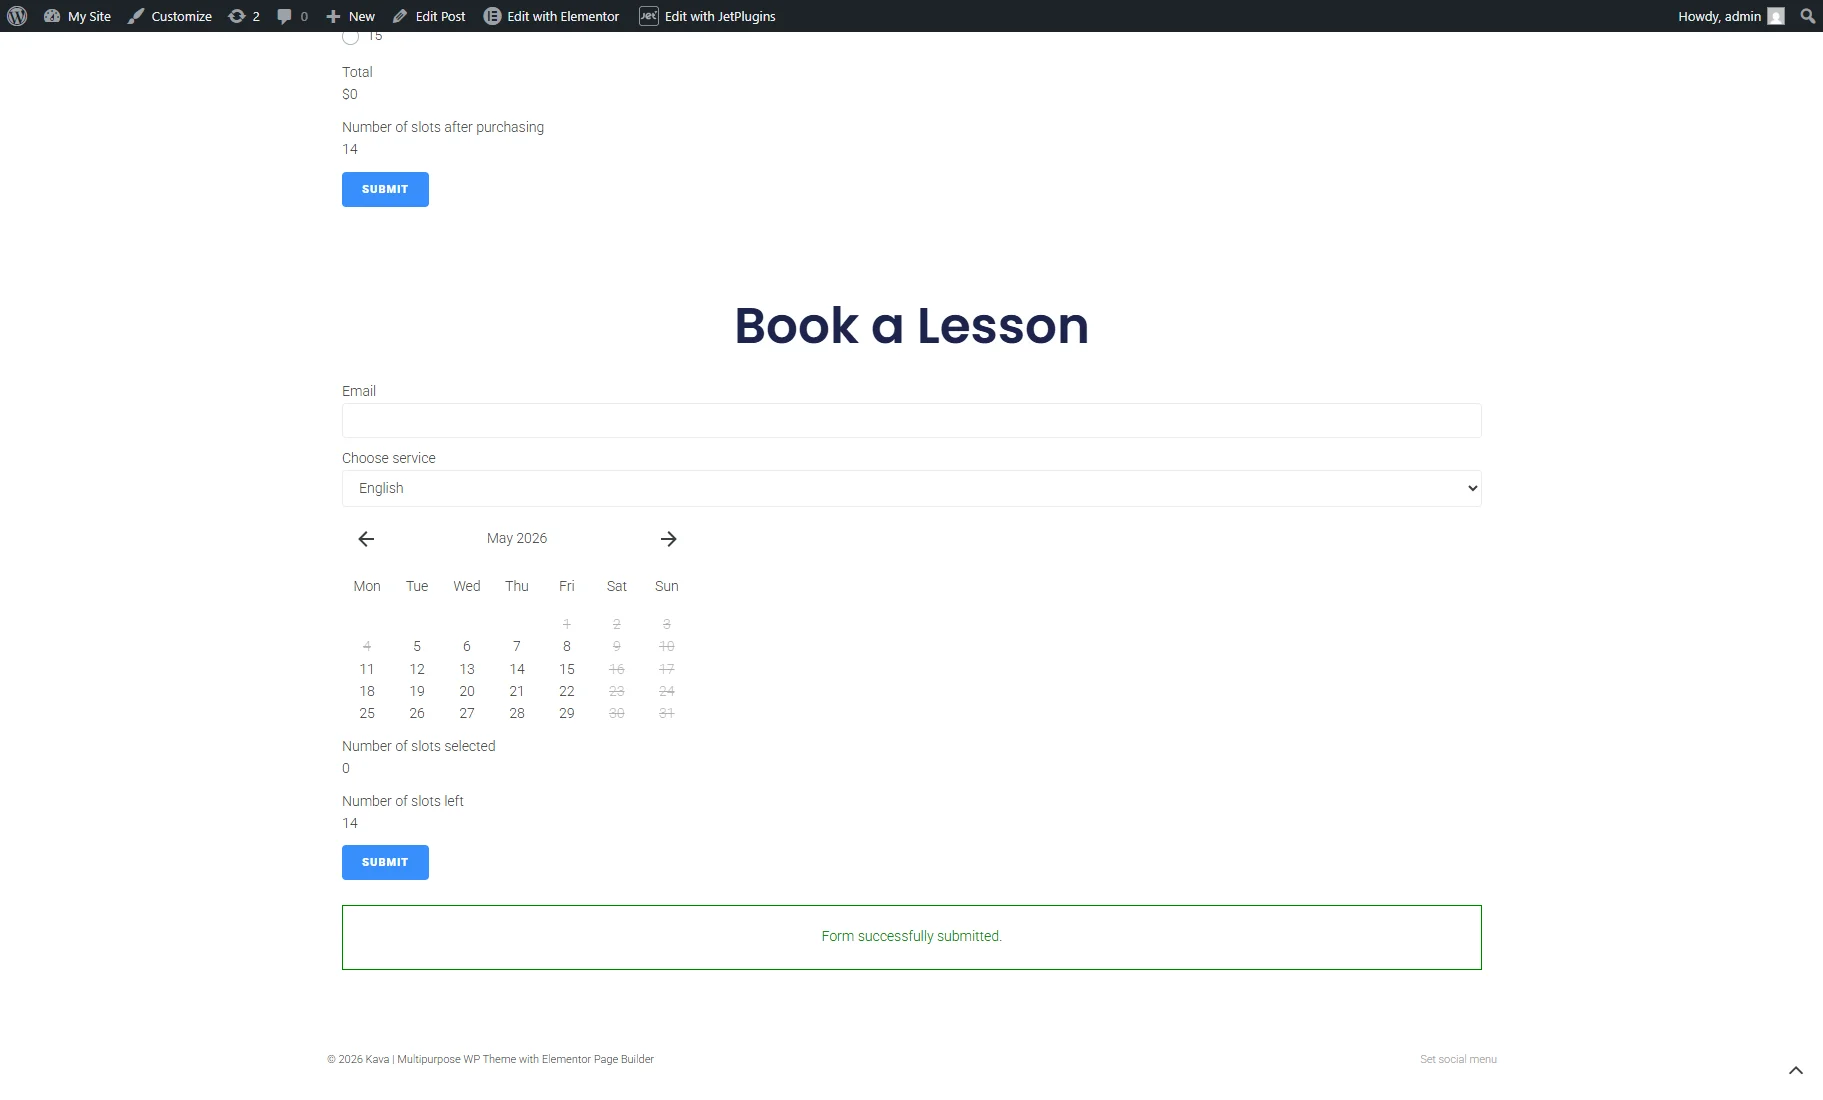
If we select “10,” the “Number of slots after purchasing” is “17” and “Total” is “160” (according to the formula, selecting “10” multiplies the price by 8).
Then, we push the “Submit” button.
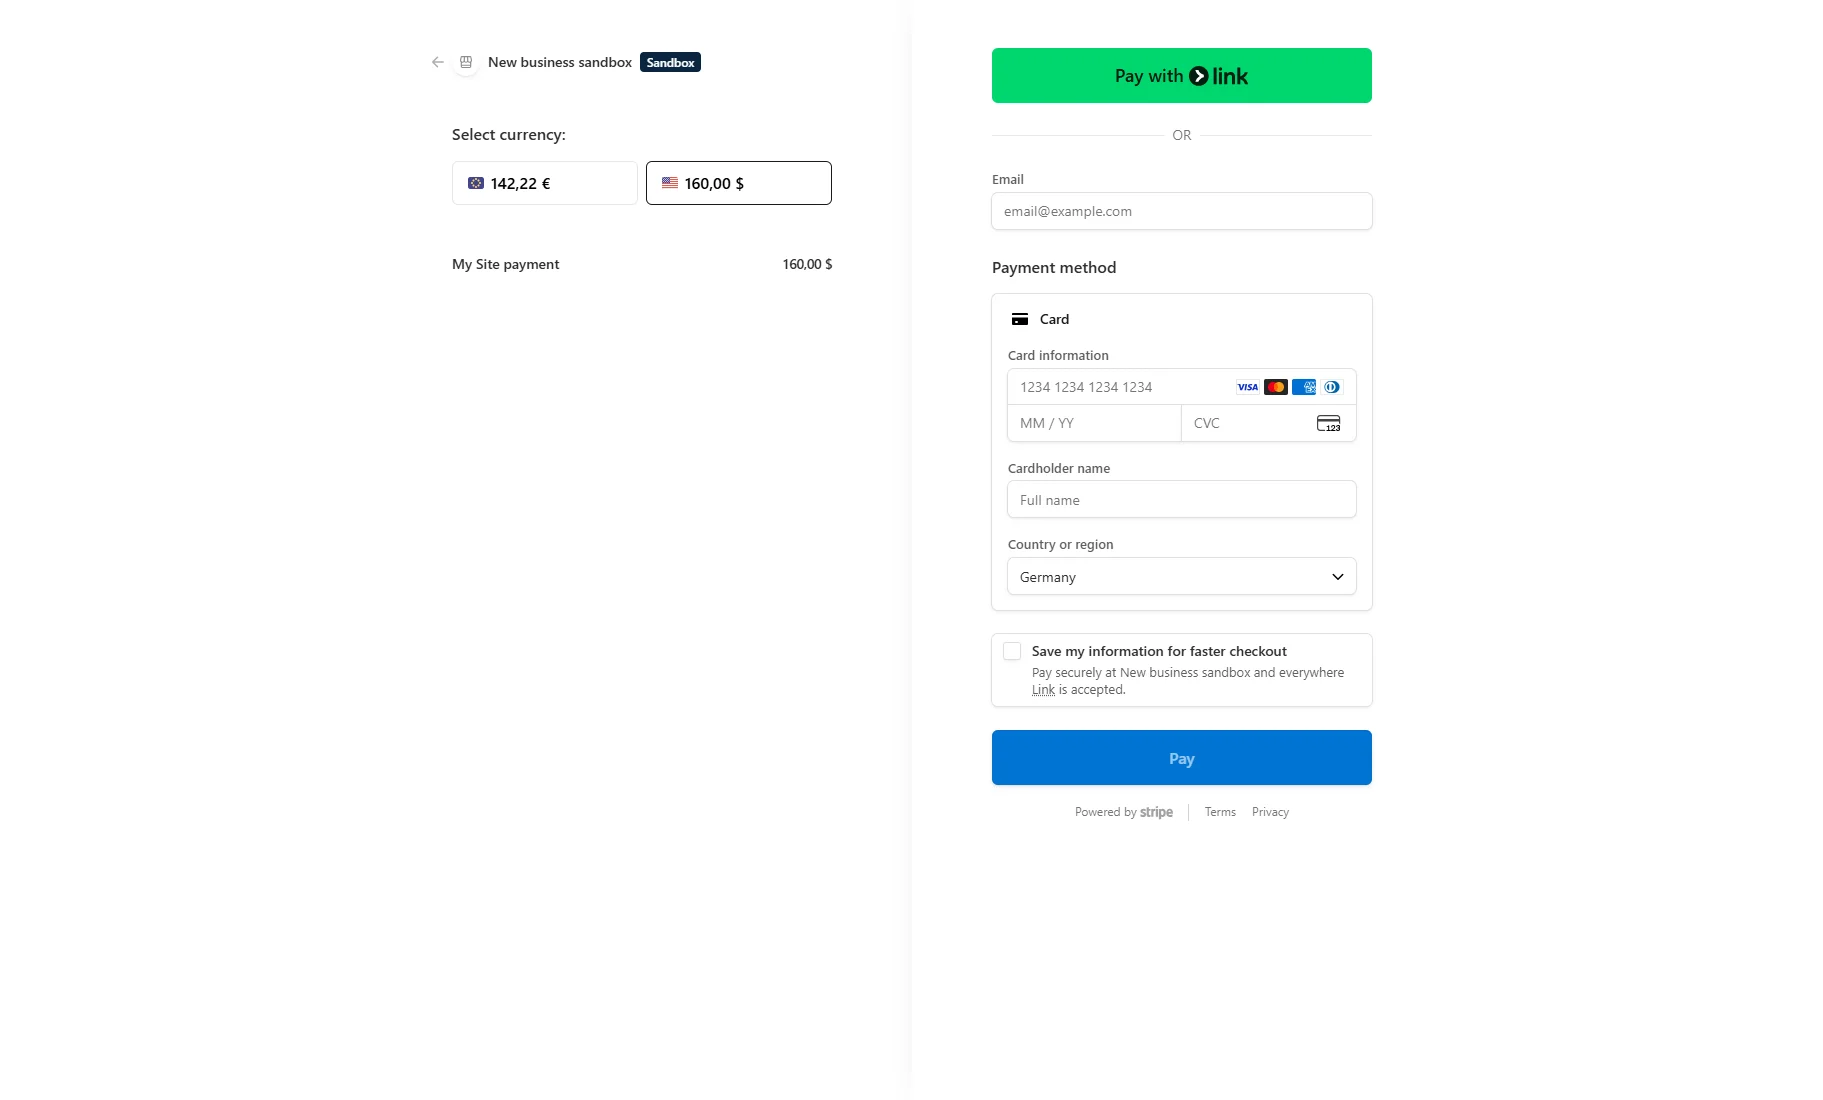
You will be transferred to the Checkout page with your set payment method.
In our case, it’s the Stripe Sandbox Checkout. We fill in fields and hit the “Pay” button.
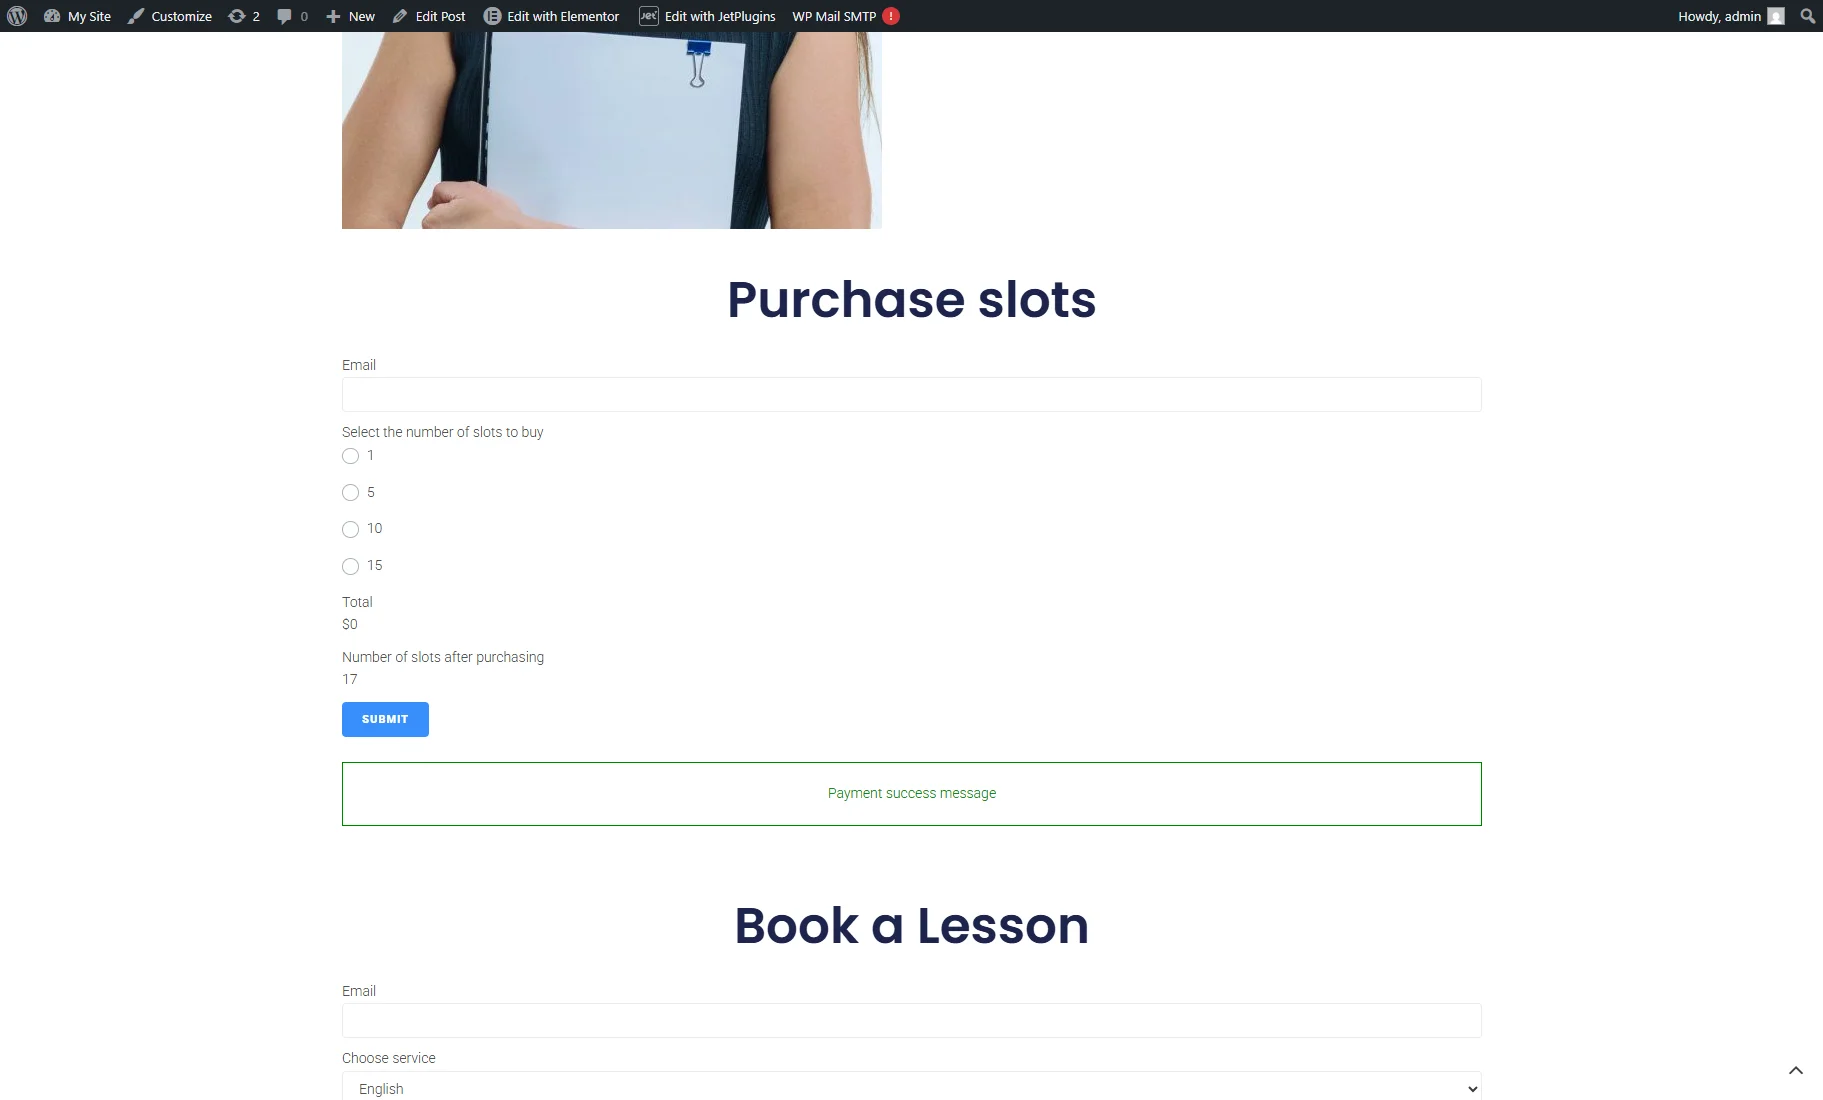
After the test payment is completed, we are redirected back to the Teacher page. The “Purchase Form” is successfully submitted, and the number of slots is increased to “17.”
The number is also changed in the WordPress Dashboard > Users > Profile page.
Next, we scroll down to the second appointment form and select three slots from the Appointment Date field.
The “Number of slots selected” field shows “3,” and the “Number of slots left” field shows “17 – 3 = 14.”
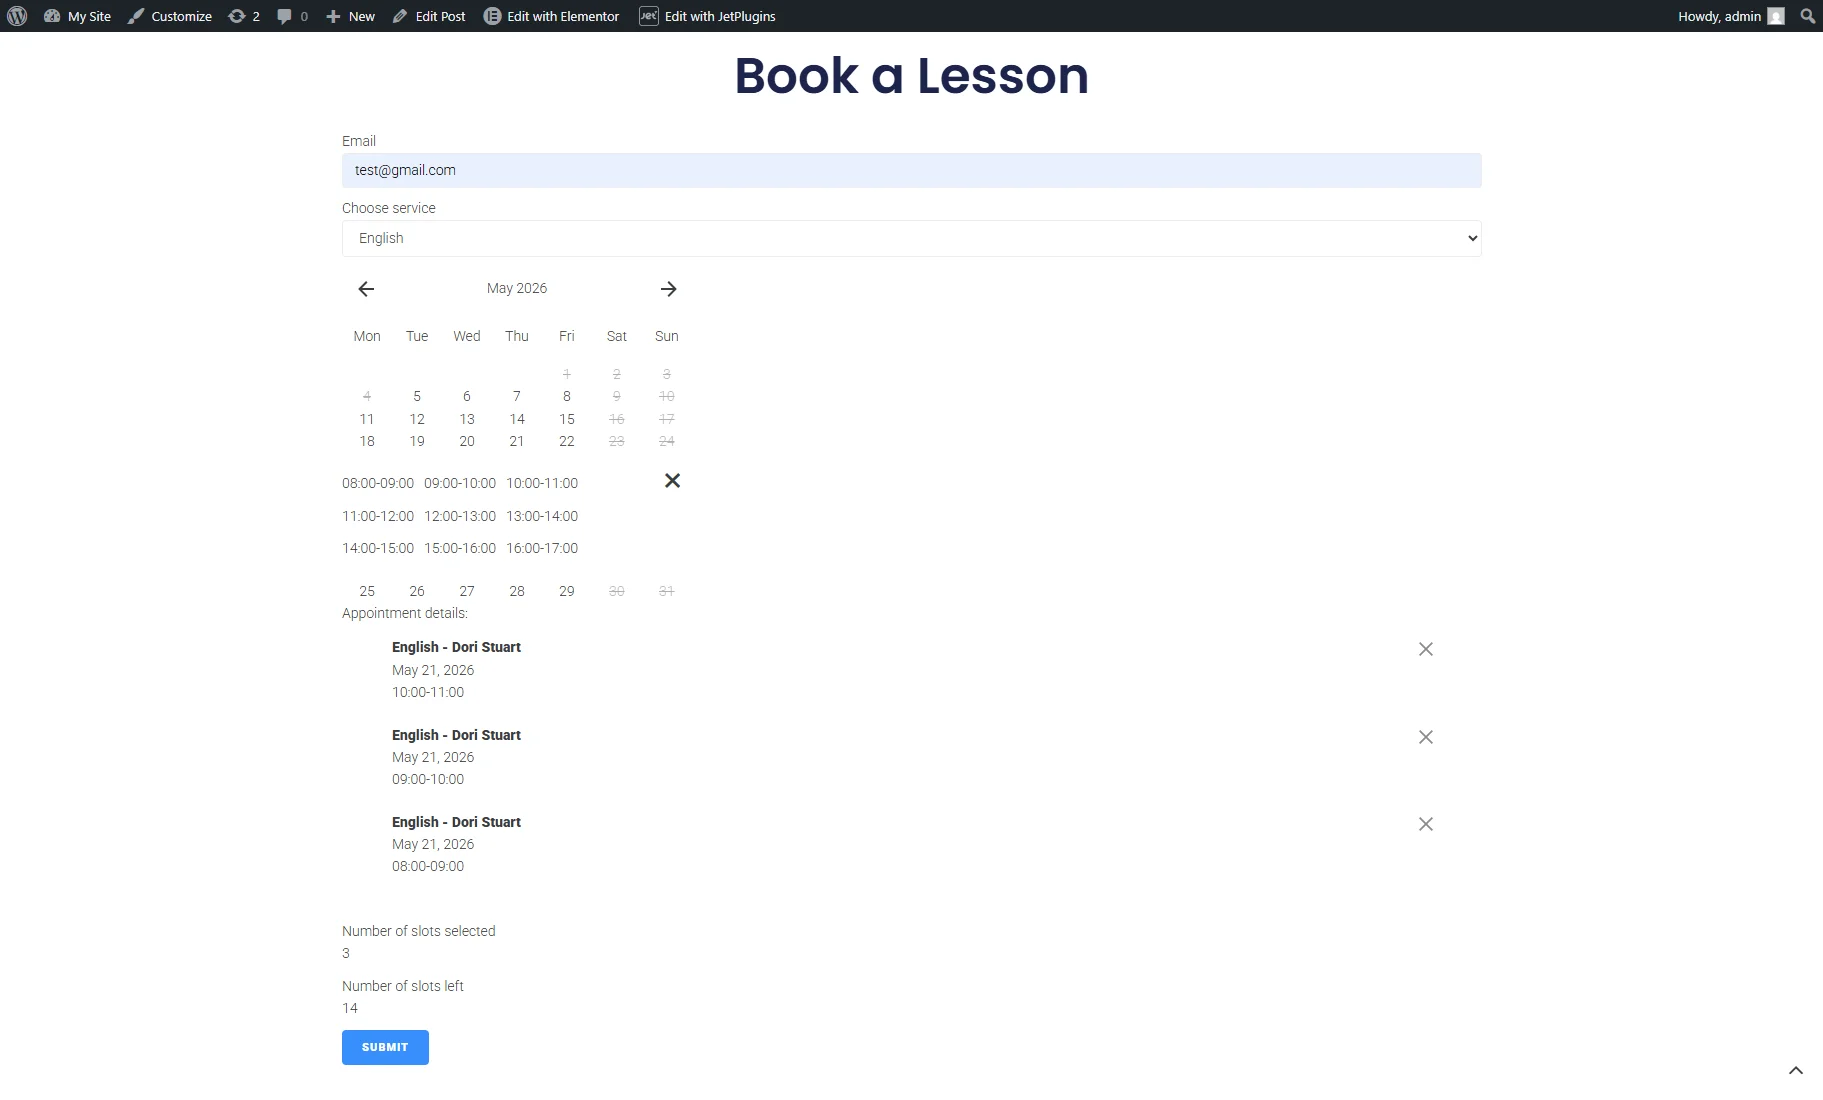
After that, we successfully submitted the form.
That’s all. Now you know how to create a flexible appointment slot purchase system with JetAppointment and JetFormBuilder, including payments, discounts, and user balance tracking on your WordPress site.