How to Add Event to Google Calendar
Learn how to add an appointment to a user's Google calendar via the Dynamic Link widget of the JetEngine plugin.
Before you start, check the tutorial requirements:
- Elementor (Free version)
- JetEngine plugin installed and activated with Custom Post Types (CPT) for for "Provider" and "Services" created CPTs created and “one-to-many” relation between them set
- JetAppointment plugin installed and activated
- WooCommerce plugin installed and activated
- JetFormBuilder plugin installed and activated
- Google account logged in a current browser
In this tutorial, we consider a case of making an appointment via a JetFormBuilder‘s form and further redirection to a WooCommerce checkout page with the Dynamic Link widget placed on it for adding the appointment to the user’s Google Calendar and placing the order.
Configure the JetAppointment Settings
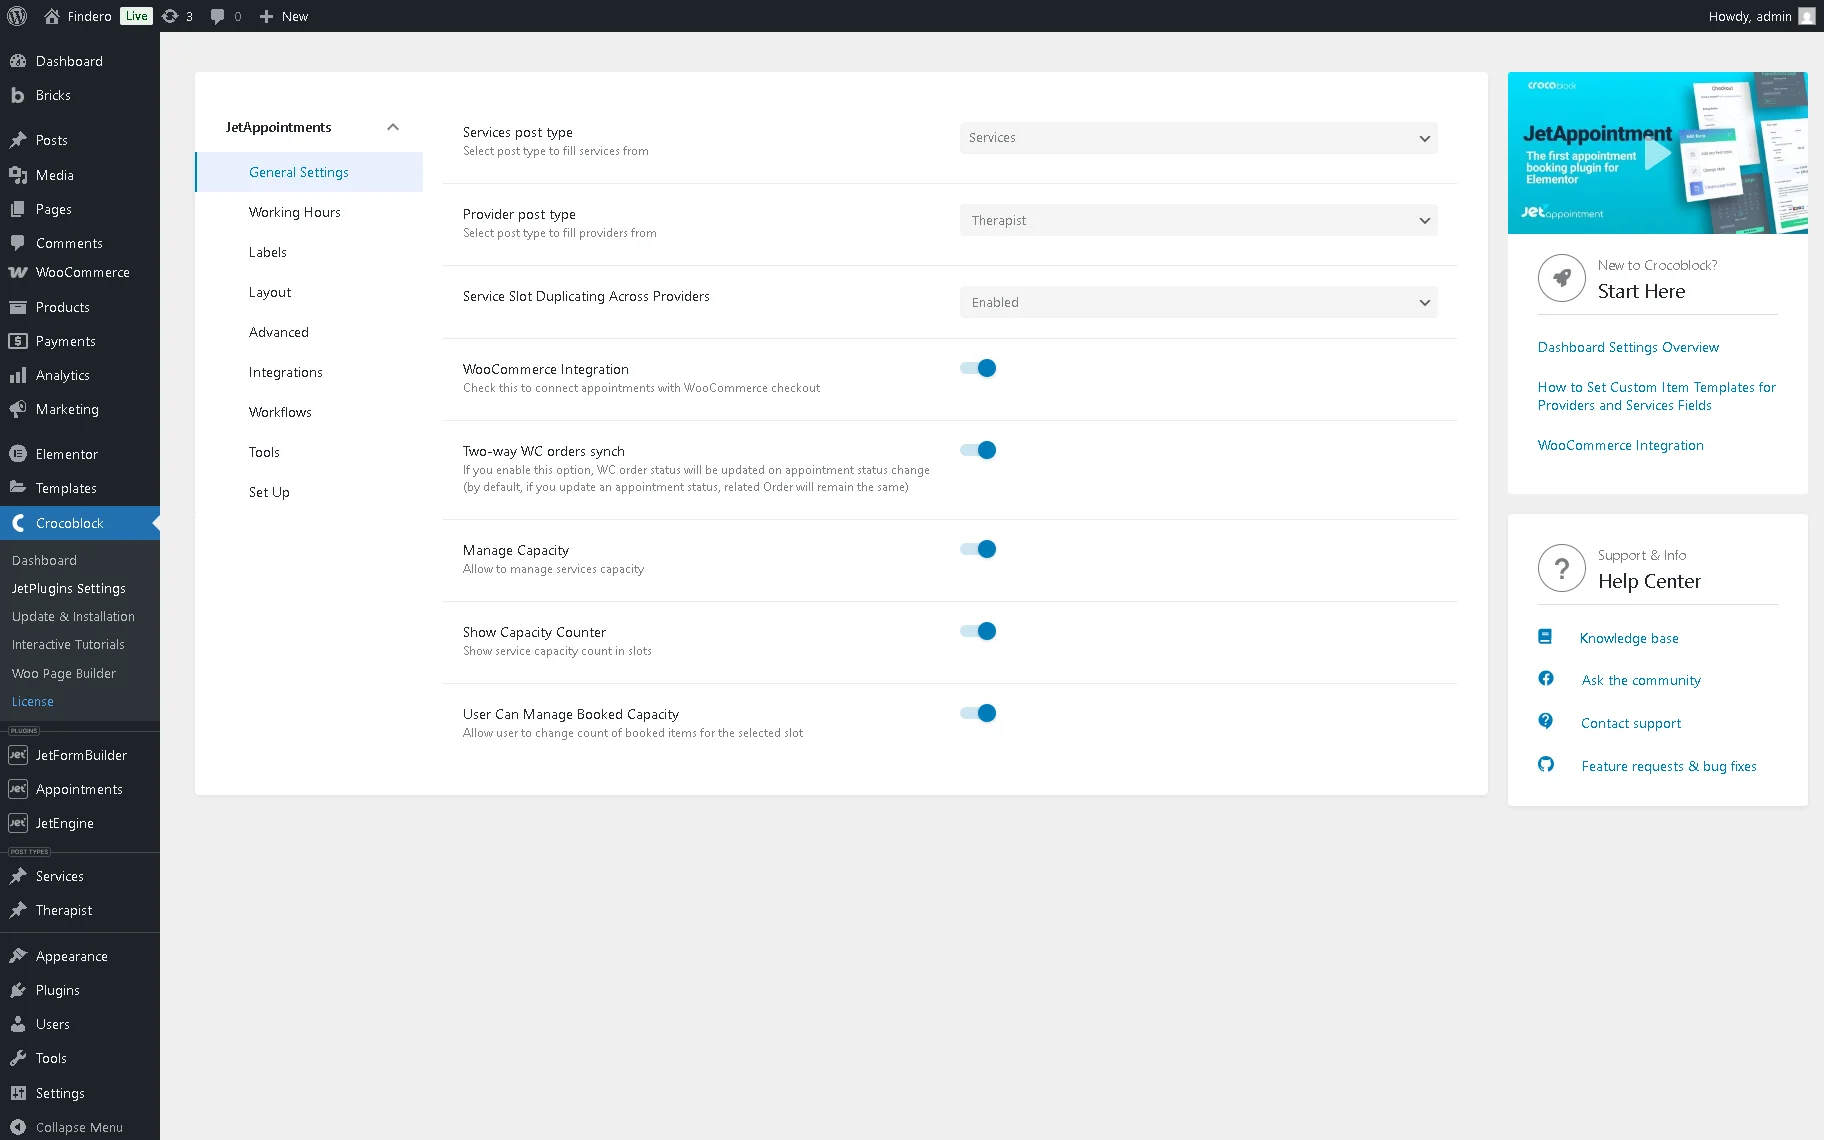
Navigate to the WordPress Dashboard > Crocoblock > JetPlugins Settings > JetAppointments > General Settings tab and set the previously created CPTs in the Service post type and Provider post type drop-down lists. In this case, we use the previously created “Therapist” CPT as a Provider and the “Services” CPT as a Service. Next, enable the WooCommerce Integration toggle.
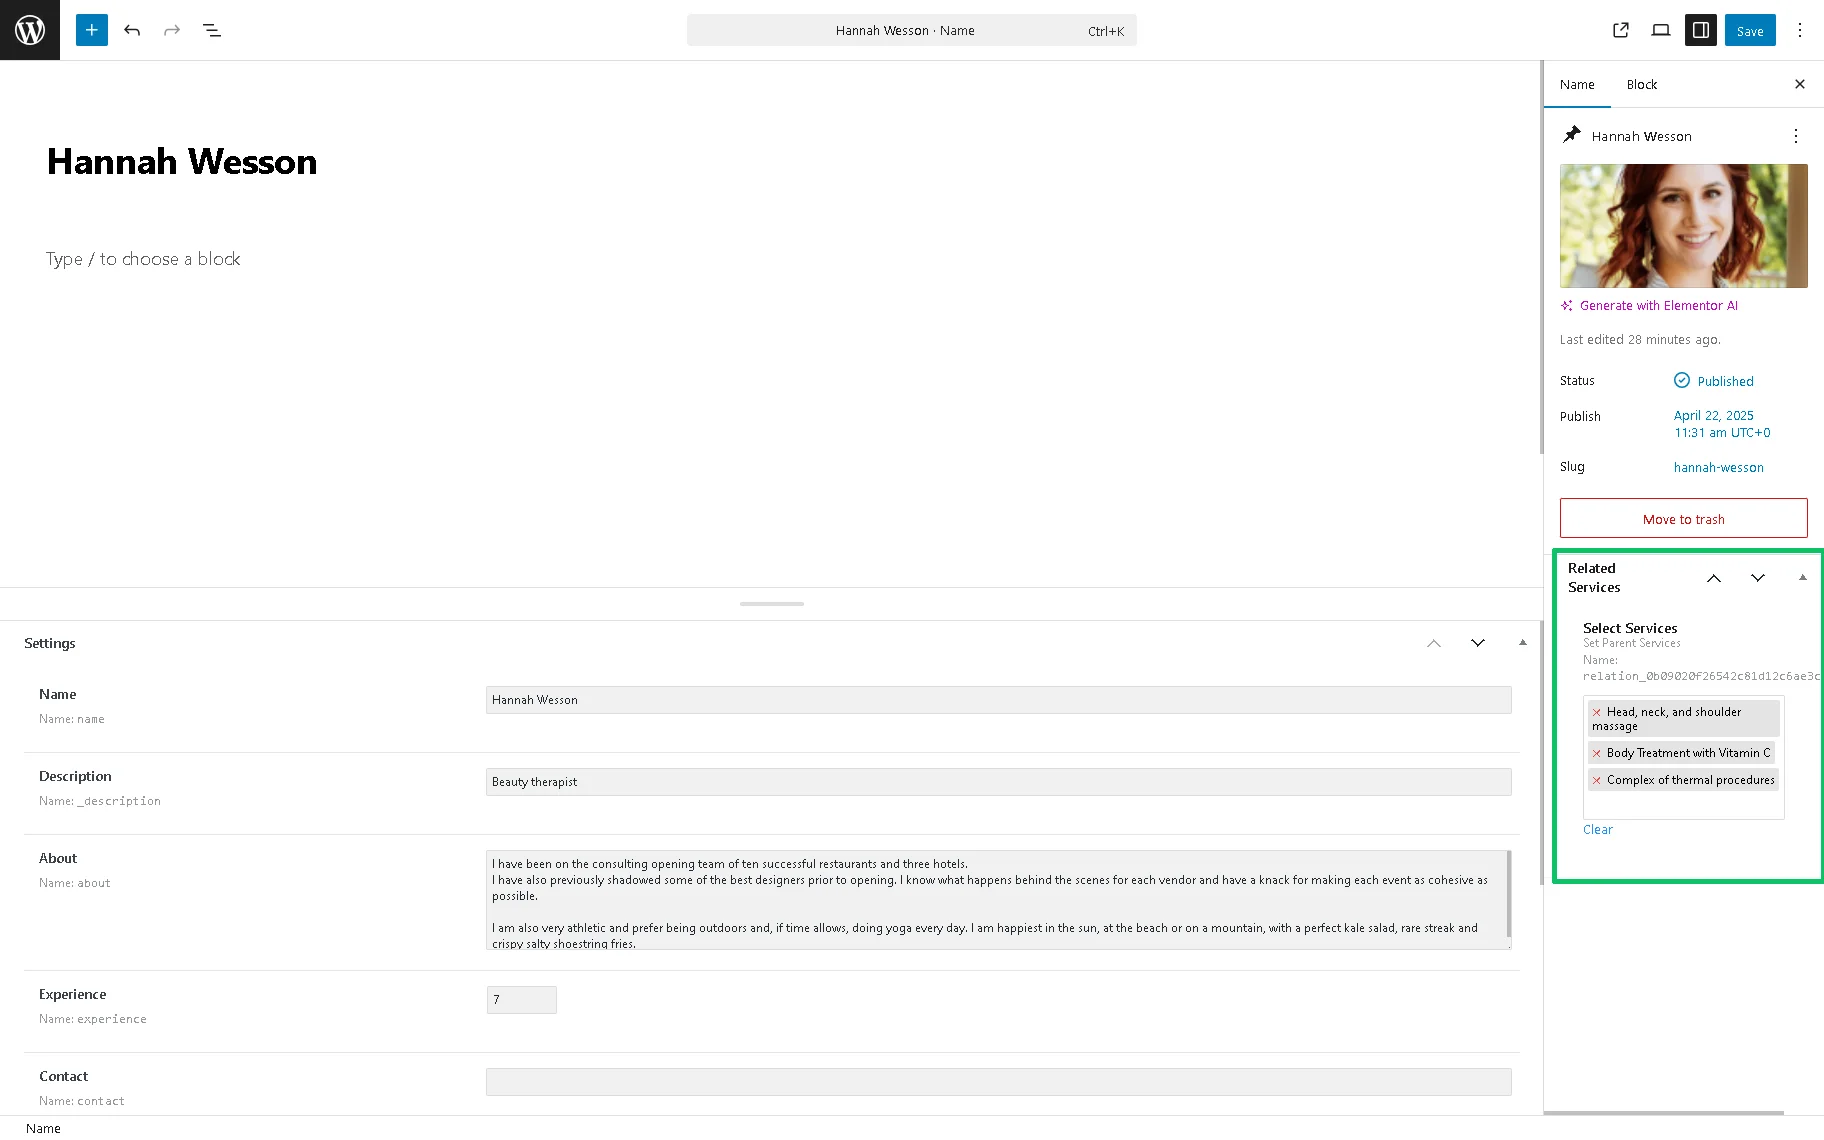
Then, set the corresponding relations between the Service and Provider; unroll the CPT post and assign the required Services to the Provider or vice versa.
Create a Page to Redirect
Since we intend to redirect users to their Google Calendar from the standard WooCommerce checkout page, we open the corresponding page and add the Dynamic Link widget there. Then, we unroll the Source drop-down list and select the “JetAppointments Booking: add booking to Google calendar” option in the General section. Next, we type the “Add to Google Calendar” text in the Label text and press the “Publish” button.

Things to know!
To expand the checkout page functionality, use the JetWooBuilder plugin. Read the How to Create a Checkout Page Template tutorial for more details.
Build a Form
Navigate to WordPress Dashboard > JetFormBuilder > Add New tab to create a new form. The form will be opened in the Gutenberg editor. Initially, it includes the Welcome block, which allows the application of the pre-created or AI-generated forms.
In this case, we type the form’s name (the “Appointment” text) and delete the Welcome block.
After that, we insert the Hidden Field and set the “service_id” FIELD LABEL, but keep the “Current Post ID” FIELD VALUE.
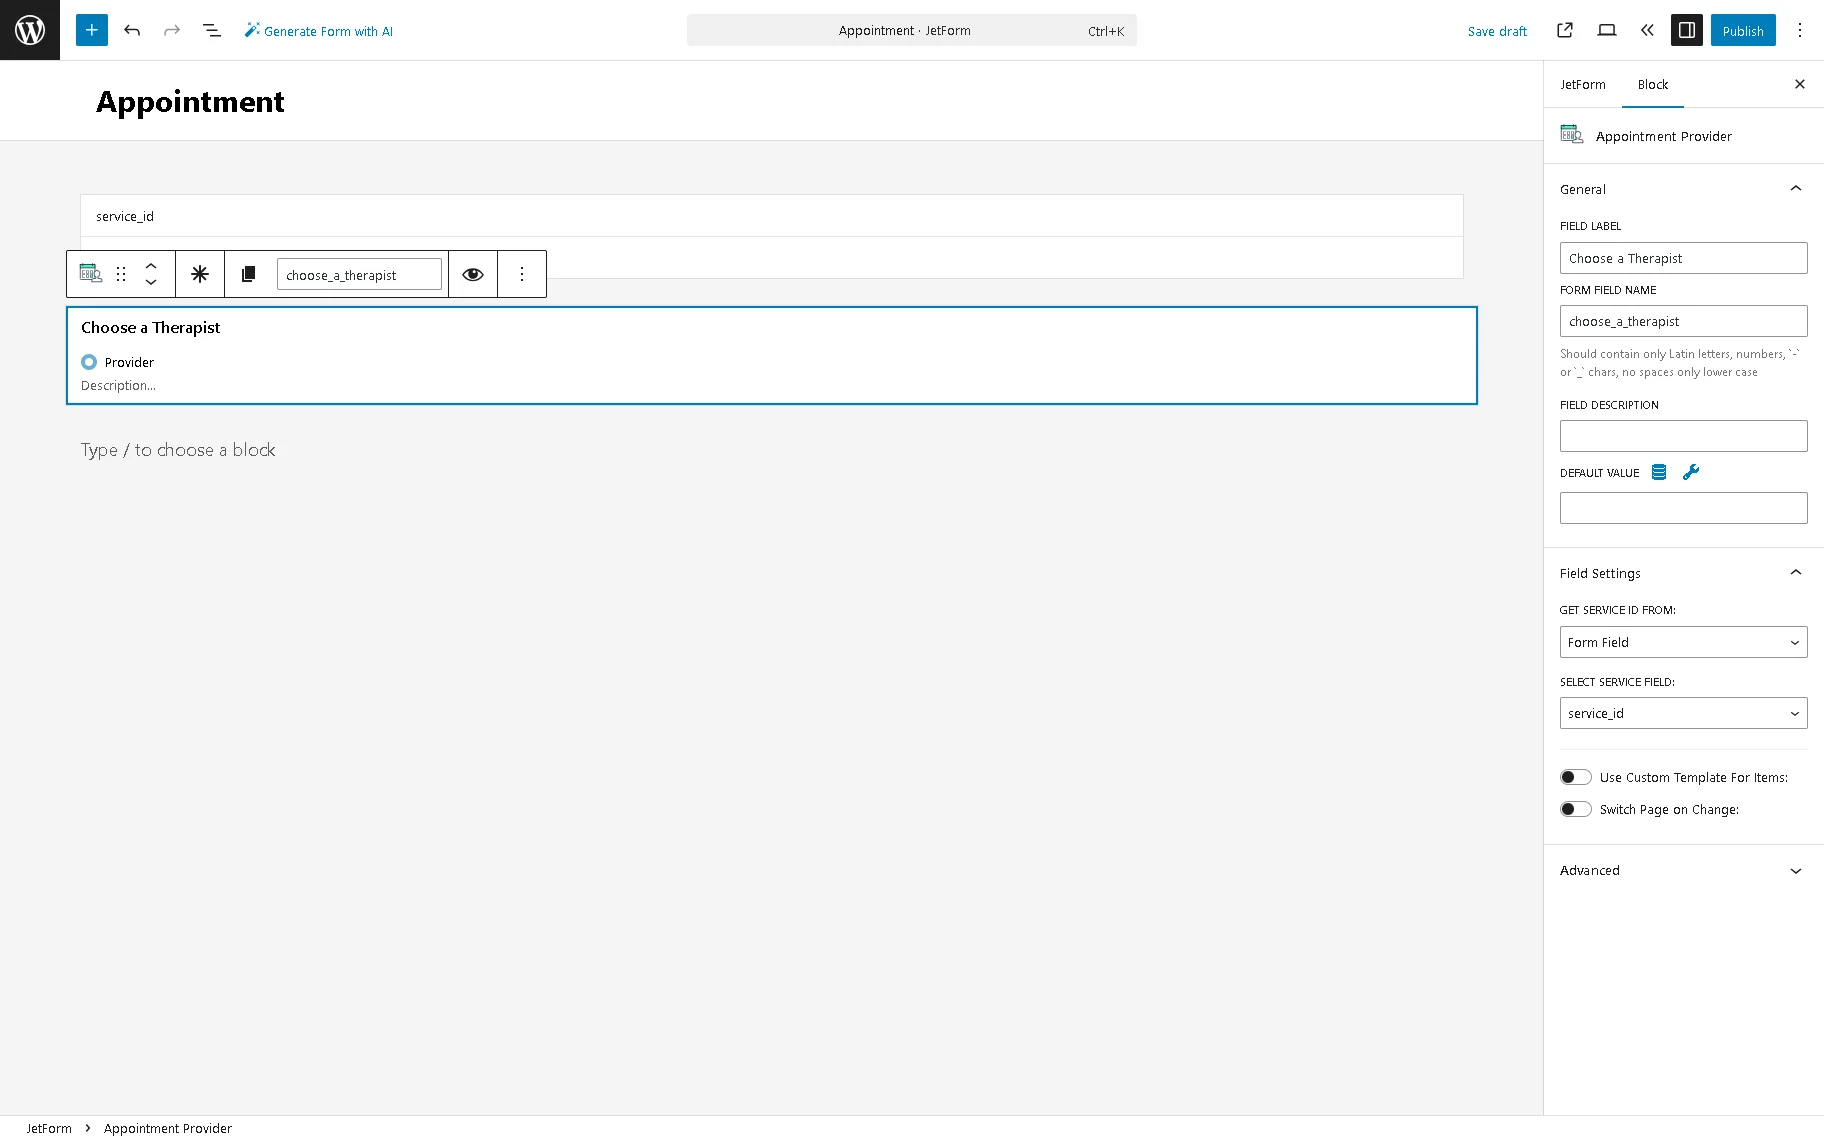
Next, we add the Appointment Provider field, type the “Choose a Therapist” FIELD LABEL, and move to the Field Settings section. Here, we select the “Form Field” GET SERVICE ID FROM and set the “service_id” option in the newly appeared SELECT SERVICE FIELD field.
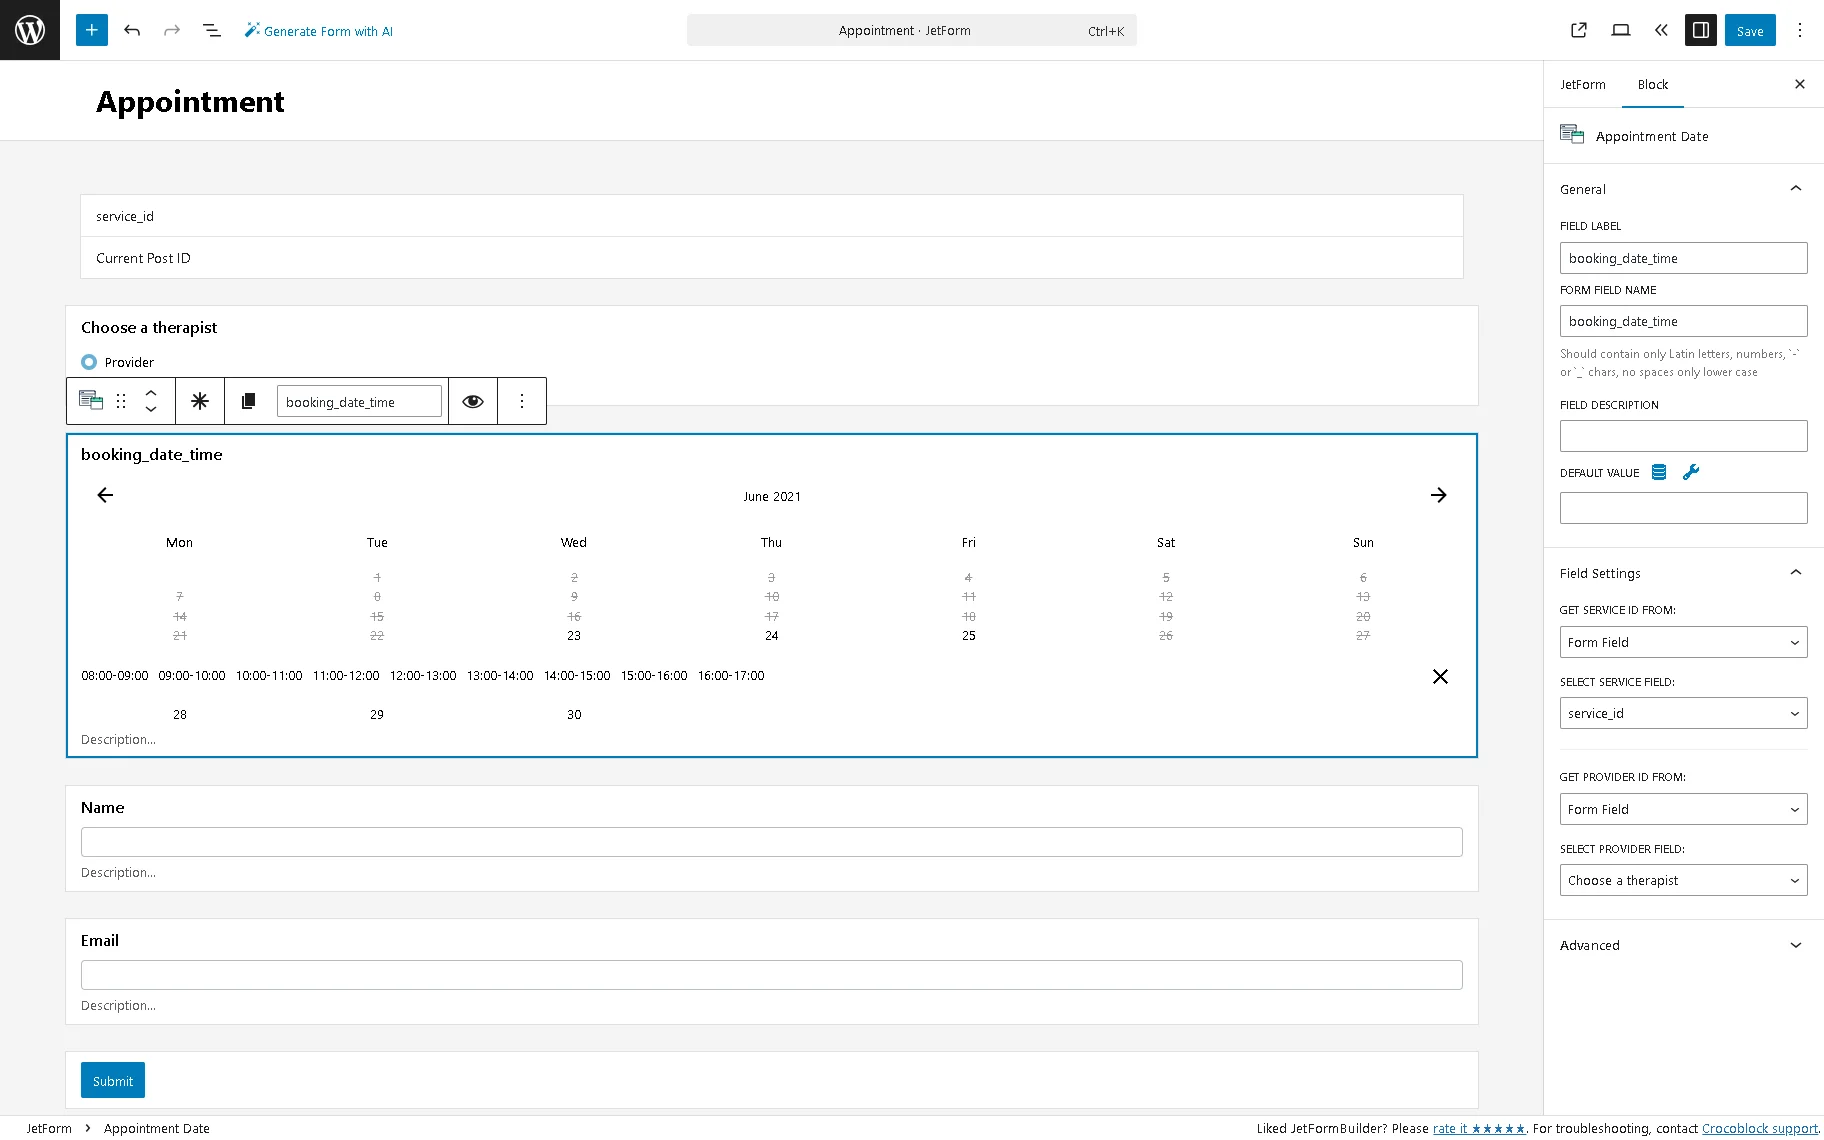
In the next step, insert the Appointment Date field. Then, add the FIELD LABEL (we type the “booking_date_time” text). After that, move to the Field Settings section and set the fields to take the Service and Provider IDs: first, select the “Form Field” GET SERVICE ID FROM and the “service_id” option (the option referring to the Hidden Field) in the newly appeared SELECT SERVICE FIELD field; second, choose the “Form Field” GET PROVIDER ID FROM and the “Choose a Therapist” option (the option referring to the Appointment Provider field) in the newly appeared SELECT SERVICE FIELD field. Next, add the Text Fields to enter the user’s contact data and the Submit Button.
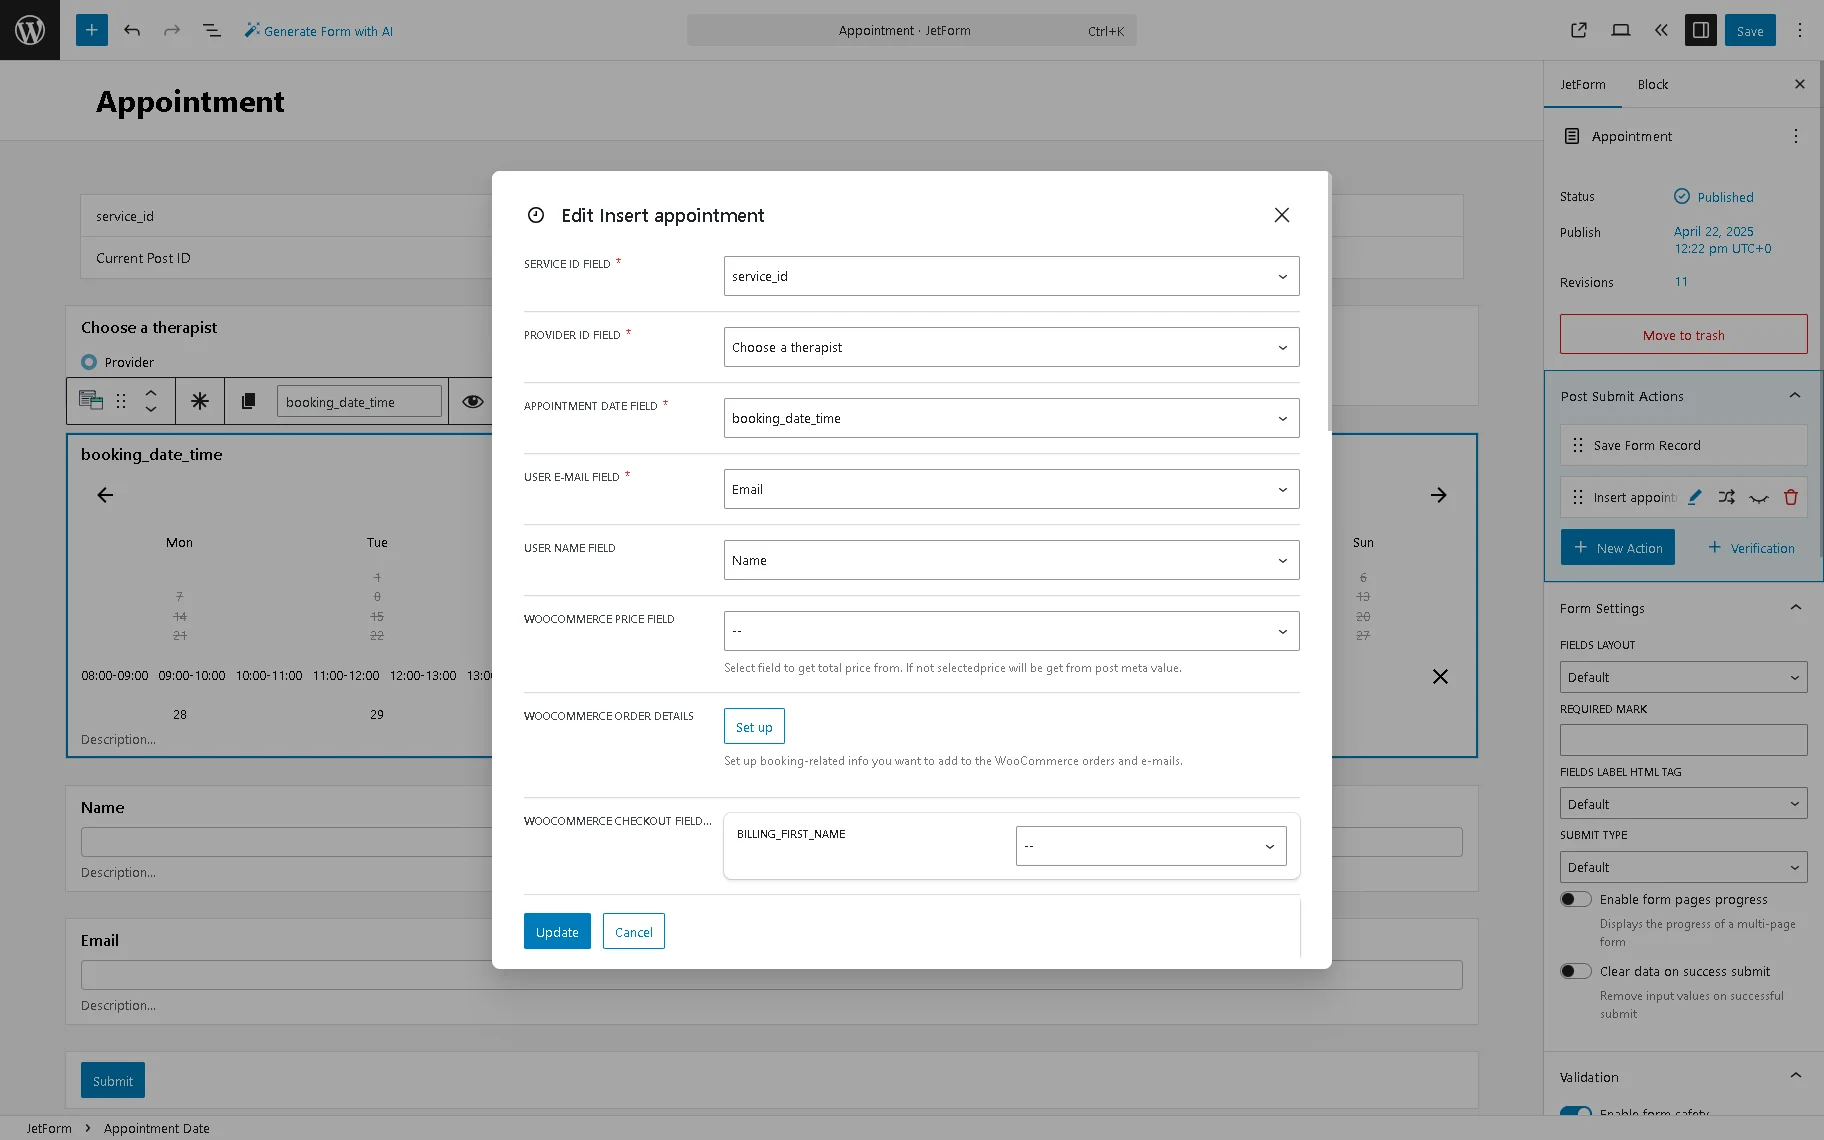
In the last stage, add the Post Submit Actions to the form. First, we insert the “Save Form Record” Post Submit Action. Second, we add the “Insert Appointment” Post Submit Action and specified the following settings in the newly appeared Edit Insert appointment pop-up: “service_id” option (the option referring to the Hidden Field) in the SERVICE ID FIELD, “Choose a Therapist” option (the option referring to the Appointment Provider field) in the PROVIDER ID FIELD, and the “booking_date_time” option (the option referring to the Appointment Date field) in the APPOINTMENT DATE FIELD. Finally, select the form fields in the USER EMAIL FIELD and other non-required fields.
For an in-depth understanding of how to configure different types of appointment forms, read the How to Build an Appointment Form tutorial.
The last Post Submit Action we configure is the “Redirect to Page” Post Submit Action, where we specified the previously created checkout page.
Finally, add a single page to place the form. Find the JetForm widget and drag-n-drop it to the page. Select the form you have created previously.
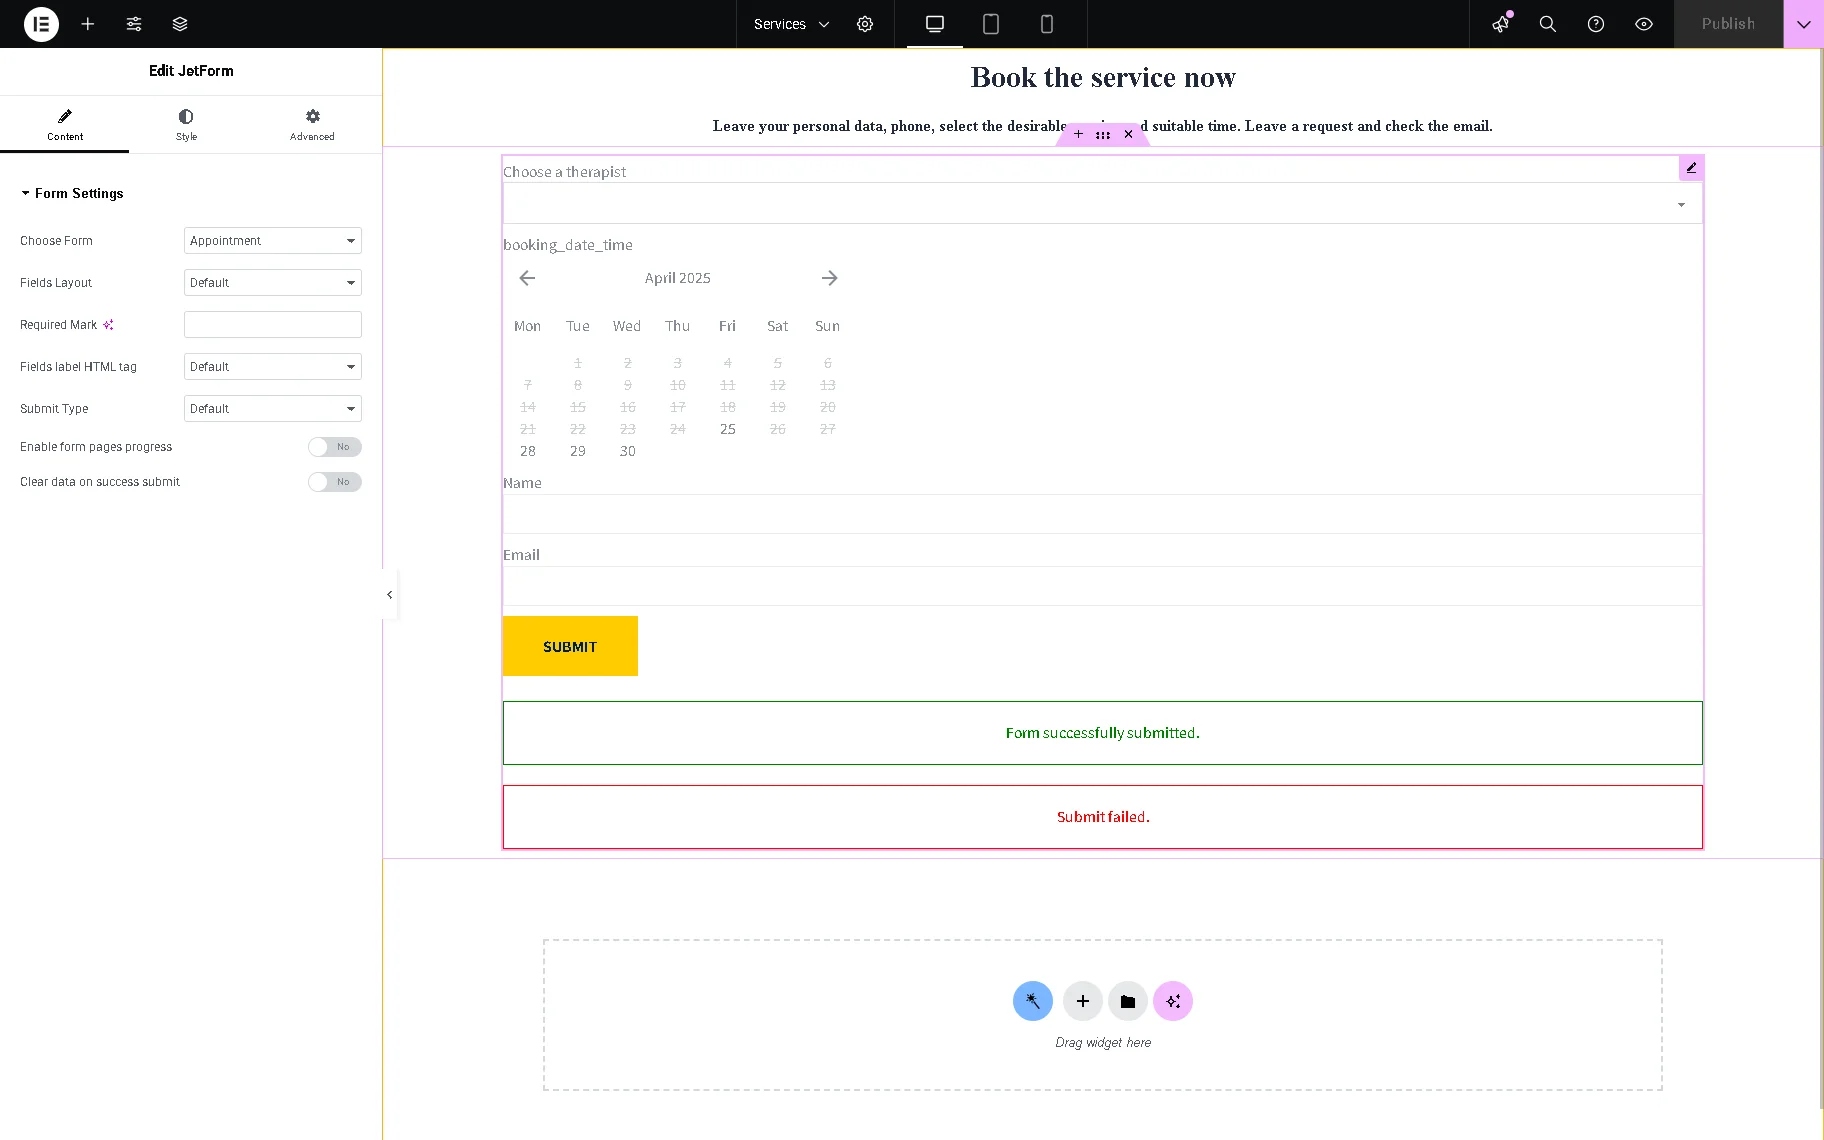
Press the “Update” button.
Test the Flow
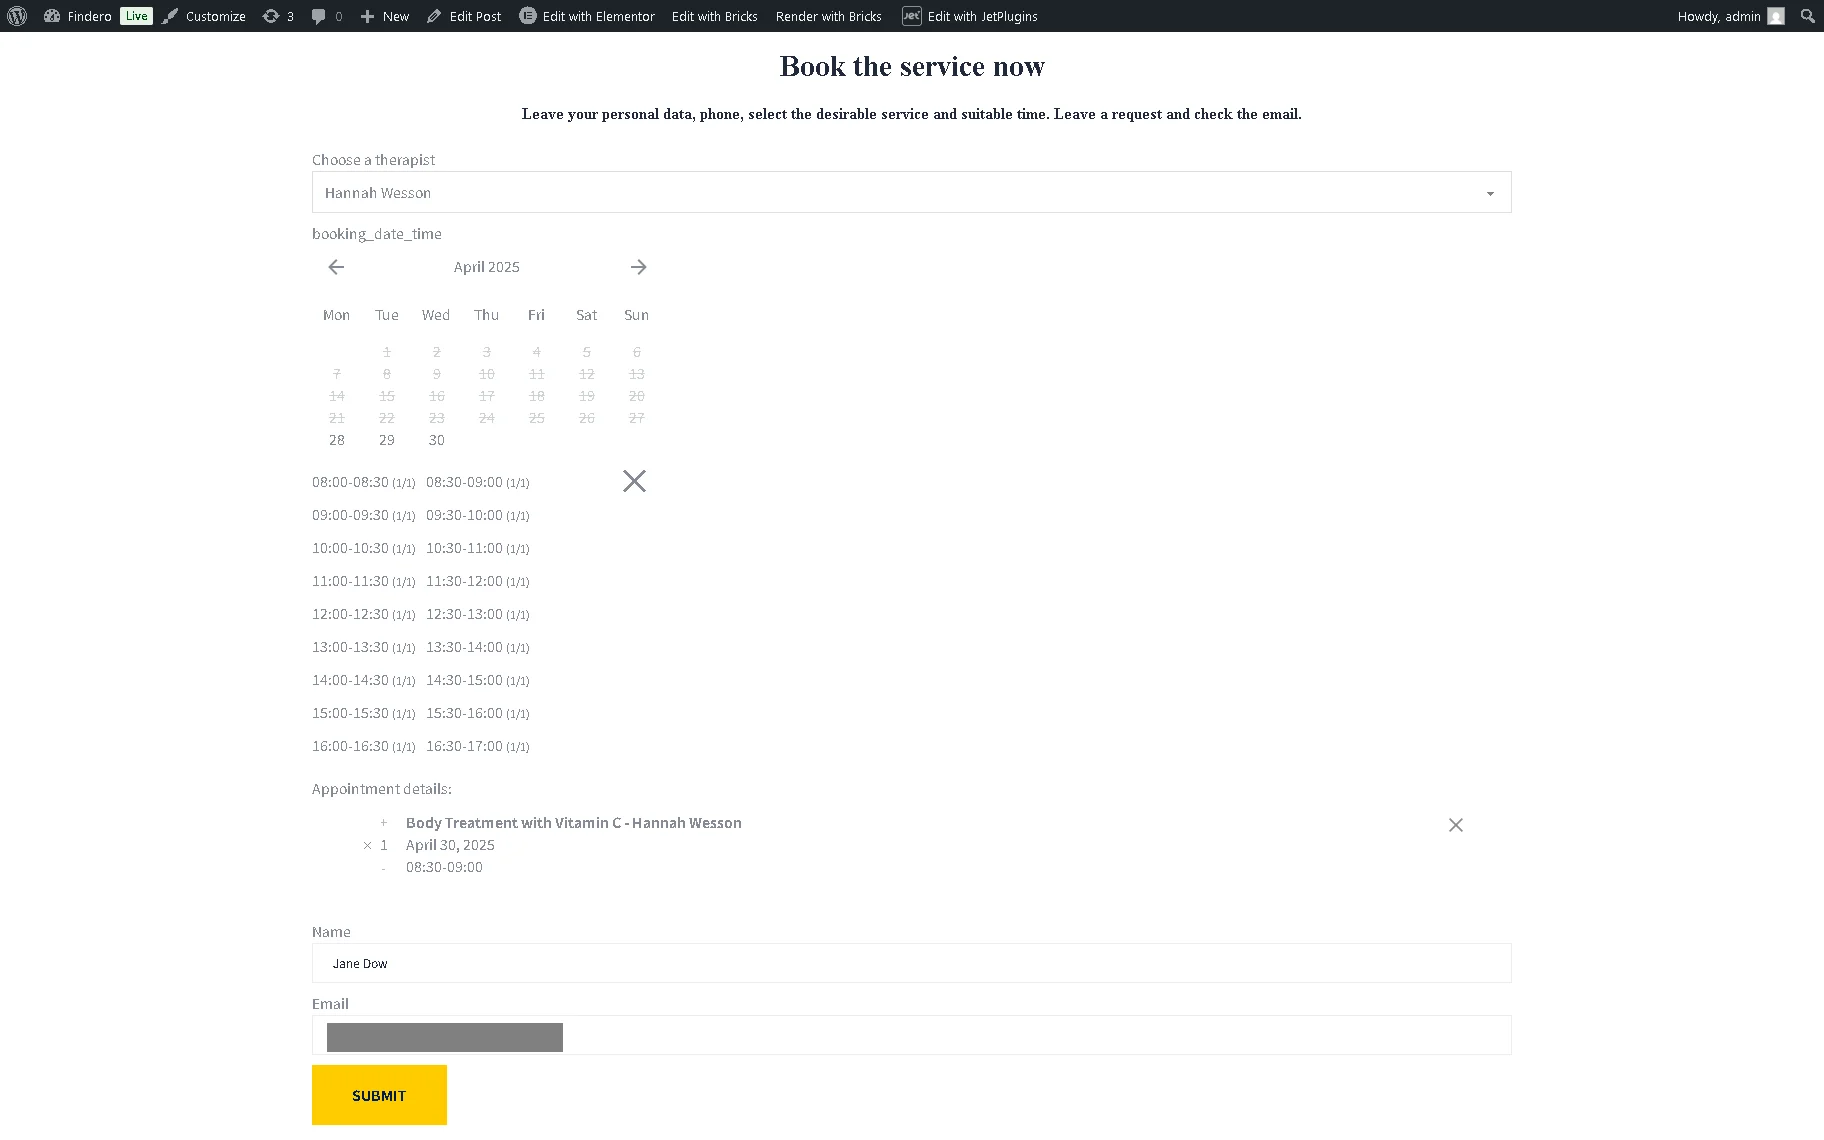
Open the page with the form, navigate to the front end, and fill out the form. First, select the therapist and the required appointment date. Then, click the needed time slot in the newly appeared time slot list. Finally, fill out the contact data.
After that, you will be redirected to the checkout page.
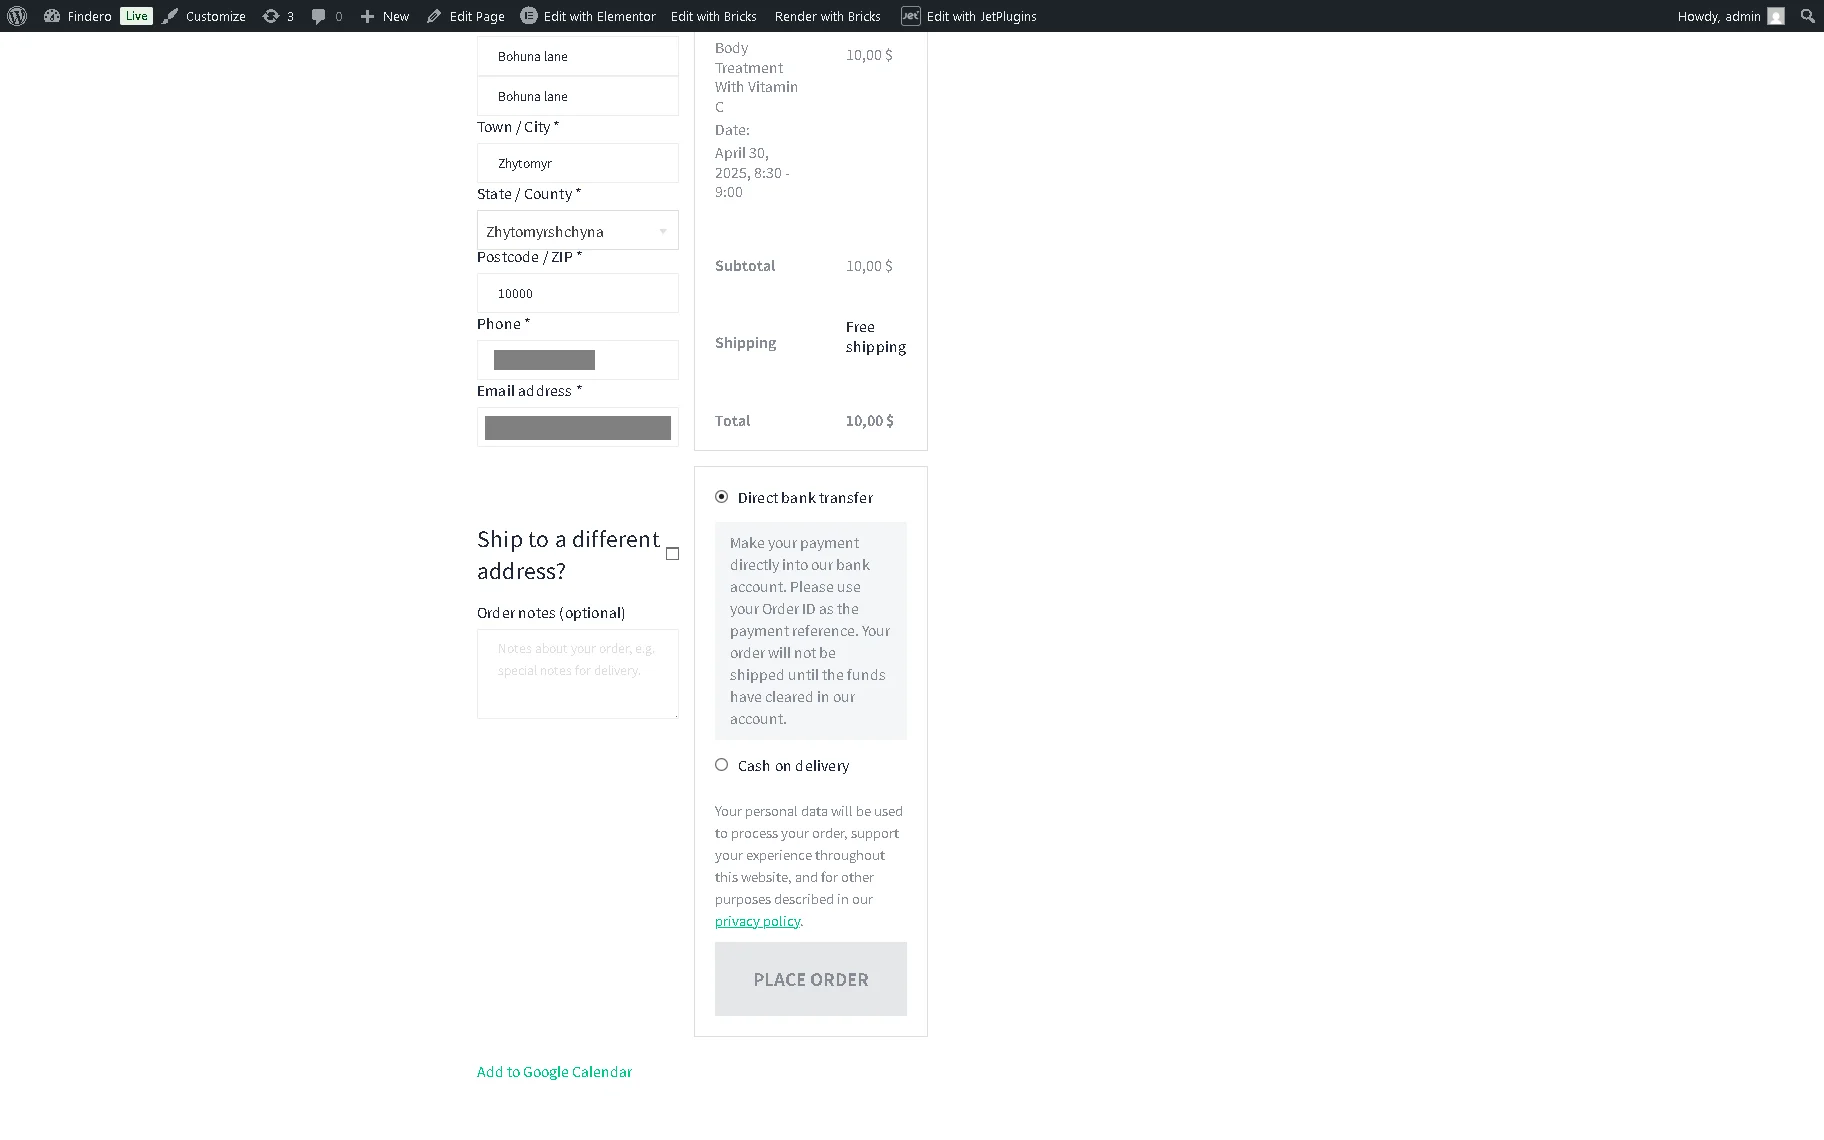
Press the “Add to Google Calendar” link to be redirected to your Google Calendar.
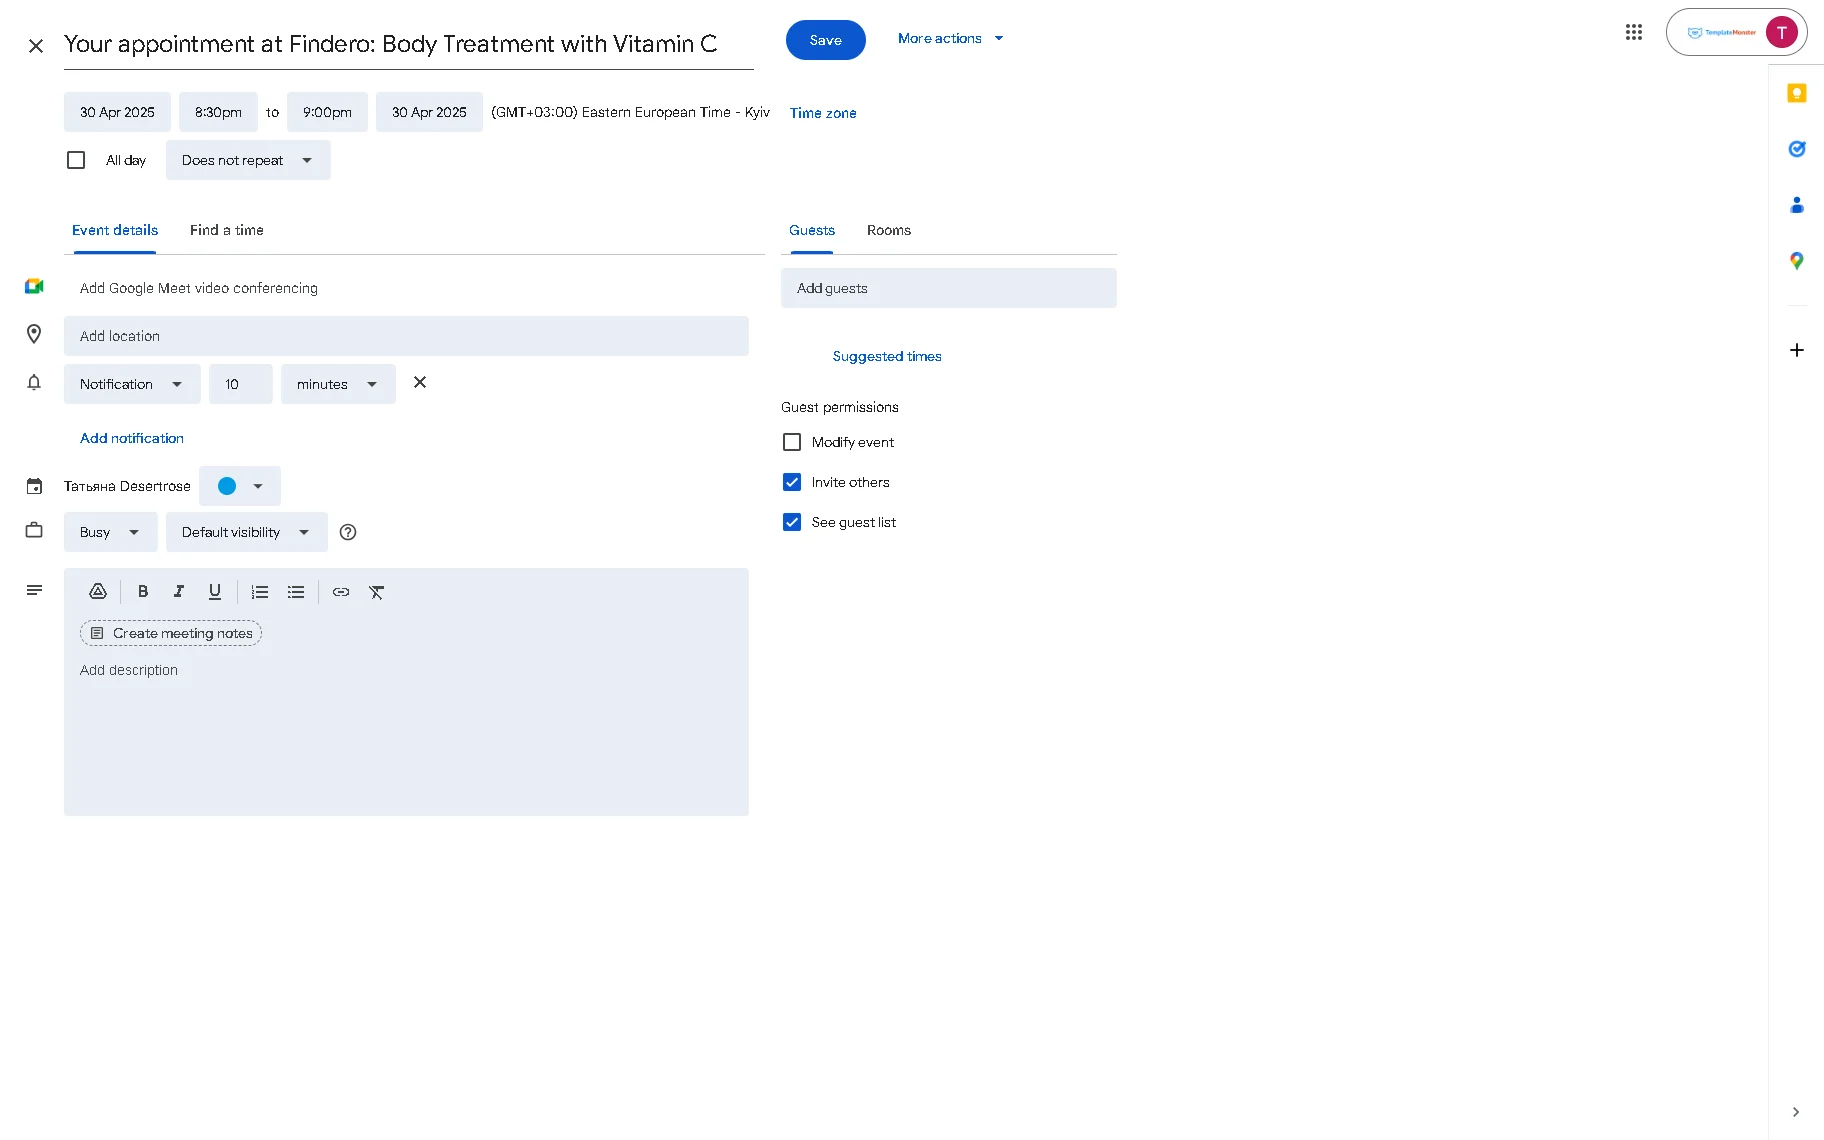
That’s it. Now you know how to add an appointment to a user’s Google calendar via the Dynamic Link widget of the JetEngine plugin for WordPress.