How to Configure the REST API Endpoint for Custom Query
From this tutorial, you will learn how to configure the REST API endpoint for custom queries and how to transfer the queried CCT items from one website to another with the JetEngine WordPress plugin.
Before you start, check the tutorial requirements:
- Elementor (Free version), or WordPress Block editor (Gutenberg), or Bricks
- JetEngine plugin installed and activated
REST API is a programming interface that allows you to create connections between your website and another website or app. With the Register Rest API Endpoint option for the JetEngine Query Builder feature, you can transfer the queried data.
As an example, we will create a Custom Content Type query to transfer queried events to another WordPress website.
Prepare a Custom Content Type on the Main Website
On the main website, go to the WordPress Dashboard > JetEngine > JetEngine tab and make sure to enable the Custom Content Type toggle.

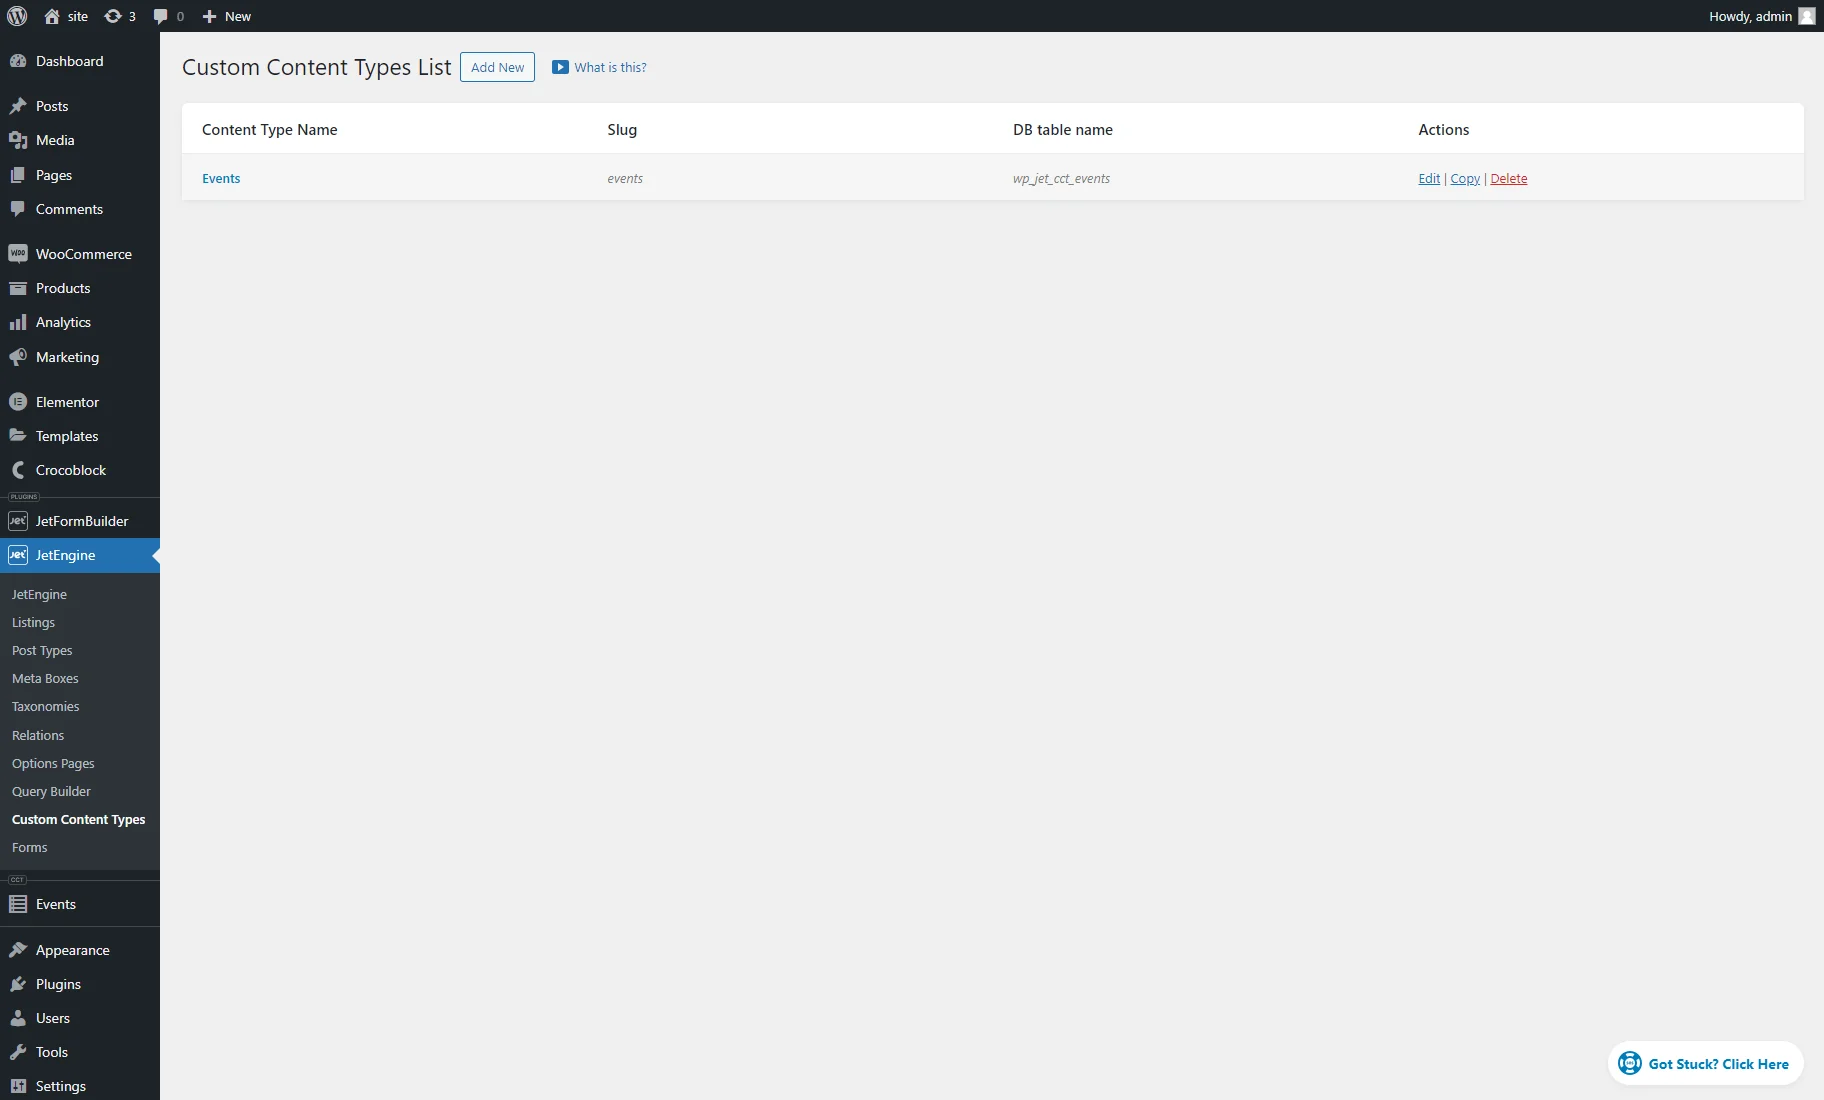
Then, head to WordPress Dashboard > JetEngine > Custom Content Types and hit the “Add New” button or click to edit the created CCT, which items you want to transfer.
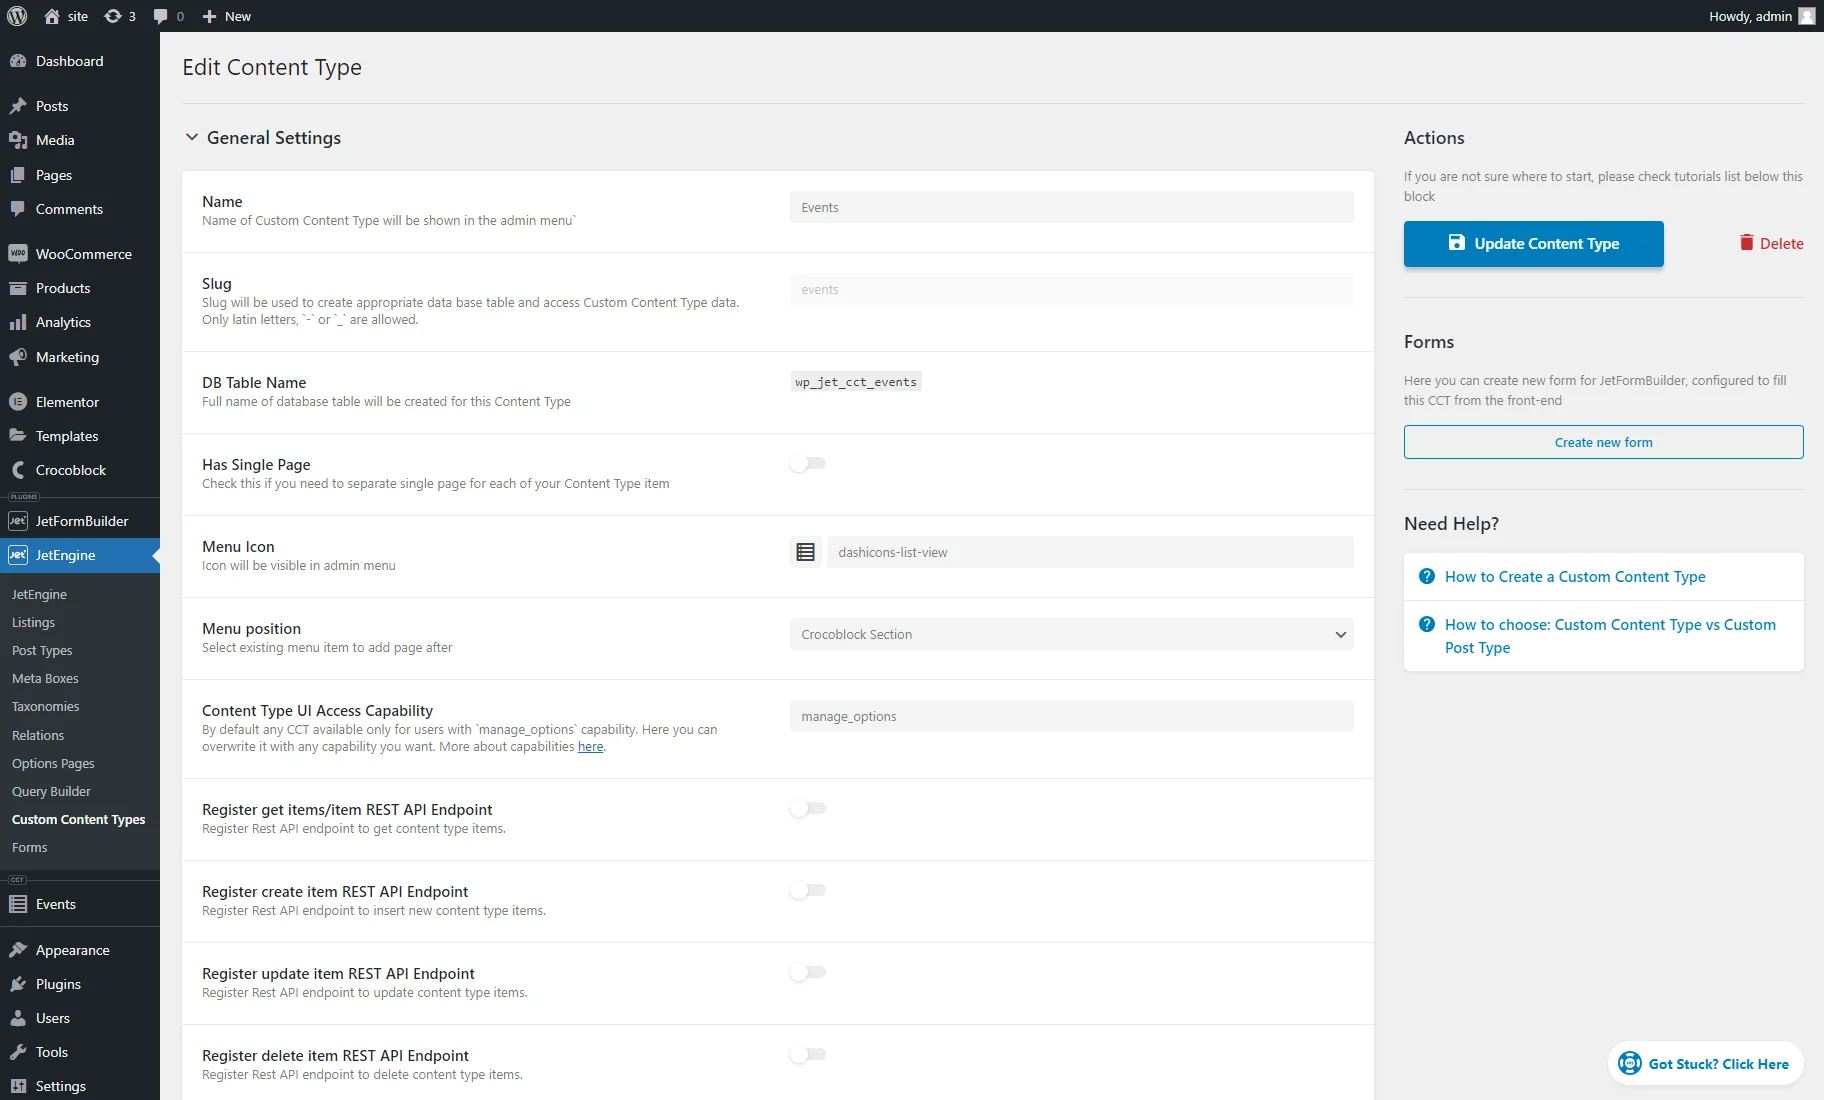
Such settings are required in the General Settings section: enter the Name, and the Slug will be filled automatically from the Name field. You can change the Slug while creating the CCT, but use only Latin letters here and ensure no spaces: use hyphens or underscores instead.
Other settings are optional for transferring the CCT items via REST API. Read more about them in the Custom Content Type (CCT) Overview.
In the Fields settings tab, we added the following meta fields: the Name “Text” field, Date “Date” field, and Image “Media” field.
The “Media” field requires more attention.

Adjust all desired settings to the CCT and press the “Add/Update Content Type” button.
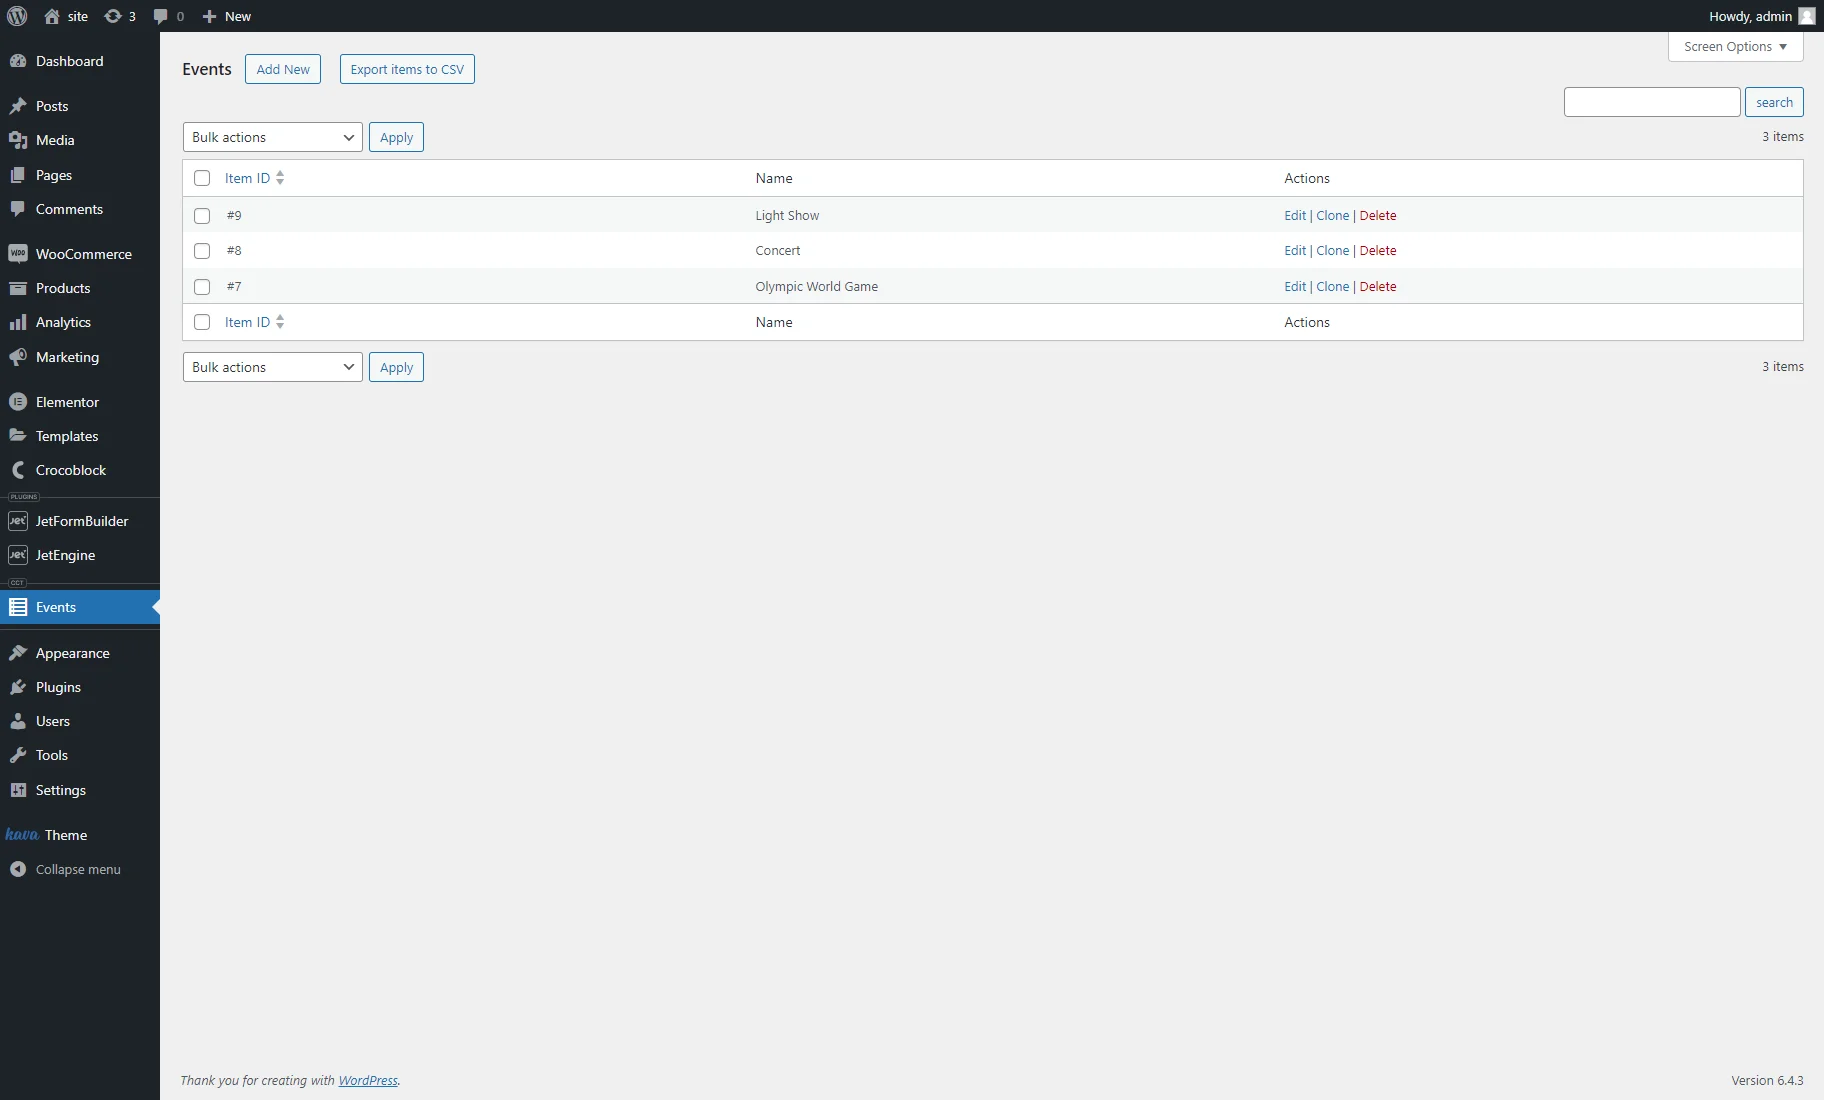
Then, proceed to the CCT menu tab on the WordPress Dashboard and create several CCT items by hitting the “Add New” button and filling in the meta fields.
Create a Query on the Main Website
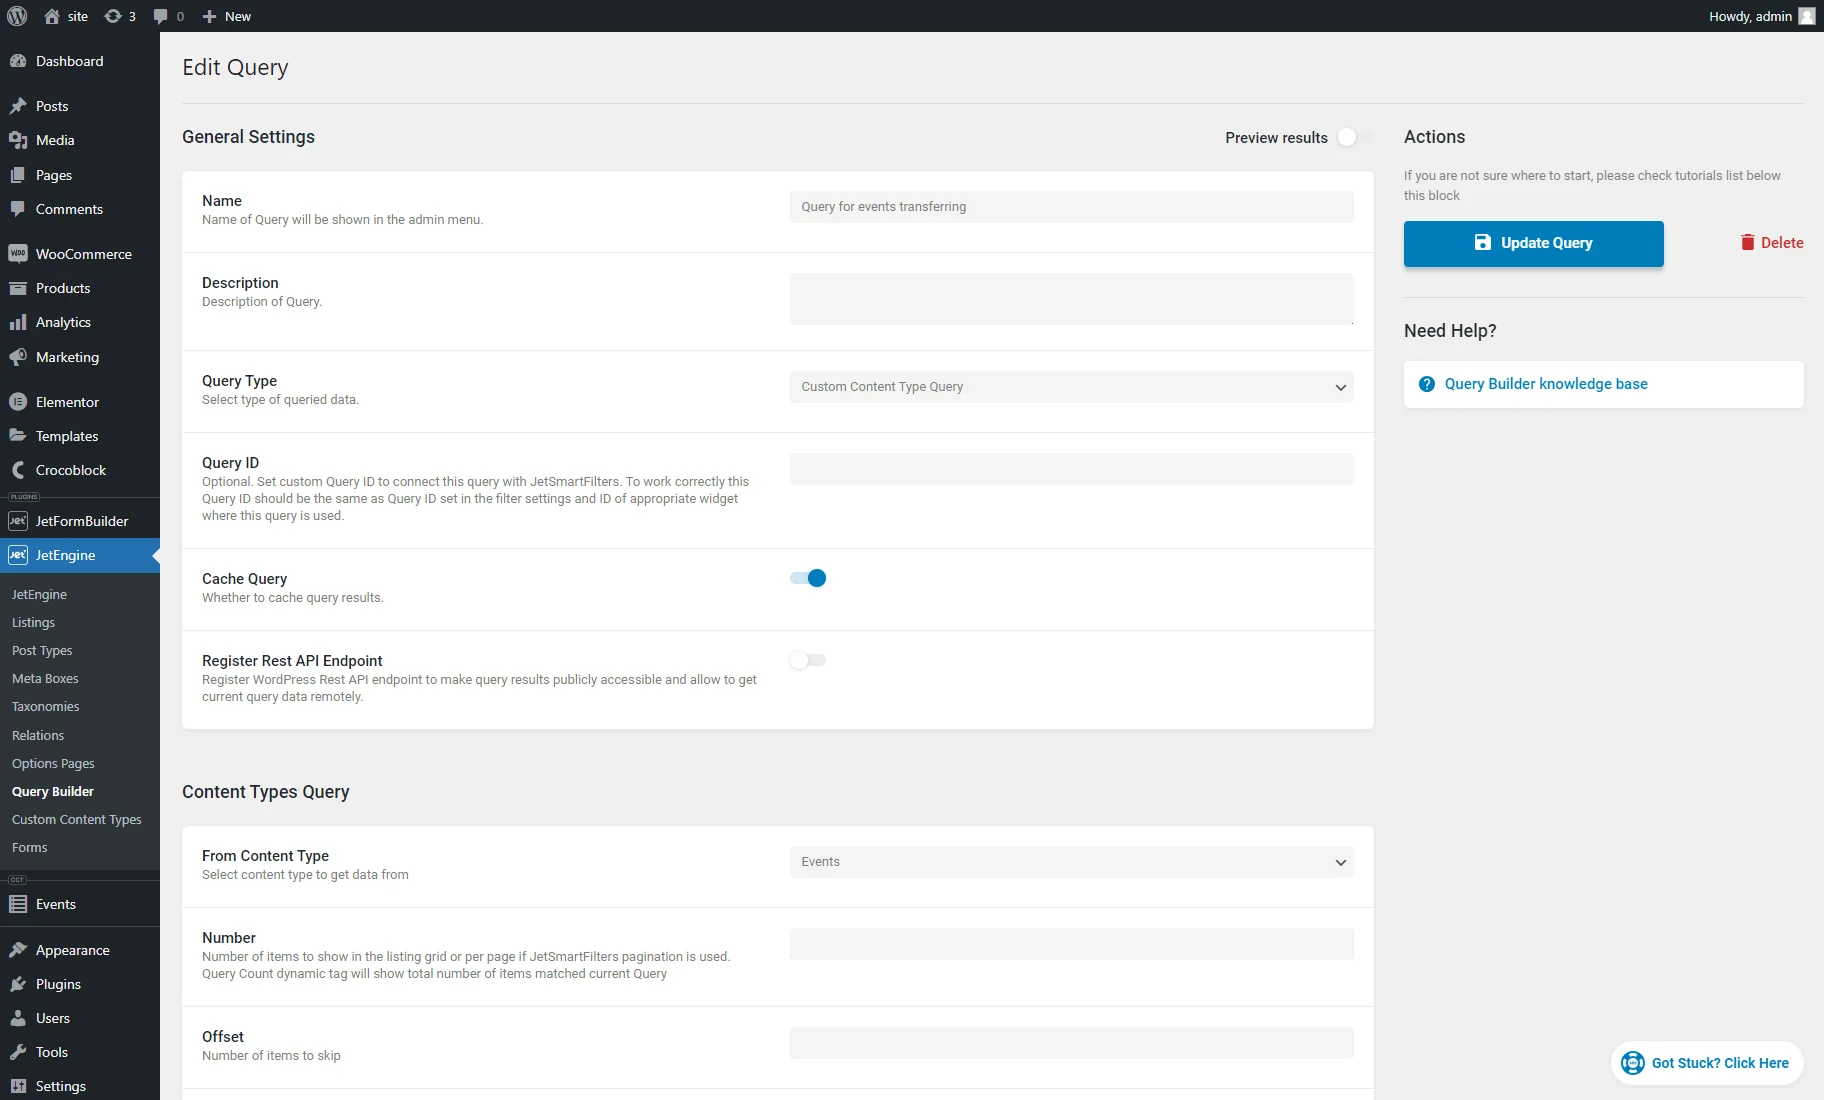
Go to the WordPress Dashboard > JetEngine > Query Builder tab and hit the “Add New” button.
In the General Settings section, enter the query Name and select the “Custom Content Type Query” Query Type.
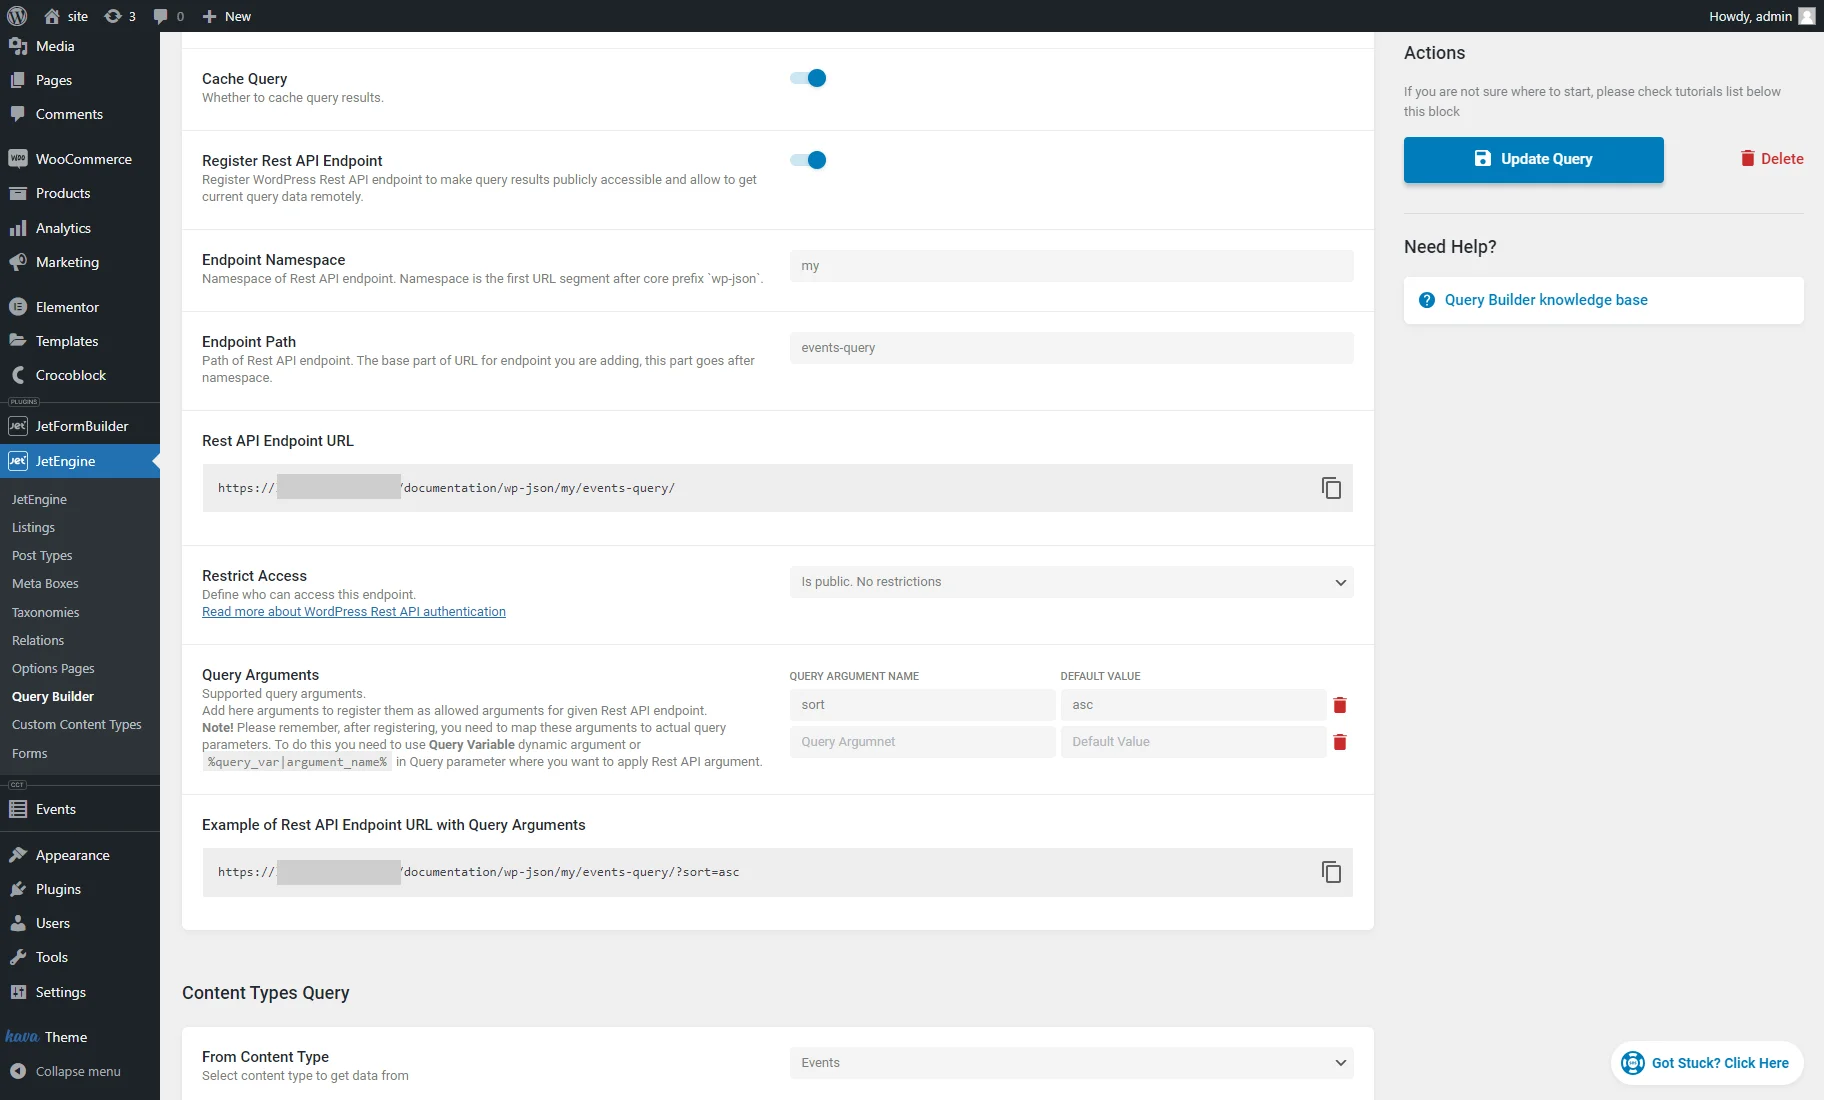
Then, enable the Register Rest API Endpoint toggle to unfold a section with more settings for the endpoint registration.
A detailed description of all options can be found in the Register Rest API Endpoint chapter.
You can set suitable Endpoint Namespace and Endpoint Path to improve SEO for your WordPress website.
The Restrict Access for the endpoint can be set as well. You can configure the public access or entry only for users with certain roles or capacities.
You can adjust the Query Arguments to customize the content returned by a web server. For instance, we entered a “sort” QUERY ARGUMENT NAME and “asc” DEFAULT VALUE to sort items (events) by date from the soonest to the latest.
In the Content Types Query settings section, select the needed CCT from the From Content Type drop-down list.
The registered arguments should be mapped to the query settings.
In our case, we hit the “Add new sorting parameter” button in the Order & Order By section. We set the Order By “Date,” the “From lowest to highest (1, 2, 3; a, b, c)” Order, and the “Date” Type to sort items (events) by date from the soonest to the latest.
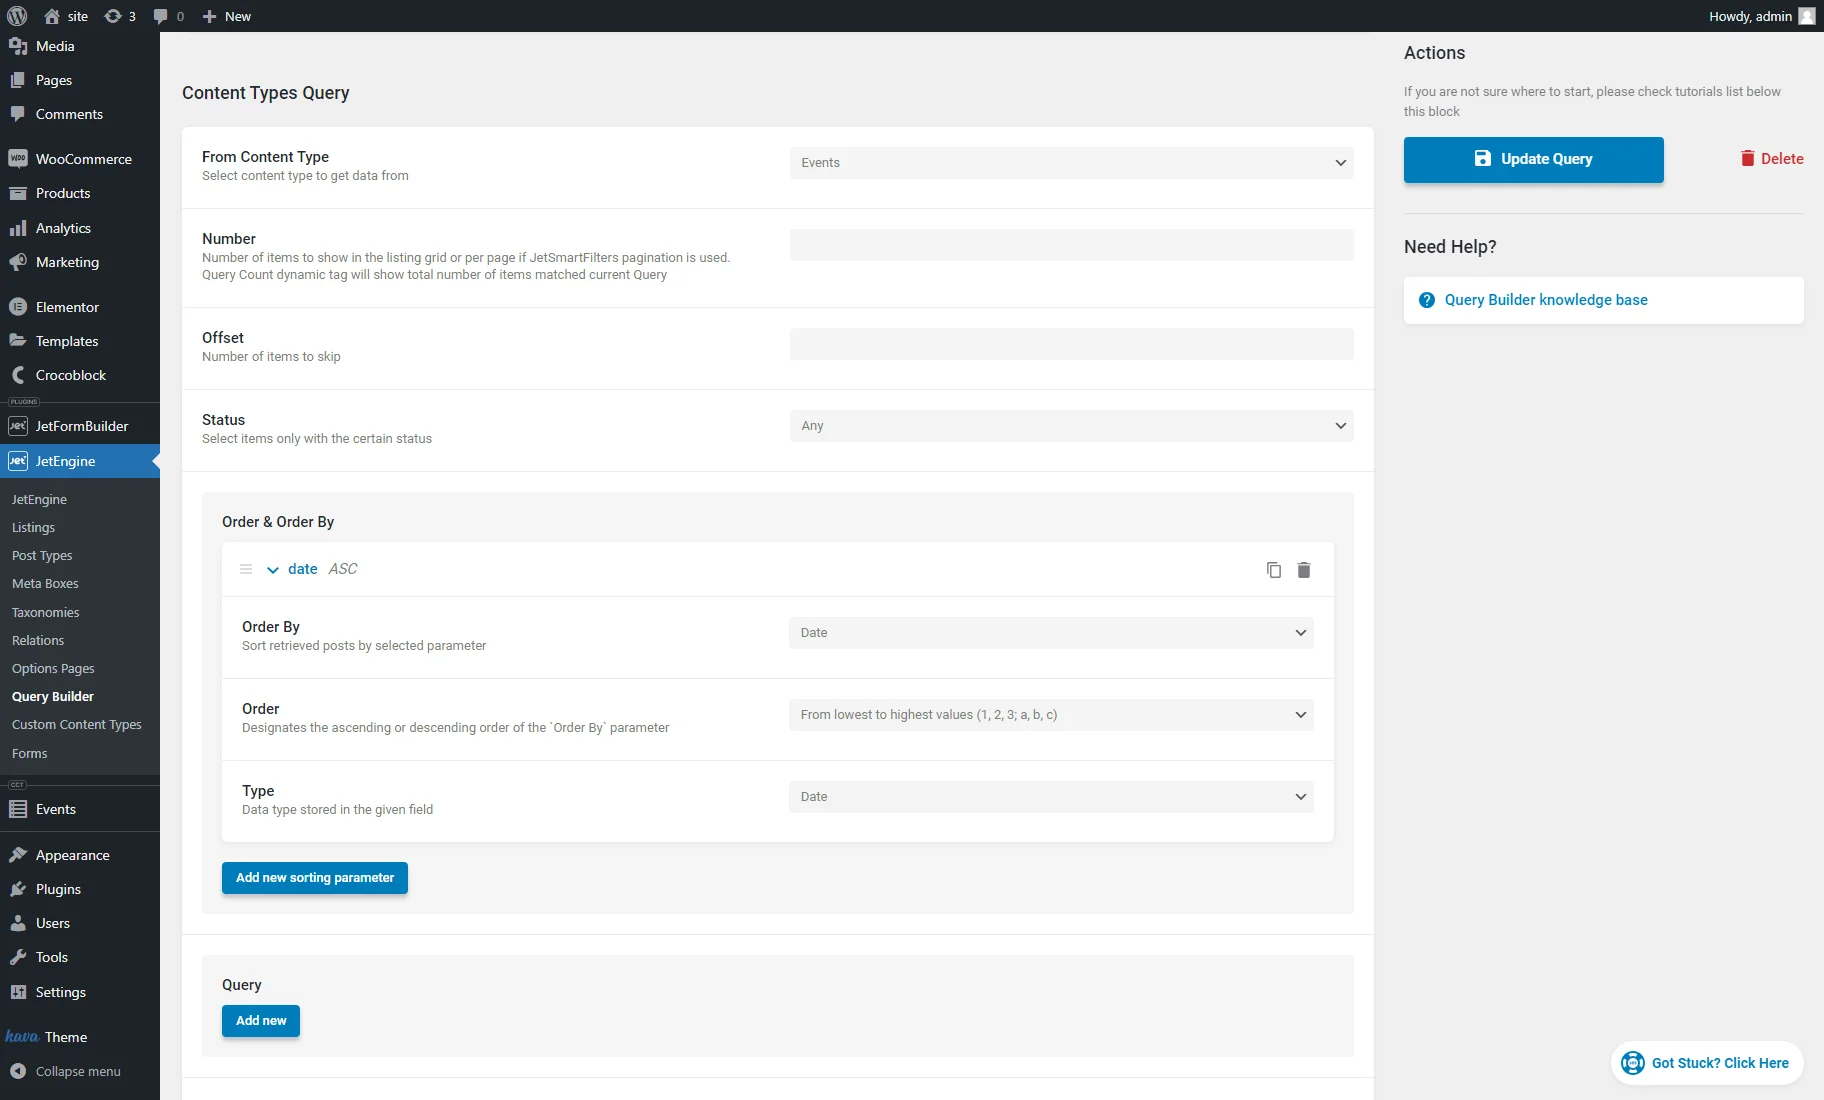
Adjust other query settings according to your needs and hit the “Add/Update Query” button.
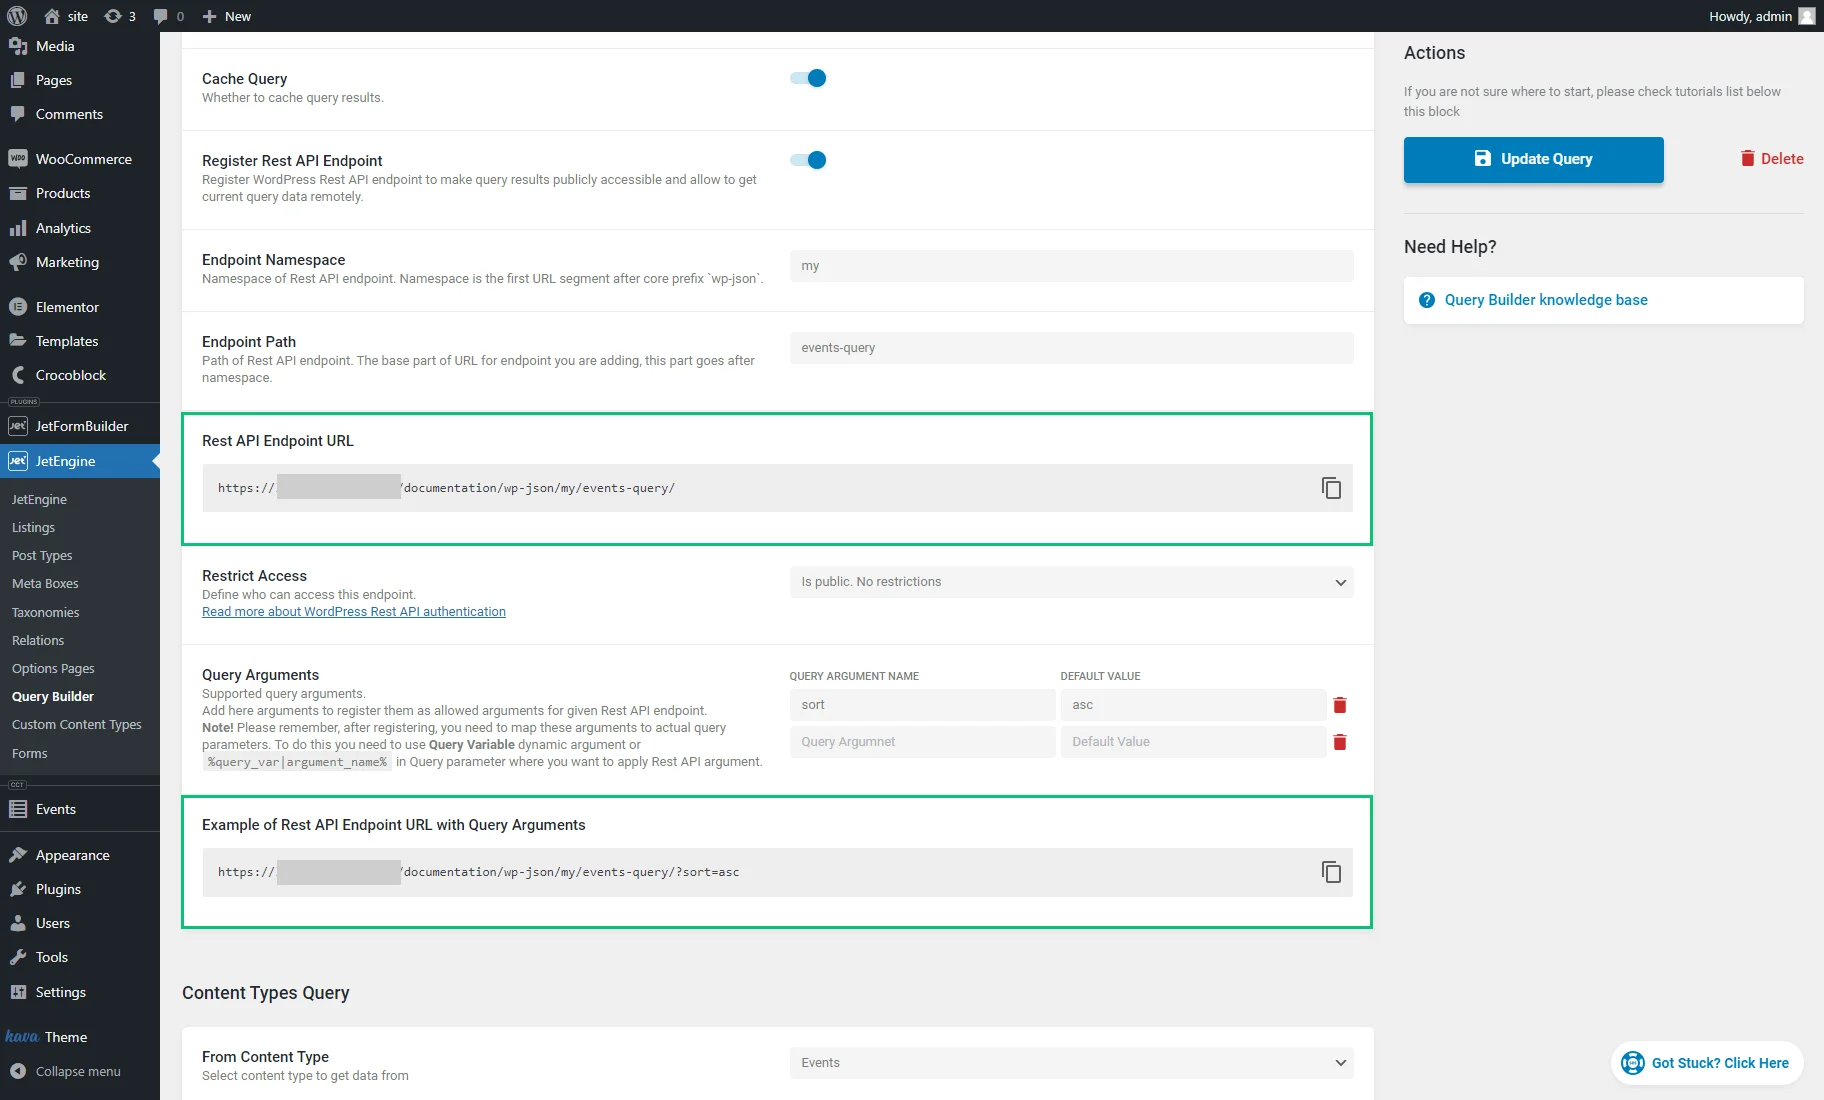
Copy the Rest API Endpoint URL or Example of Rest API Endpoint URL with Query Arguments if you add query arguments to the endpoint.
Add the REST API Endpoint URL to the Second Website
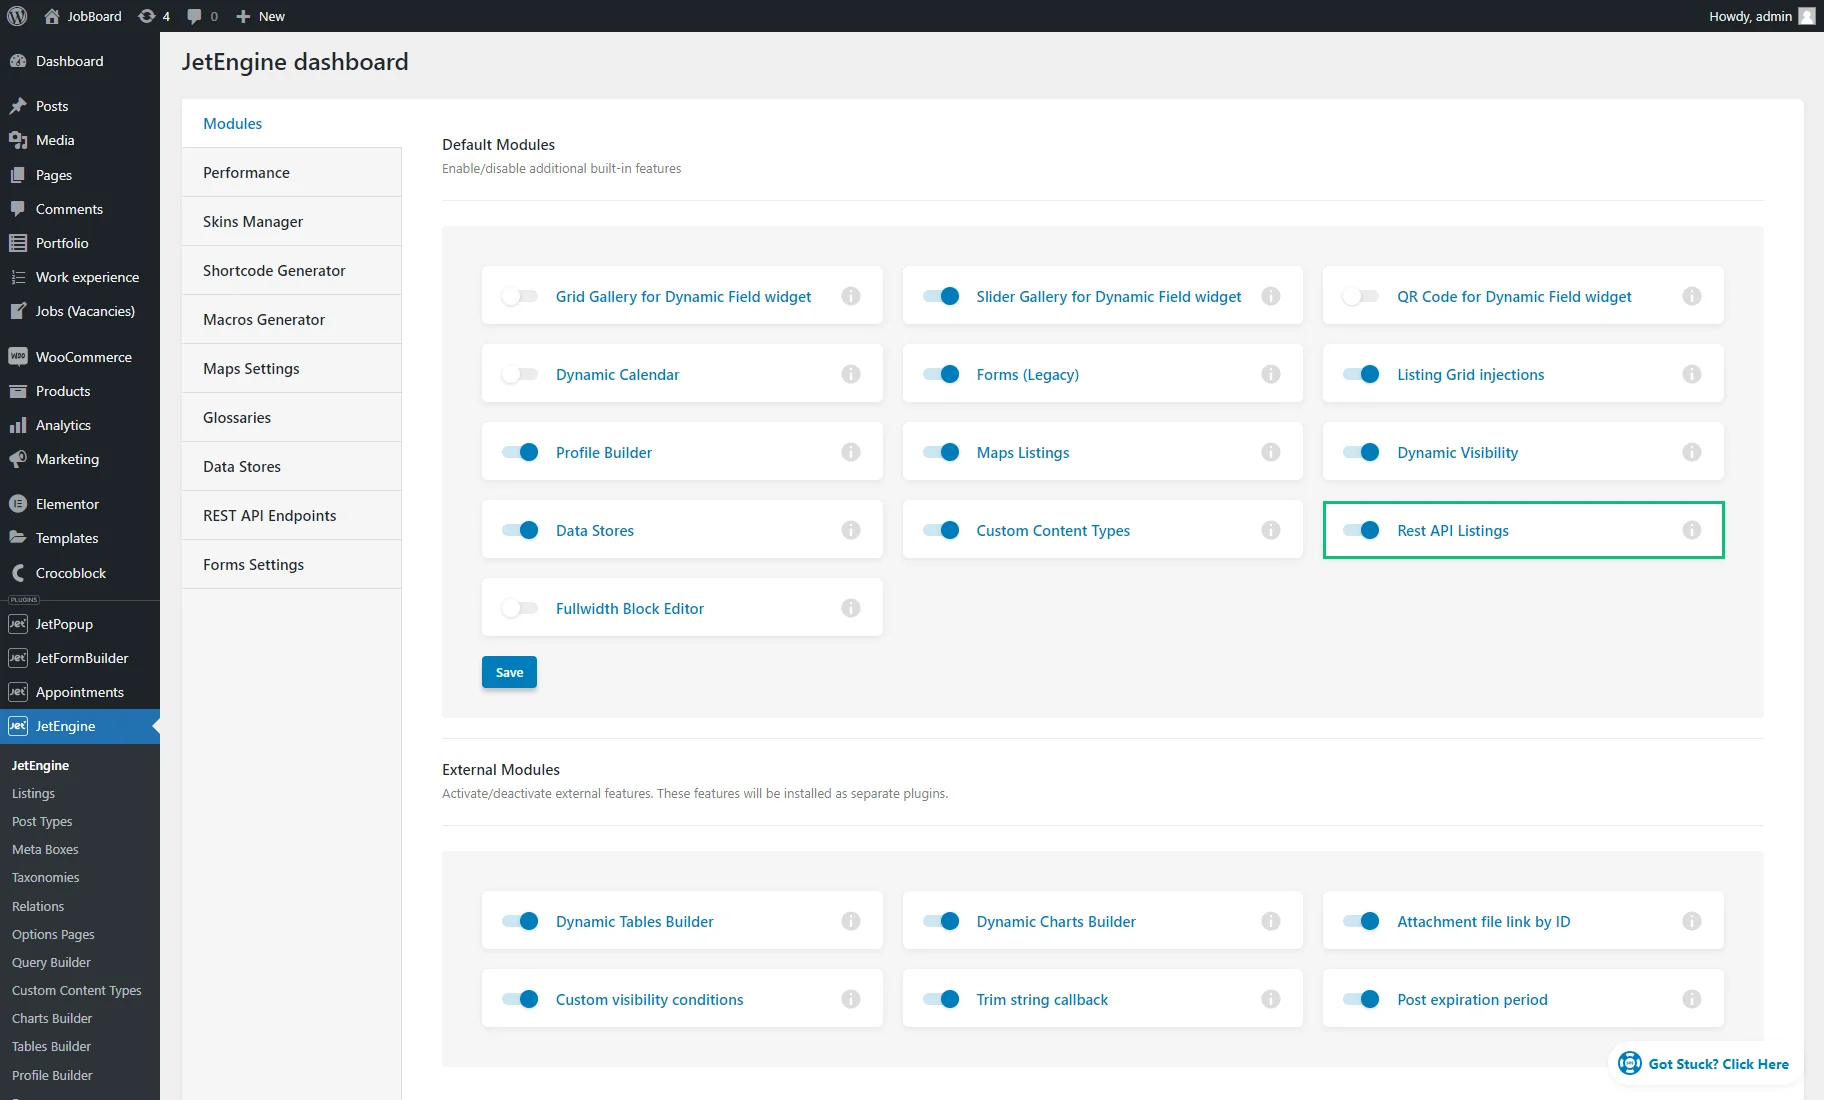
On the second website, follow the WordPress Dashboard > JetEngine > JetEngine path on the second website where you want to transfer the queried CCT items and turn on the Rest API Listings toggle. Press the “Save” button and wait until the page reloading is complete.
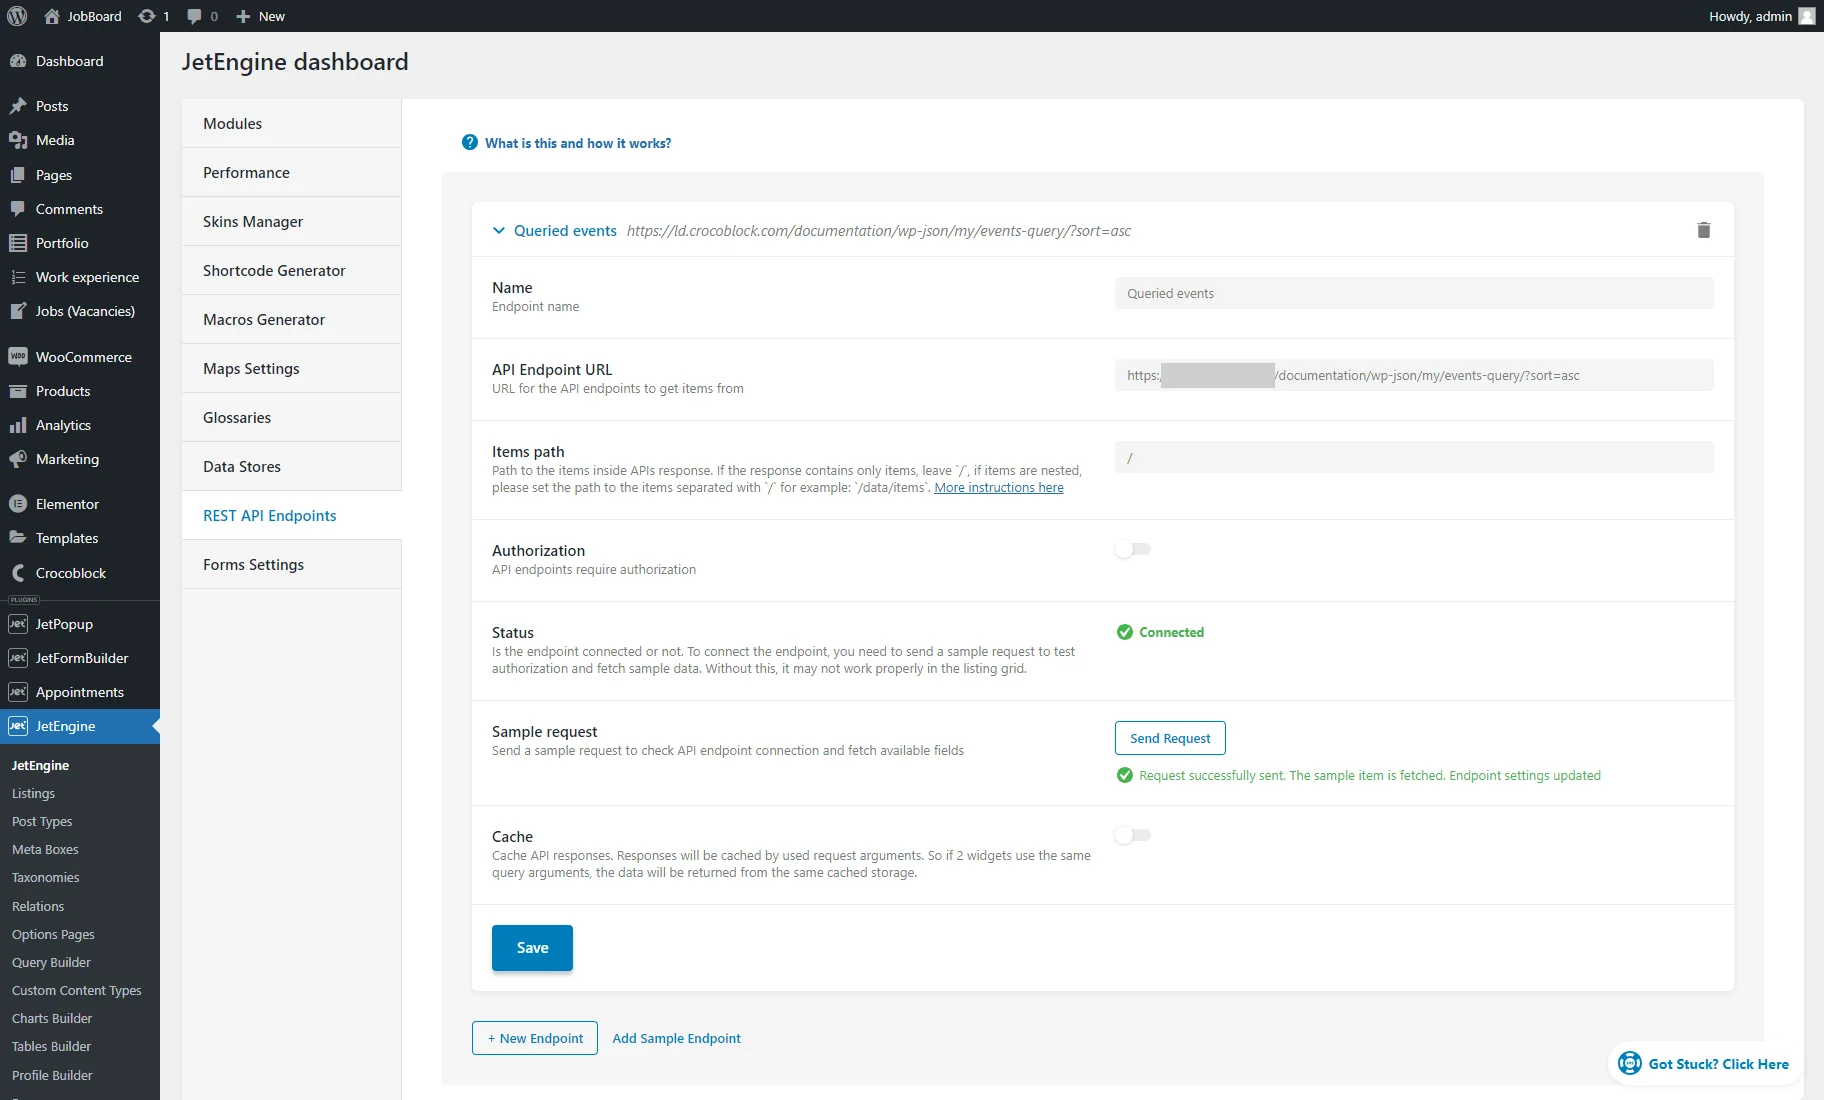
After that, the Rest API Endpoints tab will be available. Open it and click the “+ New Endpoint” button.
Type the endpoint Name (optional), enter the copied URL into the API Endpoint URL field, the “/” Items path, and set the Authorization if needed.
All settings are described in the REST API Module chapter.
Then, hit the “Send Request” button to send a sample request to check the API endpoint connection and fetch available fields. You will obtain the “Connected” Status if all progress without issue.
Finally, push the “Save” button.
Create a Listing Template for the REST API Endpoint
On the second website, head to WordPress Dashboard > JetEngine > Listings and hit the “Add New” button.
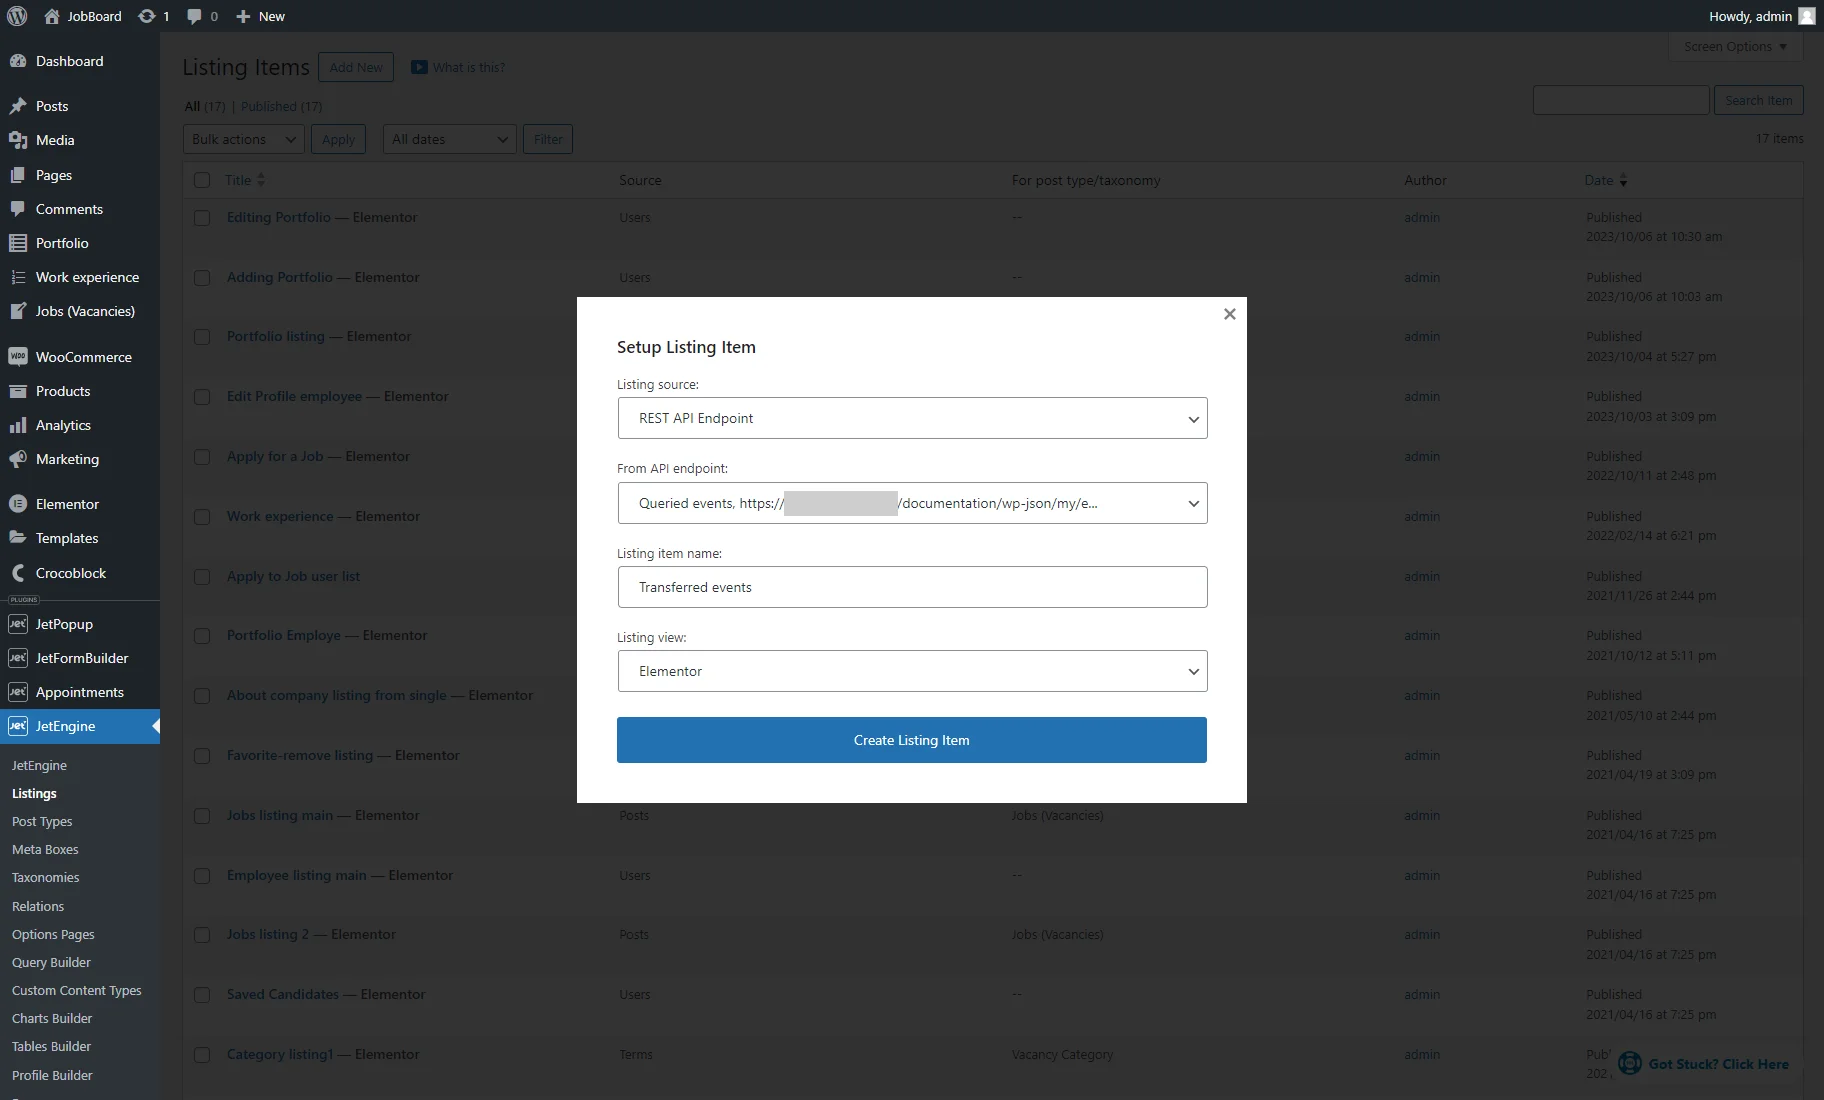
Select the “REST API Endpoint” Listing source and choose the recently added endpoint from the From API endpoint drop-down menu. Type the Listing item name (optional) and set one of the Listing views (it may be “Elementor,” “Blocks (Gutenberg),” or “Bricks”). For example, we chose the Elementor editor.
Lastly, hit the “Create Listing Item” button.
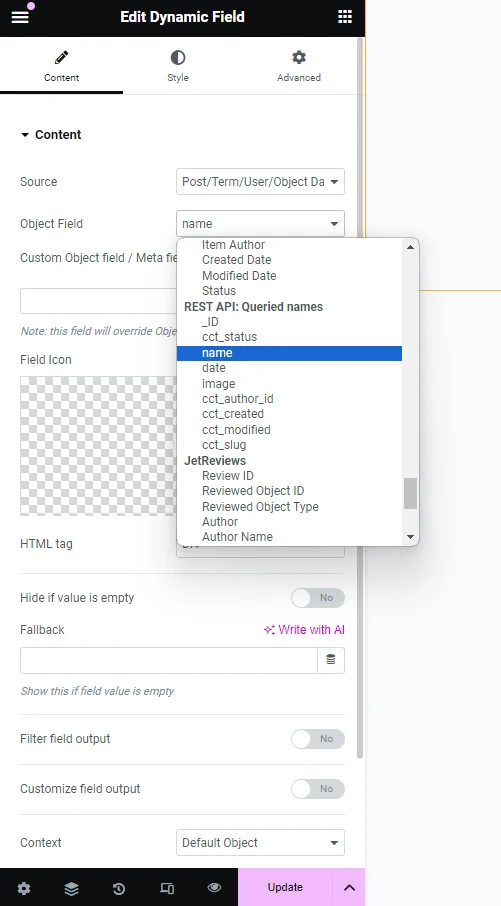
On the editing page, place the Dynamic Field widget. Keep the “Post/Term/User/Object Data” Source. In the Object Field drop-down menu, scroll down to the REST API section and select the needed meta field which data you want to display.
First, we picked the “name” meta field.
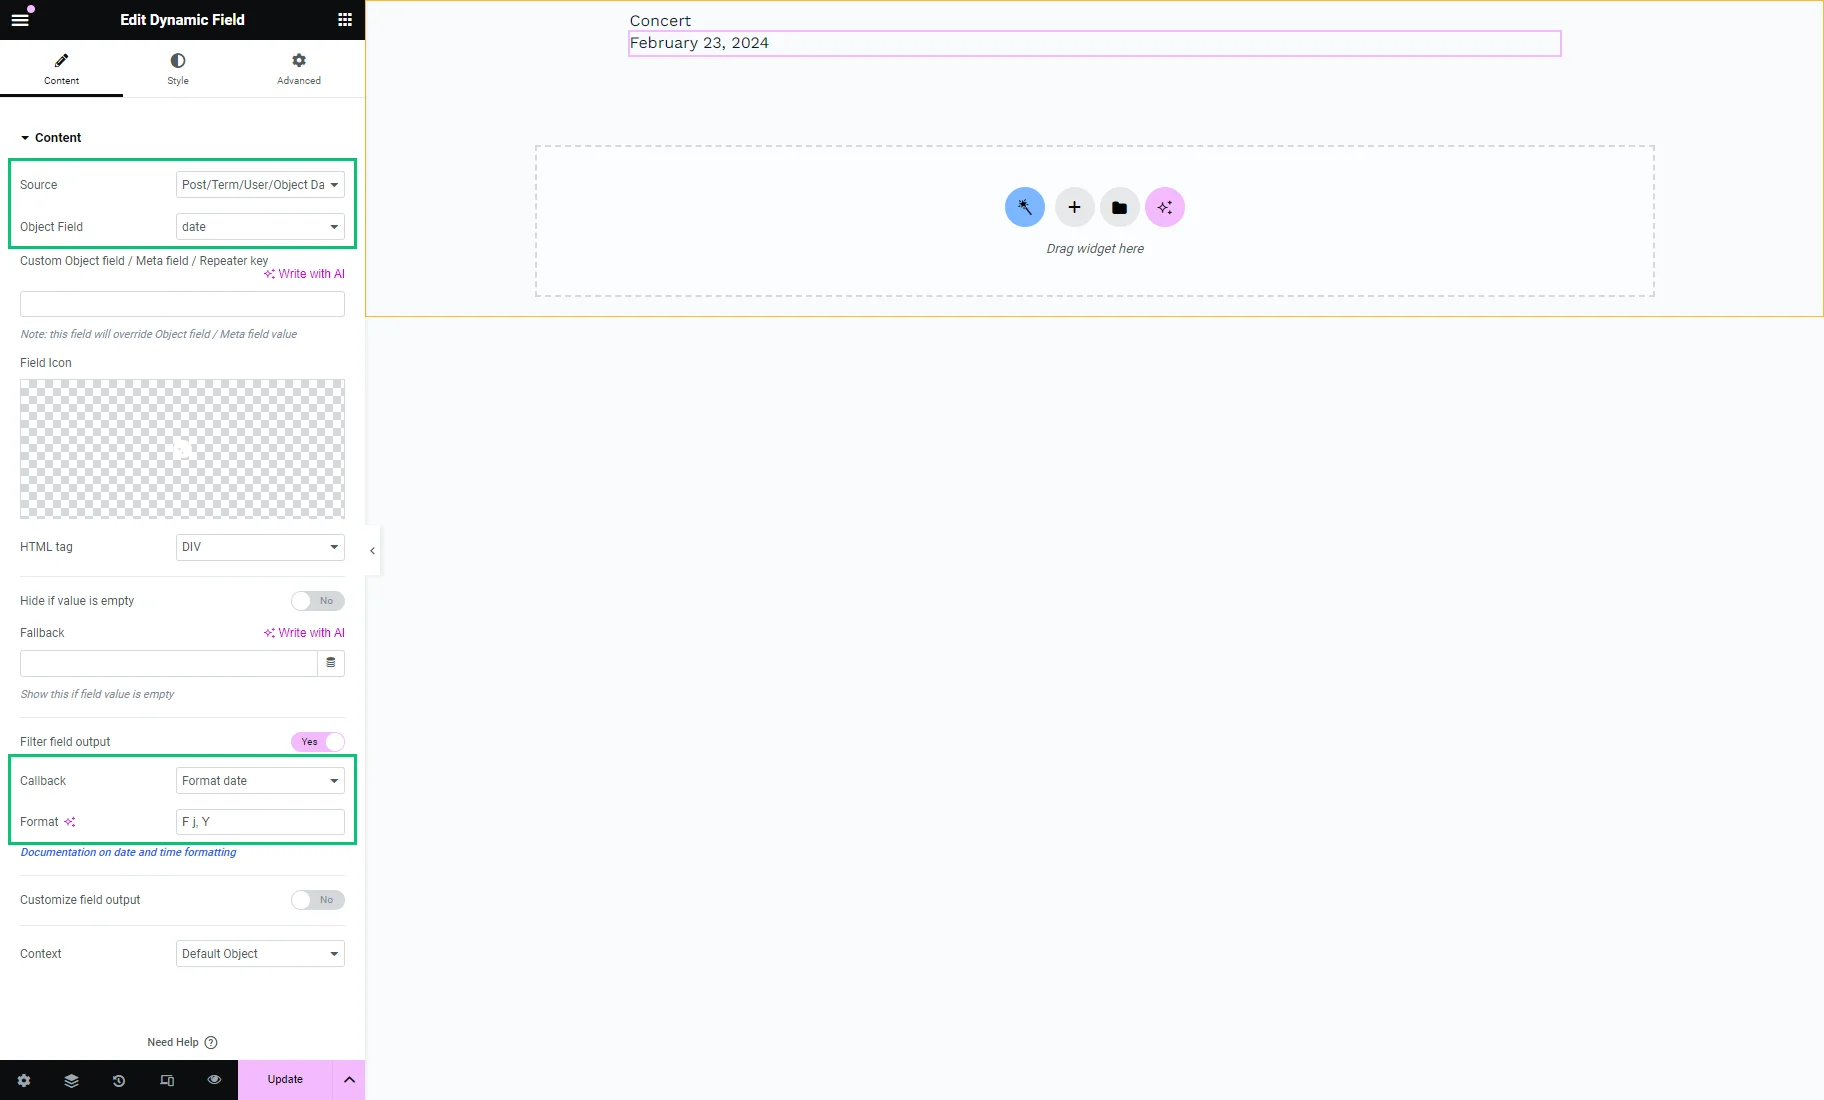
Then, we duplicated the widget and chose the “date” meta field. For the “Date” meta field types, you can enable the Filter field output toggle and pick the “Format date” Callback to customize the date format.
Read about the Customizing the Time and Date Format.
Learn more about the Dynamic Field Callbacks.
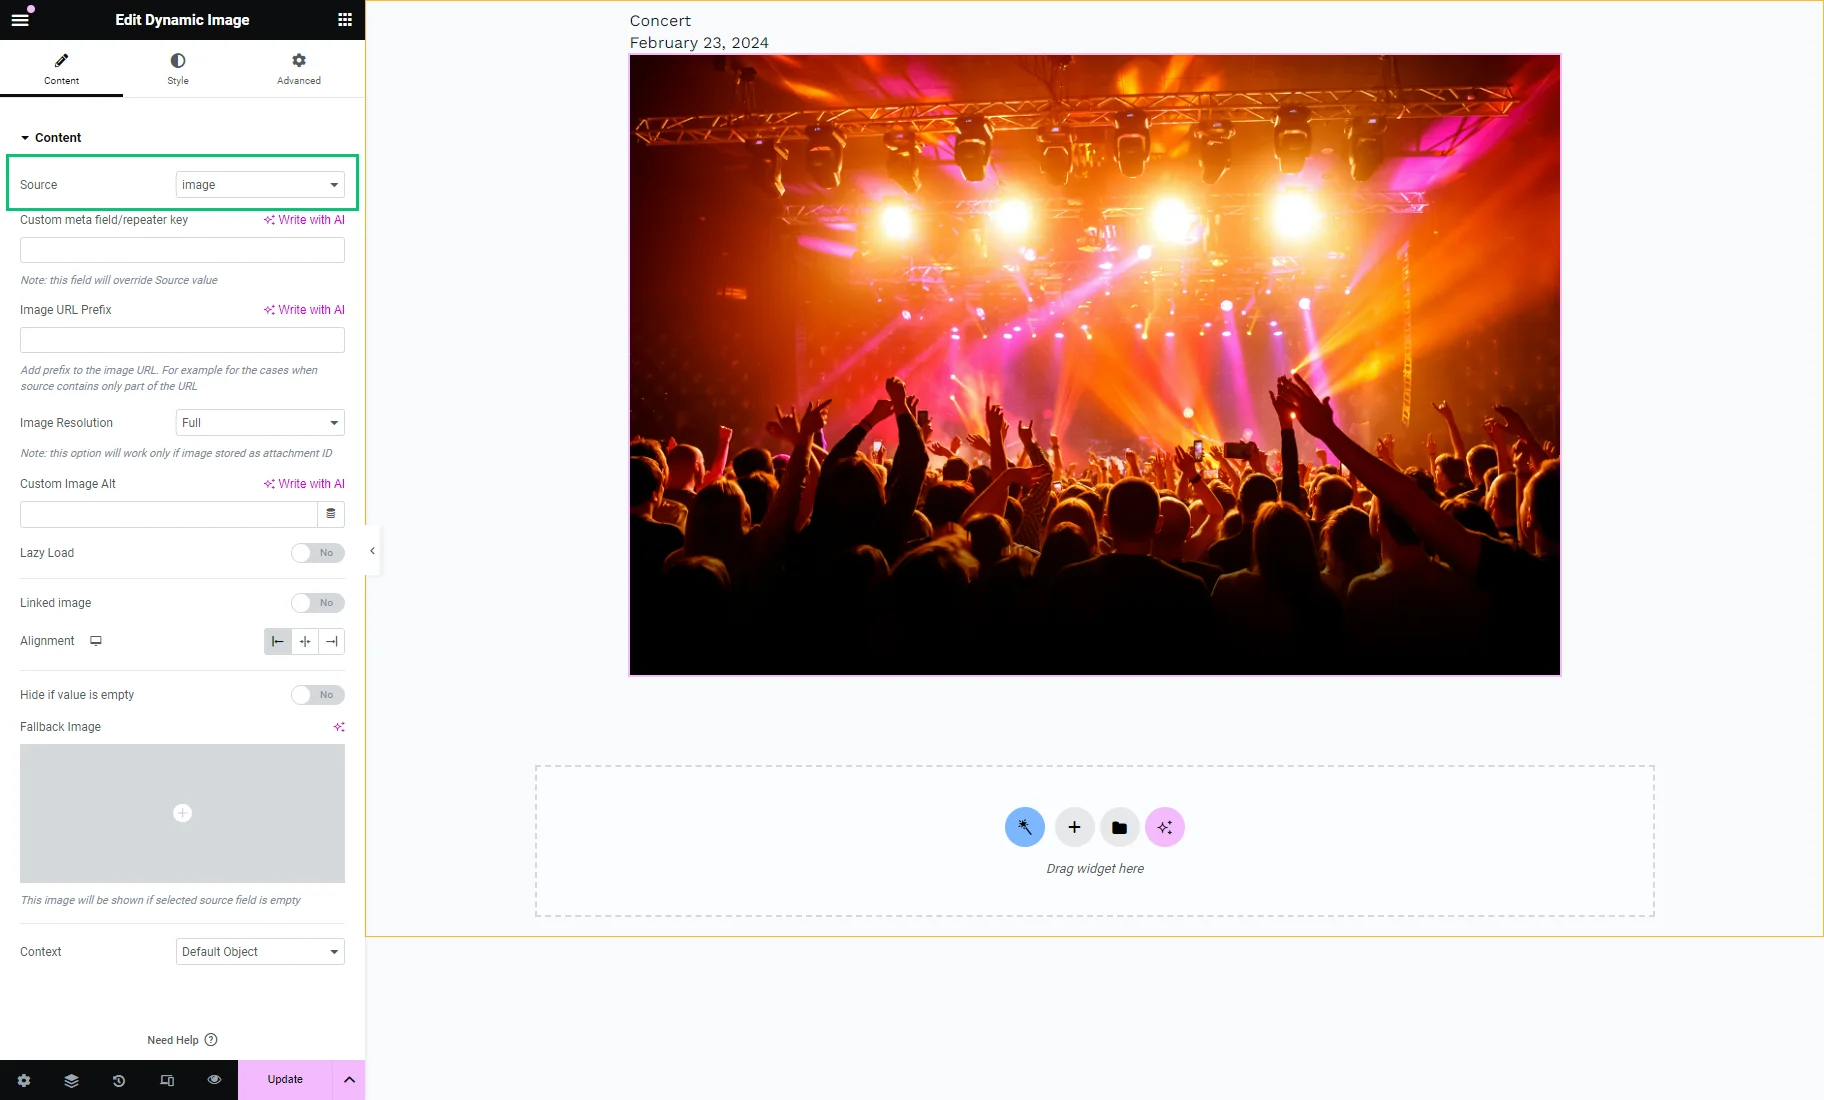
The image can be displayed in two ways. The first is to place the Dynamic Image widget and pick the needed “Media” meta field (“image,” in our case) from the REST API section as the Source.
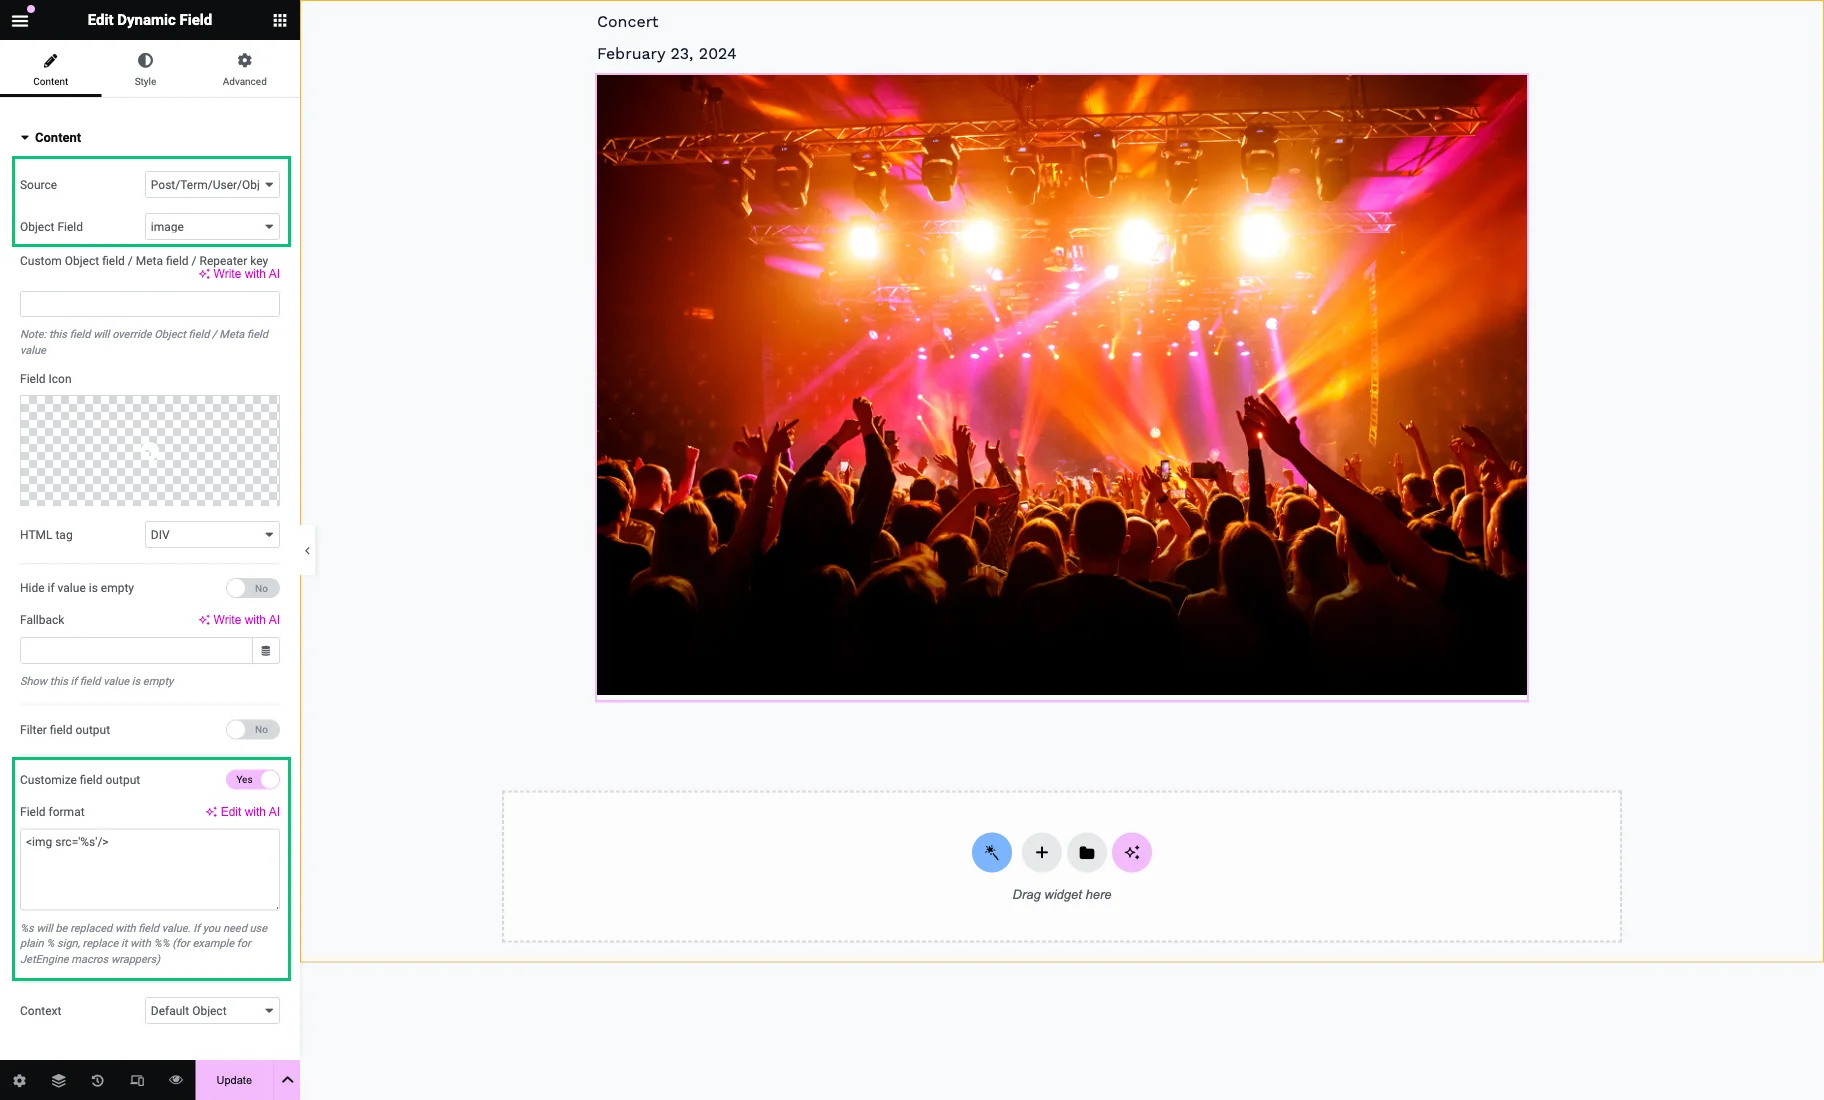
As the second way, for the Dynamic Field widget, we picked the “image” meta field, enabled the Customize field output toggle, and entered “<img src=‘%s’/>” into the Field format textarea.
Adjust other Listing template settings and hit the “Update” button.
Check the Result
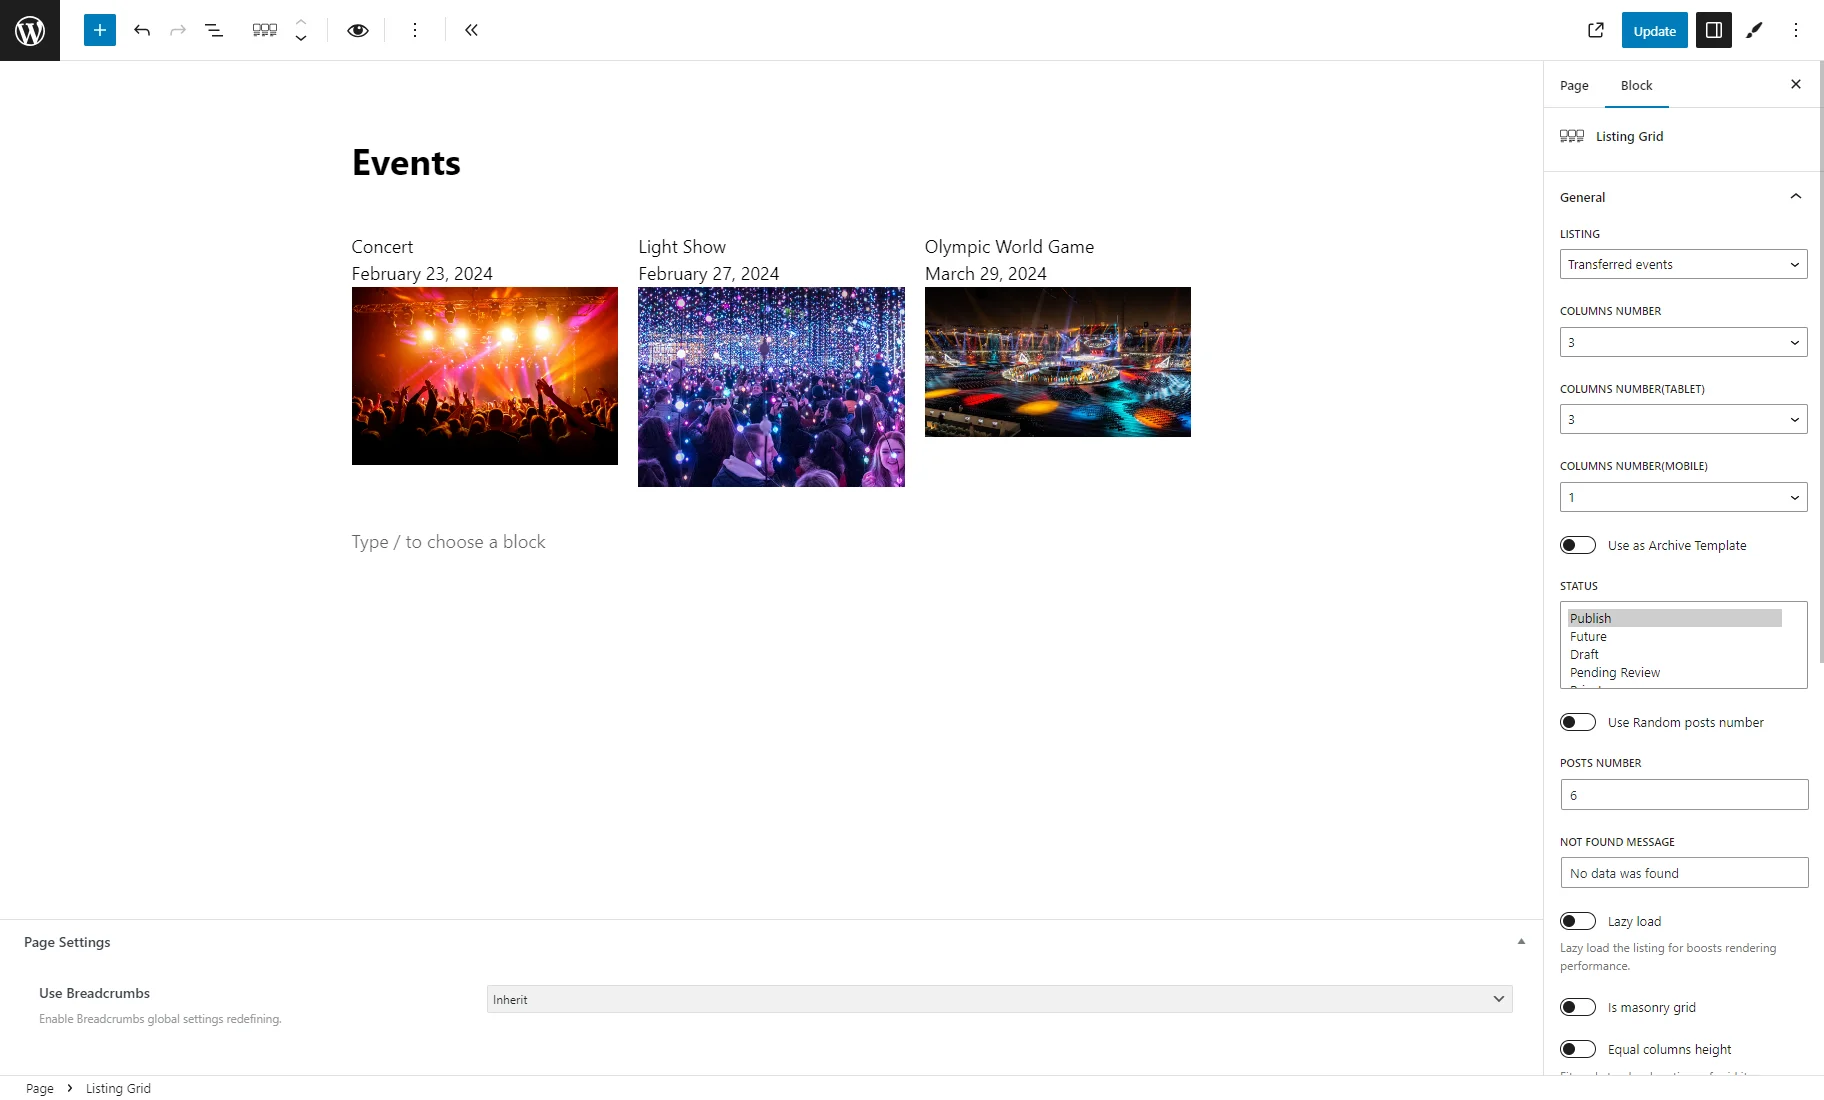
To place the listing, open the needed page in the Elementor, WordPress block, or Bricks editor, place the Listing Grid there, and pick the recently created LISTING from the drop-down menu.
The events in our Listing Grid block are displayed in ascending order by dates.
Configure the page and Listing Grid settings and hit the “Publish/Update” button.
That’s all. Now you know how to configure the REST API endpoint for custom queries and how to transfer the queried CCT items from one website to another with the JetEngine WordPress plugin.