How to Create a Single Page for the CCT REST API Item
This guide explains creating a Single page for the CCT REST API item to display the selected item's data on a static page.
Before you start, check the tutorial requirements:
- Elementor (Free version) or Block editor (Gutenberg)
- JetEngine plugin installed and activated with the REST API module enabled and the endpoint added
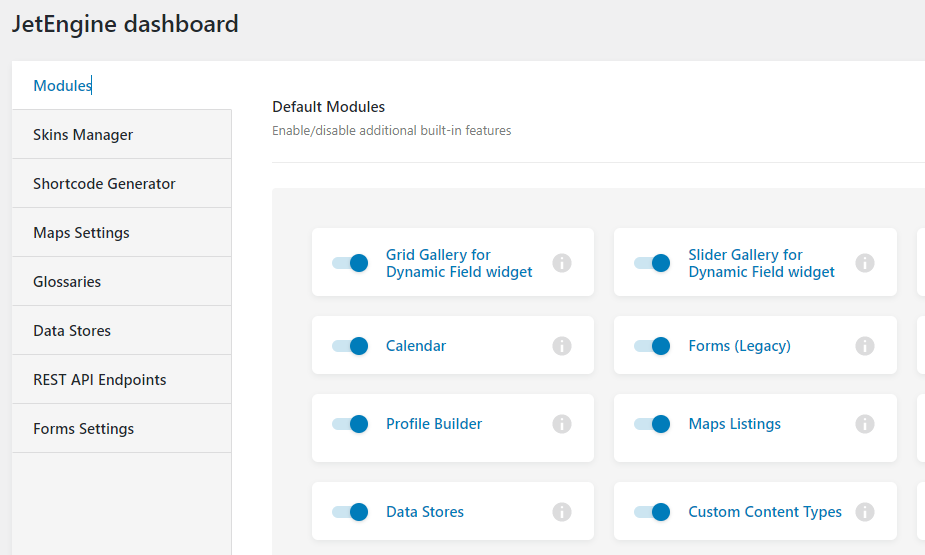
Enable the Custom Content Types Module
Before following the other steps, go to WordPress Dashboard > JetEngine > JetEngine > Modules and activate the Custom Content Types module.
Don’t forget to press the “Save” button.
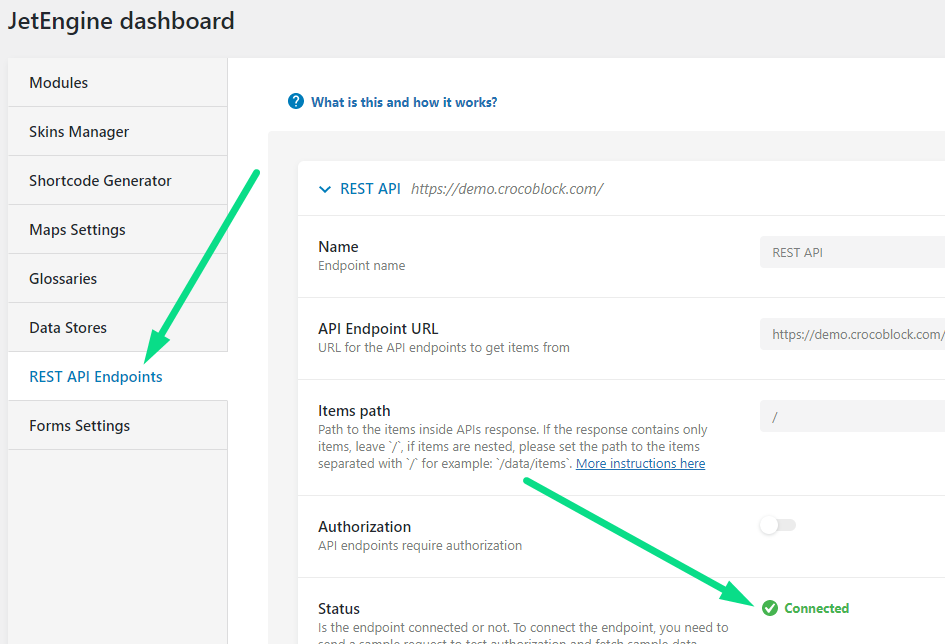
Check an Endpoint Connection
Proceed to JetEngine > REST API Endpoints tab and connect an endpoint. Once the endpoint is connected, the green “Connected” label appears in front of the Status field.
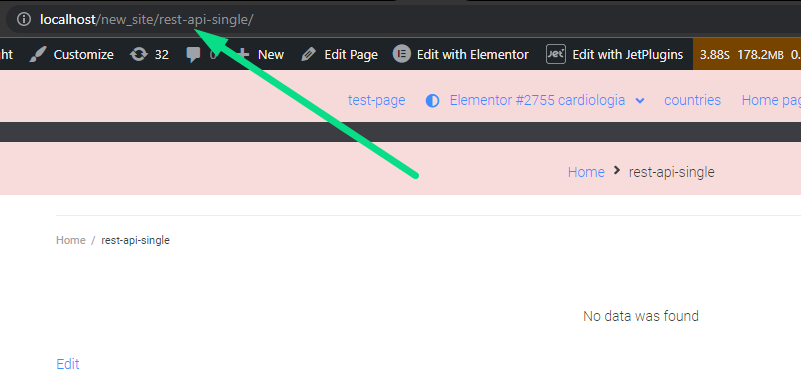
Creating WordPress Pages
Proceed to the WordPress Dashboard > Pages tab and create two static pages. The first page displays the Listing Grid widget that lists all items from the endpoint. The second page shows the data related to the item you clicked on. At this stage, leave the pages empty and copy the link to the second page, as it will be needed for the next step.
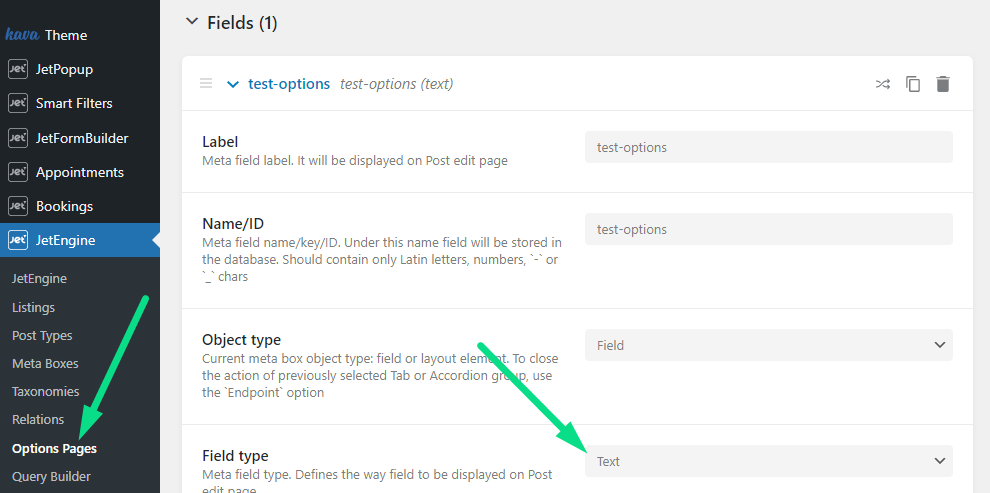
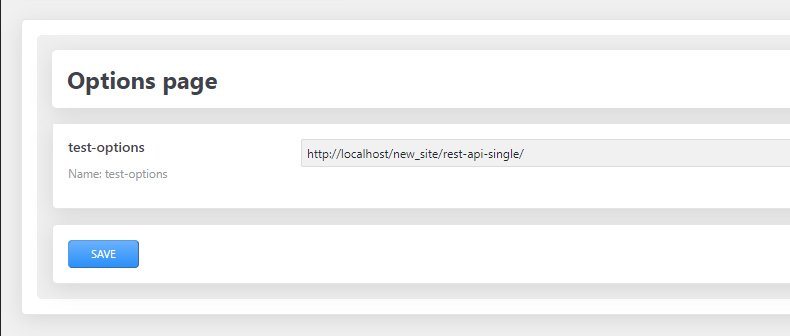
Adding an Options Page
To create an Options Page, open the WordPress Dashboard > JetEngine > Options Pages. Add a new Text meta field type to the page in the Fields tab. Save the changes and proceed to the newly created Options page on the WordPress Dashboard. Follow the Options Page Overview to learn how to set it up.
Open the options page you have just edited. The text field should be filled in with the second-page link, as suggested in the previous step.
Building a Listing Template for the REST API Endpoint
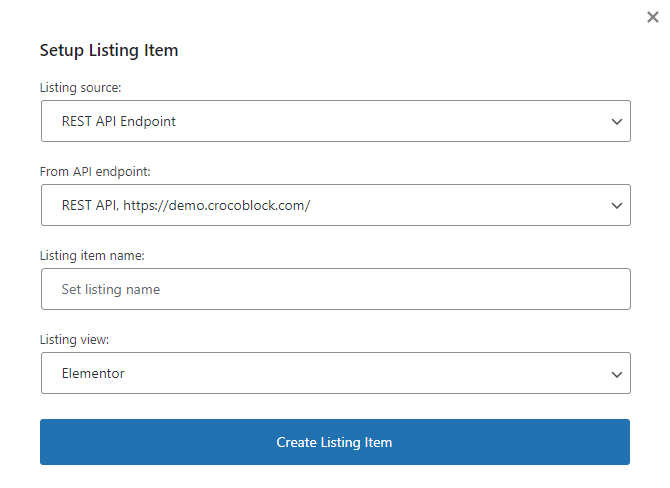
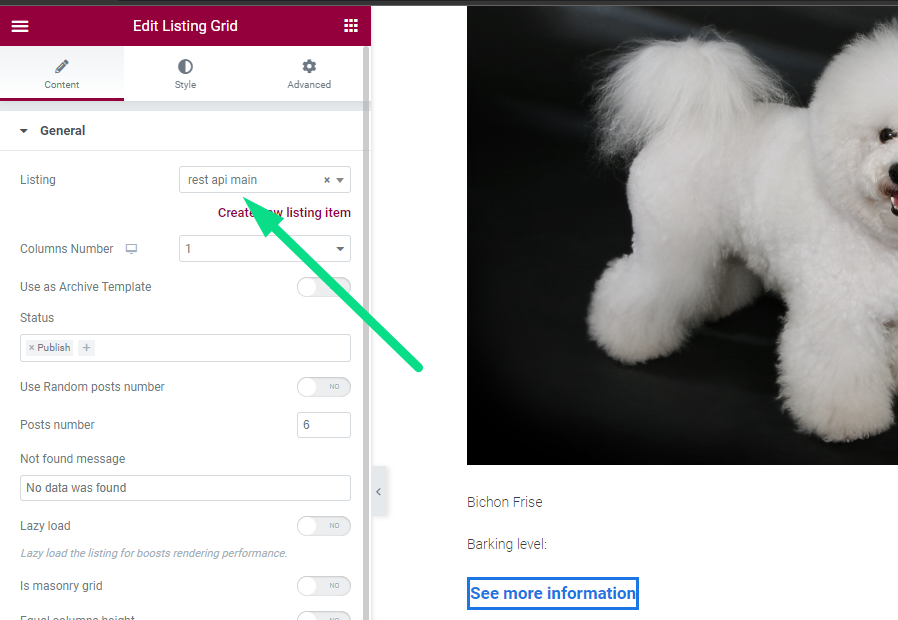
The Listing template for the REST API endpoint item will be used on the first page. To create the listing template, go to JetEngine > Listings and click the “Add New” button. Select the “REST API Endpoint” as the Listing source and choose the needed endpoint.
Complete the Listing item name field and select the desired Listing view.
Press the “Create Listing Item” button.
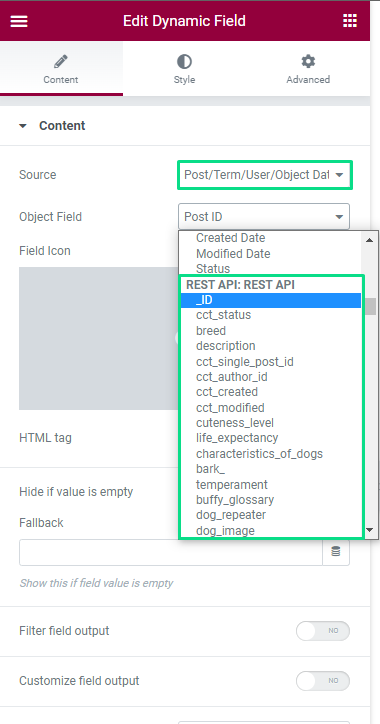
Choose the preferred page builder editor. In this case, it is the Elementor. Once the page opens, add a Dynamic Field widget to output the desired data from the endpoint.
Pick “Post/Term/User/Object Data” as the Source, and then in the Object Field, select all the needed fields to be displayed from the endpoint.
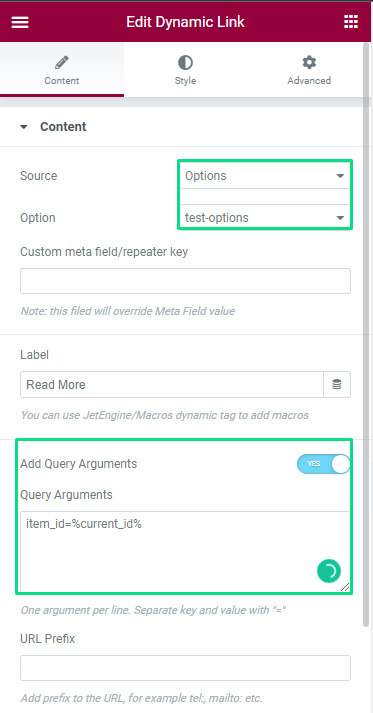
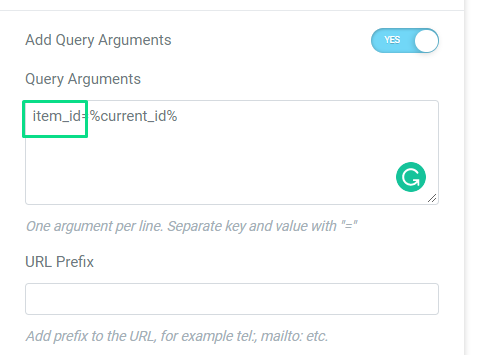
Then drag and drop the Dynamic Link widget to the page. Select “Options” as the Source, and the text field from the Options page containing the link to the page to redirect in the Option dropdown.
Enable the Add Query Arguments toggle and insert ‘item_id=%current_id%’ in the appeared field.
Creating Another Listing Template for the Same REST API Endpoint
Start building one more listing template that will be used on the second page.
The listing template should have the same source you created — the REST API endpoint. This template is how one item will look on its ‘single page’.
Therefore, add more Dynamic Field widgets to create a more detailed item layout.
Building a Custom REST API Query in the Query Builder
Go to JetEngine > Query Builder to create a custom REST API query that allows you to display the item on a single REST API page according to which item you clicked on the first page.

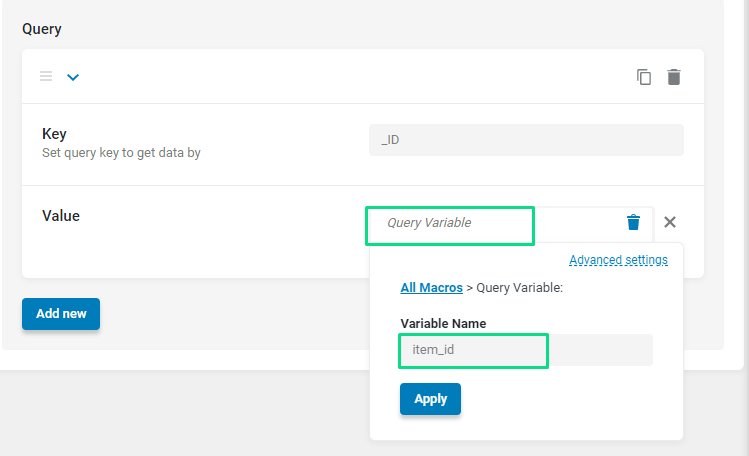
Proceed with adding the query and select the endpoint. Press the dynamic tag button next to the Value field and choose the “Query Variable” option.

The key can be found in the Preview of the endpoint.
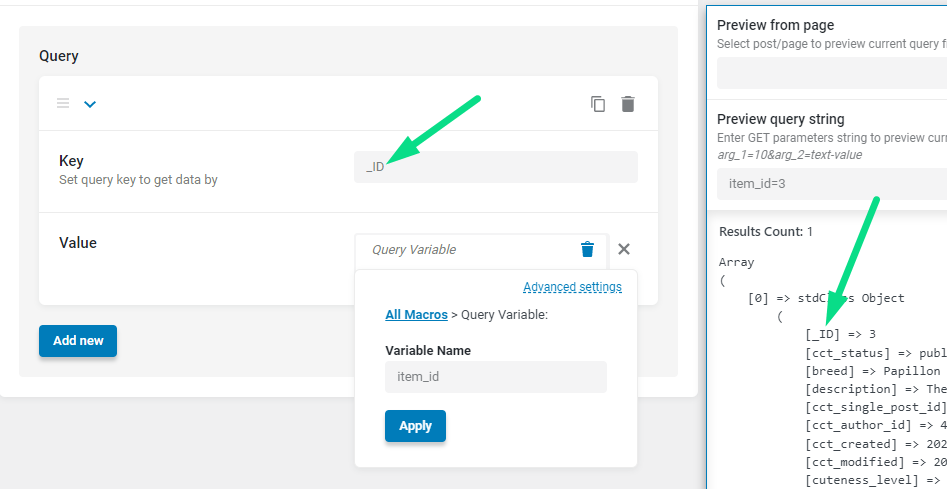
The Variable Name in the settings is the same as you wrote in the Dynamic Link widget.
Here is a little reminder of what was written in the Dynamic Link Query Arguments field.
Displaying Listing Templates in the Listing Grid Widgets
It is finally time to add the listing templates to the Listing Grid widgets.
Go to the first and the second page. Drag and drop the Listing Grid widget to each page, and select the listing templates for the first and second pages accordingly.
Here is an example of how the listing template can be added to the first page:
And that’s how it looks on the second page:
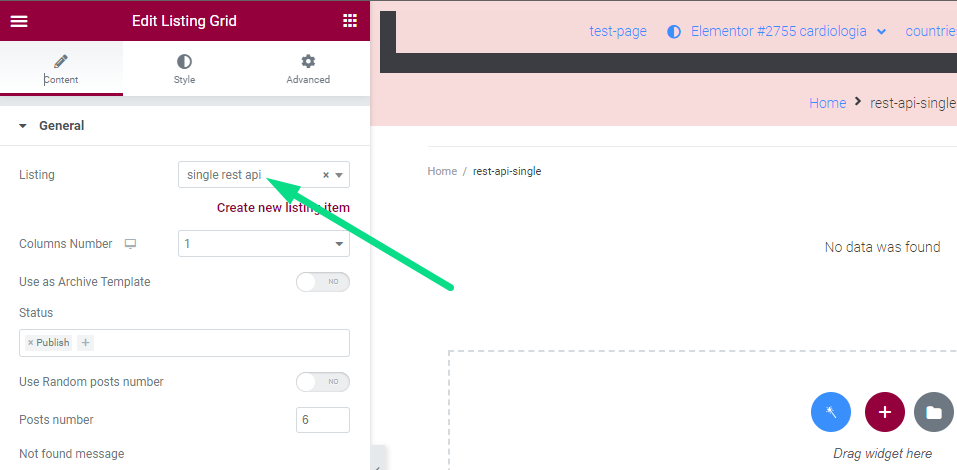
Enabling Custom Query in the Listing Grid Widget
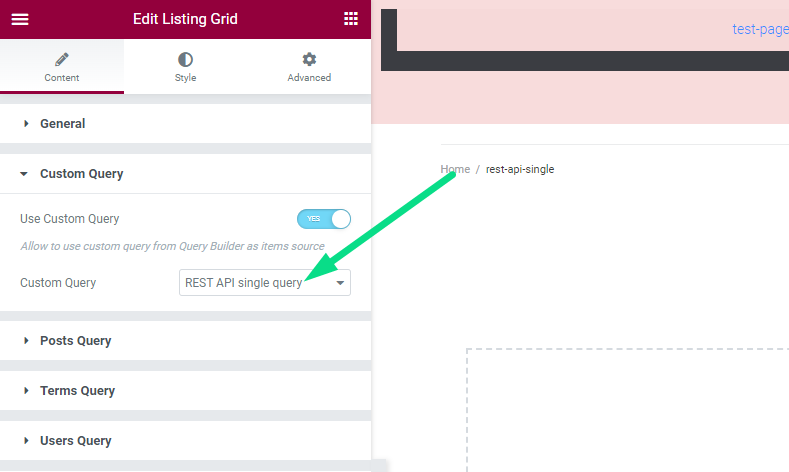
Once the custom REST API query is ready, you must select it in the Listing Grid widget on the second page. It can be performed in the Custom Query tab.
Enable the Use Custom Query toggle and select the needed item in the Custom Query dropdown menu.
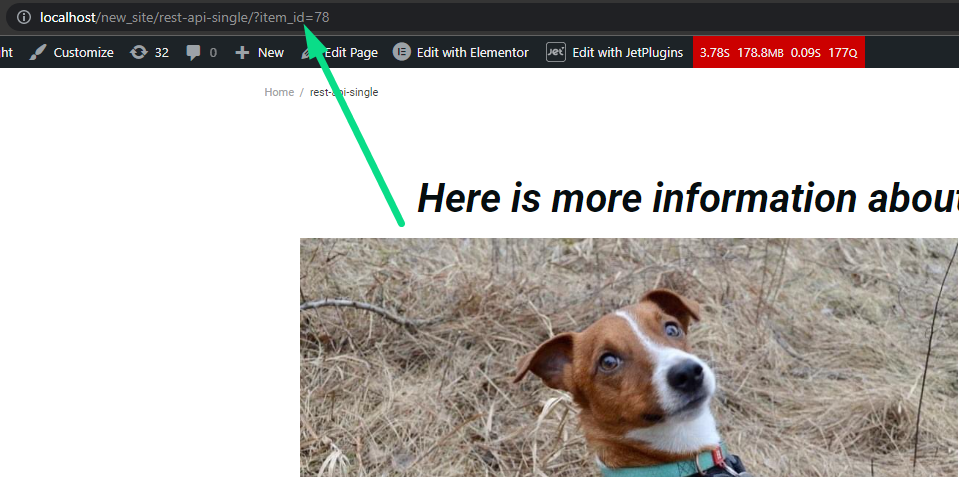
Check the result. Mind that the link in the primary Listing Grid contains a query argument.

The query argument allows displaying the data of the item you just clicked on, which creates a ‘single page’ for the REST API item.
The result is achieved; now you know how to create a single page for the REST API item on your WordPress website with the help of the JetEngine plugin.