How to Create Listing Grids for Custom Post Types in Divi
This tutorial is focused on building and using the Listing Grid element in Divi Builder with the WordPress JetEngine plugin.
Before you start, check the tutorial requirements:
- Divi 5 Theme
- Divi Integration add-on installed and activated
- JetEngine plugin installed and activated
Listing Item is one of the basic website elements. In this tutorial, we display how to build a JetEngine’s Listing Template in Divi Builder step-by-step and how to use the created Listing Grid afterward. We will focus on setting up the Dynamic Widgets to display the Custom Post Type content inside the Listing Template using the Divi Builder.
Create a Listing Template
First, proceed to WordPress Dashboard > JetEngine > Listings/Components and click the “Add New Item” button.
In the newly opened pop-up, select the “Posts” Listing source. In the From post type dropdown, select the required CPT. Enter the Listing item name and choose the “Divi” option as the Listing view.
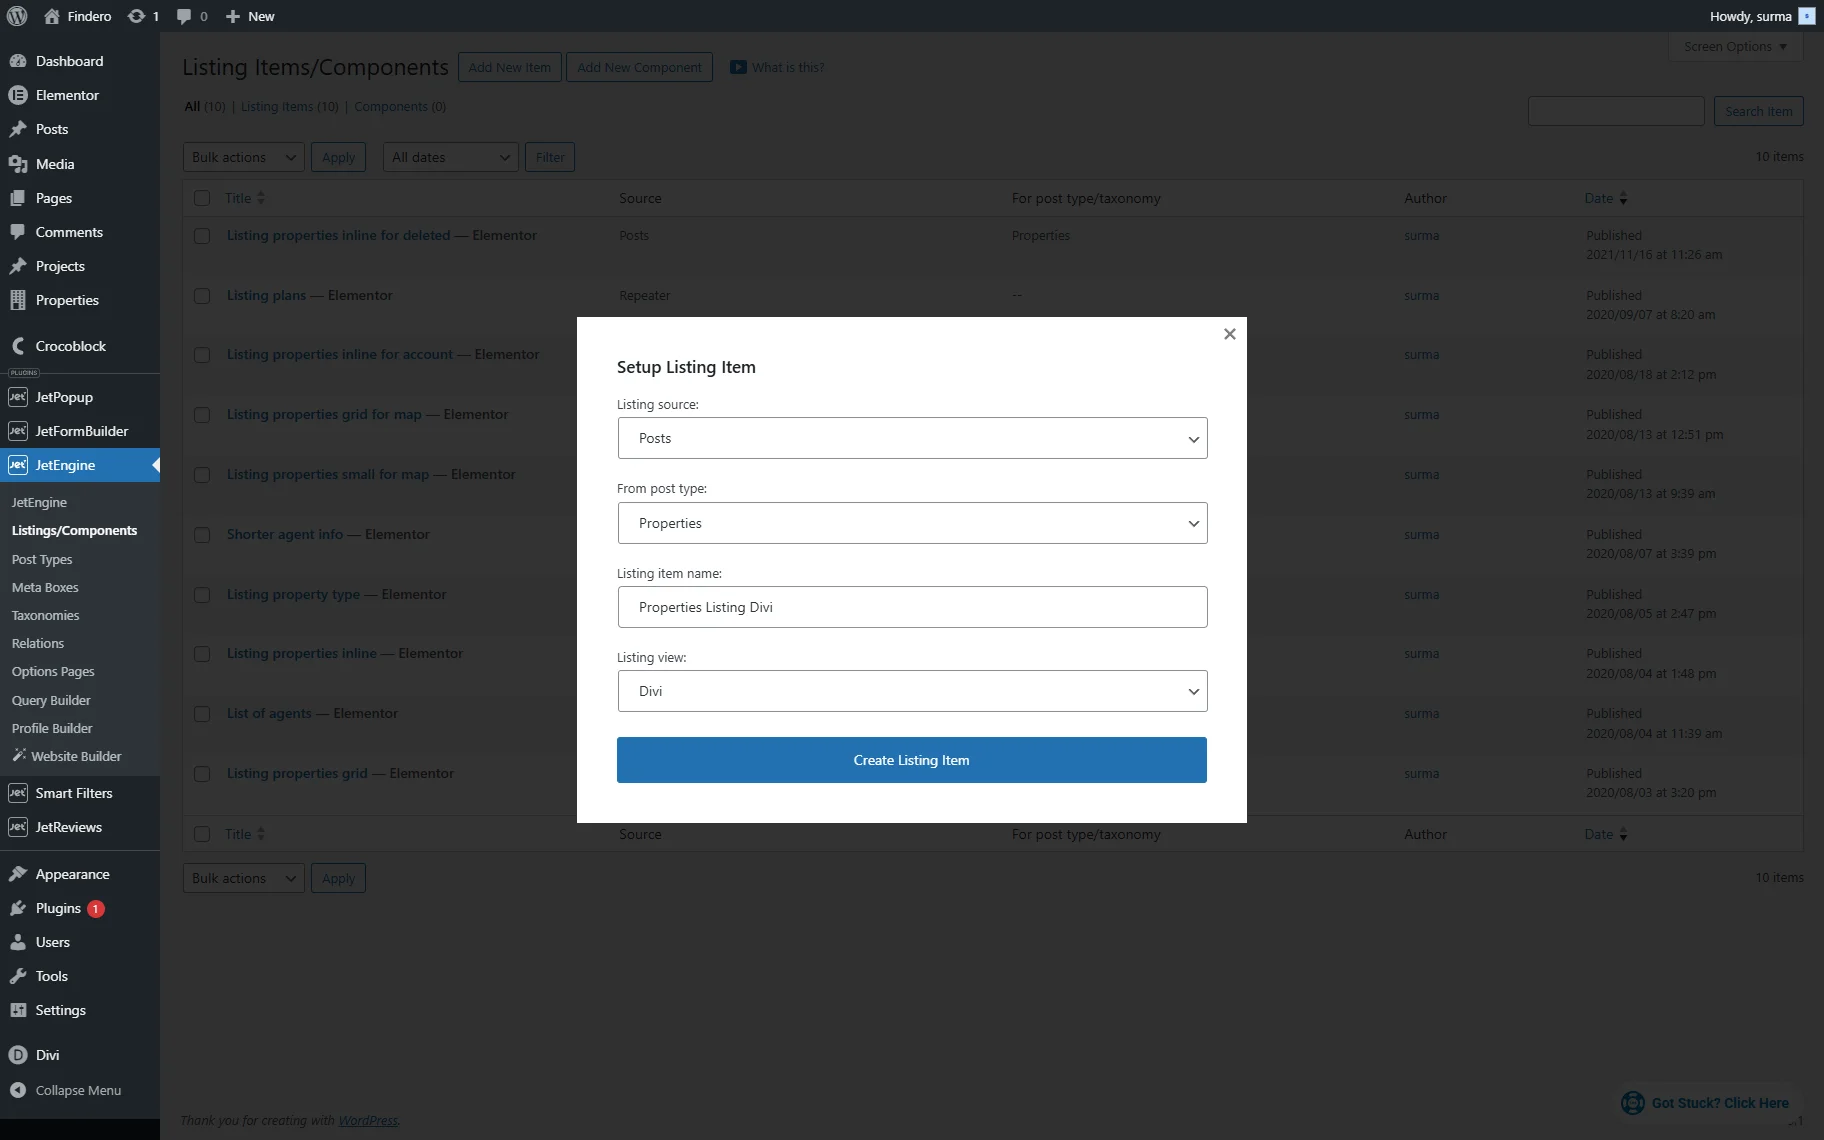
Click the “Creat Listing Item” button.
The Listing Item settings are opened in the Divi Visual Builder.
Click the “+” button to add the desired type of row.
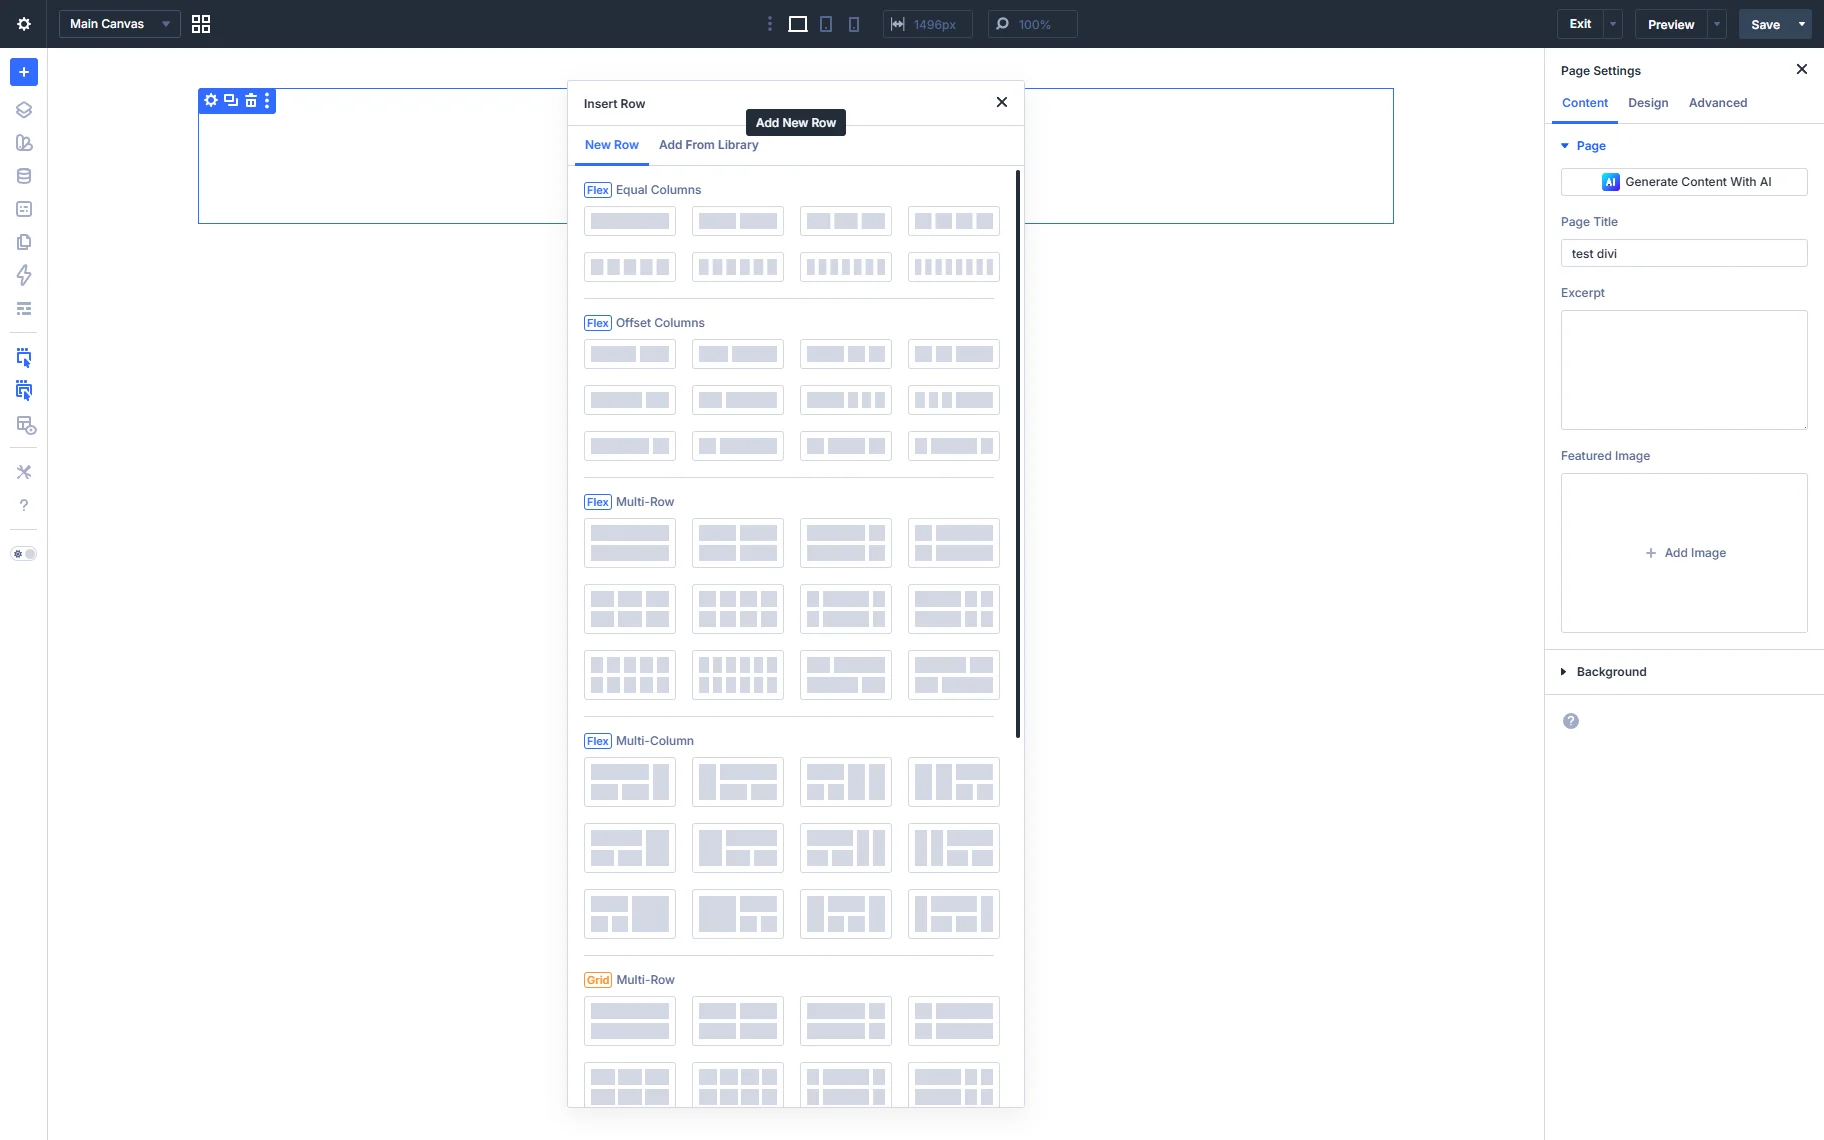
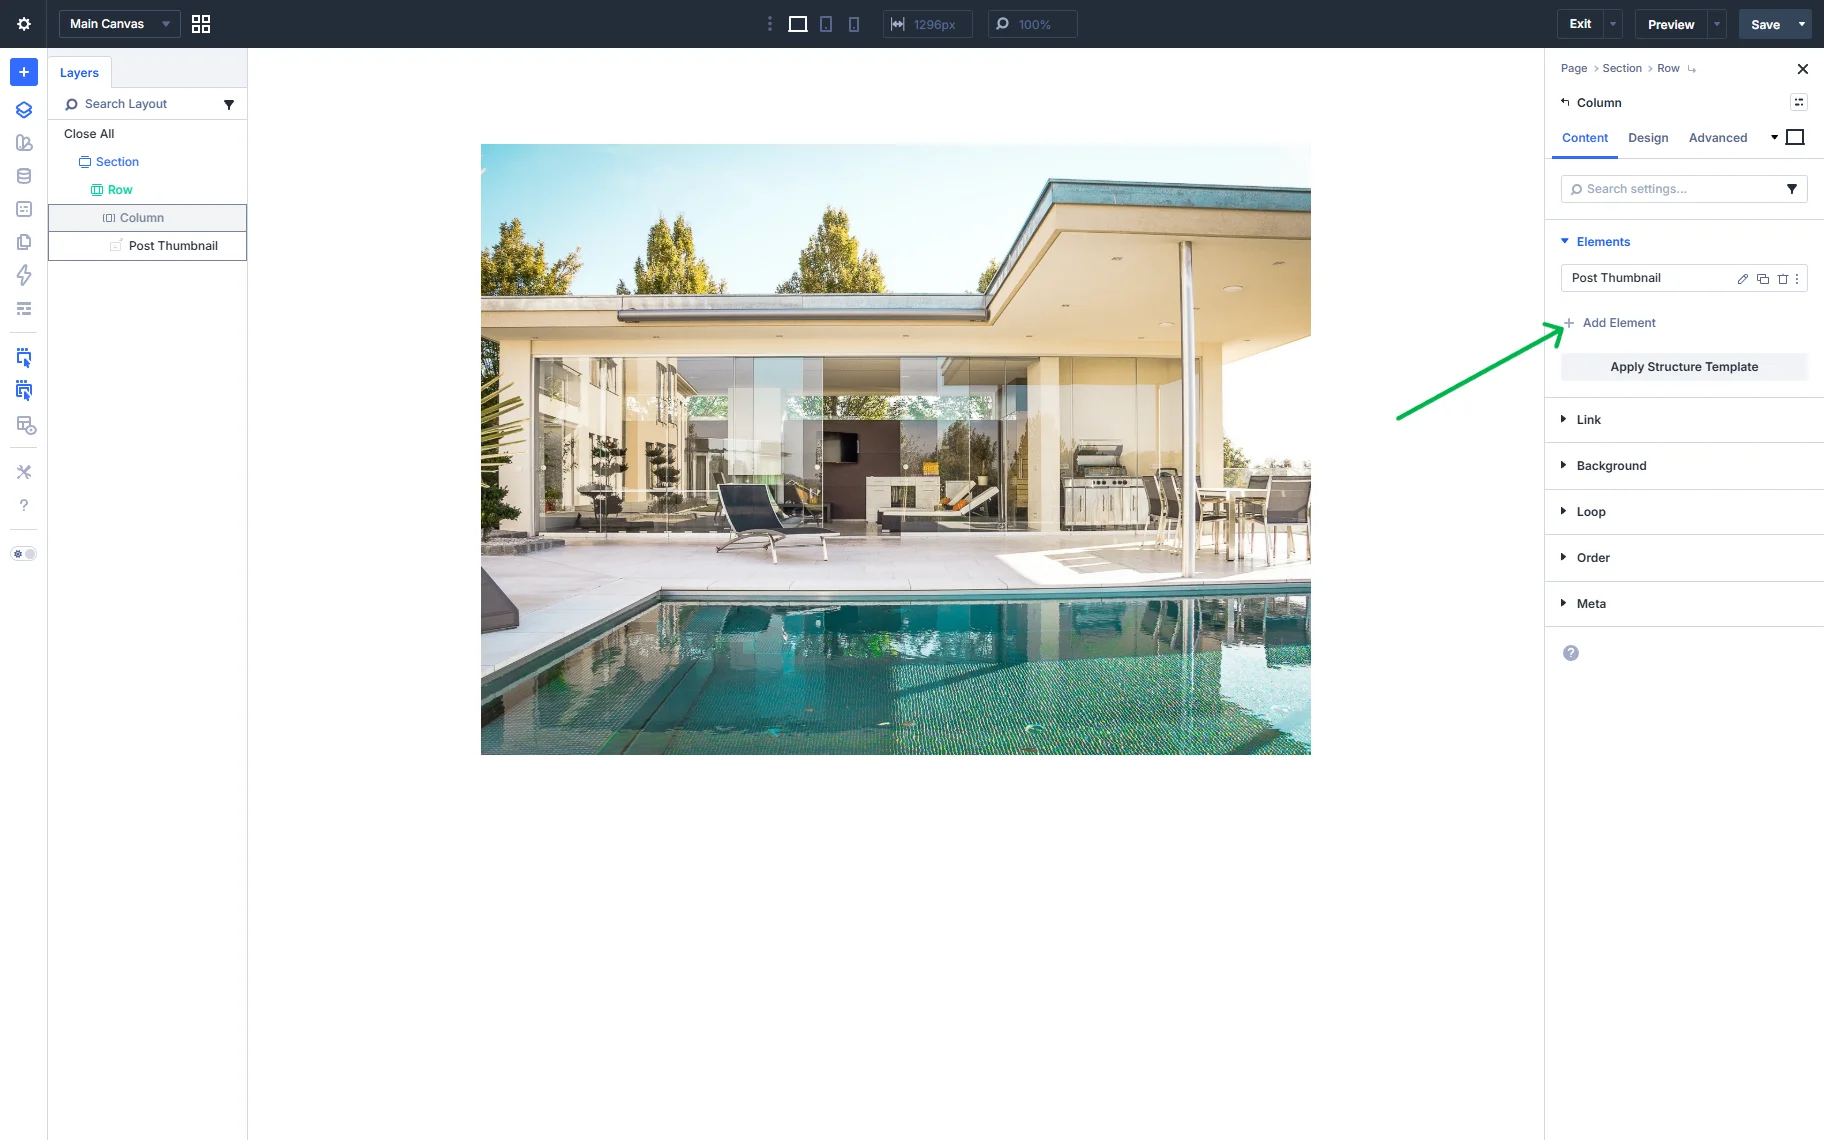
We select a single column for now. Once the row is chosen, another pop-up appears where you can add the elements. We add the Dynamic Image element.
In the General tab, you can select the Source out of the available options (“Post Thumbnail” in this case), set the image manually, or add the Image URL Prefix.

In the Layout tab, you can set an image’s dimensions, Lazy Load, or links attached, Fallback image, or Context.
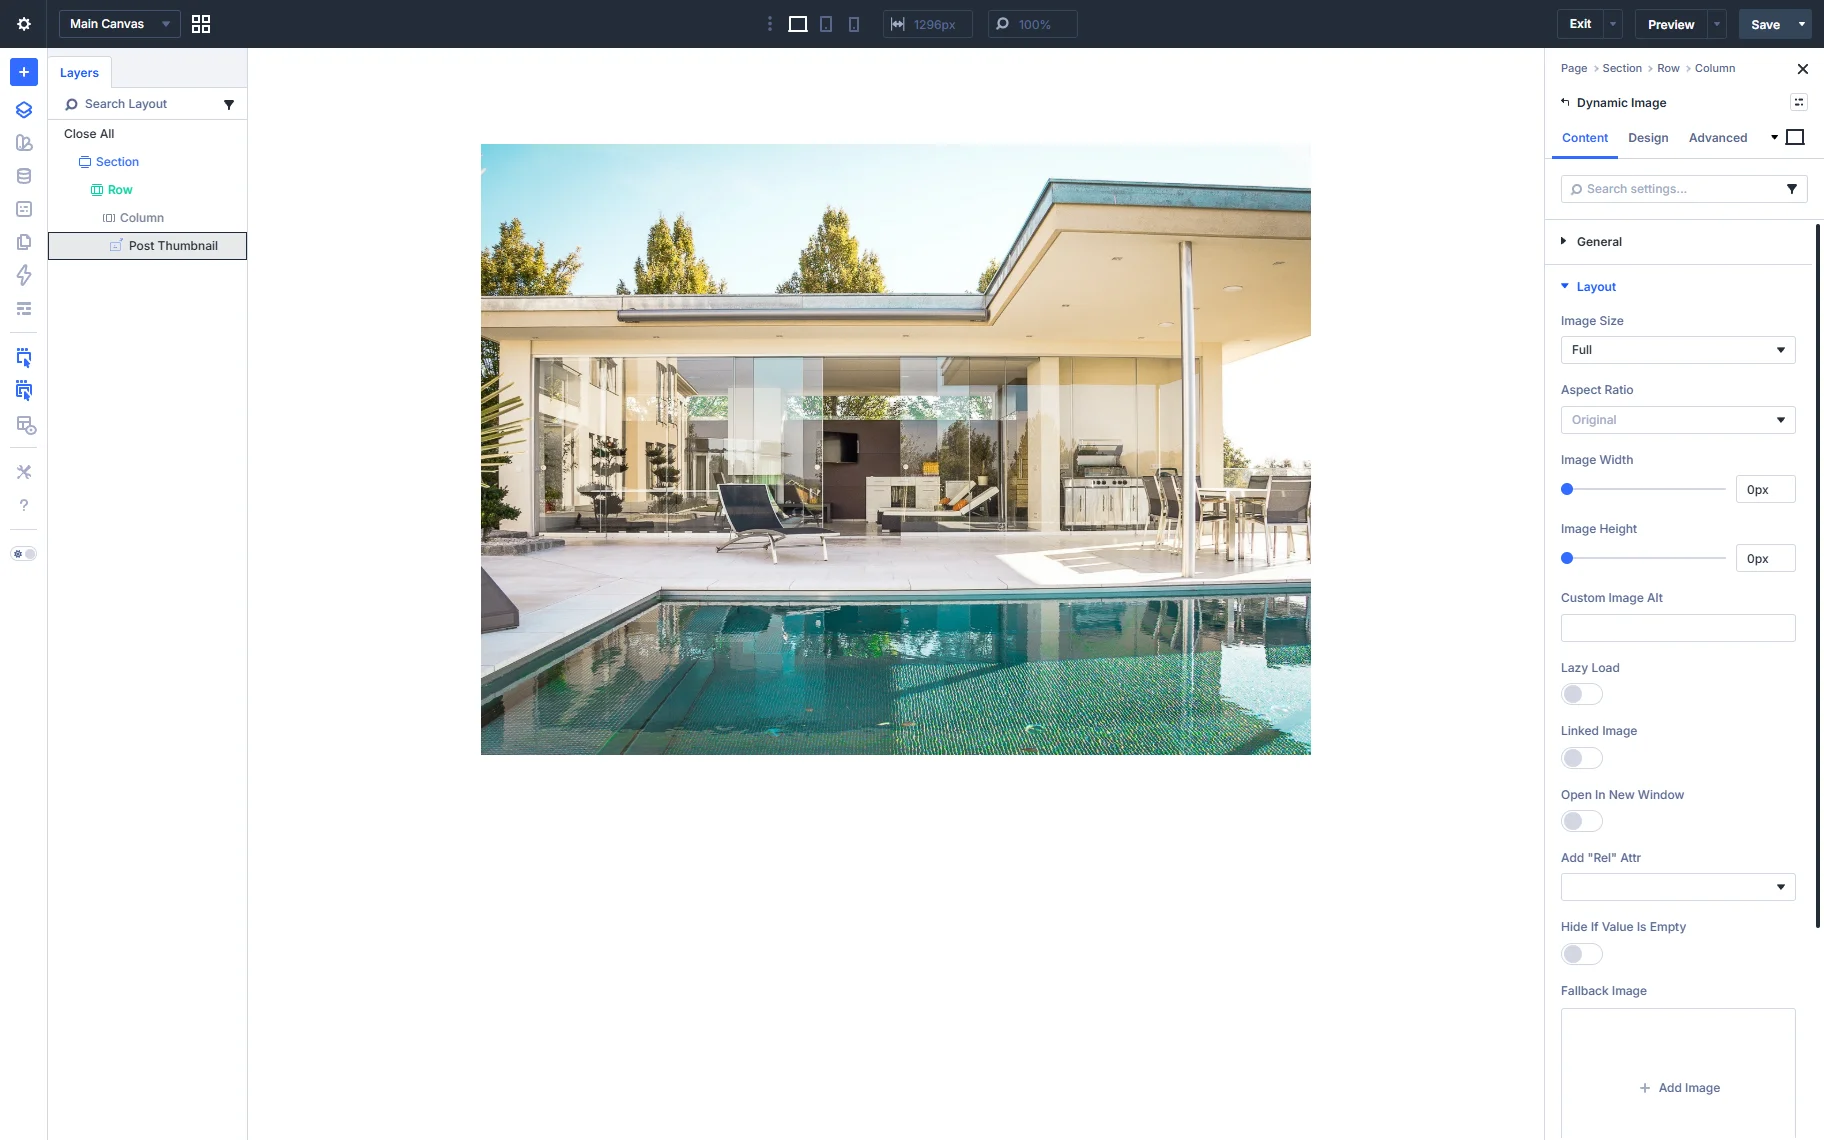
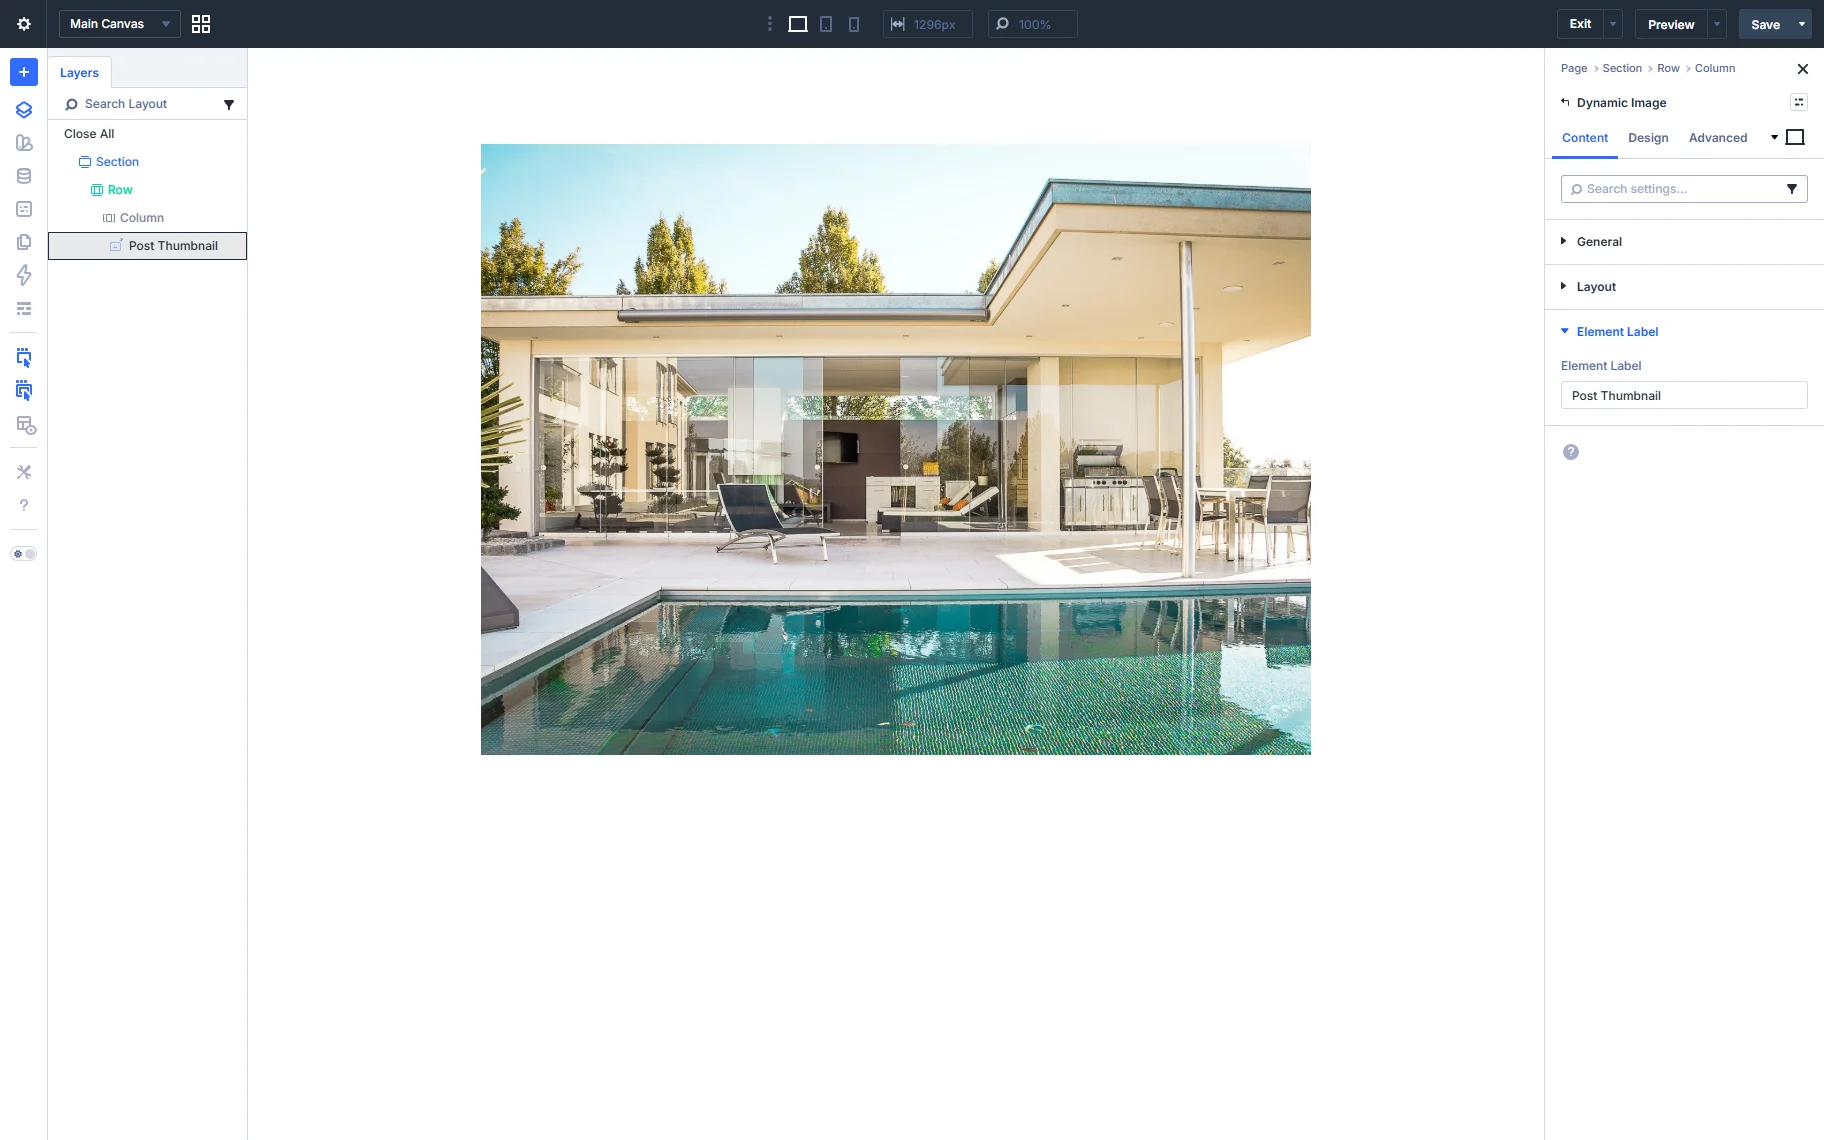
Additionally, you can set a desired Element Label so it is distinguished among other Dynamic Images in the Layout section.
The Design tab offers usual style settings.

You can add a new element either by clicking the “+” button at the bottom of all elements or by proceeding to the needed Column > Elements and clicking the “+ Add Element” button.
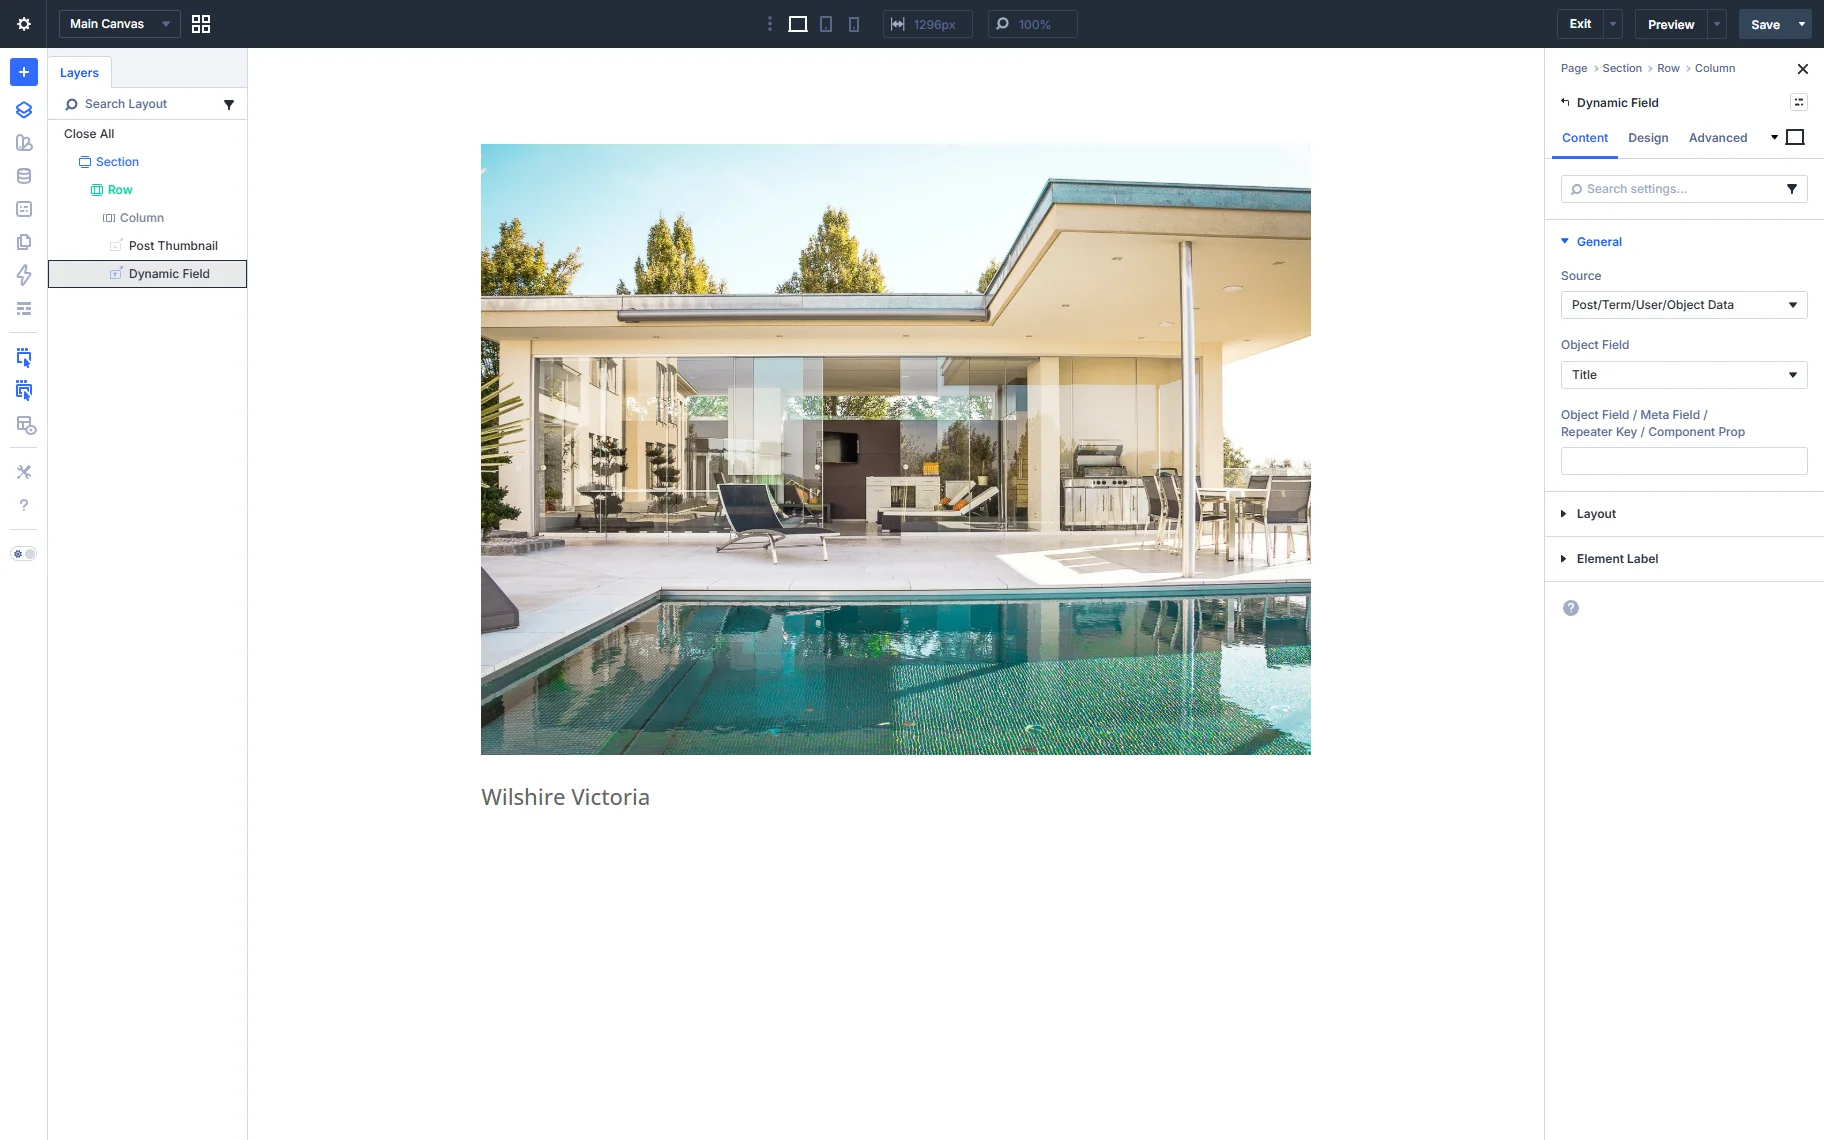
Now, let’s add the Dynamic Field element. This is one of the key elements of Divi dynamic content in Crocoblock, allowing you to pull both default and custom meta fields. You can display the general posts’ elements, such as title, using the “Post/Term/User/Object Data” Source and selecting the “Title” (or any other) Object Field.
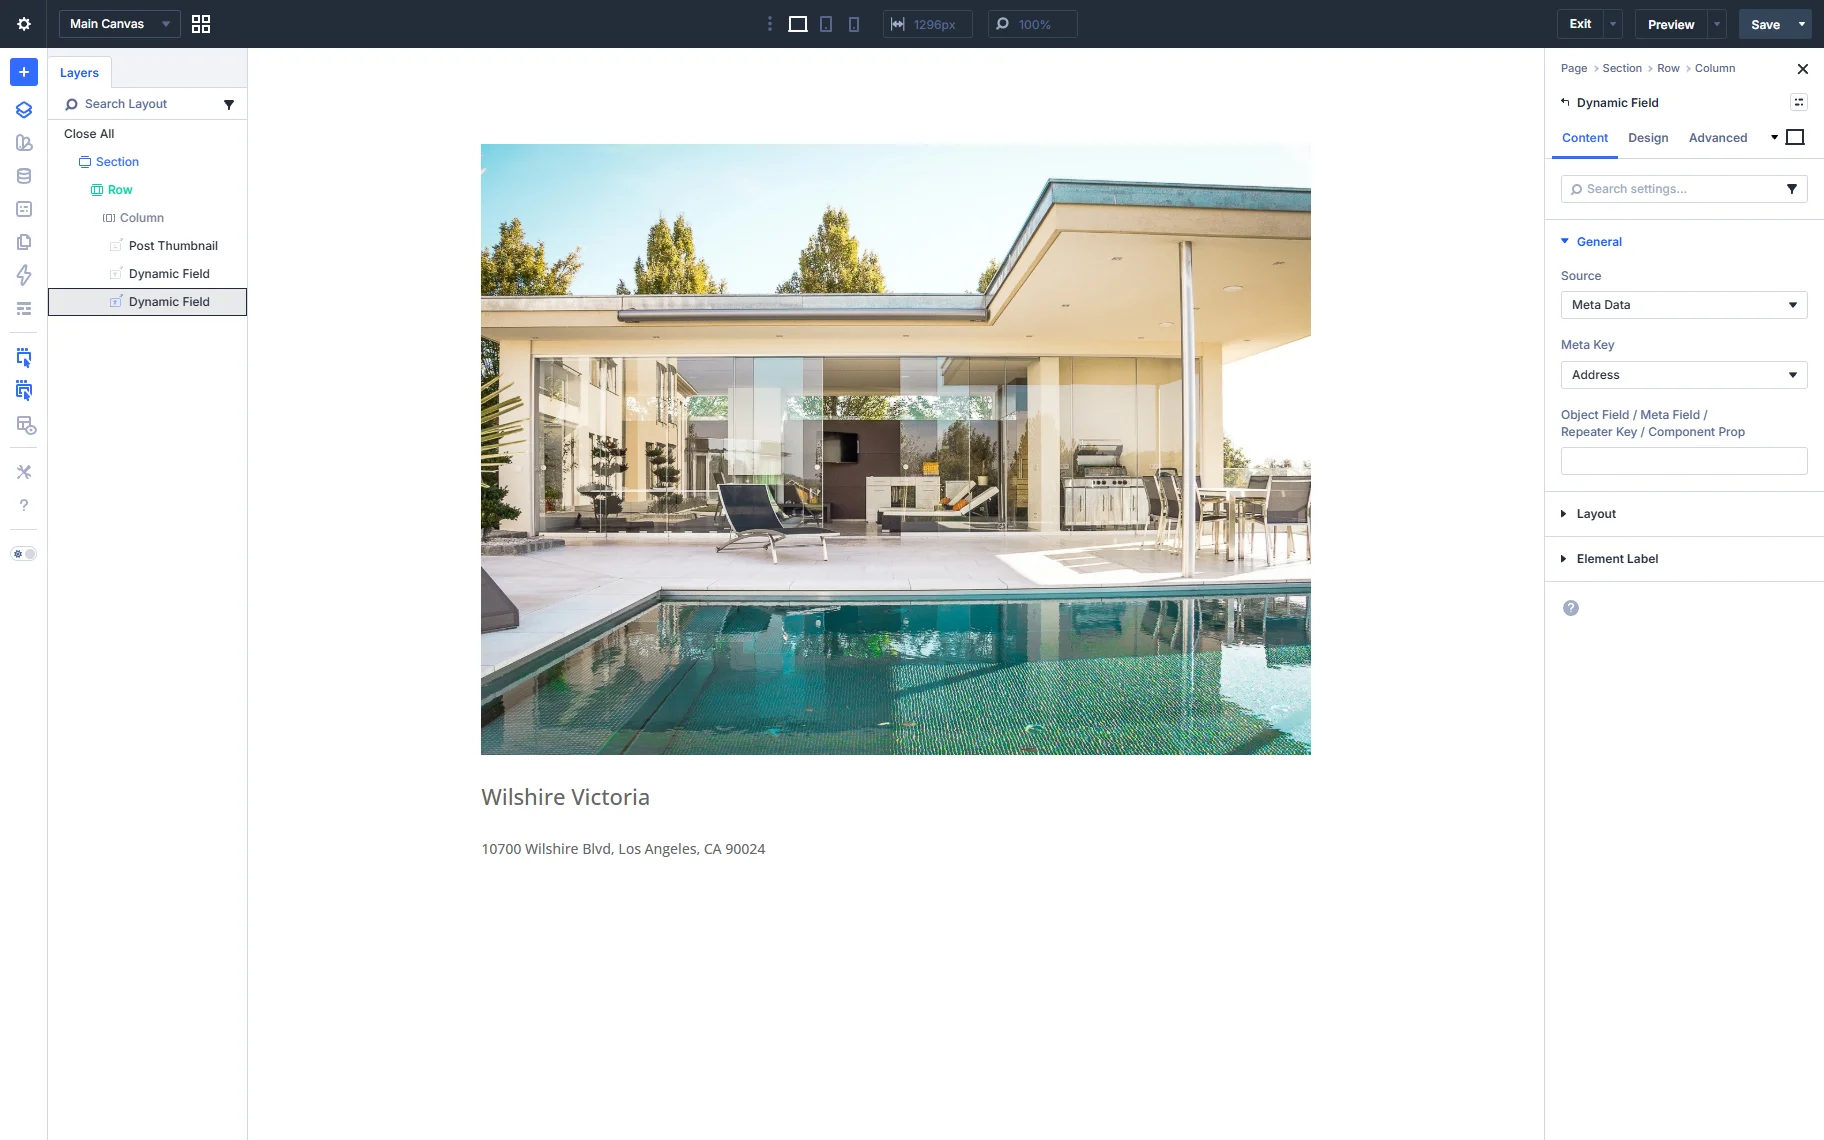
You can also show custom fields data with the help of the Dynamic Field. For that, use the “Meta Data” Source and select the needed Meta Key. For example, we display the “Address” field.
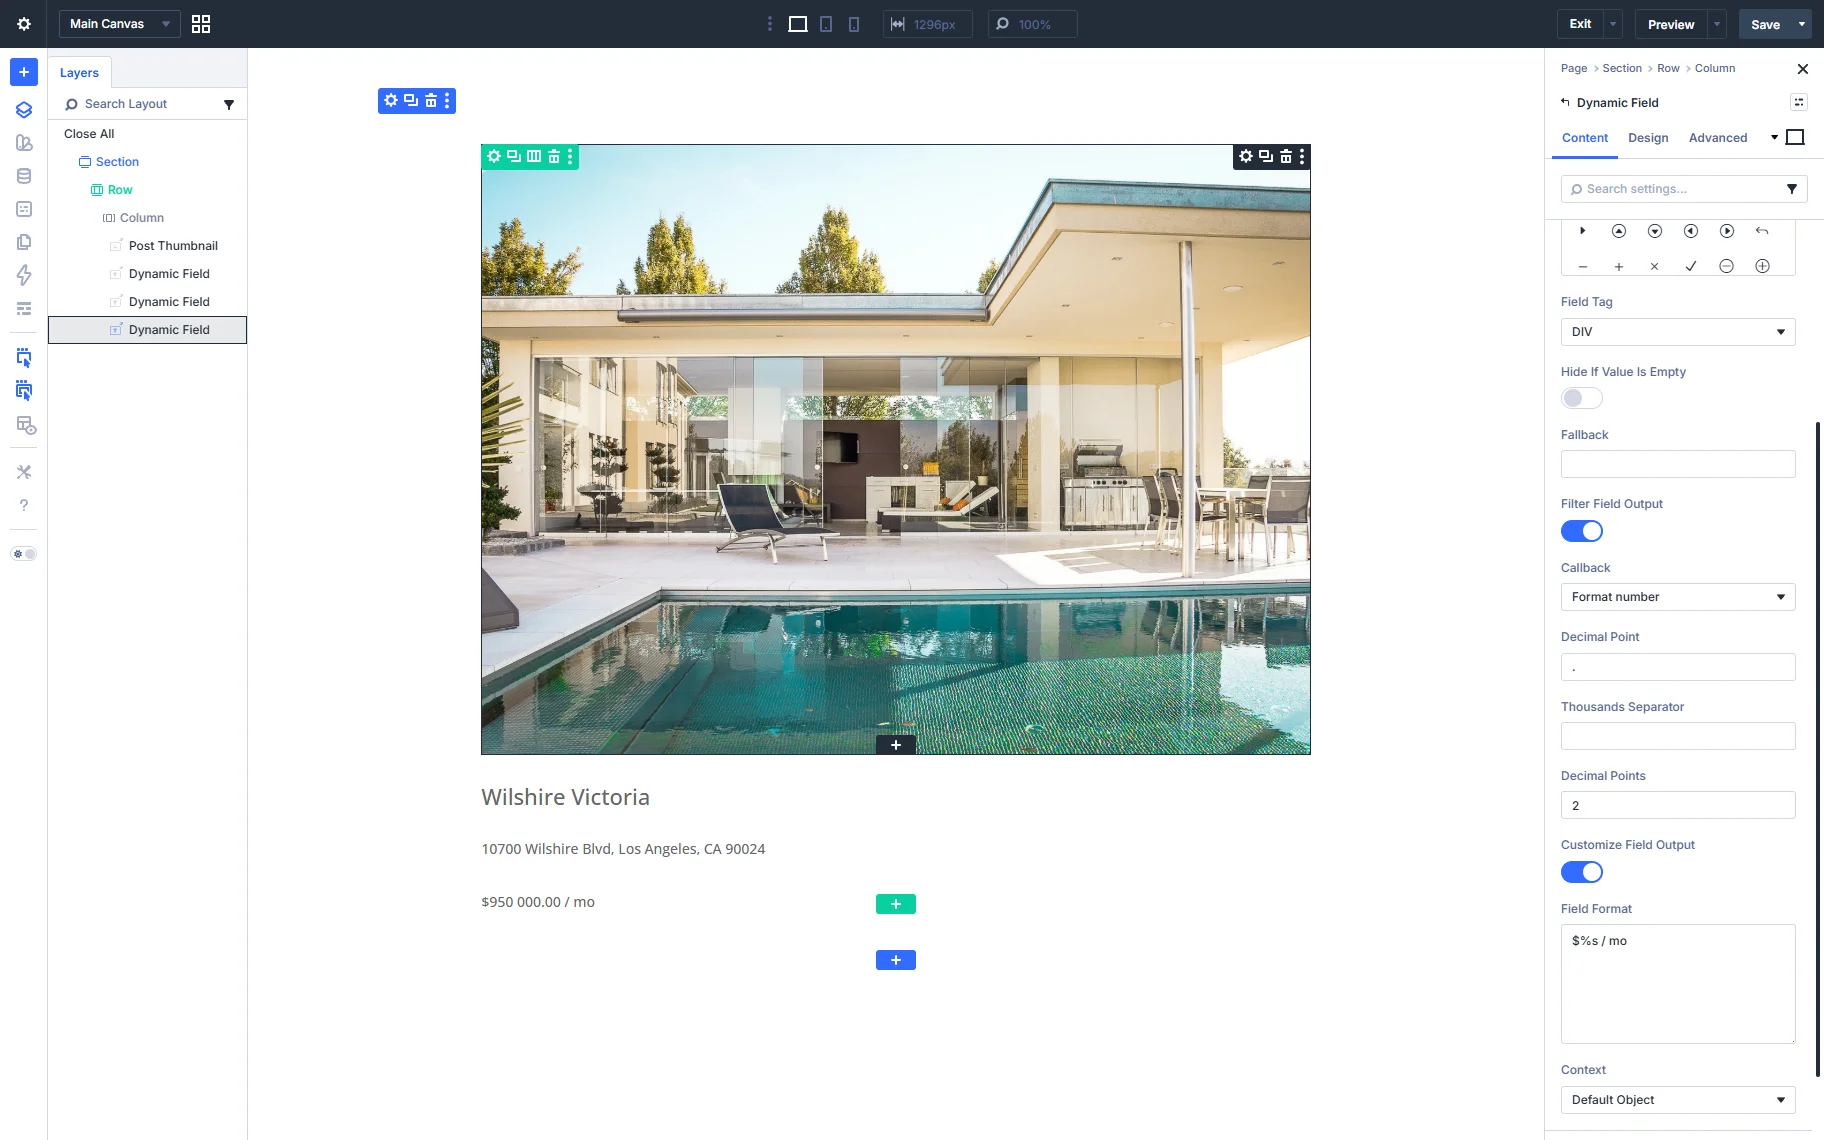
In the Layout section, you can add an icon to the field, set up the Fallback, or the Callback. You can also customize the field output.
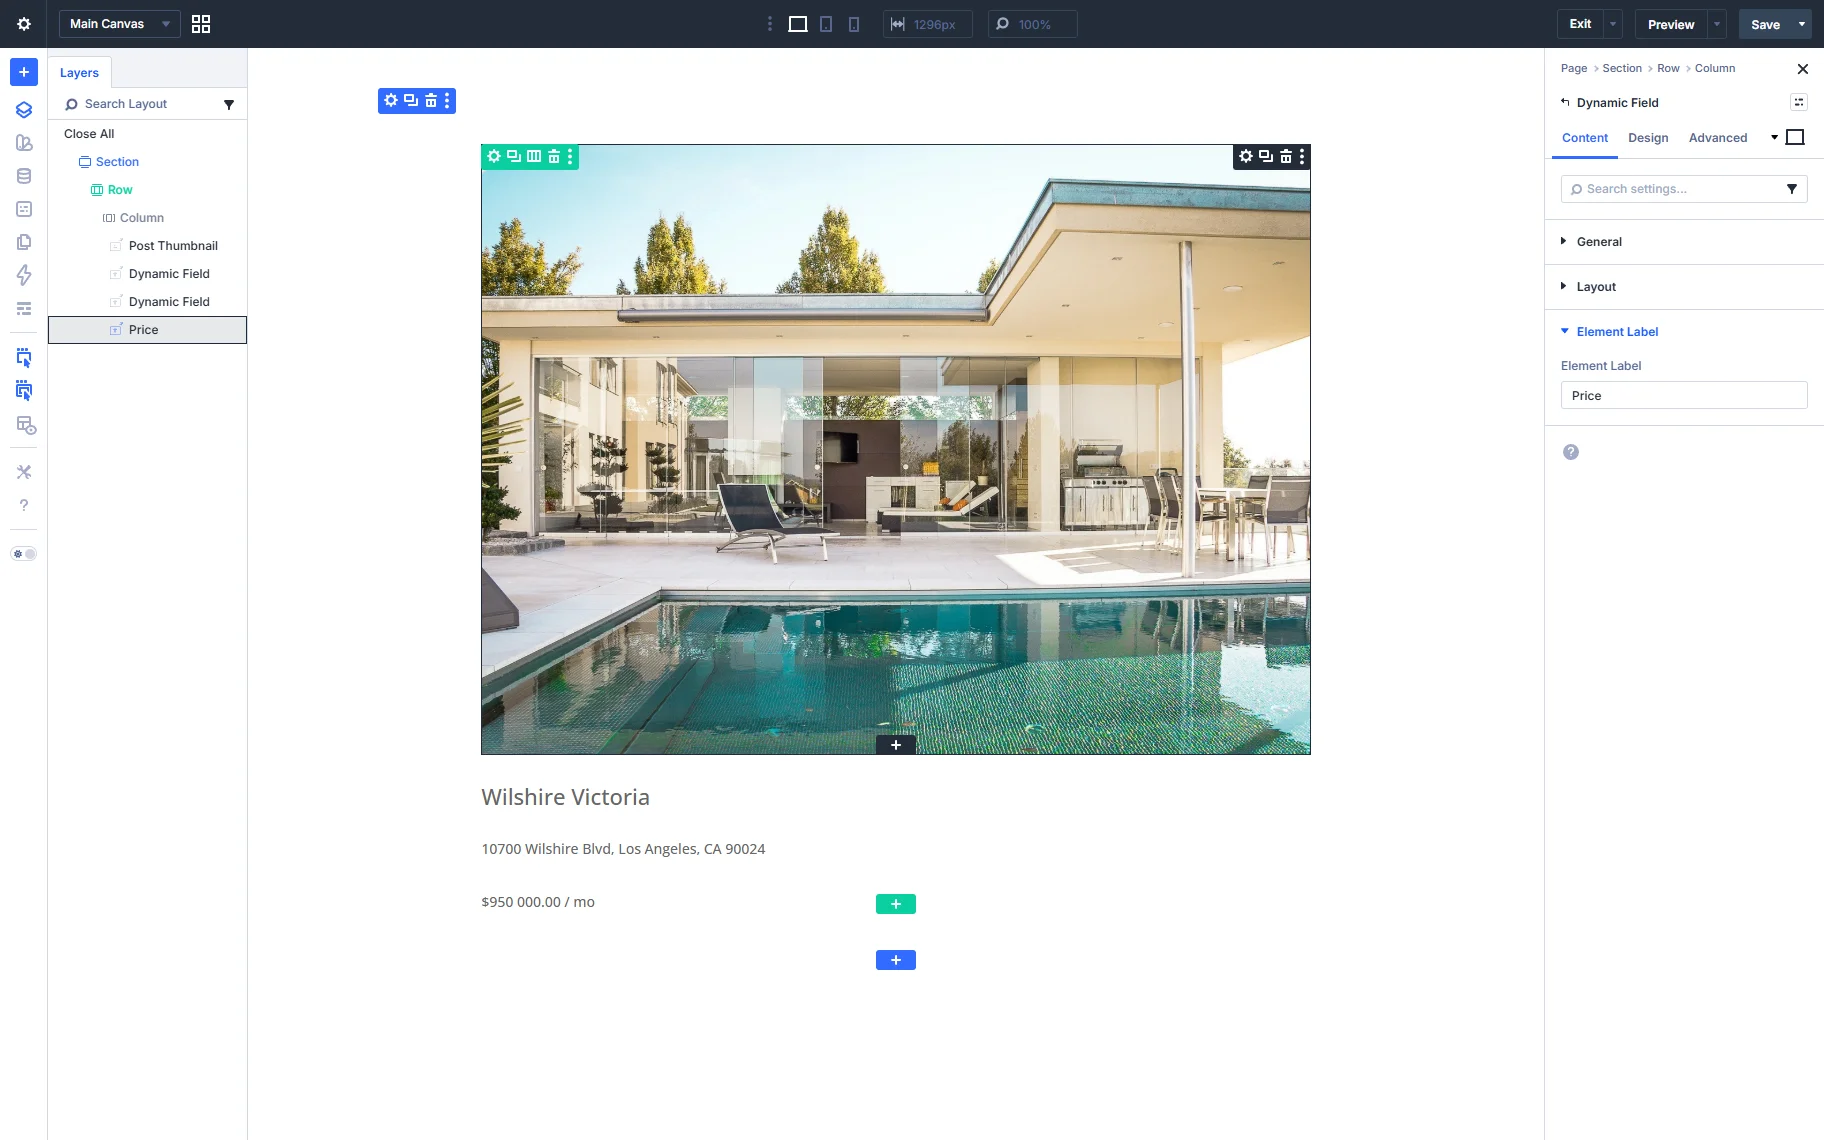
For example, for the “price” field, we add the “Format number” callback and customize the output in the Field Format input.
In the same way, you can change the Element Label for the Dynamic Field in the dedicated section.
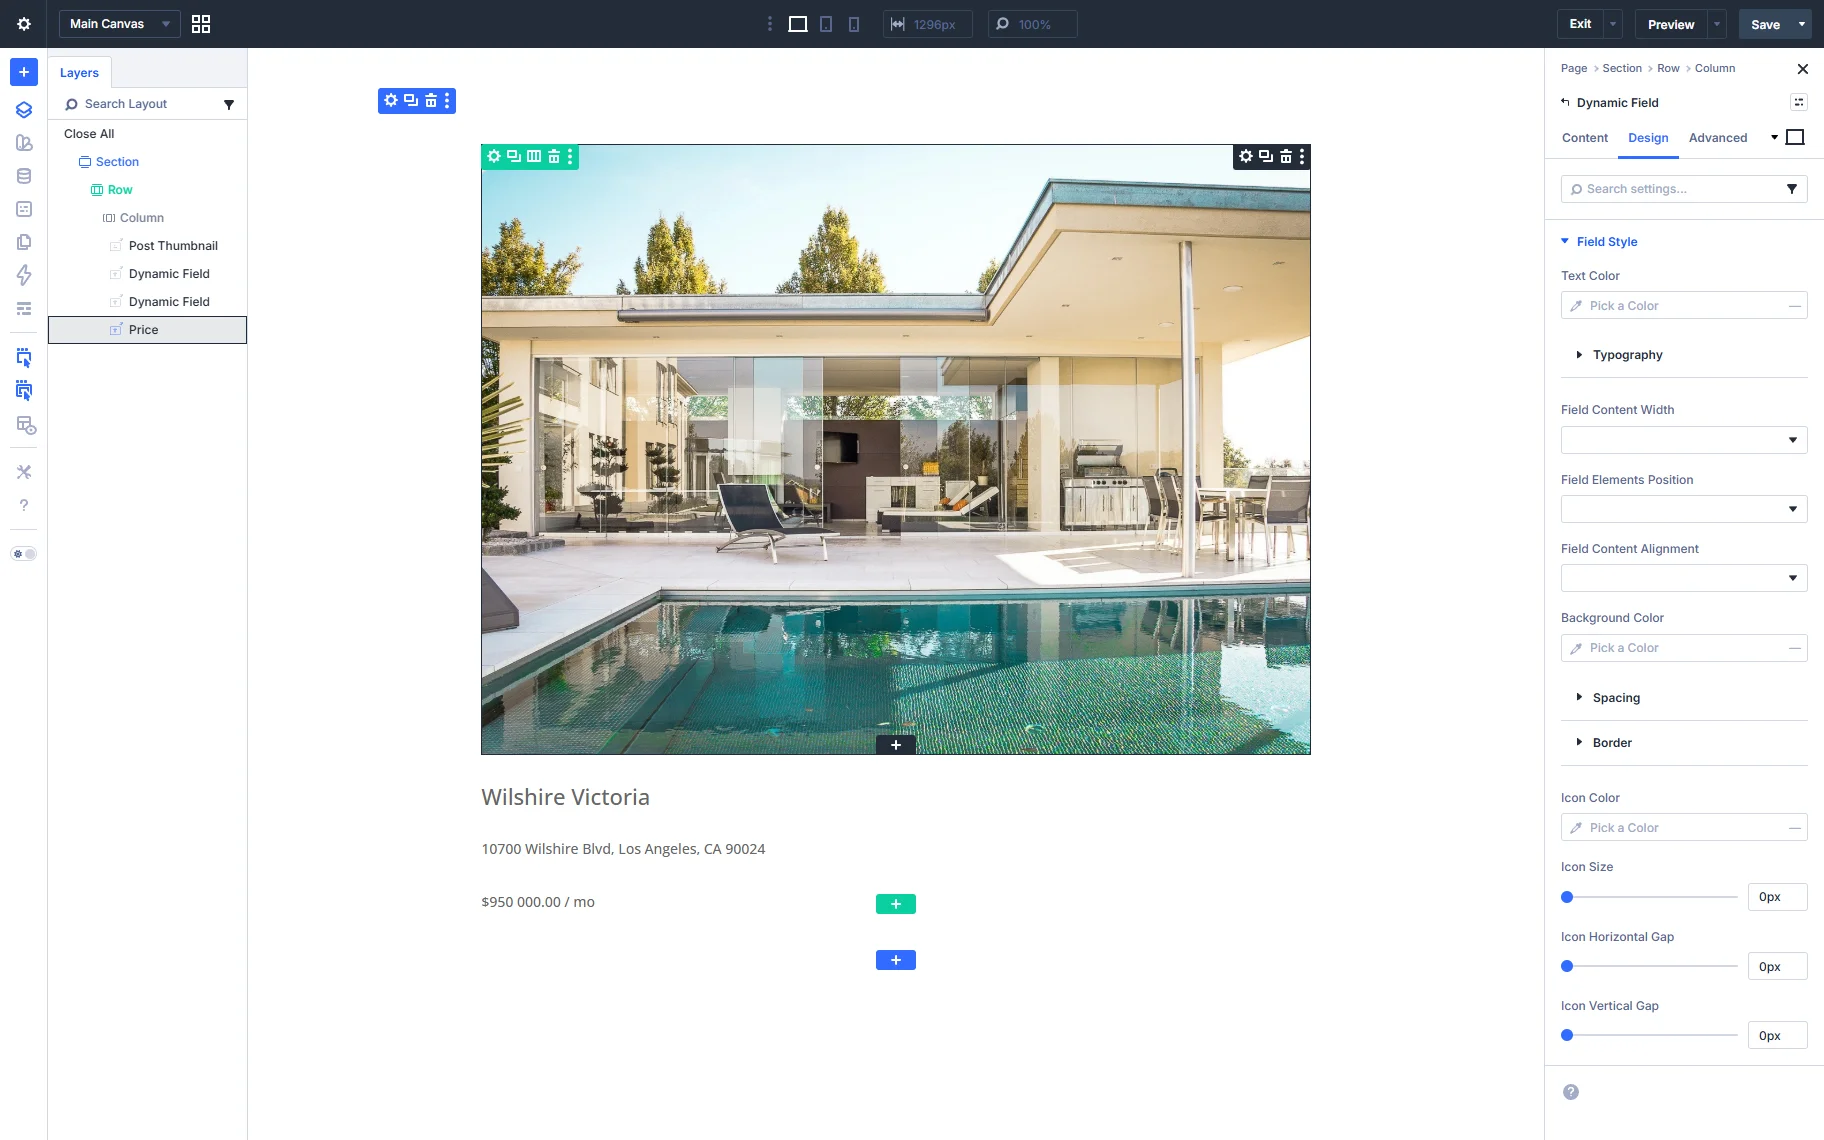
In the Design tab, you find all the style settings for the Dynamic Field.
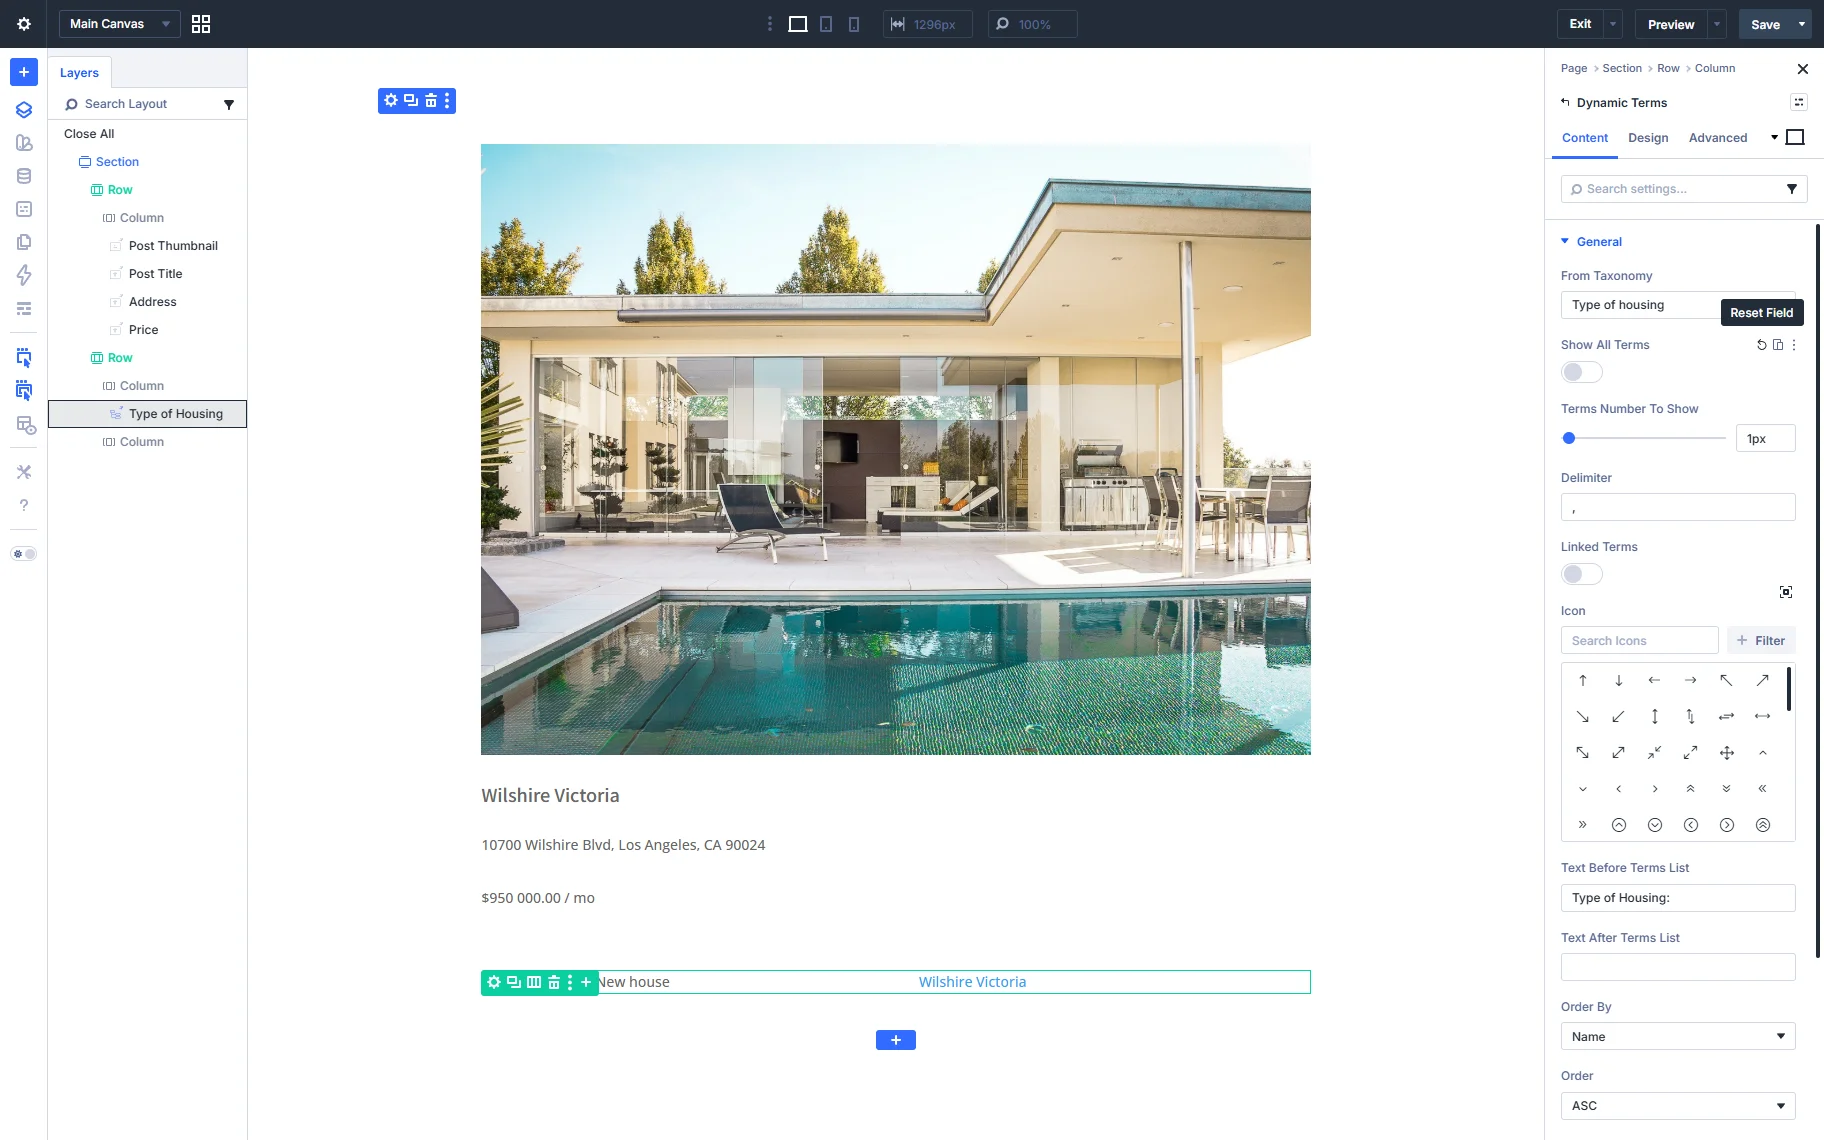
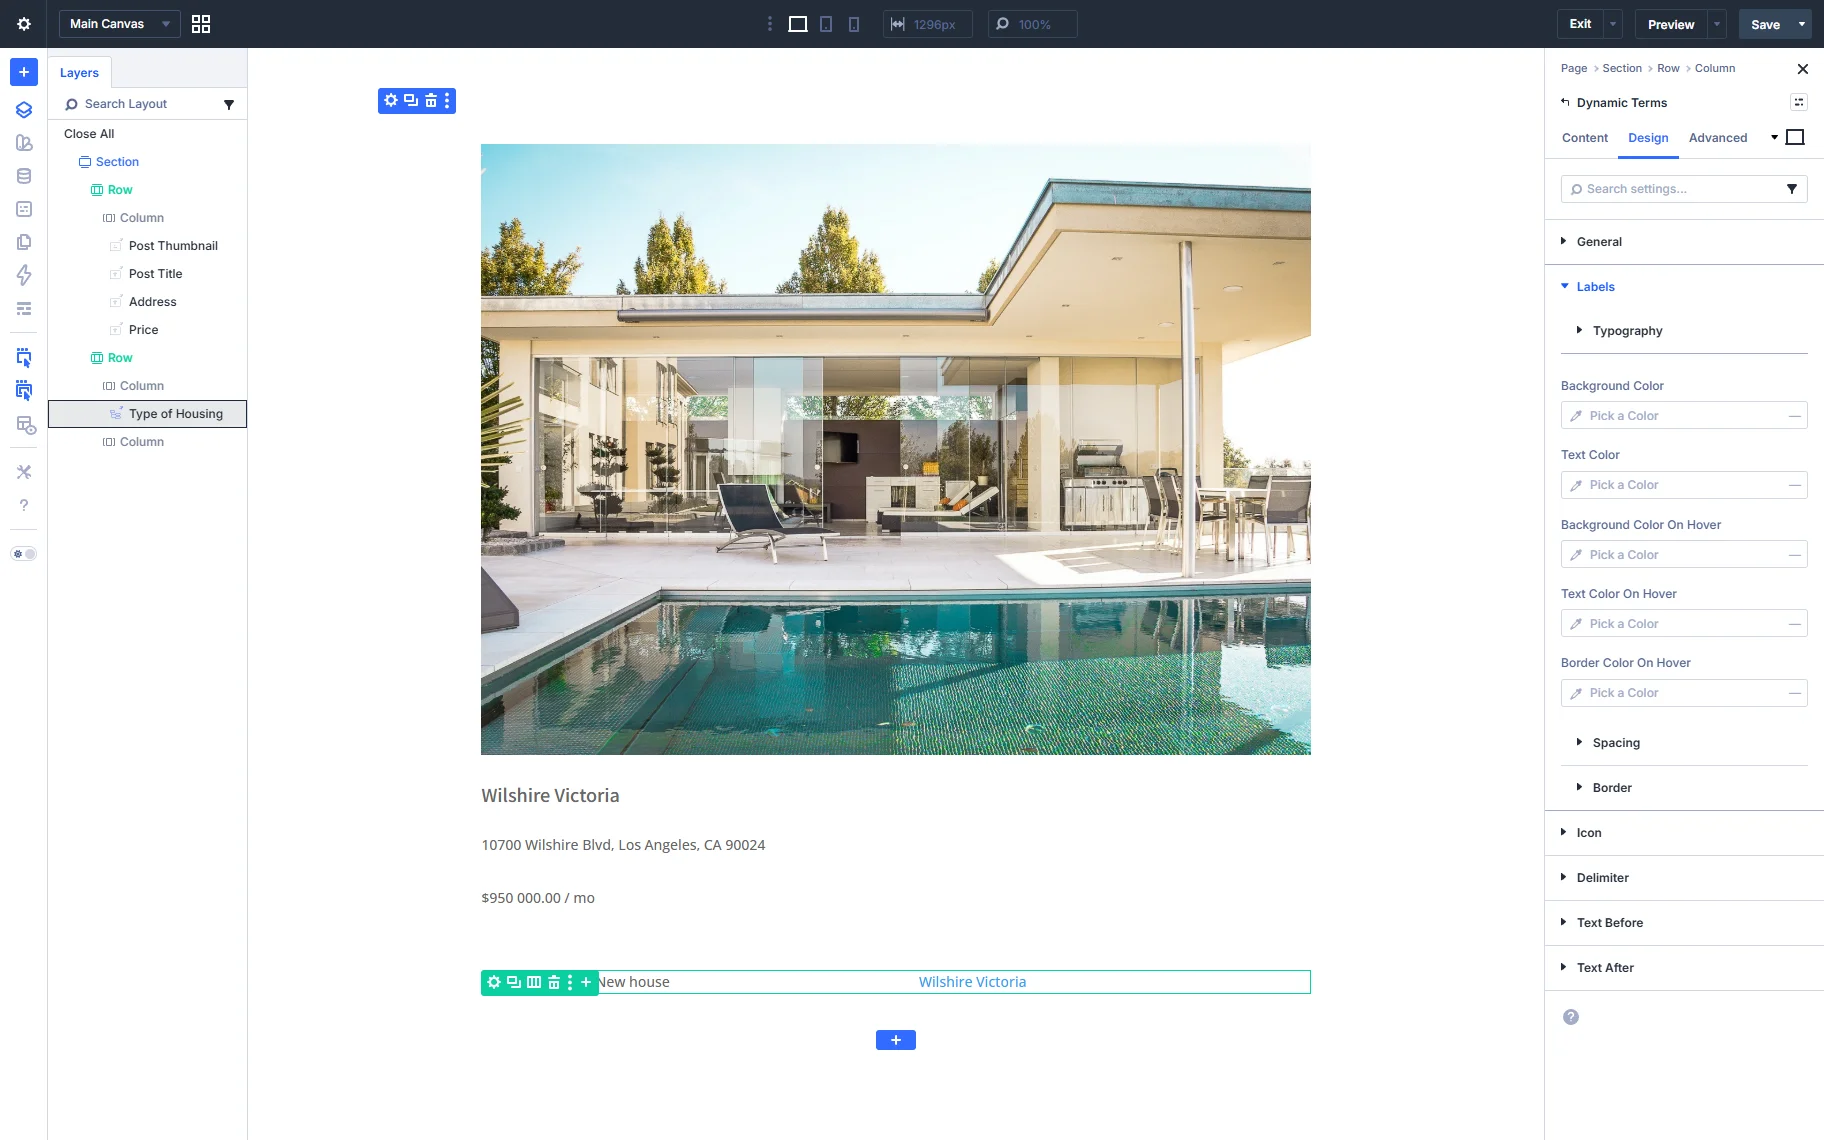
Additionally, you can display the post’s terms using the Dynamic Terms element. In the General settings tab, you can select the taxonomy from which you need terms to display, choose how many terms will be displayed, or if you need to add any text before or after the term.
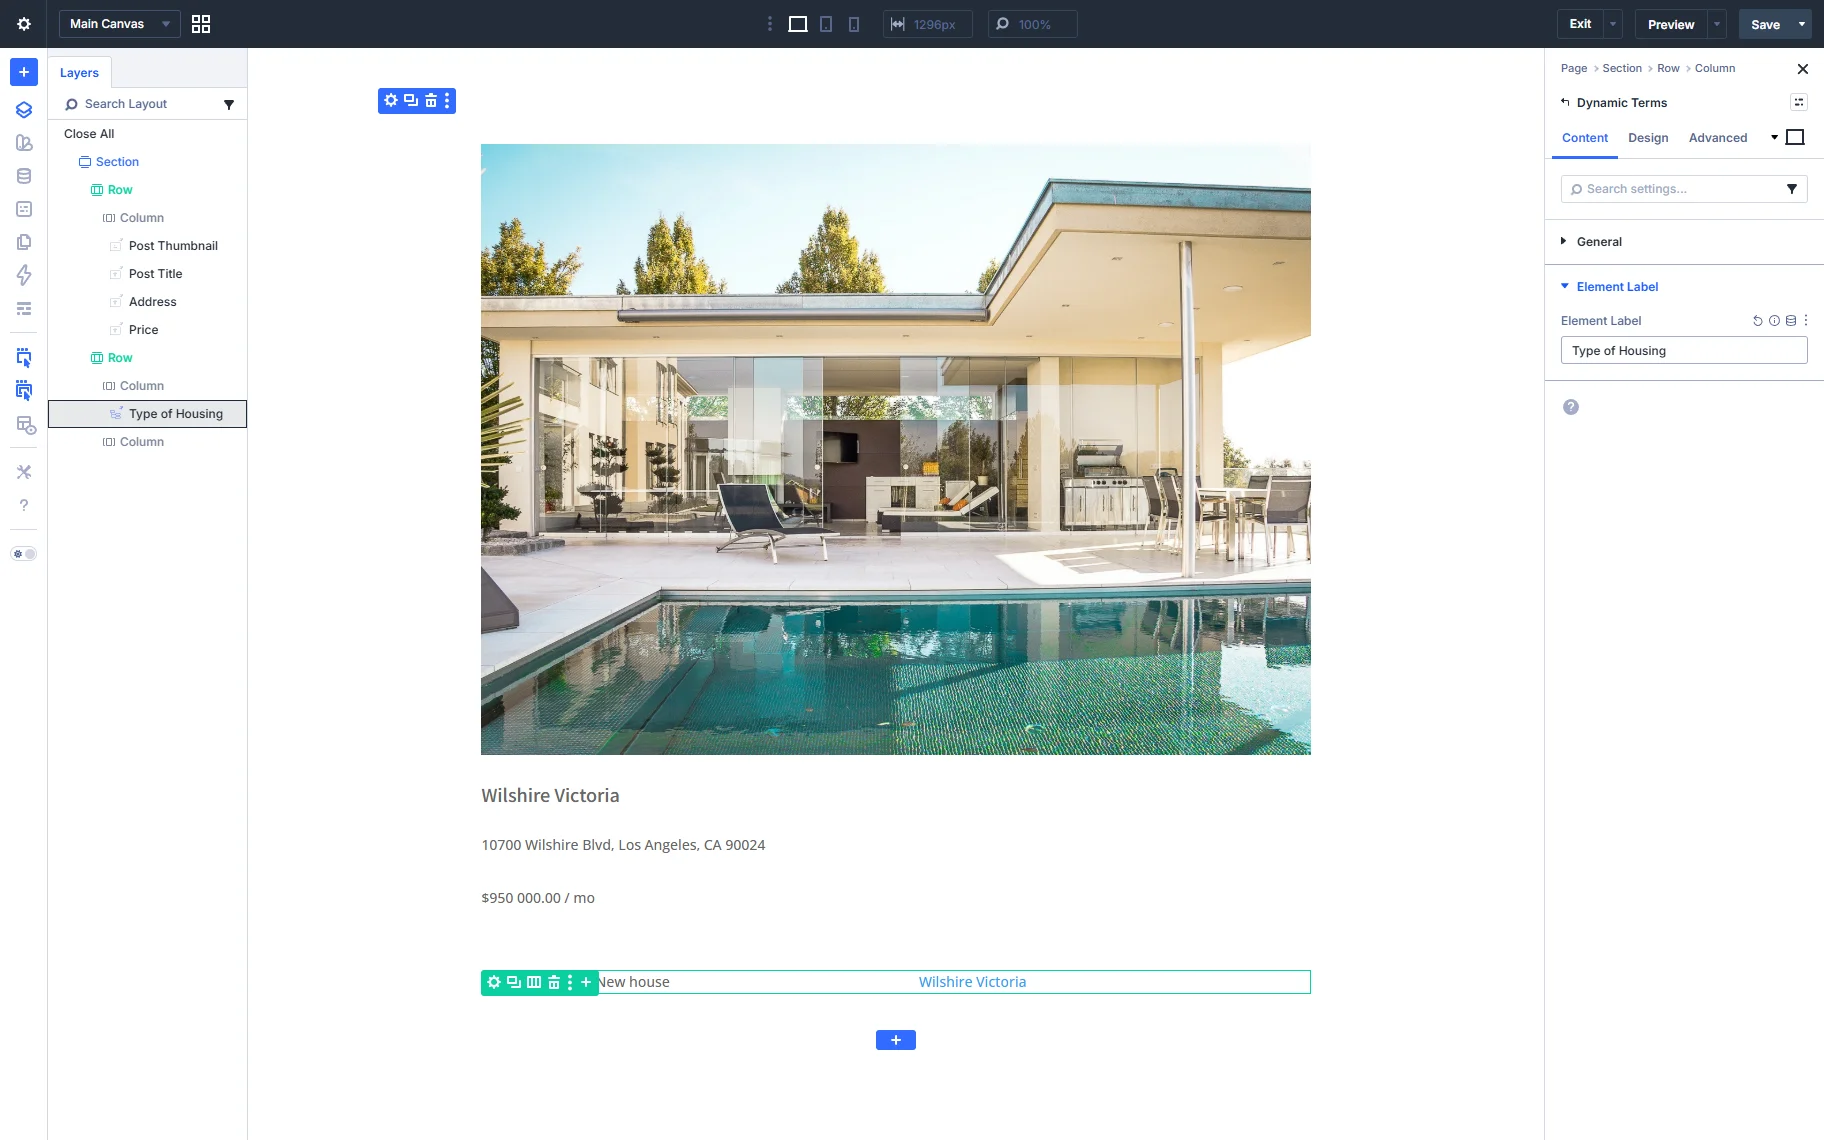
You can also change the Element Label for the Dynamic Terms.
Set the desired styles in the Design tab of the Dynamic Terms element.
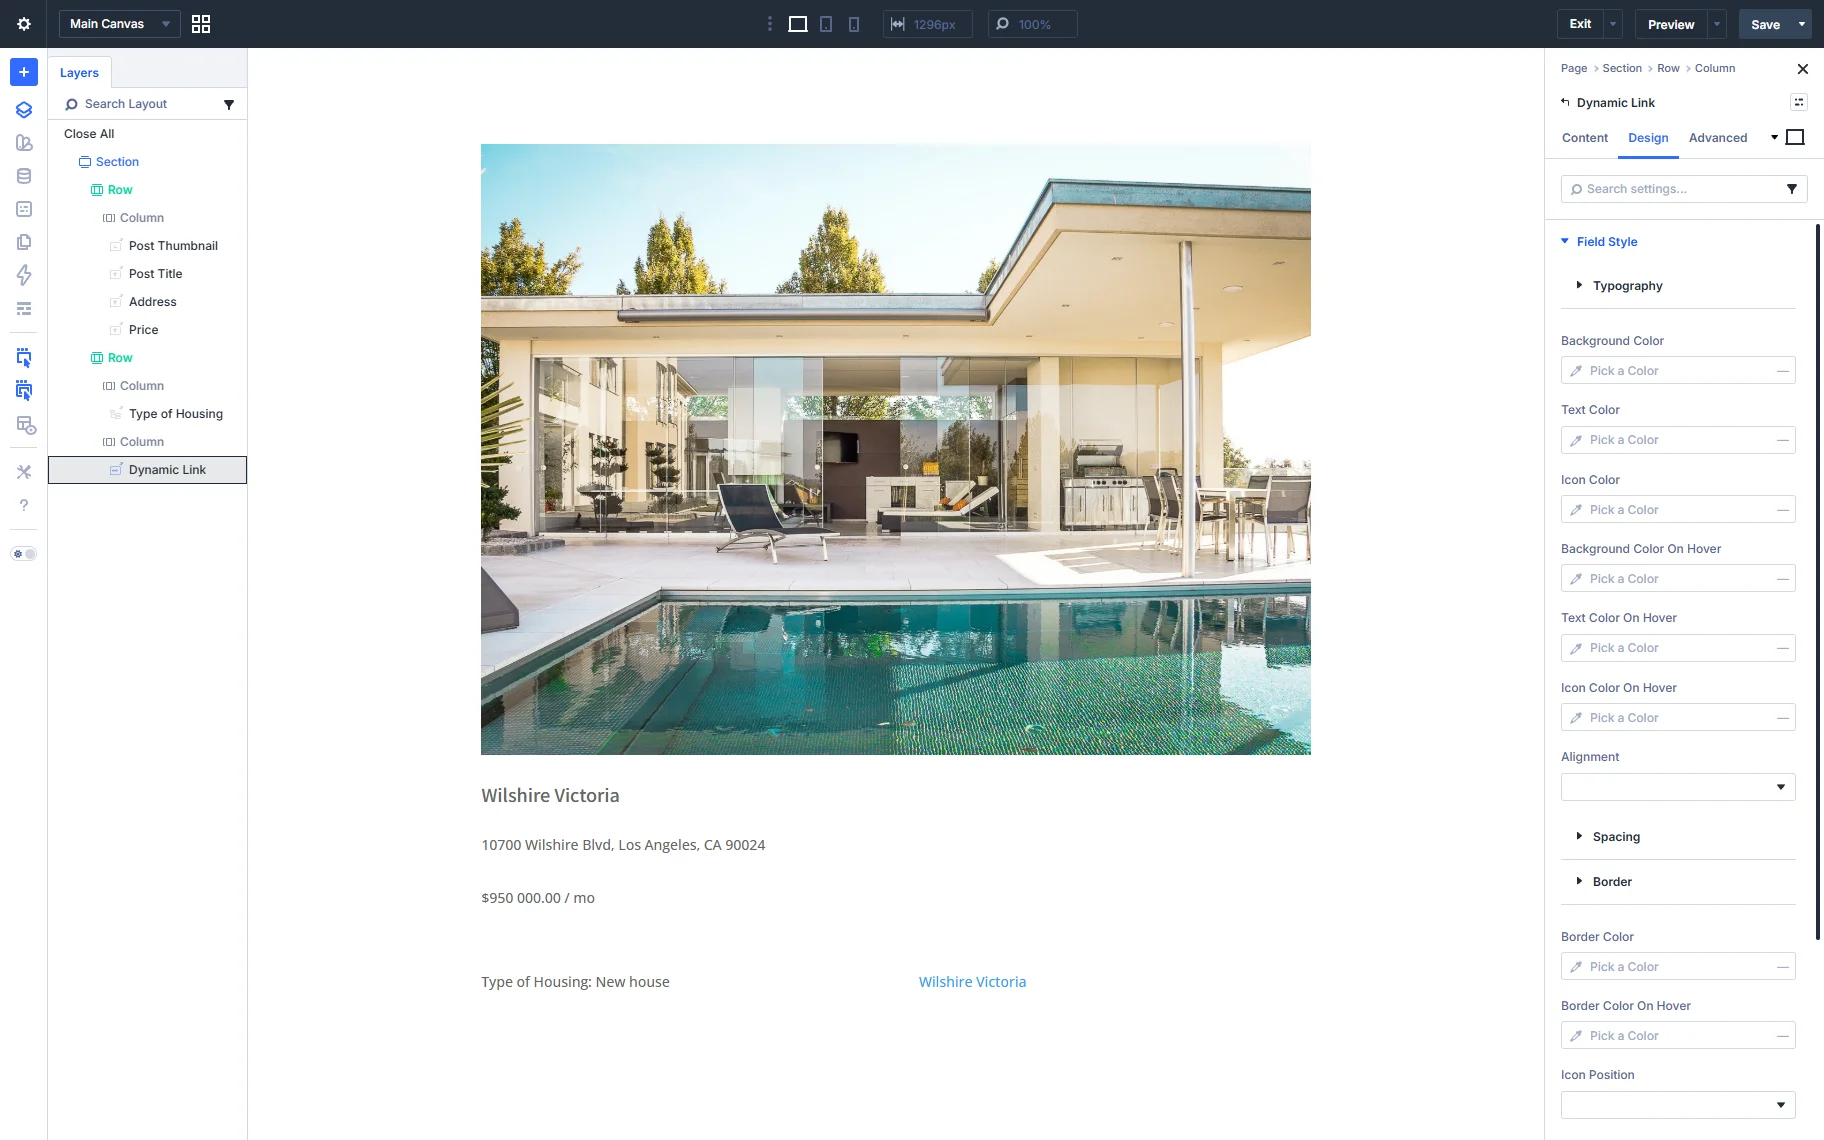
You can add the Dynamic Link element for displaying content from a predefined source (e.g., text, image, or link) with a link attached to it. For example, here, we display the post’s title with the link to the post itself.
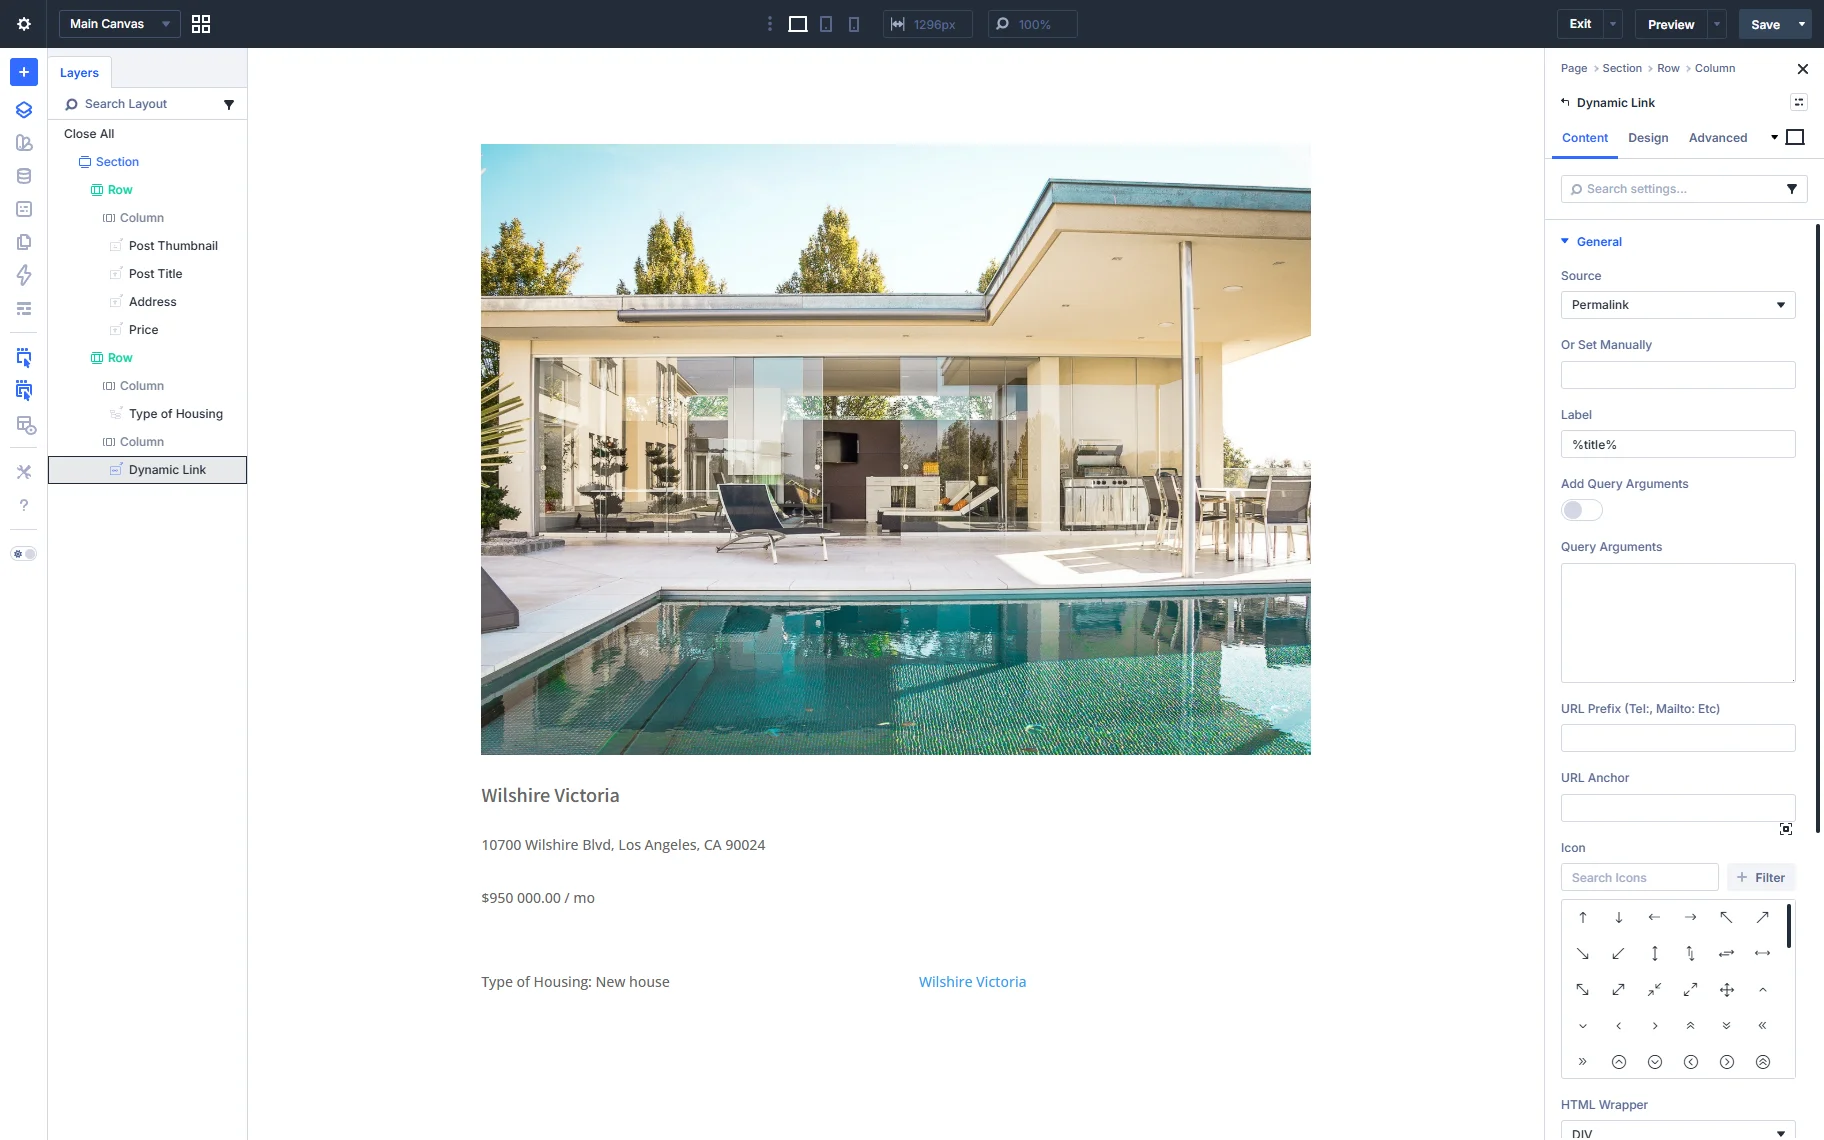
You can also set the desired styles in the Design tab.
You can also use other dynamic elements, such as Dynamic Meta or Dynamic Repeater.
Once you are ready with the Listing Template settings, click the “Save” button.
Add the Listing Grid to a Page
Proceed to the page where you need to display the listing. We create a new page in this case. Give your page a title, then click “Use Divi Builder”. This will reload the page onto the front end of the website with the Divi Visual Builder enabled.
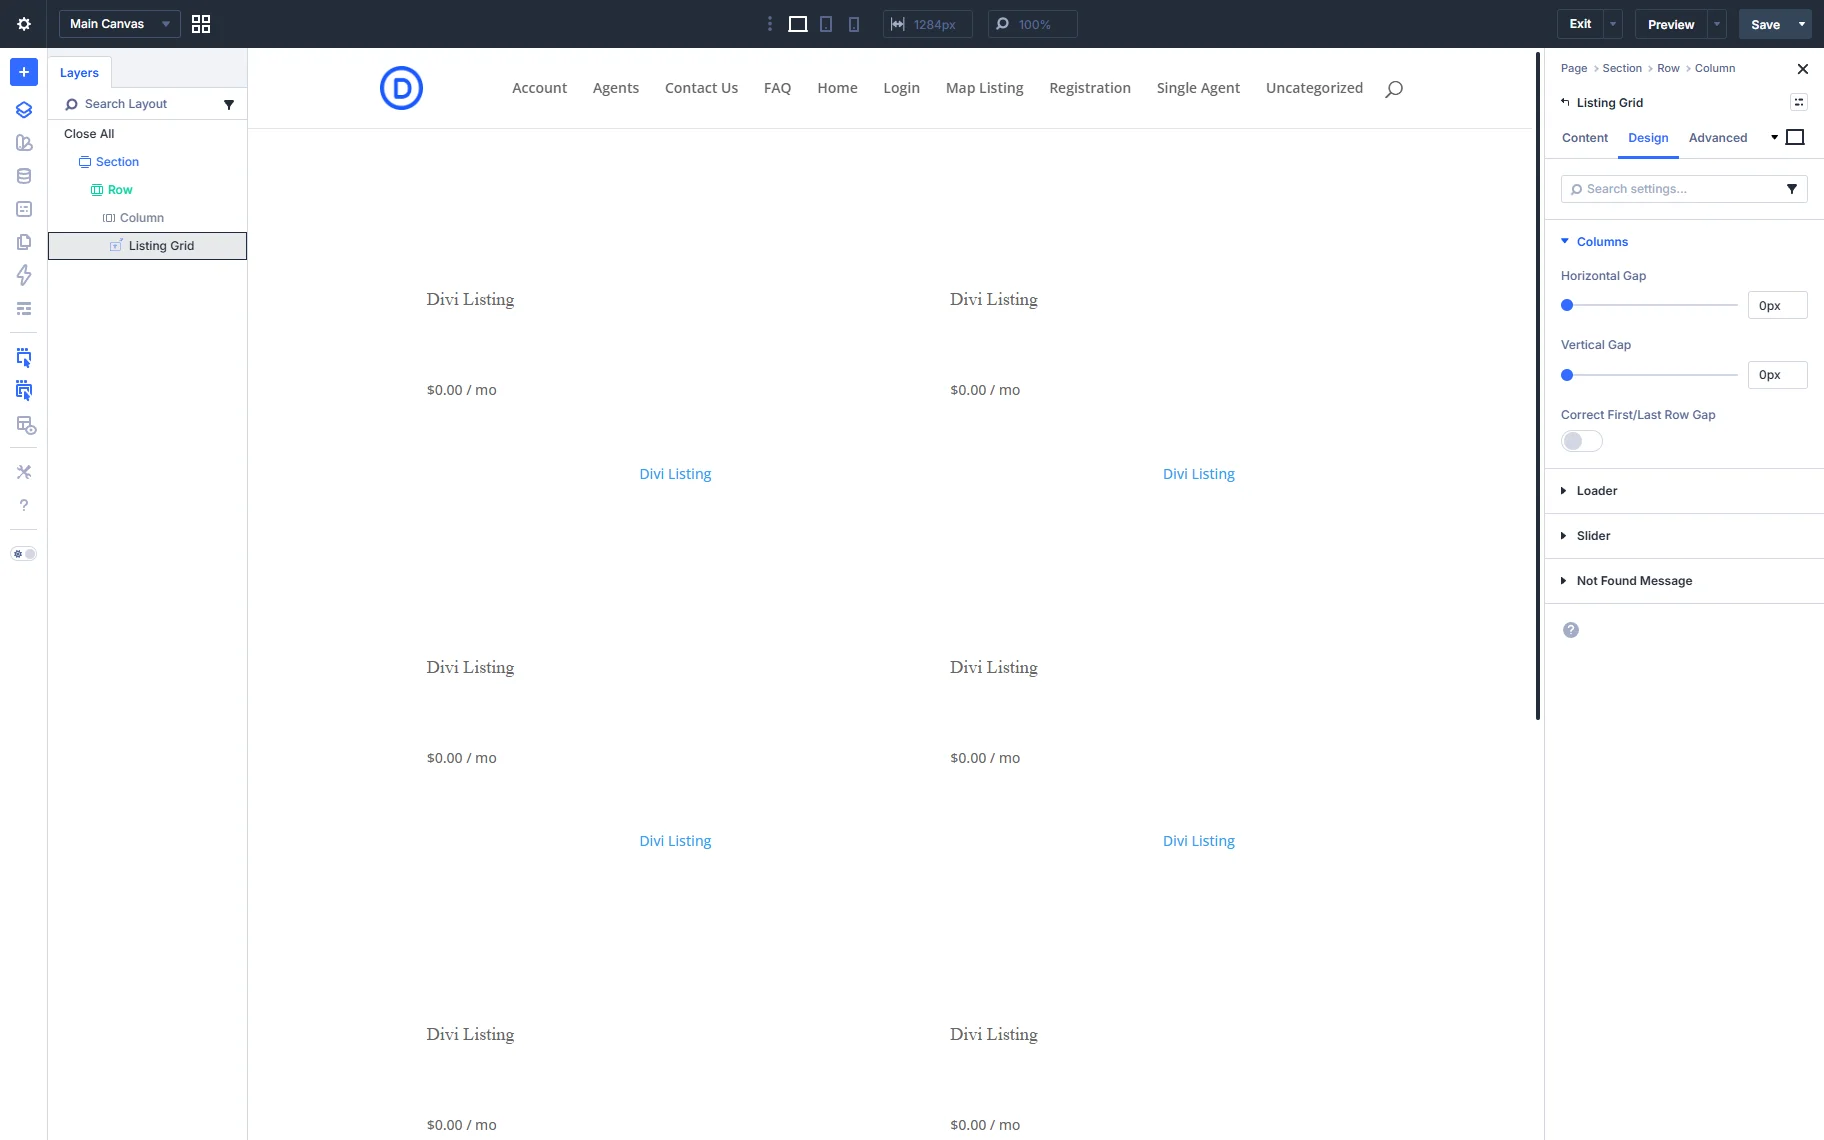
Add the desired type of column and add the Listing Grid element. Select the listing you created in the Listing dropdown. Here you can set the different Columns Number for different devices. You can also set the Min and Max Posts Numbers.
Besides, you can also see the following settings:
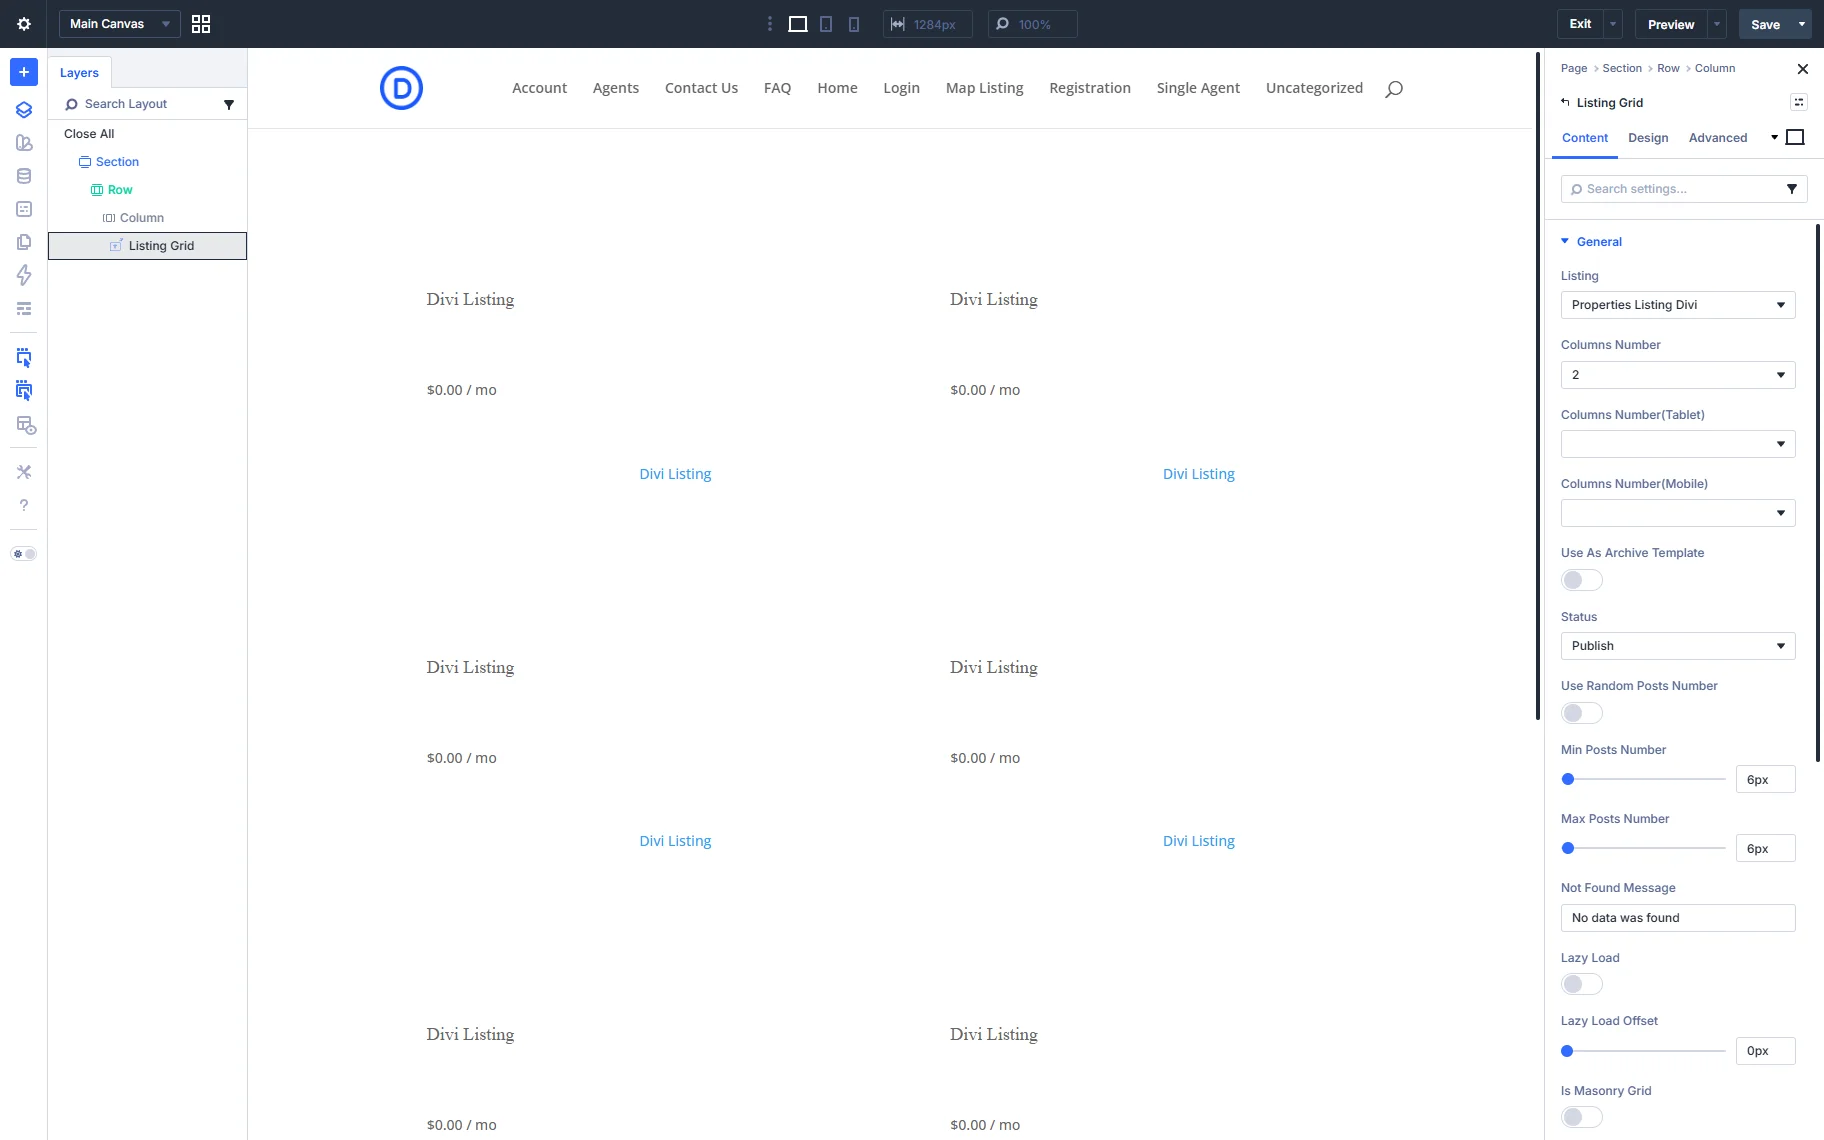
- Use as Archive Template — a toggle to use the page where the grid is placed as an archive template. In this case, the number of posts will be taken from the Blog pages shown in most fields that can be found in WordPress Dashboard > Settings > Reading window;
- Status — a field that allows selecting the needed status of posts to be displayed in the Listing Grid: “Publish”, “Future”, “Draft”, “Pending review”, “Private”, or “Inherent”;
- Use Random Posts Number — a toggle that can be enabled to show a random number of posts each time the user reloads the page. After switching it on, the minimum number of posts can be set in the Posts number bar, and the maximum number of posts in the Max Random Posts number bar;
- Not Found Message — specifies what text will appear when the data is not found;
- Lazy Load — improves page rendering performance by loading the grid content only as the user scrolls, rather than on initial page load. If enabled, the Lazy load Offset switcher sets the corresponding offset in px;
- Lazy Load Offset — defines the distance from the bottom of the Listing Grid at which the next items should start loading. When Lazy Load is enabled, the grid automatically loads the next batch of items as the user scrolls down the page;
- Is Masonry Grid — a toggle to present the Listing in the form of a masonry grid;
- Equal Columns Height — unifies all the columns by their height;
- Load More — a toggle that, if enabled, allows organization of the listing and saves page space in case there are a lot of posts to show. In this case, the defined number of posts, along with additional ones, will be shown upon the user’s demand. Additionally, an Infinite Scroll functionality can be used on the page, which means new posts in the grid will be loaded as the user scrolls through the page.
- Load More — a dropdown list where the “Load More” behavior can be picked. Additional items can be loaded on click or via an infinite scroll;
- Load more element ID — a field for the ID of the button that will be attached to the listing. It should be a separate element added to the page with the specified ID in its settings. Then this ID should be pasted in this field;
- Loader text — a text field for inserting the text that will be displayed when items are loading;
- Loader spinner — a toggle that enables a loader spinner when posts are loading.
Do not worry if the JetEngine’s Listing Grid does not display the posts’ content on the backend page in the Divi editor. Once you save the settings, the correct information will be displayed on the frontend.
The Listing Grid element also offers a Custom Query tab. This section allows using a query built with the Query Builder functionality. The setting is presented by the Use Custom Query toggle and the Custom Query dropdown list to select the needed query. This feature is especially useful when you need to filter Custom Post Types in Divi, for example, displaying posts based on specific conditions or user input.

With the Block Visibility settings section, it is possible to set the element to always be shown or hide it when the query is empty.
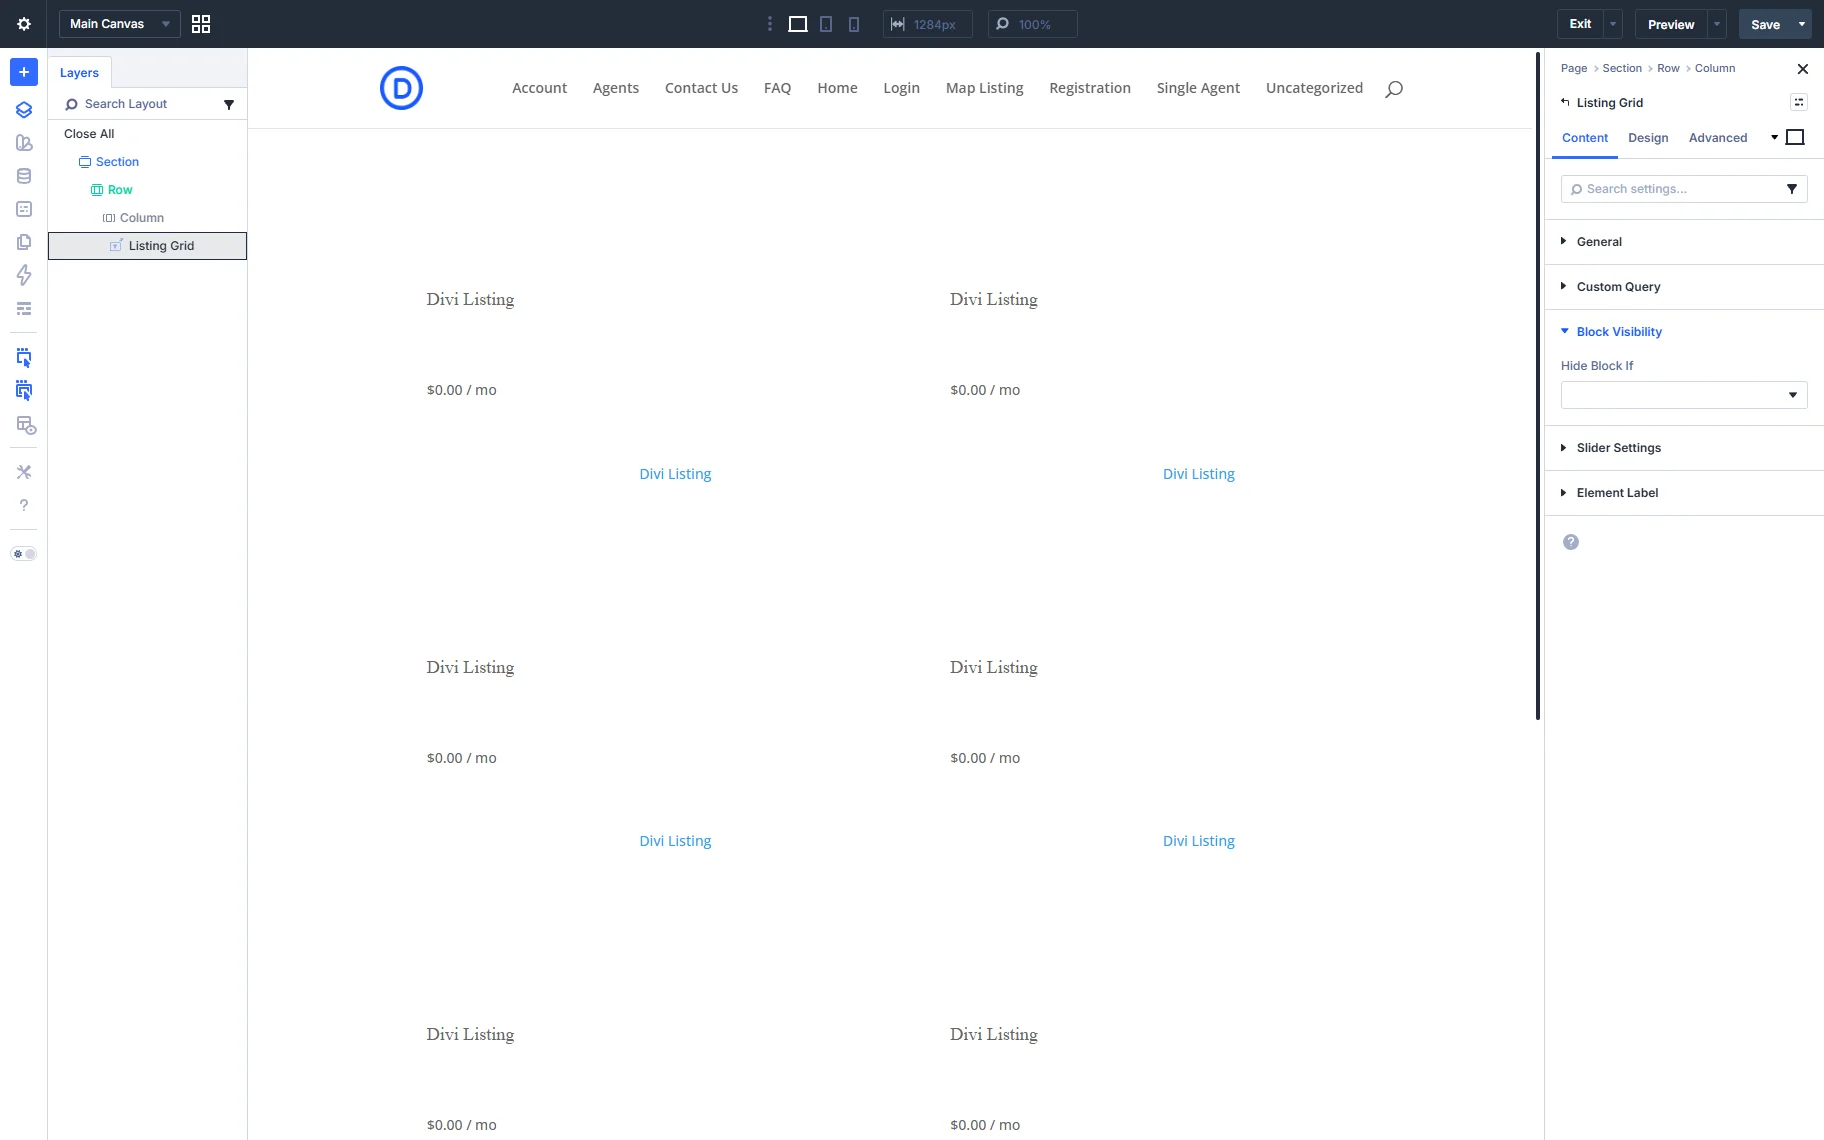
In the Slider Settings tab, you can enable and set the slider’s functionality.
The following settings are available:
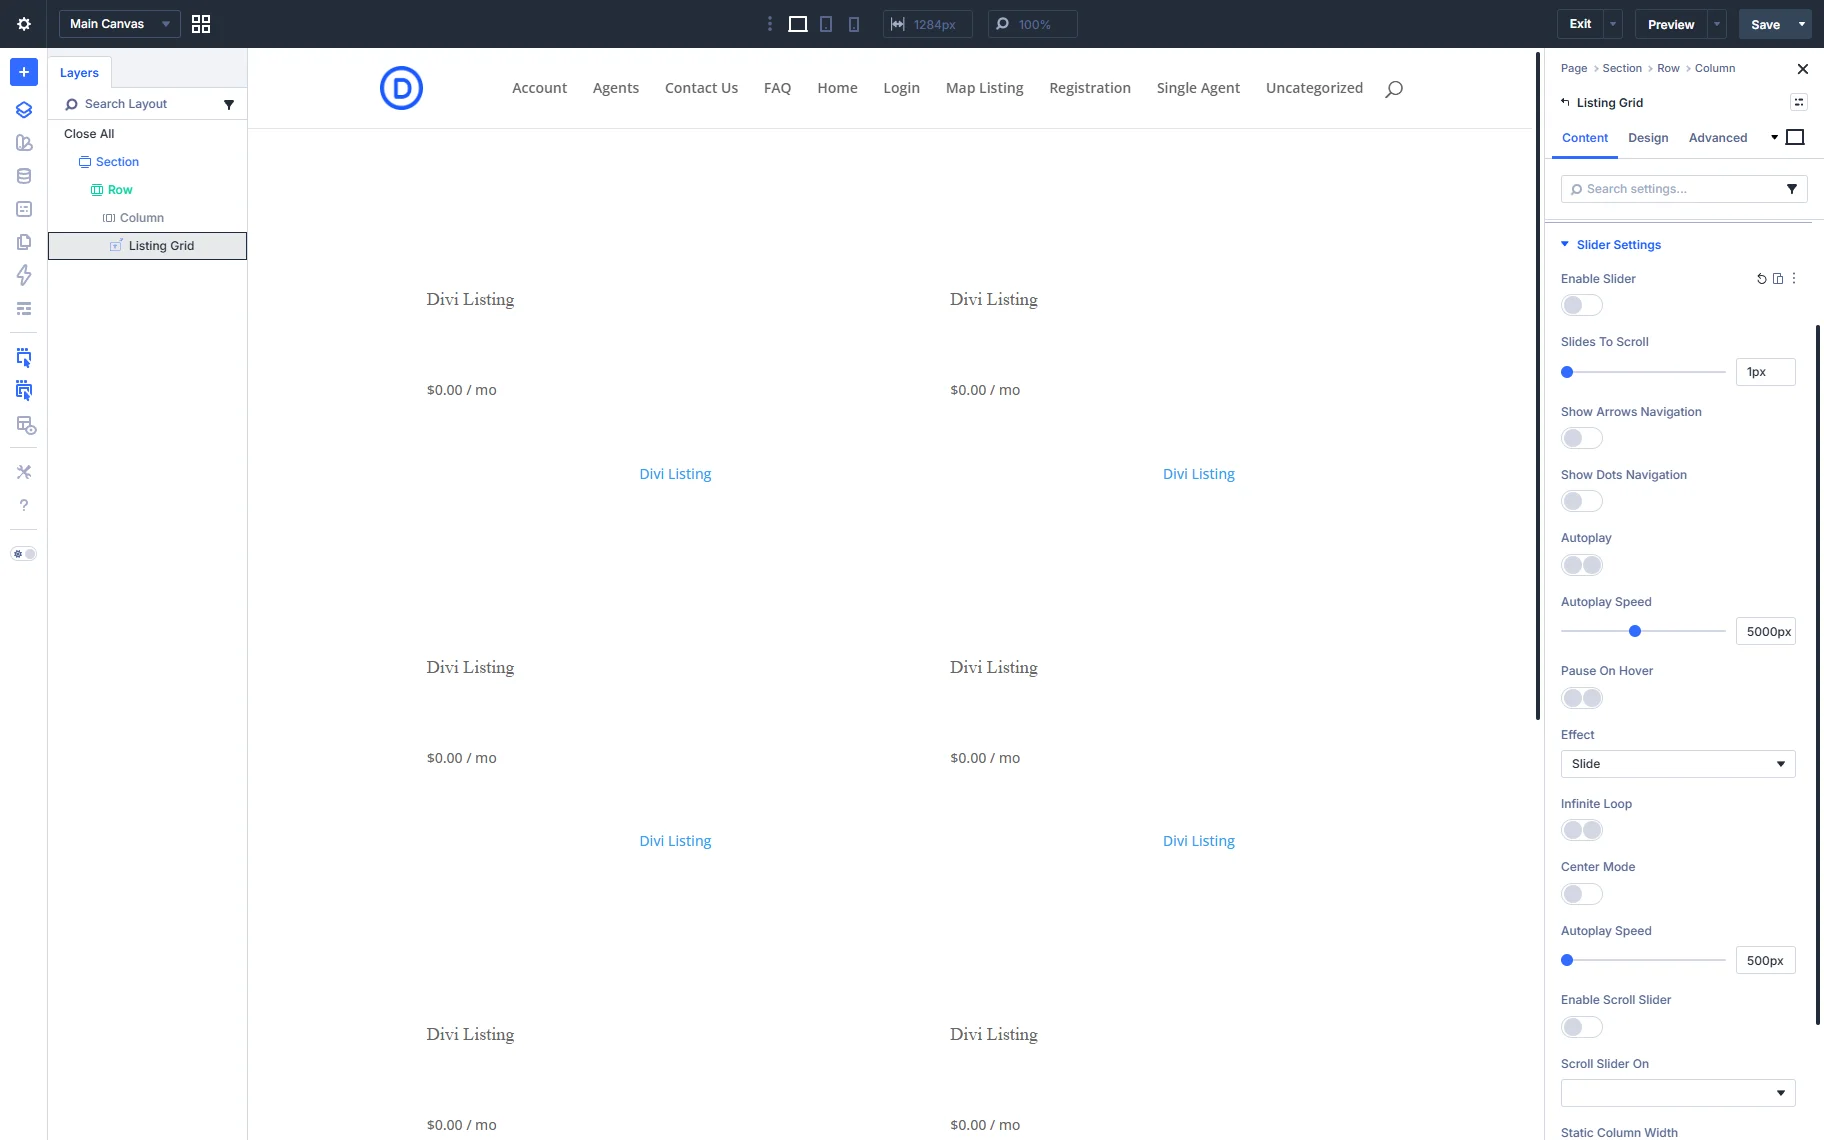
- Enable Slider — the toggle allows you to turn on the slider’s functionality for the Listing;
- Slides to Scroll — a field to decide how many posts will be shifted to the side in one click;
- Show Arrows Navigation — a toggle to be activated, so the arrows will be displayed on each side of the slide. When the toggle is enabled, you can also choose the Arrow Icon;
- Show Dots Navigation — a toggle to add the dots navigation to the bottom of the slider block;
- Autoplay — a toggle to activate the autoplay effect;
- Autoplay Speed — a field to set the slider speed if one does not want users to slide the listing manually;
- Pause on Hover — a toggle that allows the user to pause the slide switching once the user hovers over a slide;
- Effect — a dropdown with the “Slide” and “Fade” options to be applied to the slide switching;
- Infinite Loop — a switcher to be enabled for slides to repeat from the first one after the last one is shown;
- Center Mode — a toggle that makes items centered and other items pre-shown at sides;
- Animation Speed — a field to specify the speed of the slider animation;
- Enable Scroll Slider — a toggle is intended to add a horizontal scroll to the grid. On a mobile device, such a slider can be moved by just swiping it with fingers. That can sufficiently reduce the length of the page and improve the UI;
- Scroll Slider On — a dropdown list that allows setting the device on which the scroll slider will be enabled. That could be the desktop, tablet, or mobile;
- Static column width — a field to set some static widths of the grid for different devices.
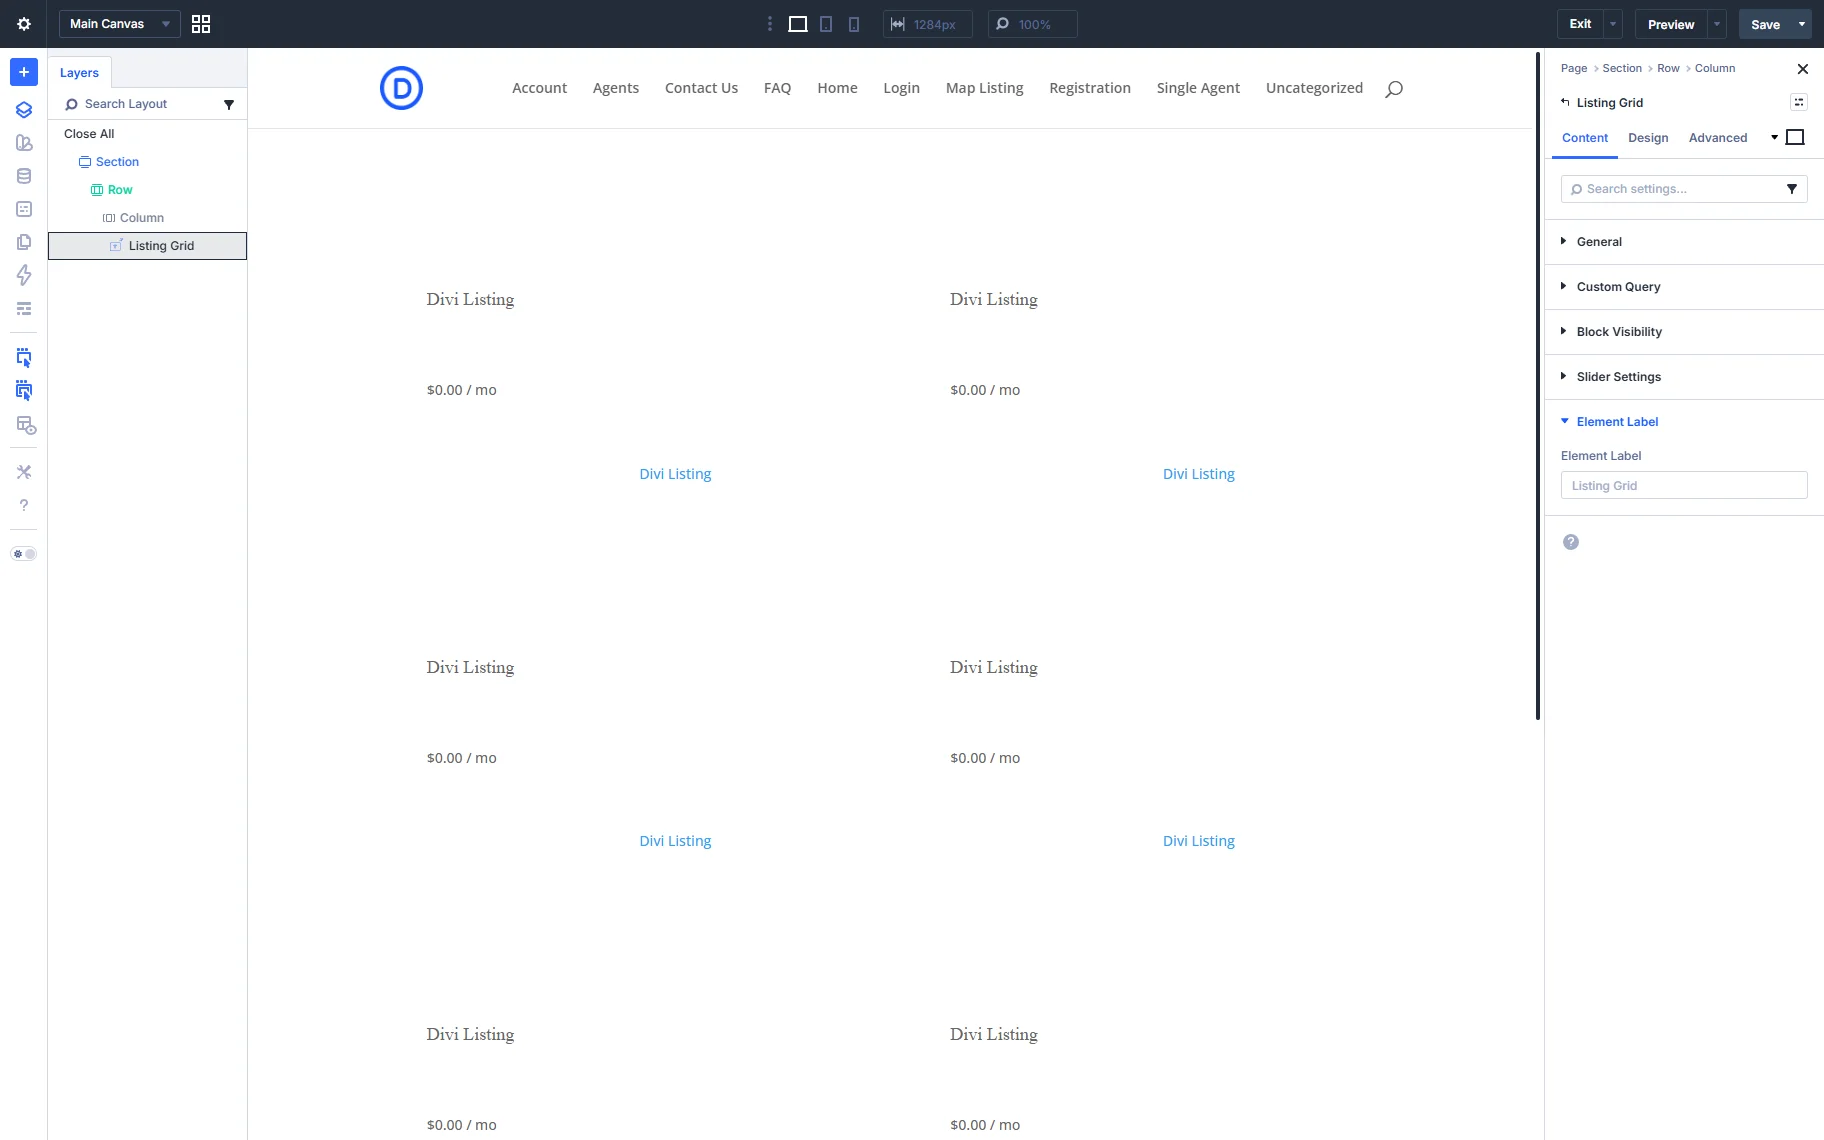
In the Element Label tab, you can change the label for the Listing Grid.
In the Design section, you can set the desired styles for the Columns, Loader, Slider, and Not Found Message.
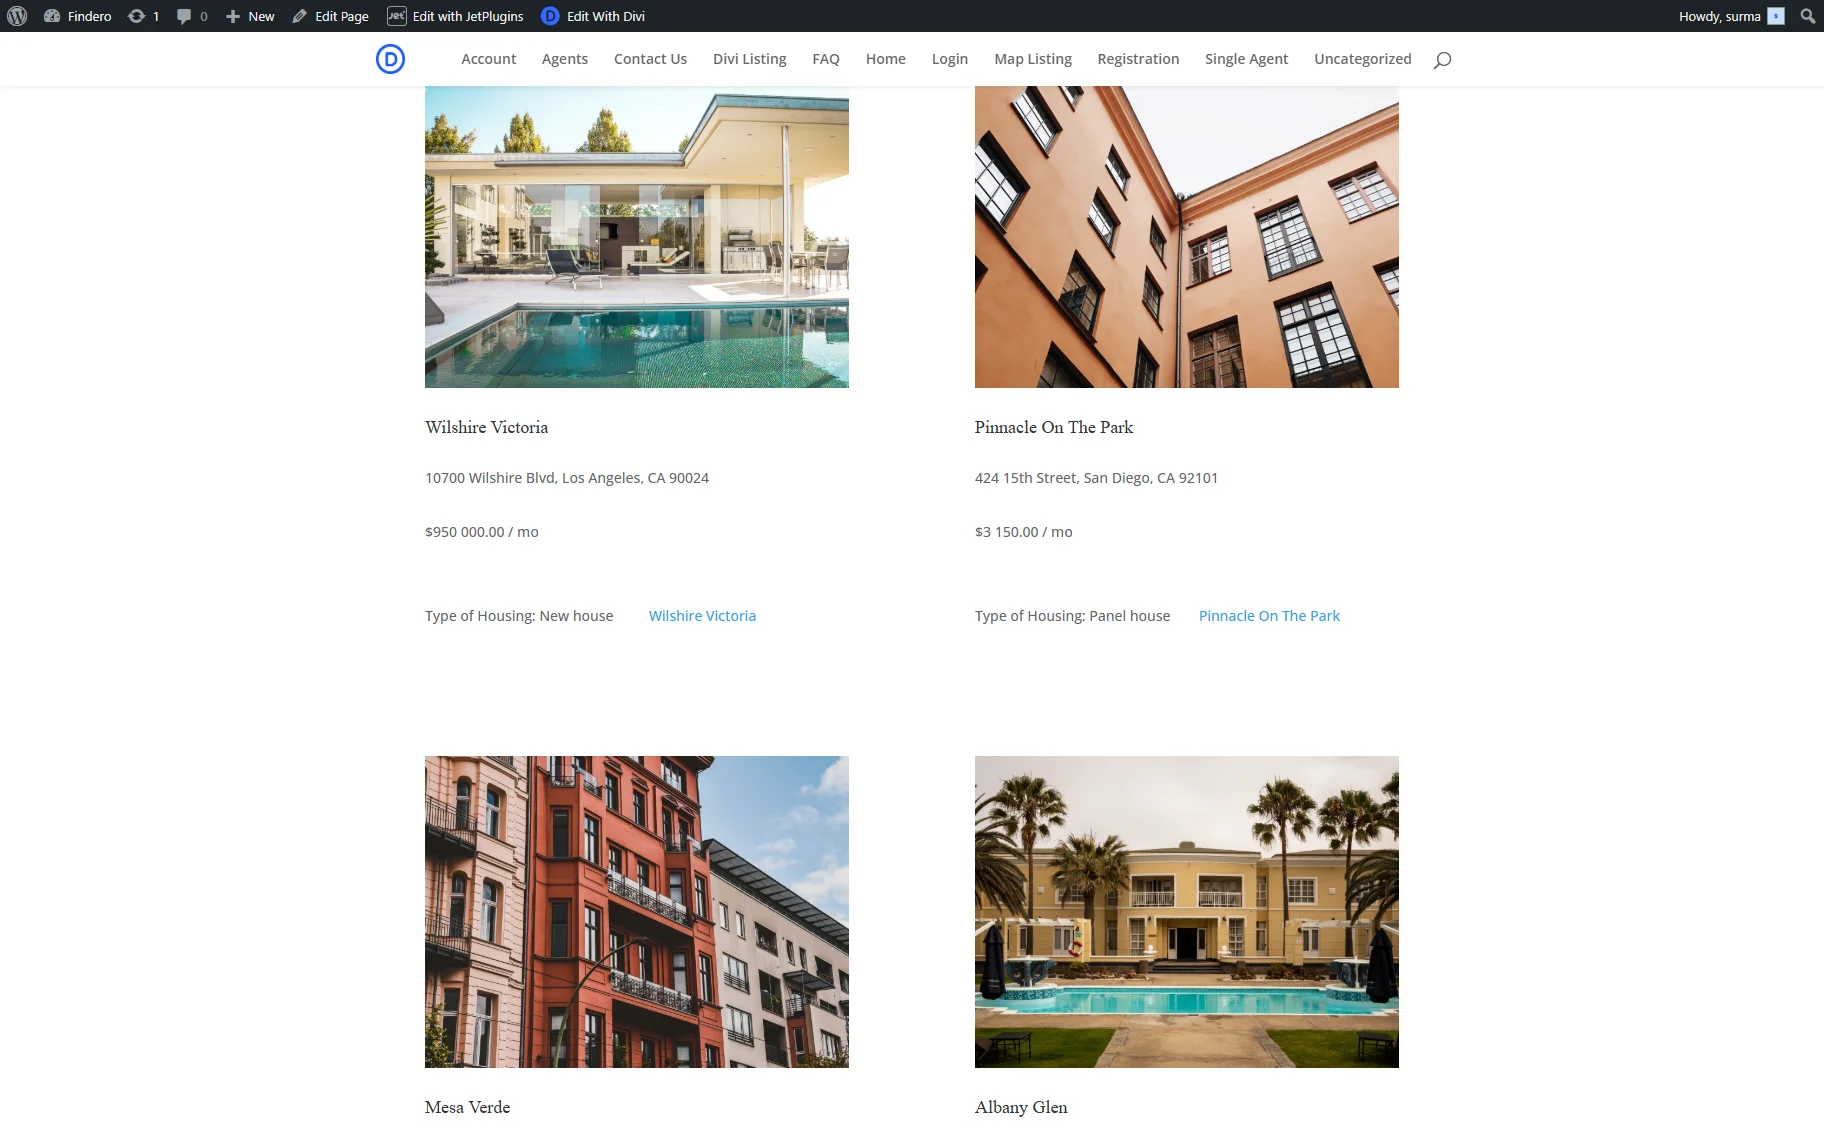
Click the “Save” button once you are ready. On the frontend, the Listing Grid displayed the posts correctly.
That’s it. Now you know how to build and use the Divi Listing Grid with JetEngine to display custom post types dynamically.