How to Set Geo Search Based on User Geolocation
Learn how to set geo search on the WordPress website based on User geolocation via the JetEngine Query Builder tool and the User Geolocation widget/block from the JetSmartFilters plugin.
Before you start, check the tutorial requirements:
- Elementor (Free version) or Block editor (Gutenberg)
- JetSmartFilters plugin installed and activated
This feature for WordPress shows posts, terms, users, or Custom Content Types (CCT) items within a given location radius of the users who visited the site if they allow sharing geolocation. You can set it via the JetEngine Query Builder tool and JetSmartFilters User Geolocation widget/block.
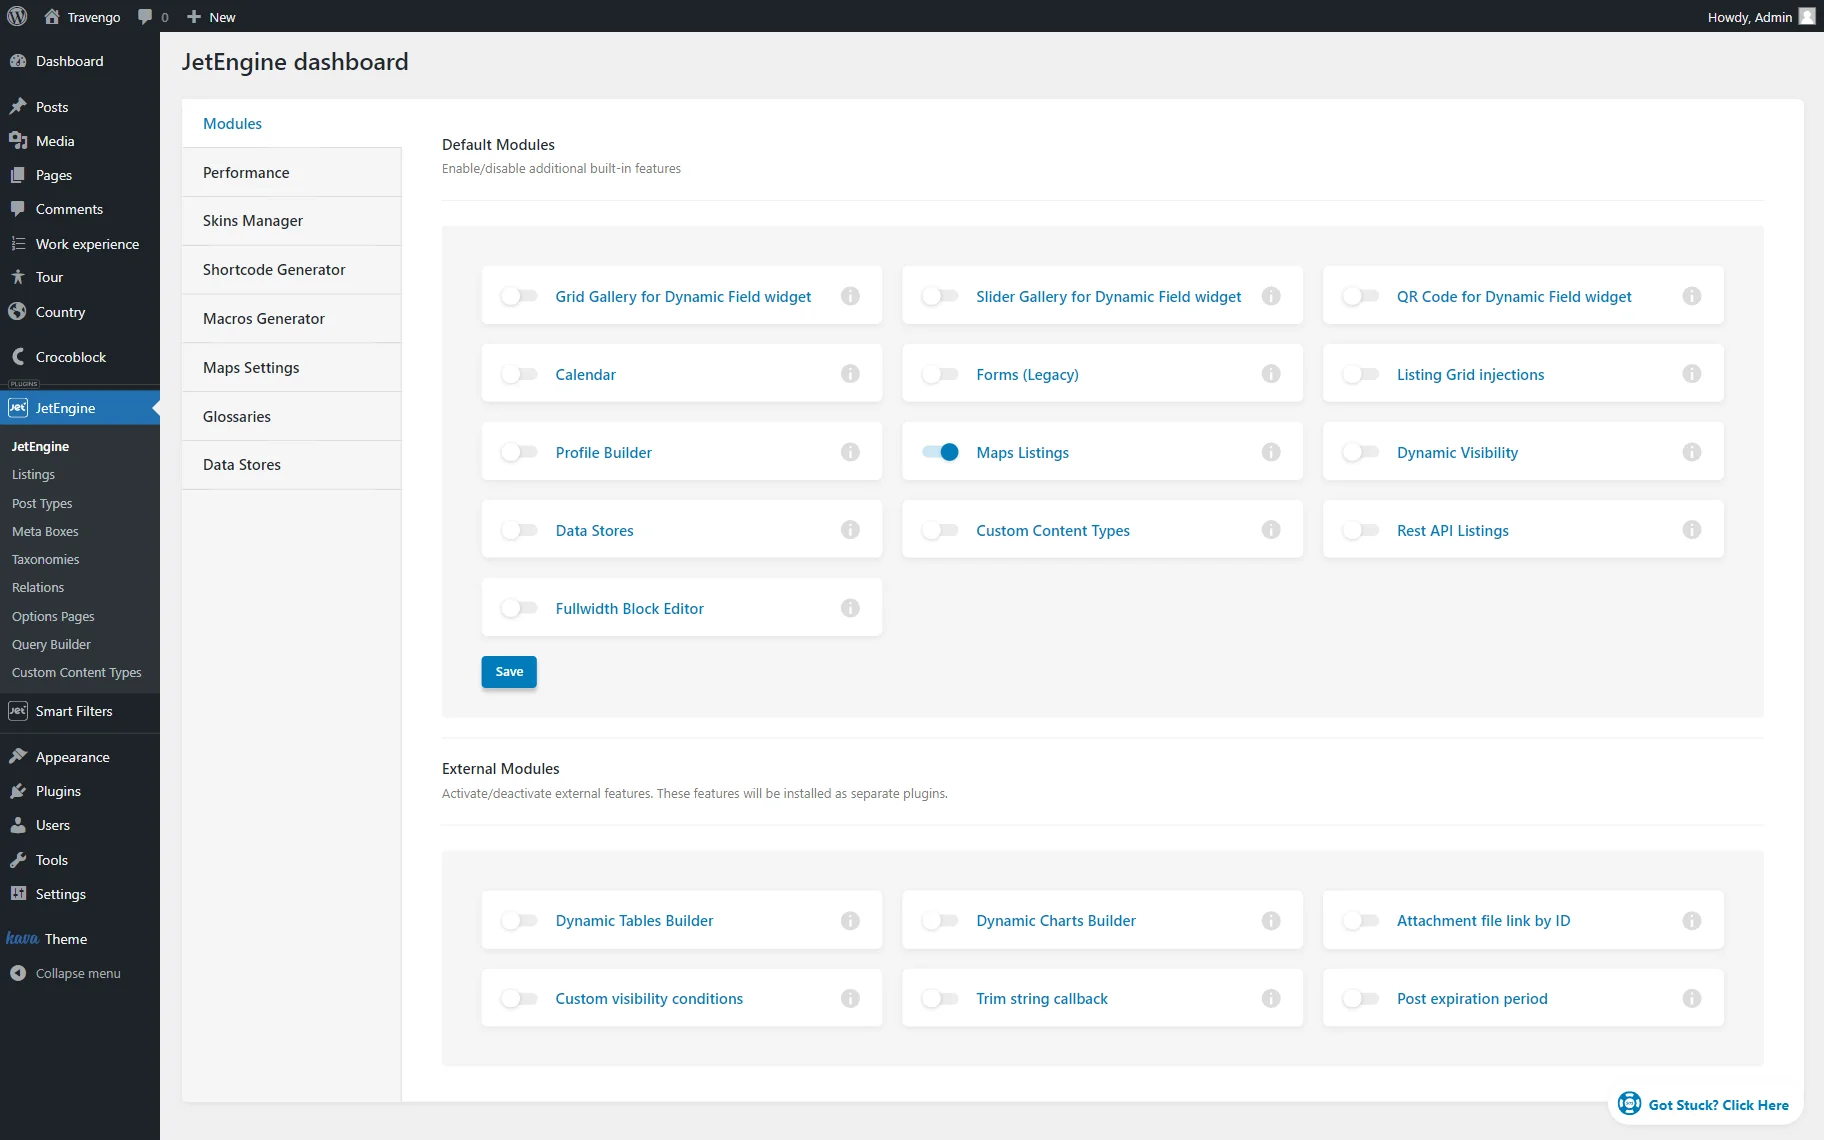
Activate a Maps Listings Module
Initially, make sure that you have activated the Maps Listings module. Otherwise, some of the setting options will not be available.
This module can be activated by following the WordPress Dashboard > JetEngine > JetEngine path and opening the Modules tab. Then, enable the Maps Listings toggle and press the “Save” button.
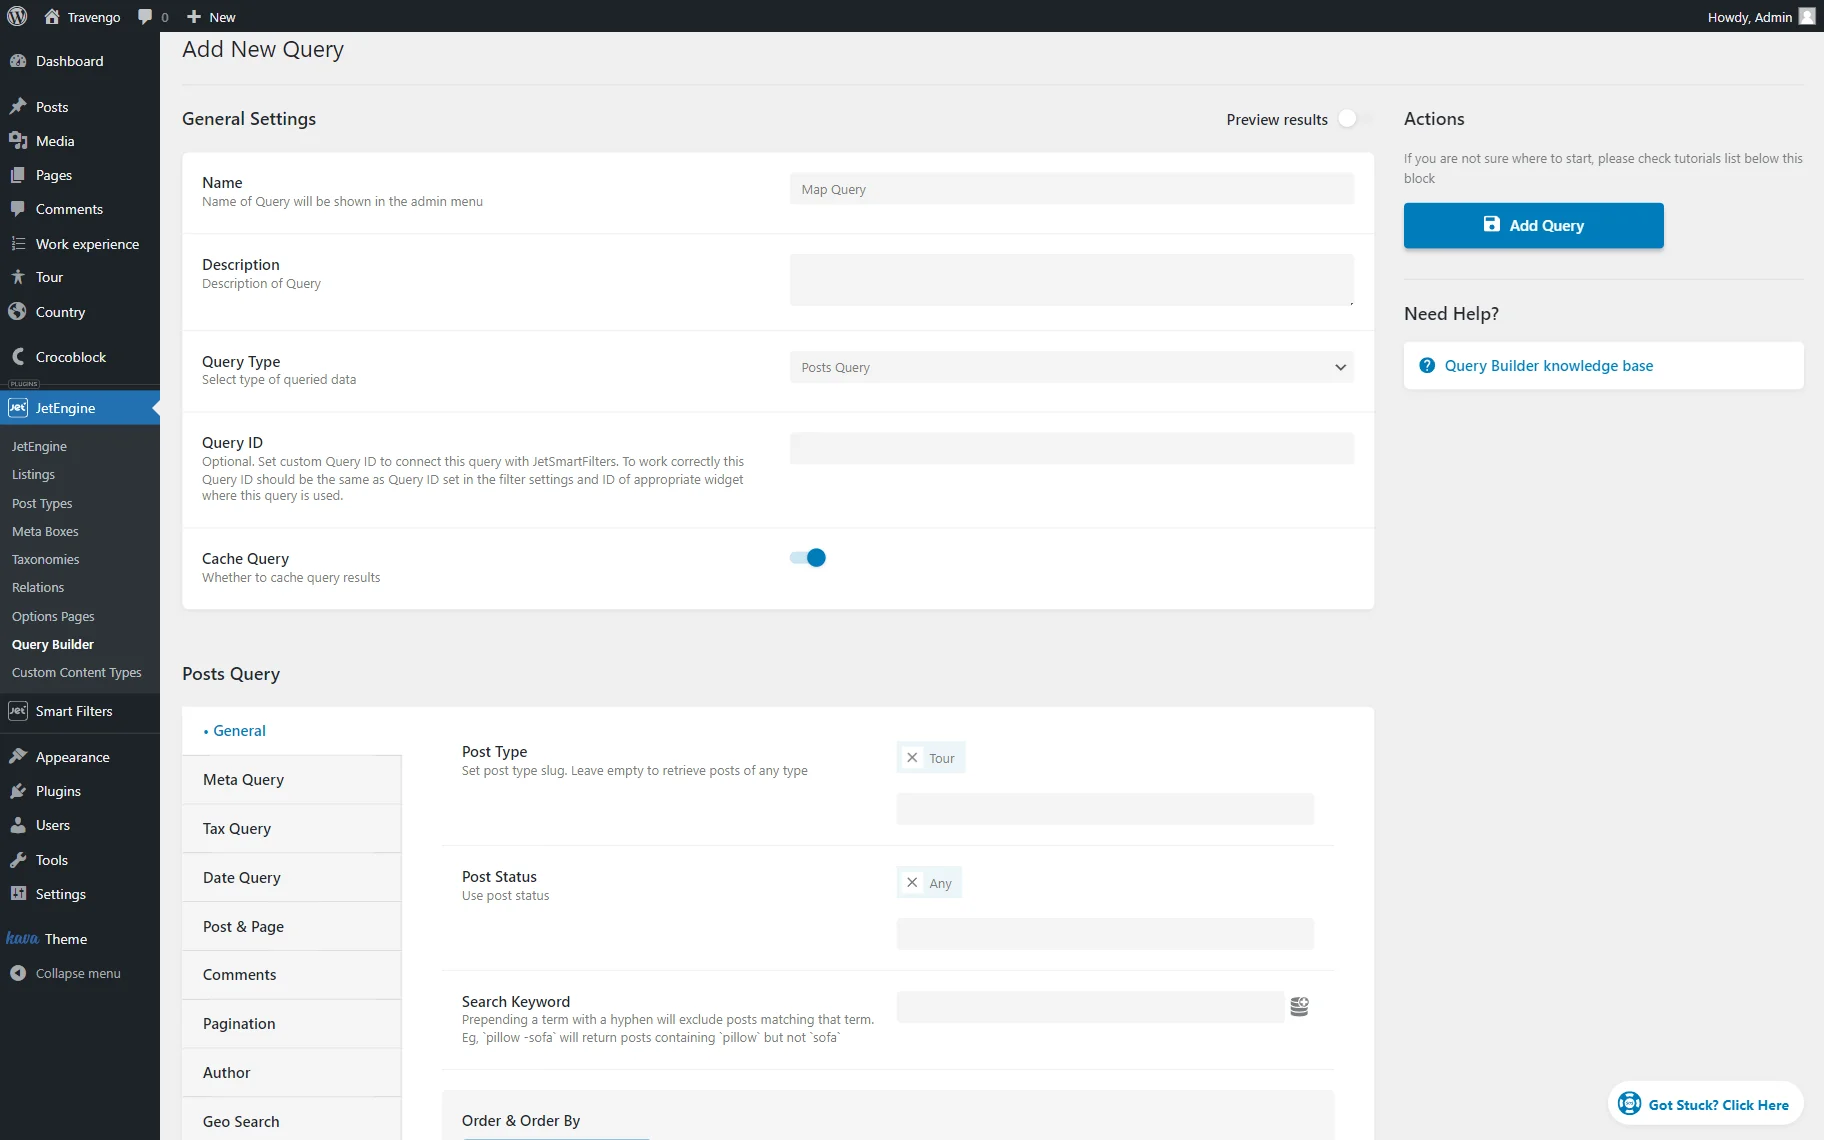
Create a Query
Navigate to the WordPress Dashboard > JetEngine > Query Builder tab and hit the “Add New” tab.
In the General Settings, type the query Name value. In the Query Type field, you can select “Posts Query,” “Terms Query,” “Users Query,” or “Custom Content Type Query” according to the object that you want to filter. These query types support the geo search.
After we selected the “Posts Query” Query Type, in the following General section, we filled in the Post Type and the Post Status fields.
Open the Geo Search tab to adjust such settings:
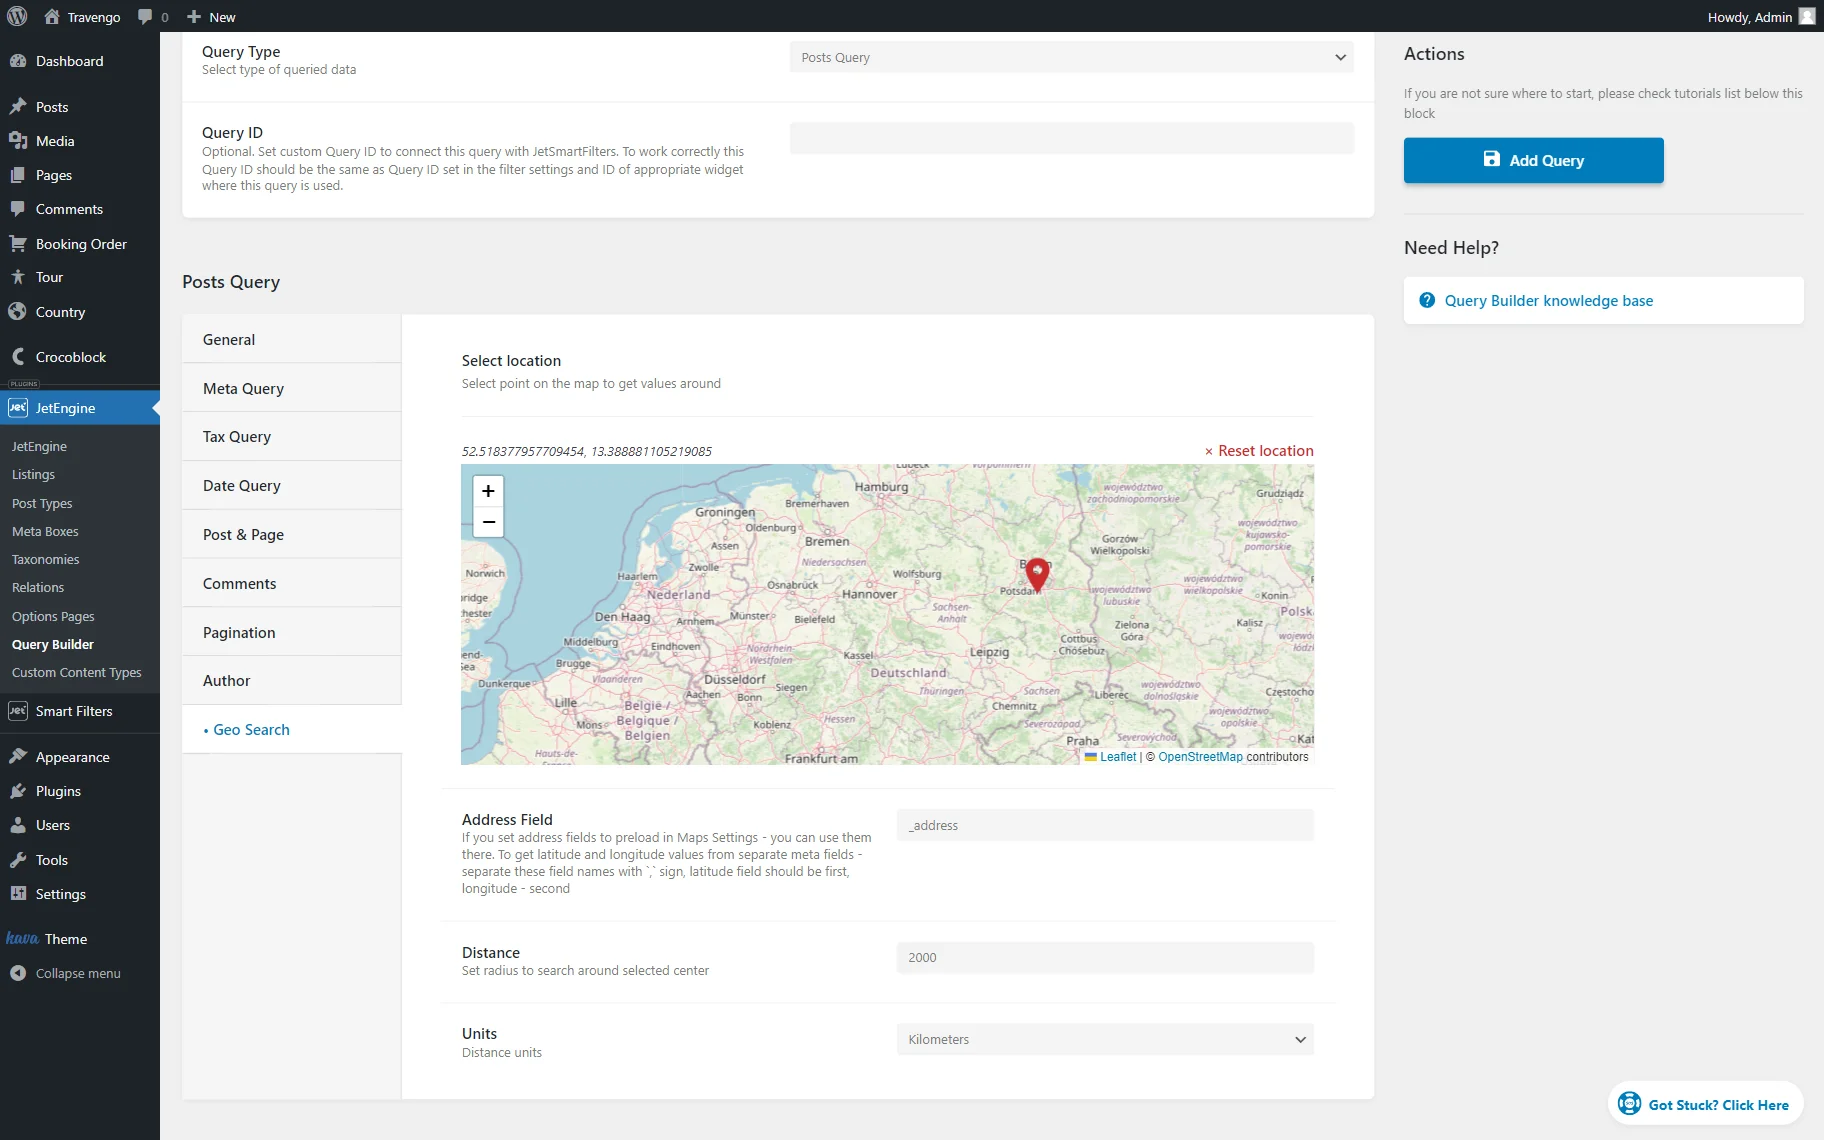
- Select location — select the point on the map, and it will be the center of the query radius if users don’t allow access to their geolocation;
- Address Field — enter the name of the post, term, user, or CCT meta fields with the address. Here, you can specify the same fields as in the Meta fields to preload option in the Maps Settings (without a prefix, as the query type is already selected in advance), a field of the “Map” type, or comma-separated fields in which latitude and longitude are stored (in separate fields);
- Distance — enter the desired radius for the search results;
- Units — select the measurement units: “Kilometers” or “Miles.”
When you finish, push the “Add/Update Query” button.
Add the Query to the Map Listing
Move to the Elementor/Block Editor page with the Map Listing widget or block and click to edit it.
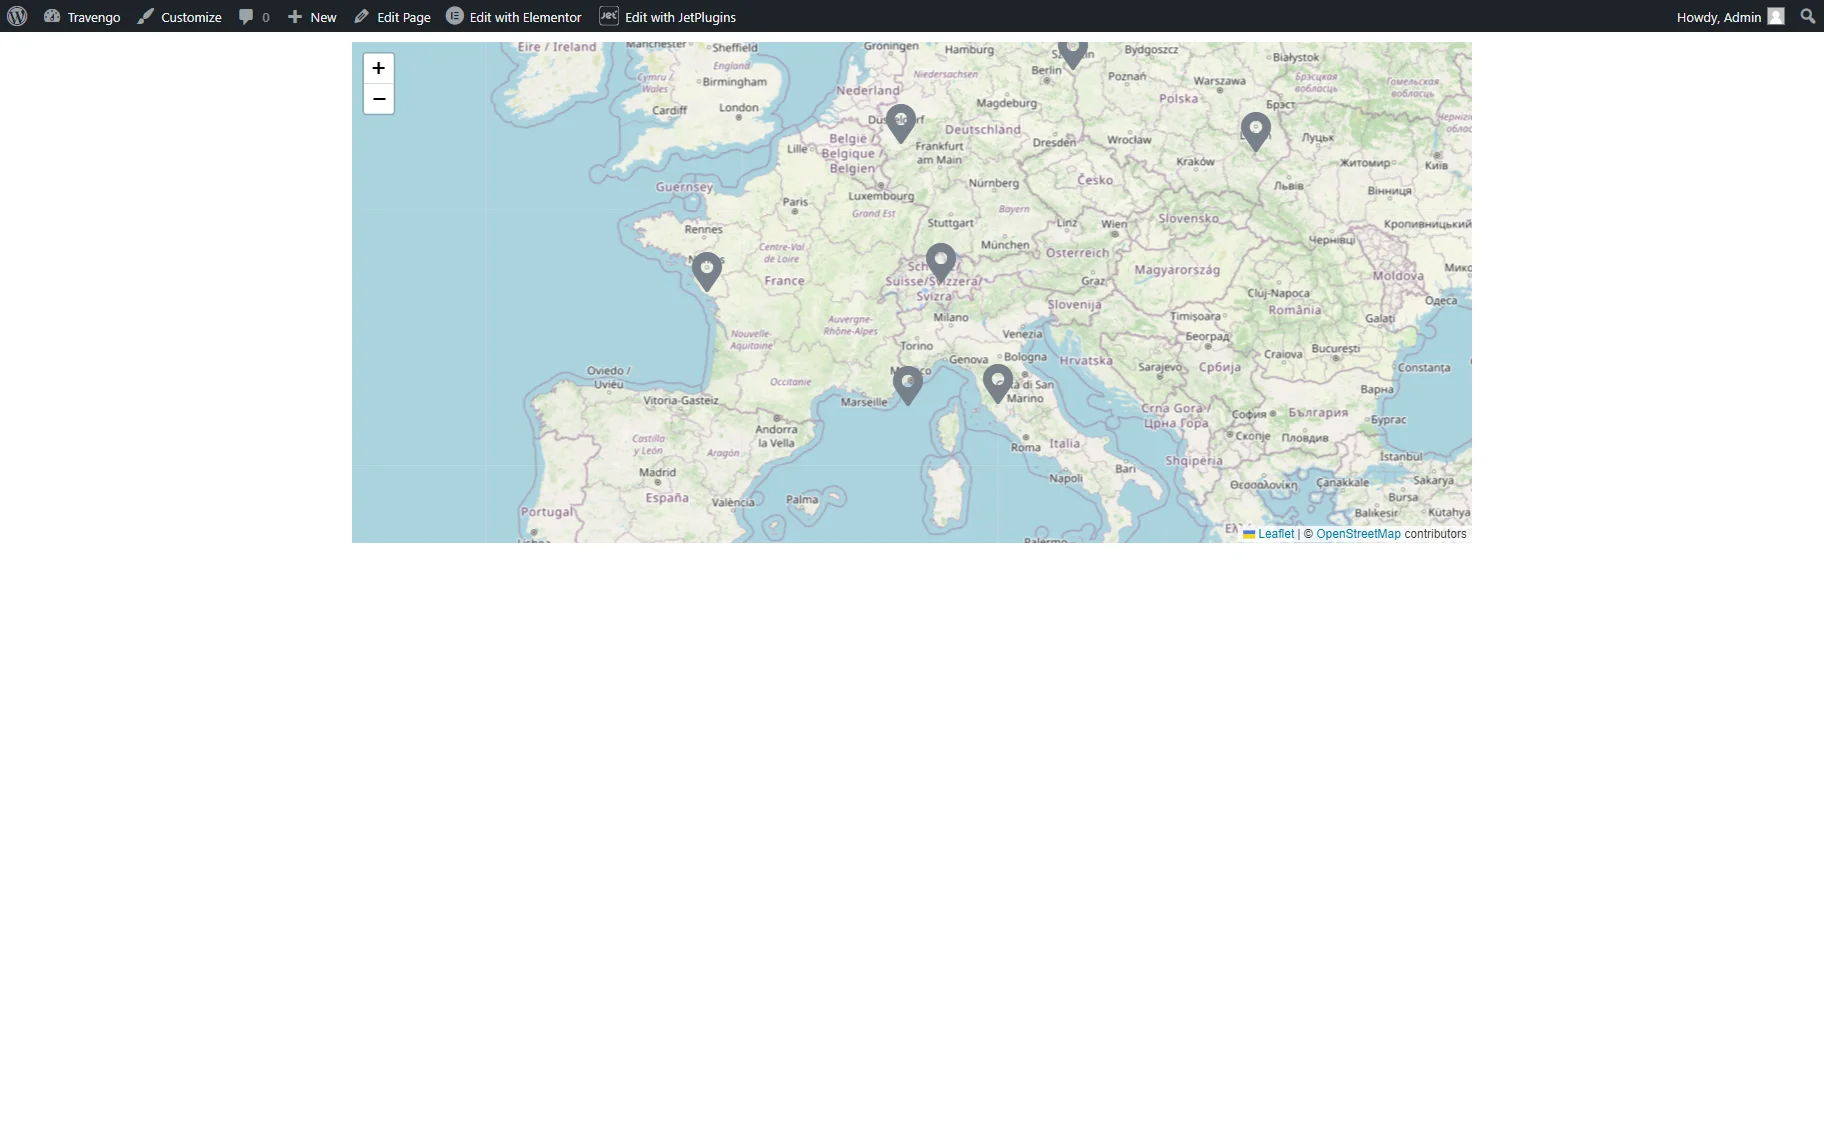
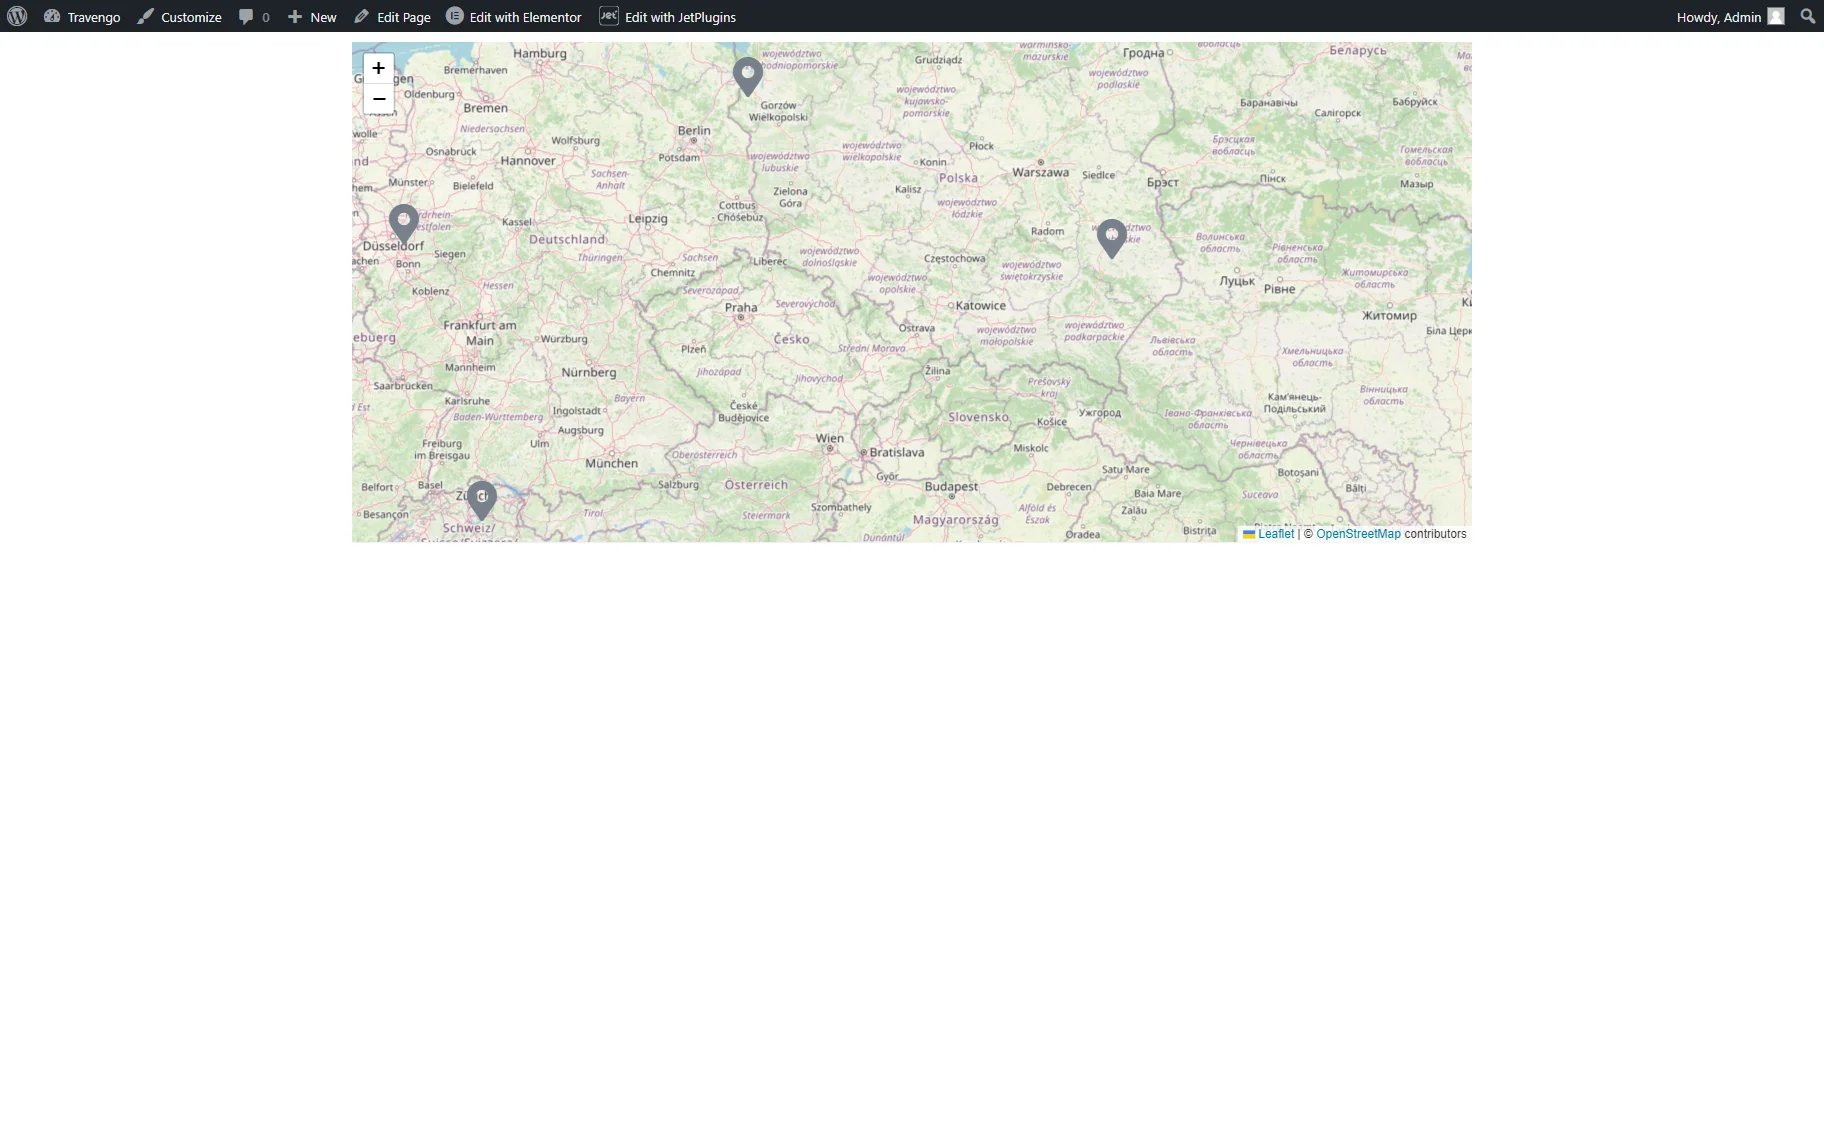
Without a query, the listing shows the entire map with all objects.
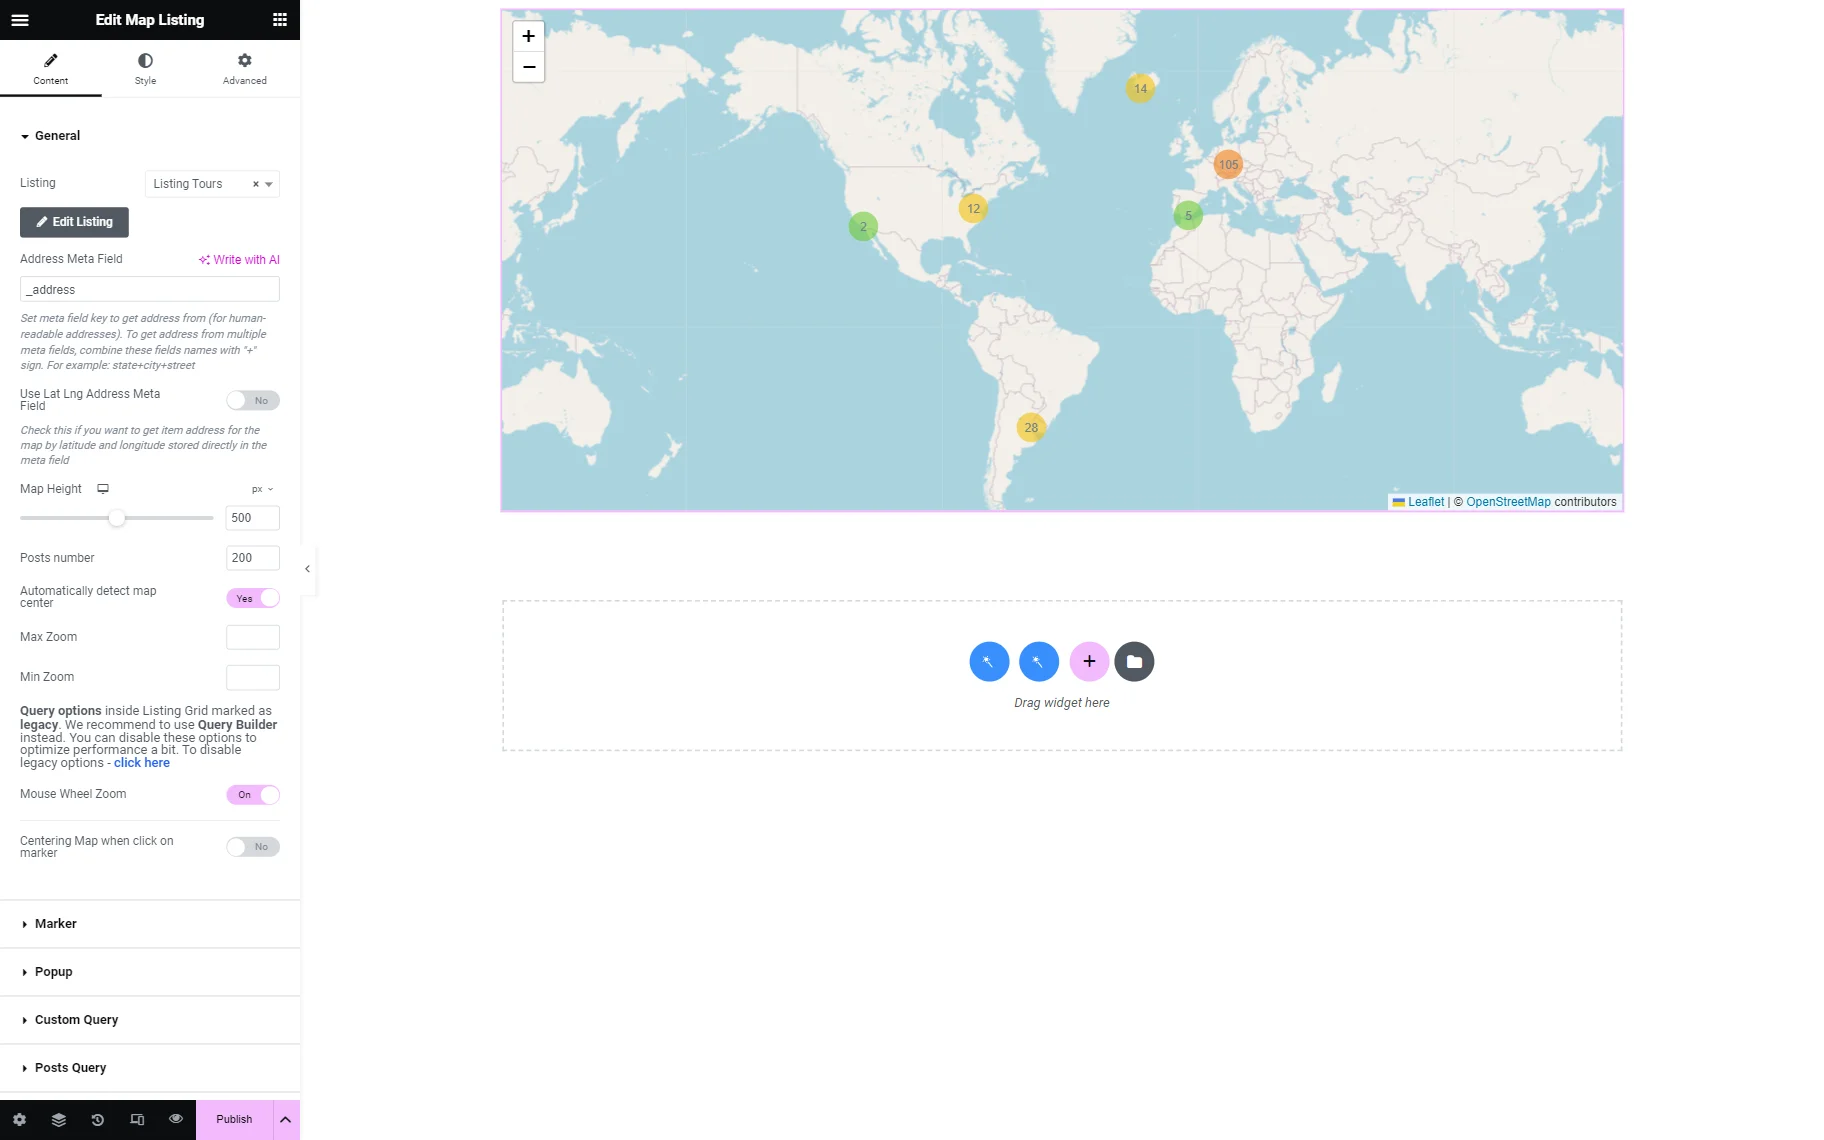
If you work with the Elementor editor, open the Map Listing widget, proceed to the Custom Query tab, enable the Use Custom Query toggle, and select the Custom Query name for the map from the drop-down list.
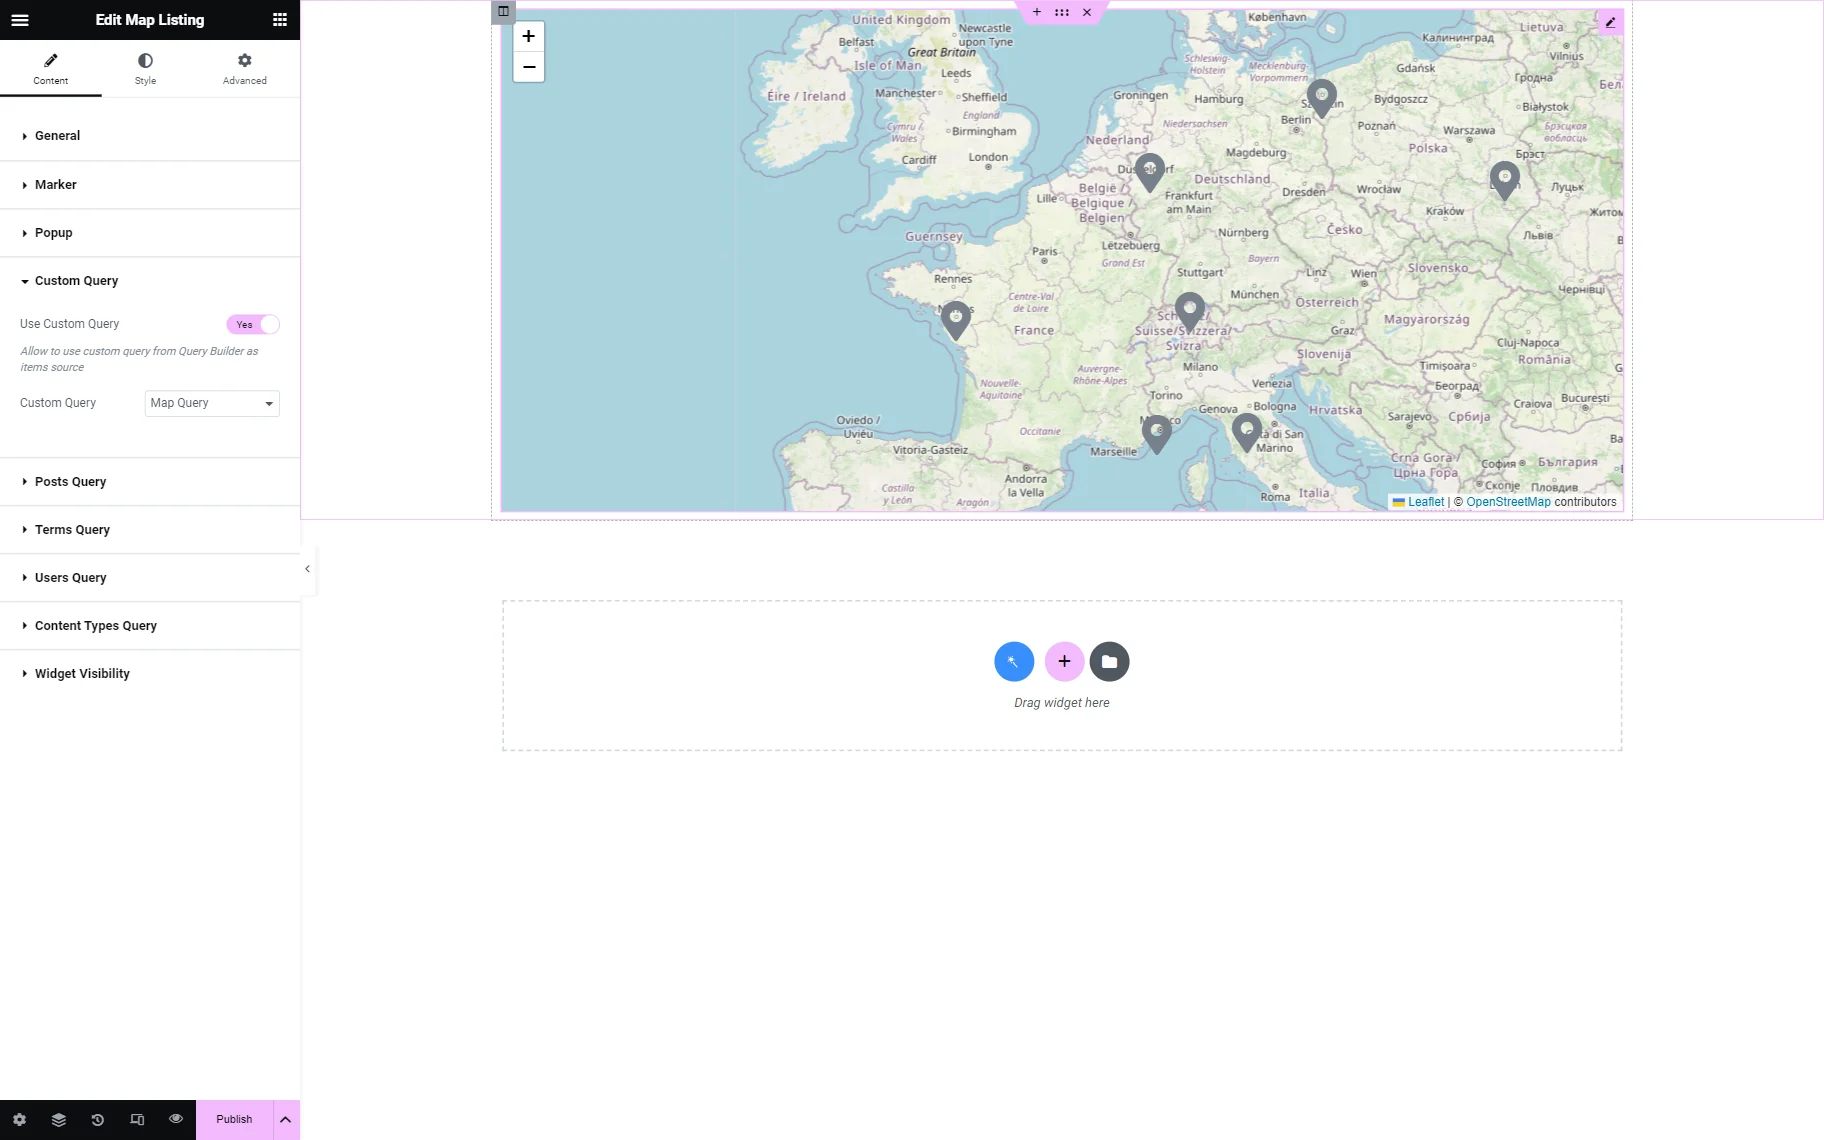
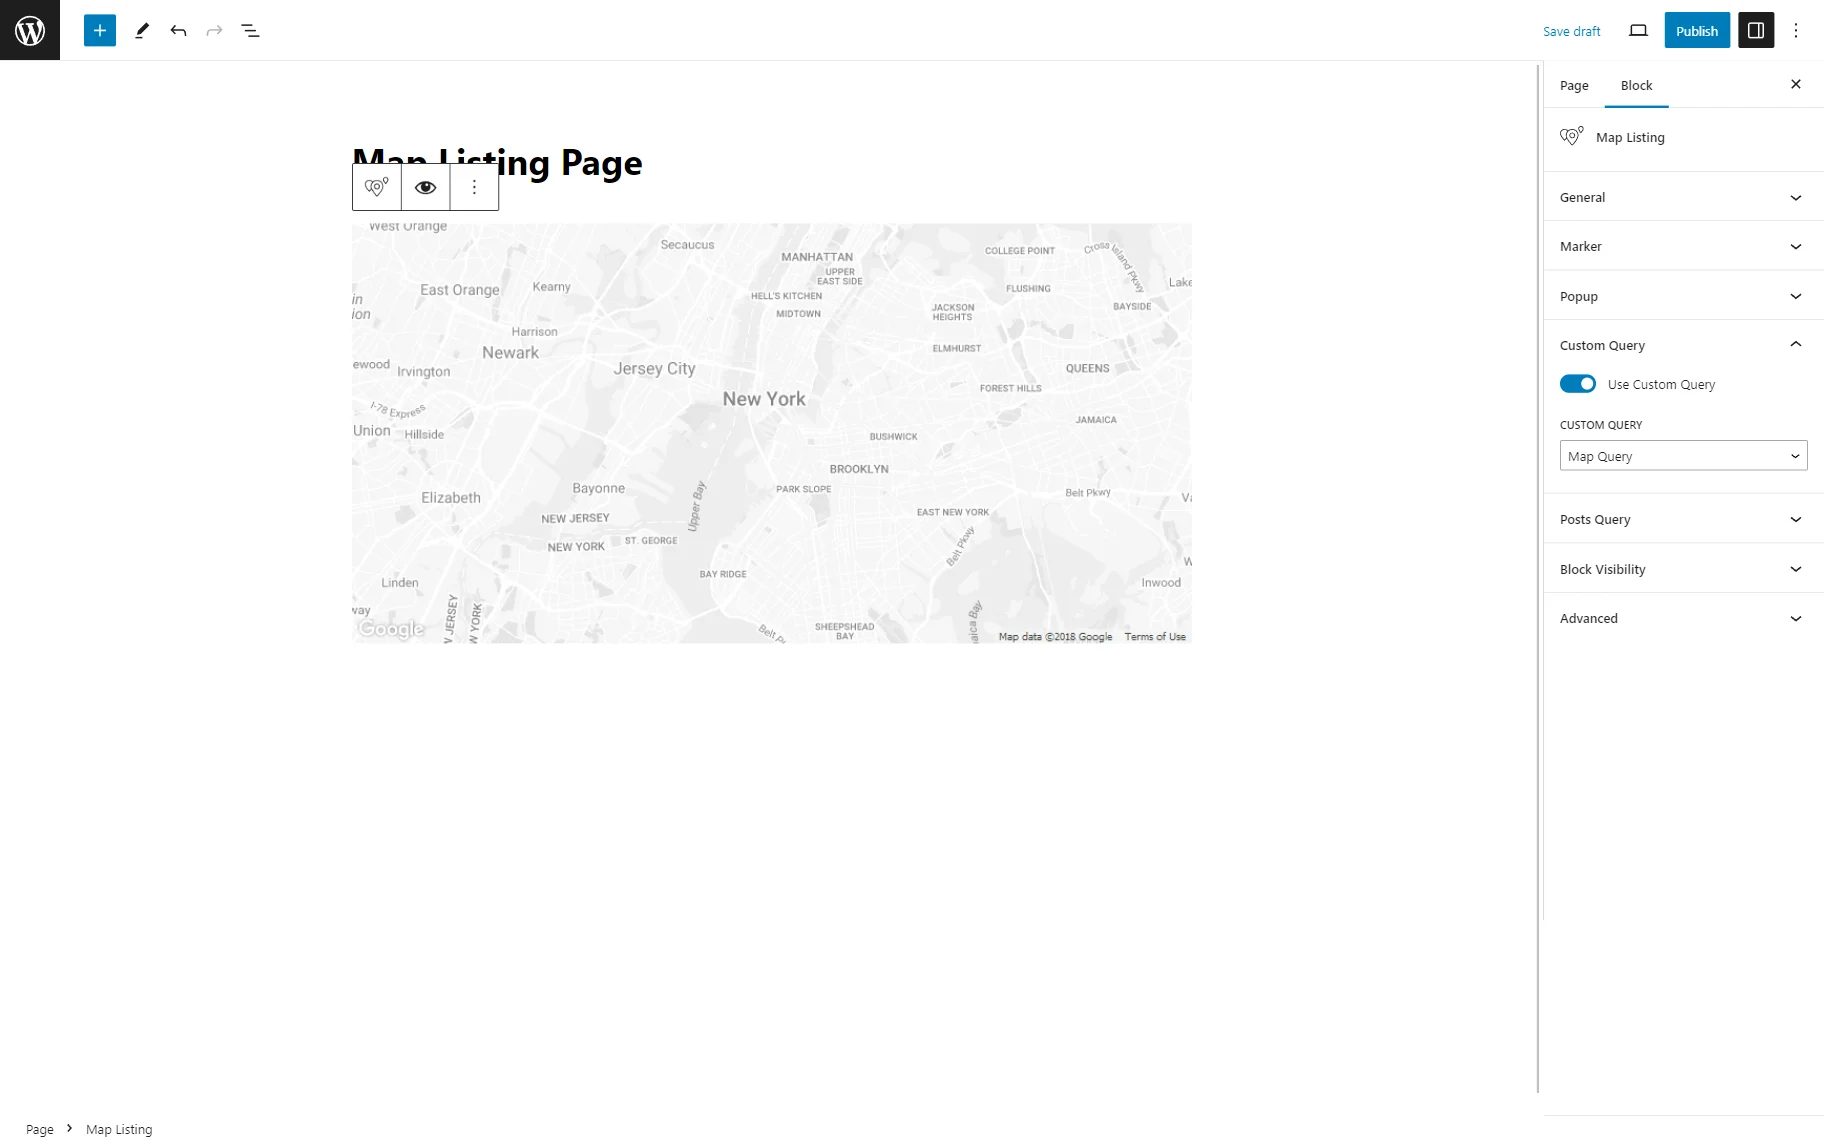
The Map Listing block has the same settings in the Gutenberg editor.
With the query, the Map Listing shows locations according to the static point in the center of the defined radius.
Create the User Geolocation Filter
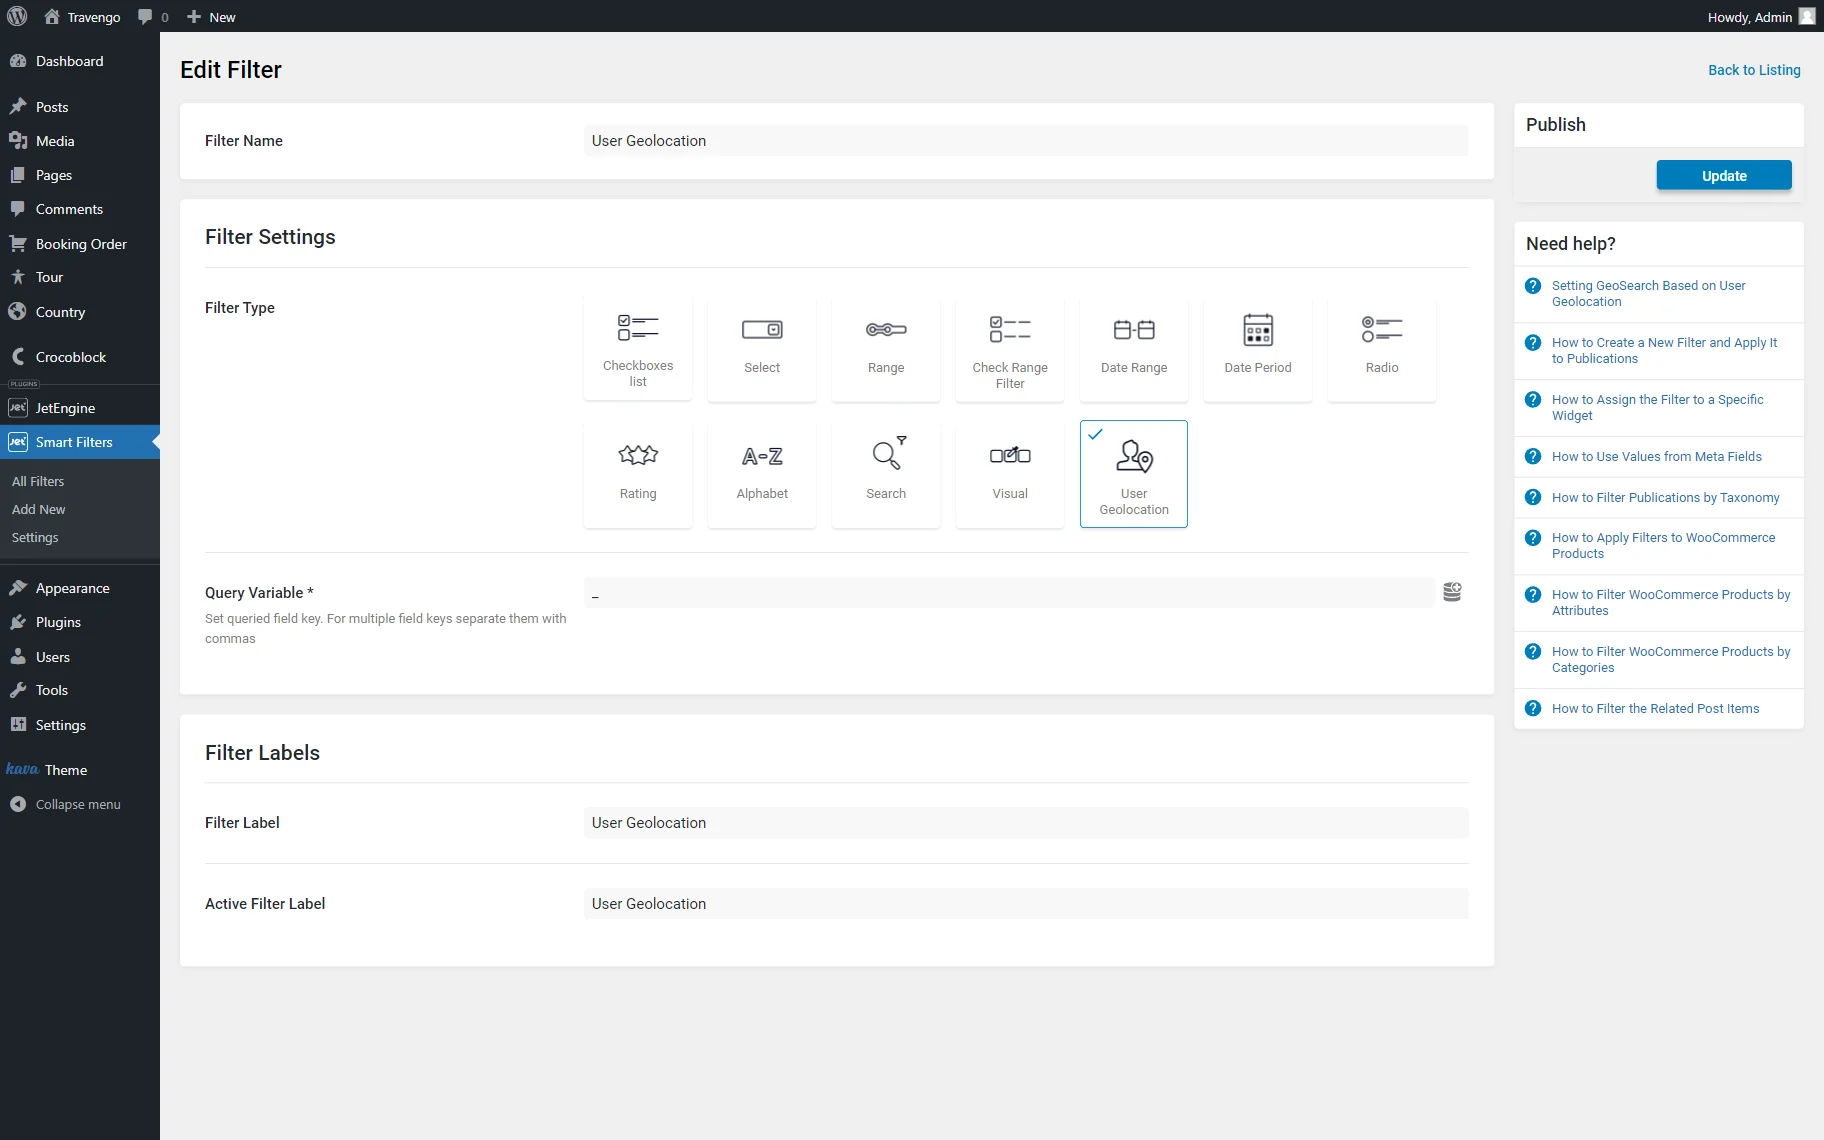
Go to the WordPress Dashboard > Smart Filters > Add New tab.
Type the Filter Name, select the “User Geolocation” Filter Type, and complete the Field Label and Active Field Label fields.
Then, press the “Update” button.
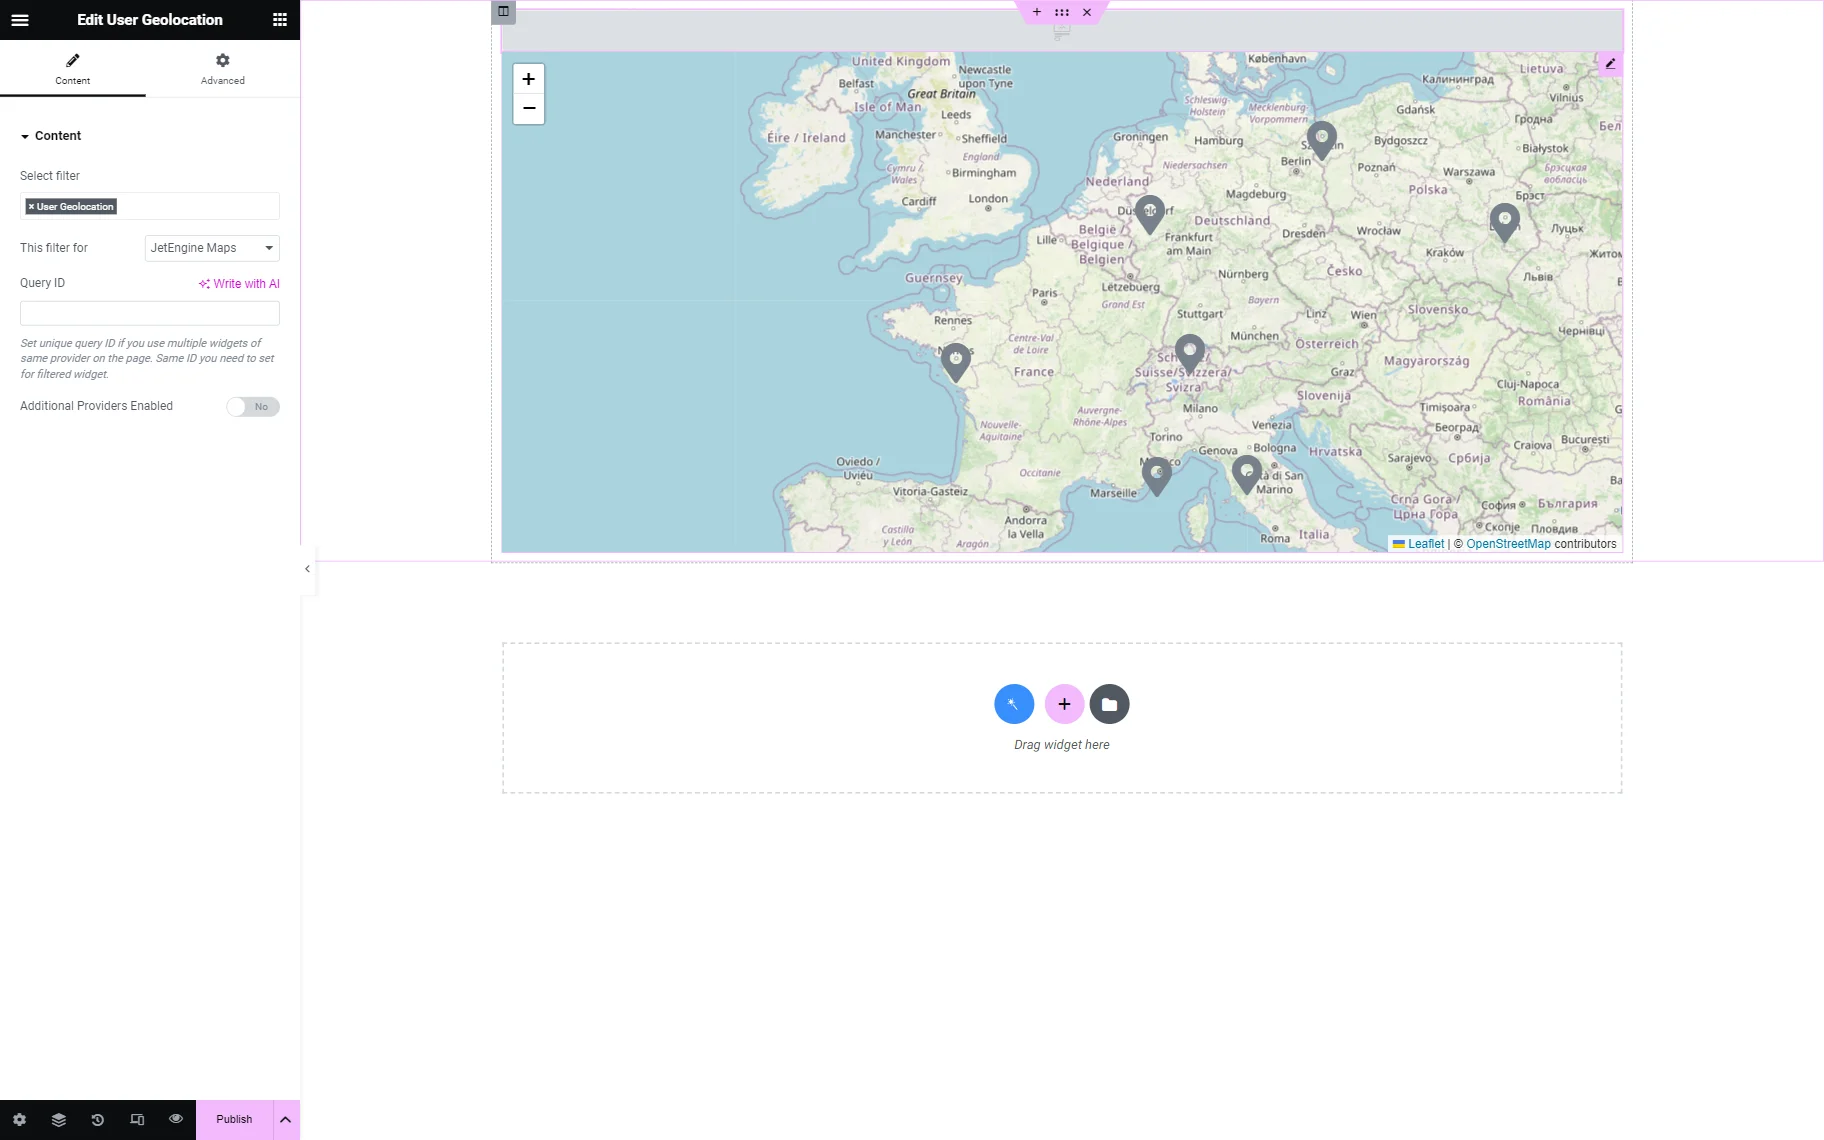
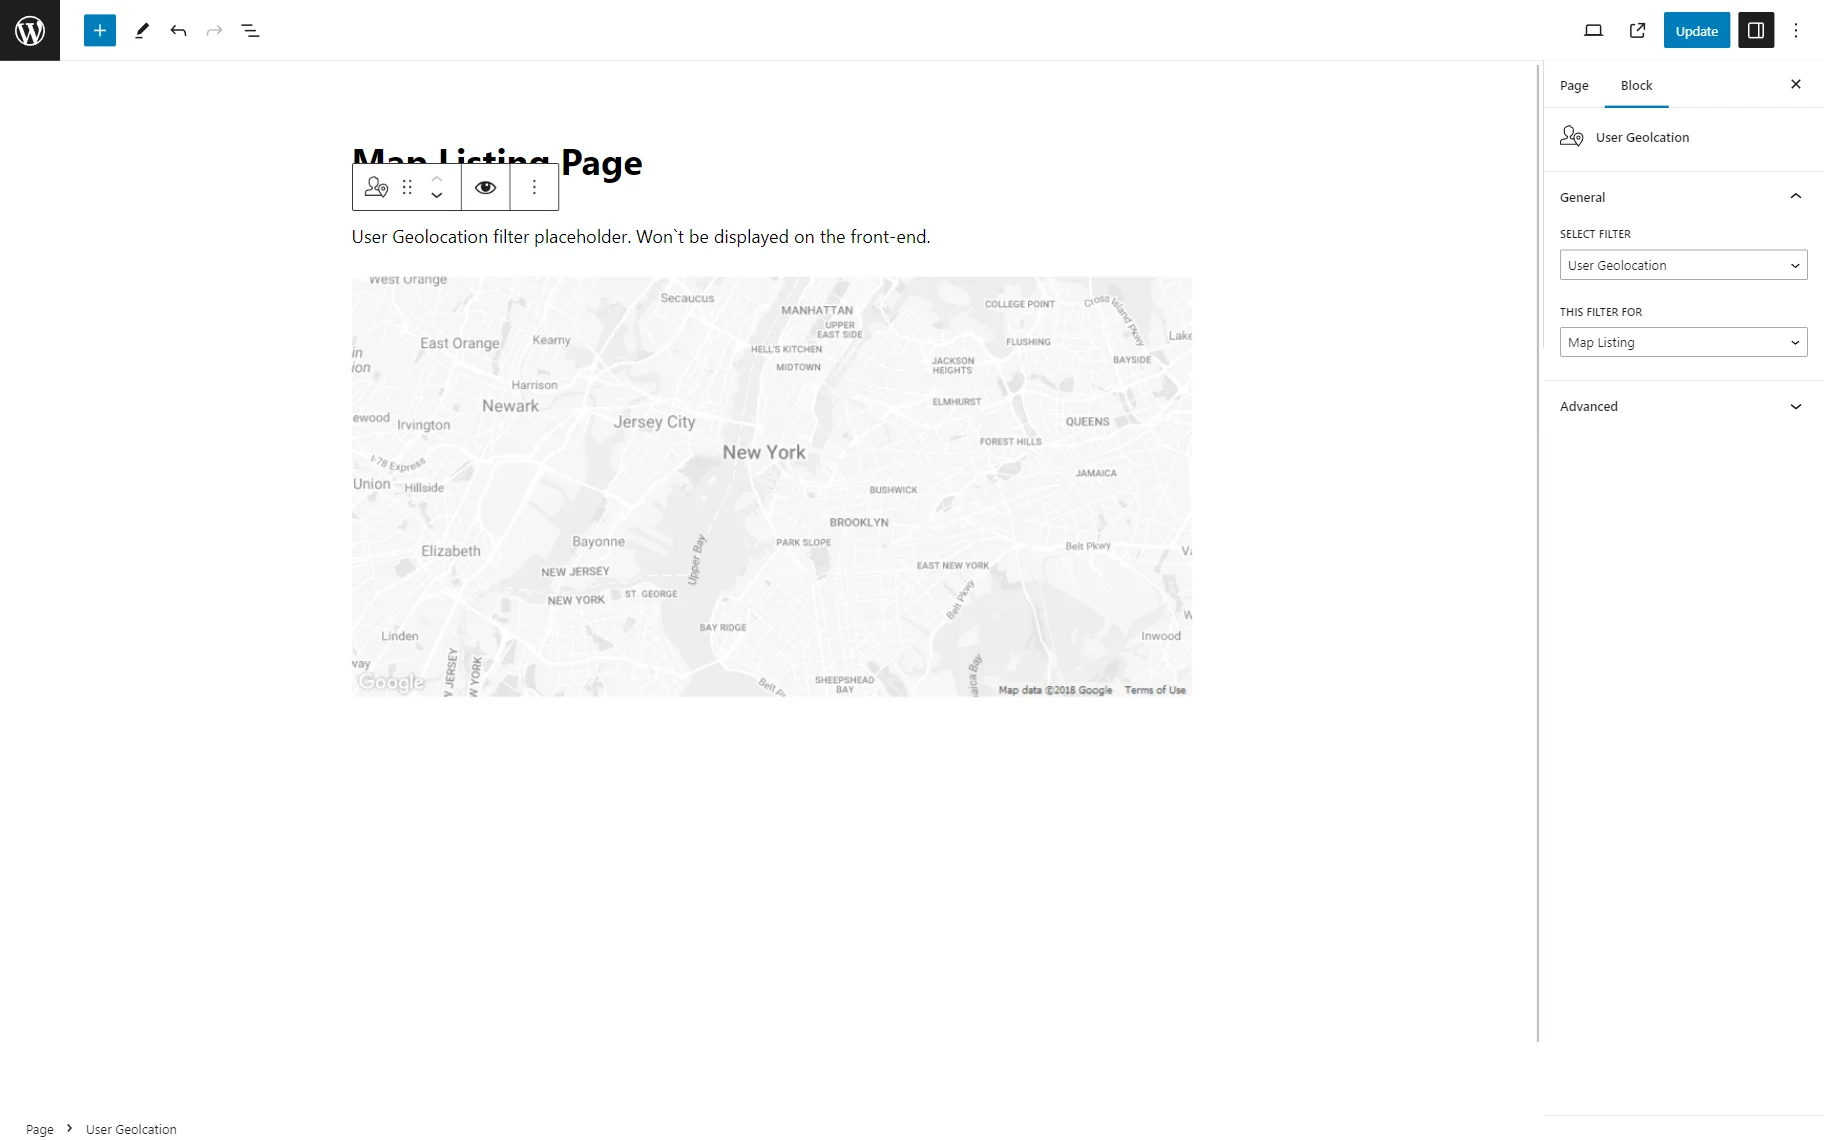
Place the User Geolocation widget or block onto the page containing Map Listing.
Select the newly created filter in the corresponding field and pick the “JetEngine Maps” option in the This filter for field.
In the Gutenberg editor, the settings are the same.
Check the Results
After finishing, update the page and open it on the front end.
All users visiting the page with the filter for the first time will see the notification asking permission to access their geolocation.
Users who click the “Block” button will see the results around the point selected in the query settings, as we showed in the second step.
If users hit the “Allow” button, the objects on the map will be filtered depending on their location.
That’s all. Now you know how to set the static point on the map with the JetEngine Query Builder and geo search based on user geolocation with the JetSmartFilters plugin.