How to Import and Export Custom Post Types, Terms, and Meta Fields
From this tutorial, you will learn how to import and export JetEngine's Custom Post Types, taxonomies, listings, and other structural settings with a demo sample content from one WordPress website to another.
Before you start, check the tutorial requirements:
- JetEngine plugin installed and activated
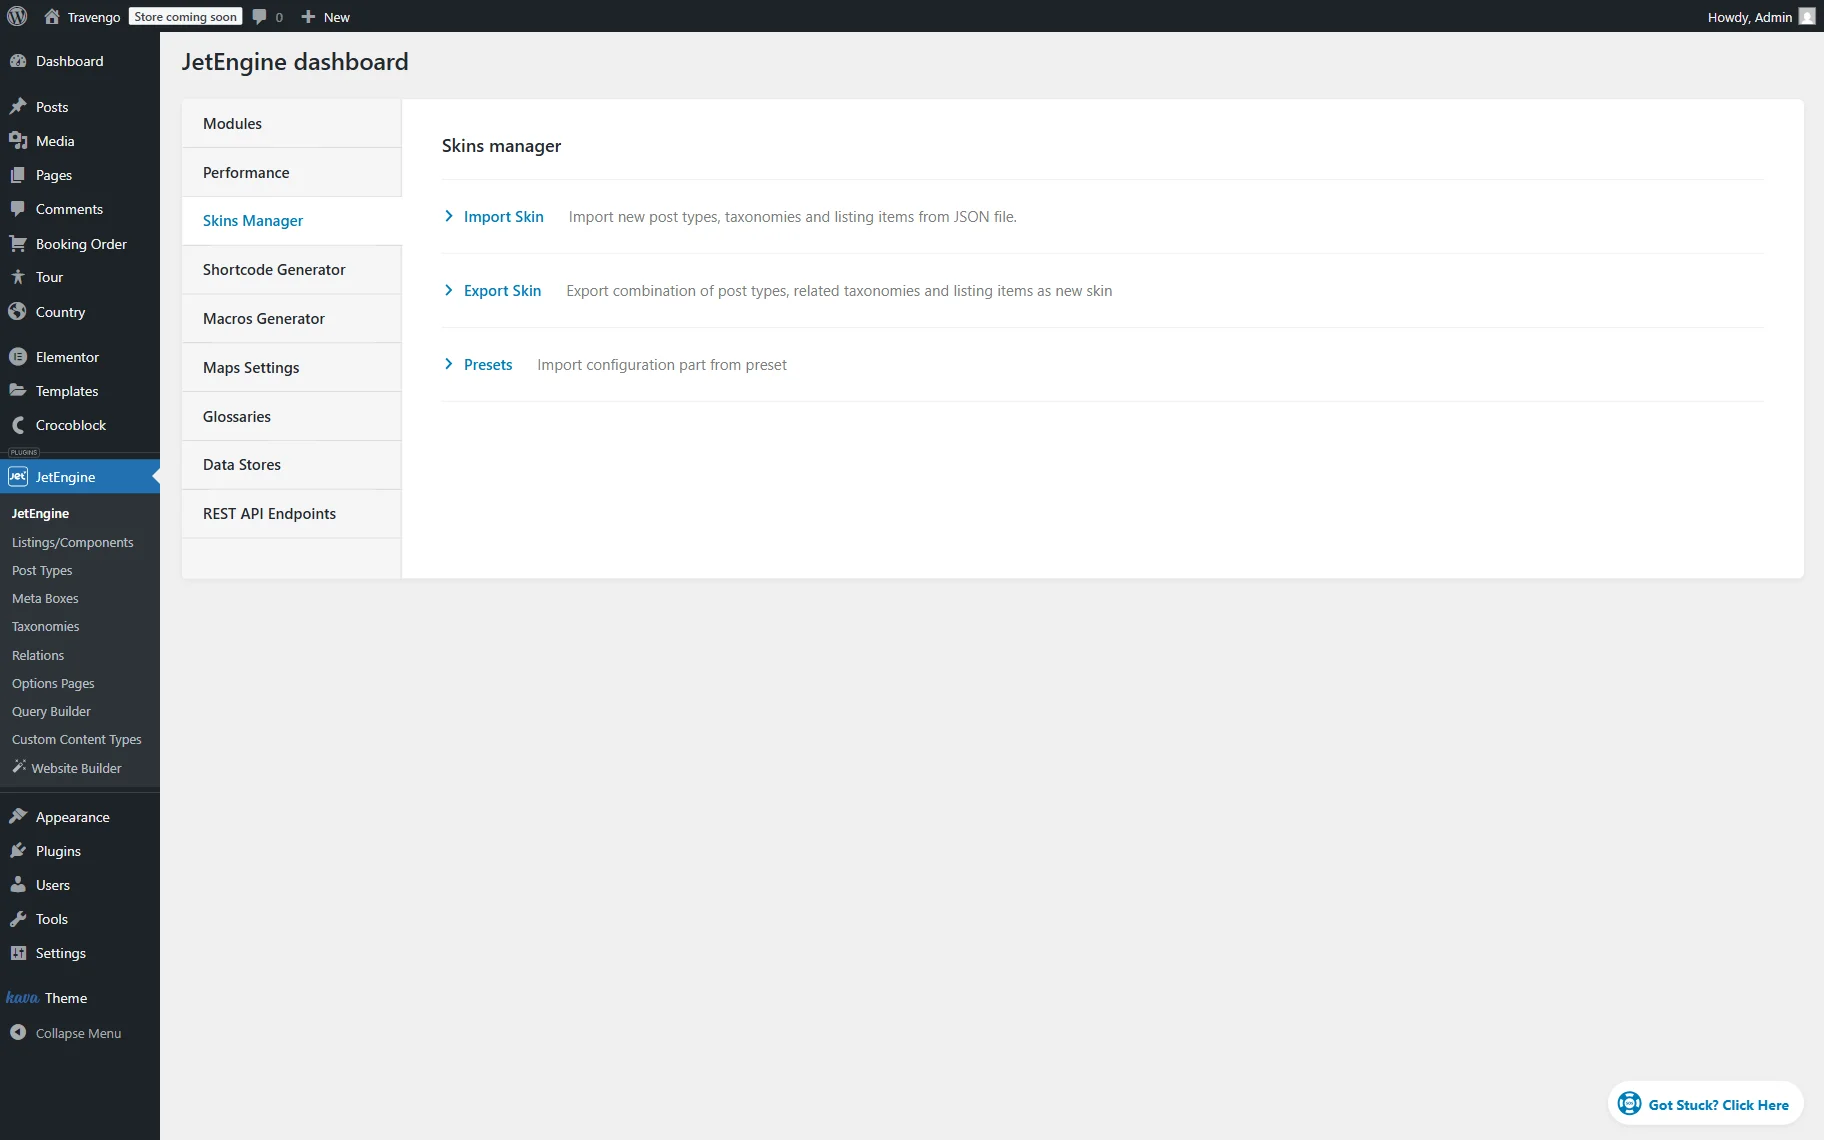
To find the needed settings, go to WordPress Dashboard > JetEngine > JetEngine and open the Skins Manager tab.
Here, you will have access to three tabs: Import Skin, Export Skin, and Presets.
Import Skin
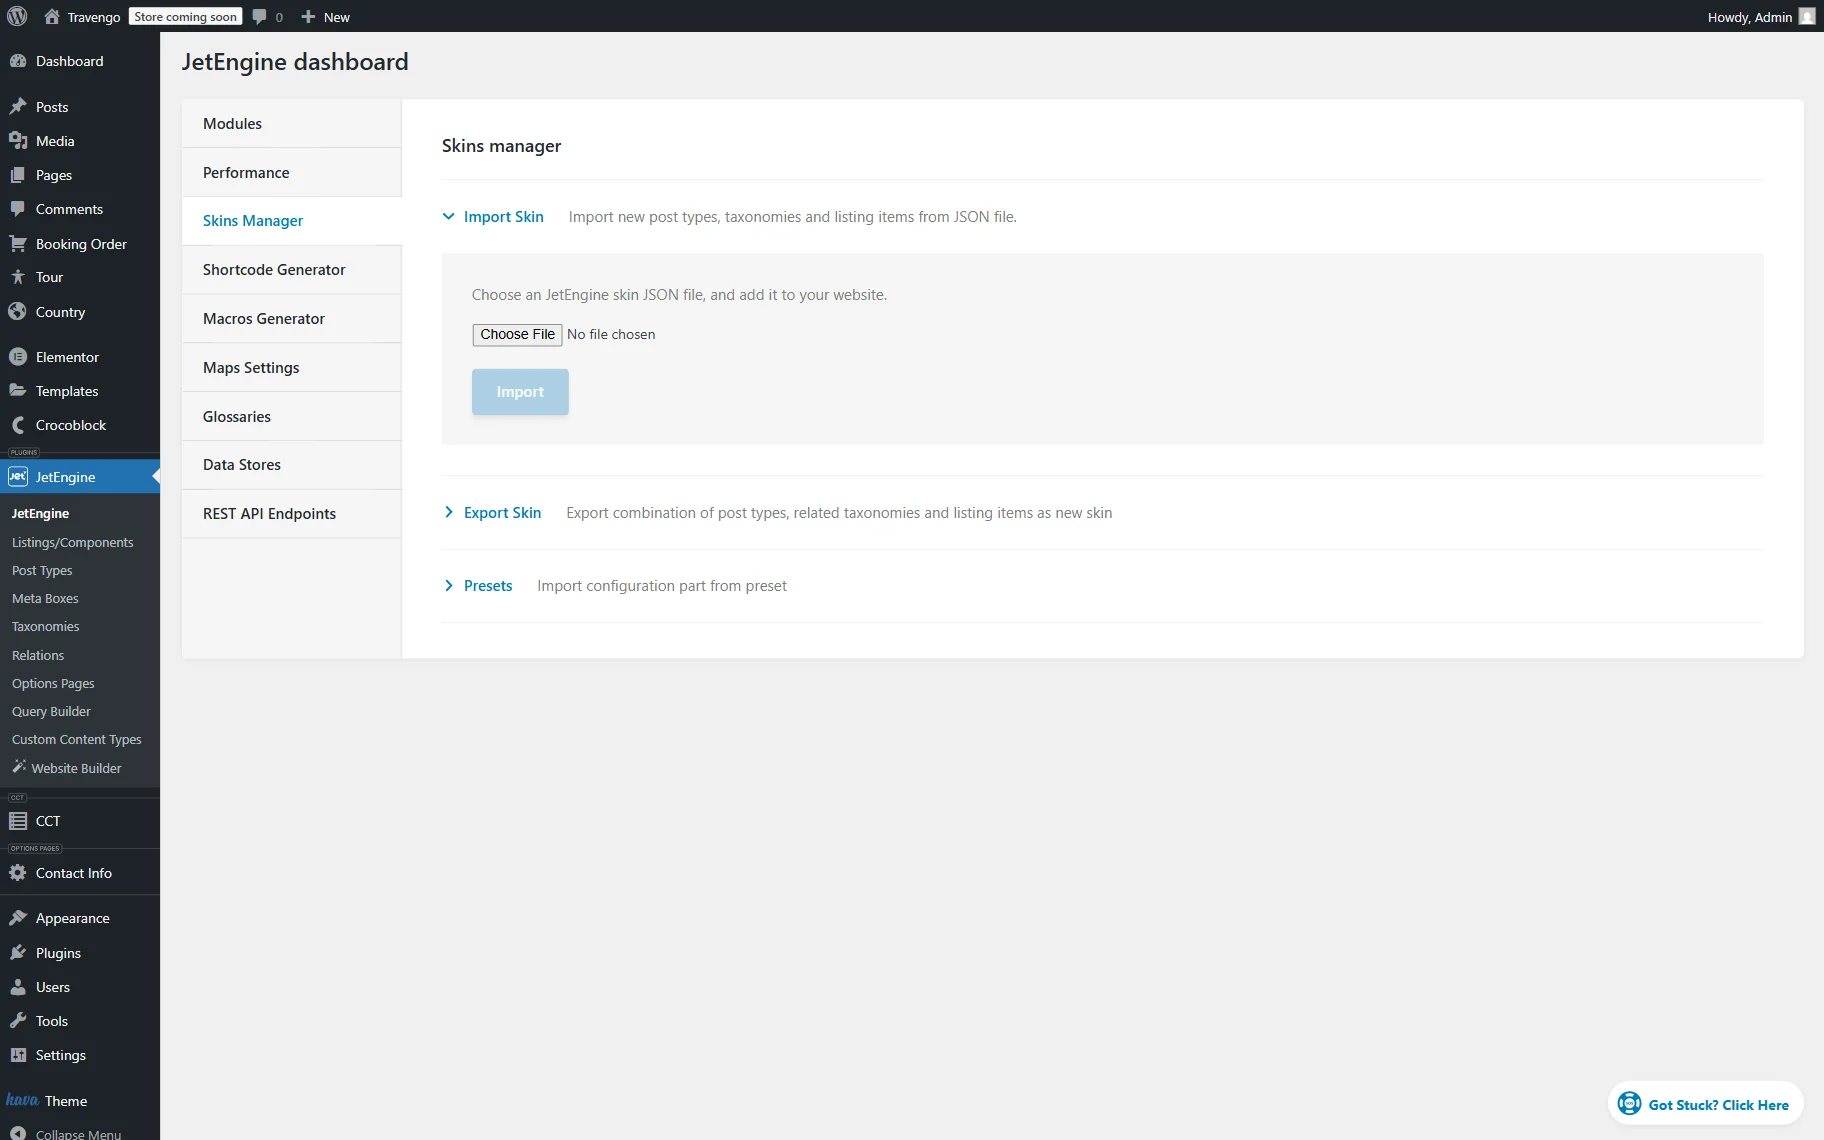
To import skins to the current WordPress website, unfold the Import Skin block.
Click the “Choose File” button, select the JSON file from your computer, and then press the “Import” button. Now the content is imported to the website.
Export Skin
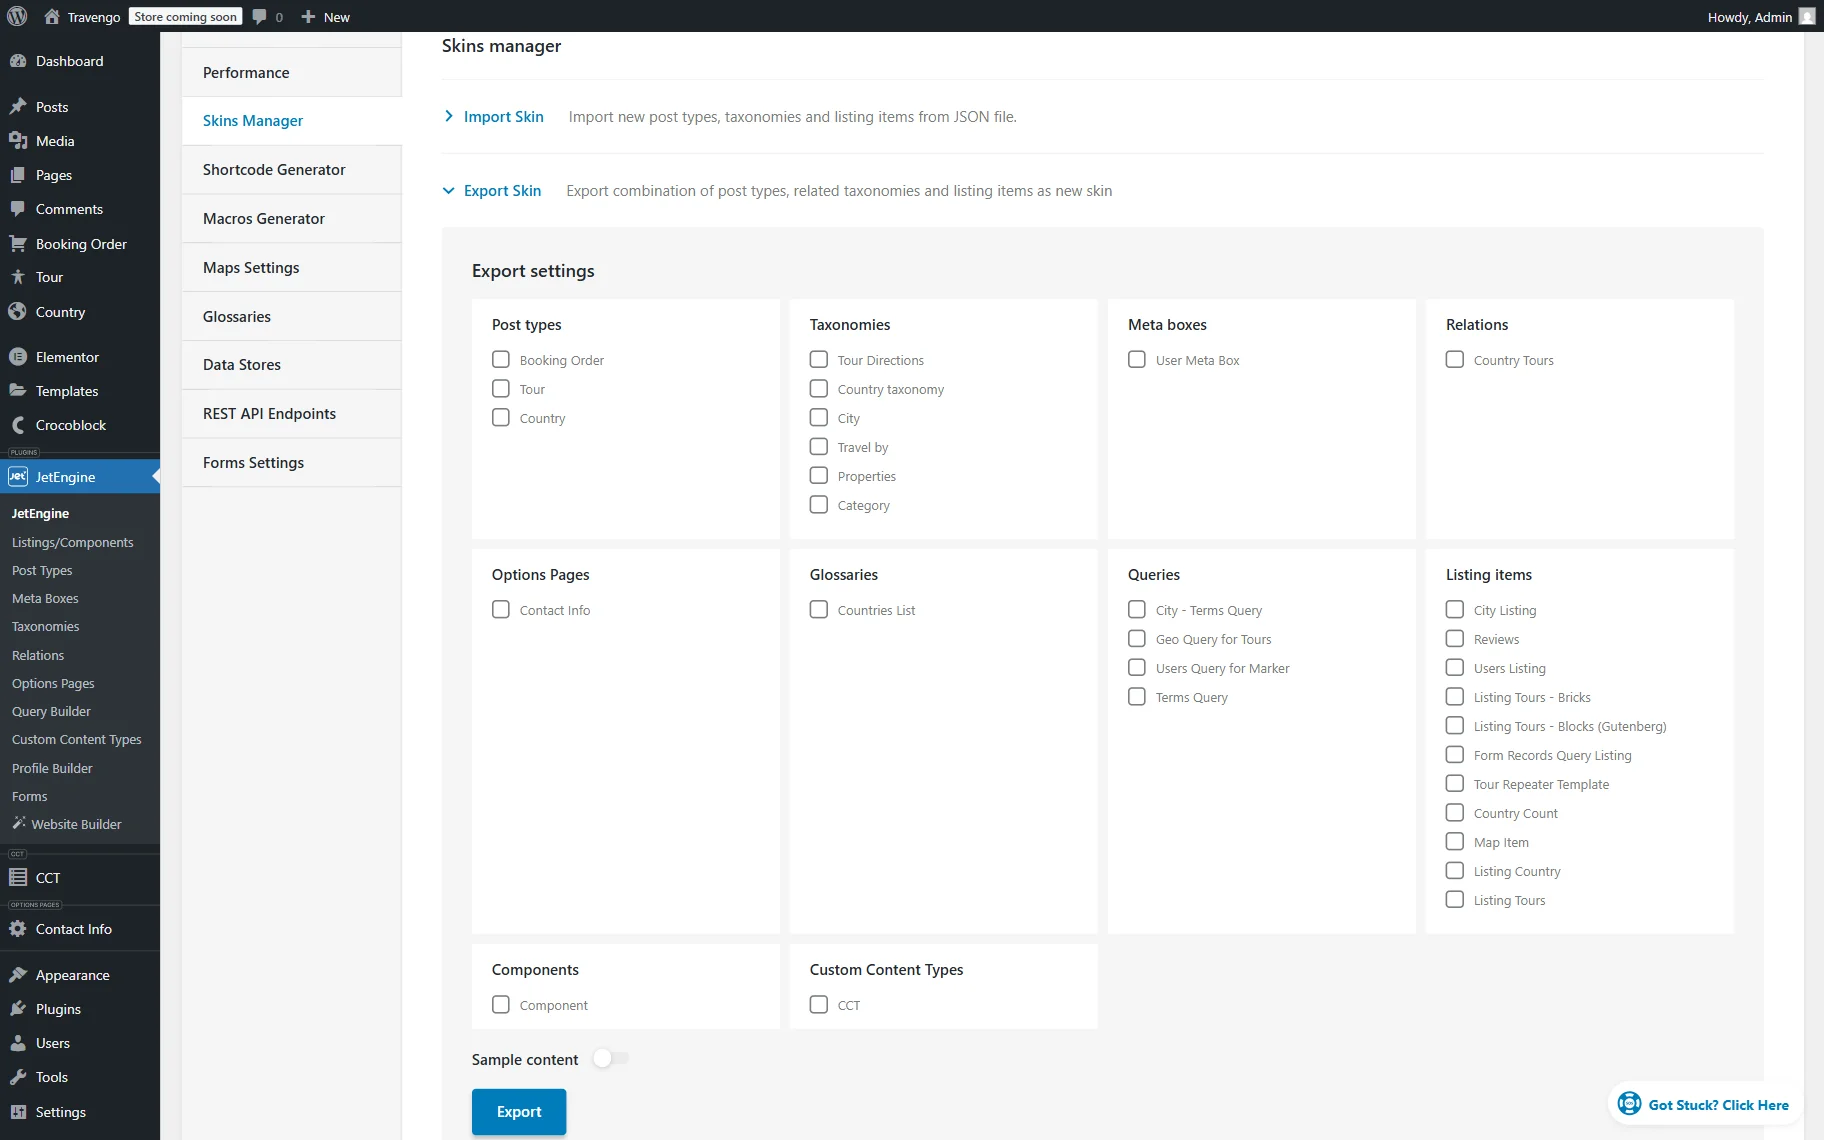
To export skins from the current WordPress website, unfold the Export Skin block.
Tick the checkbox next to the types of content you want to export.
You can also activate the Sample content toggle to export the sample content of one post.
Whenever ready, hit the “Export” button. The necessary content is now exported as a JSON file to your PC.
Presets
The third setting block of the Skins Manager is Presets.
There are two options presented:
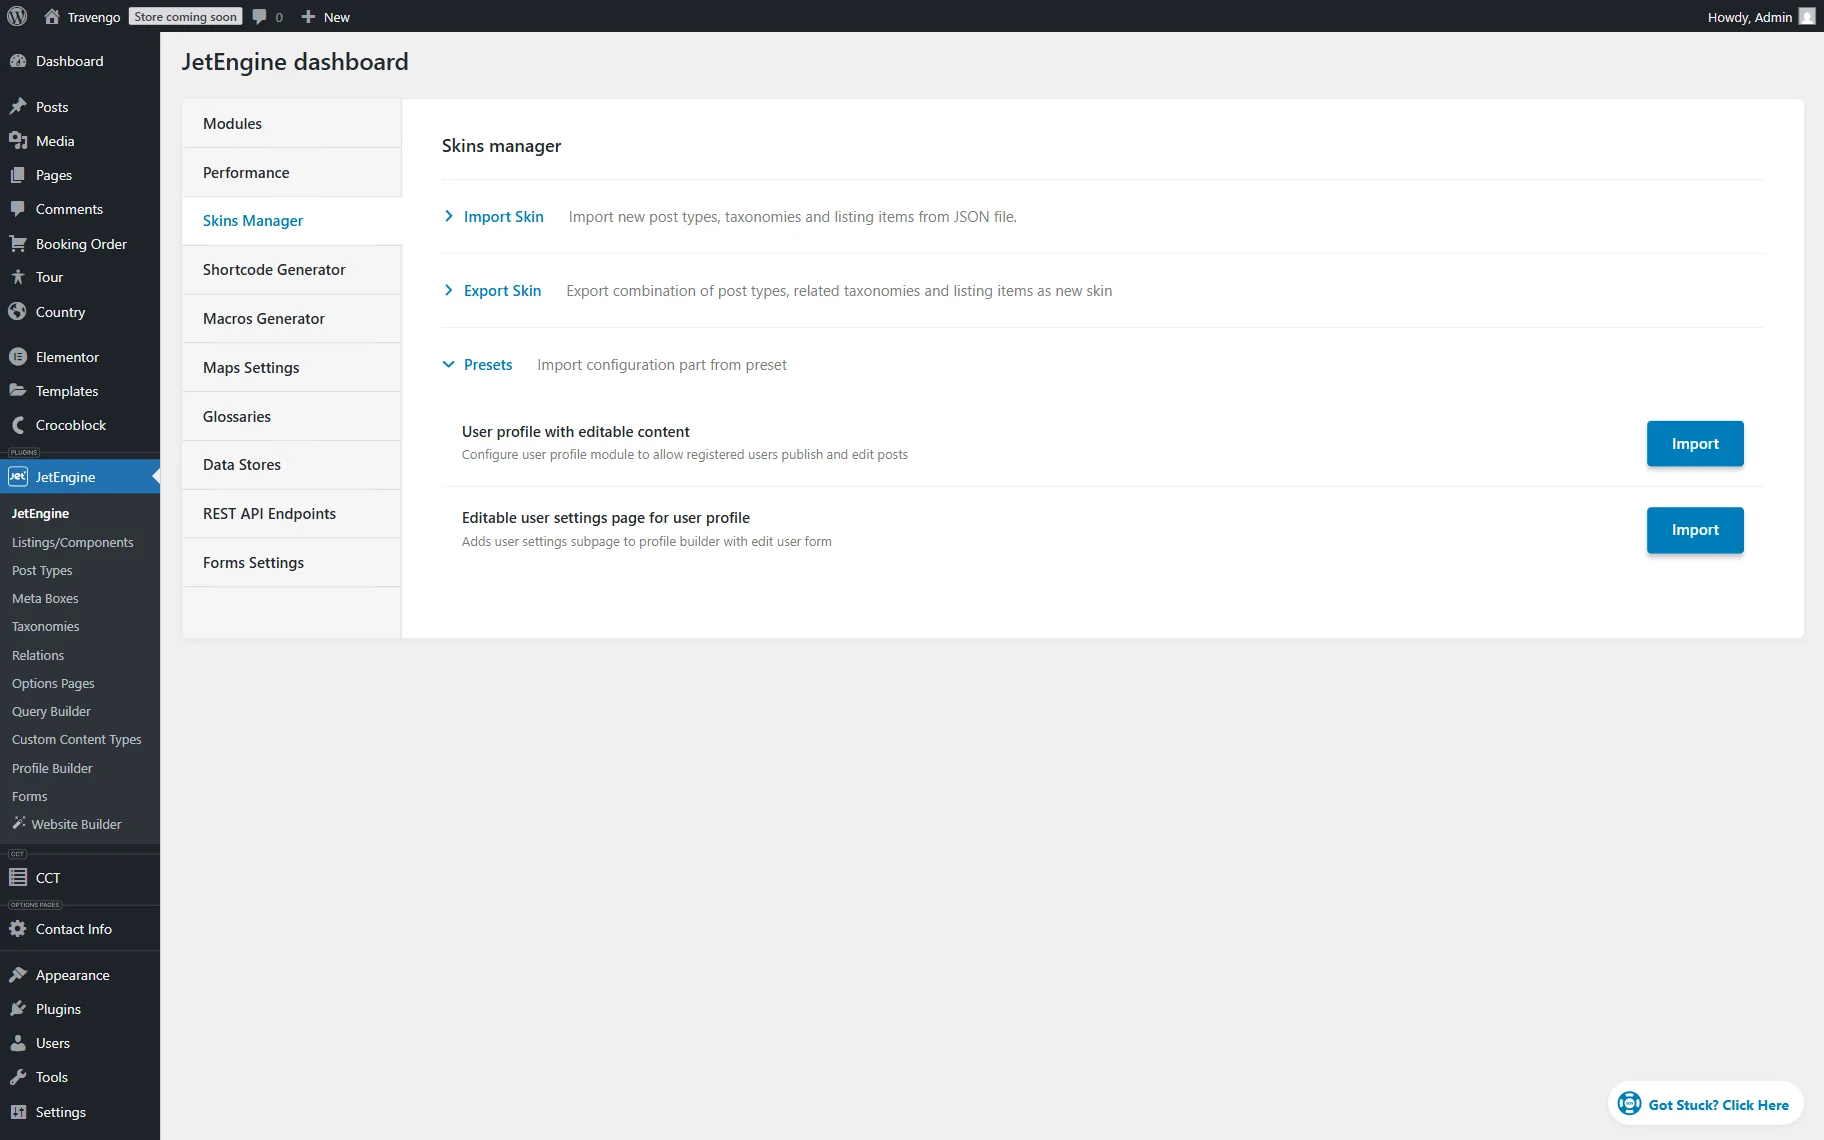
- User profile with editable content — configures the user profile module to allow registered users to publish and edit posts;
- Editable user settings page for the user profile — adds a user settings subpage to the profile builder with an editable user form.
If you need more details about these presets, check out the Profile Builder Overview.
That’s it; now you know how to export and import content settings of the JetEngine plugin for WordPress.