How to Expand/Collapse Categories in Site Filters
From this tutorial, you will find out how to use the “Collapsible” feature with the Checkbox and Radio filters available with JetSmartFilters.
Before you start, check the tutorial requirements:
- Elementor (Free version), Block editor (Gutenberg) or Bricks builder
- JetSmartFilters plugin installed and activated
- JetEngine plugin installed and activated with custom hierarchical category built and posts attached to it
Build a Filter
To begin, let’s create a filter. To do so, follow the WordPress Dashboard > Smart Filters > Add New path.
Complete the Filter Name and select either the “Checkboxes list” or “Radio” Filter Type, as the “Collapsible” feature can be implemented only with these two types.
In the described case, we will use the “Checkboxes list” Filter Type.
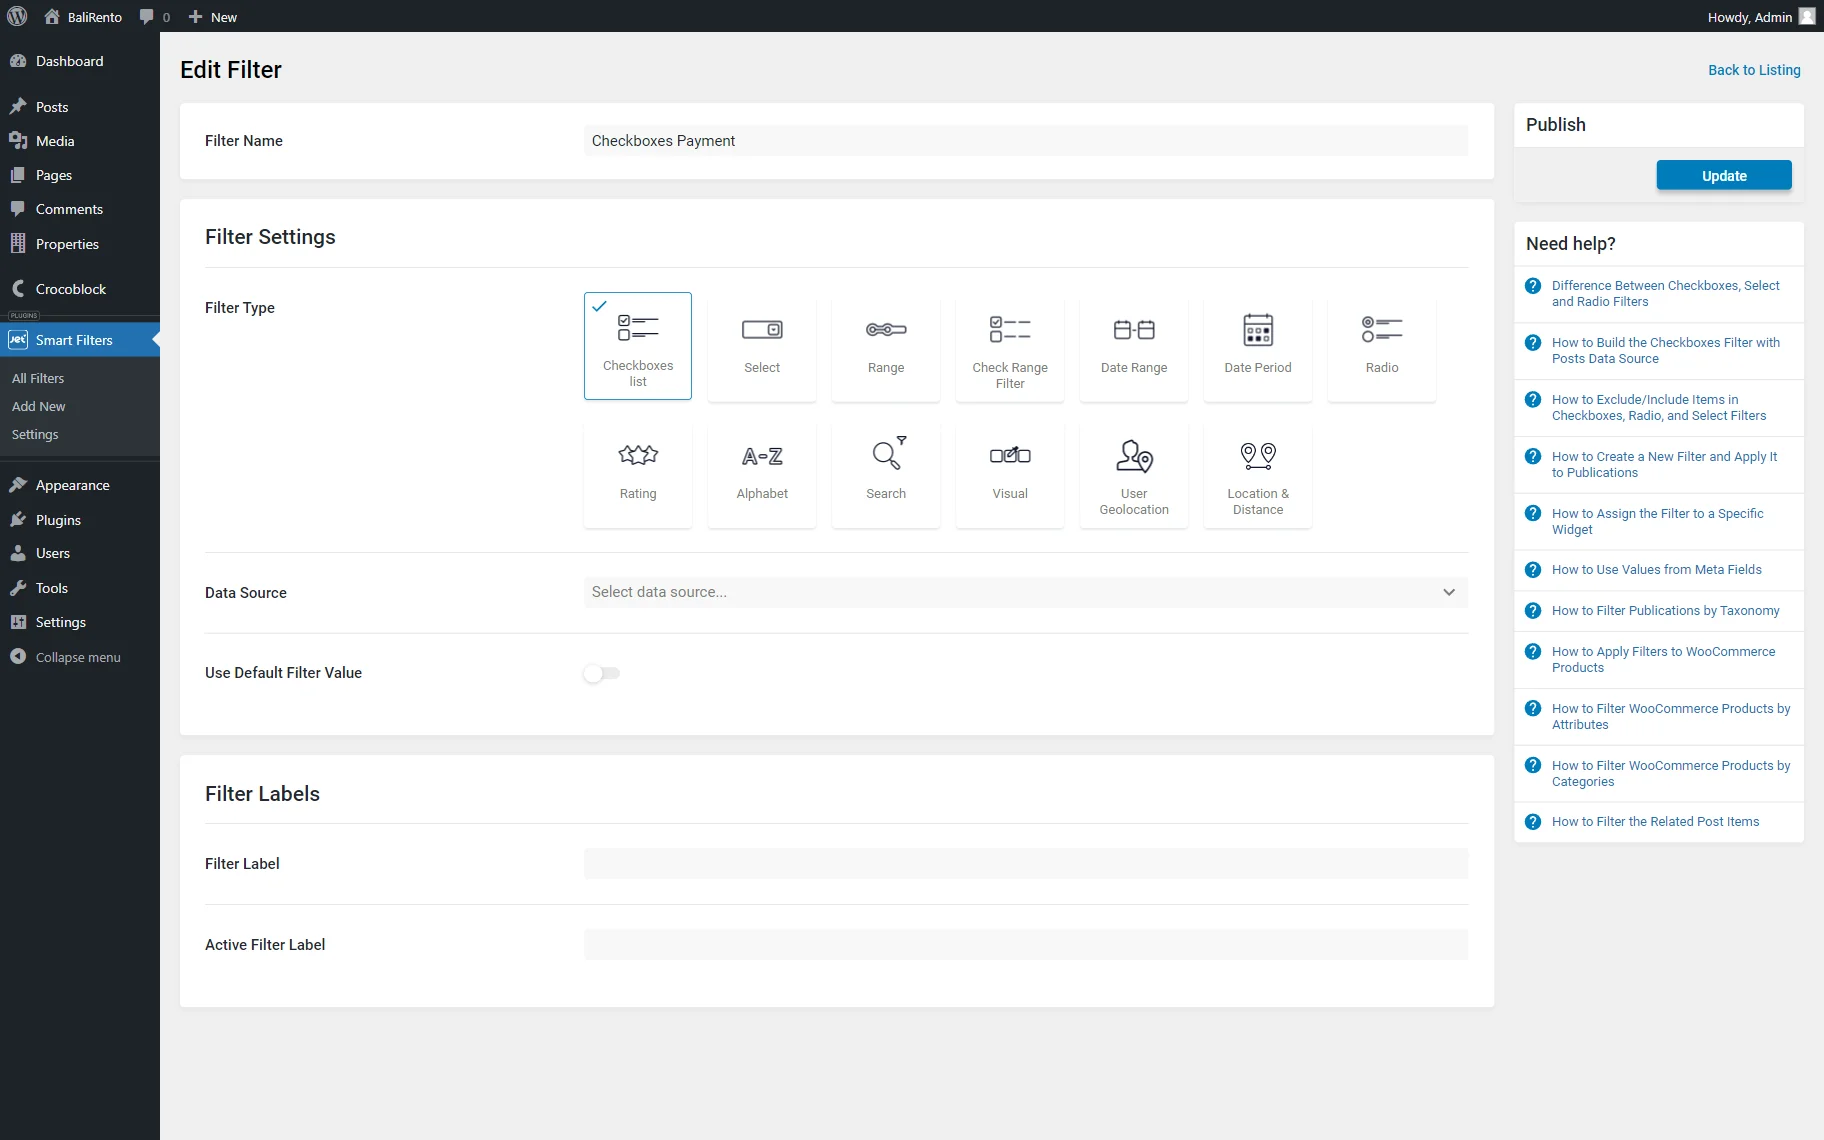
The following step is selecting the Data Source. Pick the “Taxonomies” option and determine the Taxonomy items that will be used as filter items.
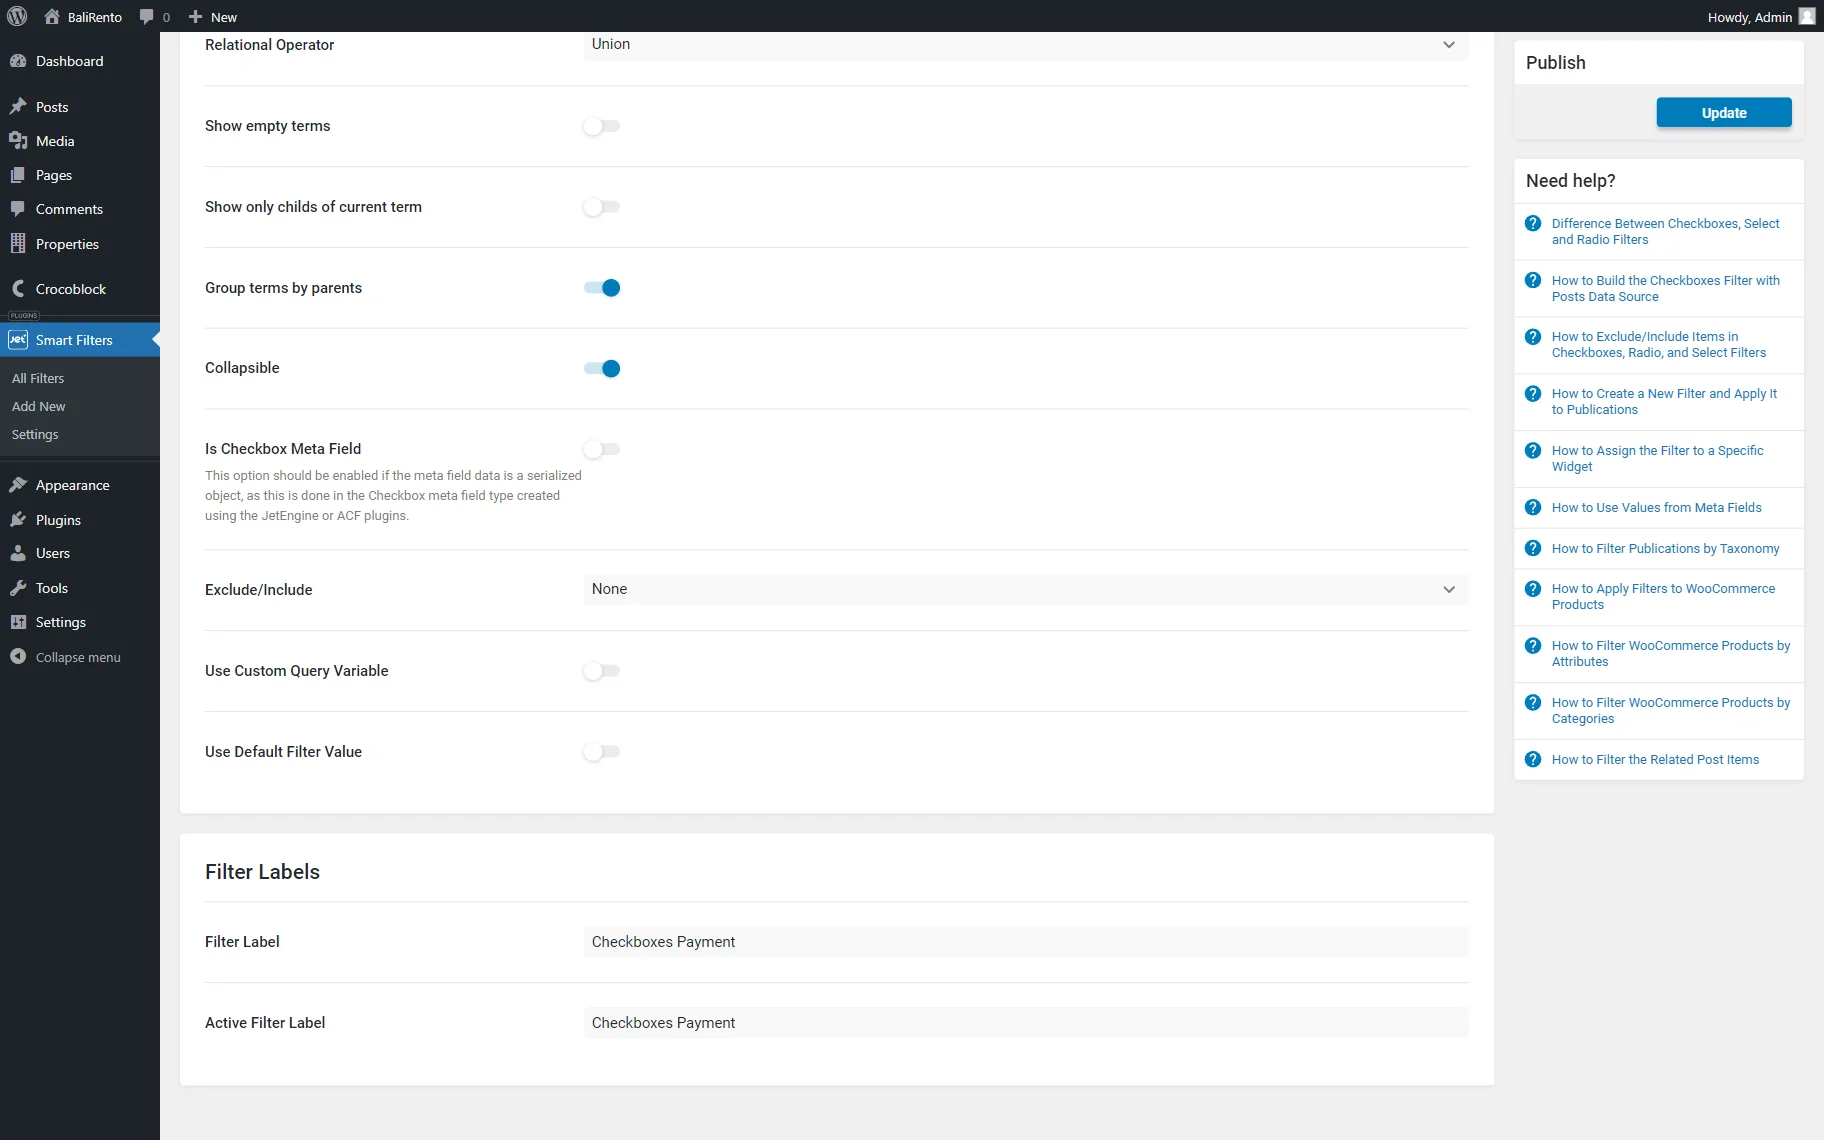
Adjust the following fields as needed and activate the Group terms by parents toggle.
Once the toggle is activated, the Collapsible toggle appears. Enable it as well.

Proceed to the Filter Labels section and complete the Filter Label and Active Filter Label if desired.
Whenever the filter is ready, push the “Update” button.
Put Filter on the Page
Go to the page editor of your choice to add the filter on the desired page. It can be the Block editor (Gutenberg,) Elementor, or Bricks.
We will use Gutenberg, but the customization process will be the same for all the builders.
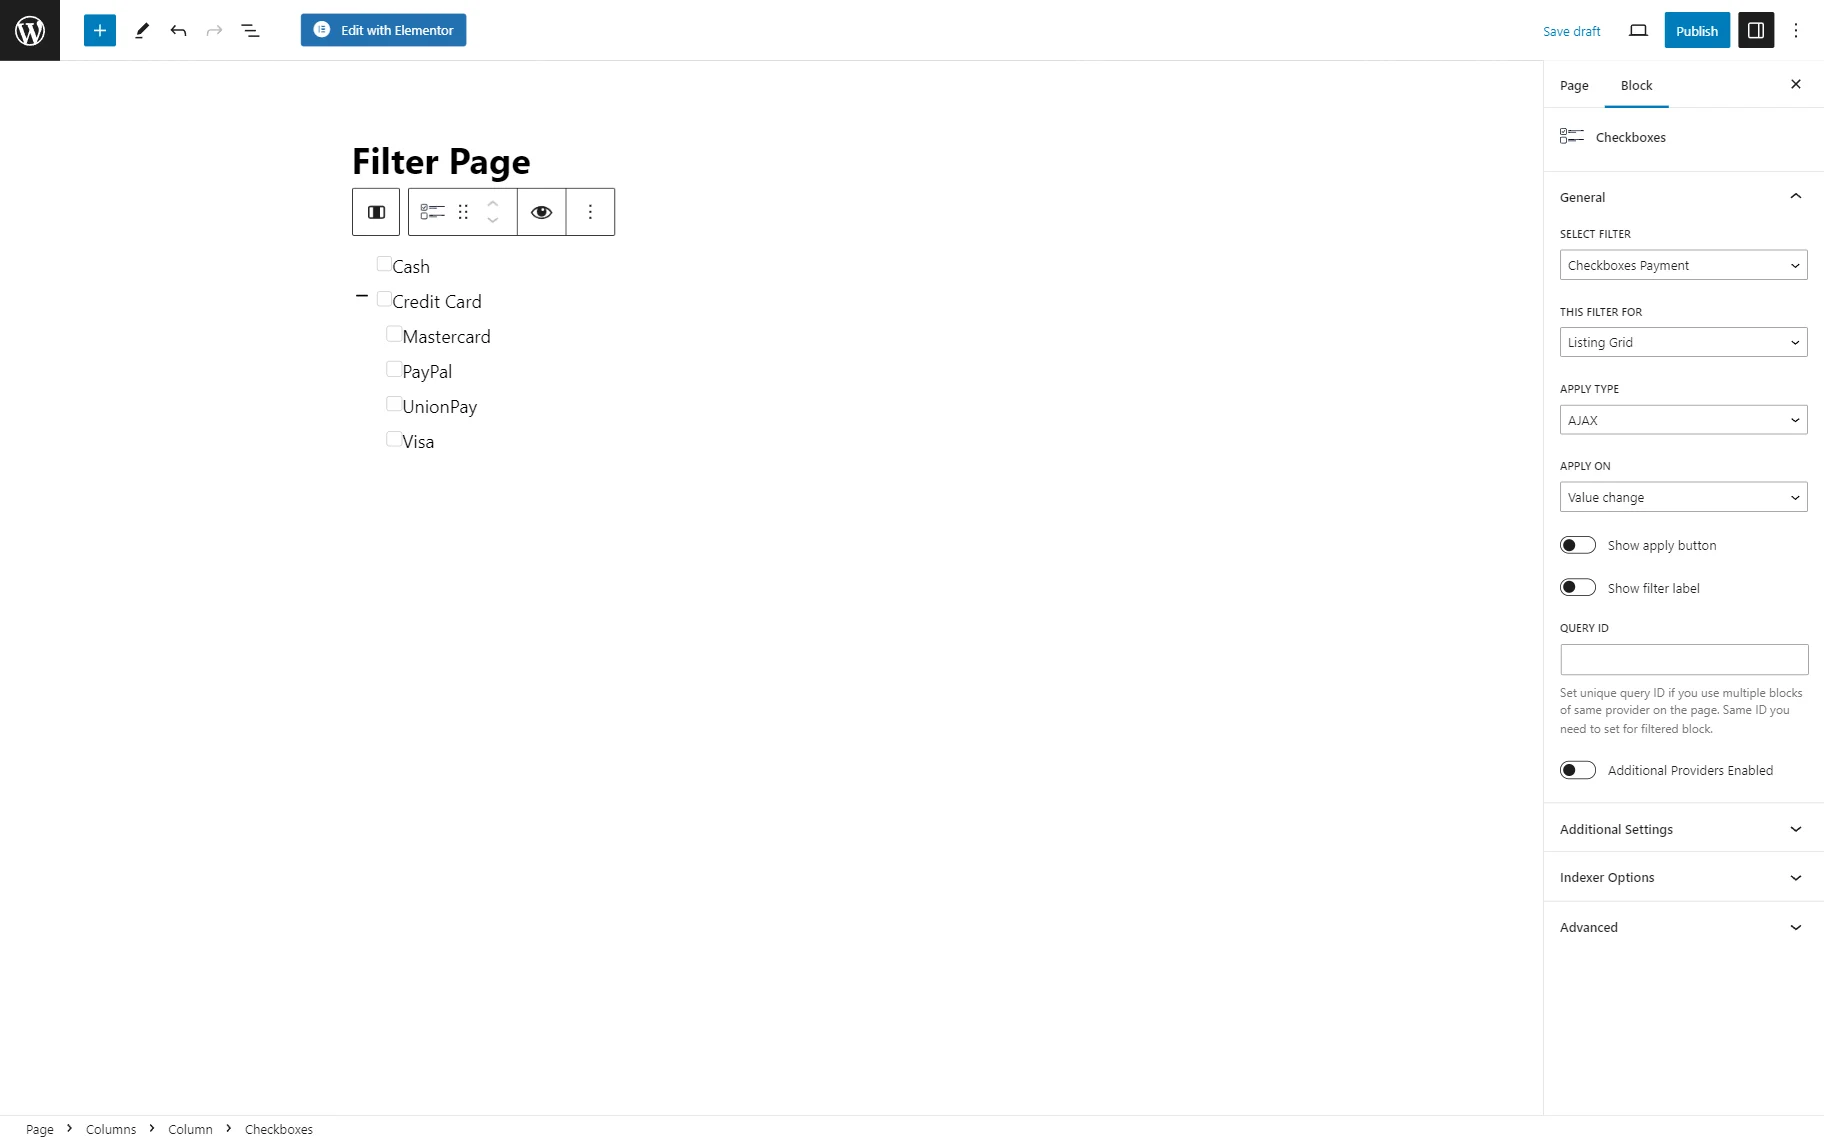
Place the filter block/widget/element on the page. In our case, it is the Checkboxes block.
Select the filter in the namesake field and define the provider in the This filter for drop-down menu. Adjust the following filter settings as needed.
To style the filter, you can use the JetStyleManager plugin.
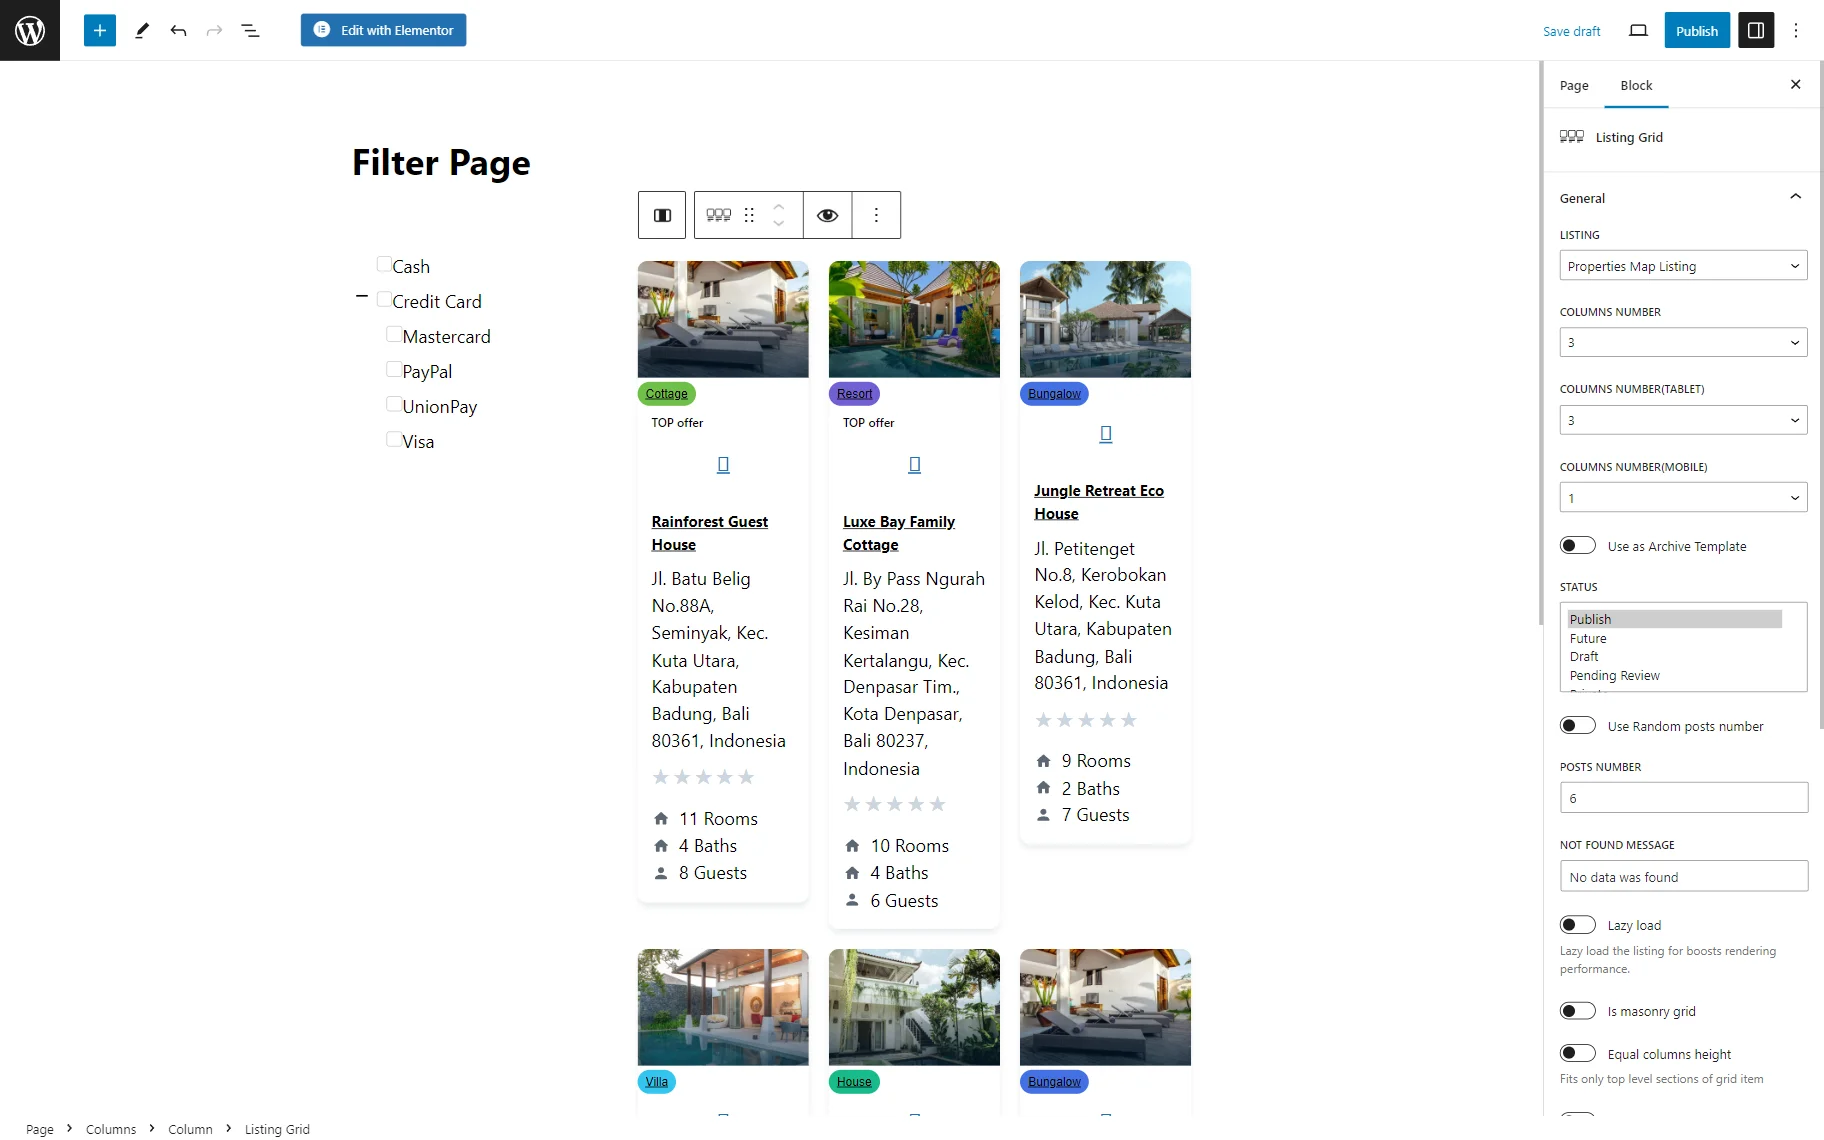
Add the provider block, widget, or element on the page if you haven’t done it yet, and customize the page according to your needs.
Learn what blocks, widgets, and elements can be filtered from the Filters Providers Overview.
Press the “Publish/Update” button.
Check the Result
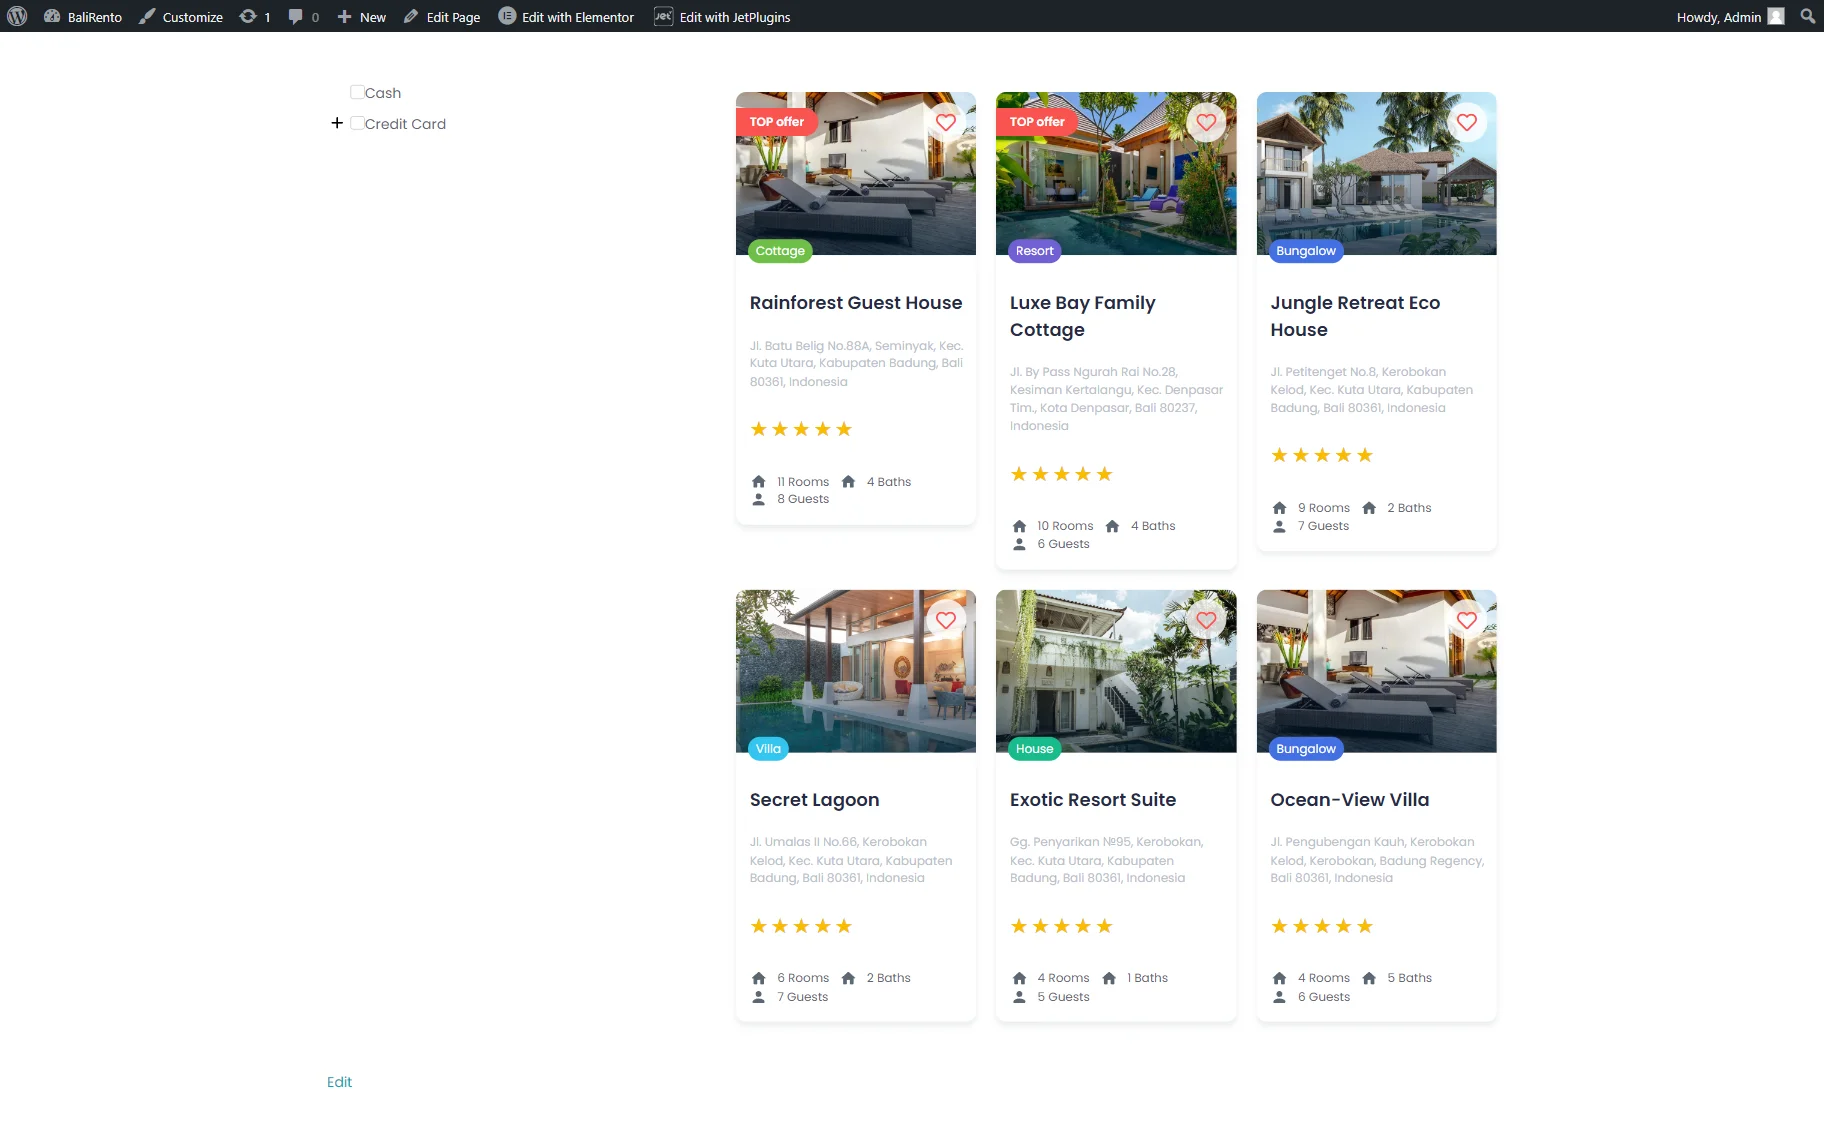
Open the front-end view of the page to check the result. At first, we see only the parent categories.
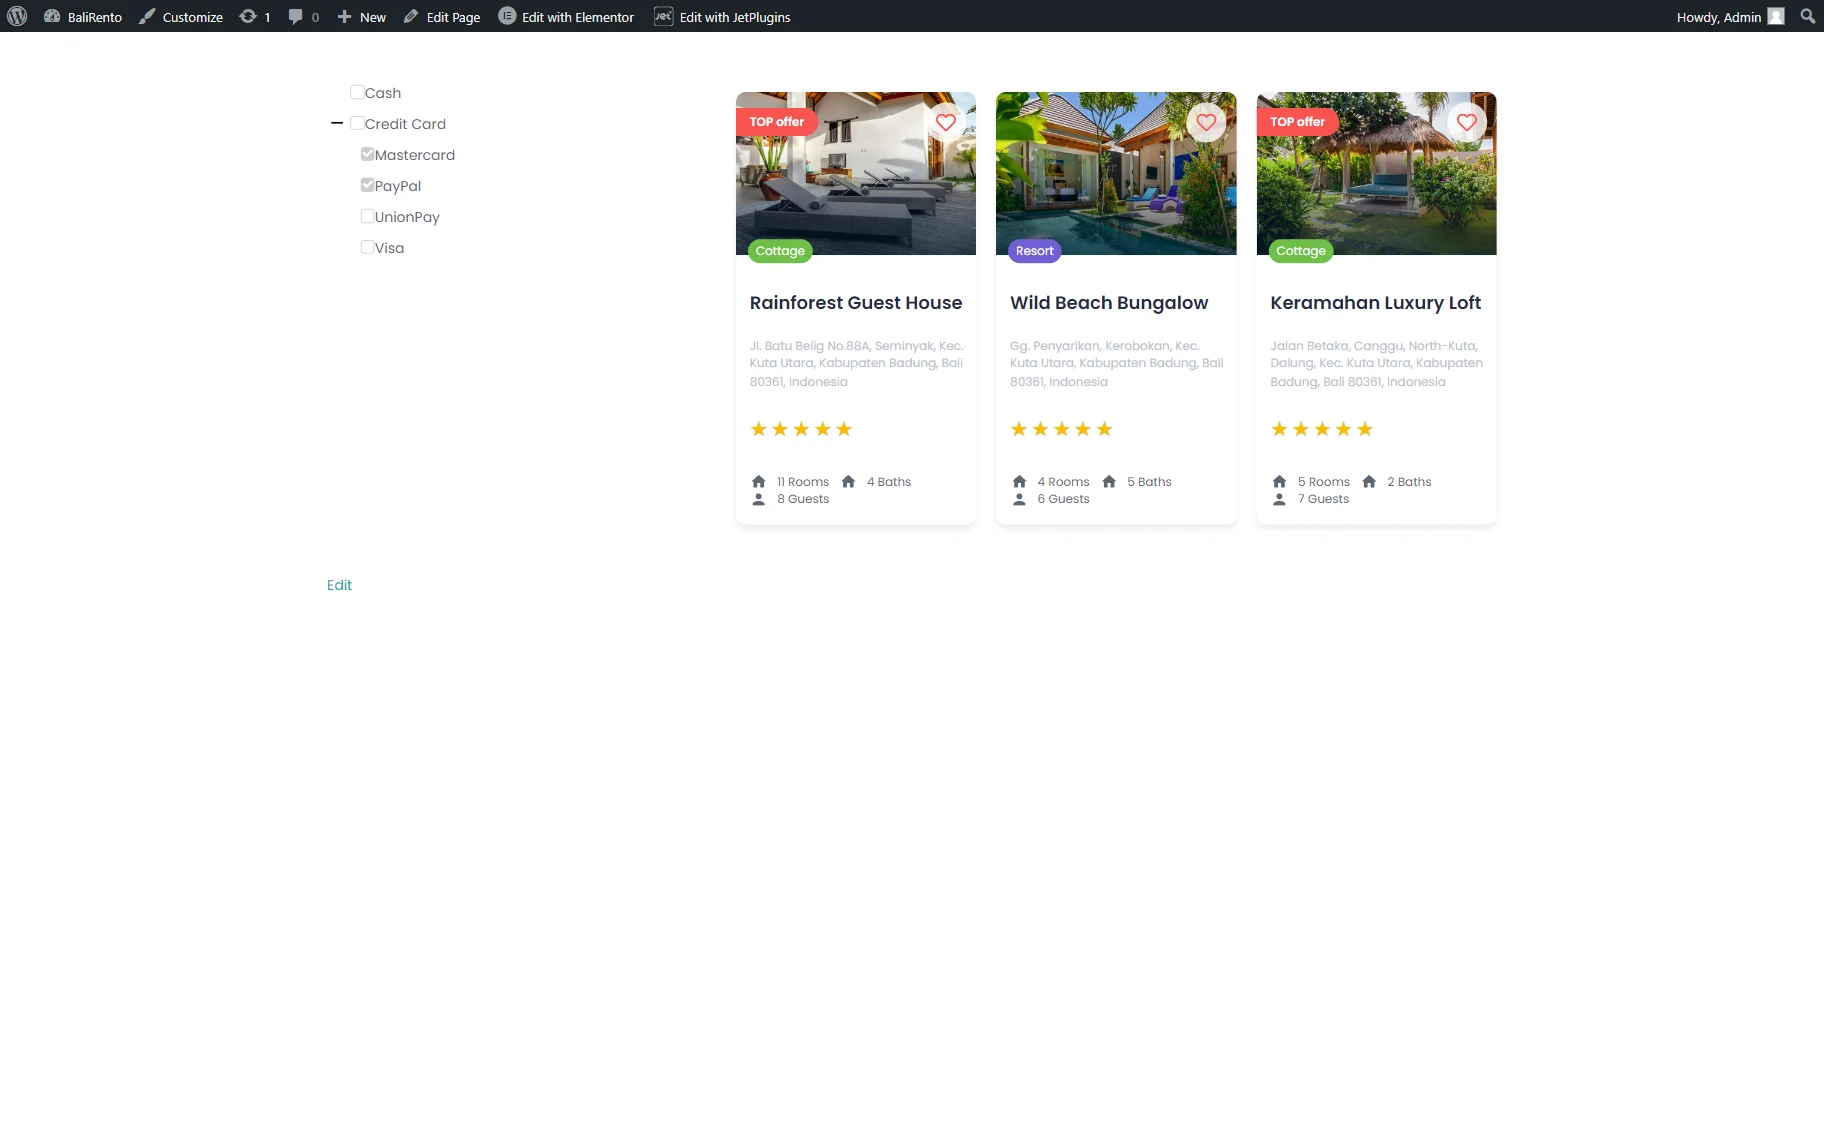
Also, a “plus” icon will be displayed next to the terms that contain child terms. Click on it to expand the hidden terms.
So, if we select one of the options, the list of its child categories will expand as well. Now, they can be selected in the filter.
That’s it; now you know how to create a collapsible filter with the help of the JetSmartFilters functionality for your WordPress website.