How to Create Visual Filter Based on SQL Query with Open AI
Learn how to use AI to create a custom query in JetEngine’s Query Builder and create a JetSmartFilters filter based on it.
Before you start, check the tutorial requirements:
- Elementor (Free version) or Block editor (Gutenberg)
- JetSmartFilters plugin installed and activated
- JetEngine plugin installed and activated
Add Meta Fields to Post Type
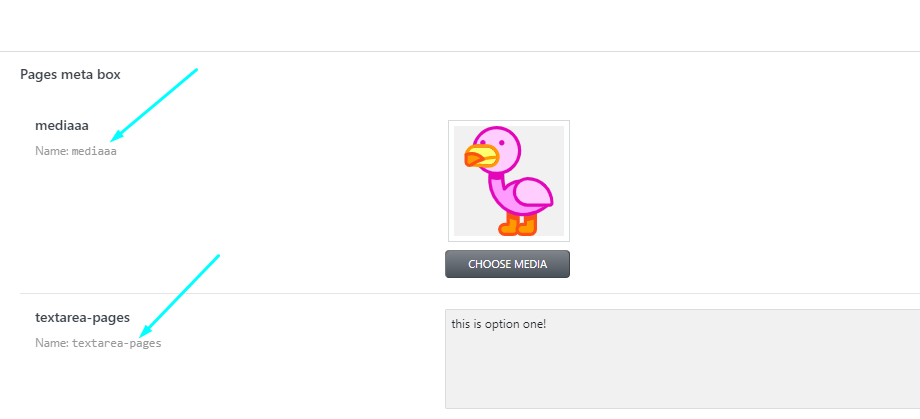
Before getting into creating the custom query, let us see which meta fields can be used. In the described example, two meta fields were created, one is the ‘mediaaa’ meta field of the “Media” Field type, from which an image is pulled to show a list of options in the filter, and the ‘textarea-pages’ meta field, by which the filtering is to be performed.
Create Custom SQL Query with AI
Once the meta fields are added to a post type and filled in posts, move to WordPress Dashboard > JetEngine > Query Builder.
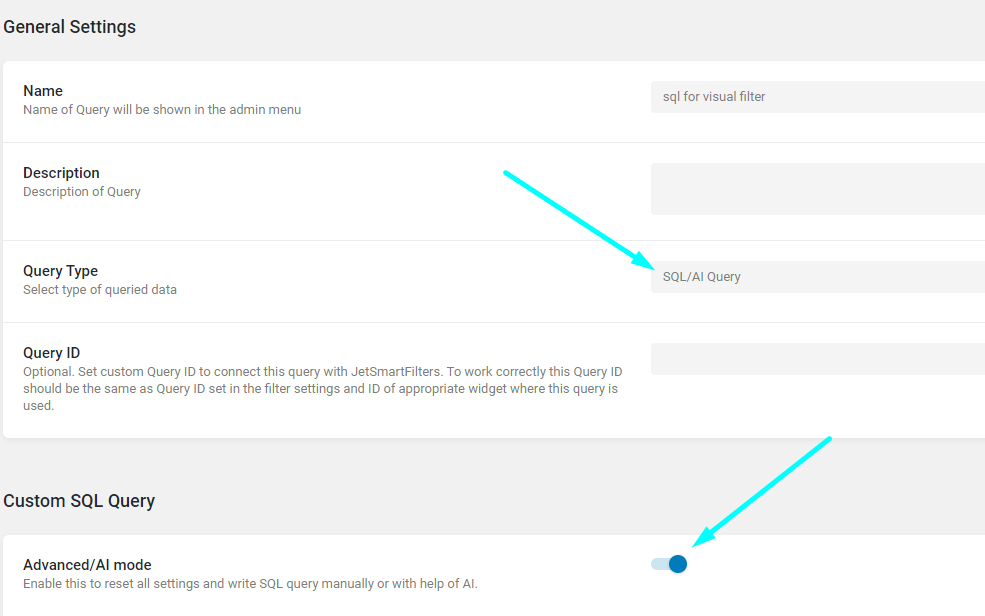
Create a new query, complete the Name of the query, and select “SQL/AI Query” Query Type in the General Settings section.
Head to the Custom SQL Query and switch on the Advanced/AI mode feature.
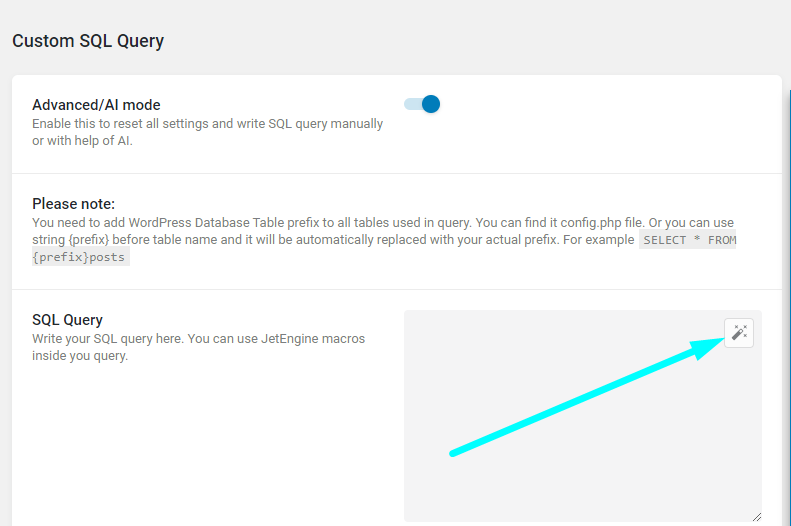
Click the “Generate query with AI” button to get to the prompts. The idea is that we need to tell the AI that there are two fields with specific names from which we need unique values to be retrieved, so we will work on writing a prompt for this request. You can write the prompt according to how you want the posts, terms, CCT items, etc., to be queried.
Here are the examples of prompts we used to create an SQL query:
Post has fields 'textarea-pages' and 'mediaaa'. Return distinct values from 'textarea-pages' and values from 'mediaaa'.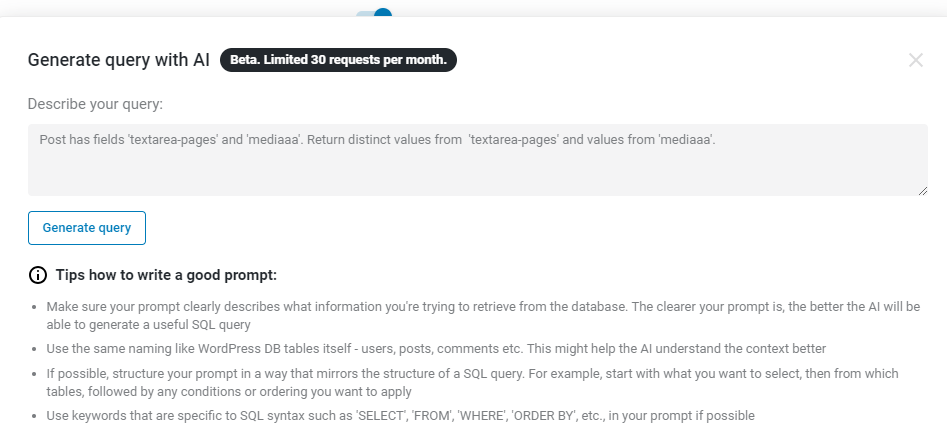
In this query, we should have mentioned that these meta fields are from the same post.
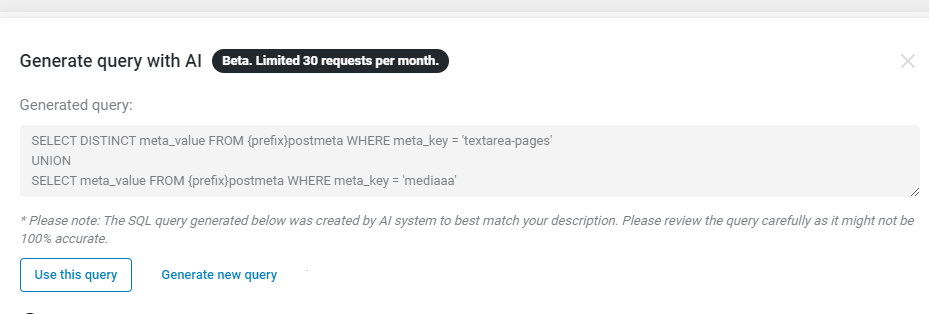
Now we got this SQL query which is not exactly what is needed:
SELECT DISTINCT meta_value FROM {prefix}postmeta WHERE meta_key = 'textarea-pages'
UNION
SELECT meta_value FROM {prefix}postmeta WHERE meta_key = 'mediaaa'
So here is another version of the prompt:
Post has meta fields 'textarea-pages' and 'mediaaa'. Return distinct values from 'textarea-pages' and values from 'mediaaa' for each post.This request generates the following query:
SELECT DISTINCT {prefix}postmeta.meta_value AS textarea_pages, {prefix}postmeta2.meta_value AS mediaaa
FROM {prefix}posts
INNER JOIN {prefix}postmeta ON {prefix}posts.ID = {prefix}postmeta.post_id AND {prefix}postmeta.meta_key = 'textarea-pages'
INNER JOIN {prefix}postmeta AS {prefix}postmeta2 ON {prefix}posts.ID = {prefix}postmeta2.post_id AND {prefix}postmeta2.meta_key = 'mediaaa'
This query is correct, but the info that the ‘textarea-pages’ meta field must not be empty should also be mentioned.
So here is another one:
Post has meta fields 'textarea-pages' and 'mediaaa'. Return distinct values from 'textarea-pages' and values from 'mediaaa' for each post. 'textarea-pages' field must not be empty.This request generates this query:
SELECT DISTINCT {prefix}postmeta.meta_value AS textarea_pages, {prefix}postmeta2.meta_value AS mediaaa
FROM {prefix}posts
INNER JOIN {prefix}postmeta ON {prefix}posts.ID = {prefix}postmeta.post_id AND {prefix}postmeta.meta_key = 'textarea-pages' AND {prefix}postmeta.meta_value != ''
LEFT JOIN {prefix}postmeta AS {prefix}postmeta2 ON {prefix}posts.ID = {prefix}postmeta2.post_id AND {prefix}postmeta2.meta_key = 'mediaaa'
WHERE {prefix}posts.post_type = 'post' AND {prefix}posts.post_status = 'publish'
In this case, OpenAI decided that we query a ‘post’ post type, which is why it is better to specify from which post type the posts are pulled.
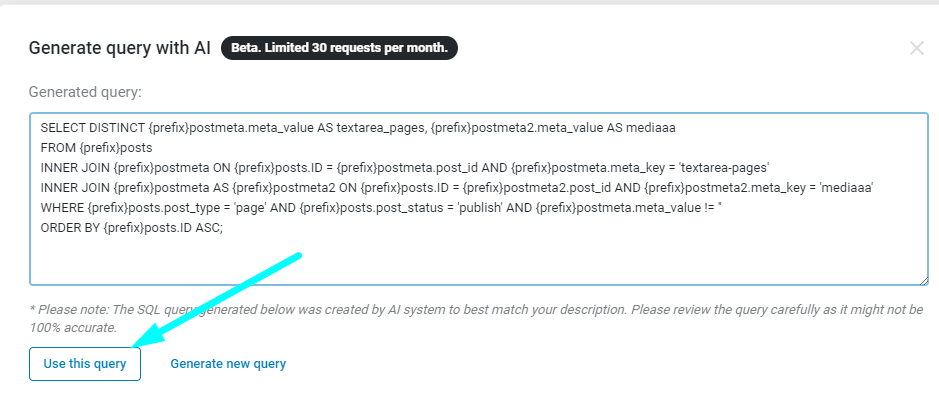
So here is the final version:
Post type 'page' has meta fields 'textarea-pages' and 'mediaaa'. Return distinct values from 'textarea-pages' and values from 'mediaaa' for each post. 'textarea-pages' field must not be empty.
SELECT DISTINCT {prefix}postmeta.meta_value AS textarea_pages, {prefix}postmeta2.meta_value AS mediaaa
FROM {prefix}posts
INNER JOIN {prefix}postmeta ON {prefix}posts.ID = {prefix}postmeta.post_id AND {prefix}postmeta.meta_key = 'textarea-pages'
INNER JOIN {prefix}postmeta AS {prefix}postmeta2 ON {prefix}posts.ID = {prefix}postmeta2.post_id AND {prefix}postmeta2.meta_key = 'mediaaa'
WHERE {prefix}posts.post_type = 'page' AND {prefix}posts.post_status = 'publish' AND {prefix}postmeta.meta_value != ''
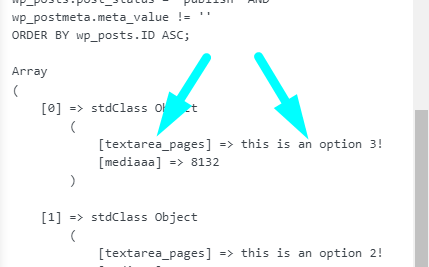
ORDER BY {prefix}posts.ID ASC;The result is:
At this point, the query matches the idea. Besides, you can add final edits to the query. For instance, change the order.
By the way, the ‘distinct’ word used in the query prompts comes from SQL’s vocabulary, but OpenAI will understand the word ‘unique’ instead of it.
Now press the “Use this query” button.
Optionally, you can activate the “Preview results” toggle to ensure the query provides the values according to the request.

Create Visual Filter
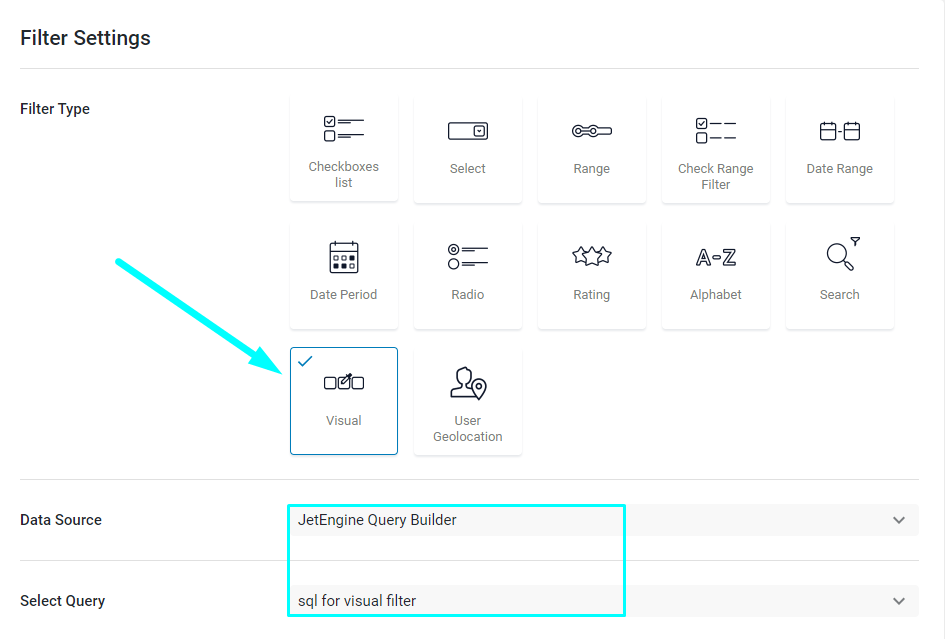
After the custom query is saved, create a new filter in WordPress Dashboard > Smart Filters > Add New. Select the “Visual” Filter type. Data Source should be set to “JetEngine Query Builder,” in the Select Query field, you should pick the custom query that has just been created using AI.
Complete the rest of the fields.
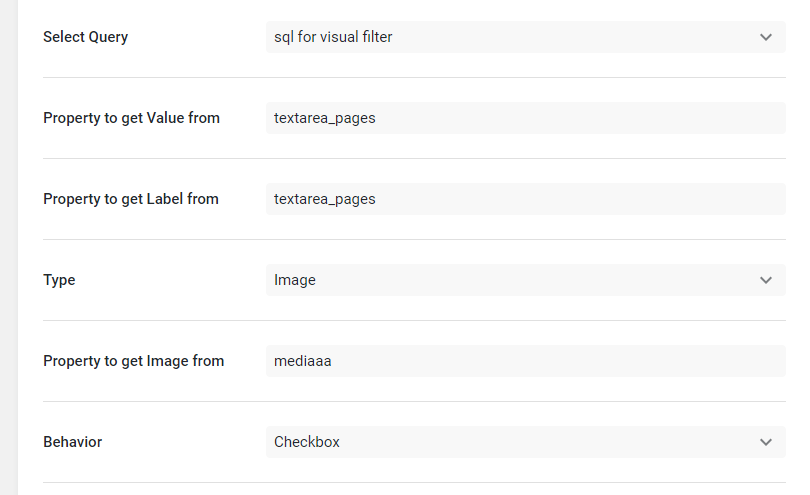
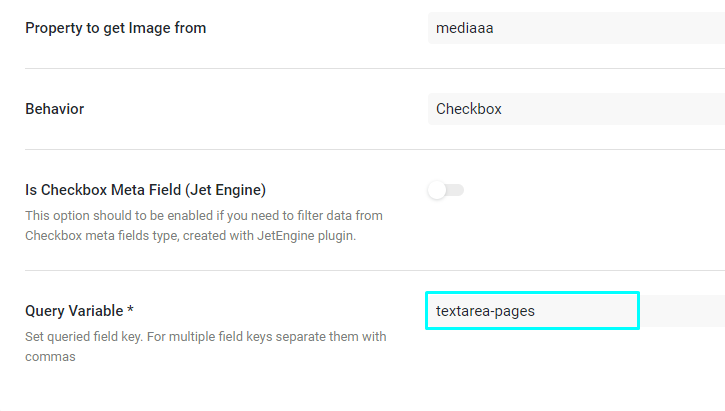
The Property to get Value from field, is completed with the ‘textarea_pages’ value to filter by the values from this meta field.
You can also use the same value in the Property to get Label from field in case you want to show the values from this field as a Label of the filter’s option. An “Image” option has been selected in the Type field, so we can specify the field’s name from which to get the image.
Lastly, you can select the Behavior of the Visual Filter, “Checkbox” or “Radio,” to define whether the user can check multiple options in the filter or just one.
Then, insert the Query Variable name. It should be the field name by which the filtering will be done.
Press the “Update” button to save the filter.
Set Up Visual Filter on the Front End
Let us set up the filter for the Listing Grid widget/block on the front end.
Gutenberg editor
Add a Visual block to the page, and select the Visual filter you created. You can use a “Listing Grid” block as a provider in This filter for setting.
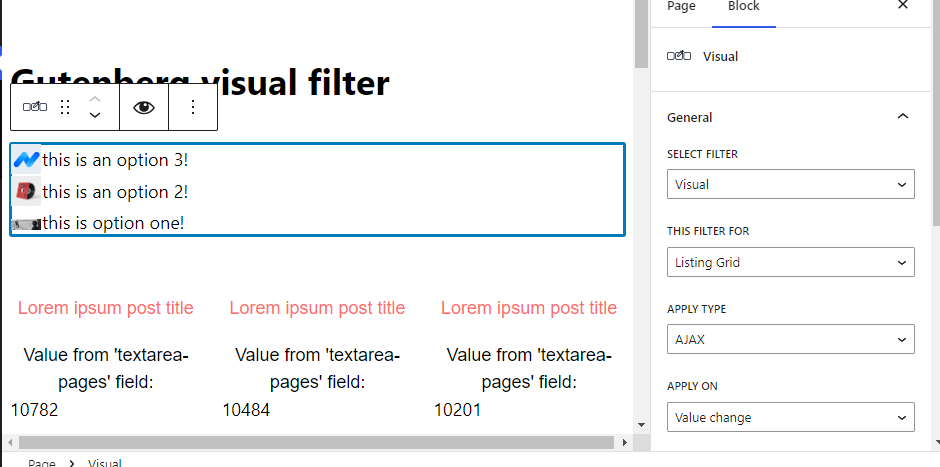
Then add the Listing Grid block to the page, and select a Listing template for the post type in which posts need to be filtered.

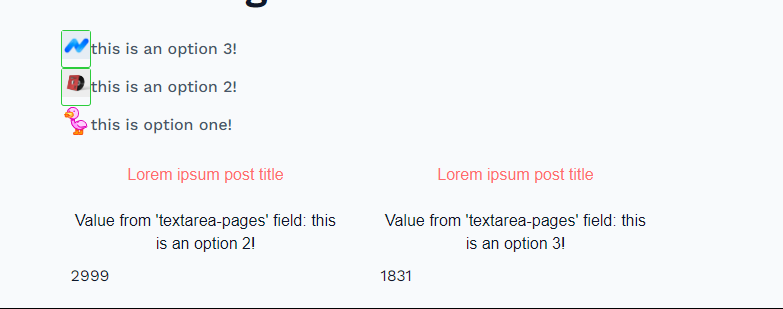
On the front end, you can see that the posts in the listing are filtered using the Visual Filter.
Elementor editor
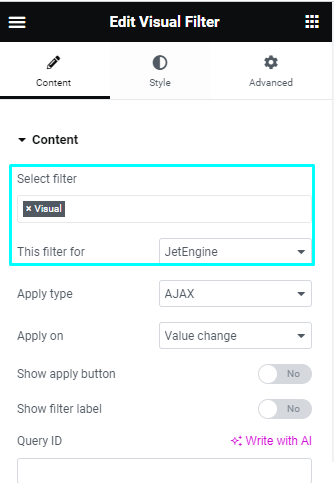
Add the Visual Filter widget to the page, and select the Visual Filter you have just created. In This filter for setting, you can use the “JetEngine” widget as a provider.
Then add the Listing Grid widget to the page, and select a Listing template for the post type in which posts need to be filtered.
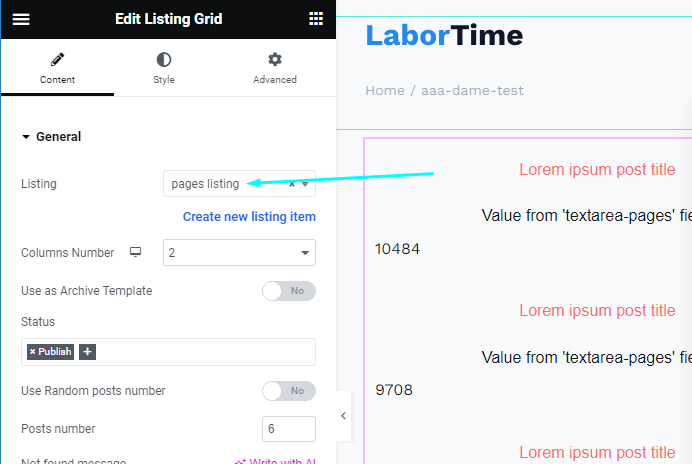
After saving the page, you can check the result on the front end.
Once the option is selected in the Visual Filter, the post with the selected value in the ‘textarea_pages’ meta field is filtered accordingly.

Now you know how to bring more AI into building JetSmartFilters Visual Filter based on SQL query in the Query Builder of the JetEngine plugin.