How to Use Hidden Filter with Components
Learn how to use JetSmartFilters’ Hidden Filter with JetEngine’s Components feature on your WordPress website.
Before you start, check the tutorial requirements:
- Elementor (Free version), Block editor (Gutenberg), or Bricks
- JetEngine plugin installed and activated with the Custom Post Type (CPT) built
- JetSmartFilters plugin installed and activated
Hidden Filter is a feature that is available with the JetSmartFilters plugin, and it allows you to modify the query that has already been applied to its provider.
Check the Hidden Filter Overview to find out more about its settings.
In this guide, we want to use the Hidden Filter with JetEngine’s Component, which contains another queried filter and a queried Listing Grid.
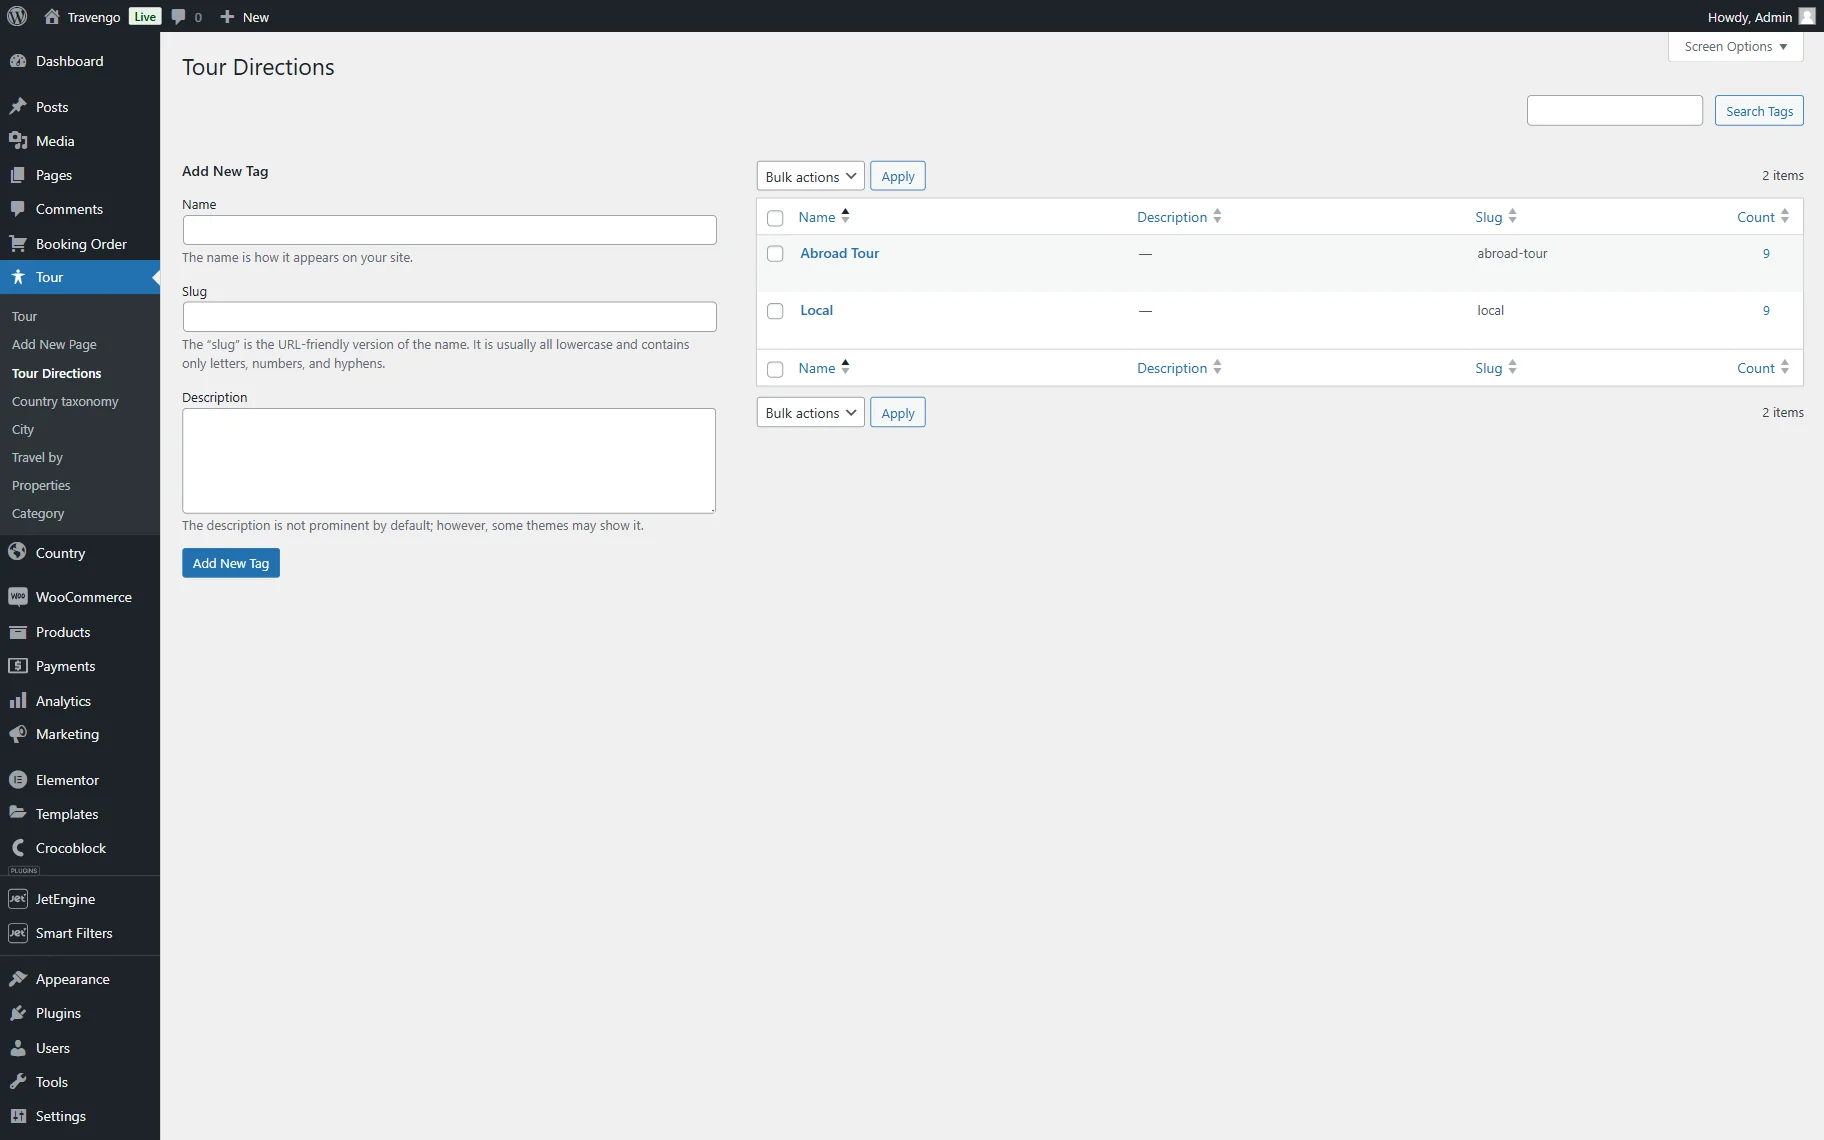
Create Taxonomy
Initially, we build a custom “Tour Directions” taxonomy for the “Tour” Custom Post Type (CPT), add terms to it (“Abroad Tour” and “Local”), and attach posts to these terms.
Check the detailed guide on How to Create a Custom Taxonomy.
Build Listing Template
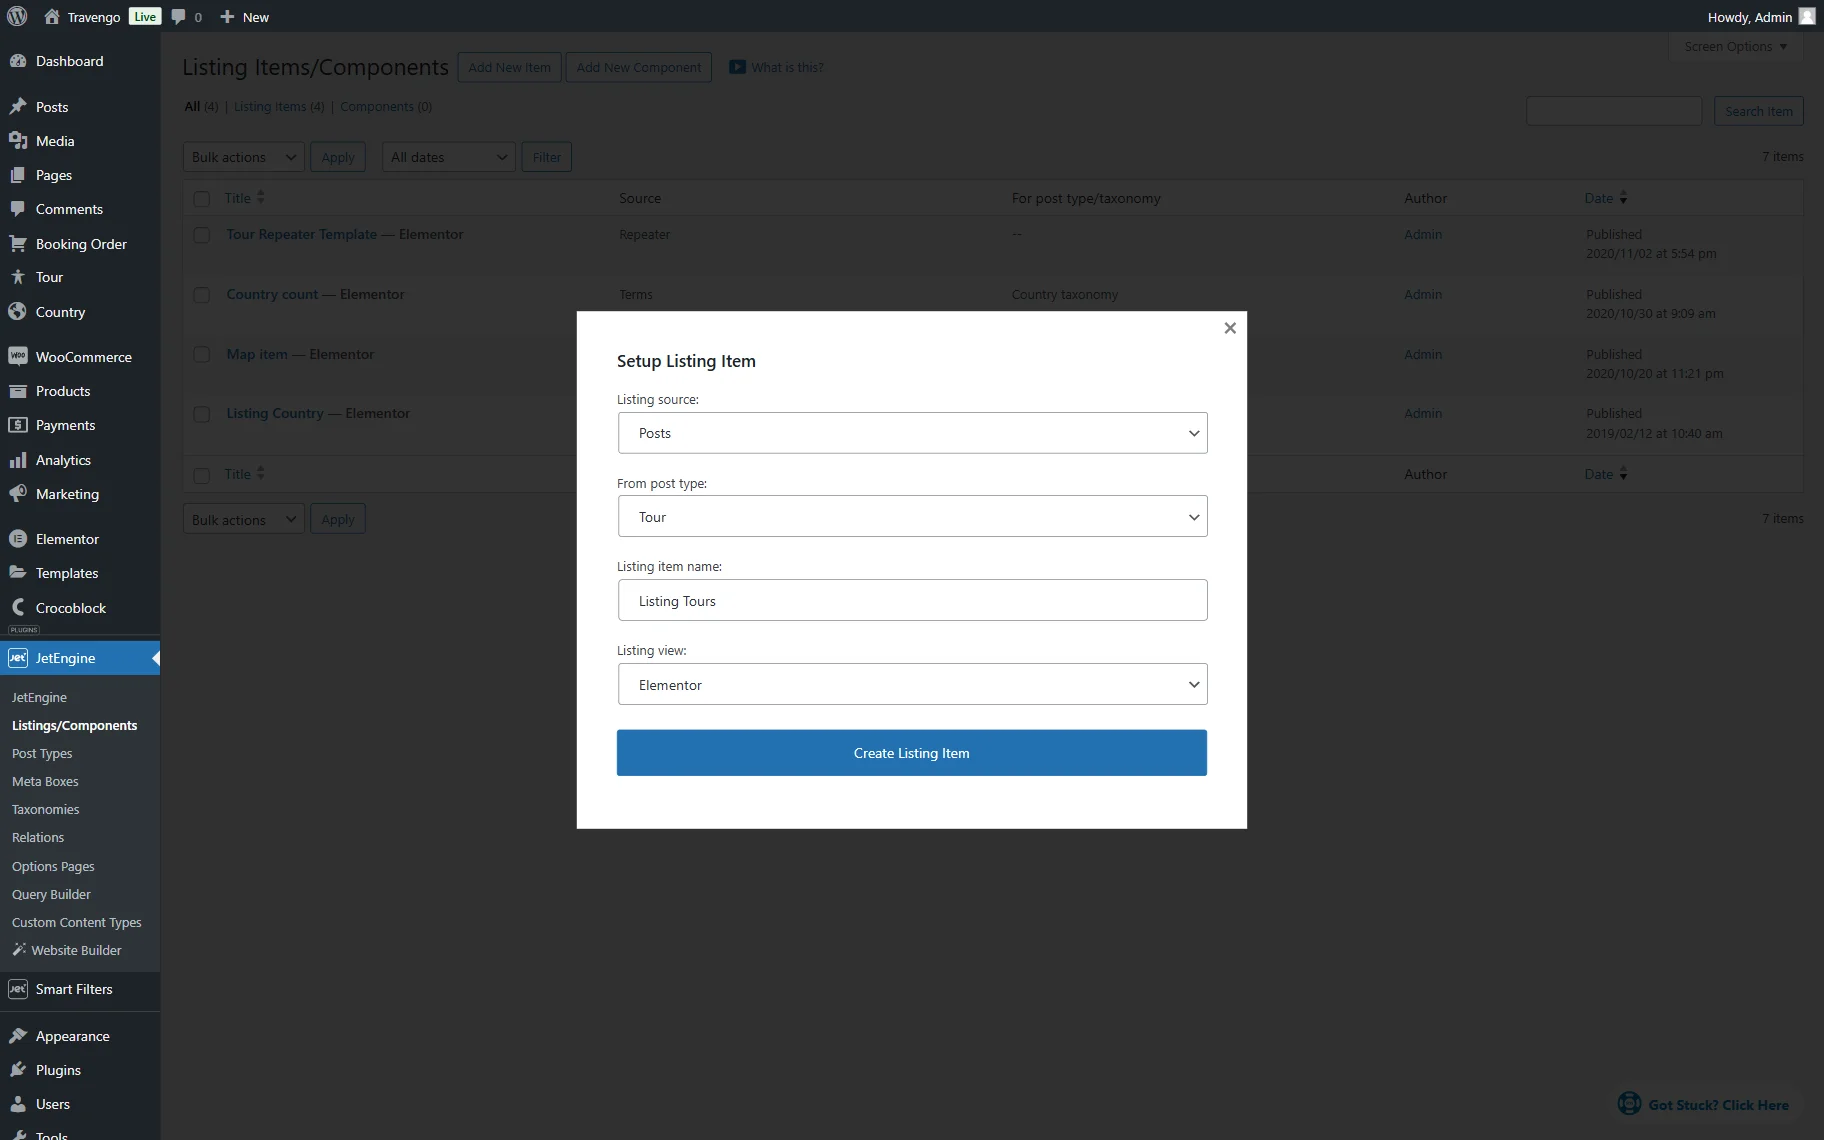
Next, we want to build a Listing item that will be added later in the Component.
Go to WordPress Dashboard > JetEngine > Listings/Components and press the “Add New Item” button.
We leave the default “Posts” Listing source, select “Tours” Custom Post Type in the From post type field, set the Listing item name to “Listing Tours,” and pick the “Elementor” option as the Listing view (you can use any preferred Listing view).
Next, click the “Create Listing Item” button to proceed to Elementor.
In the editor, we add dynamic widgets that display the meta data of the posts.
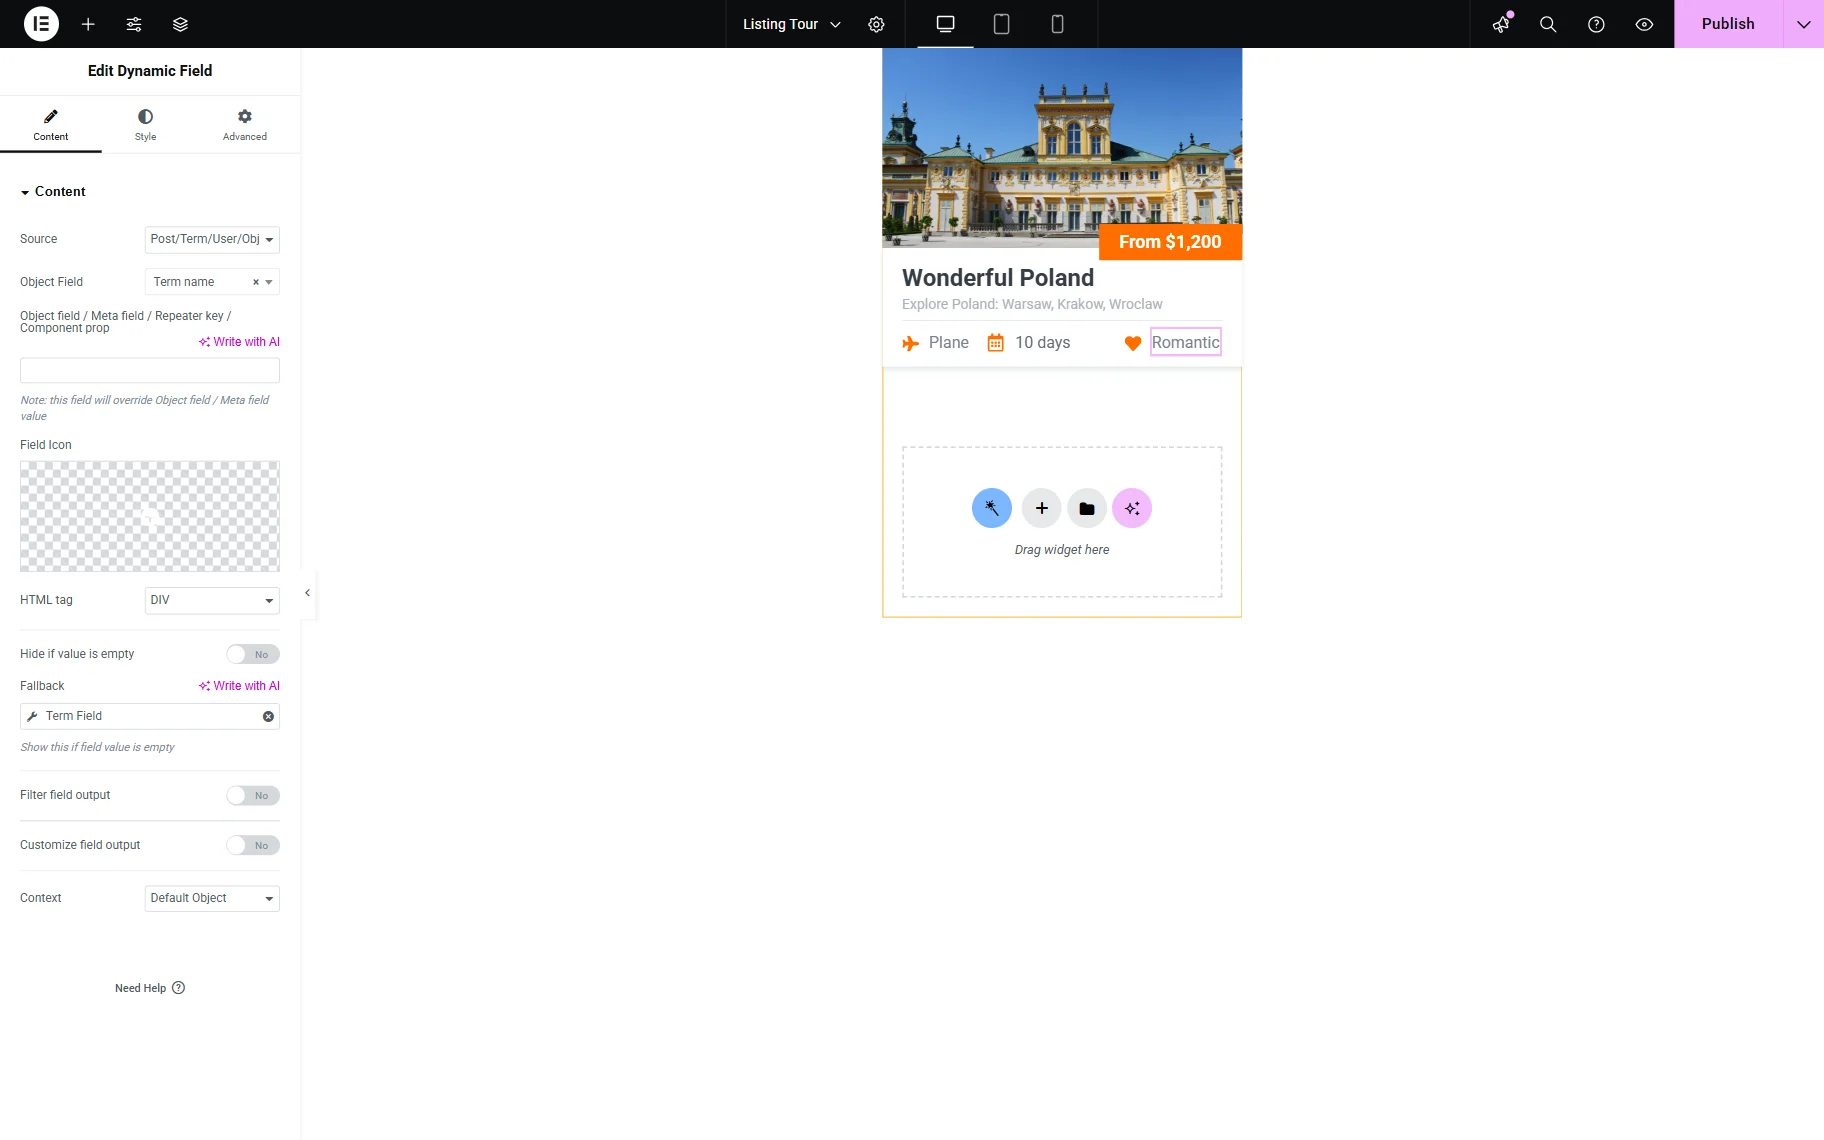
Once the listing item is ready, press the “Publish” button.
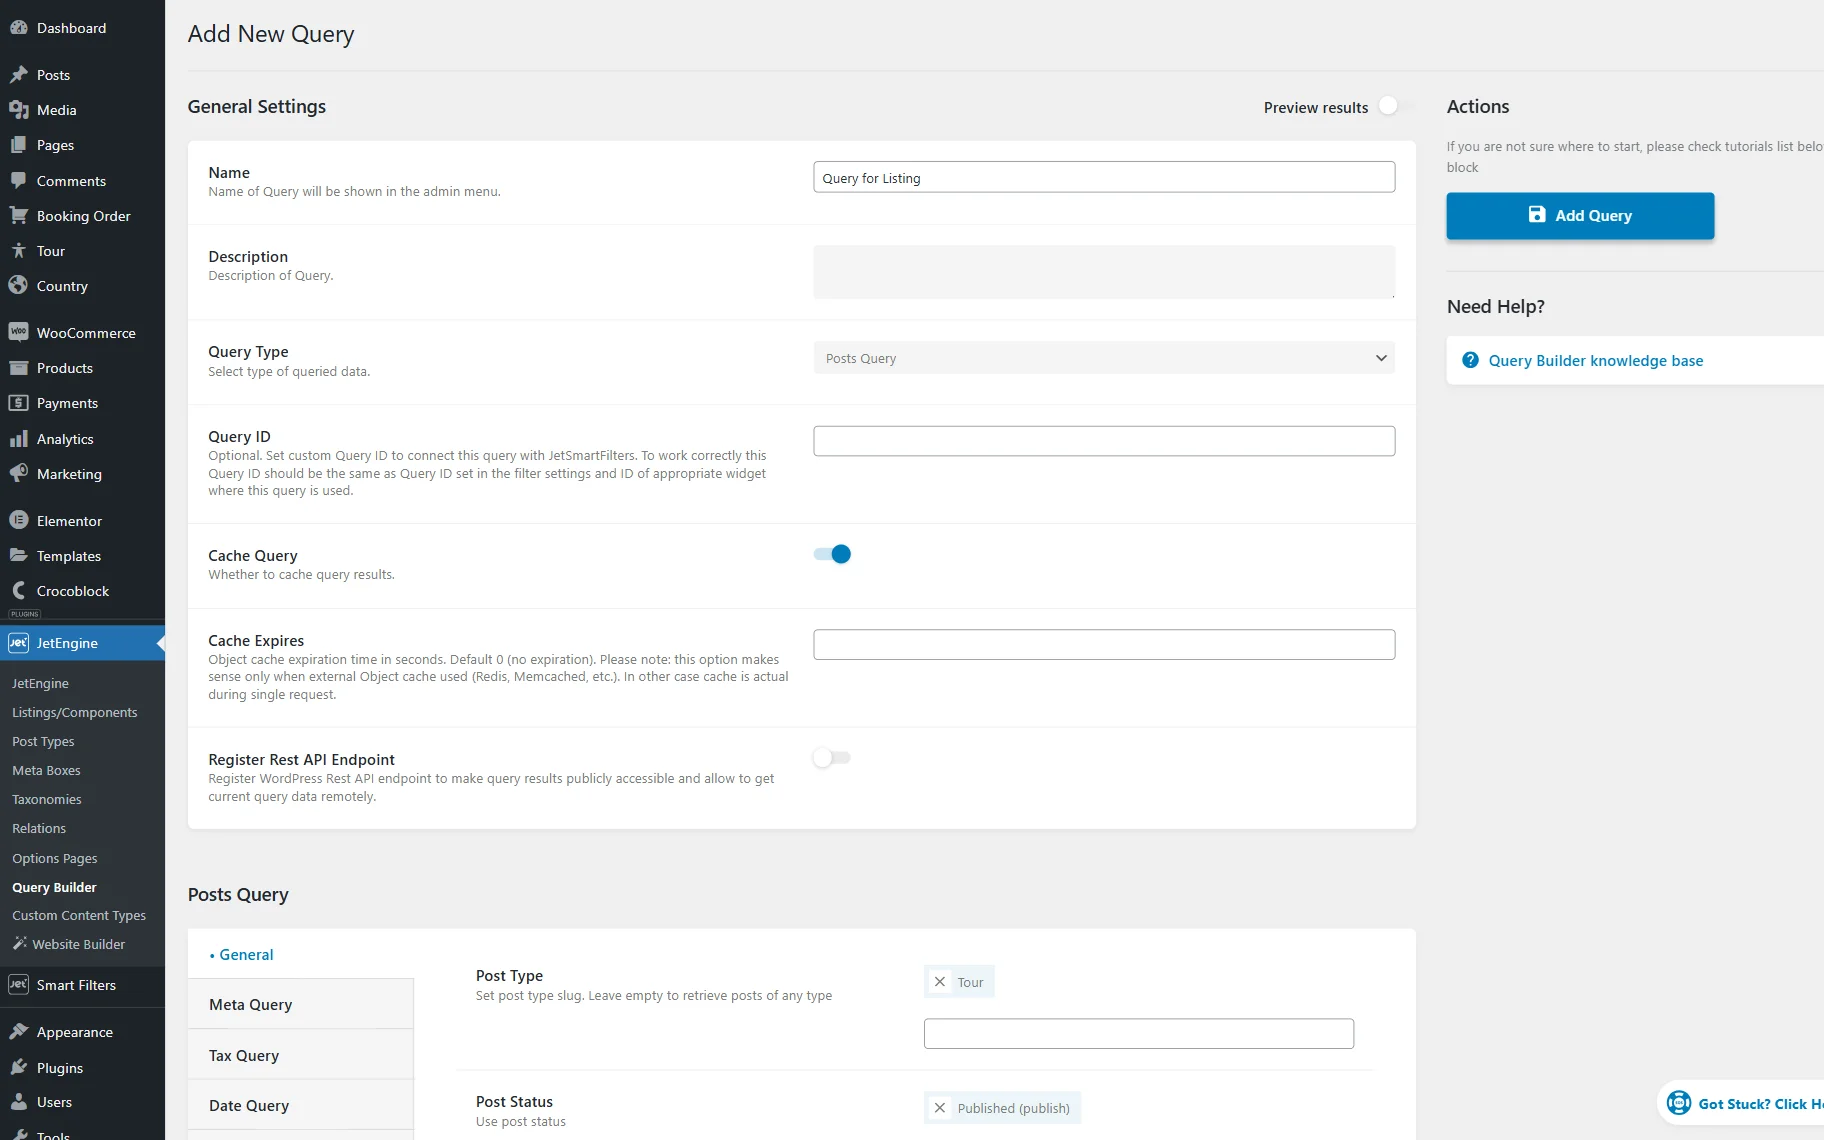
Create a Query for the Listing
Next, we will build a Query for the Listing item built before. This query will connect the Listing Grid with the Component Control Value that will be added later to the Component.
Head to WordPress Dashboard > JetEngine > Query Builder and click the “Add New” button.
In the General Settings section, complete the Name field (in this guide, it’s “Query for Listing”) and select the Query Type (here, “Posts Query”).
Move to the main settings section. Here, it’s Posts Query.
In the General tab, we pick the “Tour” Post Type and set the Post Status to “Published (publish)”. Now, only published posts from the “Tour” CPT will be shown in the Listing Grid when the query is applied to it.
After that, we open the Tax Query tab.
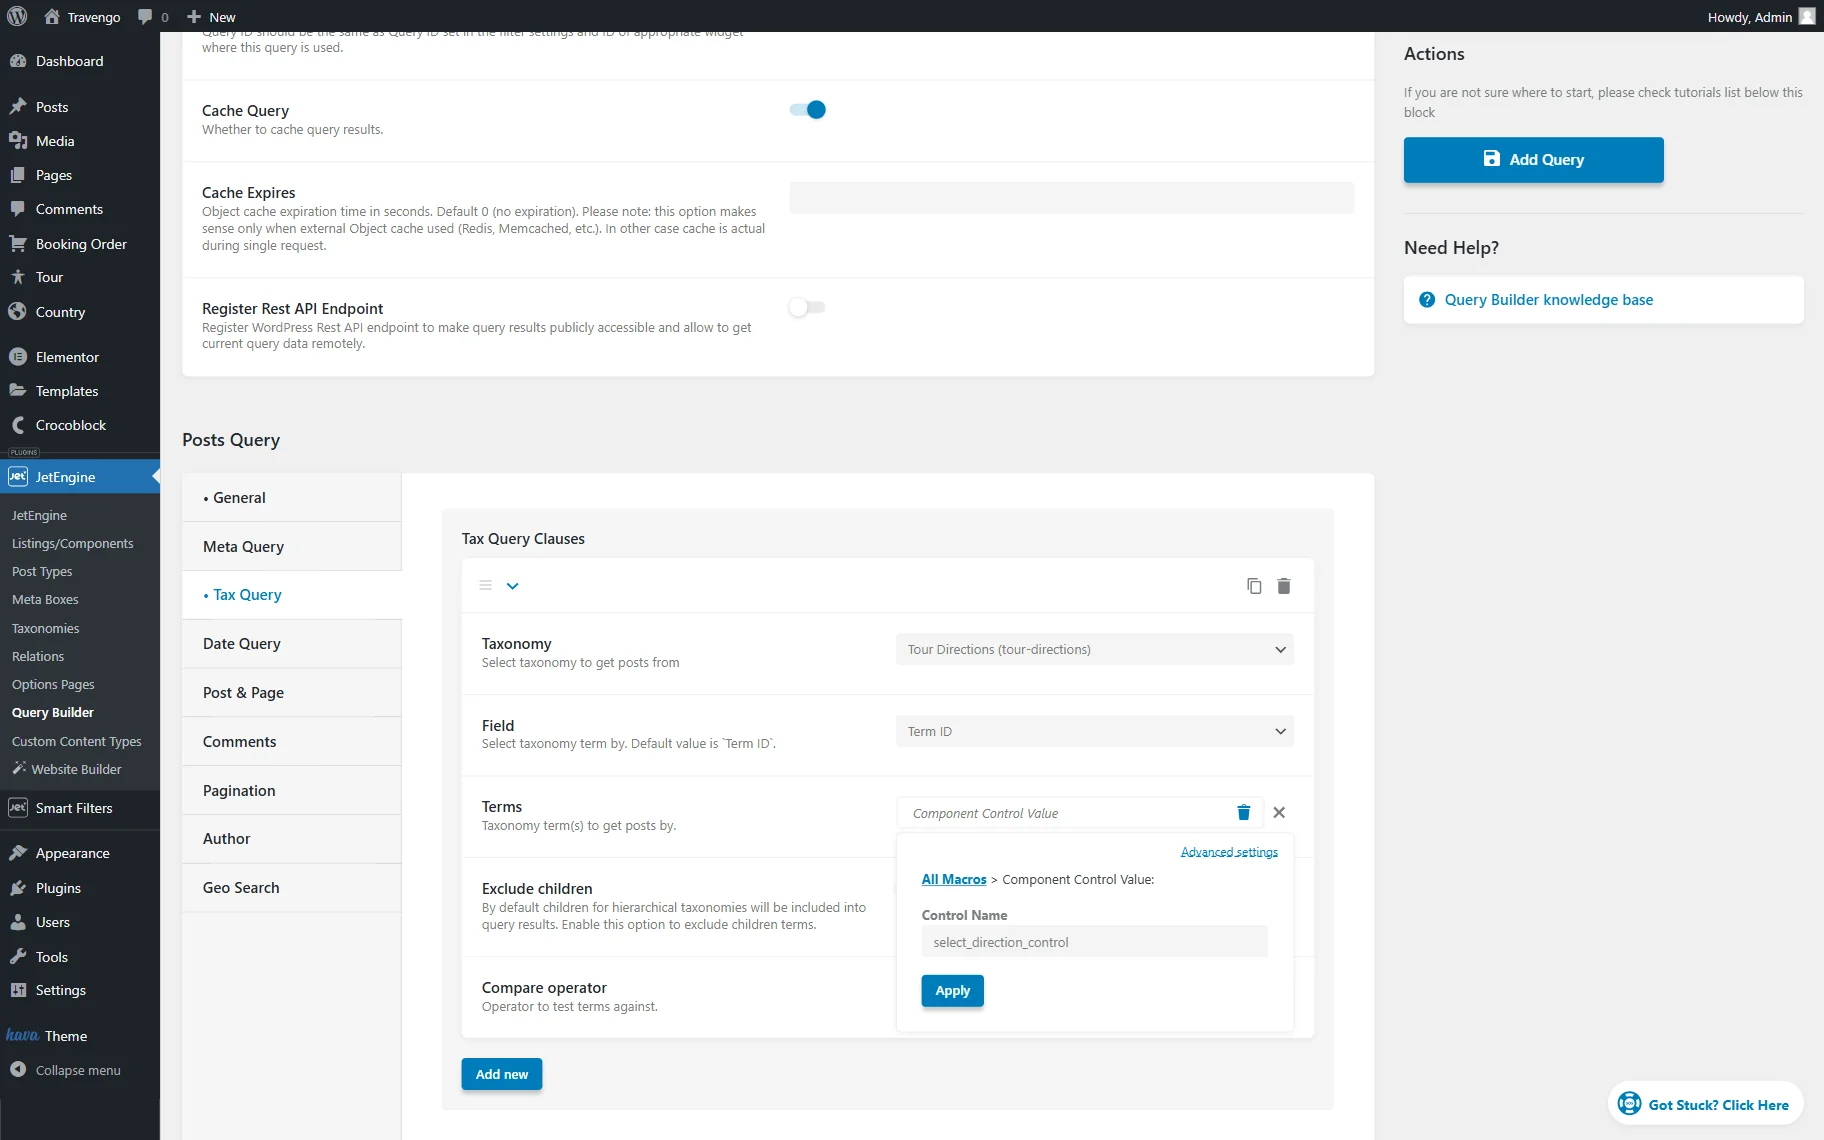
Here, we pick the “Tour Directions” Taxonomy, set the Field to “Term ID,” and press the “Dynamic Tags” button next to the Terms field.
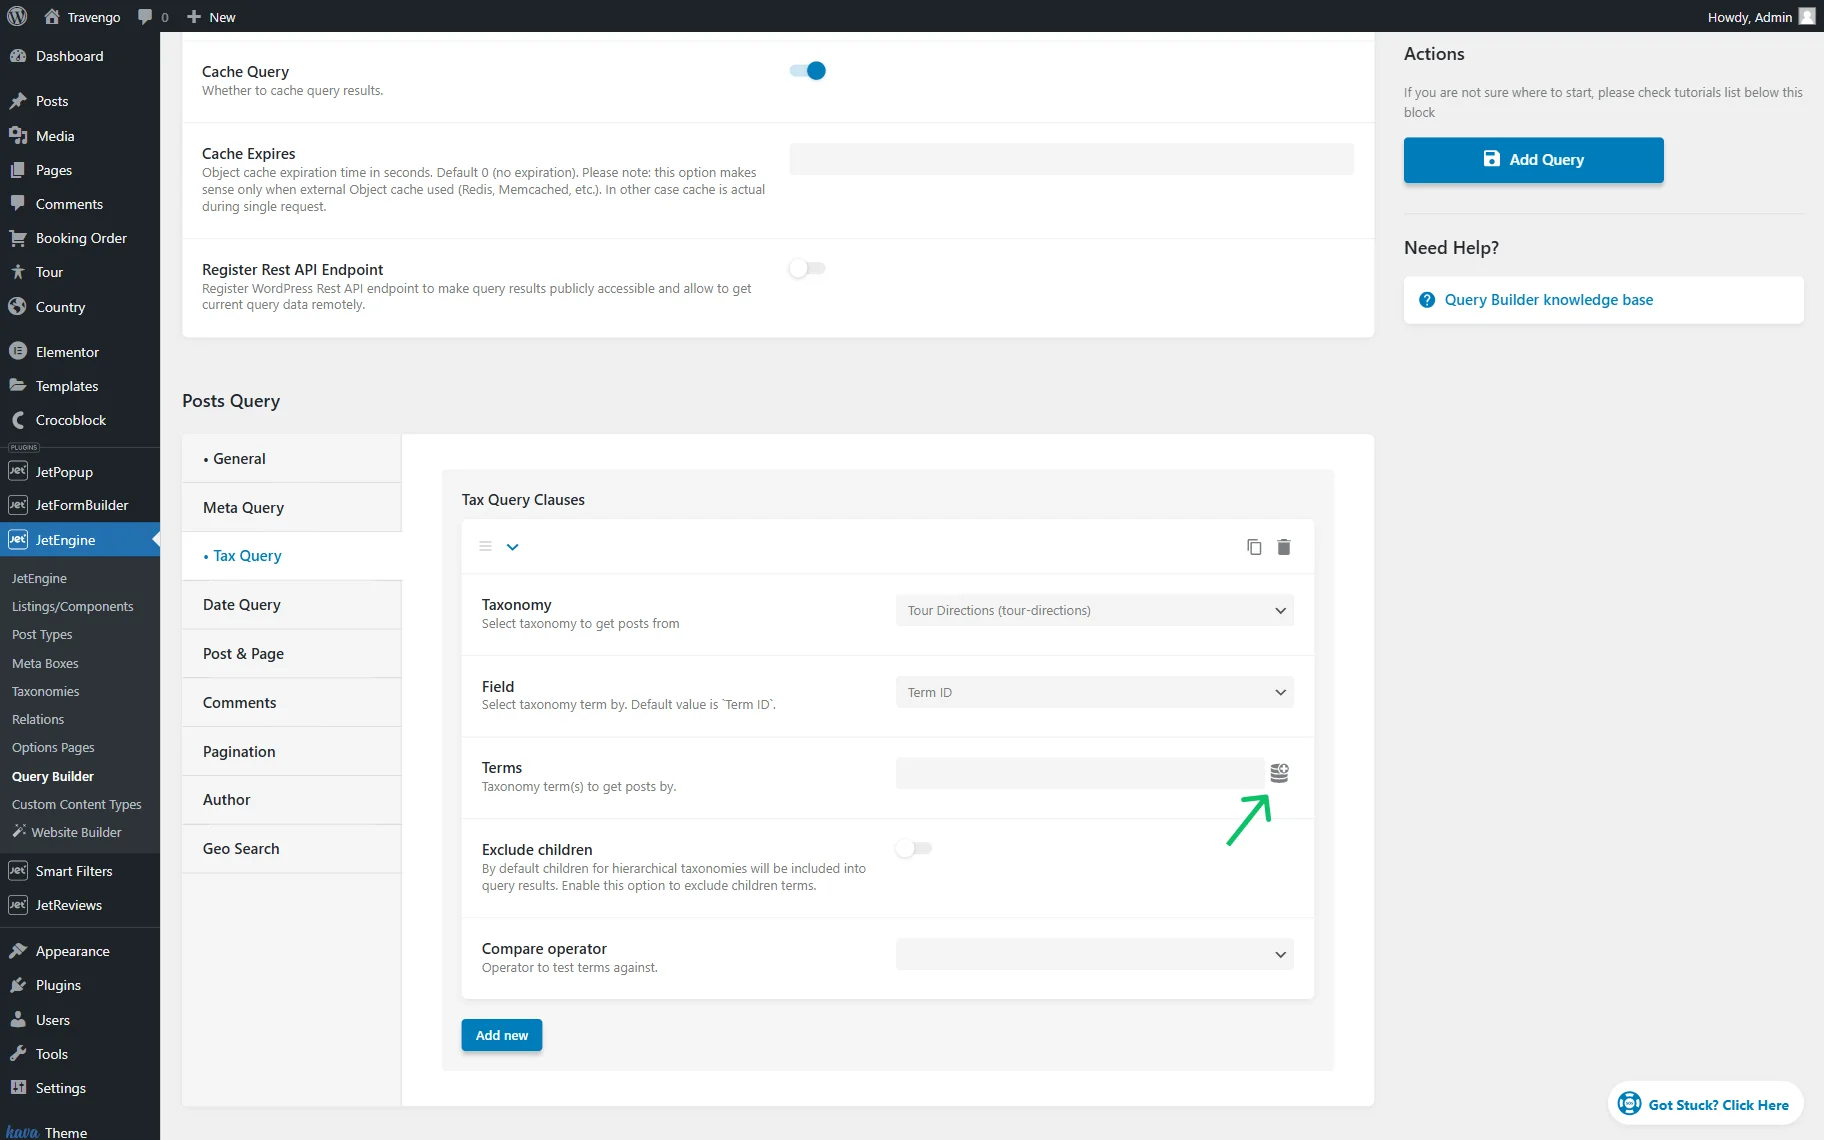
In the appeared list, select the “Component Control Value” macro and click on it to open its settings.
Add the value that will be later attached to the Component’s “Select” control in the Control Name field. Here, we add the “select_direction_control” value.
Save the query by pressing the “Add Query” button.
Add a Query for the Filter
Now, we will add a Query for the filter that we will build in the next step.
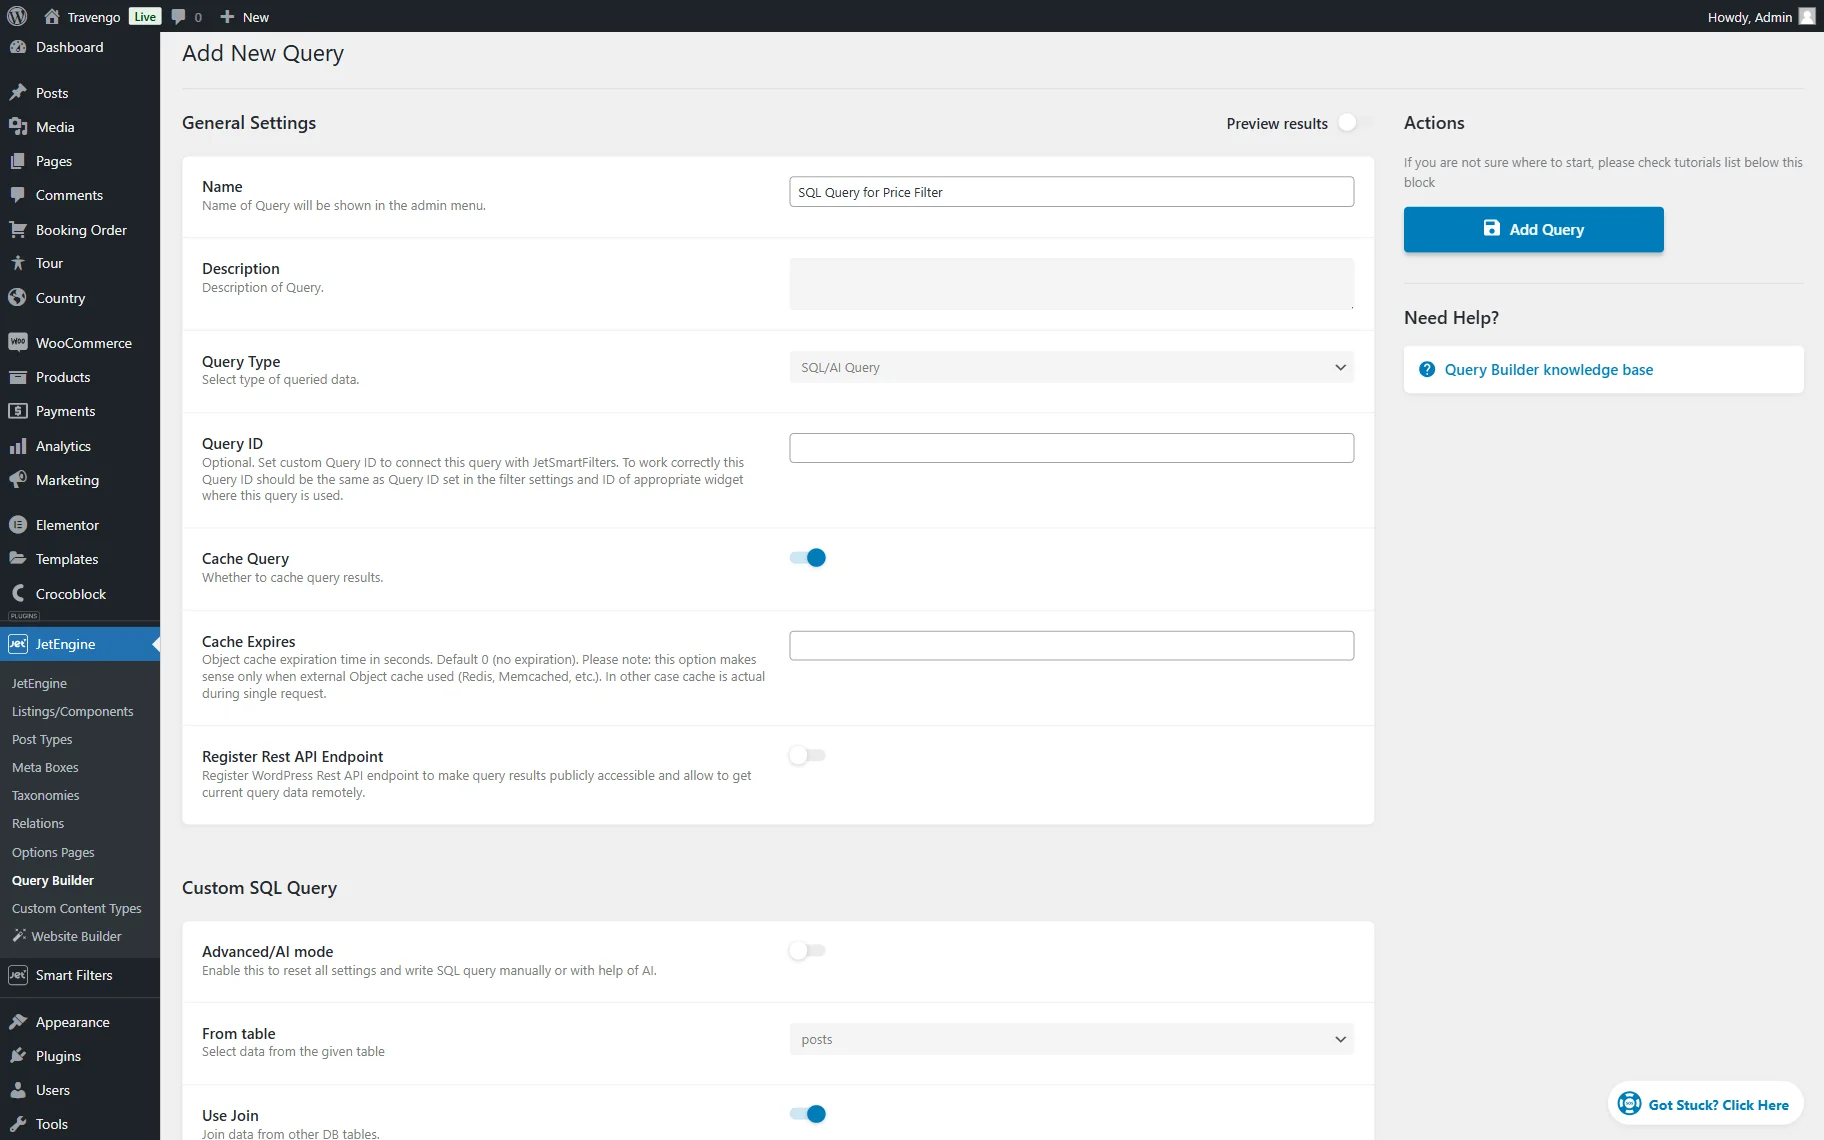
Go back to WordPress Dashboard > JetEngine > Query Builder and press the “Add New” button once again.
In the General Settings section, complete the Name of the query (here, “SQL Query for Price Filter”) and select the “SQL/AI Query” option in the Query Type field.
Scroll down to the Custom SQL Query section.
Here, pick the “posts” option in the From table field and activate the Use Join toggle.
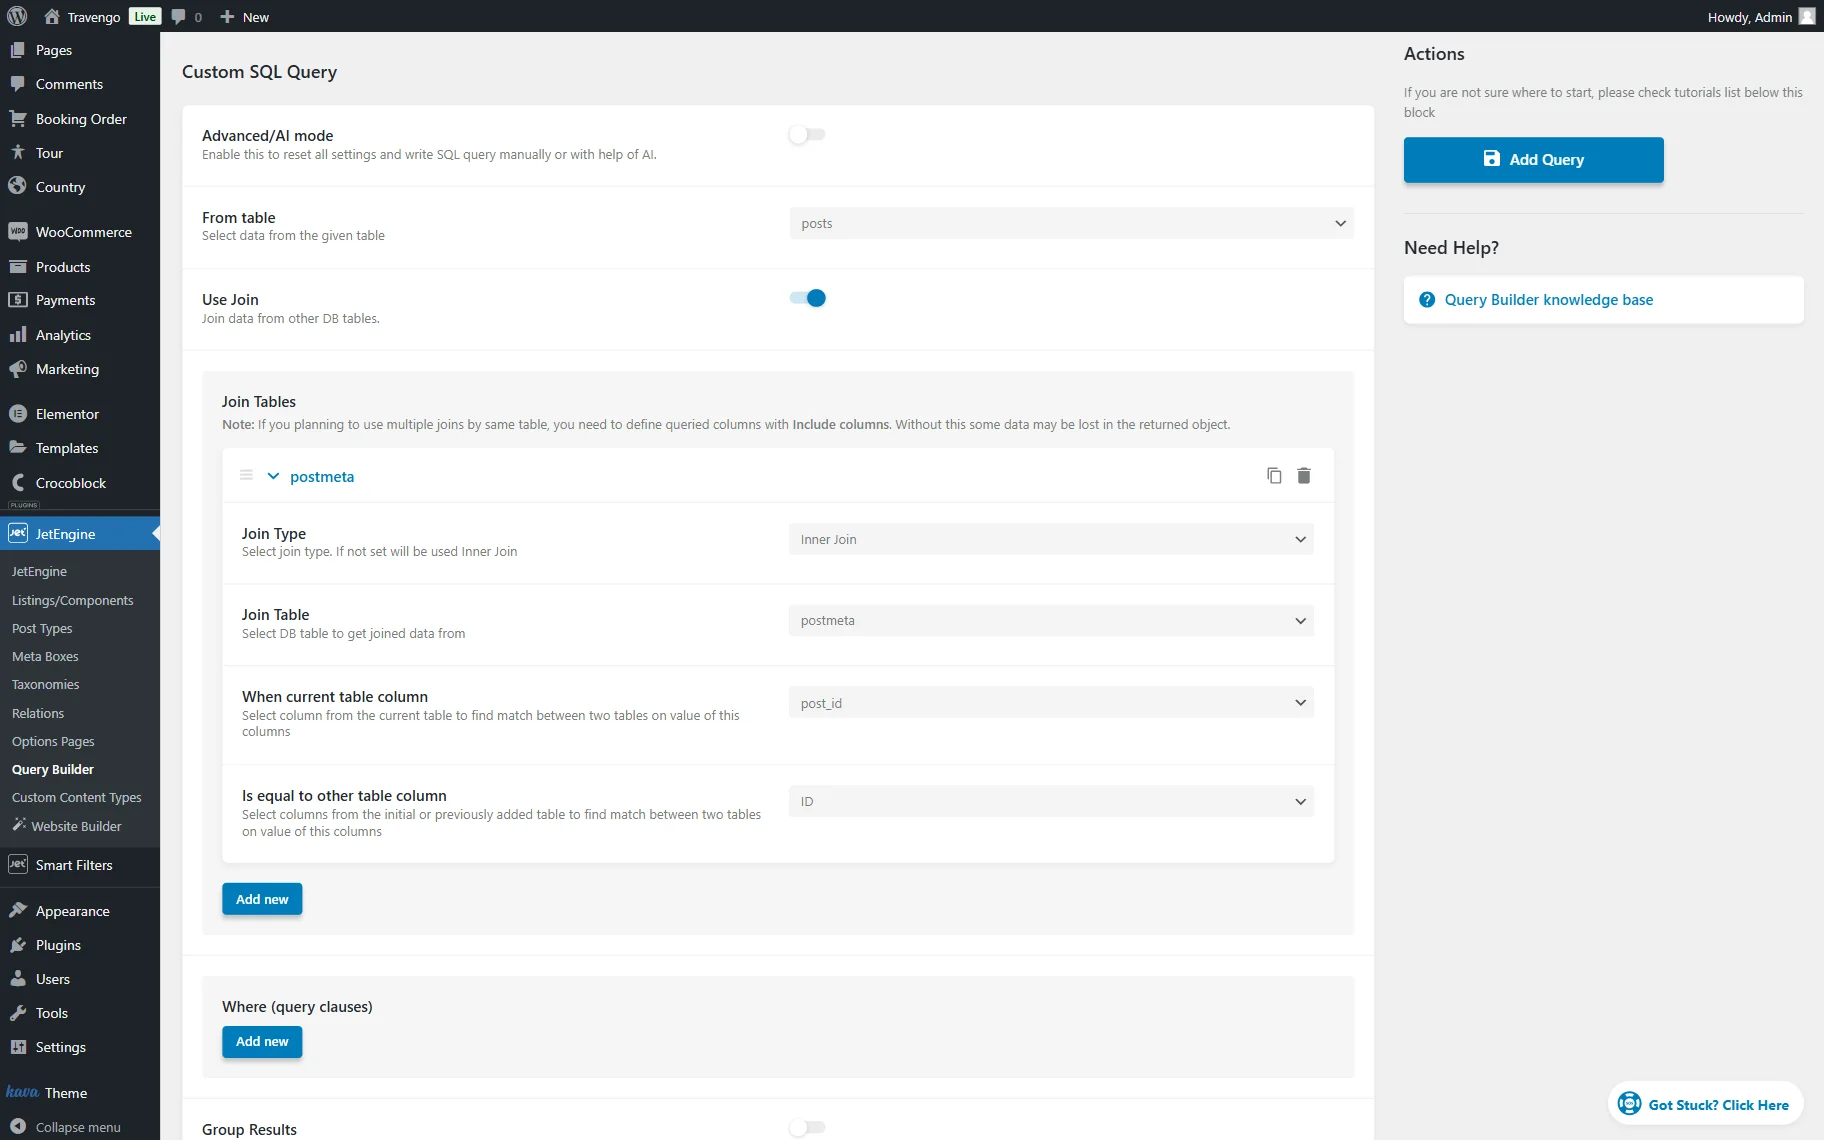
In the appeared Join Tables section, press the “Add new” button.
Pick the “Inner Join” option as the Join Type. Then, select the “postmeta” option in the Join Table field.
In the When current table column field, pick the “post_id” option and select the “ID” option in the Is equal to other table column field.
Then, press the “Add new” button to join one more table.
Set the “Inner Join” Join Type and pick the “term_relationships” option in the Join Table field.
In the When current table column field, select the “object_id” option, and in the Is equal to other table column field, pick “ID”.
Hit the “Add new” button once again.
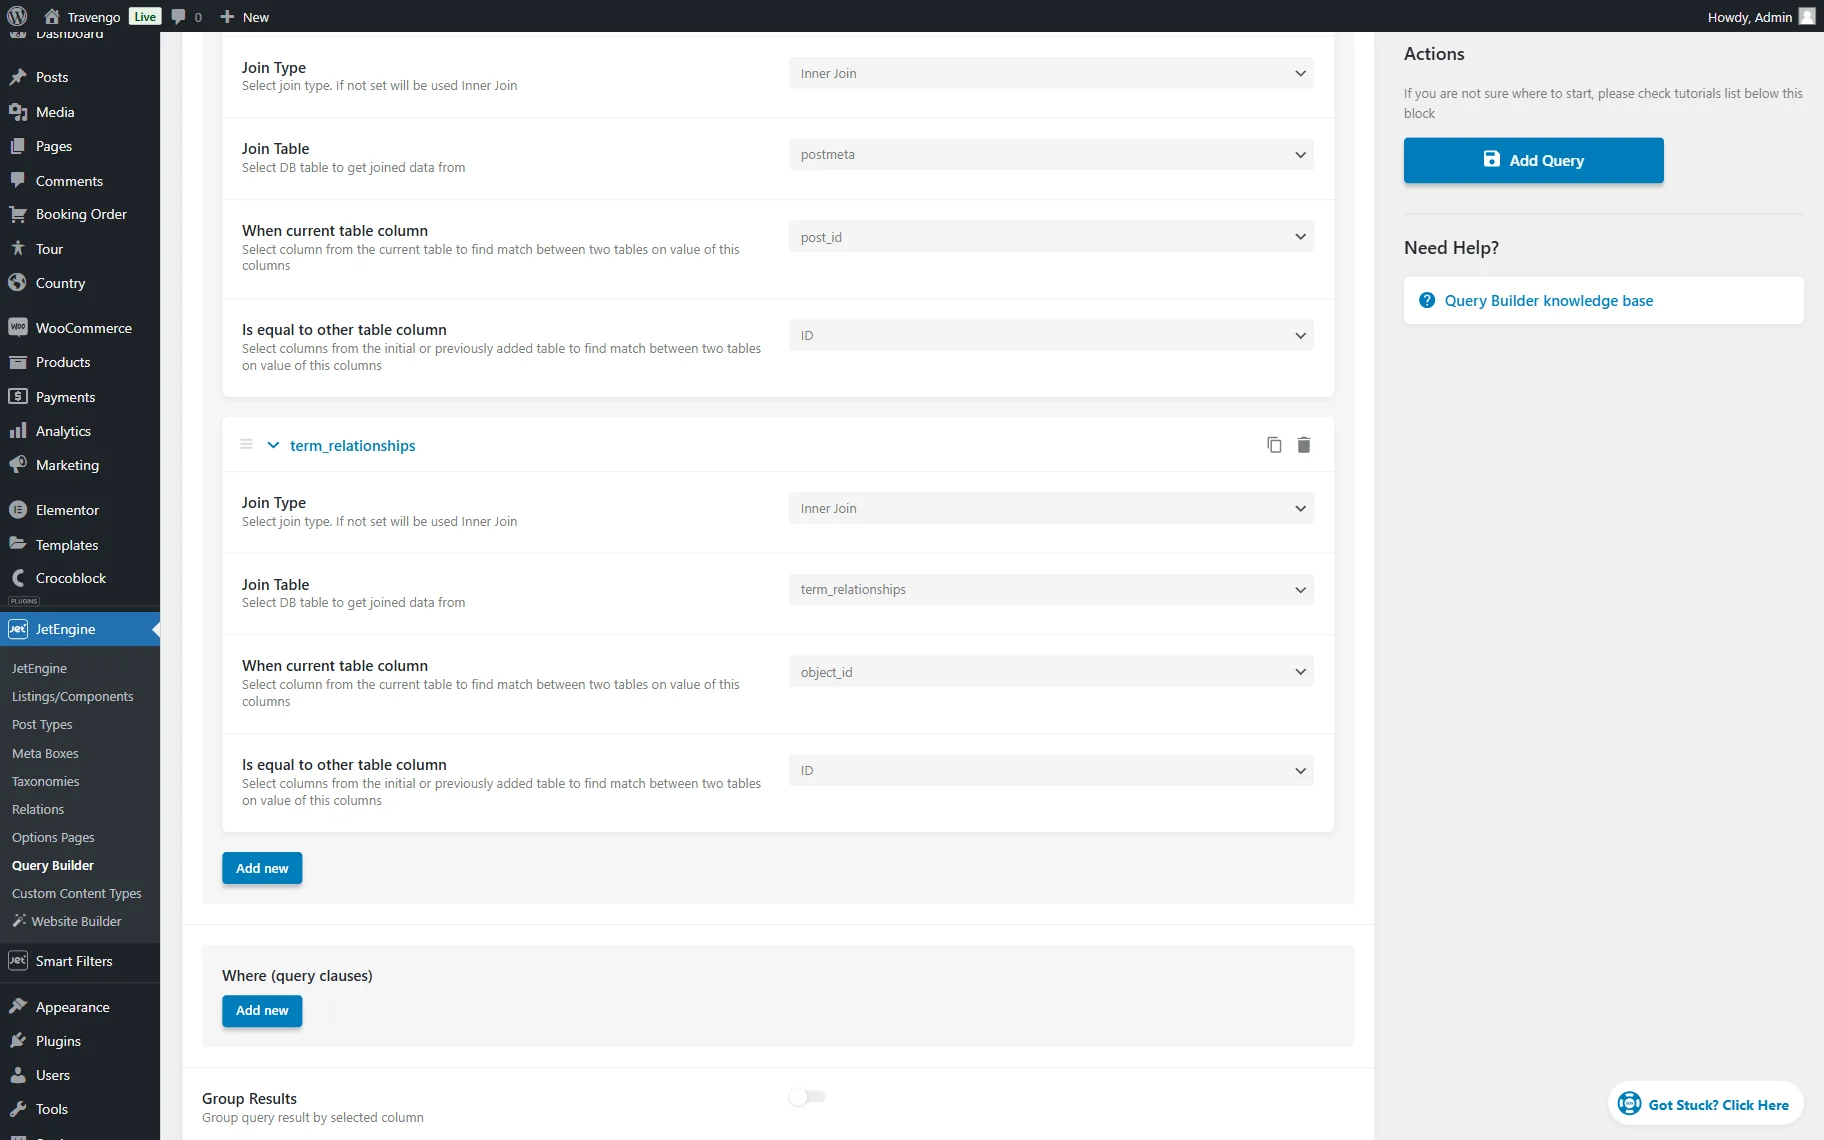
Select the “Inner Join” option in the Join Type and the “terms” option in the Join Table field.
Choose the “term_id” option in the When current table column field and the “term_relationships.term_taxonomy_id” option in the Is equal to other table column field.
Now, press the “Add new” button one more time.
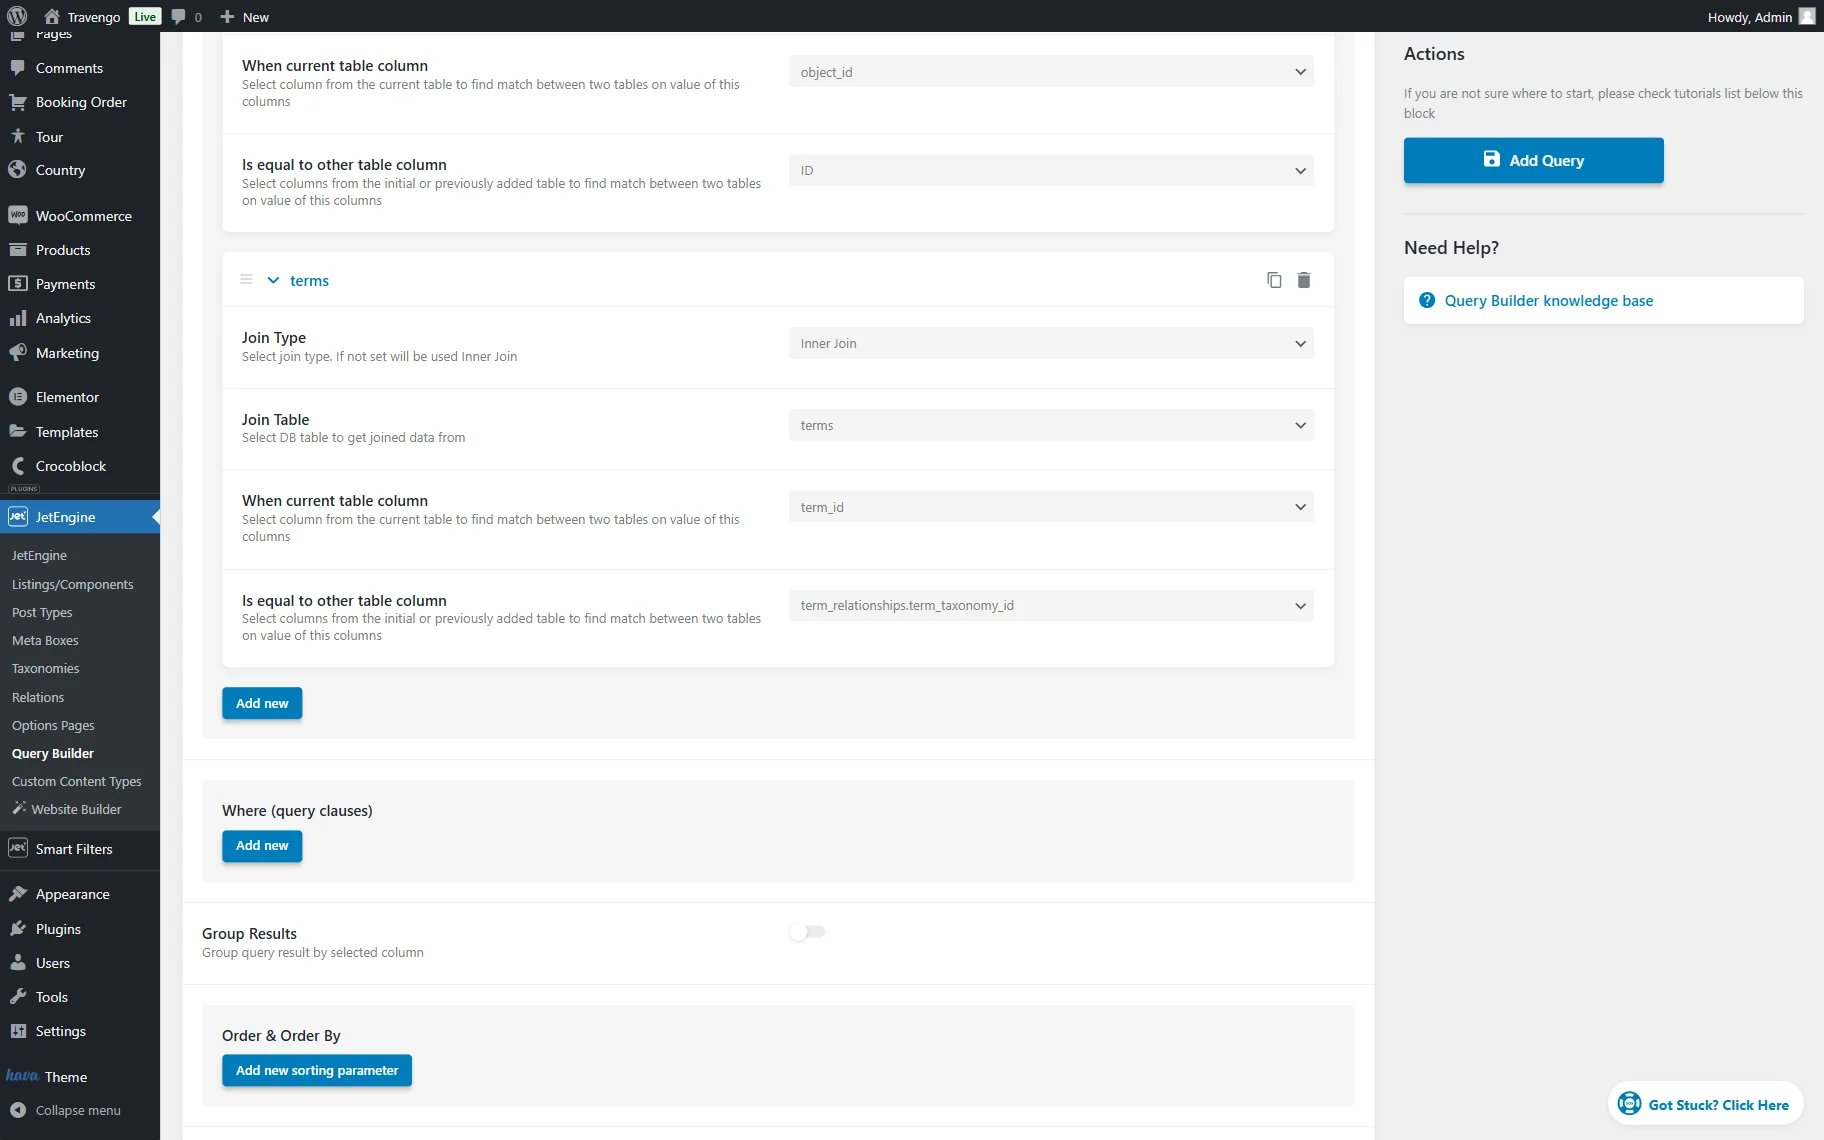
Set the “Inner Join” Join Type and “term_taxonomy” Join Table.
Then, select the “term_id” option in the When current table column field and the “terms.term_id” option in the Is equal to other table column field.
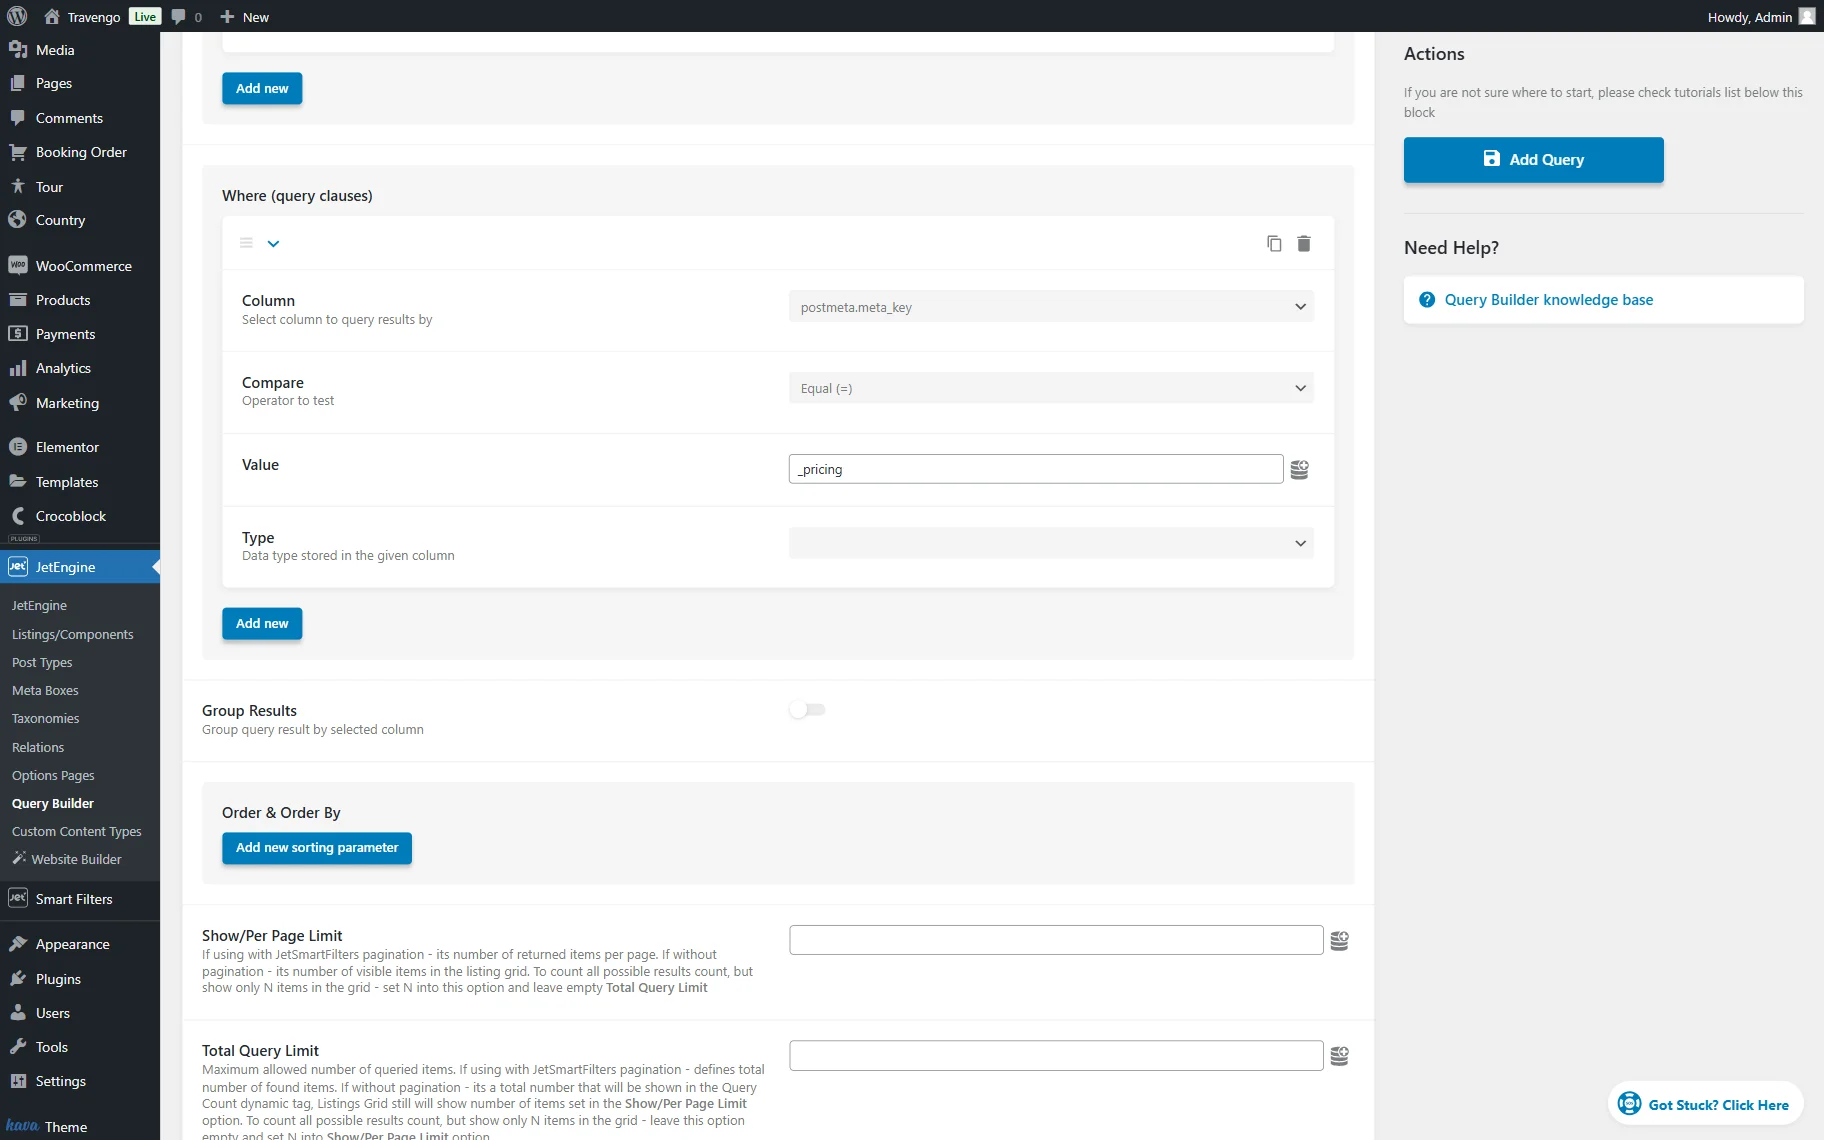
Next, press the “Add new” button in the Where (query clauses) section.

Pick the “postmeta.meta_key” Column, set the Compare operator to “Equal (=)”, and set the needed Value. Here, we paste the “_pricing” value, which is the Name/ID of the “Pricing” meta field attached to the “Tour” CPT (this field is also completed with values in the “Tour” posts.)
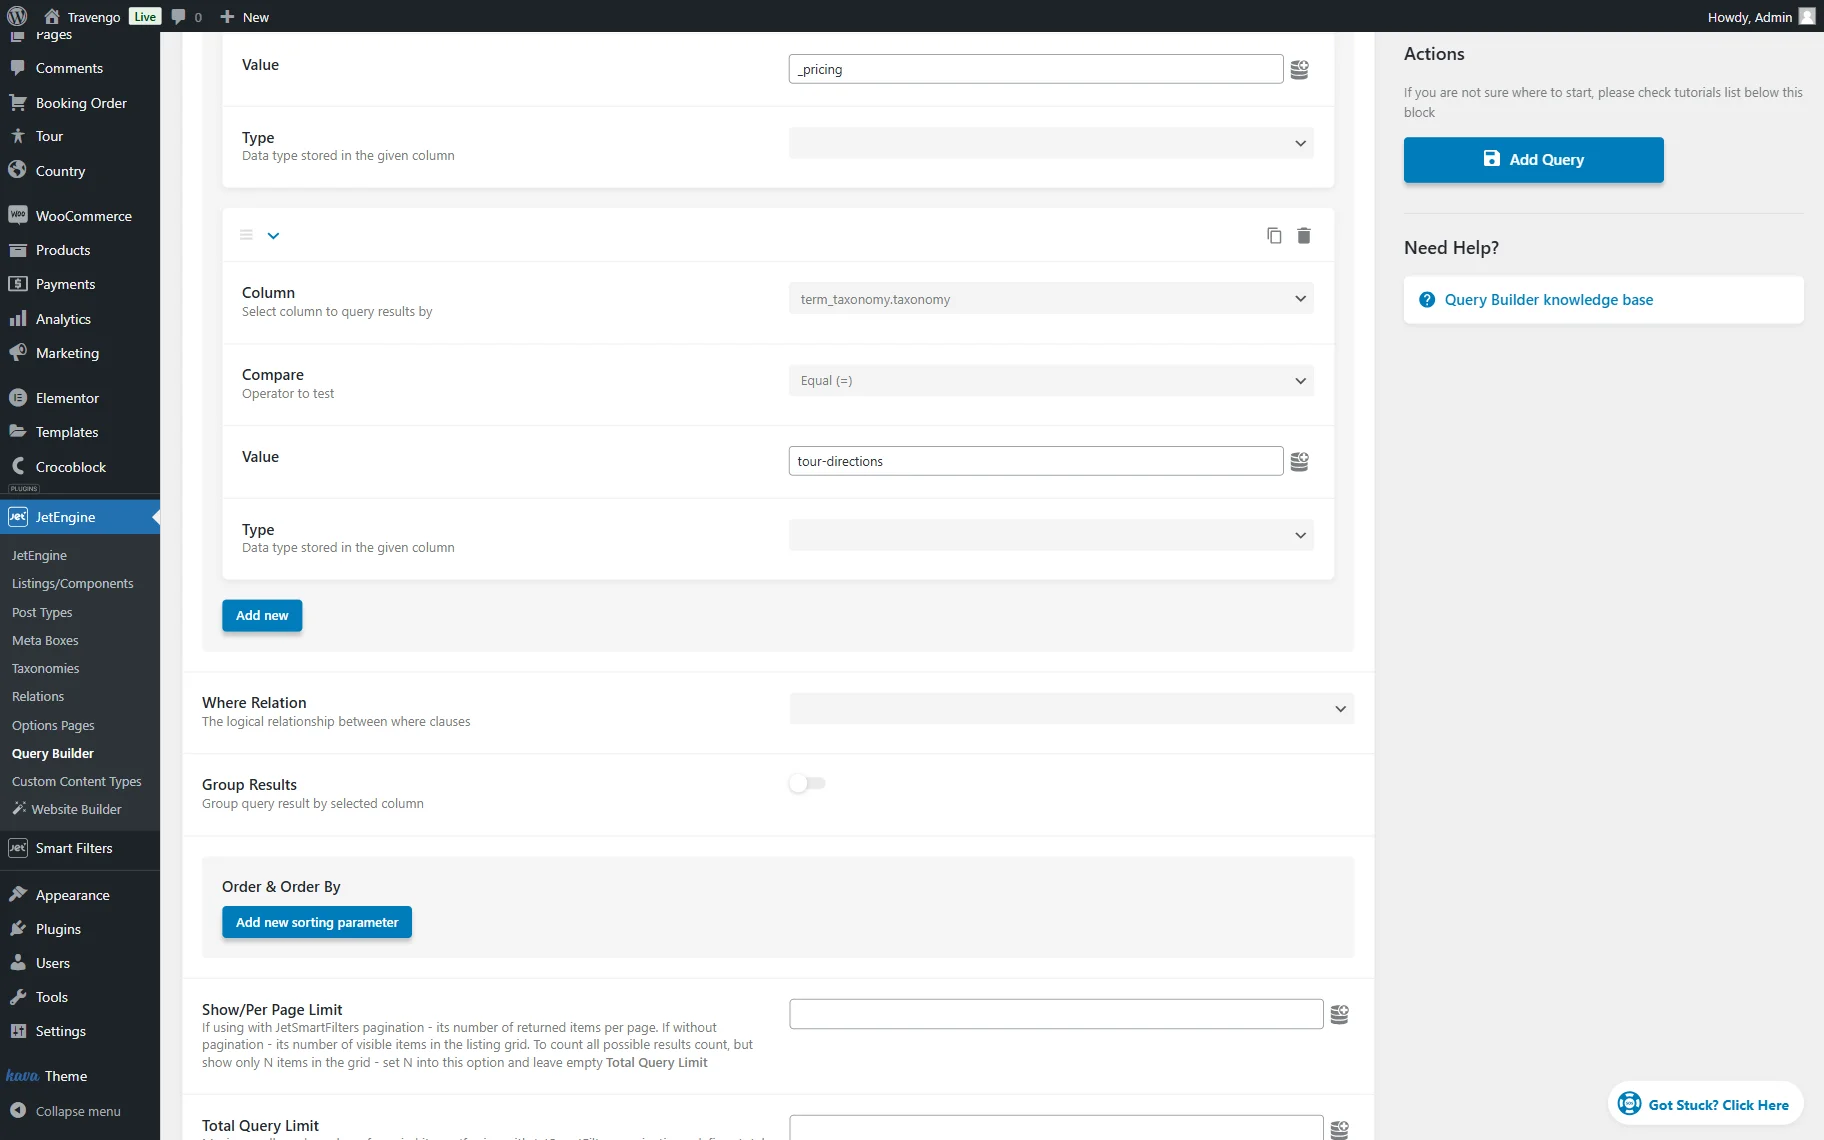
Press the “Add new” button.
Select the “term_taxonomy.taxonomy” Column, set the Compare operator to “Equal (=)”, and paste the needed Value. Here, we put the “tour-directions” value, which is the slug of the taxonomy we built previously.
Press the “Add new” button in this section once again.
Pick the “terms.term_id” option in the Column dropdown list, select the “Equal (=)” option in the Compare operator, and press the “Dynamic Tags” next to the Value field.
Find and select the “Component Control Value” option in the list and paste the Control Name (here, “select_direction_control”) that will be later used in the Component settings.

Next, we pick the “And” option in the Where Relation field and activate the Group Results toggle.
In the Group By field, pick the “posts.ID” option.
Scroll down to the Include columns field and press it to see the available options.
Here, select the “postmeta.meta_value” option.
Ultimately, press the “Add Query” button.

Create a Filter
Proceed to WordPress Dashboard > Smart Filters > Add New to build a filter that will be later added to the Component.
Set the Filter Name; here, “Price Filter,” and select the desired Filter Type. For instance, in this case, we pick the “Radio” option.
Select the “JetEngine Query Builder” Data Source and pick the query built for this filter in the Select Query field.
In the next two fields, Property to get Value from and Property to get Label from, paste the “postmeta.meta_value” value.
We also activate the Add all option and Ability to deselect radio buttons toggles, but it is optional.
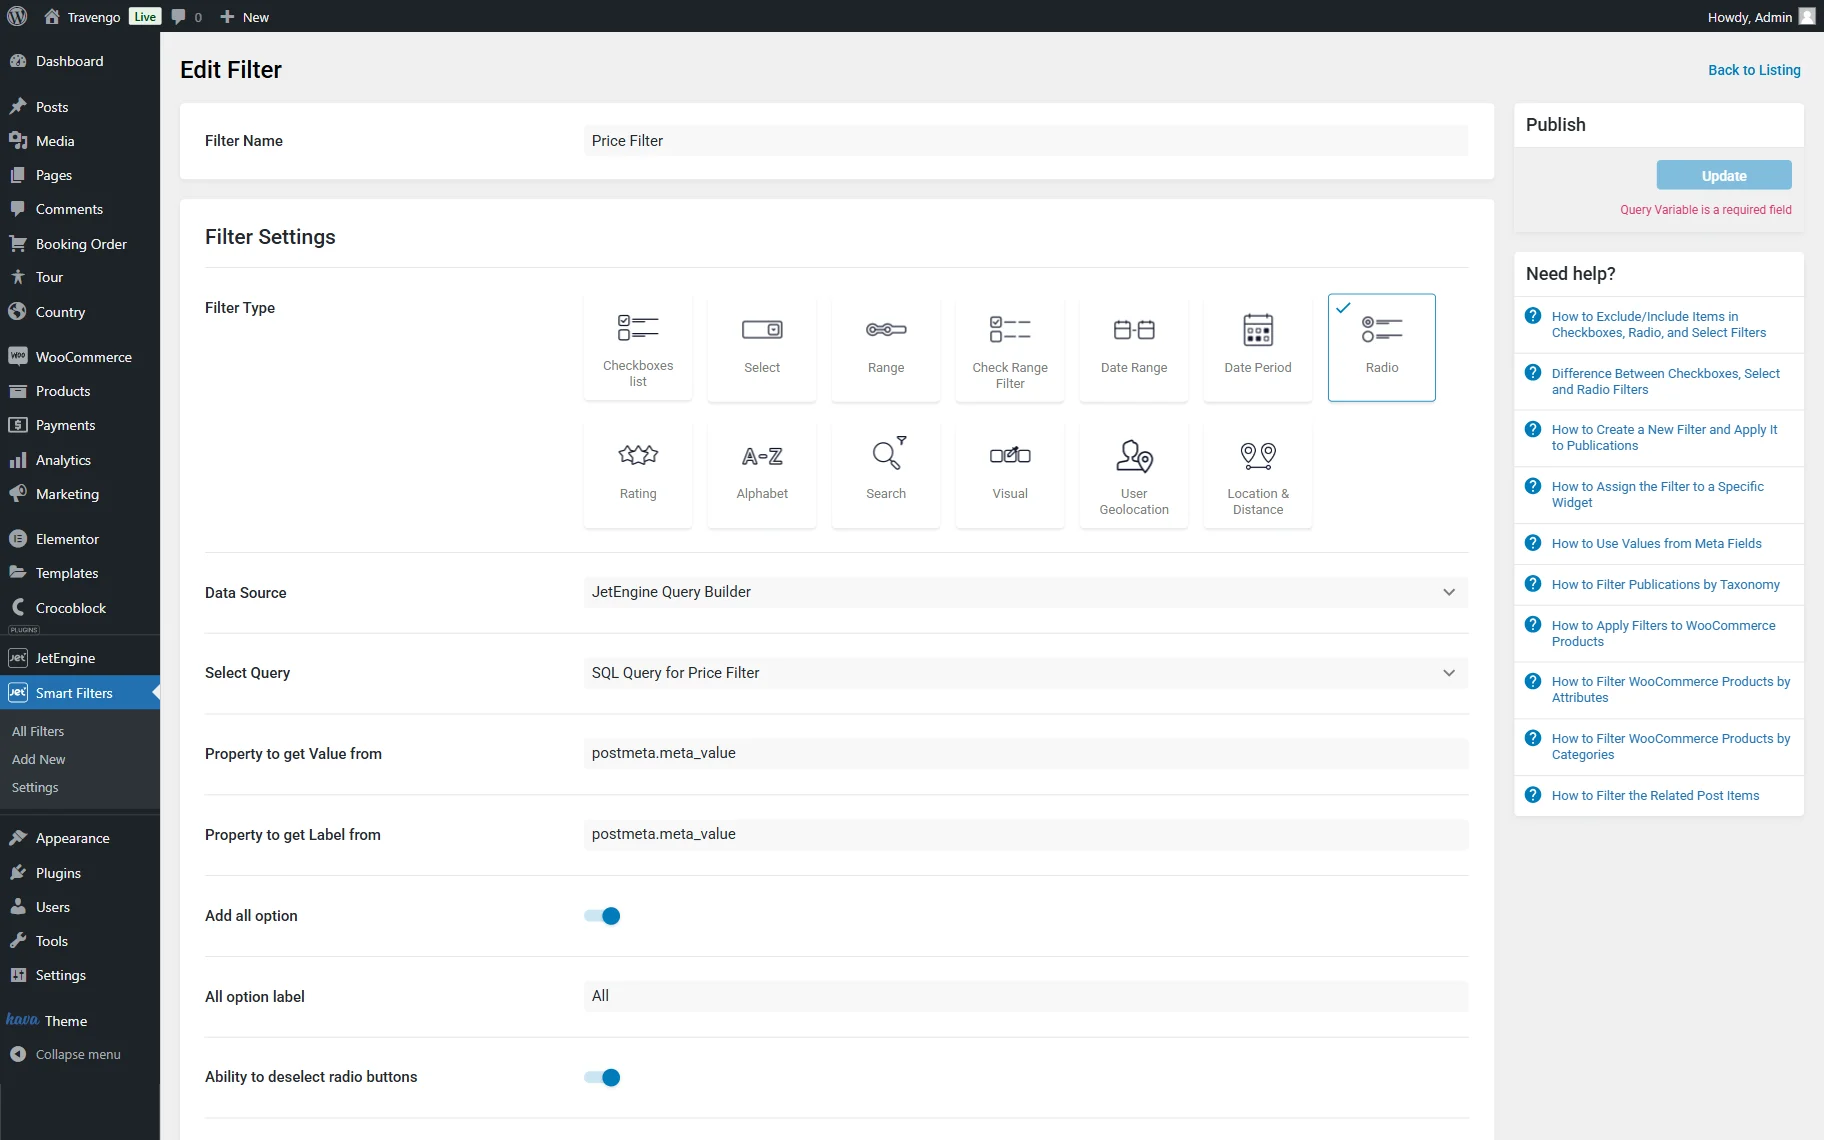
Move to the Query Variable field and paste the needed value in there. Here, “_pricing” as it is the Name/ID of the “Pricing” meta field attached to the “Tour” CPT.

Also, we set the Filter Labels and press the “Update” button to save the filter.
Build a Component
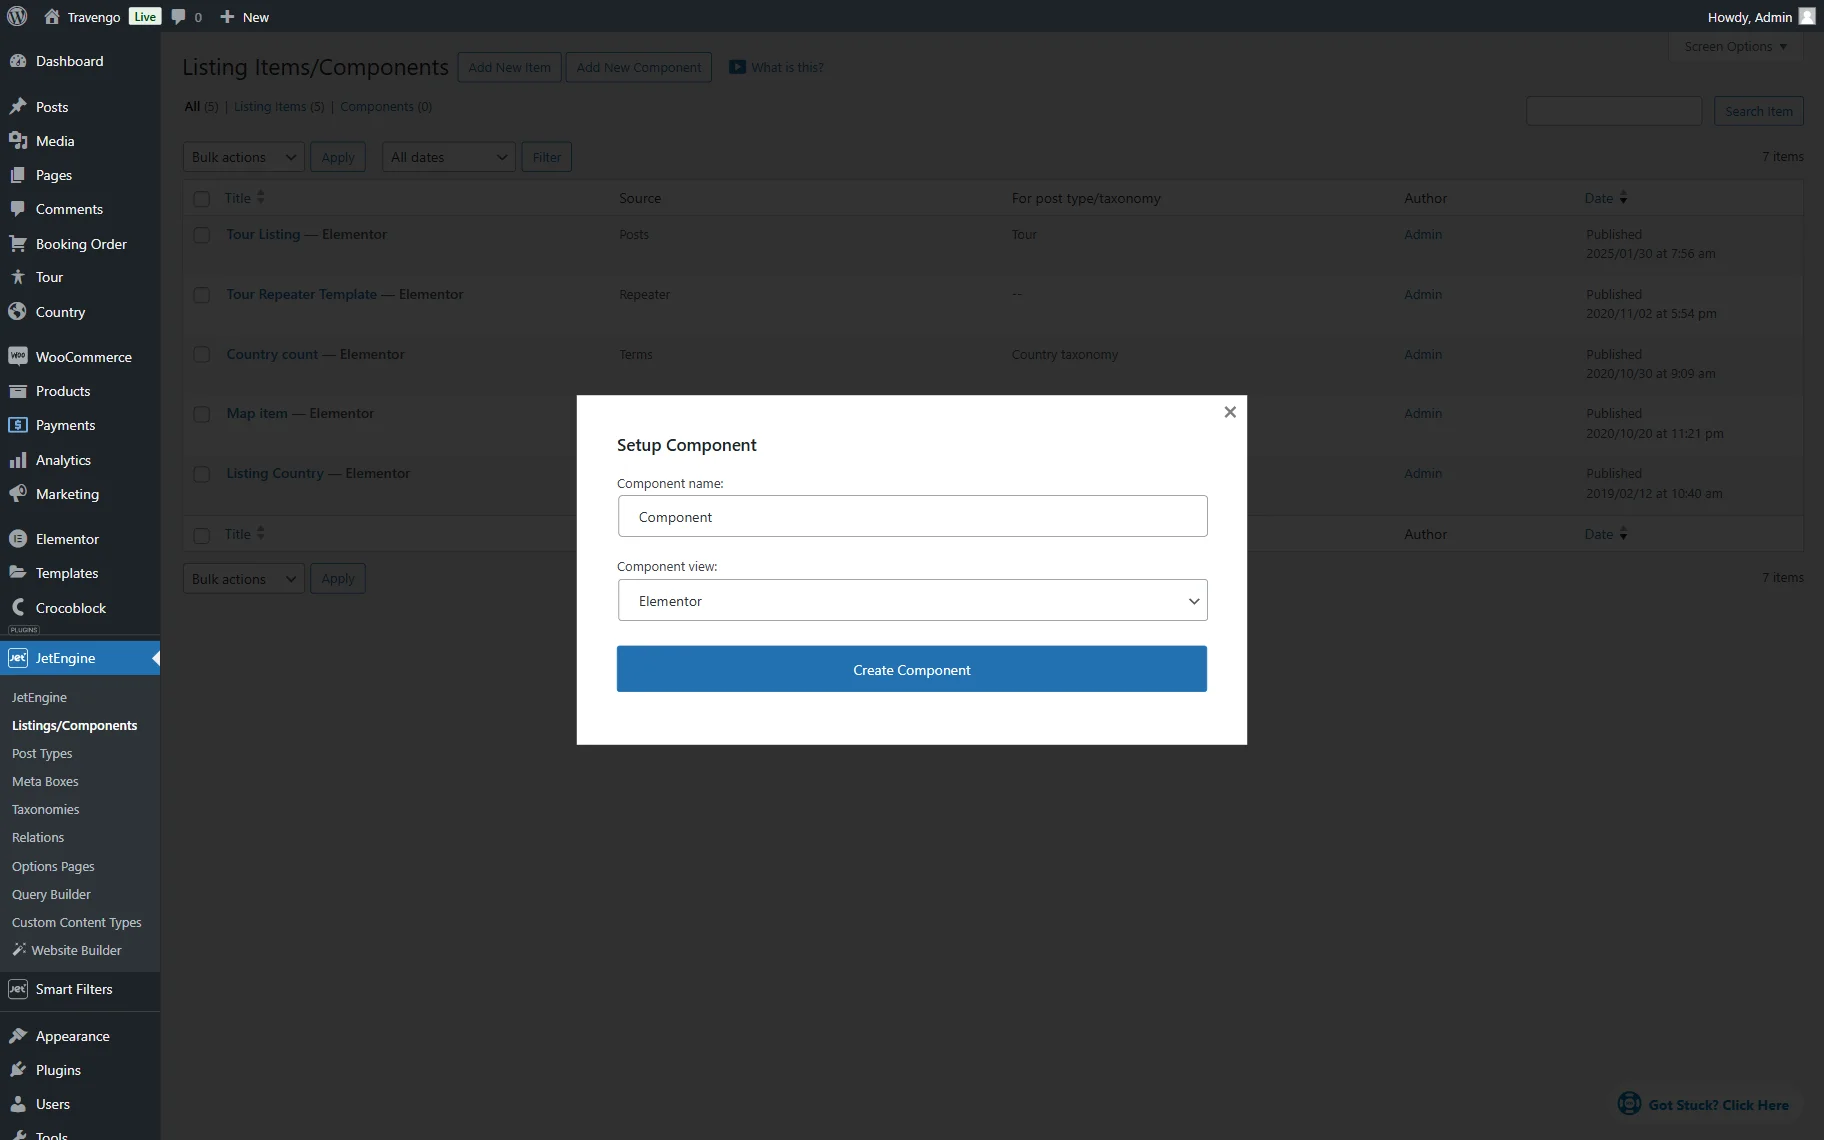
Head to WordPress Dashboard > JetEngine > Listings/Components and press the “Add New Component” button.
Set the Component name (here, “Component”) and select the Component view (here, “Elementor.”)
To proceed to the editor, press the “Create Component” button.
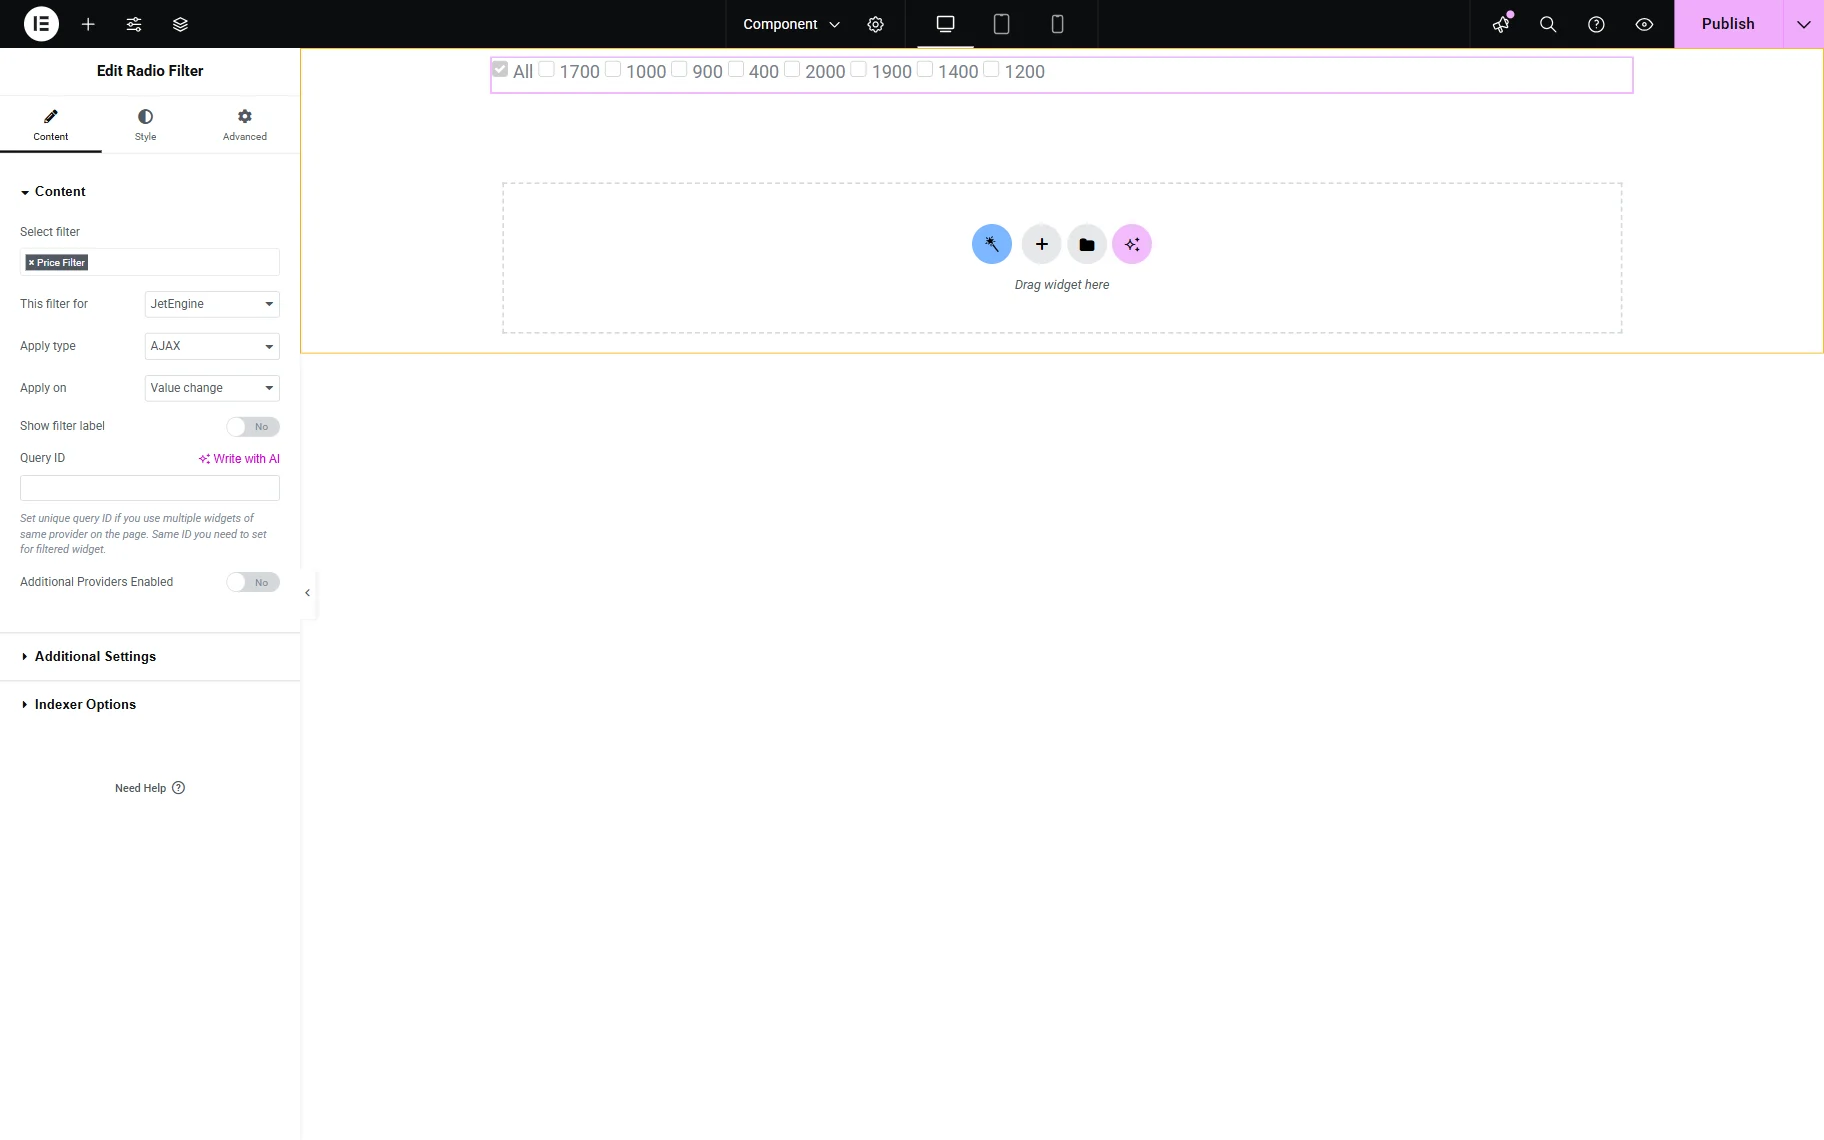
In the opened editor, add the filter widget to the page. Here, Radio Filter.
Pick the created filter in the Select filter field and select the “JetEngine” provider in the This filter for field.
Make other changes if needed.
Add a Listing Grid widget to the page.
Pick the built Listing and adjust other General settings if needed.
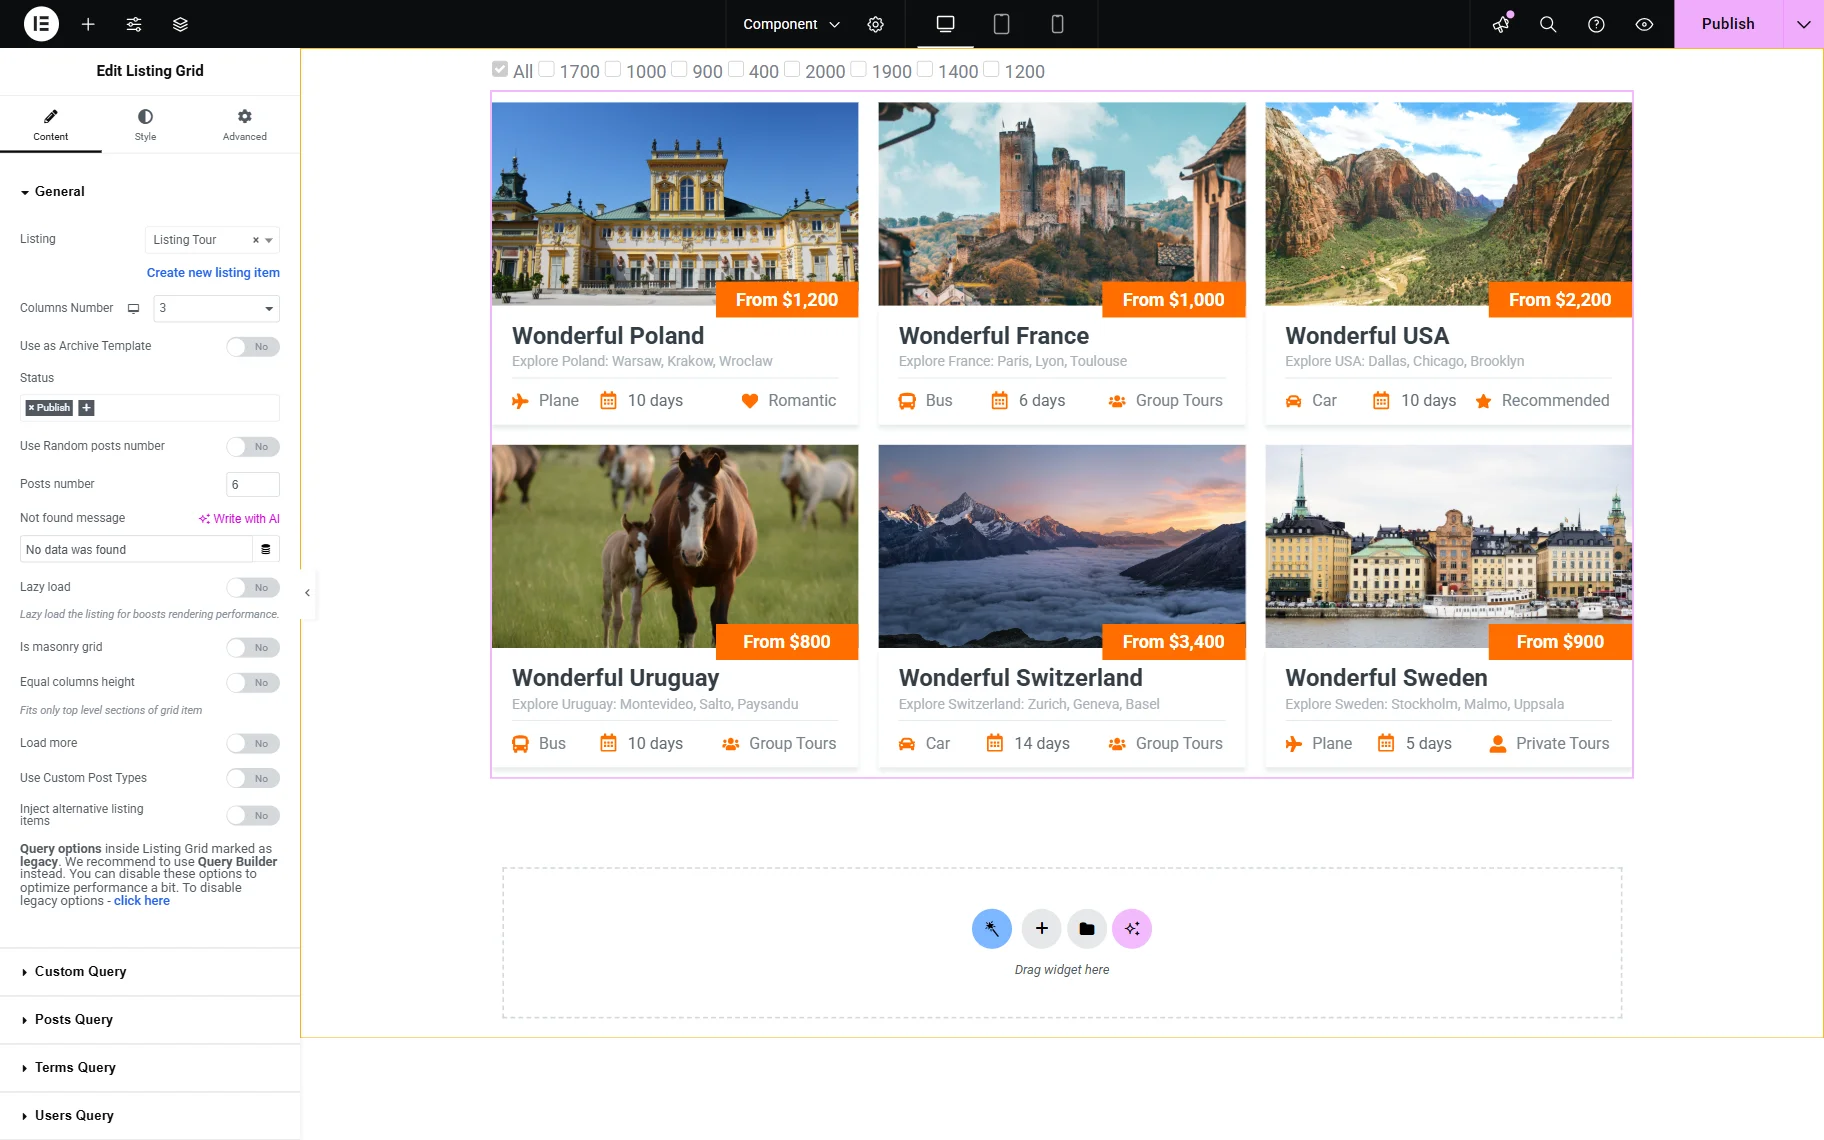
Open the Custom Query tab and activate the Use Custom Query toggle.
In the Custom Query field, select the query you have previously built for the listing.
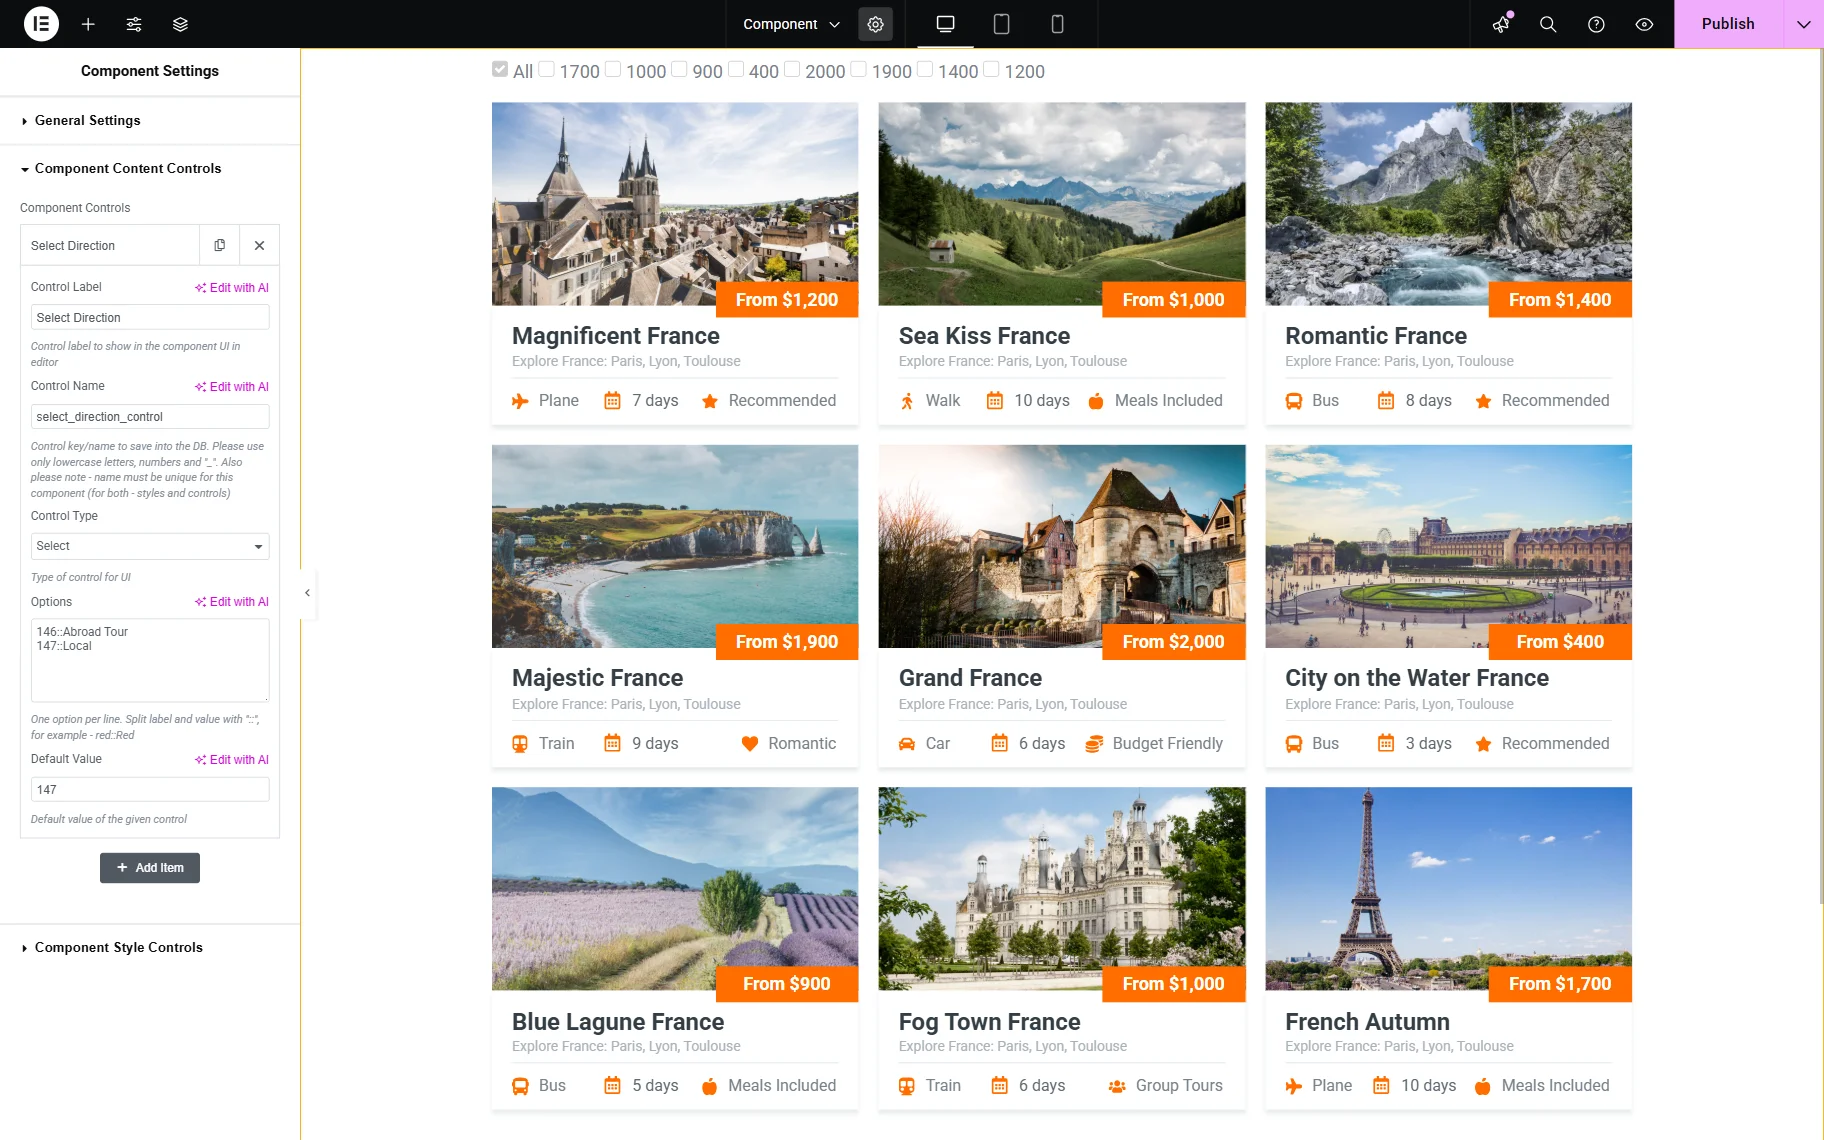
Adjust other settings if needed and press the “settings” button next to the component name.
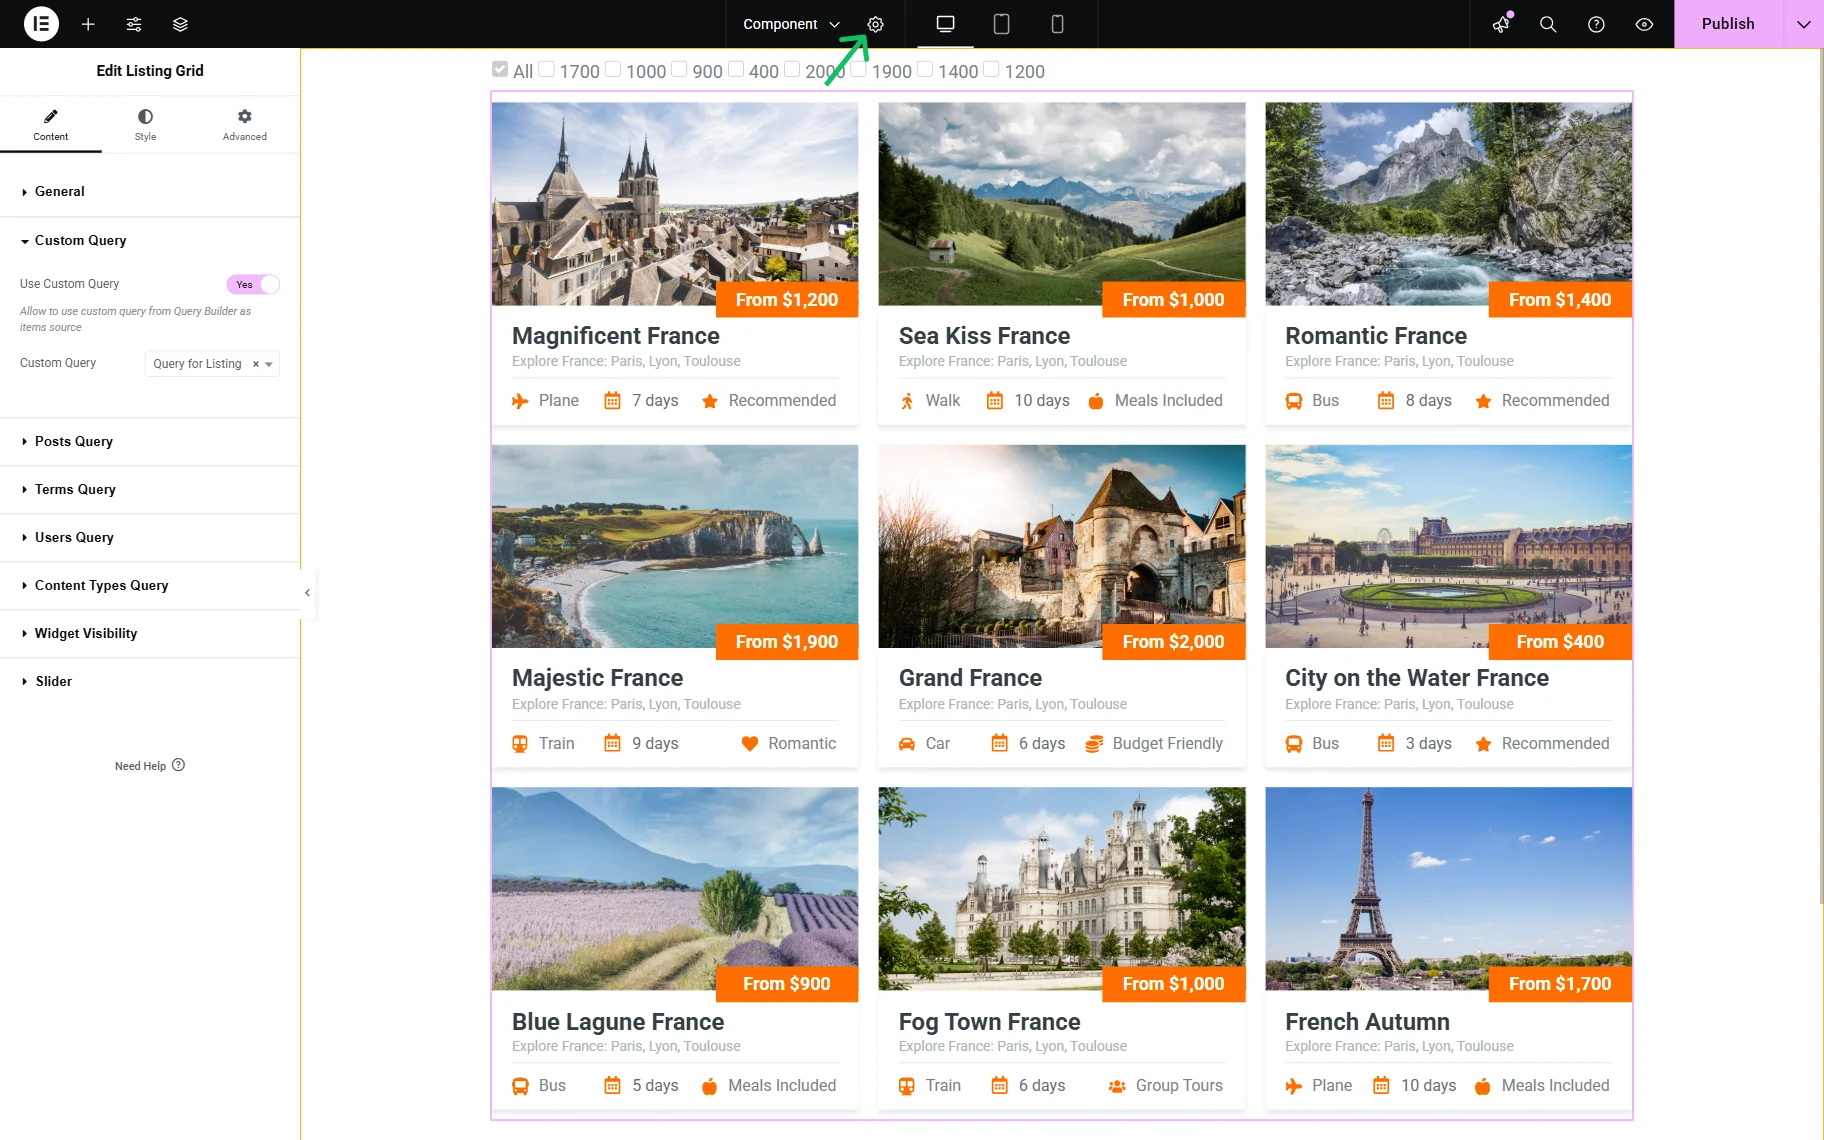
Open the Component Content Controls tab and press on the added control to edit it.
Set the Control Label (here, “Select Direction”) and set the Control Value (here, “select_direction_control”).
Pick the “Select” Control Type and move to the Options textarea field.
Here, set the needed options in the “1::Red” format, where “1” is the term ID and “Red” is its label.
For example, we add such options:
“146::Abroad Tour
147::Local”
as “146” is the ID of the “Abroad Tour” term and “147” is the ID of the “Local” term.
We also set the “147” ID as the Default Value.
Press the “Publish” button.
Add the Component to the Page/Template
Open the page or template where you want to use the component. In this tutorial, we head to WordPress Dashboard > Pages > Add New and open the Elementor page builder.
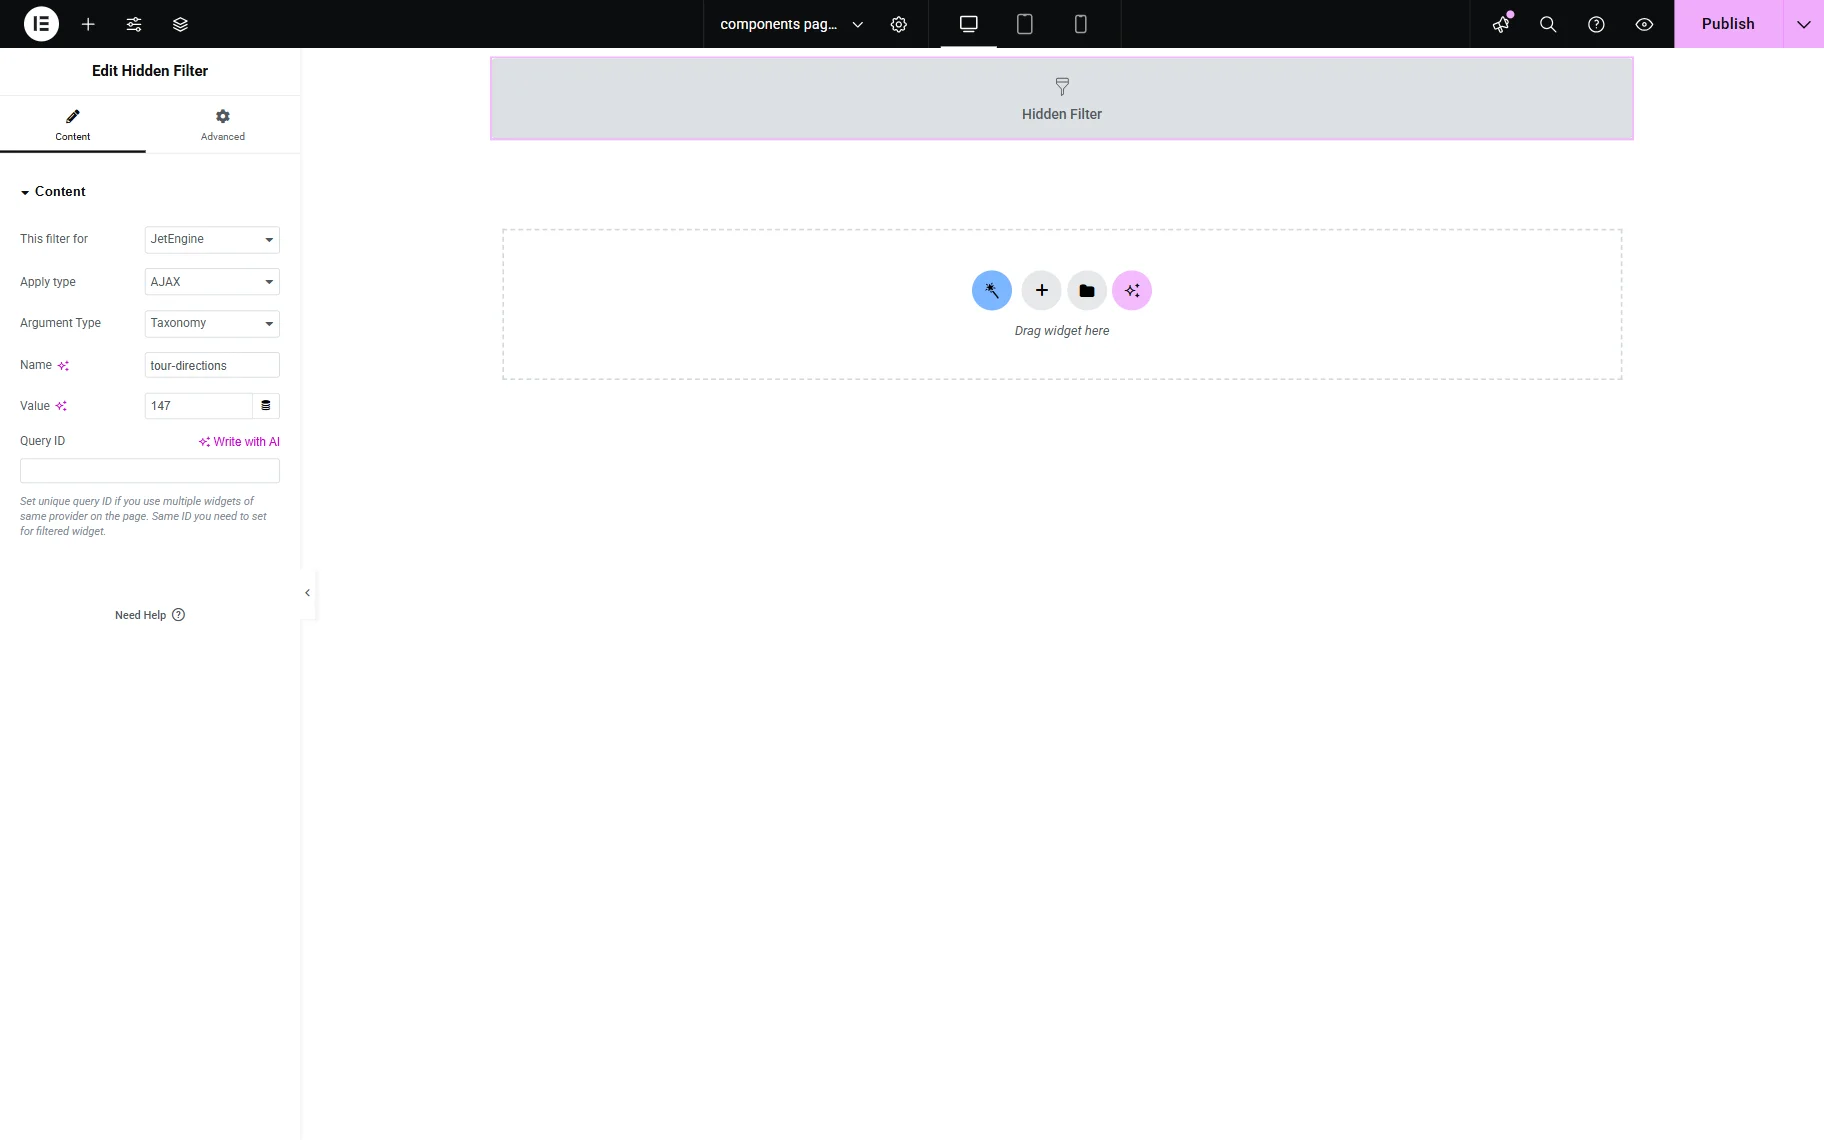
Add the Hidden Filter to the page.
Select the “JetEngine” provider in the This filter for field and change the Apply type if needed.
Next, select the “Taxonomy” Argument Type, enter the built taxonomy’s slug in the Name field, and add the ID of the term you want to be displayed by default in the Value field. In the described case, the Name is set to “tour-directions” and the Value to “147” (which is a “Local” term.)
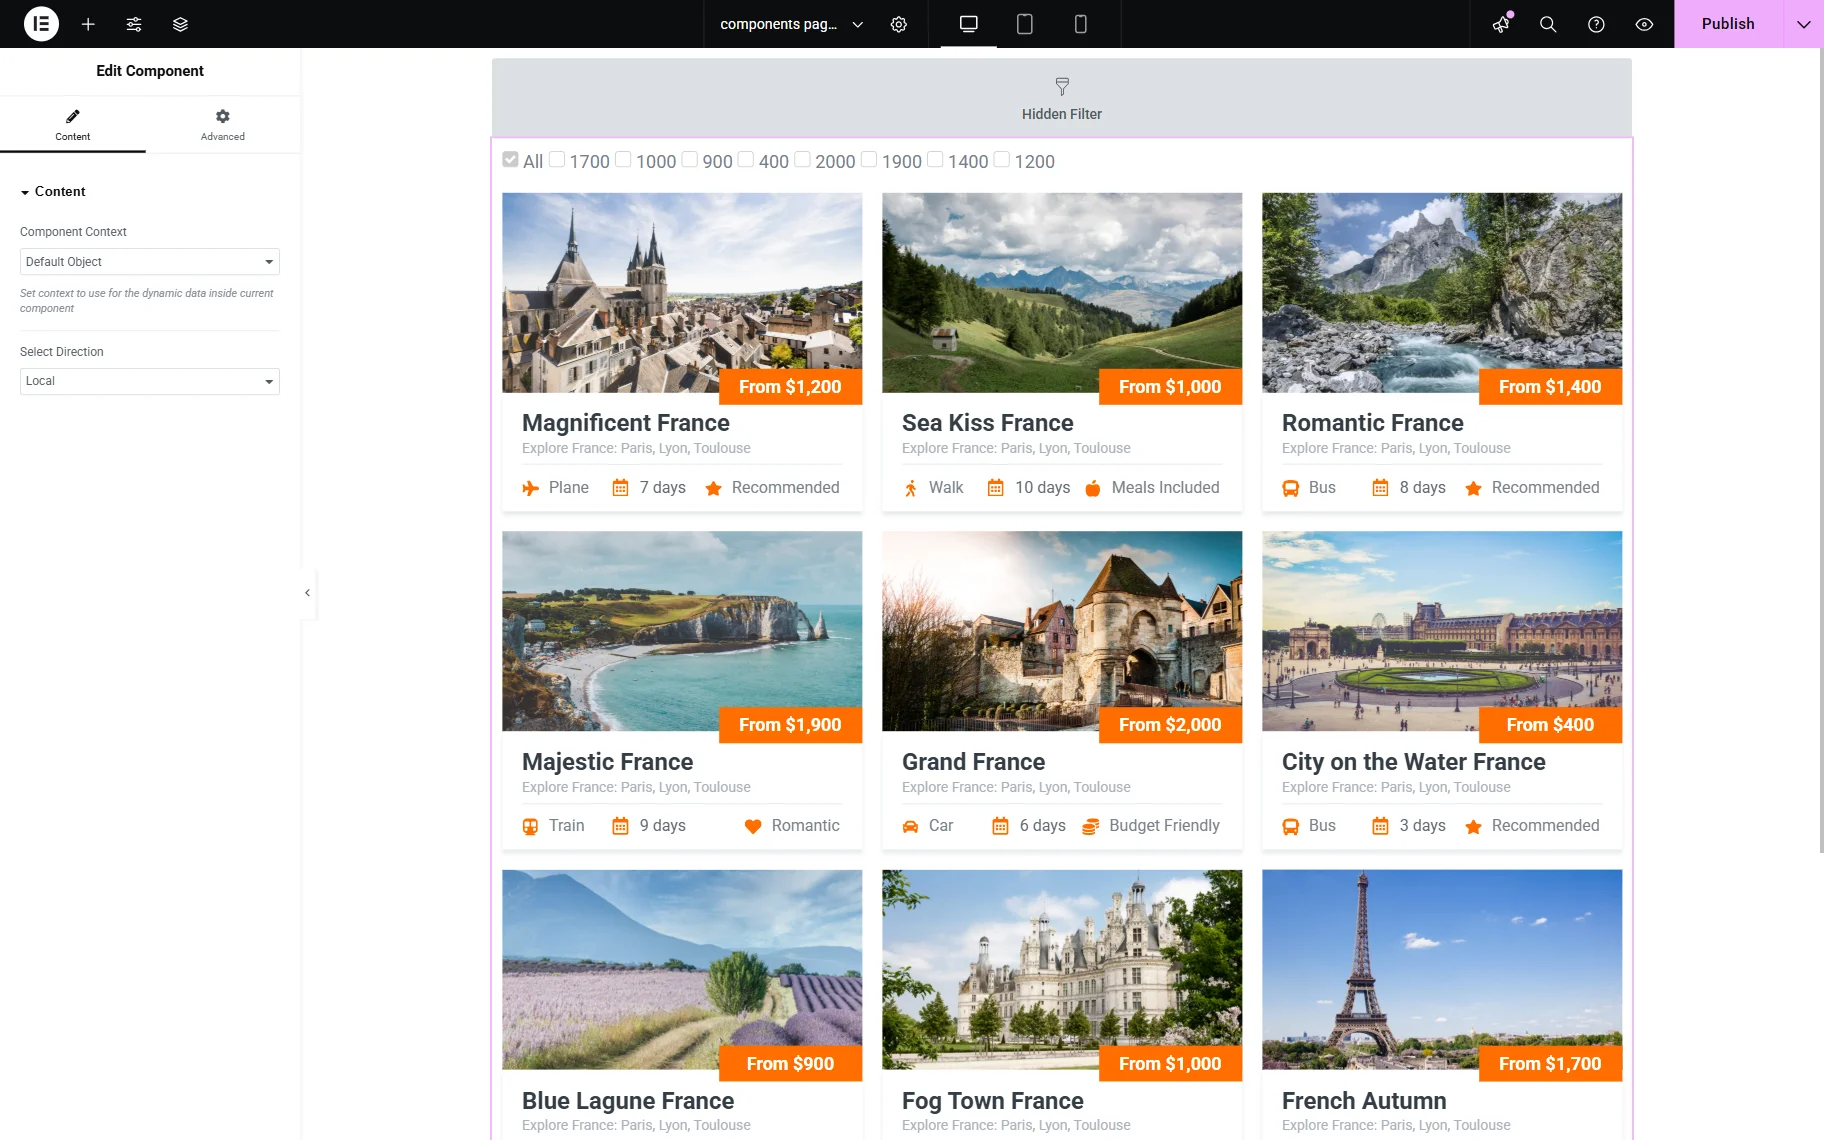
Find and add the component you have built before to the page.
You will observe the added component control in the settings. Here, the Select Direction field. In this field, we can pick the needed option to activate the preferred direction for display.
Adjust other settings, and whenever you are ready, press the “Publish” button.
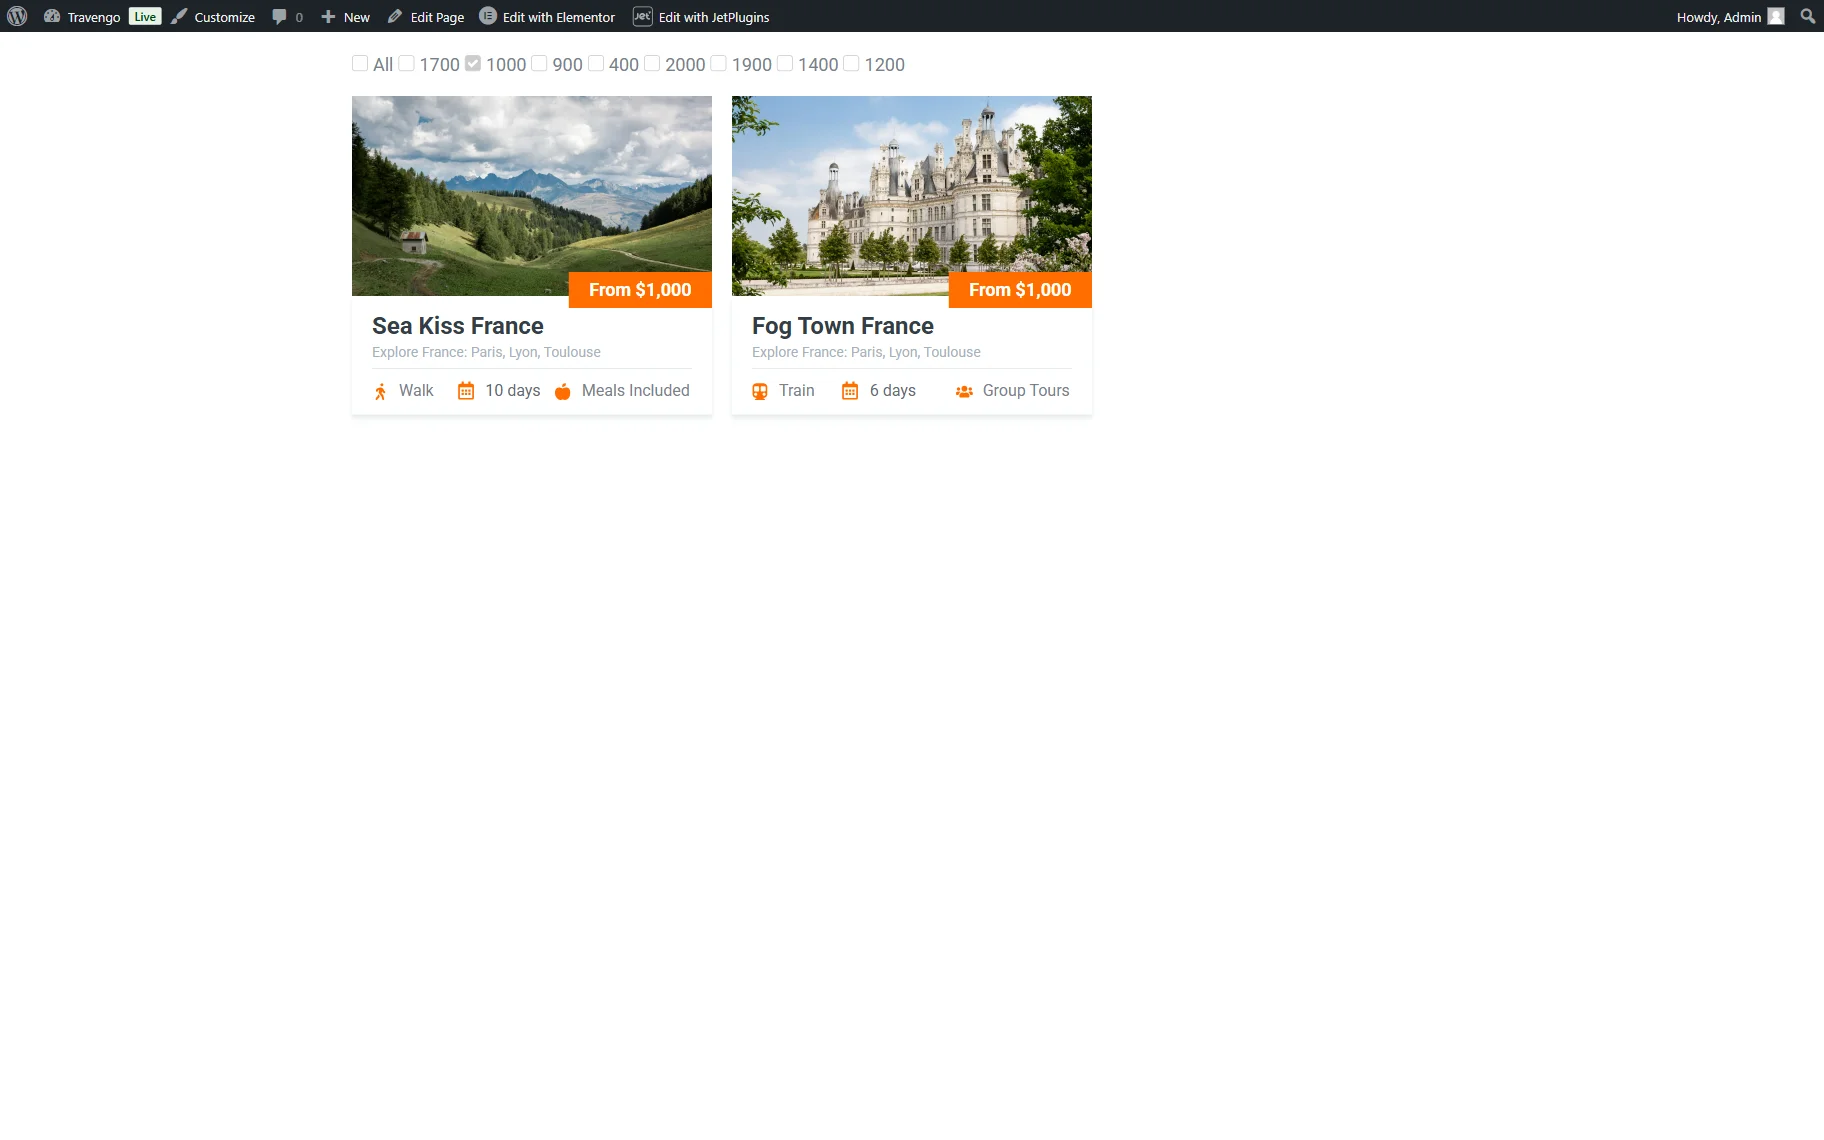
Check the Result
Open the built page/template on the front end.
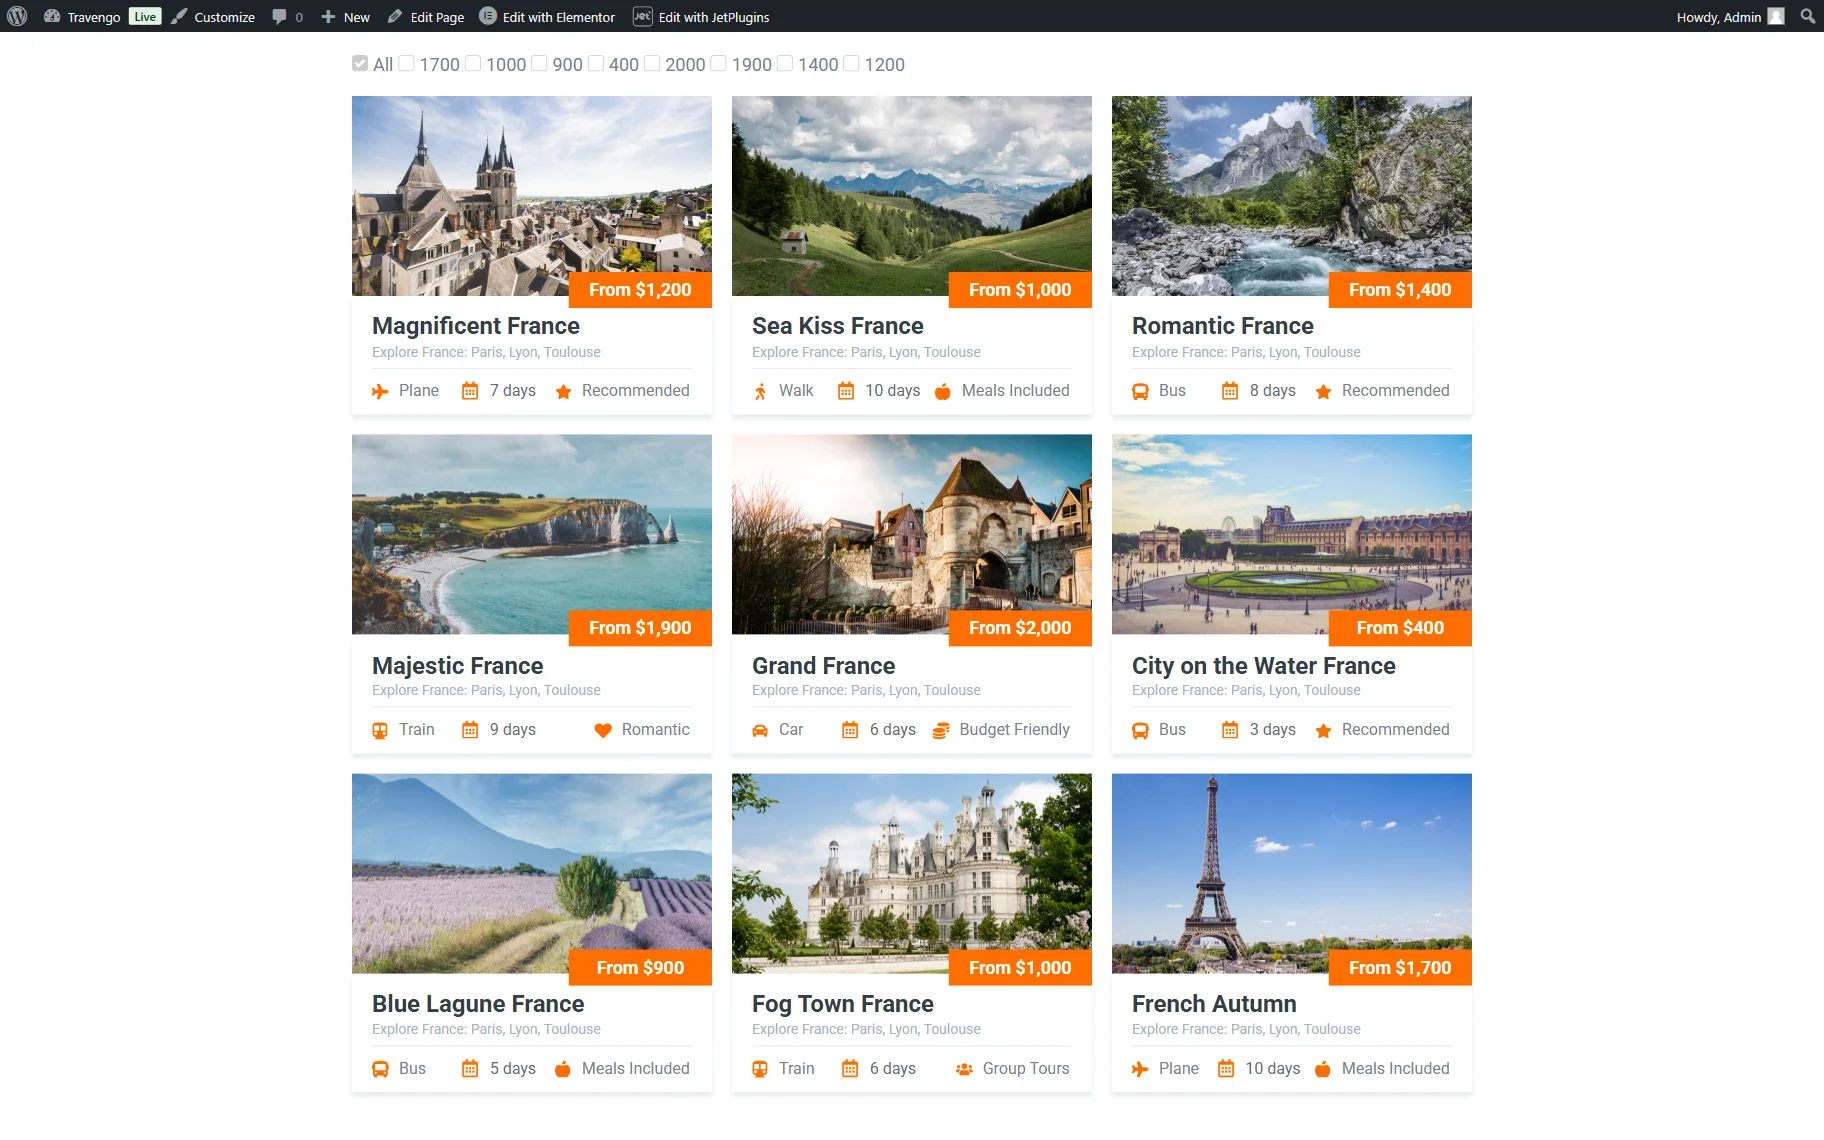
Select one of the options in the filter to see if it works.
That’s all; now you know how to use JetSmartFilters’ Hidden Filter with JetEngine’s Components on your WordPress website.